Make It Your Own: Updating a T-Shirt with Stencils
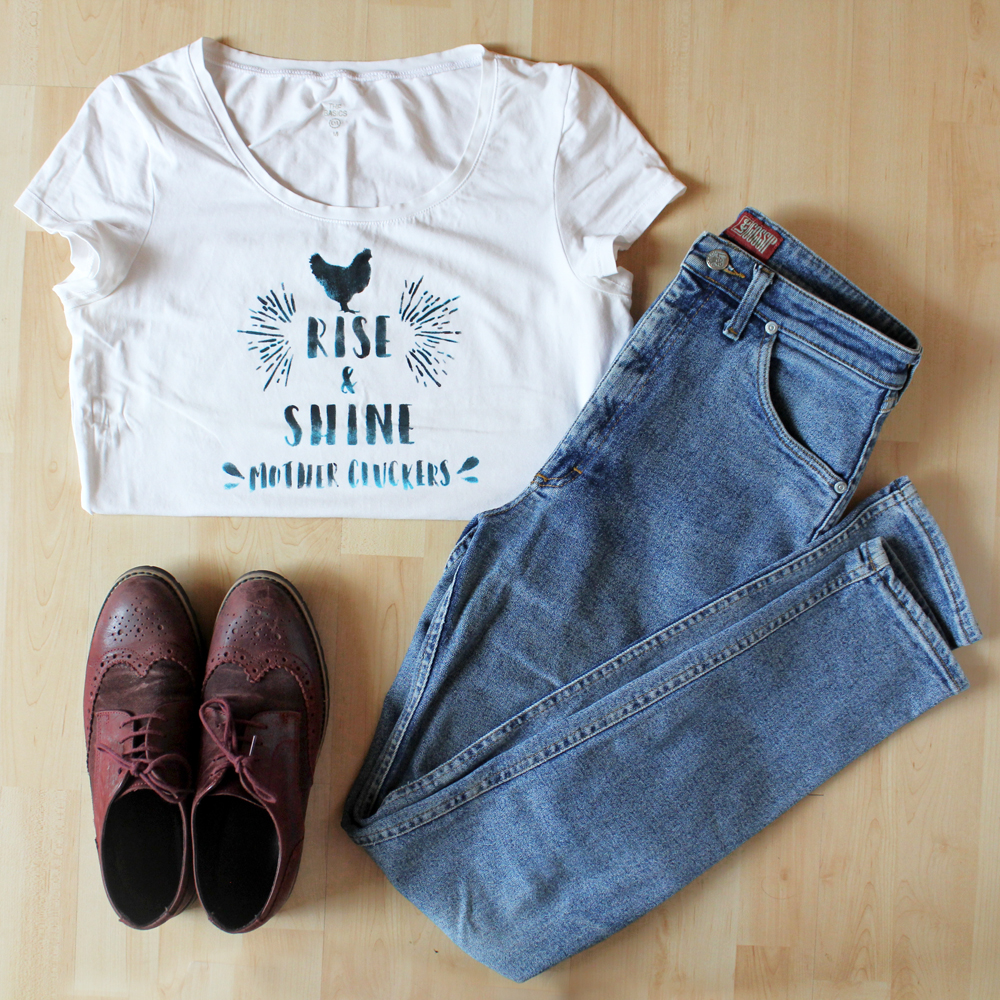
Hello there! Today I want to share a really fun & quick project to personalise or update your t-shirts! This is really easy to do and the perfect project if you feel like a creative project but don’t have a lot of time on your hands. It only took me a couple of minutes plus the time it needs to dry. I love those little projects that you can squeeze in after work.
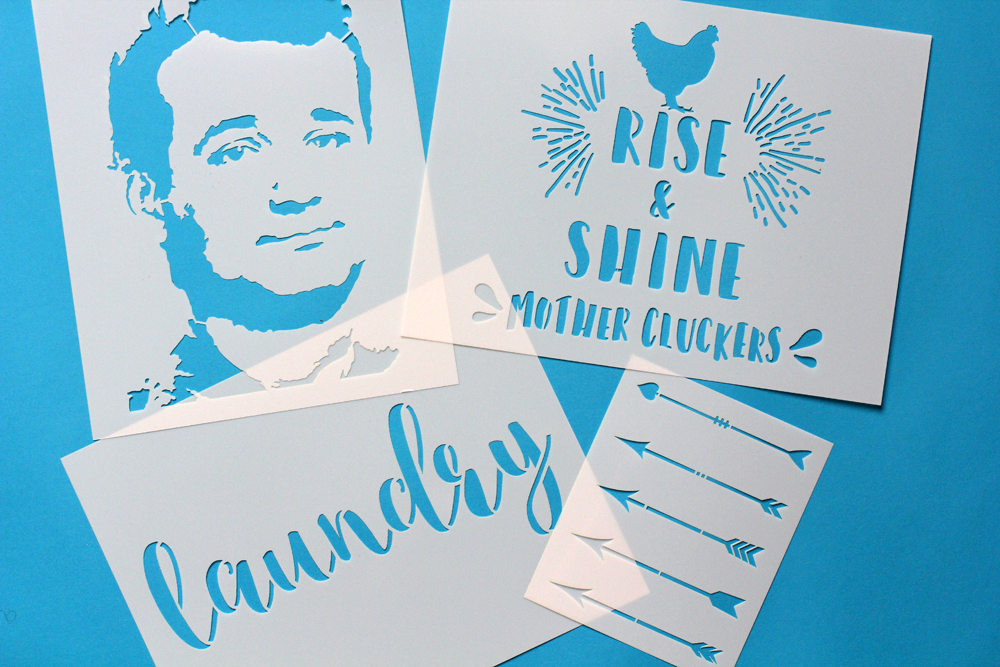
The lovely folks over at Stencil Revolution offered to send some stencils for me to try. What I love about their company is that it’s a small, family-owned operation that developed out of what originally was a street art forum. I love supporting upcoming creative businesses and I really had a great experience with them. They offer a large variety of designs and sizes (for decorating walls etc), I stuck to smaller sizes as they seemed a better fit for decorating shirts, fabrics and tote bags.
These stencils are not very expensive but are very long lasting. It’s a hard plastic sheet that you can wipe and wash and reuse many times. I had specific project ideas in mind when ordering the three larger stencils. But I picked the arrow stencils knowing this would be a motif I will probably use over and over again! Obviously, you can use these for walls, furniture, bags etc., too. I just love a t-shirt refashion and I buy plain white & black t-shirts every once in a while for exactly these kind of projects.

So, how does it work?
First of all, here’s what you need:
– stencil templates
– fabric paint (I used black and light blue/turquoise)
– small dry sponge
– old plate or plastic container to pour the paint in
– masking tape
– a piece of cardboard (big enough to place under the area you are using colour on)
– iron & iron board
- Prepare the shirt/fabric and template.
If necessary, you might want to iron the shirt to make sure there are no creases. Clean the template if you used it before, to make sure it’s dry and there no residue colour. Use some masking tape to tape the template into place. It’s very important that it doesn’t move once you start with the colour.
If using this on a shirt, place a piece of cardboard between both fabric layers. Otherwise, the colour might come through and leave stains on the back. A hard, smooth surface also makes it easier to get a neat result. - Pour fabric paint onto your dish and dab your dry sponge in it. Dab it a couple times more onto the plate to have some of the paint come off. Using too much paint might need to colour bleeding. If you want to get crisp edges, make sure you use less paint and apply it in several layers.
- Dab the paint onto the fabric. Try not to use stroking motions as this might lead to blotches and colour bleeding as it gets under the template. This will also give the paint more of a sprayed “graffiti” look.
If you want an ombre effect as I did with my project, start with the lighter colour. I used the light blue for the first layer, let it dry a bit and then dabbed over it with black again. For the colours to blend softly you really want to use as little paint on the sponge as possible. Work in layers until you get the opacity that you like. - Let it dry. I usually remove the template afterwards. If you remove it while the paint is still wet it might smudge and blur.
- Once it’s dry remove the template and iron your fabric from the wrong side to set the colour.
That’s it, you’re done!


I’m planning more projects with these stencils. They would also make a great project to do with kids. That Bill Murray will go on a tote bag for sure!
I’m looking for some nice gold or rose gold textile paint. Do you have any recommendations?
xx
Charlie
Please note: As always, all opinions are my own. All my product reviews are completely honest. I was gifted this product, but not asked to review it or given compensation for doing it.
Happy crafting!
♥
facebook/bloglovin/pinterest
twitter/instagram
Stay in touch!
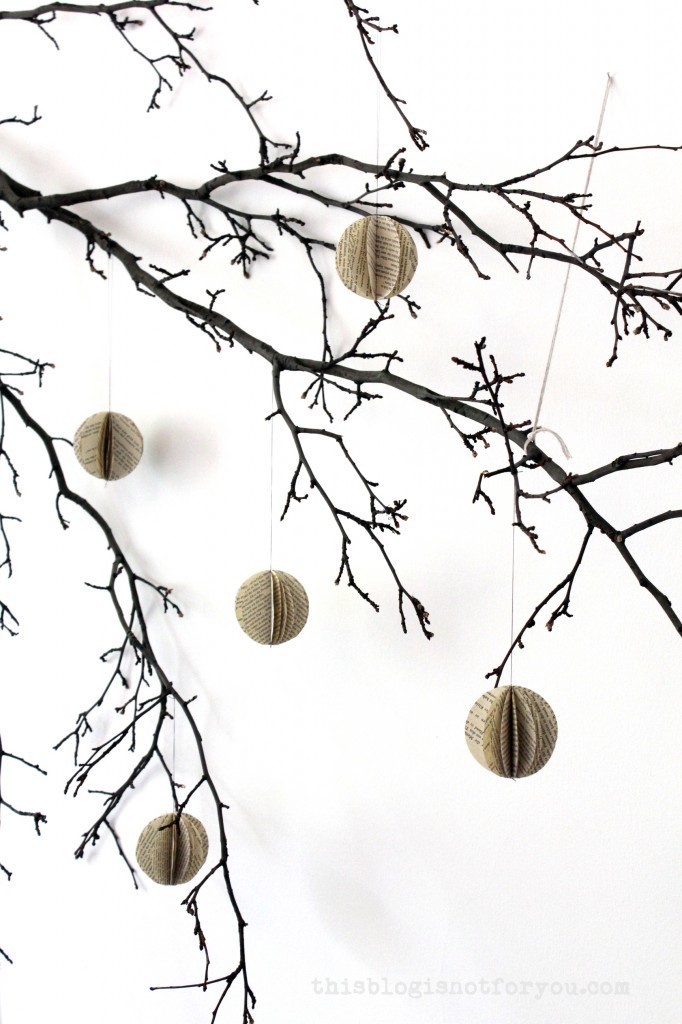
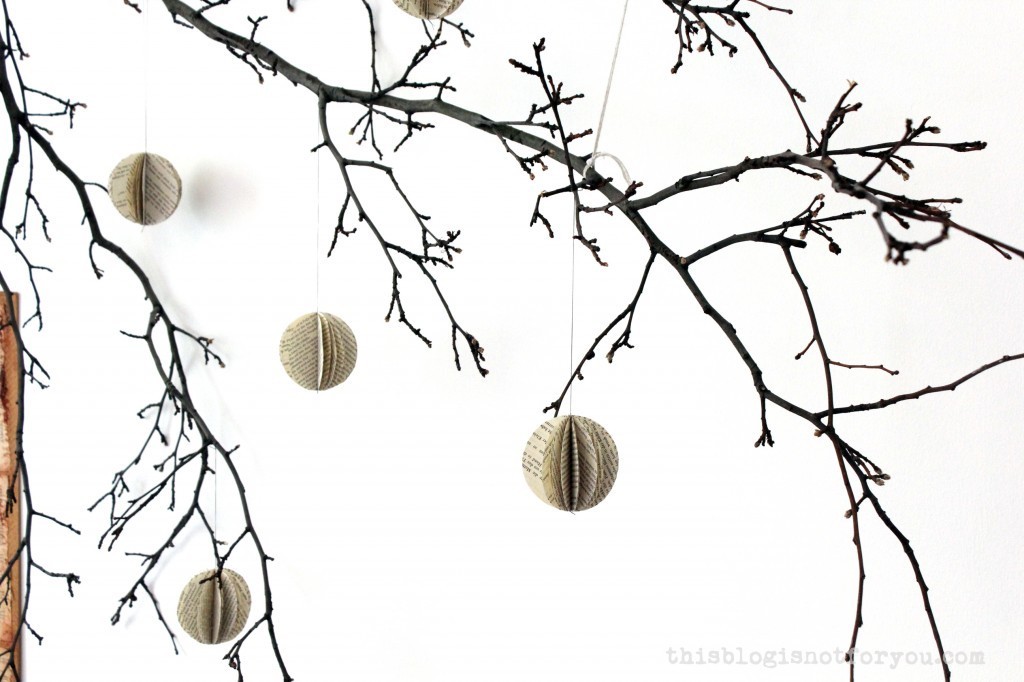 Today I thought I’d share a sewing-related craft project which is super easy to make. You can make these paper balls from different sorts of paper and in whatever size you fancy. They are very quick to make and perfect for parties or home decor.
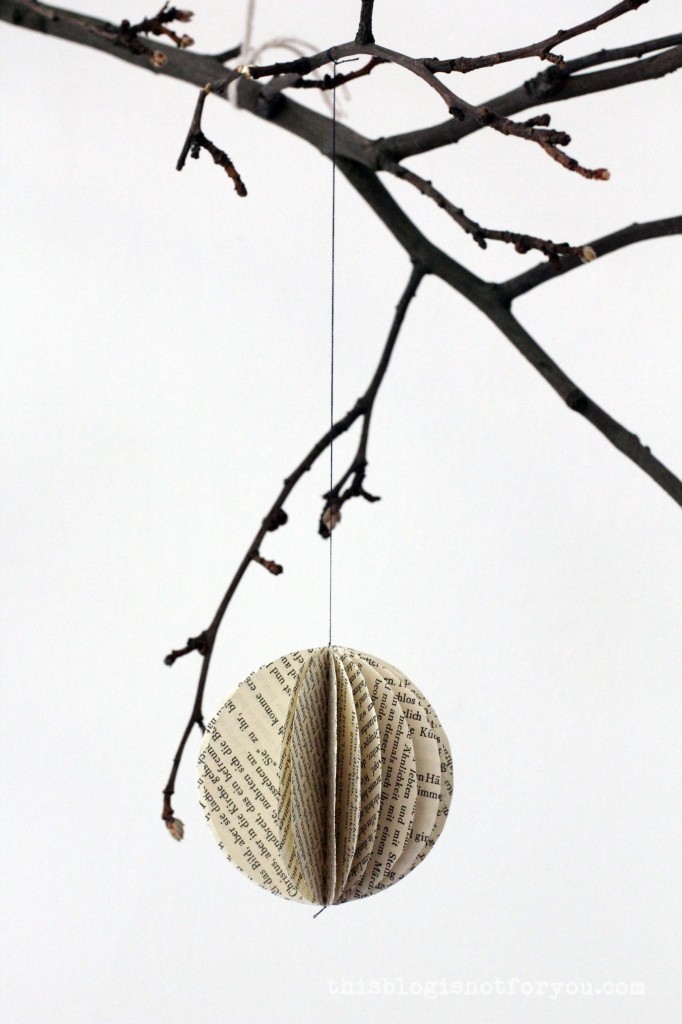
 1. For the book paper balls get some old book from the flea market or your own shelves. Draw a circle onto the paper using a glass/jar/cup and tracing it with a pencil.
 2. Cut it out (you can cut through several layers at once to speed up the process) and repeat until you’ve got enough pieces for the amount of paper balls you want to make. You will need approx. 8-15 circles per paper ball, depending on the thickness of the paper and the size of the paper ball. For bigger ones I’d recommend using more.
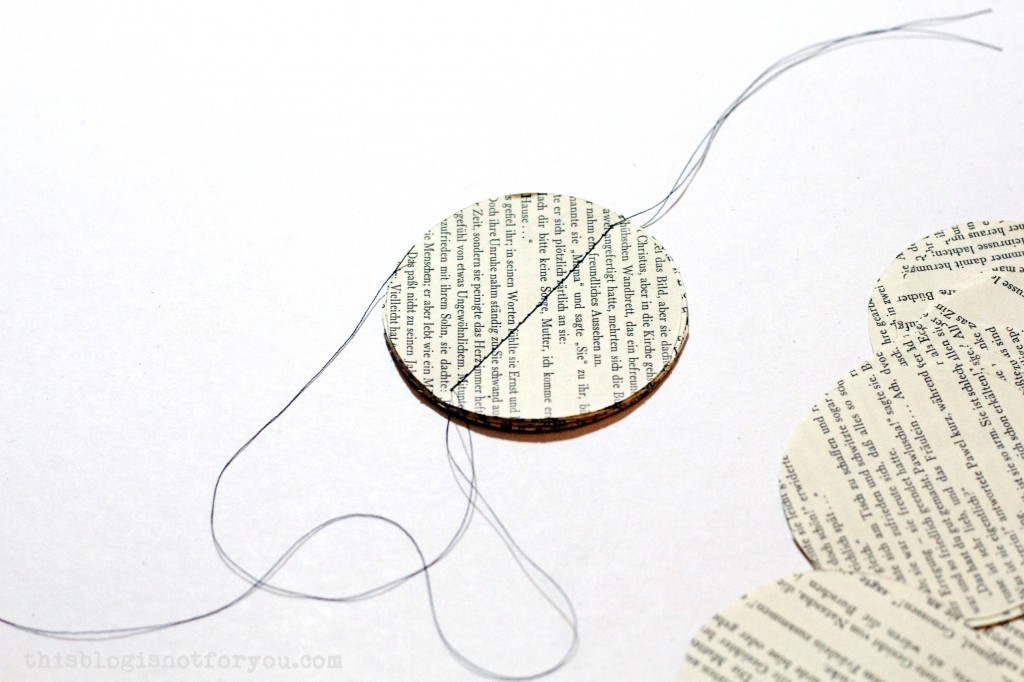 3. Stack them on top of each other and stitch down the middle with a straight stitch and a wider stitch length. My standard machine had no problems tackling 12 layers of book paper. However, if you are using more than 12 layers and they get stuck in your machine, you can simply sew them together by hand or try using a stapler.
 You can also try and make them using colourful scrapbook paper or pages from old fashion magazines.
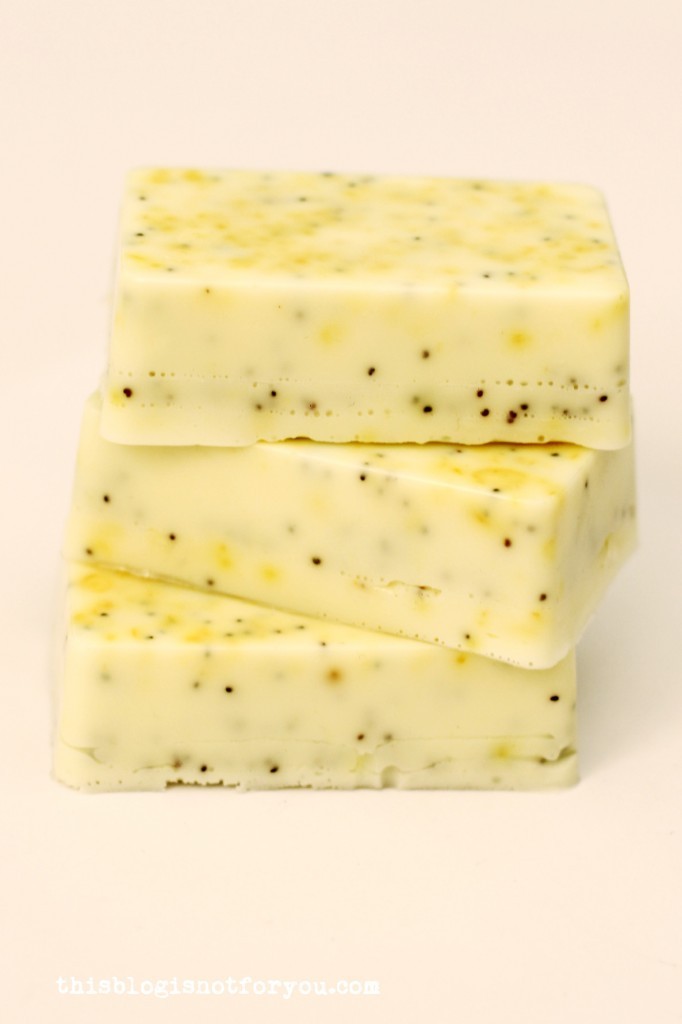
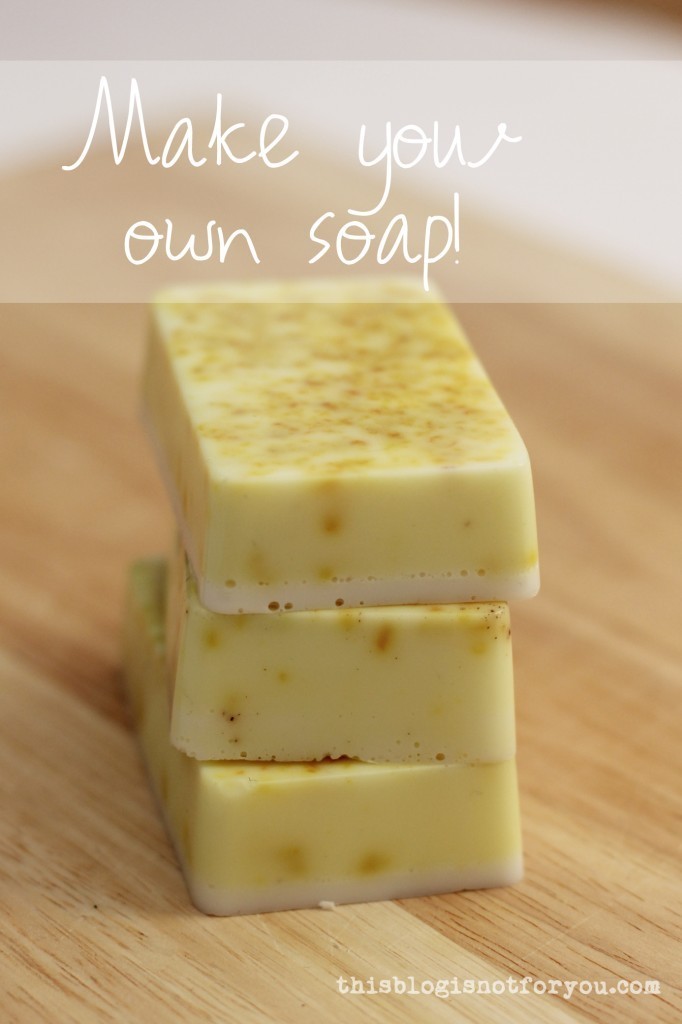 Ahhh, our flat smells heavenly! One of the many benefits of making your own soap. I love making soap because you can create the perfect soap bar with your favourite fragrances and ingredients. And, believe me, picking up the finished soap bar for the first time and smelling it is such a bliss!
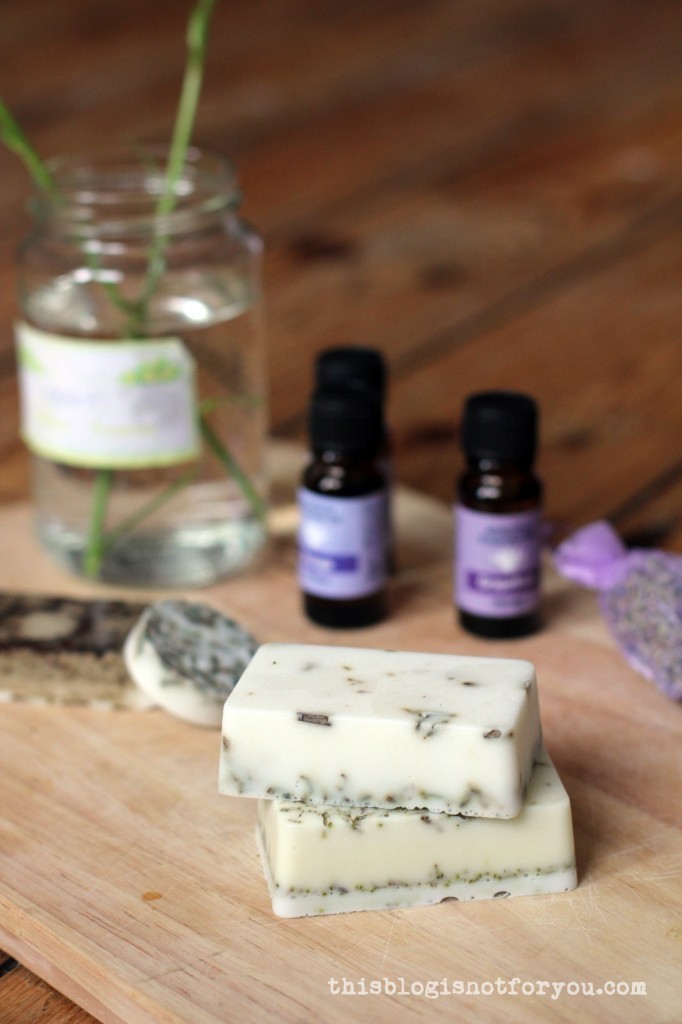

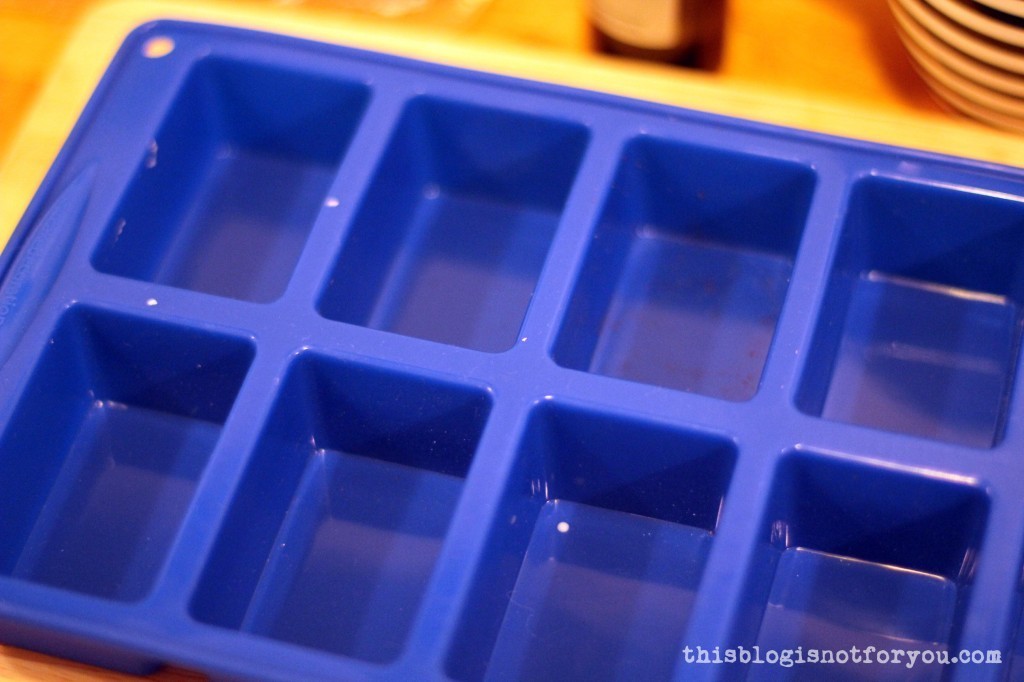 1. Make sure your silicone mould is clean and dry. I placed it on a wooden board, so I could move it while the soap wasn’t completely hardened yet.
 2. Cut your soap base into smaller cubes with a knife and place them in a clean bowl.
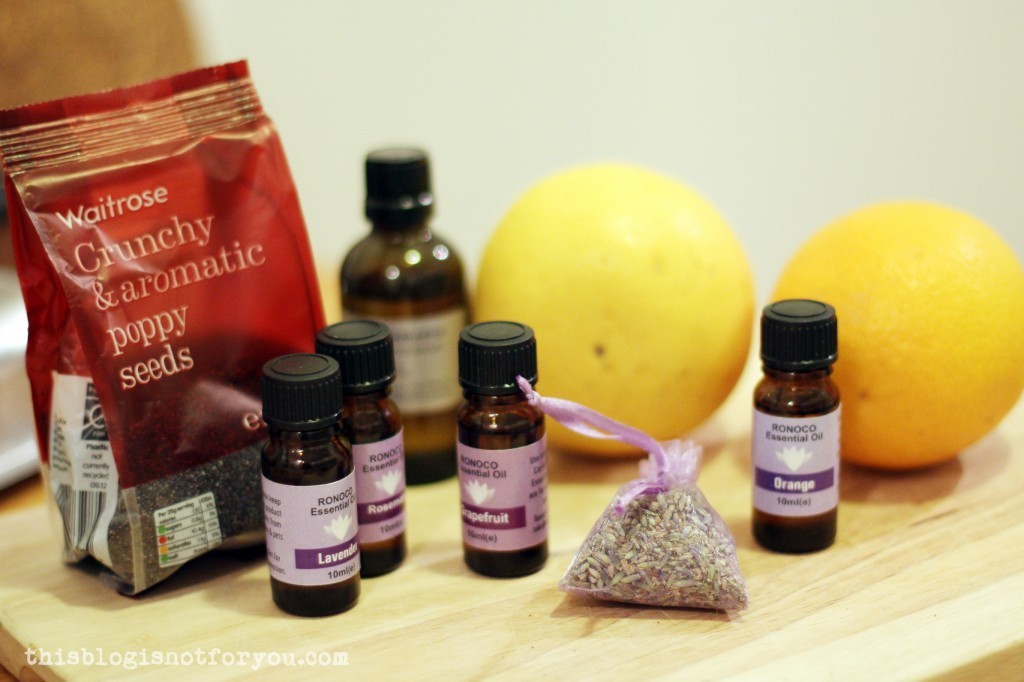
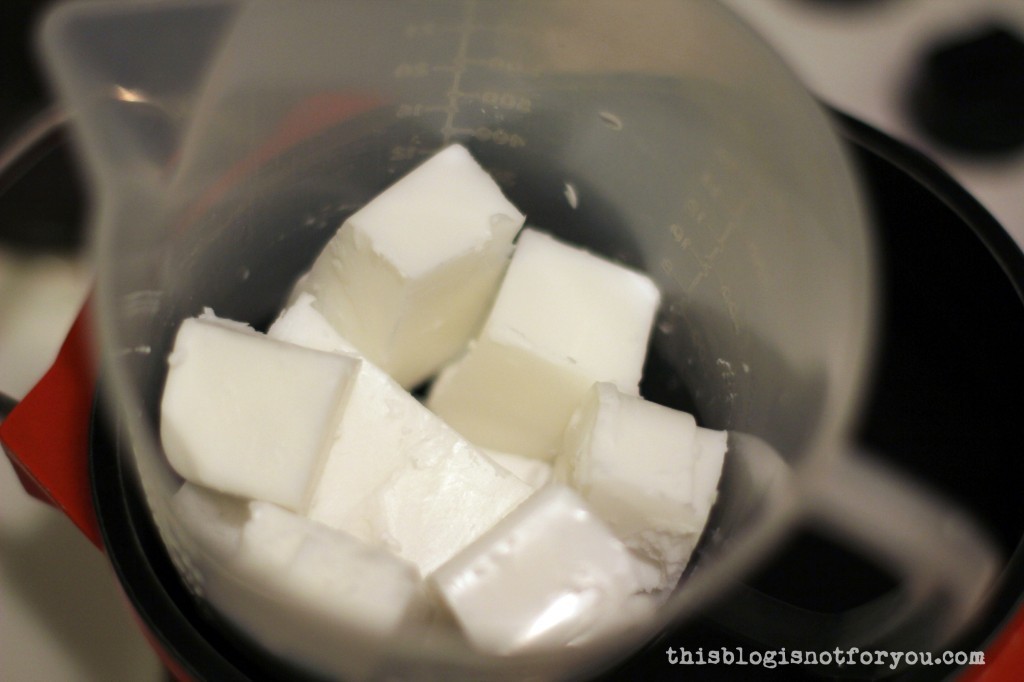 3. Before you melt the soap base, make sure you have all ingredients handy. The soap hardens quite quickly, so it’s better to zest the orange/grapefruit and open any plastic bags before you start melting the base.
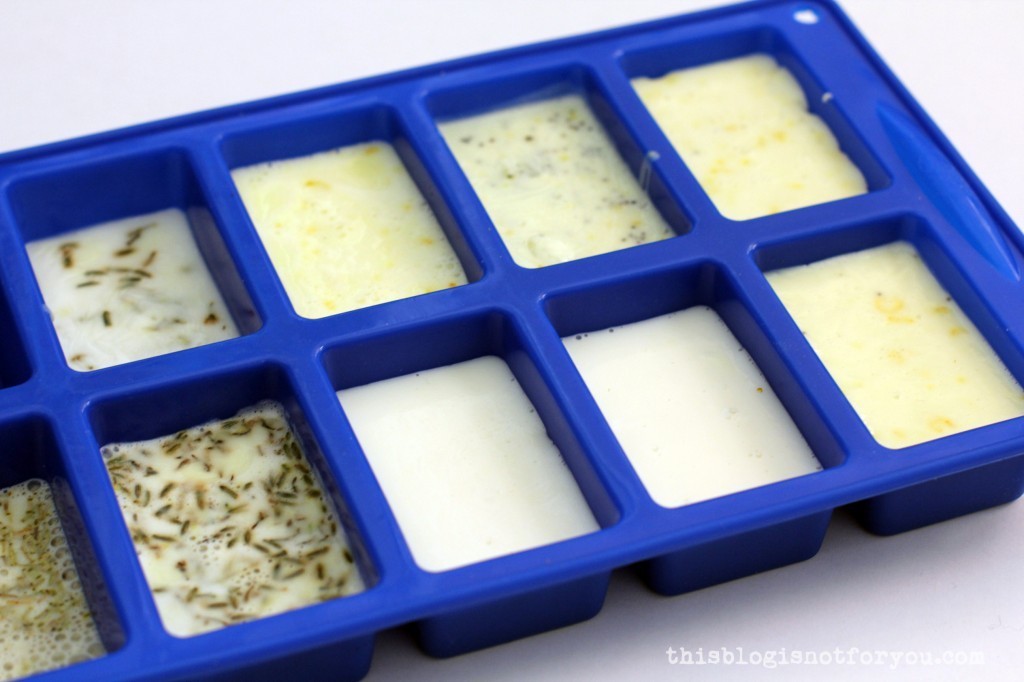 6. Let the soap harden. It only takes a couple of hours, but if you want to be on the safe side you can leave it in there over night. I put a piece of paper over the silicone mold to keep the soap dust-free.
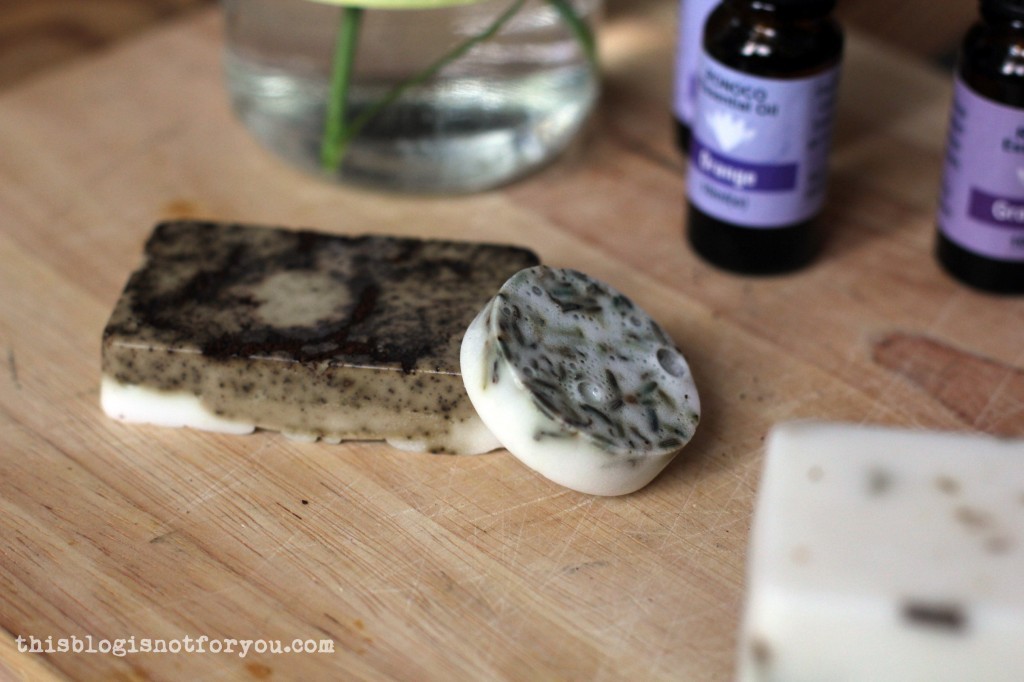
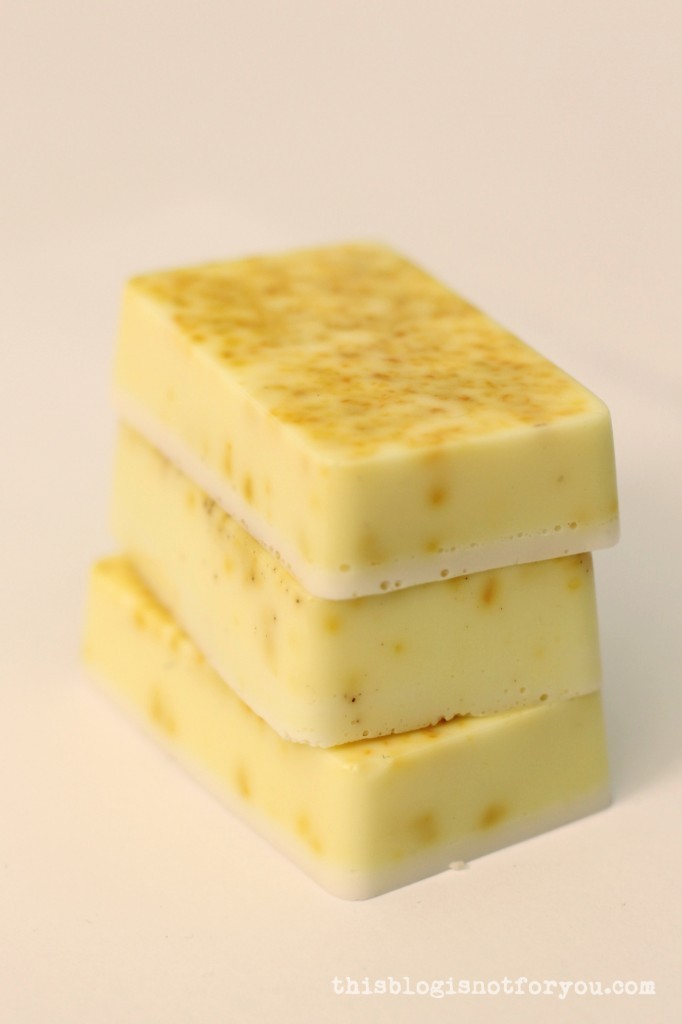
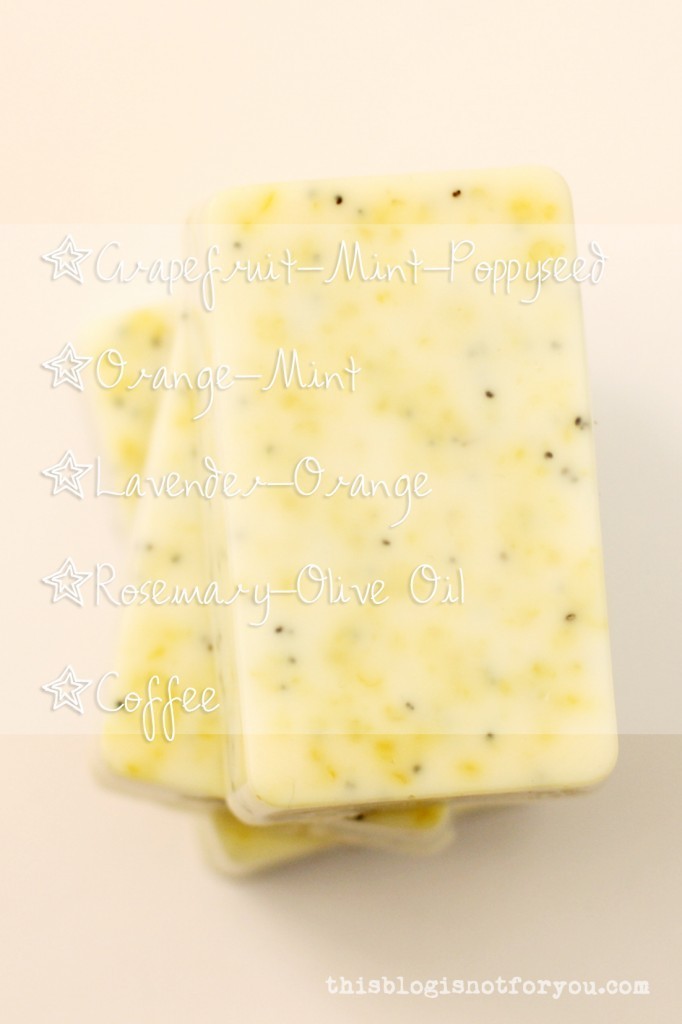 Grapefruit / mint / poppy seed: zest of half a grapefruit, 10 drops of grapefruit oil, 3 drops of mint oil, 1tbsp poppy seeds.
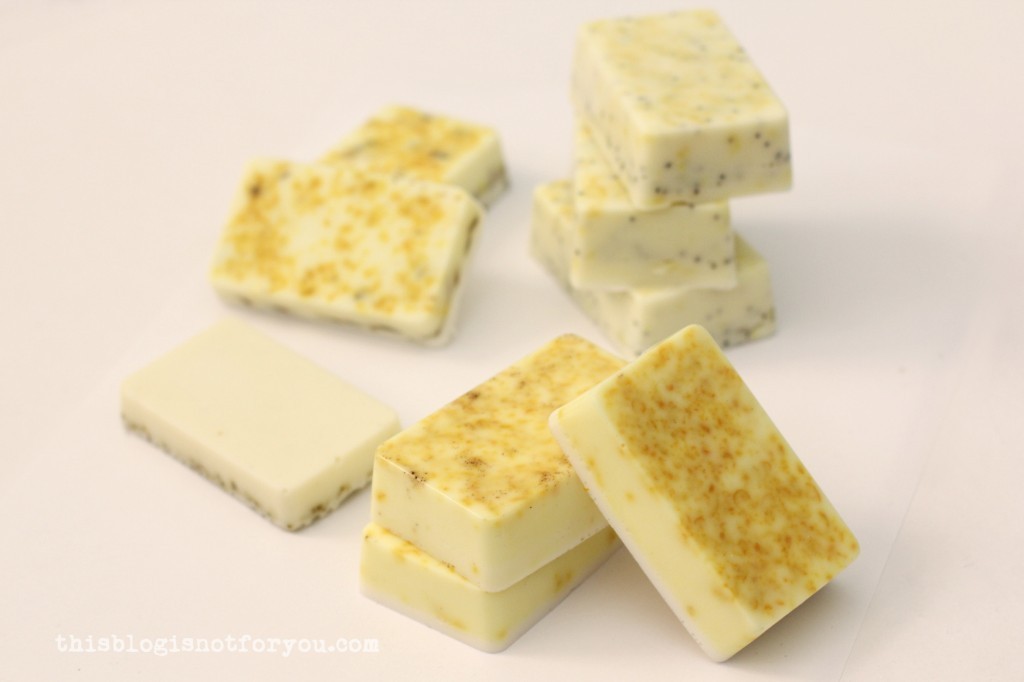
 I wrapped the soap bars in recycled paper (I cut strips out of a shopping bag), which I taped together on the bottom.
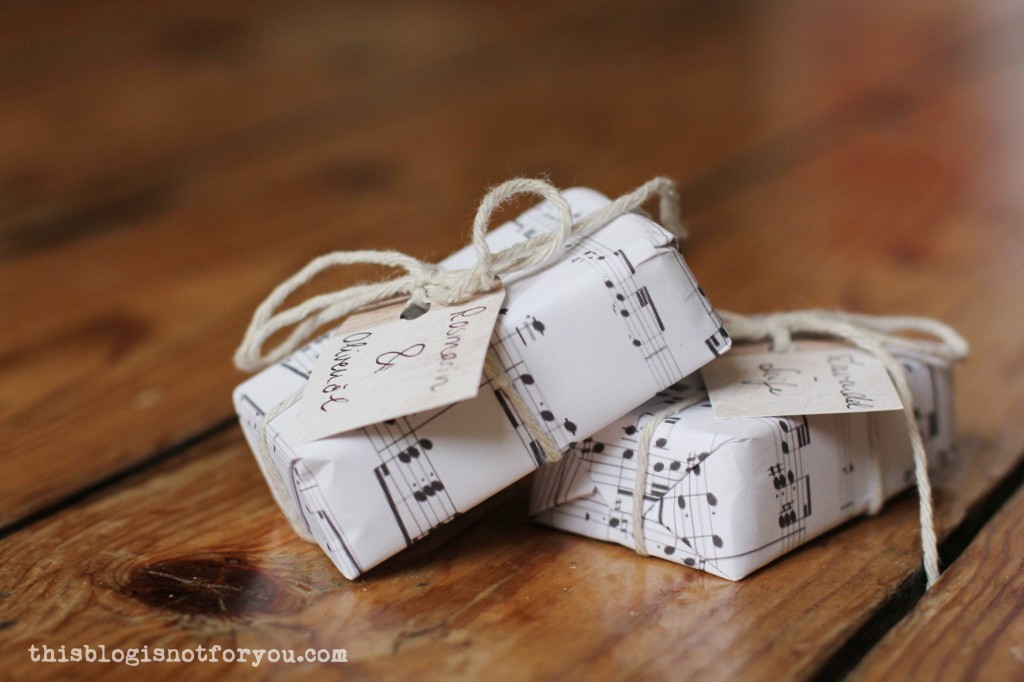
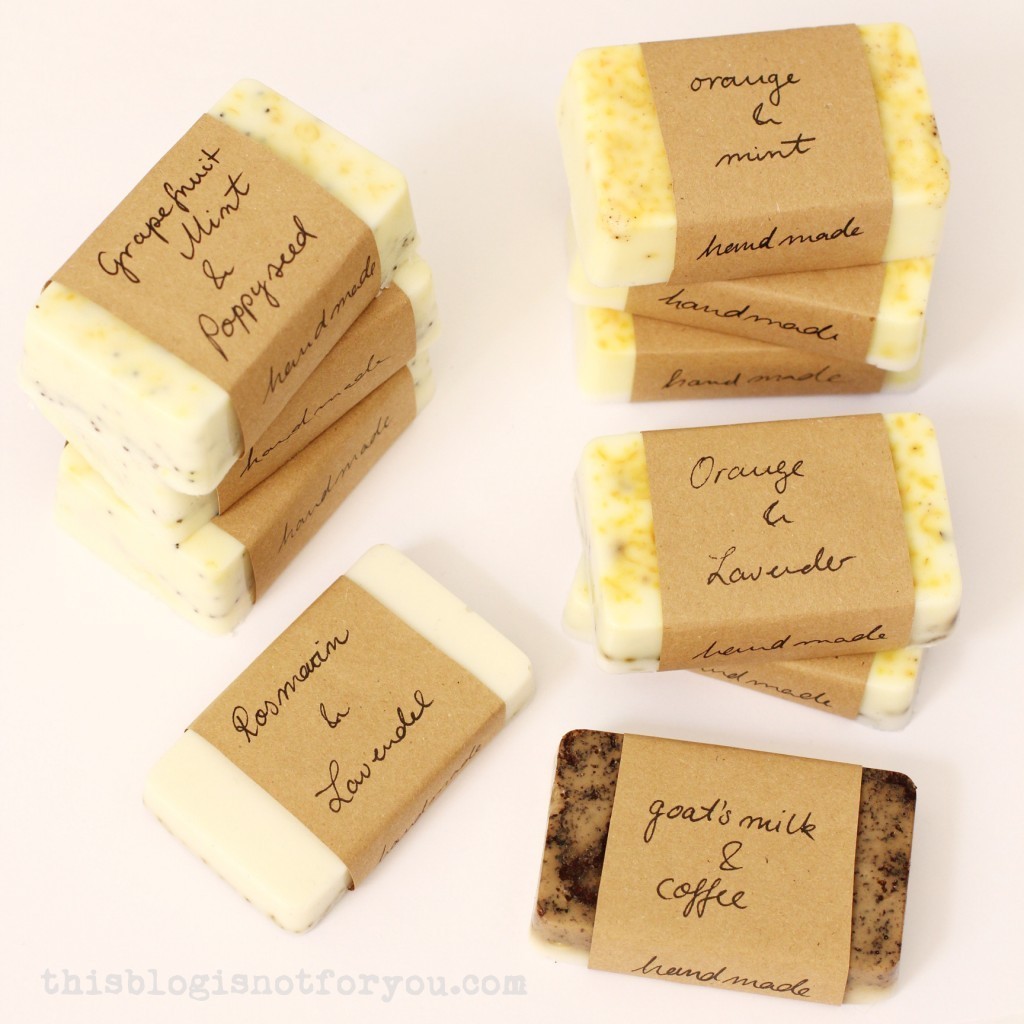 Before I gave some of the soap bars away to friends and family, I wrapped them in music paper (which I had printed out) and attached small labels with twine.
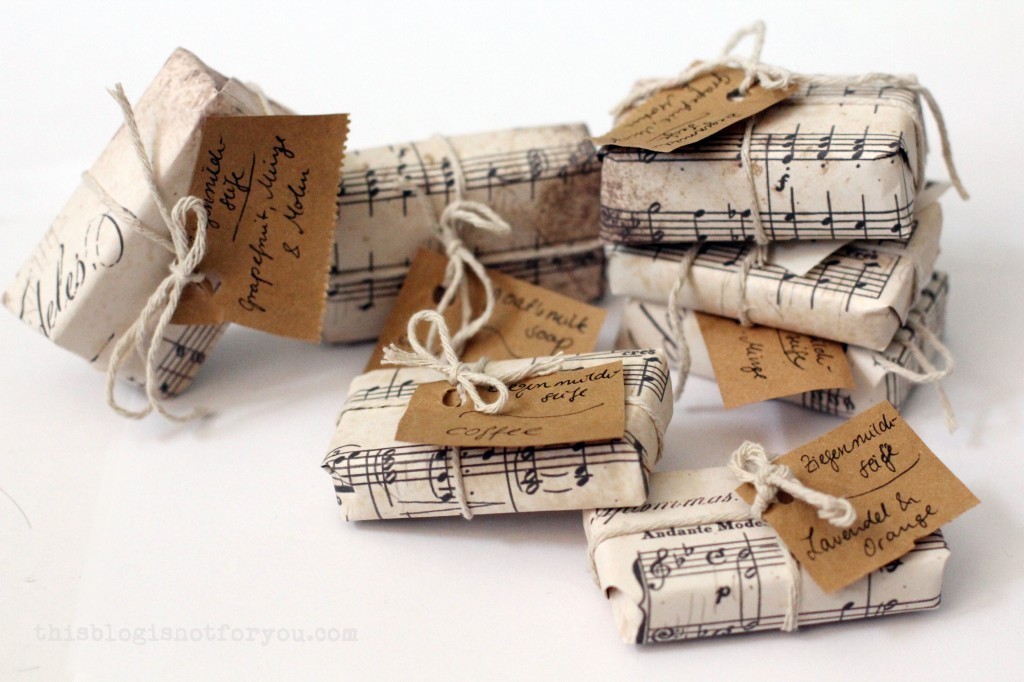
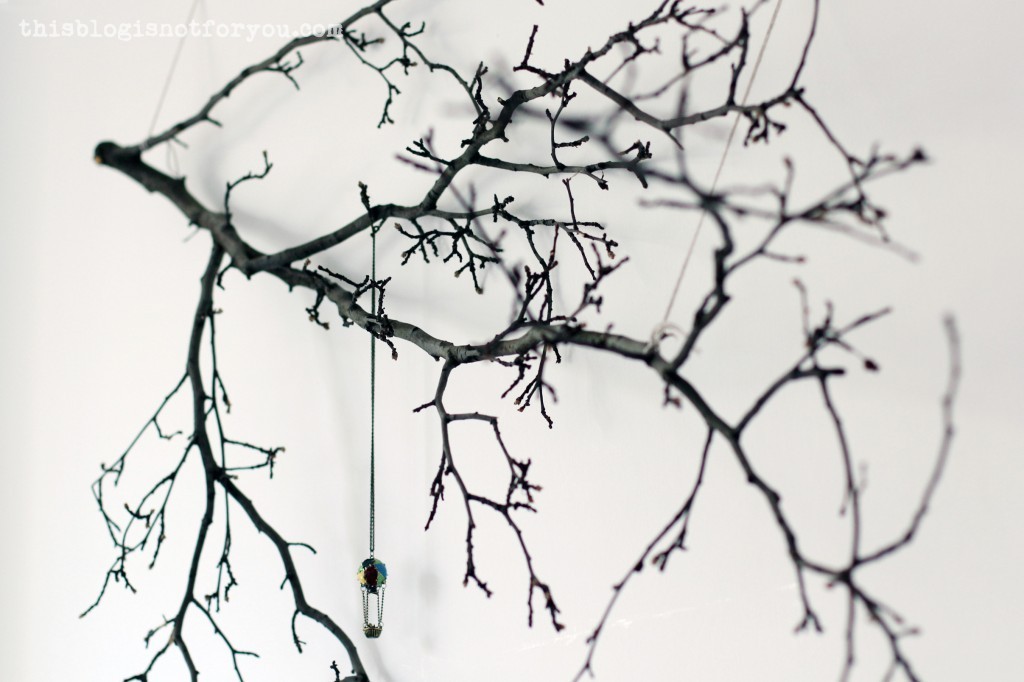 There’s a tree branch hanging on our wall. At first I was afraid this thing could attack me by falling down, but I didn’t (so far) and I love it. Here’s a selfie of our shabby couch with our new (not so new anymore) roommate.
 I found this nice little guy when I went running after a day of stormy weather. Out of pity I picked it up and carried it home. I thought Londoners would be used to so much weird stuff that they’d ignore this, but they stared anyway. (The branch is about 1.5m long, our couch is just so big, that it makes it look tinier than it is)
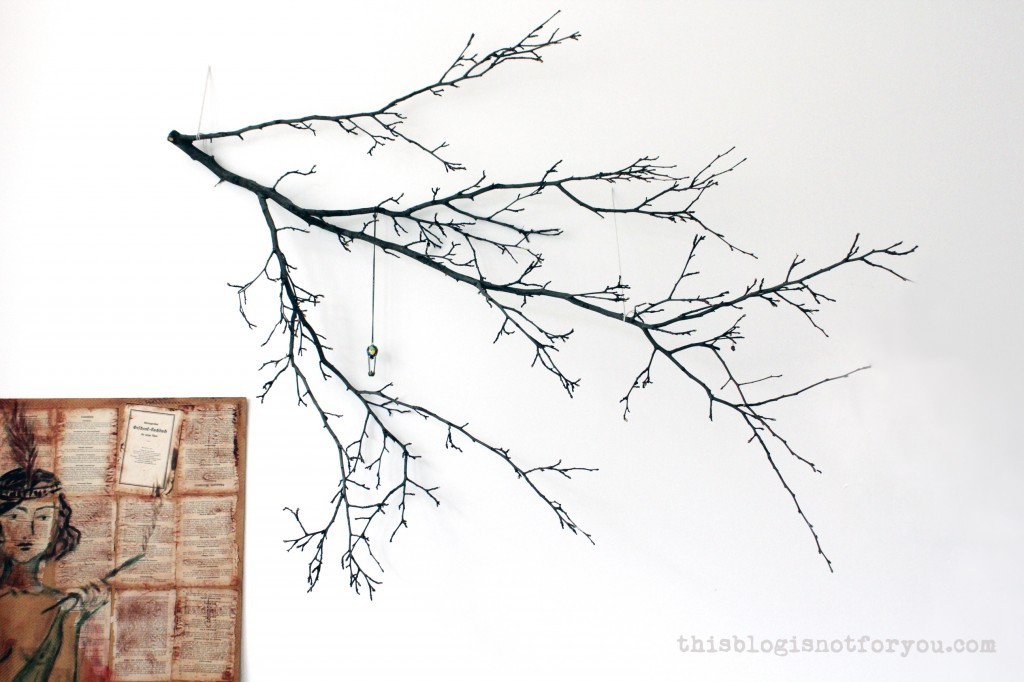 Mr Thisblogisnotforyou was a bit surprised but was willing to help me find a place for it. We hung it on the wall with two small nails and a few bits of string.
 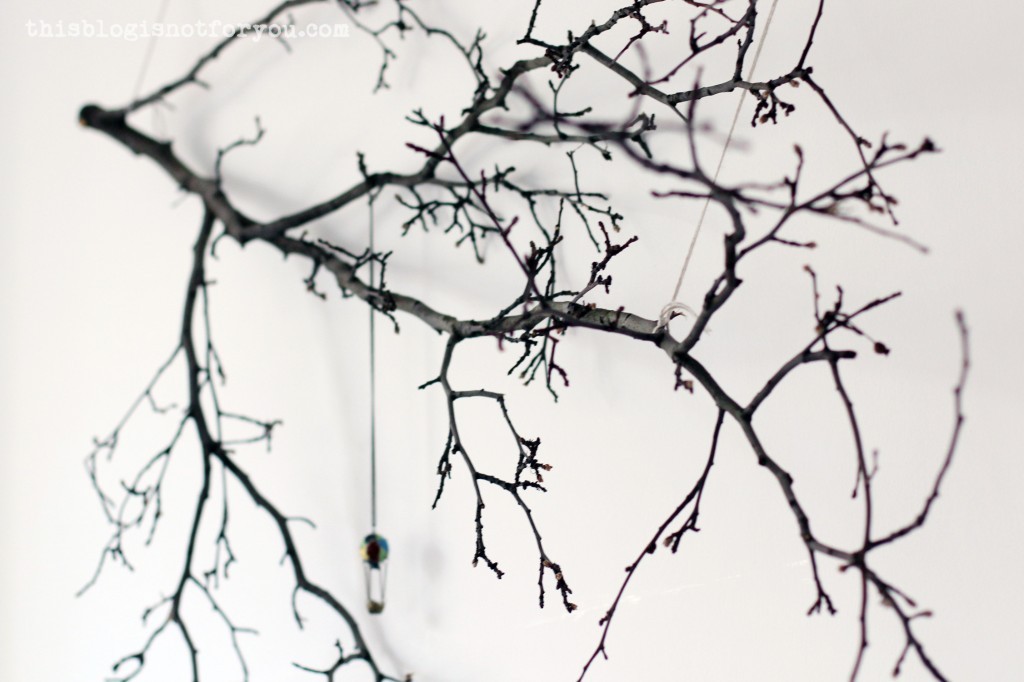 I was planning on decorating it with white mini origami cranes and just hung this necklace there for the time being. But we liked this so much, we kept it like that.
 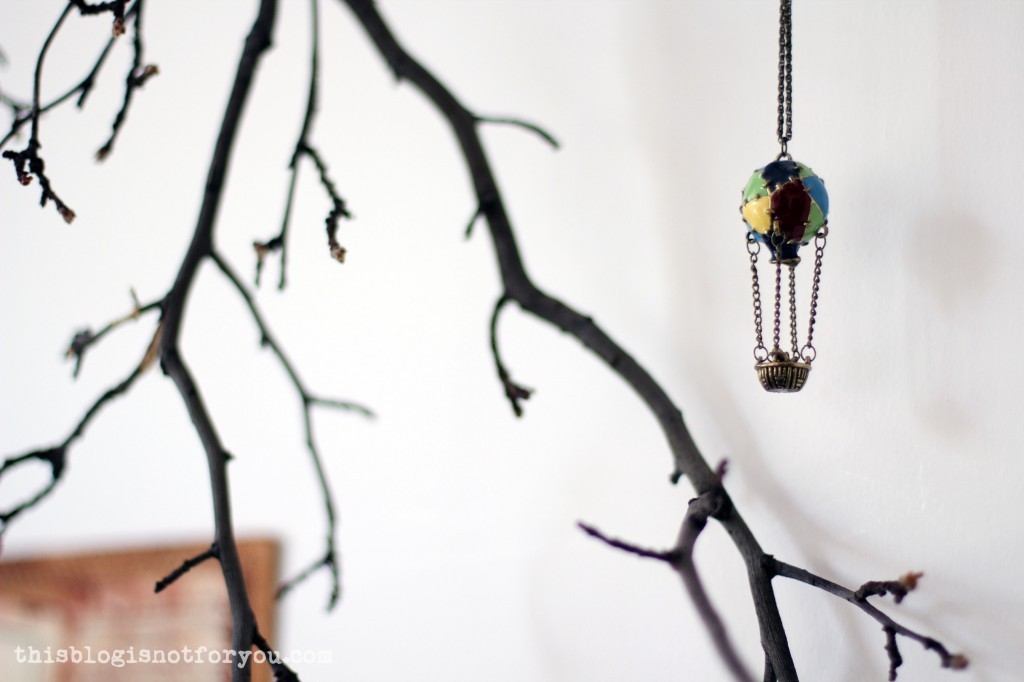 It has a great effect and it’s such an easy and really simple DIY decor project. I love tree branches because I love wood. That’s probably why I chose to live in a place with this:
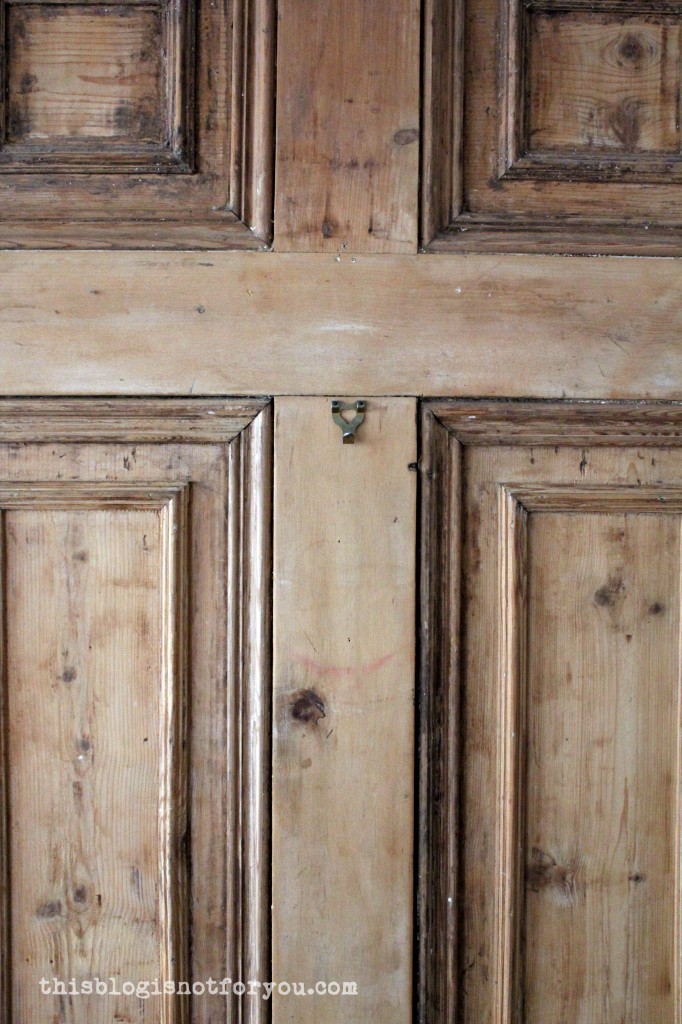 And…this:
 This hole in the floor has eaten so many pins that I stopped counting. And a battery. But it hasn’t stolen any of my chocolates yet, so I can live with it.
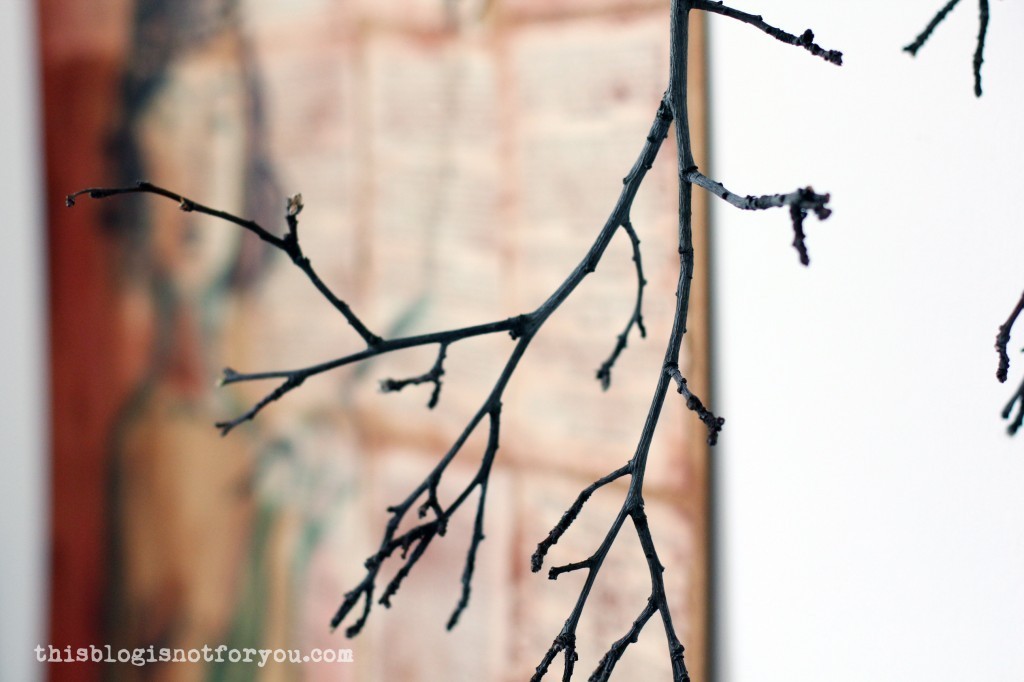

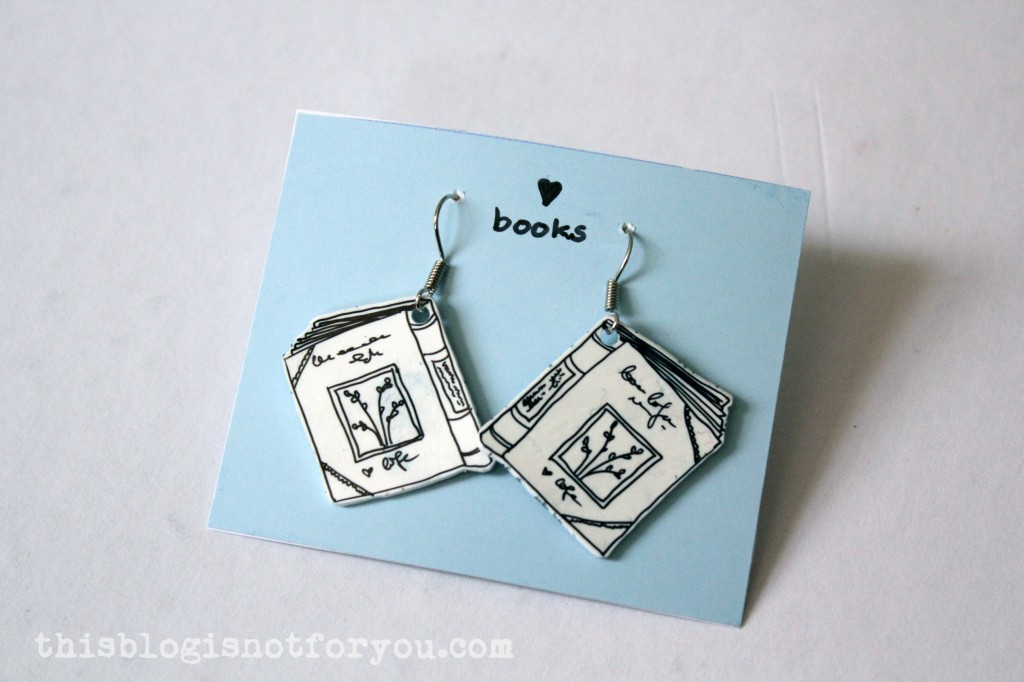
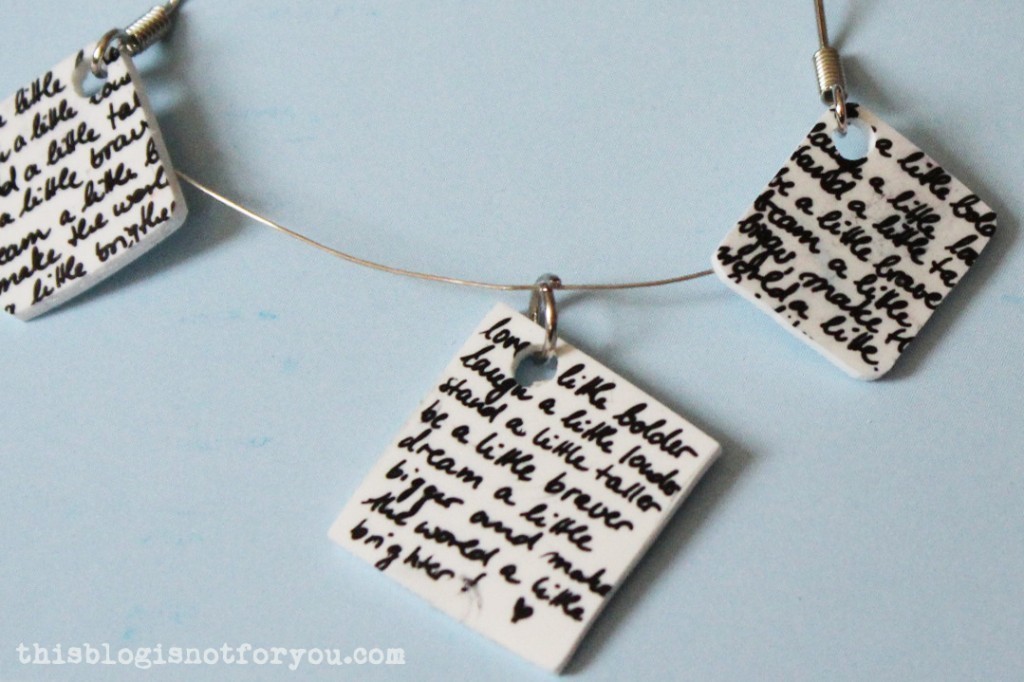
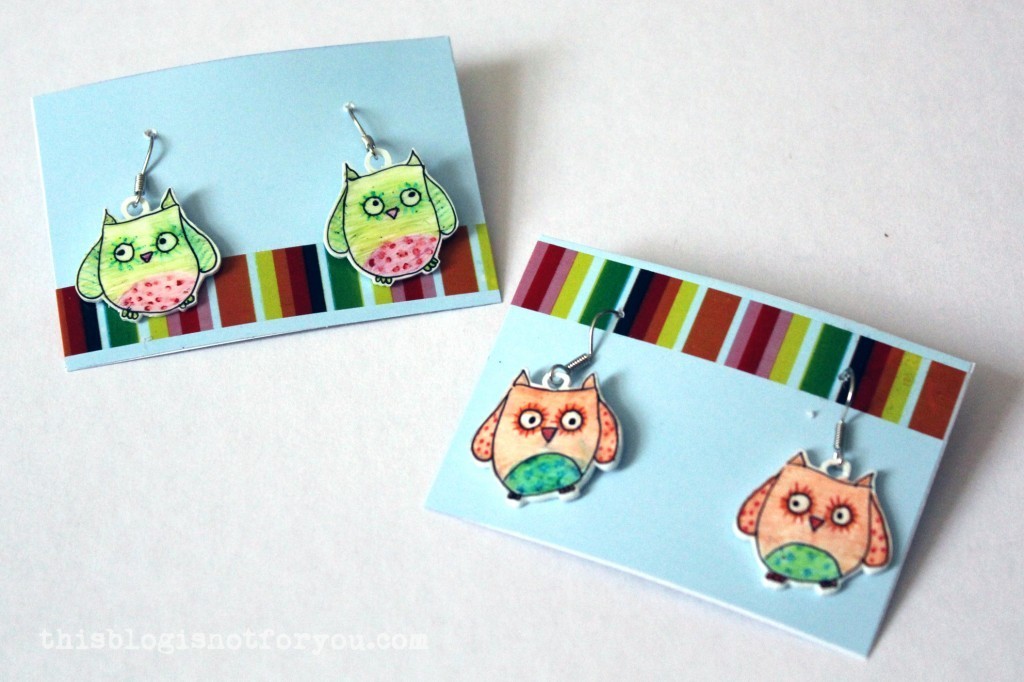 I made these cute little earrings and necklace charms for my friend’s birthday. She loves owls and books, so these were the obvious choice!
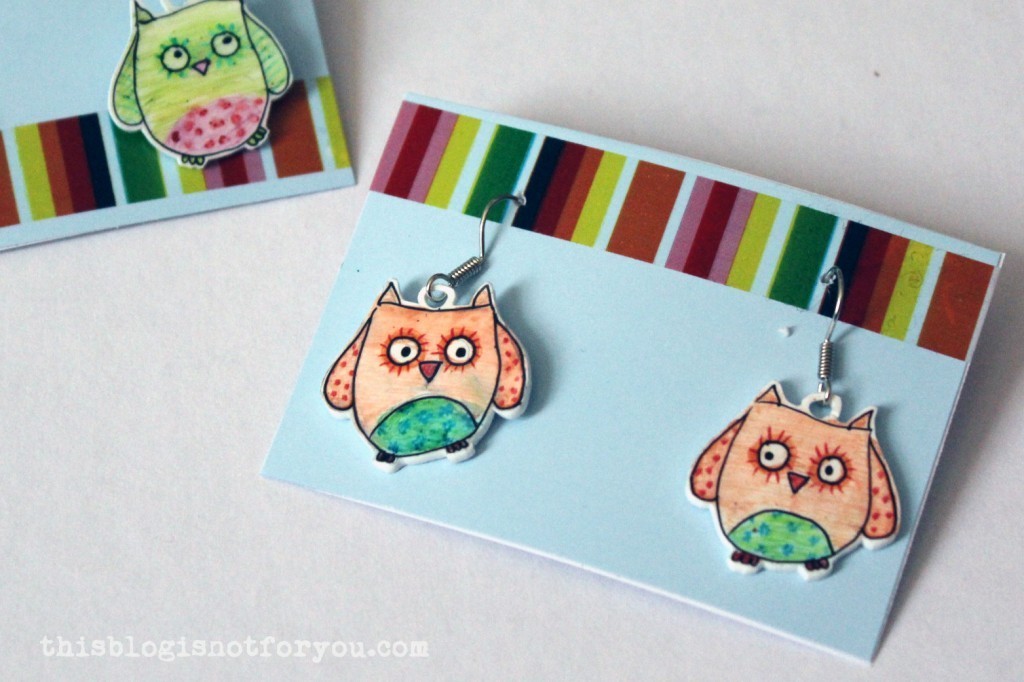
 The shrinkage is about 50%, which you have to consider when you choose the size of your image. You can draw directly on the plastic using a permanent marker. If you want to add colour, you can sandpaper the shrink plastic with very fine (!) sandpaper and then simply use crayons, acrylic paint or water colour. I recommend to keep the finished make from getting wet, as non-water-resistant colours might blur (even after baking the plastic).
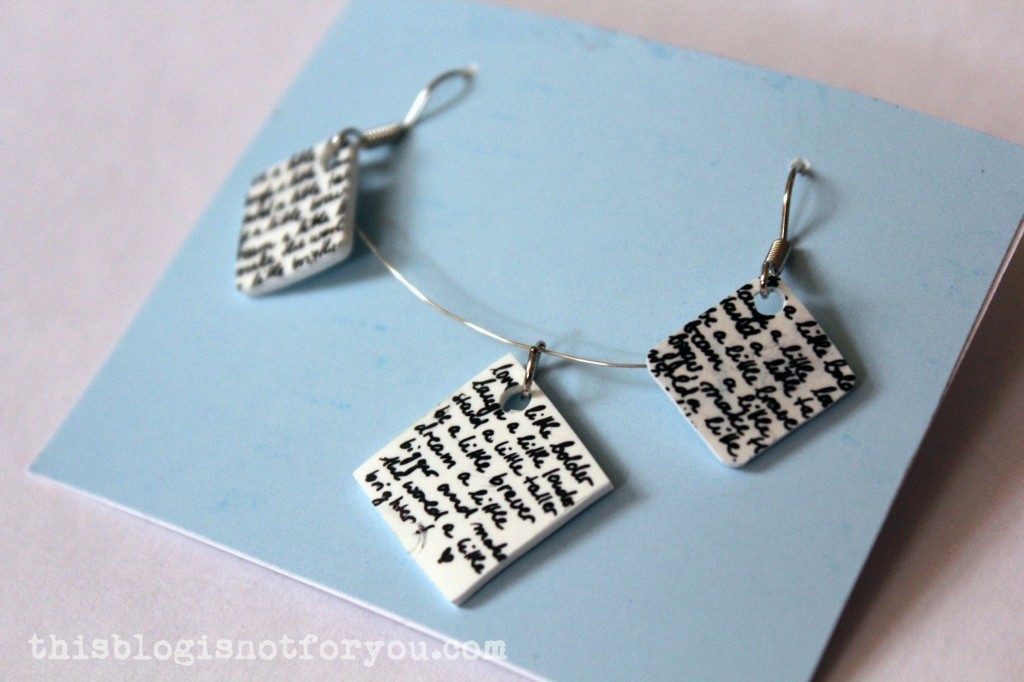
 I made these chevron earrings for myself (I got my friend to wear them for the pic 😉 ).
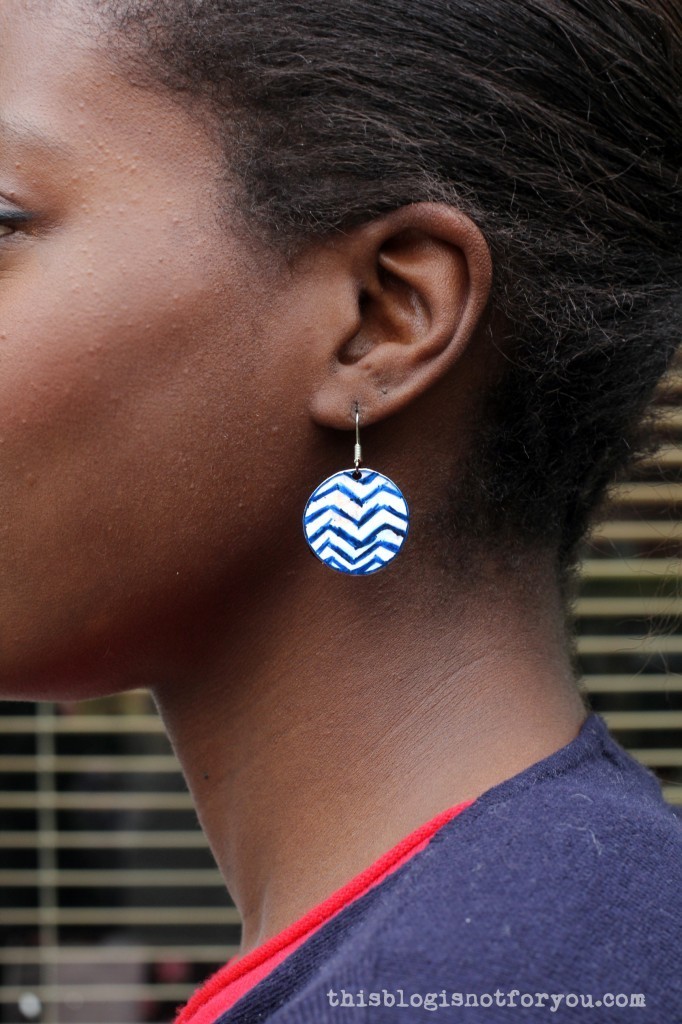 If you like my shrink plastic DIYs, you might want to check these out, too!