Sew Cute To Cuddle [Book Review]

Sew Cute To Cuddle review by thisblogisnotforyou.comHi everybody! Today I want to share with you a book that I pre-ordered on Amazon a couple of weeks ago. And since I got it last month I’ve been making plush animals!

And if you’re asking whether making plush animals is different from making clothes: Oh my, yes it is! But more on that later.Sew Cute To Cuddle review by thisblogisnotforyou.com

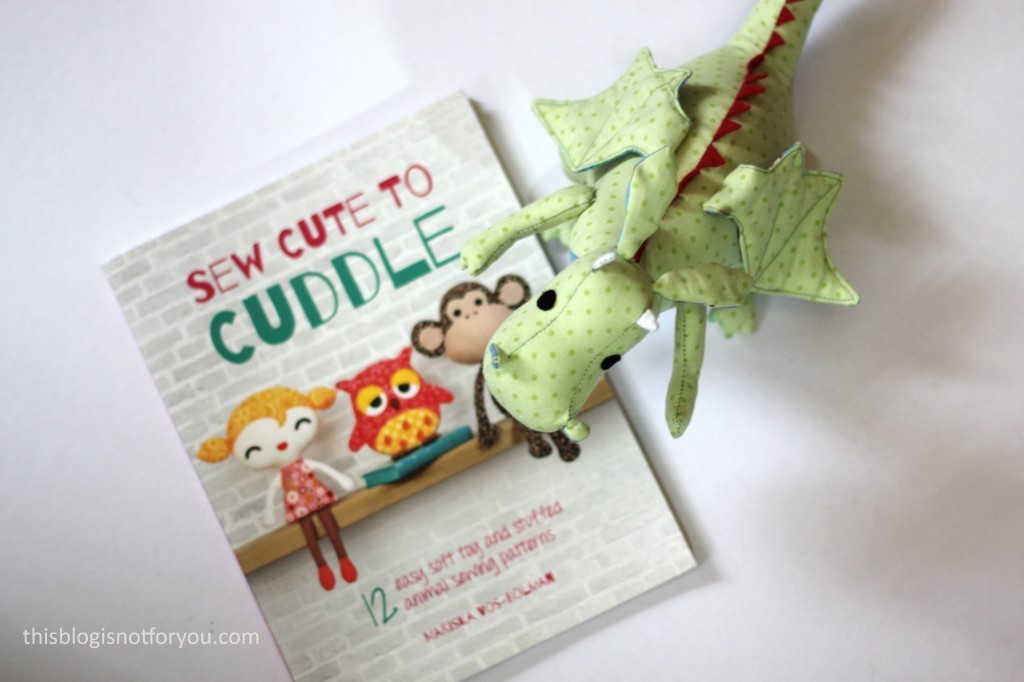
The book “Sew Cute to Cuddle” by Mariska Vos-Bolman includes 12 easy soft plush animal patterns and step-by-step instructions to make them. The book came out 8th September this year, so it’s basically brand-new! The patterns are full-size and in the back of the book. All you need to do is copy them and then cut them out, some bigger pattern pieces will also need to be glued together.

Sew Cute To Cuddle review by thisblogisnotforyou.com

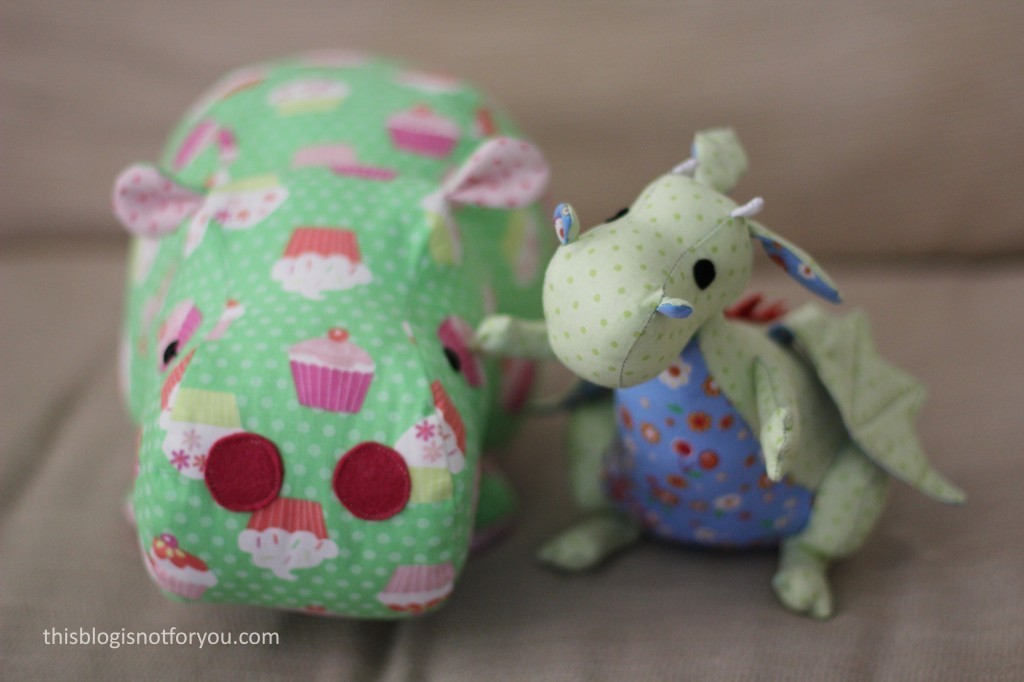
Above you can admire the two little fellows I made using the book and its patterns, Larry and Marvin (left to right). According to the book they’re called Mary and Daron, but the Mr. decided otherwise. Next on my sewing list are the owl, the dog (too cute!) and Gronk, the monster. These little friends are just perfect for killing some leftover fabric scraps! And they make cute presents, too. But believe me, once they’re stuffed, you don’t want to give them to anyone anymore!Sew Cute To Cuddle review by thisblogisnotforyou.comSew Cute To Cuddle review by thisblogisnotforyou.com

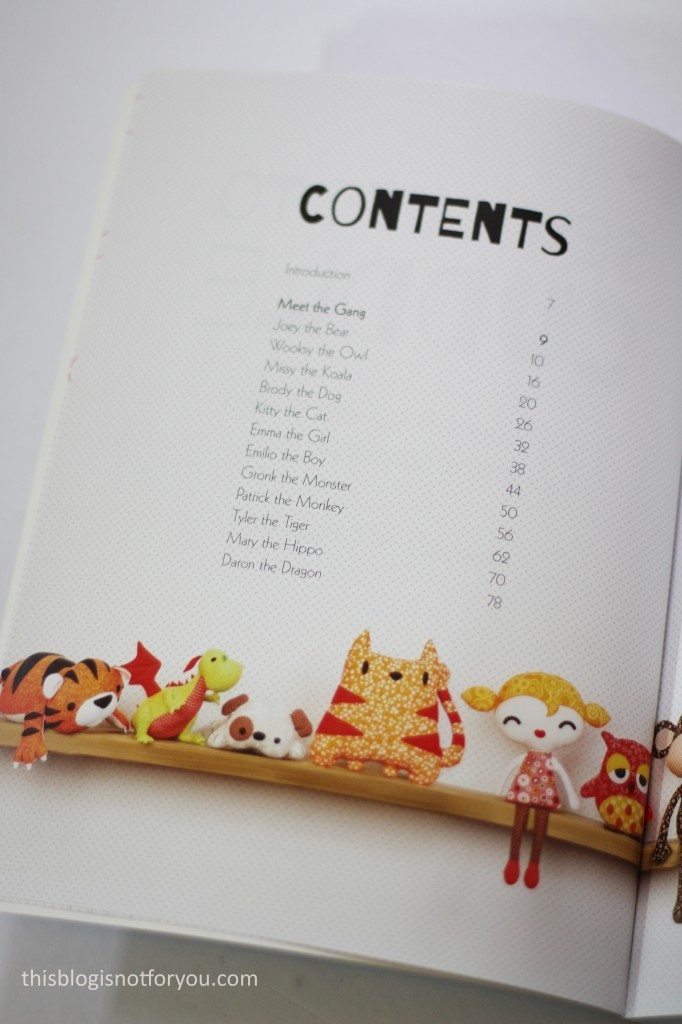
So let’s talk about Marvin first! (Who would have been named Drogon, if it was up to me! But apparently I’m not the one making the decision when it comes to naming stuffed animals.)Sew Cute To Cuddle review by thisblogisnotforyou.comSew Cute To Cuddle review by thisblogisnotforyou.com

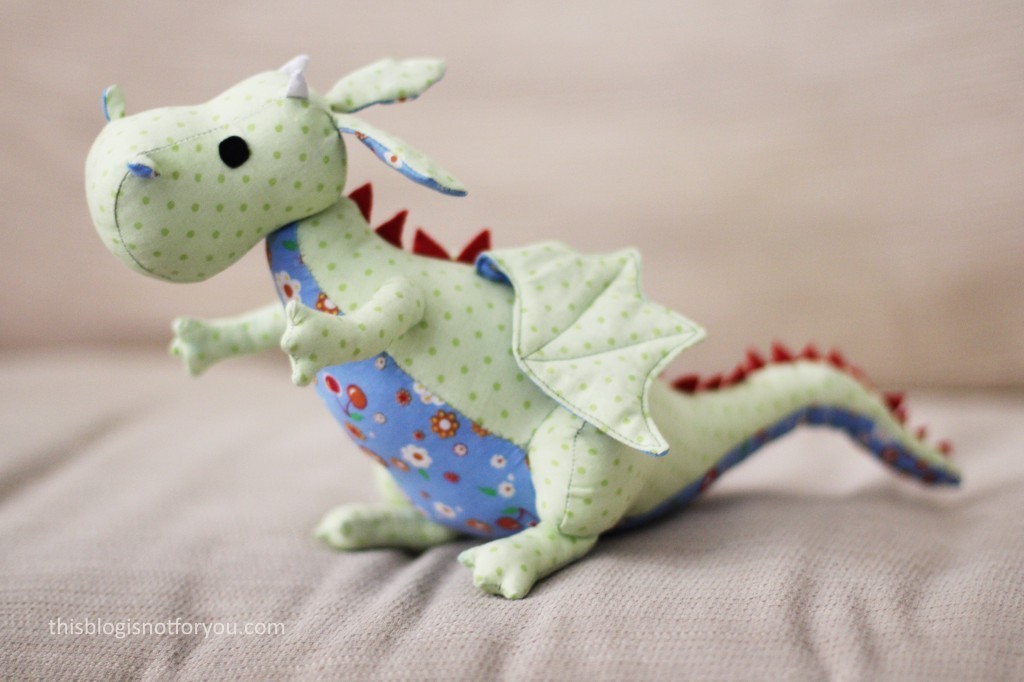
Making Marvin the dragon took longer than expected! Actually, it took as long as making a dress!

The thing with those cute little fellows is, that they don’t use up much fabric, but then they are also awfully fiddly to sew with! For the dragon, I had to sew some seams by hand, especially very tiny curves, as they were too difficult to sew with the machine.

The feet and arms were probably the hardest part to sew.Sew Cute To Cuddle review by thisblogisnotforyou.comSew Cute To Cuddle review by thisblogisnotforyou.comSew Cute To Cuddle review by thisblogisnotforyou.com

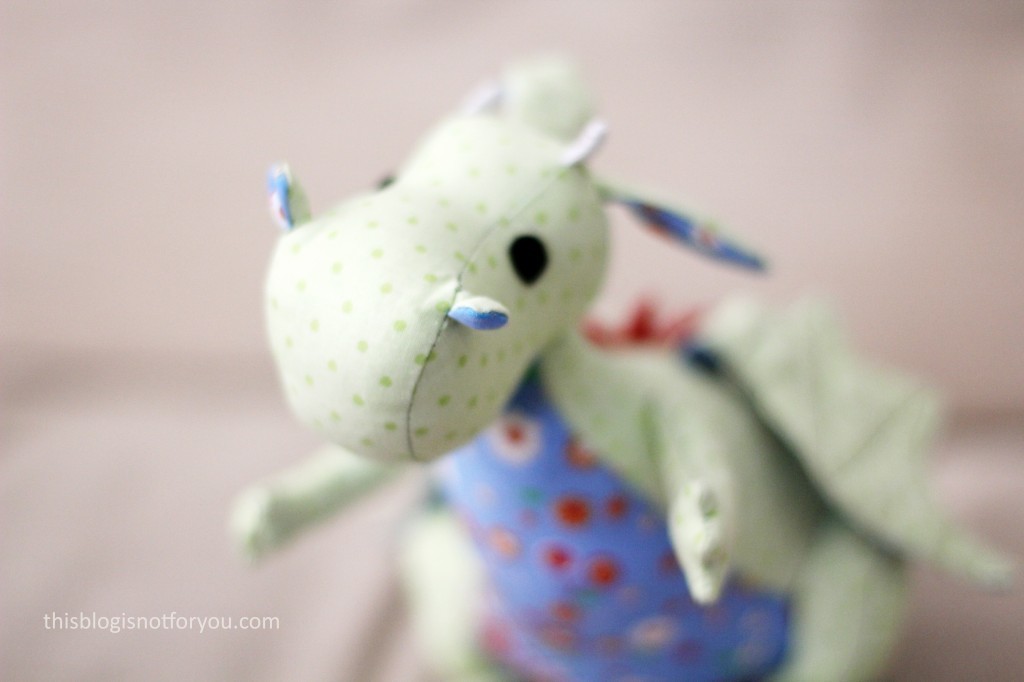
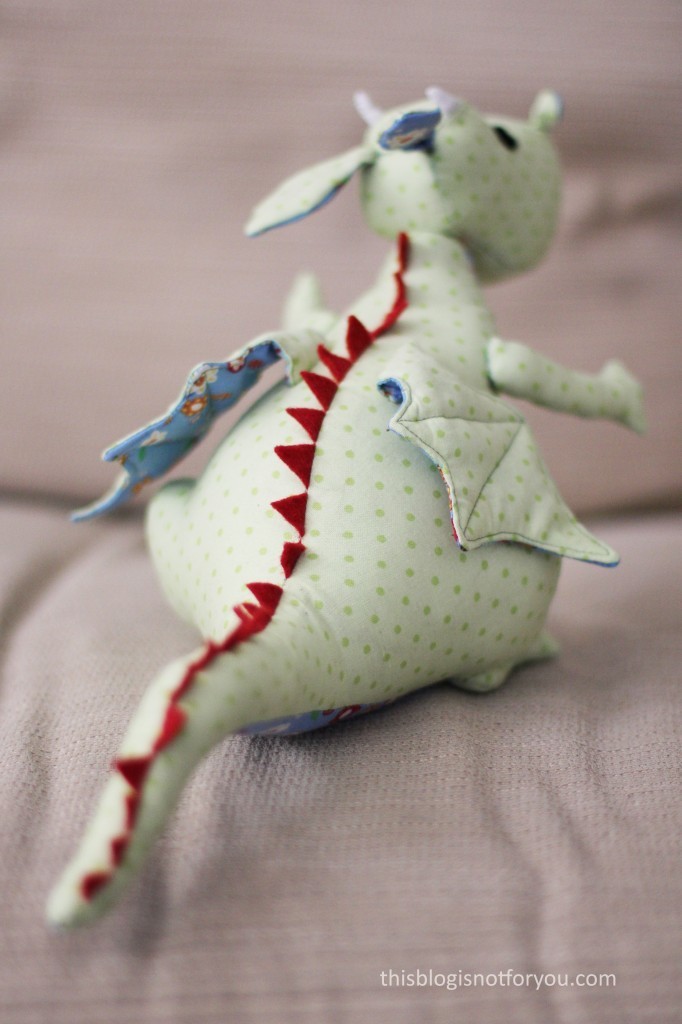
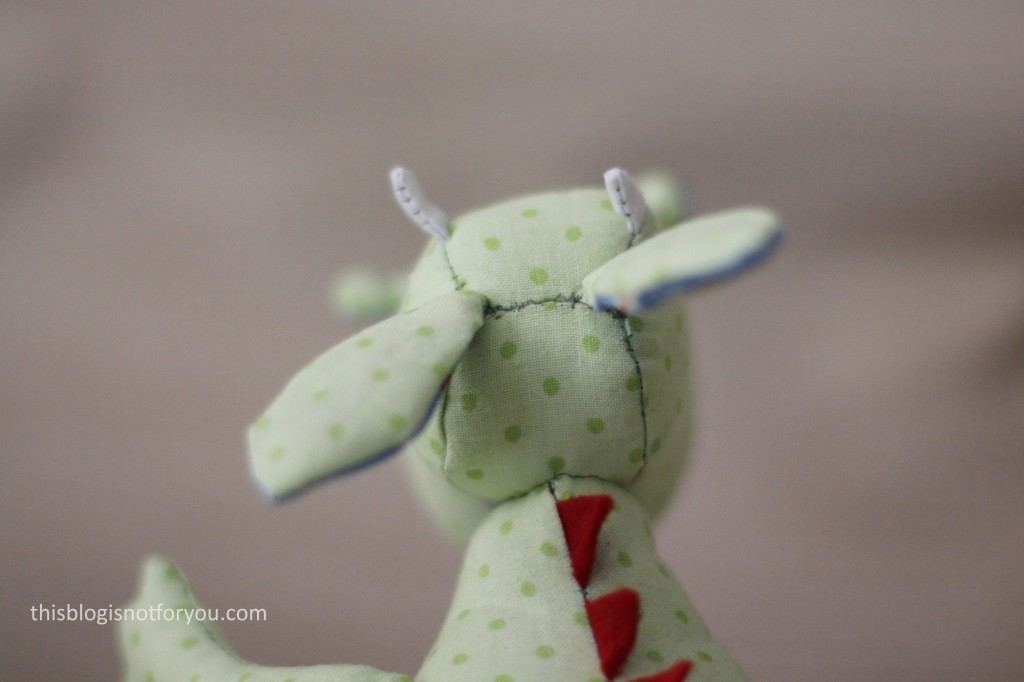
For the dragon, head and body are sewn and stuffed separately and then attached at the neck. You can see the little seam where the stuffing for the head went in at the back of Marvin’s head! (Yes! Between those cuuute little ears!)

The part that I probably enjoyed most, was sewing the quilted wings. They are just the cutest little detail on this little man.Sew Cute To Cuddle review by thisblogisnotforyou.comSew Cute To Cuddle review by thisblogisnotforyou.comSew Cute To Cuddle review by thisblogisnotforyou.com
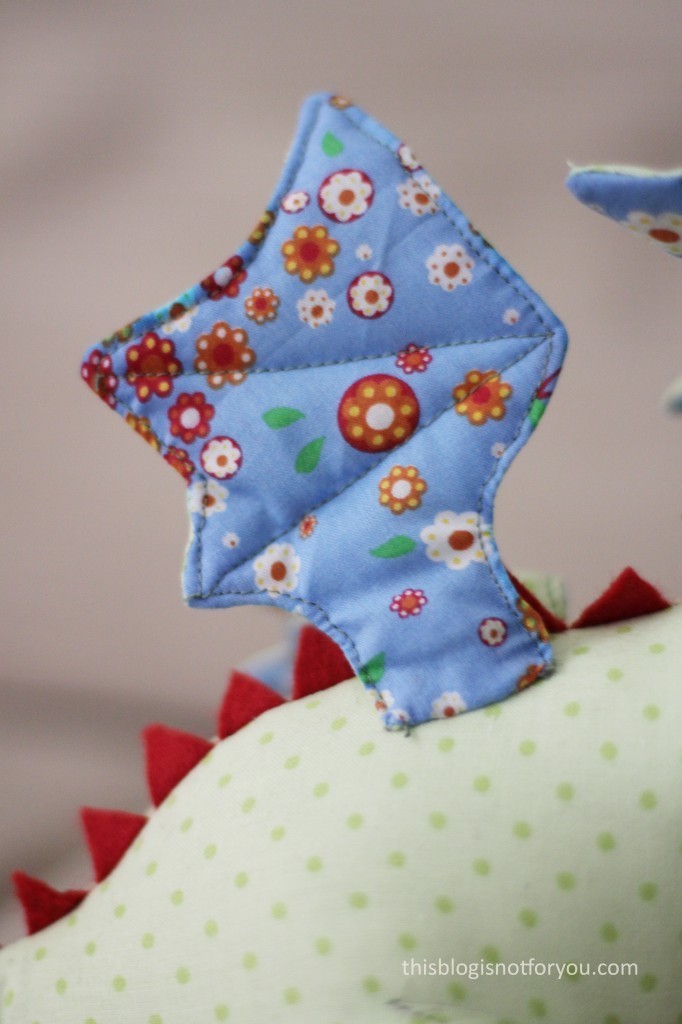
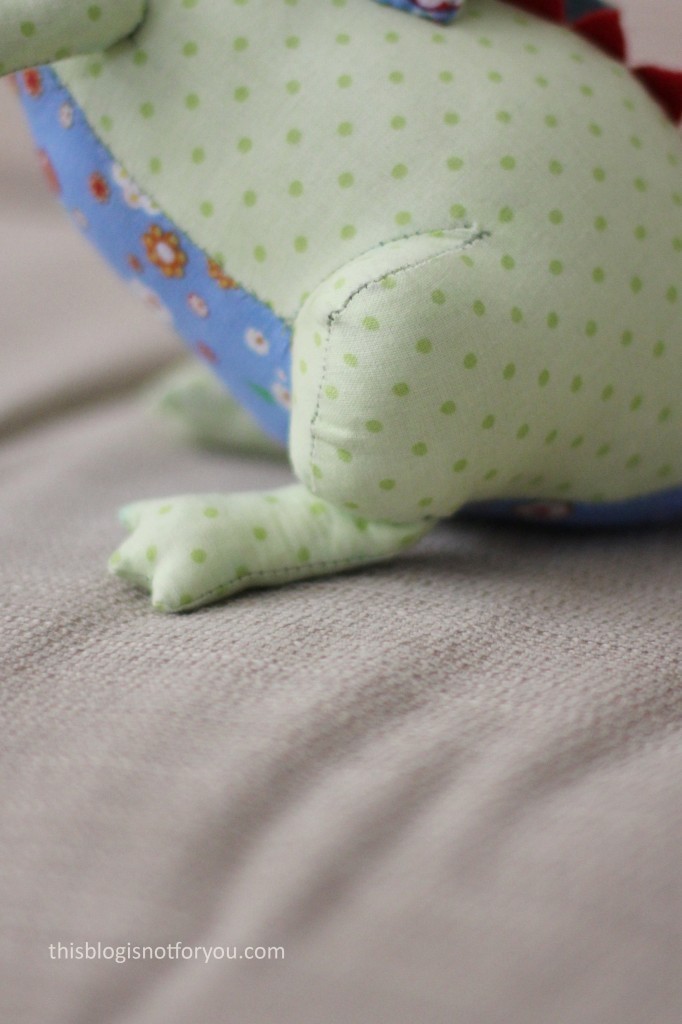
Here you can see the chubby legs and feet which were the hardest part. Luckily, the instructions are illustrated and very detailed. So I think even a confident beginner could tackle this project. (The dragon is actually the last project in the book – the other ones are certainly better for absolute beginners!)

I followed the instructions step by step and threw in some handsewing where I had to because things just became a bit too fiddly at some point. I ended up having something that looked like legs and feet, so I’m quite satisfied (although the ones in the book look a tiny bit different).Sew Cute To Cuddle review by thisblogisnotforyou.com

Look at those nostrils! Marvin would’ve made a formidable Drogon.Sew Cute To Cuddle review by thisblogisnotforyou.com

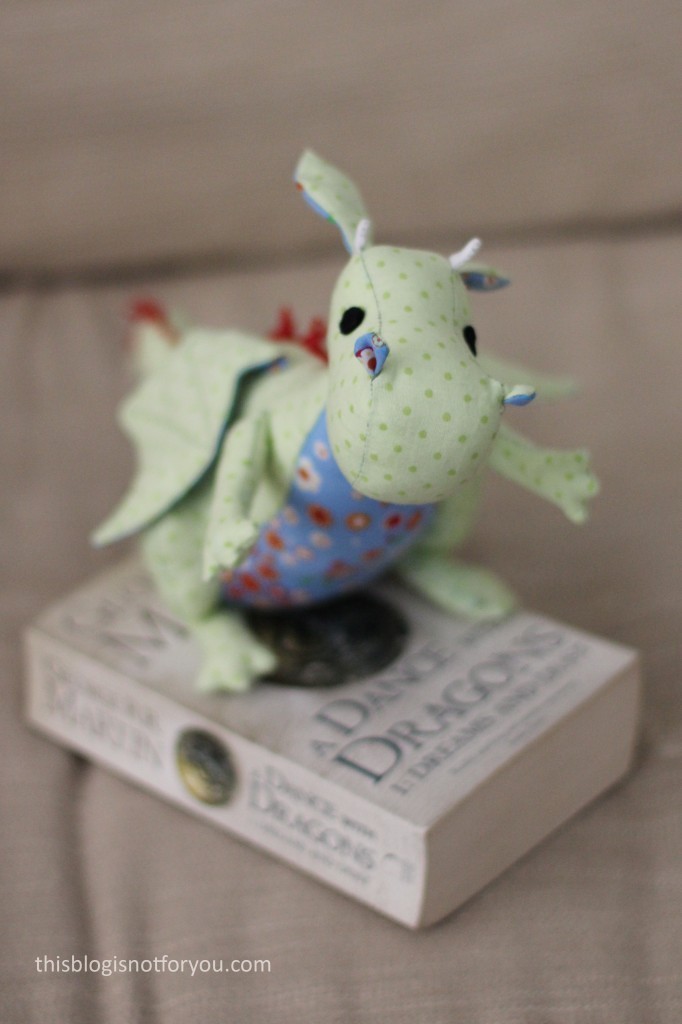
Next up is Larry, our hippo with a sweet tooth. (Rumours came up that he might be gay)

Sew Cute To Cuddle review by thisblogisnotforyou.comSew Cute To Cuddle review by thisblogisnotforyou.com

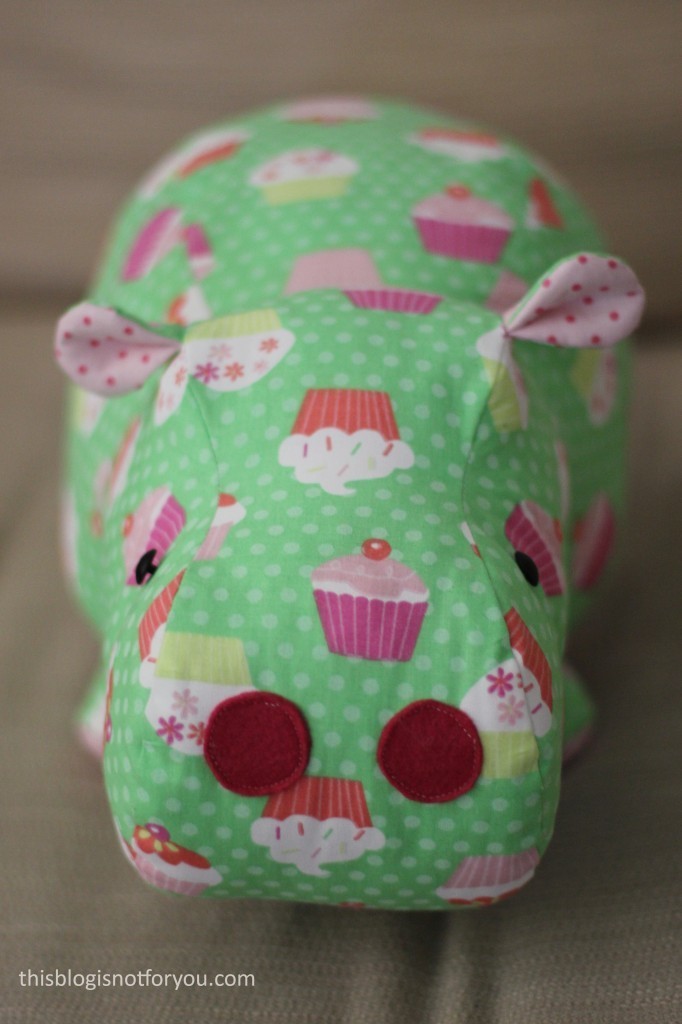
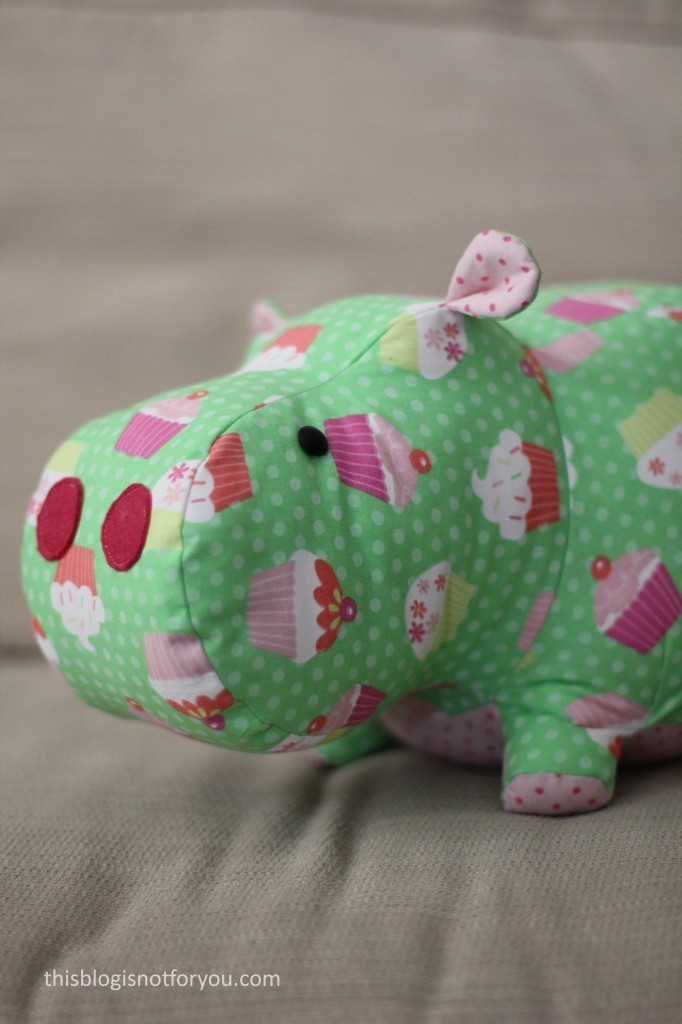
Larry turned out to be bigger than I thought, if not to say massive. There are no finished measurements in the book, but I should have guessed by just looking at the size of the pattern pieces. Well, usually they turn out to be much smaller in the end after stuffing and all that, but not so with this guy here.

This one just became bigger and bigger and his behind ate up three quarters of the stuffing from that Primark pillow I bought. Nothing left for the owl or the dog!

Well, now I know better and will just copy the pattern smaller and make a mini version of this big guy.Sew Cute To Cuddle review by thisblogisnotforyou.com

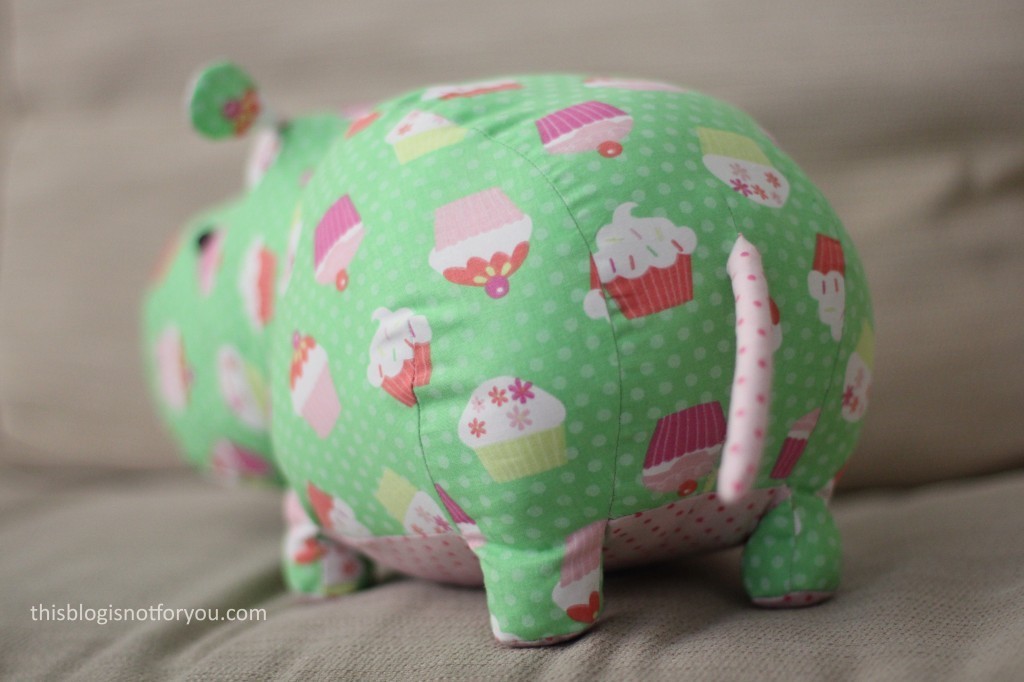
For both Larry and Marvin I used leftover fabric scraps, which you might even recognise from previous projects. The cupcake fabric was left over from a toddler pinafore I made last year and the flower and cherry fabric I had used for making an Anthropologie inspired kitschy kitchen apron.Sew Cute To Cuddle review by thisblogisnotforyou.com

I really enjoyed making these projects and would recommend this book to anyone who wants to try making their own stuffed animals. No matter whether you’re a pro or a beginner. I love that the projects are quite unusal and not just the typical teddy bear project you would expect.

Have you ever made stuffed animals? Would you like to try?


Happy sewing!

facebook/bloglovin/pinterest
twitter/instagram

Stay in touch!

The new Pussy Bow Blouse pattern by Sew Over It

 Sew Over It Pussy Bow Blouse by thisblogisnotforyou.com

Hi folks! Today I sharing my newest pussy bow blouse with you! After sewing three (!) Lottie Blouses, it was time to try another pussy bow blouse pattern. Luckily enough, Lisa, mastermind behind Sew Over It, asked me to test her newest pattern, the Pussy Bow Blouse. Lisa is known for her gorgeous patterns, mostly basic wardrobes staples (such as the Ultimate Trousers pattern or the Ultimate Wrap Dress) with a vintage touch.

source: www.sewoverit.com

So here it is, in all its glory!

 Sew Over It Pussy Bow Blouse by thisblogisnotforyou.com

 Sew Over It Pussy Bow Blouse by thisblogisnotforyou.com

The pattern:

The pattern was pretty much straight-forward and the instructions are very comprehensive and easy to follow, thanks to the illustrations. The blouse comes in two different variations – you can choose between a v-neck or keyhole version. I wanted to try the keyhole version, but couldn’t wrap my head around one particular step in the instructions (we all have those days, no?) and since I already have three keyhole Lottie Blouses, I went with the v-neck option in the end.

The pattern comes in UK sizes 8-20 and is available as both a printed pattern and as a downloadable PDF. Sew Over It will also host a sewalong in the future, so keep your eyes peeled!

What I loved most about the pattern are the little details: for example the super cute buttoned cuffs. I used a black fabric covered button, which you can hardly see on the polkadot fabric!
 Sew Over It Pussy Bow Blouse by thisblogisnotforyou.com Sew Over It Pussy Bow Blouse by thisblogisnotforyou.com

The fit: 

I love the long sleeves – especially now that it is getting colder I was in desperate need for a long-sleeved blouse for work. This is the perfect pattern! The pattern has some interesting details in the way it is cut. It has a seam in the centre front! The cut resembles 1940’s blouses, sitting a bit off the shoulder. It confused me at first since I thought it was a fitting issue and I thought it would prevent me from moving my arms freely. In front of the mirror it felt as if I could’nt lift my arms all the way up, but now, after I have worn it at work several times, I can say that it didn’t bother me at all. I actually like that it has this vintage look.

The sleeves were a bit long for my taste and I simply could’ve shortened them, but I was too lazy to make a muslin. They are quite baggy and I really like the general shape of the sleeves and the cuffs, but since they are about 7cm too long they cover up the cute cuffs. My own fault! I could’ve at least measured them before attaching the cuffs!

 Sew Over It Pussy Bow Blouse by thisblogisnotforyou.com Sew Over It Pussy Bow Blouse by thisblogisnotforyou.com

The fabric:

The pattern suggests using light and drapey fabrics, such as rayon, chiffon and lightweight silks and crepes. I used a nude coloured georgette, which is slightly see-through and covered in black polkadots. I bought the fabric on Walthamstow Market ages ago (all I can remember is that it was super cheap), planning to make a dress or skirt from it. The print is actually quite busy and I am glad that I did not make a dress – I think it works best for a blouse like this!

The georgette is the perfect fabric to wear at work as it is not too warm (no sweat stains!) and is perfect for layering. It’s horrible to sew with, though. Cutting out georgette is messy and frustrating (never rush, but take your time!) and you have to be very careful that the fabric layers don’t slip when sewing and pinning. Luckily, I already had my overlocker then, so at least I didn’t have to worry about fraying edges!

 Sew Over It Pussy Bow Blouse by thisblogisnotforyou.com

I mostly wear my blouse over skinny jeans and tight dark miniskirts or tucked in paired with a pencil skirt. It’s a perfect office look and ideal for our smart casual dresscode at work. I also accidentally wore it on the day at work when we went to visit a farm, so imagine me watching the piggy race and feeding the alpacas dressed up like a 1940’s secretary. Well, the alpacas didn’t mind.

Have you tried any Sew Over It patterns yet? The Ultimate Trousers are still on my list and I’m eyeballing the 1940’s tea dress, as well.

Don’t forget to enter the blog anniversary giveaway, if you haven’t done so yet! The giveaway is open internationally and closes on 30th September!


Happy sewing!

facebook/bloglovin/pinterest
twitter/instagram

Stay in touch!

A very autumnal Malvarosa Dress

Malvarosa Dress by thisblogisnotforyou.com
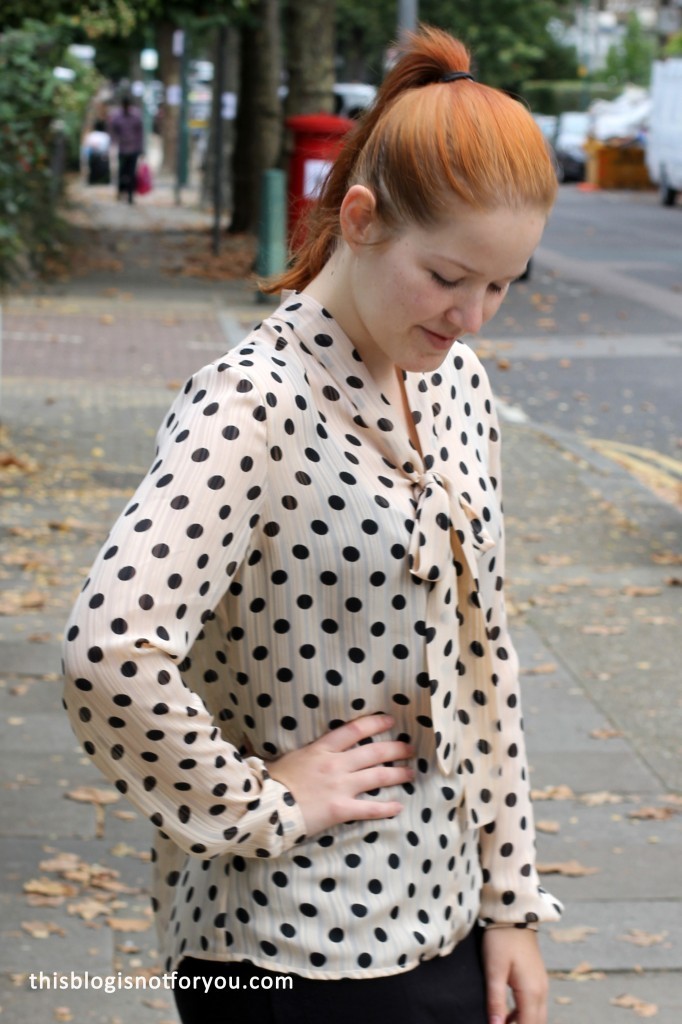
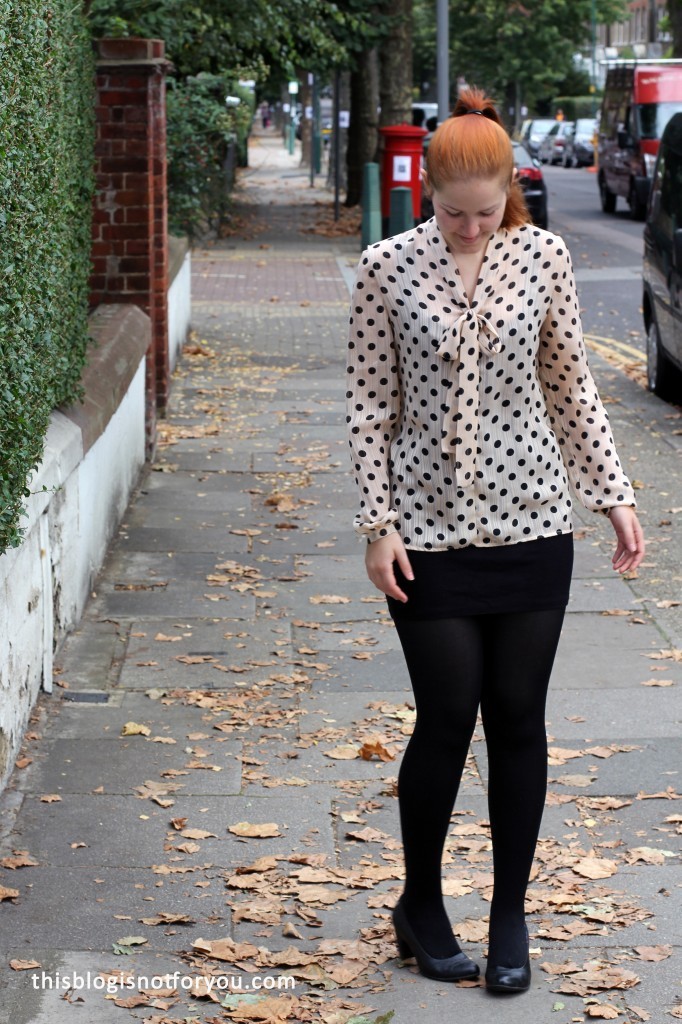
Hi ya, fellows! Hope you had a great week so far. After a few very stressful shifts at work this week and last weekend I am now even more happy about having a week and a bit off – my first official annual leave since I started my new job. My best friend is coming to visit me here in London (whoop, whoop!) and I hope to get loads of sewing WIPs done, as well.

By the way, did I mention that I started teaching sewing workshops at work? I work in a large psychiatric hospital and many of our patients are on home leave on the weekends, so it’s a bit quieter on these days and I have some time to squeeze in a workshop every now and then. The first one went really well and was great fun for everybody.

Another great news: Tomorrow my blog turns two years old and shhh… make sure to pop by; there will be a giveaway you surely don’t want to miss!

Now, let’s get back onto the subject: I hate to say this, but it seems as if summer has come to an end. I am finally forced to think about my autumn wardrobe. I tried to avoid this for as long as possible (we can wear sleeveless dresses in autumn as well, can’t we? Long love cardigans!) Well, but then I came across this fabric.

Malvarosa Dress by thisblogisnotforyou.com

The fabric:

It’s a beautiful peachskin polyester, courtesy of stoffe.de. It was end of roll fabric, but I loved it so much and got 1.1m of it. I thought it would be enough for a blouse or a mini shift dress. It’s a love it or hate it print and I love it (the Mr. does not so much). The fabric is lovely to wear, very light and soft and drapes really well. It was also great to sew with. Although I hate ordering fabrics online, I really liked my ‘shopping experience’ on stoffe.de (they’re called myfabrics.co.uk here in the UK!) They’ve got a massive choice of fabrics which are sorted very well and it’s easy to find what you’re looking for. The fabric is described in detail so what I thought I would get was actually exactly what I got in the end (which often isn’t the case when I shop online).

Malvarosa Dress by thisblogisnotforyou.comMalvarosa Dress by thisblogisnotforyou.com

The pattern:

The print is quite large and I thought too many darts and seams would ruin it. Browsing through the Pauline Alice patterns website (there was a 20% sale for their first anniversary!) I came across the Malvarosa pattern and thought the cut would be perfect for the fabric I had. I wasn’t sure whether I had enough fabric (you needed at least 1.5m), but I thought I’d figure something out anyway. In the end I shortened the skirt a bit and did not cut it as wide as suggested in the pattern. Thus, I have a few gathers less, but I could squeeze the pattern onto the fabric. I even had enough for the pockets (which actually sold the pattern to me!)

Malvarosa Dress by thisblogisnotforyou.com
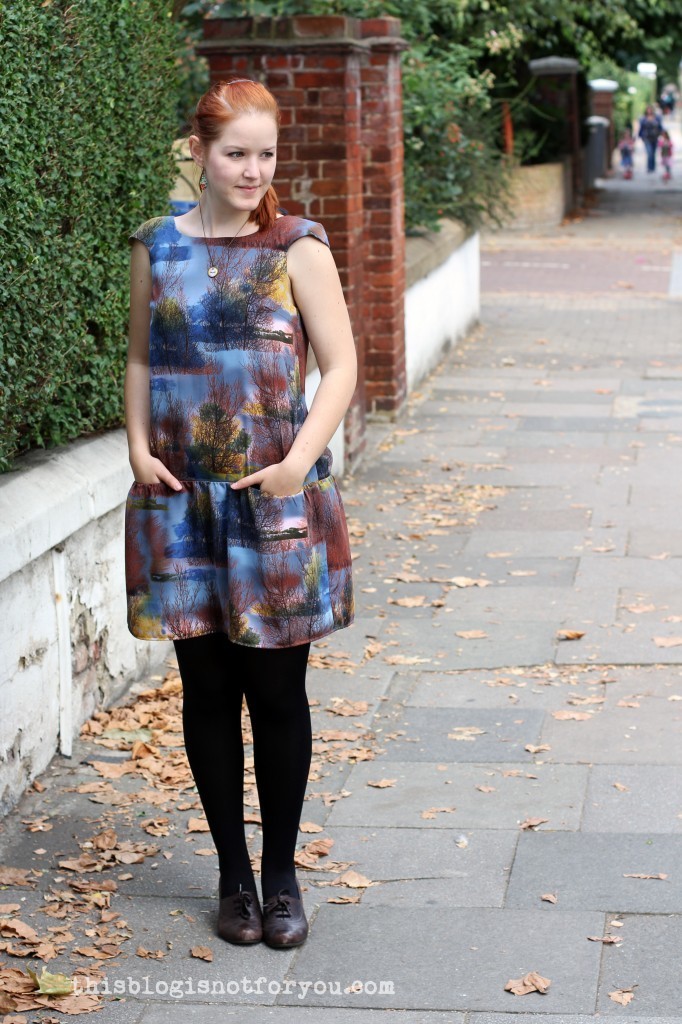
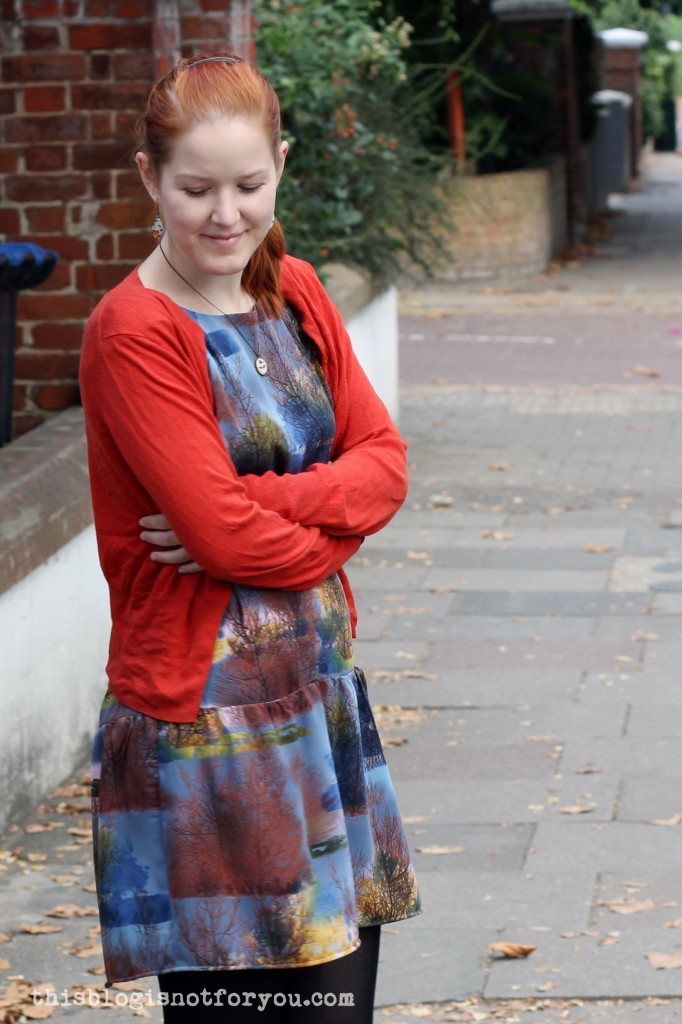
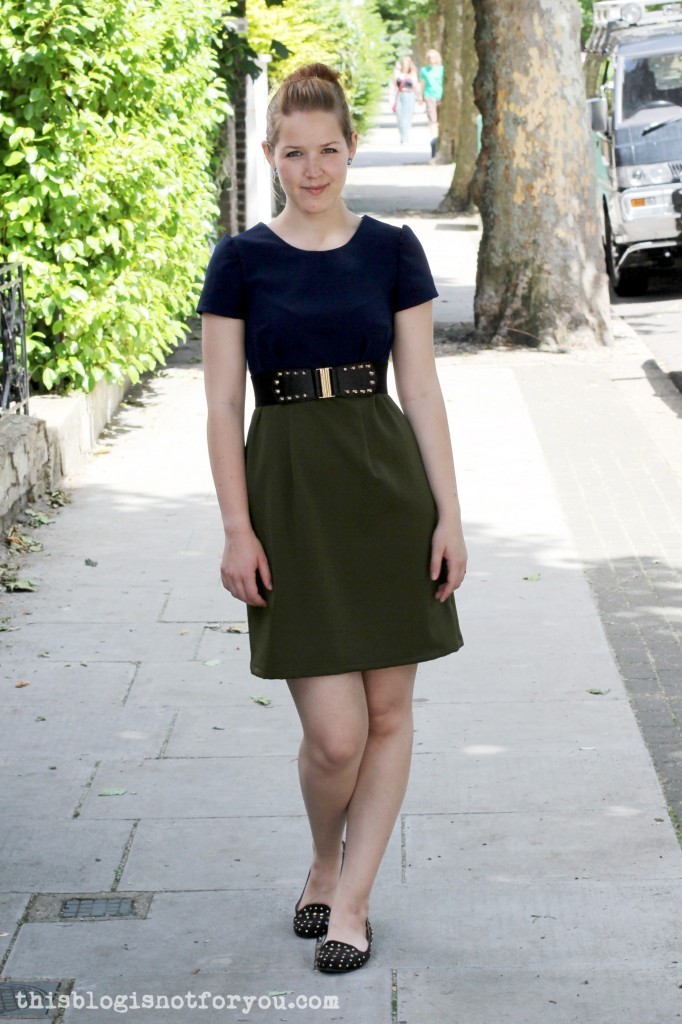
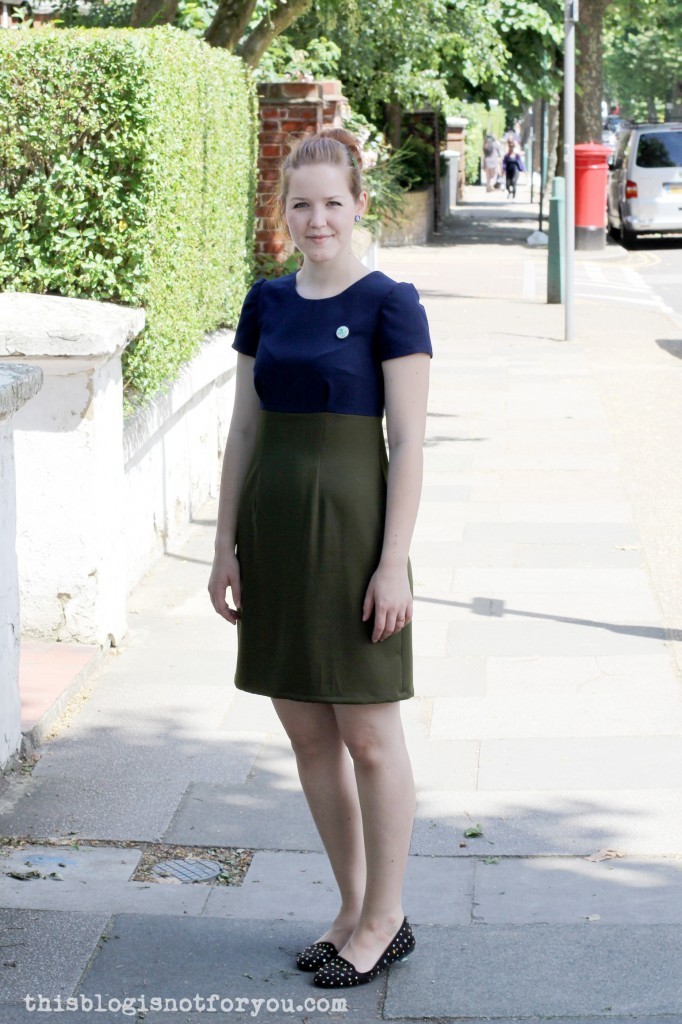
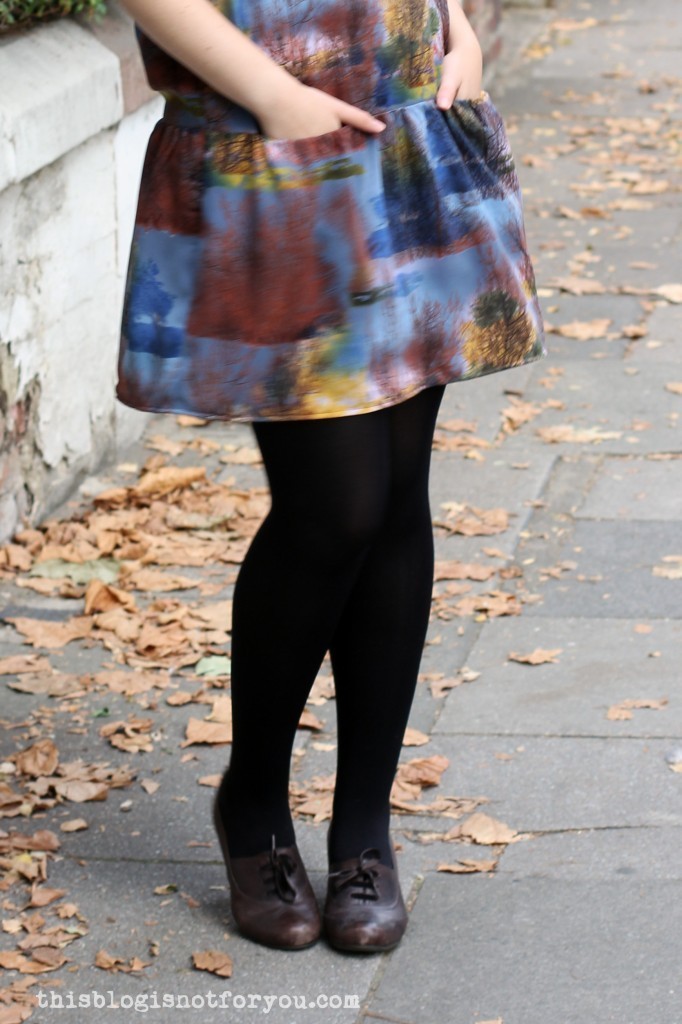
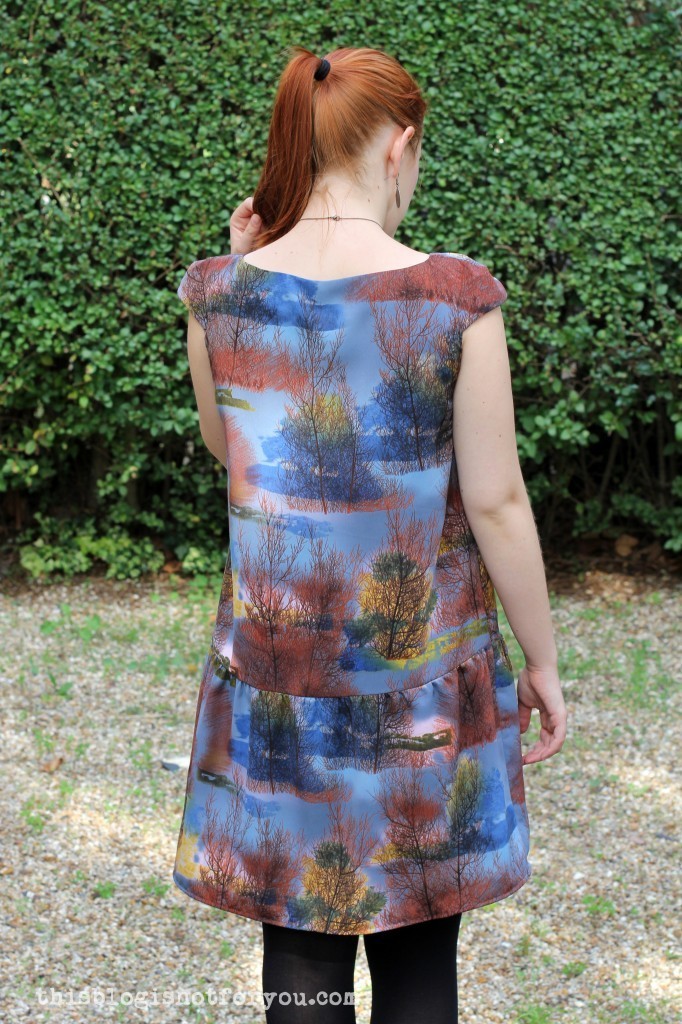
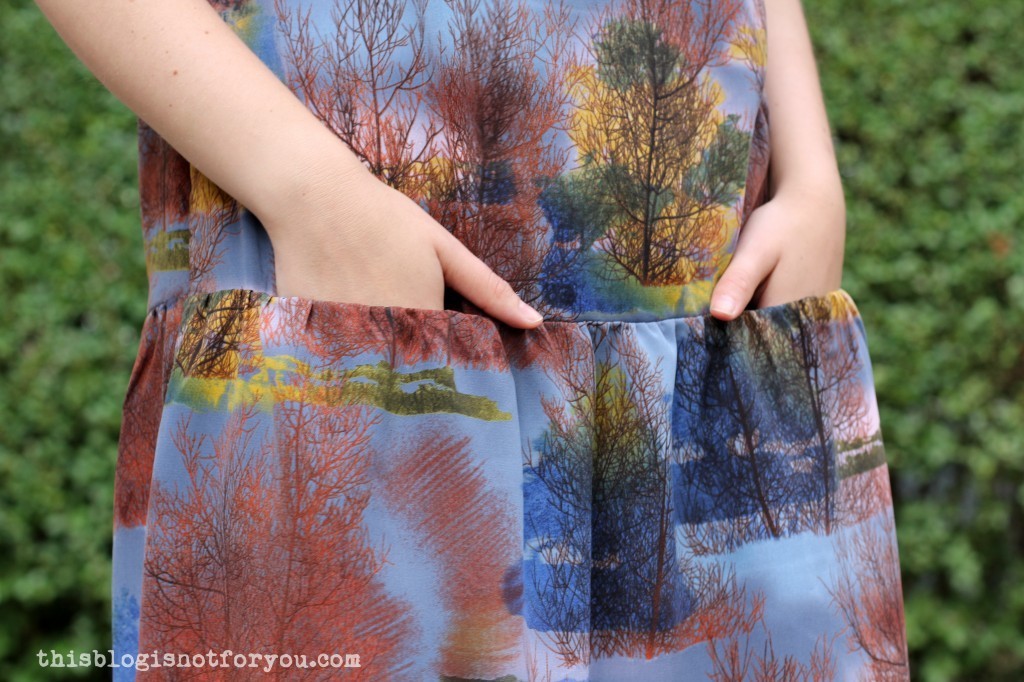
I love pockets! Pockets are great!
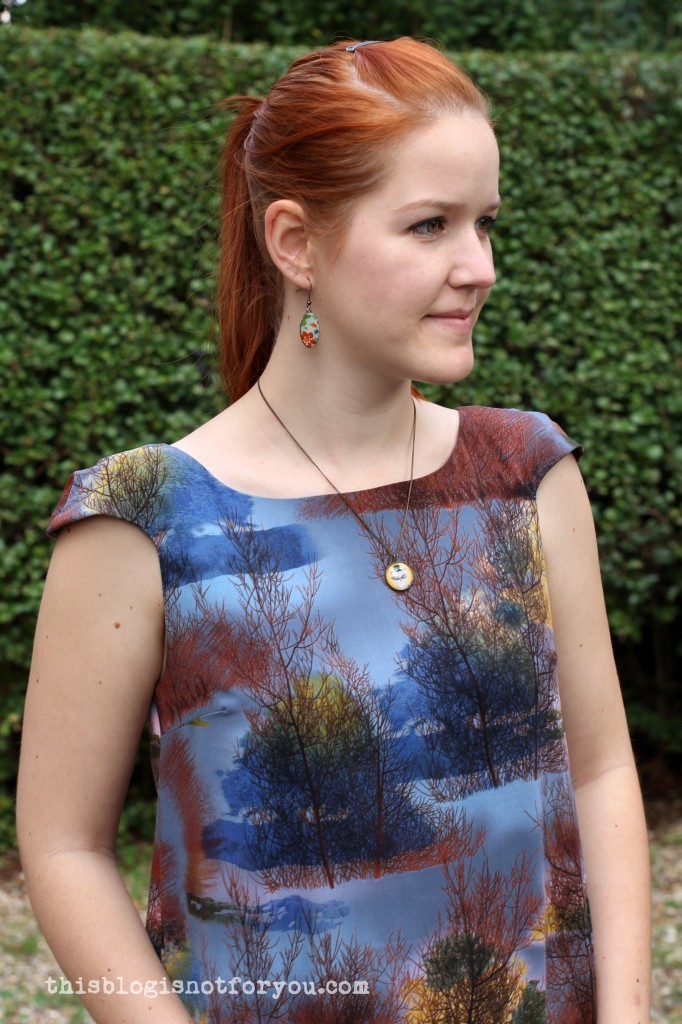
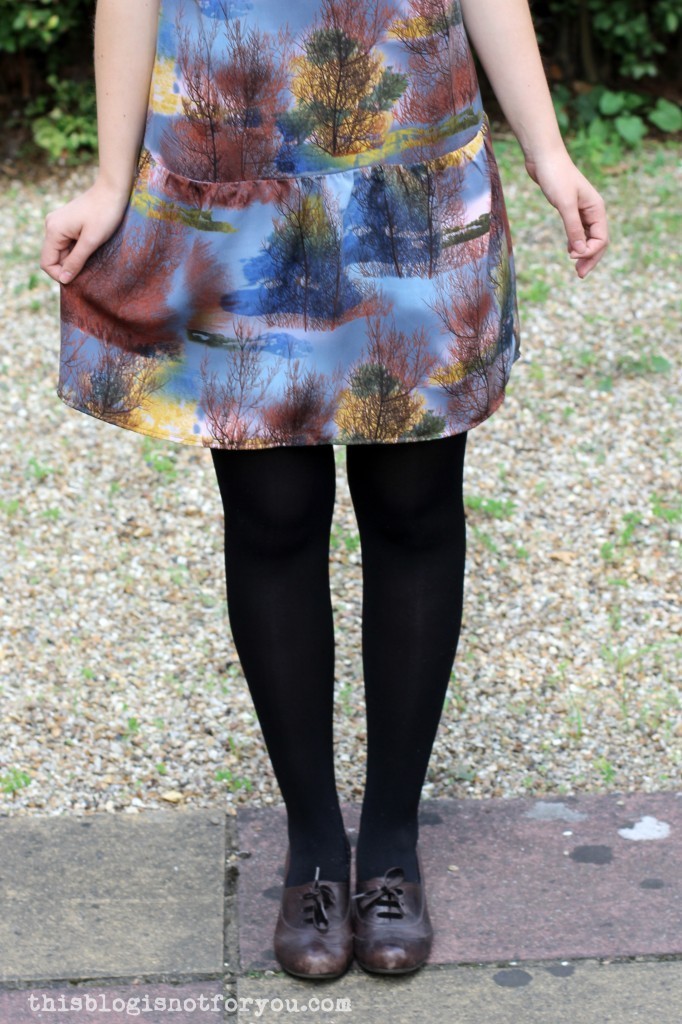
Malvarosa Dress by thisblogisnotforyou.comMalvarosa Dress by thisblogisnotforyou.comThe fit:

I really like the fit of this dress. The pattern describes the Malvarosa as

“babydoll dress [which] features an A-line bodice, low waistline, full gathered skirt, boat neckline, bust darts and drop shoulder sleeves.”


And this is exactly what it is. The dropped waist makes the fitting of the dress really easy and it’s very comfortable to wear. I actually think the wider fit is quite flattering. I never got so many compliments at work!

The only thing I am not so sure about are the ‘sleeves’. I really liked the long-sleeved version, but obviously had not enough fabric. I thought the cut of the sleeveless variation was very interesting and unusual, but after wearing the dress I am not sure whether I am a big fan or not. They don’t bother me, but I don’t think I like the shape too much. It is a good shape to wear at work though, as the shoulders are covered.

Malvarosa Dress by thisblogisnotforyou.comMalvarosa Dress by thisblogisnotforyou.comMalvarosa Dress by thisblogisnotforyou.comMalvarosa Dress by thisblogisnotforyou.com

Have you tried the Malvarosa pattern? I’d love to hear your thoughts!

I’m pretty sure I’ll make this dress again, probably with the long sleeves. I also bought the Carme Blouse and Ninot Jacket pattern, make sure you check these out, too!

xx
Charlie


Happy sewing!

facebook/bloglovin/pinterest
twitter/instagram

Stay in touch!

Say Hello to Average Pony DIY!

Maren Wilcyk Average Pony on Thisblogisnotforyou.com

Hello lovelies! Today I want to introduce my awesome new sponsor: Maren from Average Pony DIY!

Maren Wilcyk Average Pony

Maren and I actually met at university a few years ago. Back then she used to sell very cute jewellery and accessories on Dawanda (which is basically the German answer to Etsy). In April this year she expanded her business and created “Average Pony DIY”, now selling materials for making your own jewellery and accessories. The shop is still growing and at the moment also includes the cutest washi tape I’ve ever seen, covered buttons and hand-stamped labels for your handmade makes. All products are absolutely swoon-worthy and come at very affordable prices. You can make your own personalised (and very professional looking) jewellery for no more than 1-2€.

I was super happy when Maren sent me a parcel with different materials to try some of her products. I loved how much care she puts into wrapping everything and decorating it with washi tape!

Maren Wilcyk Average Pony on Thisblogisnotforyou.comMaren Wilcyk Average Pony on Thisblogisnotforyou.com

I got to test different necklace, earring and hairslide jewellery-settings as well as glass cabochons in different colours.Maren Wilcyk Average Pony on Thisblogisnotforyou.com

There were also some clear cabochons included and I took a few pics while making my own pair of studs:Maren Wilcyk Average Pony on Thisblogisnotforyou.comMaren Wilcyk Average Pony on Thisblogisnotforyou.com

You basically glue the glass cabochon onto paper (if you want to print out your own image I found that photo paper works best), wait for the glue to dry and then cut it out and glue it into the setting. Pretty straight-forward, isn’t it?Maren Wilcyk Average Pony on Thisblogisnotforyou.comMaren Wilcyk Average Pony on Thisblogisnotforyou.comMaren Wilcyk Average Pony on Thisblogisnotforyou.com

Here are some of first attempts:Maren Wilcyk Average Pony on Thisblogisnotforyou.com

Of course I tried to make some sewing-related studs, after which I noticed that it’s much much better to use photopaper, because normal paper soaks up some of the glue which can leave stains on the image.Maren Wilcyk Average Pony on Thisblogisnotforyou.comMaren Wilcyk Average Pony on Thisblogisnotforyou.com

I also tried book paper studs (“heart” & “love” in German).

Maren Wilcyk Average Pony on Thisblogisnotforyou.com

Aaaand, of course, sewing machines I drafted in Illustrator and my favourtie colour, navy blue!

Maren Wilcyk Average Pony on Thisblogisnotforyou.com

I really enjoyed making my own jewellery with Average Pony’s products, as it is very simply and quick, yet very effective. It’s perfect if you need a last-minute handmade gift.

I also ordered a few more settings and cabochons. My absolute favourite ones are the hipster animal necklace charms:

Maren Wilcyk Average Pony on Thisblogisnotforyou.comBHL Polly Top by thisblogisnotforyou.com

The two top ones (on light blue background) I printed off the interwebs, the other four I ordered on Average Pony DIY:The clear ones are the best, because you have endless possibilities! You can get them in different sizes from 8mm to 20mm.

If you find something on Dawanda which you’d like to order, I basically works the same way as Etsy. On the bottom of the page you can choose your language and currency:

dawanda

Average Pony DIY ships internationally and if you have any questions about ordering, you can simply pop them a message.


Happy jewellery making!

facebook/bloglovin/pinterest
twitter/instagram

Stay in touch!

The Megan Dress – Stitching My Way Through Tilly’s New Book

Megan Dress by thisblogisnotforyou.com
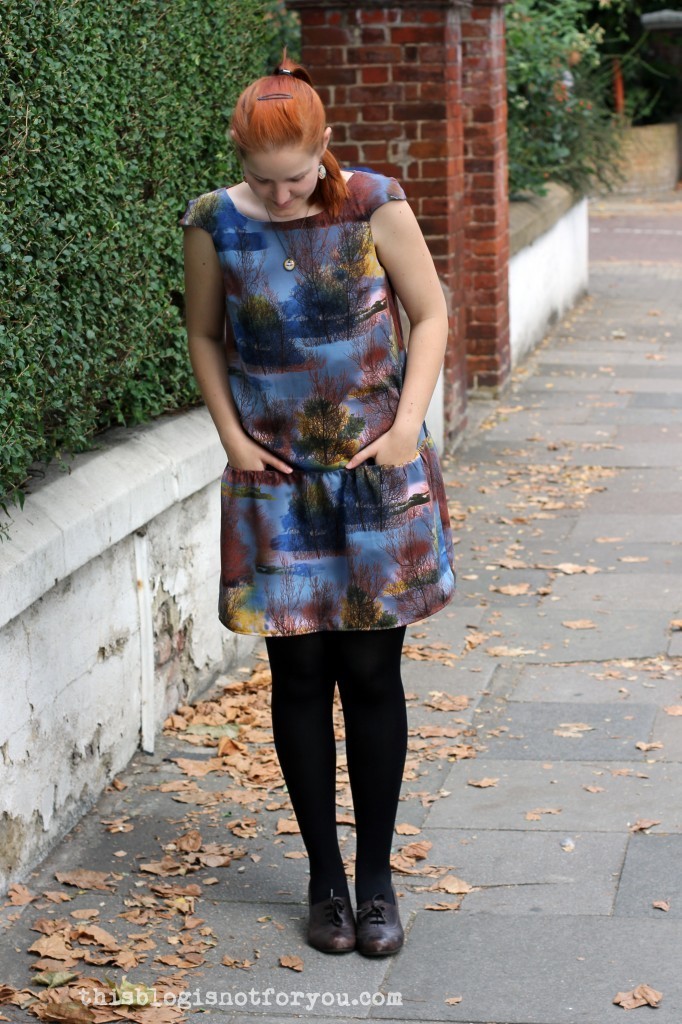
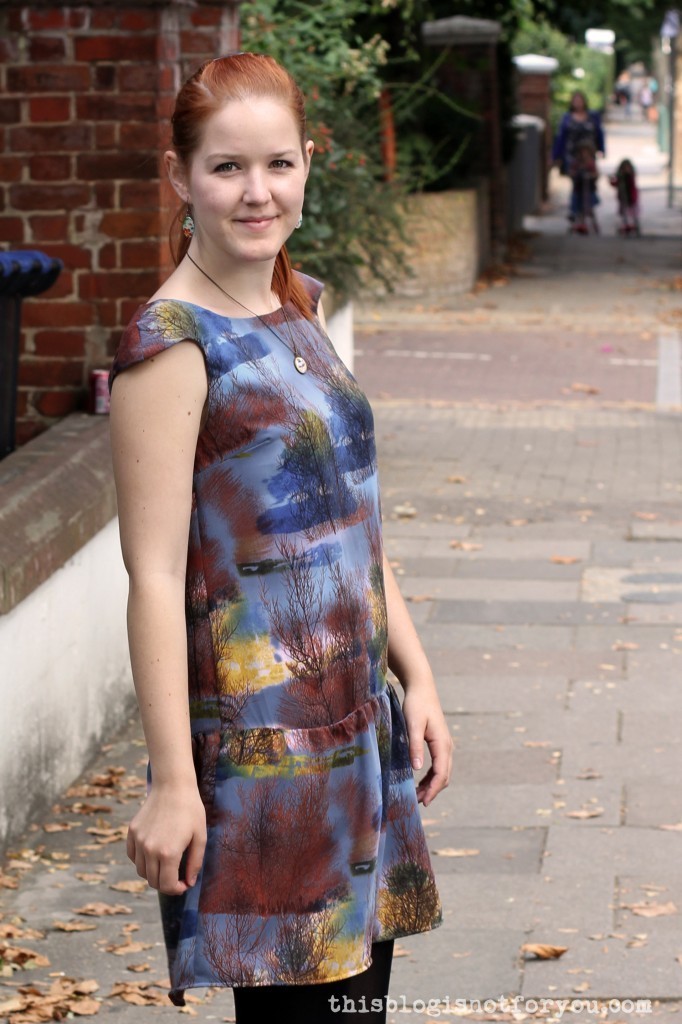
Two weeks ago I got Tilly’s Love at First Stitch in the mail and on the same evening read it from cover to cover. Although I love Tilly’s blog, I had my doubts about buying the book. I have so many sewing books that cover all the basics and as I consider myself an advanced seamstress by now, I thought this book just wasn’t for me. However I saw all these gorgeous Megans, Lilous and Mimis popping up over the interwebs and wanted to get a hand on these patterns myself.

Even if I don’t like the book, I thought, it would make a perfect prezzie for a novice sewer. All I can say is I wasn’t disappointed. Quite the opposite! Although the book covers all the basics more advanced sewers will already be familiar with, it’s super entertaining to read. I love Tilly’s voice in there and you will find her distinctive style on every single page in the book. I even found out that my cheapo-machine has a thread cutter, which I had never noticed before. Win!

The book itself is absolutely adorable and I won’t be giving it to anyone. I will keep it. Forever. HA! But I might get a second copy in the future, should I ever need a sewing-related gift.

Megan Dress by thisblogisnotforyou.com

Megan Dress by thisblogisnotforyou.com

Since I was eyeballing the Megan dress from the beginning, this was the obvious first choice. I traced the pattern before even knowing what fabric I would use. I found two fabrics in my stash which were leftovers from previous projects.

Basically the same fabric in different colours. I don’t quite know what fabric it is though. It’s quite heavy-weight, but stretchy and seems to be a woven. It’s probably a blend which definitely contains polyester. Any ideas?

I used the navy fabric for my Audrey Hepburn dress and the green fabric was leftover from my wiggle dress. Stash diet ahoy!Megan Dress by thisblogisnotforyou.comMegan Dress by thisblogisnotforyou.com

The dress was stitched together in just a few hours, with no alterations. I cut out a size 3, which according to the measurement table should’ve been rather wide, but it ended up being a bit too tight, although the fabric is quite stretchy. There’s a bit of gappage at the back when I lift my arms, so I have to keep reminding myself to pull the dress down every once in a while.

I started the dress the night before the John Lewis Sewing Bee and still had to put in the zip in the morning. But I managed to finish it on time and wore it that day.

Megan Dress by thisblogisnotforyou.comJohn Lewis 150 Sewing Bee // thisblogisnotforyou.com

I actually wore it twice already, on a hot sunny day last weekend but I noticed that it’s a bit too warm for those incredibly warm days outside. I will probably sew it again using some light-weight cotton.

Oh, and a Lilou pattern hack is on its way 😉

Are you planning on getting Tilly’s book or have you already tried some of the patterns?

xx
Charlie


Happy sewing!

facebook/bloglovin/pinterest
twitter/instagram

Stay in touch!