

Hi there! Thanks for stopping by! In this post I’m going to show you how to make some really cool chew toys for your dog!
There’s a very detailed step-by-step tutorial when you scroll down, explaining the basic technique I am using for making these sturdy fabric toys. But before we start, a few notes on durability and use.
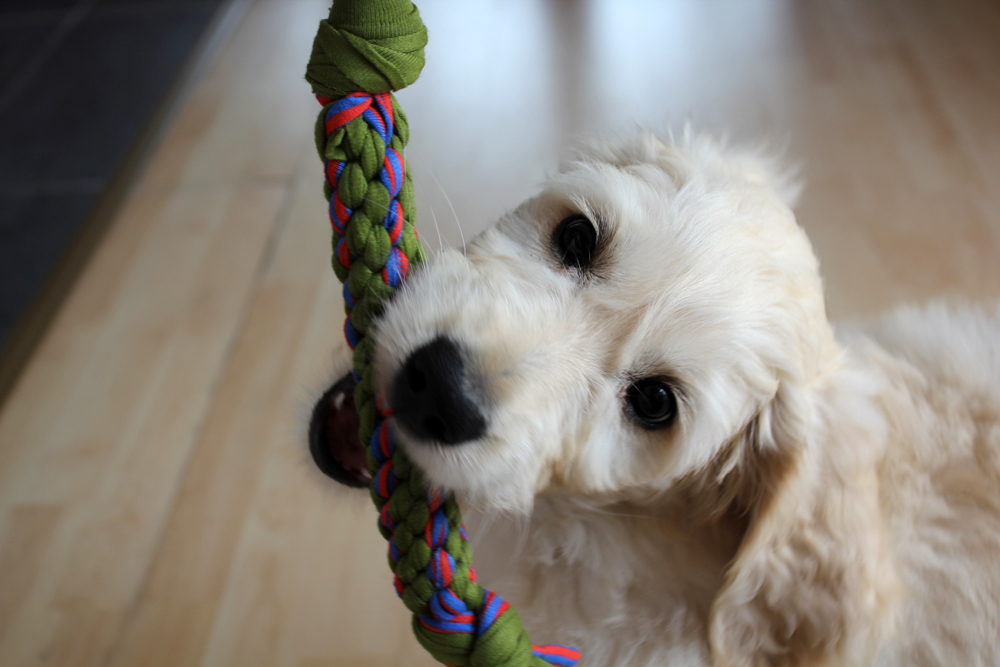
First of all, recycling stuff while making eco-friendly and washable toys for your dog is amazing, right? You can throw these toys into the washing machine when they get grubby! They are soft and won’t hurt your pup’s teeth and you do not have to worry about little plastic bits breaking off which your dog could choke on. They are really sturdy if you tie the knots really tight. Our puppy is quite a heavy chewer and hasn’t managed to destroy any of these yet after using them for almost three weeks.
But there’s a note of caution, nonetheless.
As with any other chew toys, never leave your dog unattended or at least check on him every now and then when they’re playing with toys. Every toy might break at some point. No toy is indestructible. Check your dog’s toys every night and throw away any toys that are broken or hazardous in any other way.
We also use these toys to teach. If your dog manages to destroy any toy in minutes, don’t leave him alone to get on with it. Use toys to teach him “leave it” and “take it”, “be gentle” or do some fun retrieving exercises. Your toys will last much longer! If your dog tends to be bored by this kind of toy: We never leave more than three toys out and rotate them on a regular basis, so the dog doesn’t start ignoring them. They’ll stay much more interesting this way!
Alright, here we go then!

MAKE YOUR OWN!
Here’s what you’ll need:
- some leftover cotton jersey fabric (less than half a yard/metre is more than enough!)
- scissors
Yep, that’s really all you need. If possible, use two different colours of fabric as this makes it easier not to get confused tying the knots when you try this the first time!
You do not necessarily need to use jersey fabric. Any other natural fibre would be OK for your dog, as well. But the stretch of the jersey makes the toy much more durable, as the knots are a lot tighter!

Cutting the fabric:
There’s no rule about how wide or long the fabric strips need to be. It depends on how big a chew toy you want to make. I found the narrower the strips are, the sturdier the toy seems to be. Large strips of fabric might come loose after a while. I cut narrower strips and worked two as one while making the knots.
I cut 50-70 cm long strips about 3 cm wide for making the toys shown in this post.
How many do you need to cut? If you are using two different colours and you want them to run diagonally, you need to work with four bands (So eight in total, four of each colour, if you want to work two as one as I did). If you want the colours to run vertically, use six bands (four of one colour and two of the other – which makes 12 strips of fabric in total!).
The start:
The technique is roughly the same no matter how many bands you’re using. The beginning is exactly the same for both:
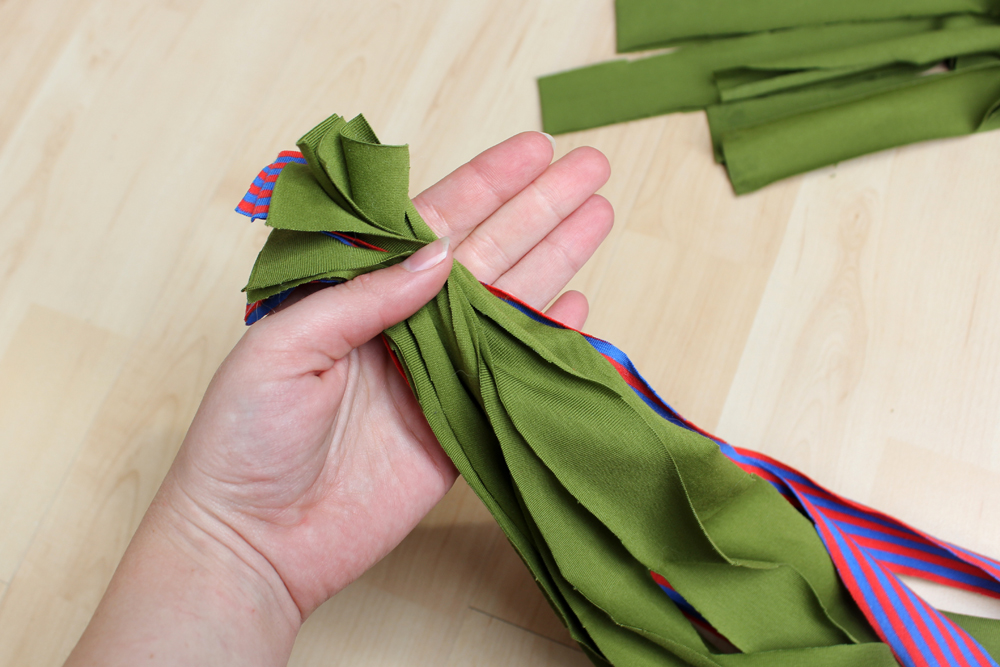
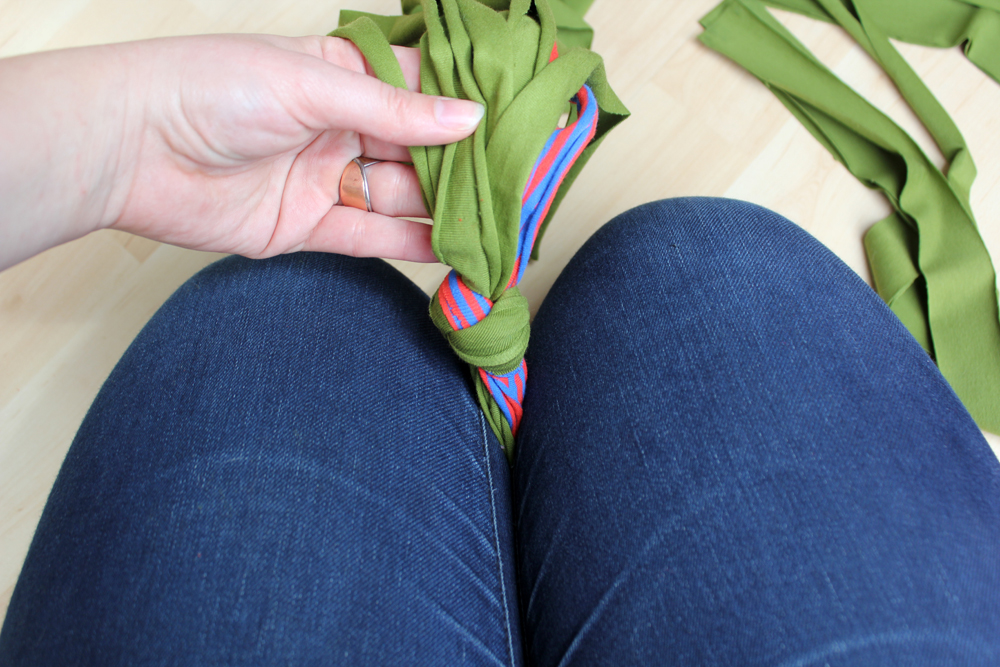
Gather all the strips together at one end and tie a really tight knot like so: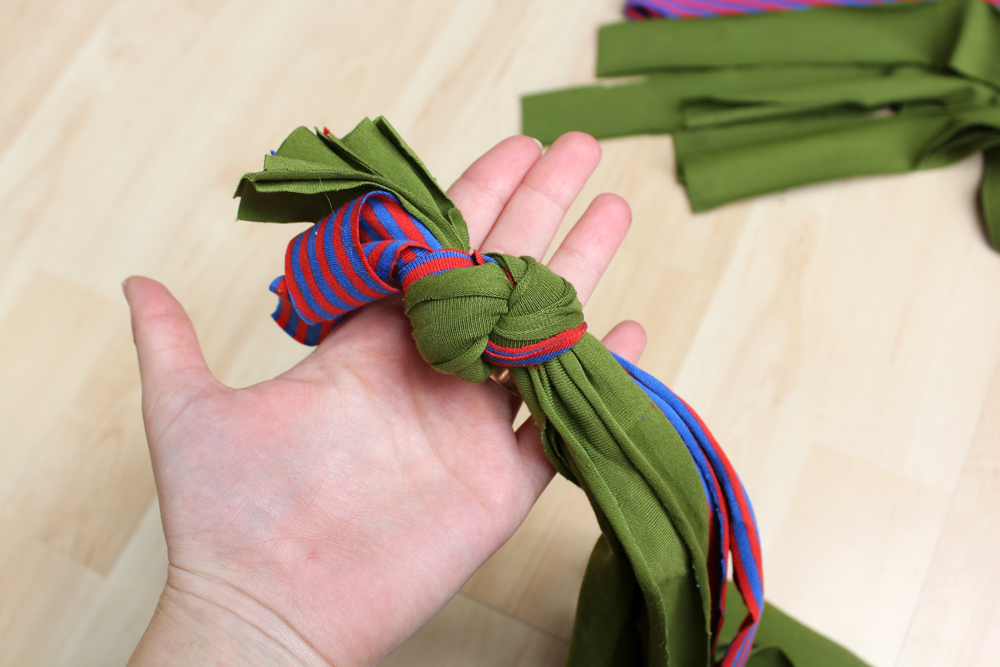
Tighten the knot by pulling hard on every single end. You will see the knot tighten and the fabric roll up as shown below.
 In this example I am making a toy using two colours and four bands, each one consisting of two strips of fabric of the same colour:
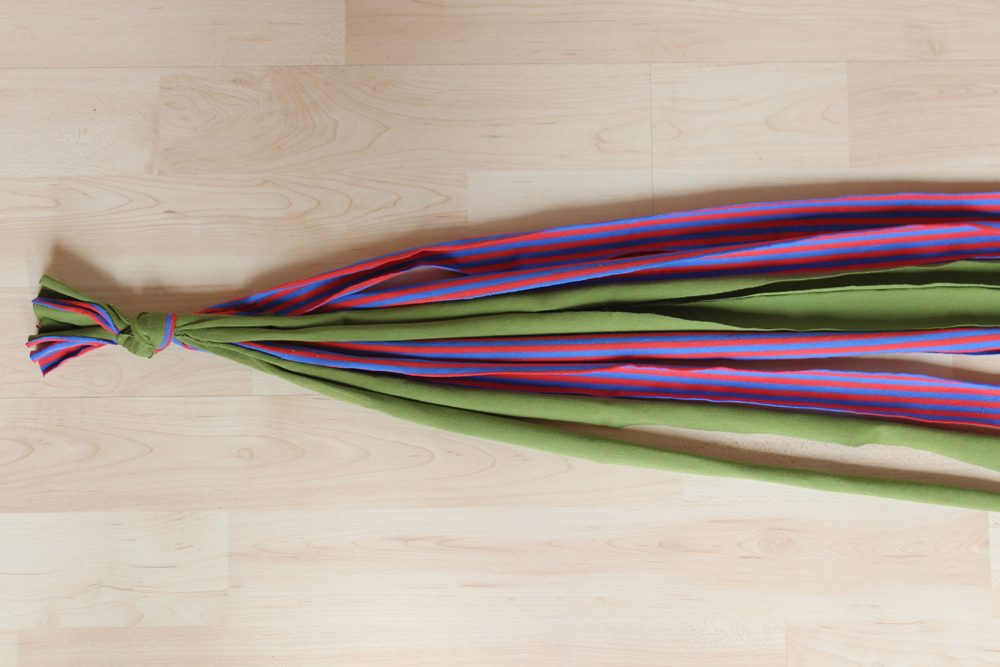
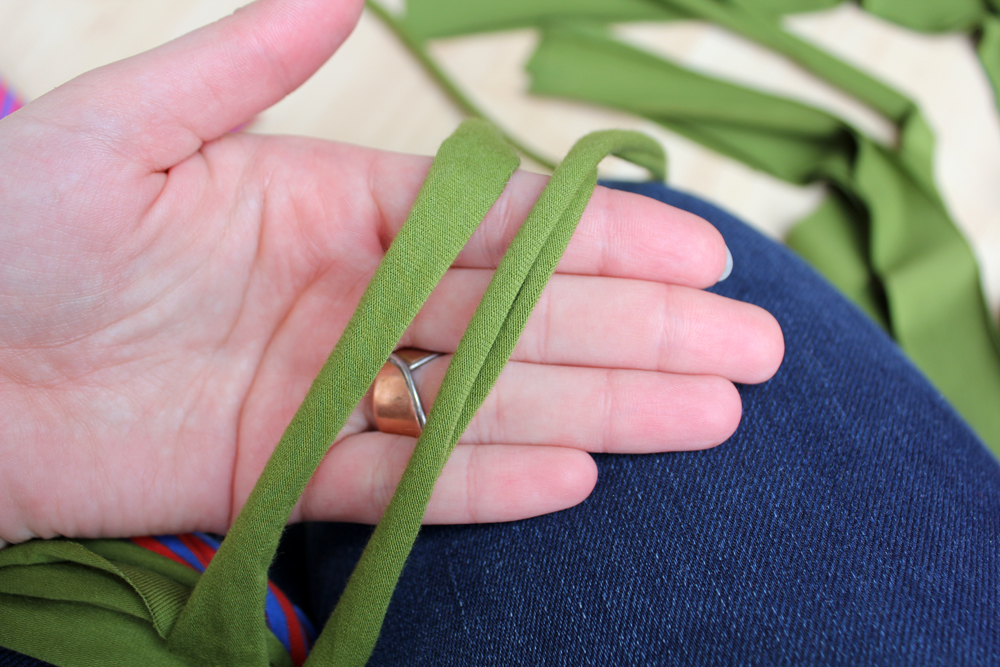
You can use a hook or safety pin, as well, but I find this method easier: Place the ends between our knees (sitting or kneeling) and hold it that way. Both of your hands are now free to work.
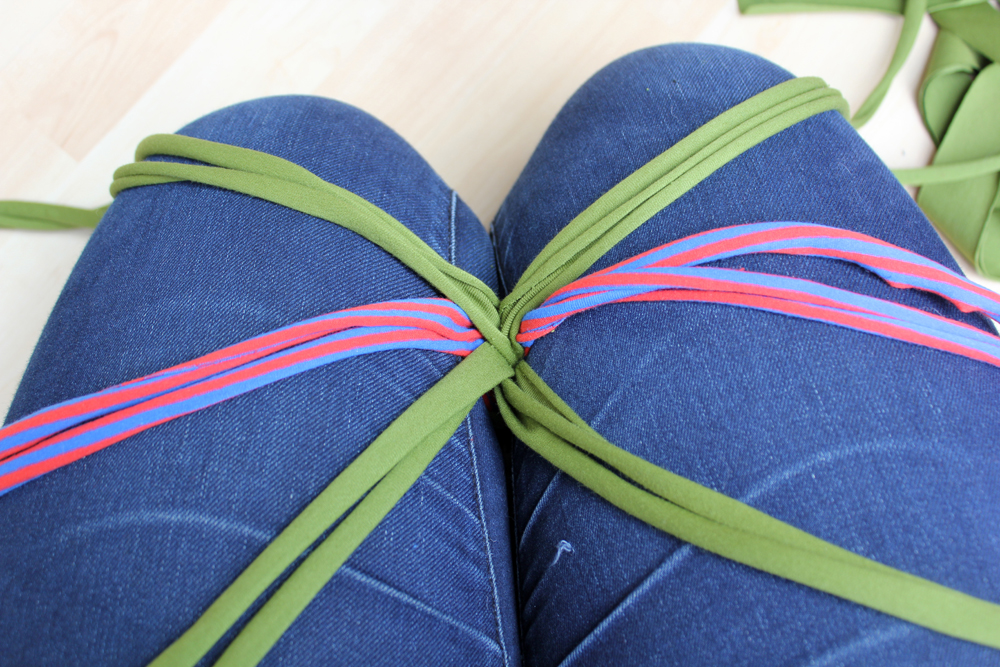
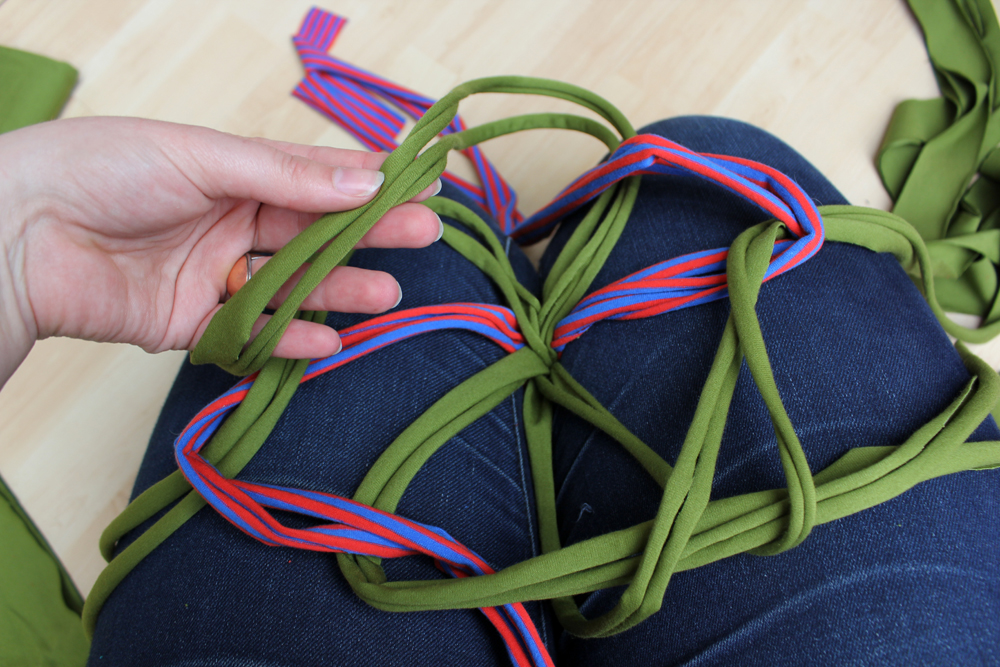
Knotting using four bands:
Sort out the strips according to colour. You should have four bands. Place them like shown below. You should be looking at the knot you tied. (In this picture there’s already one row of knots tied, so yours will look slightly different). 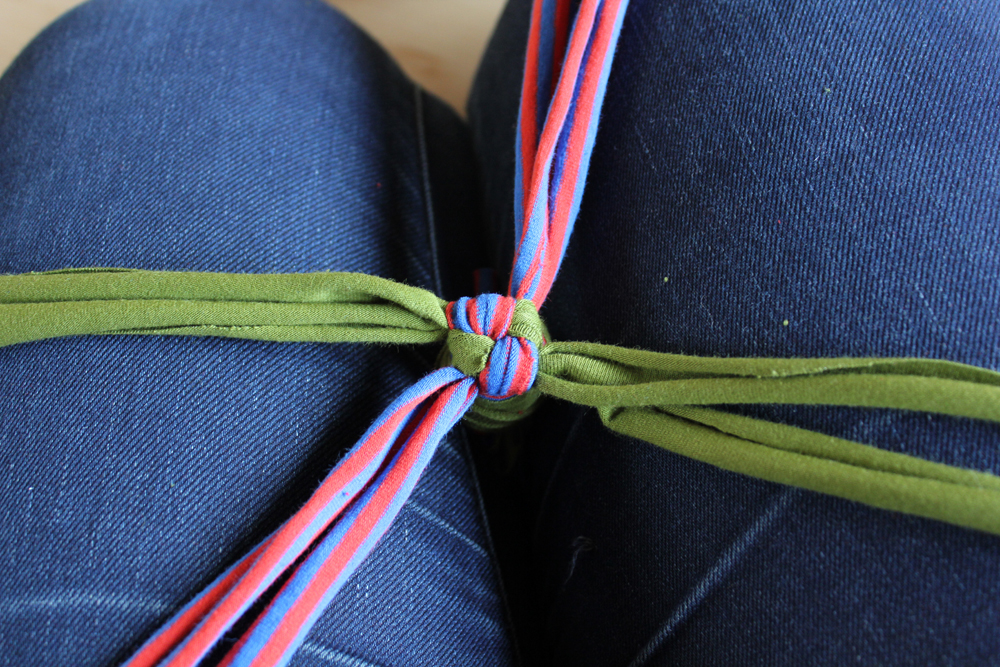
Start by placing the first band (it doesn’t matter which one you start with!) over the next one on the left. Then take the ends of that left one and, again, place them over the one next to it on the left. 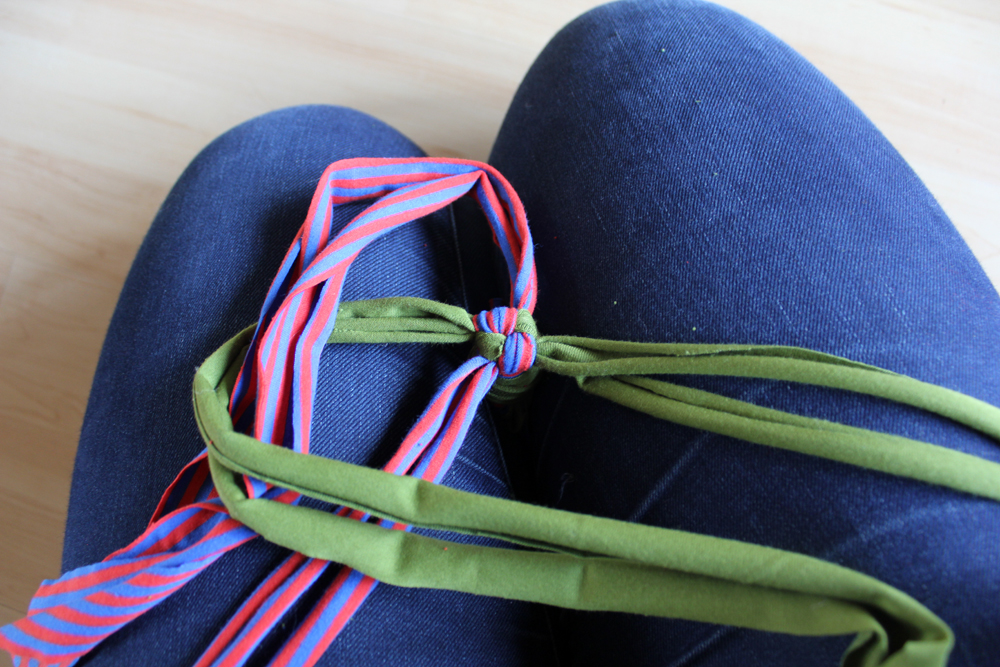 Repeat.
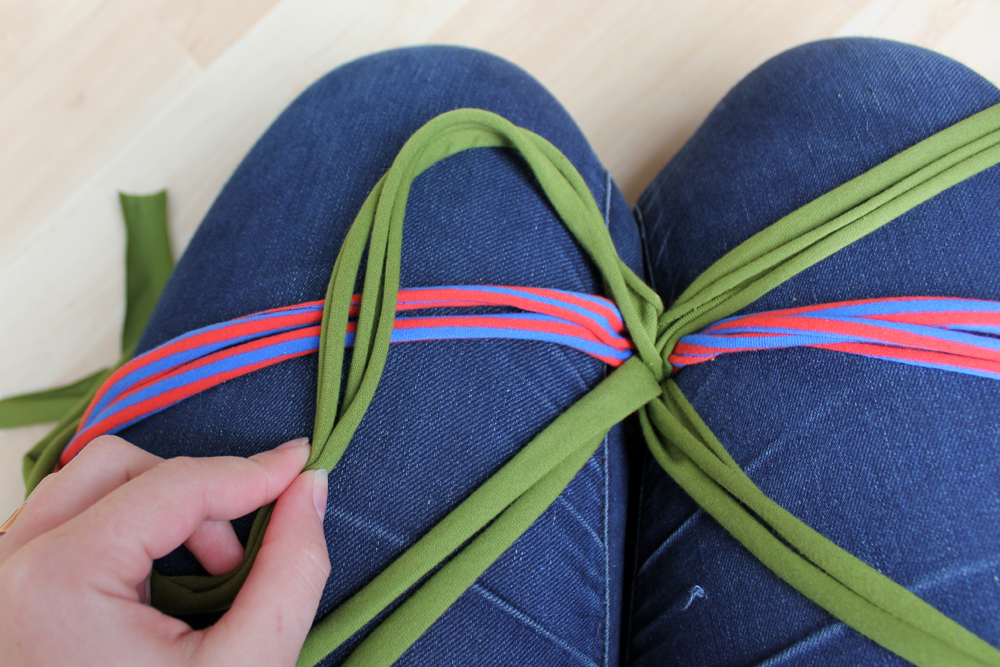
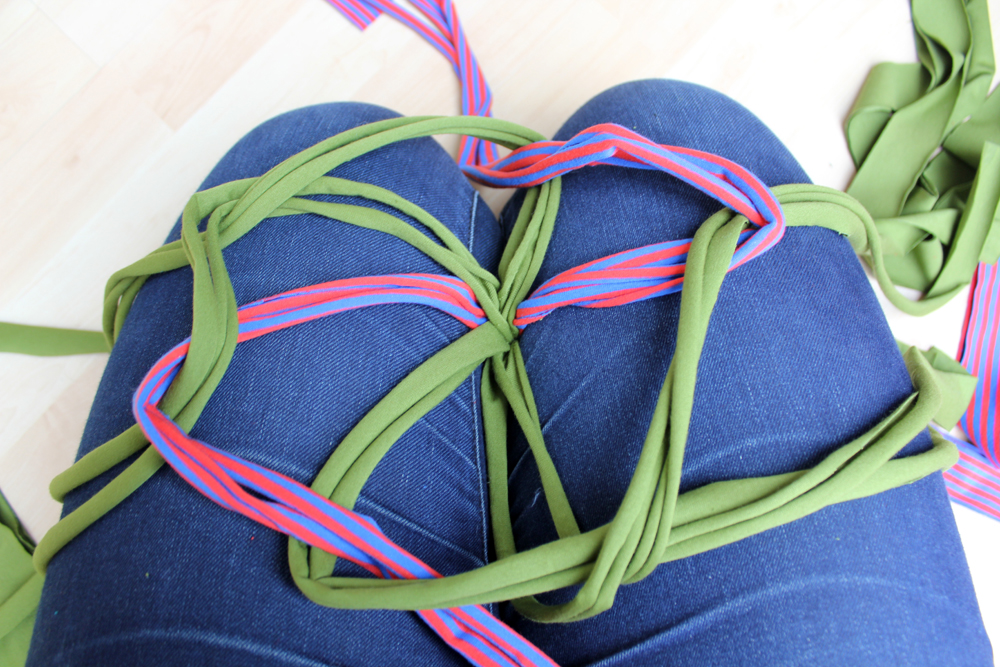
  Work your way around until you reach that first band again. Take the end of that fourth band and pull them through the loop you created when you crossed the first two. It should look like this:
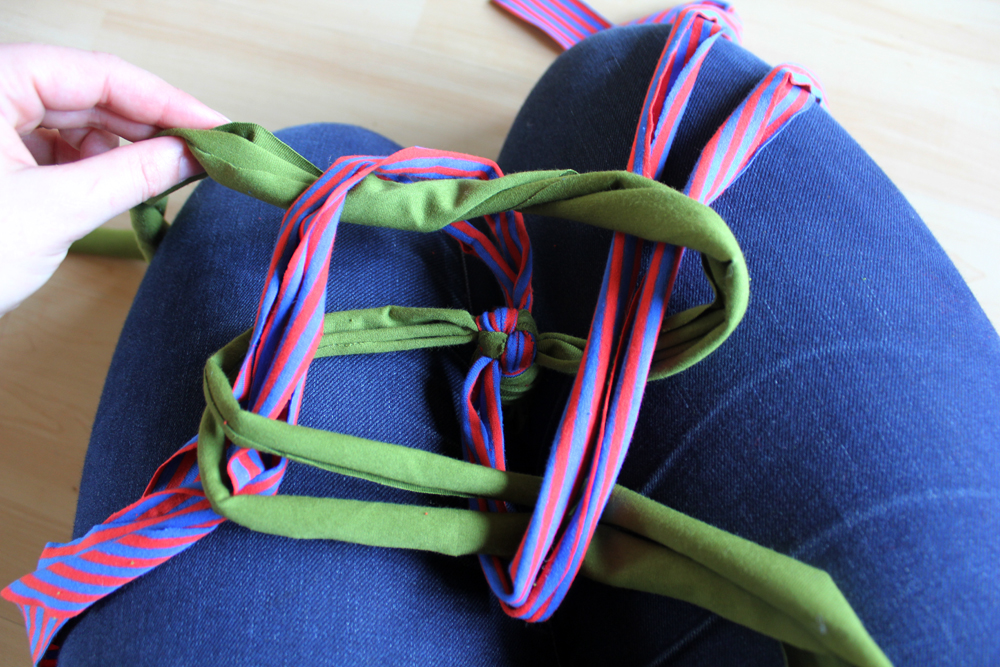
Now you pull that knot tight. You will need to pull on all four ends and repeat that pulling several times until the knot is really tight and even.
Knotting using six or more bands:
Here’s the same technique using more than four bands. You can use any amount of bands, but the more you use, the bigger the toy gets. (Note: At some point there’ll be a gap in the middle of the toy which you might fill with something while braiding around it. If not, the braid might be quite loose.)
I used six bands for the next one. Start as described above. Sort out all the different colours before starting.
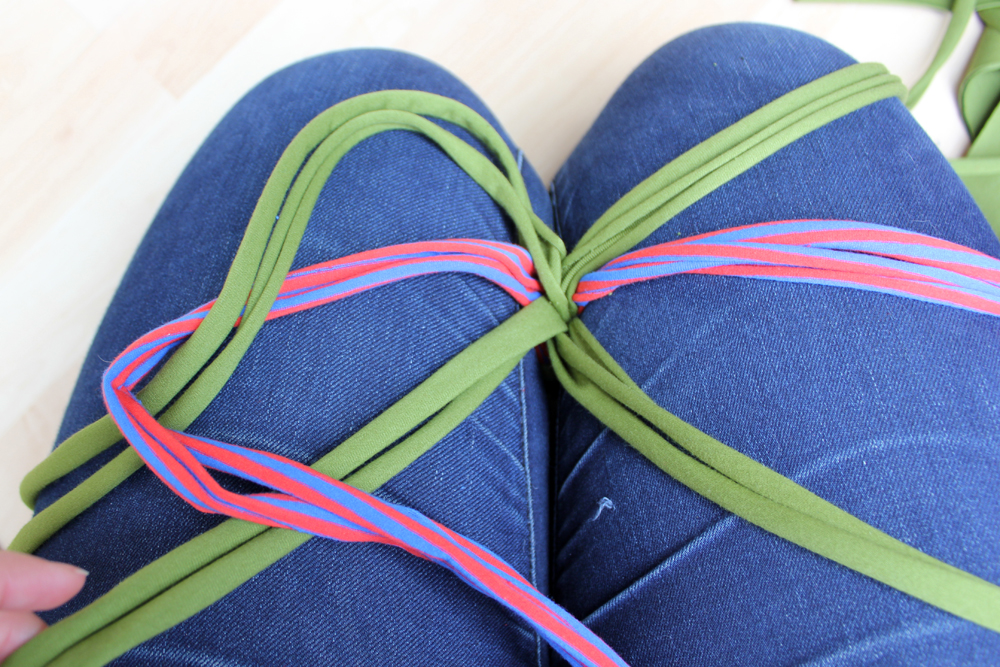

As you can see, we’re doing the exact same thing here. We just don’t stop at the fourth but continue until we’ve finished the whole round again until we pull the last one though the loop.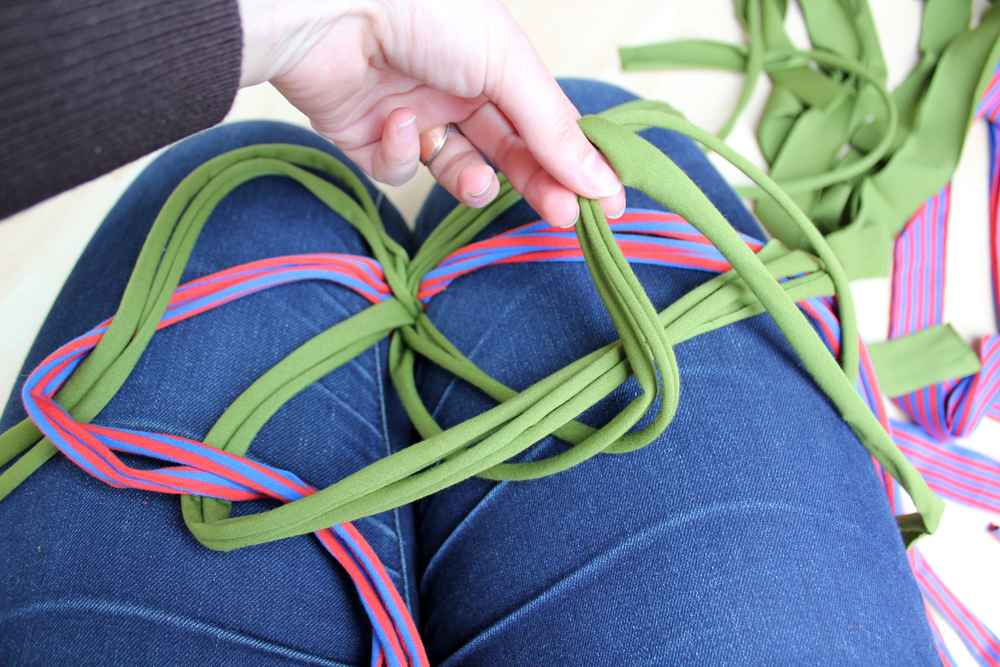
Pulling this one tight is a bit trickier. I recommend starting to pull at one end and then working your way clockwise for two or more rounds until everything is tight and neat.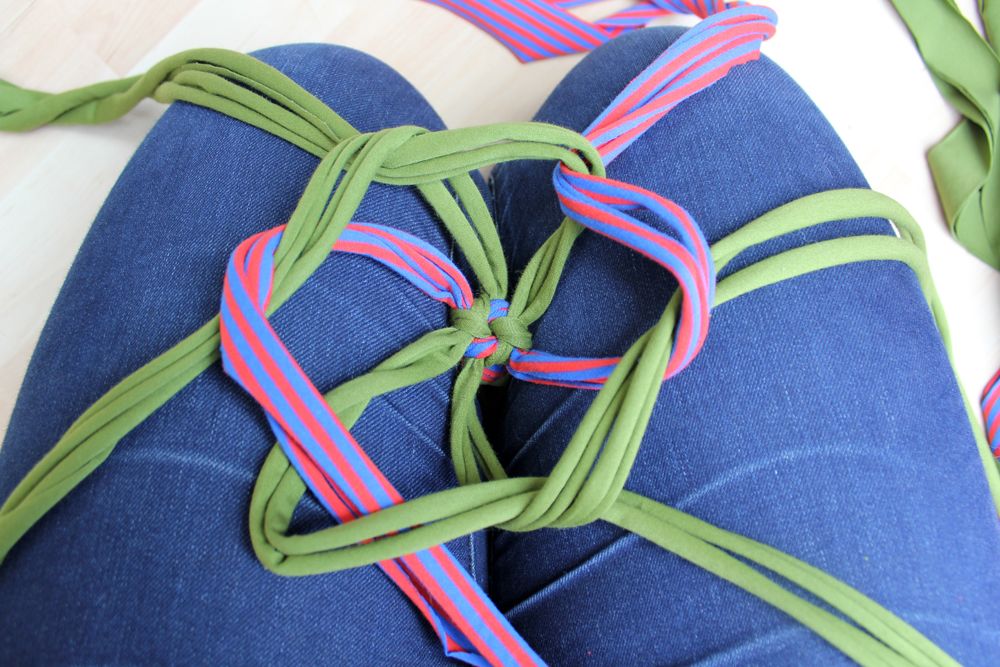

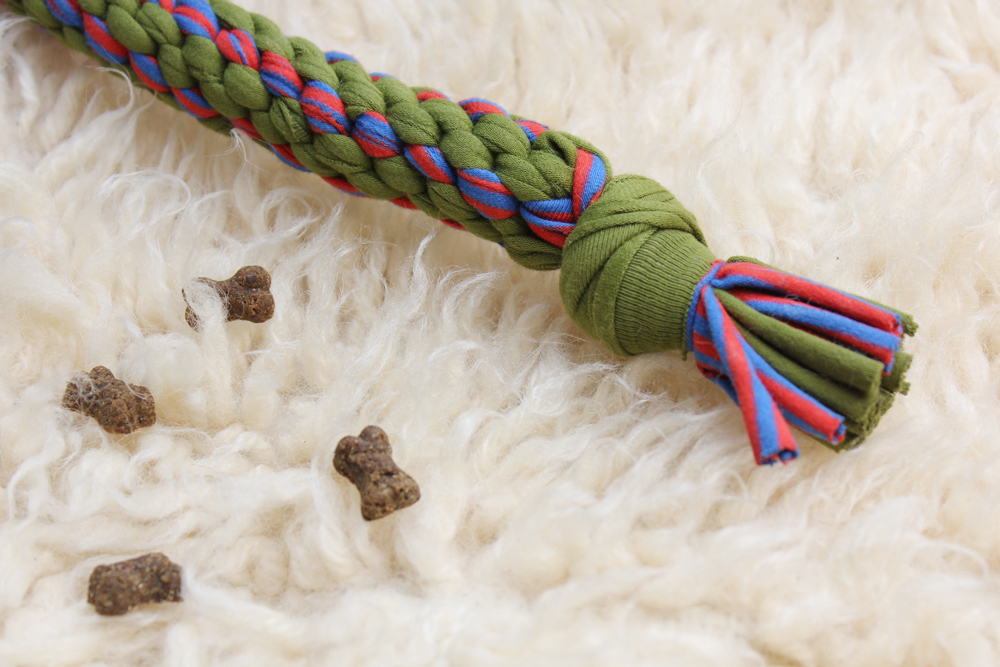
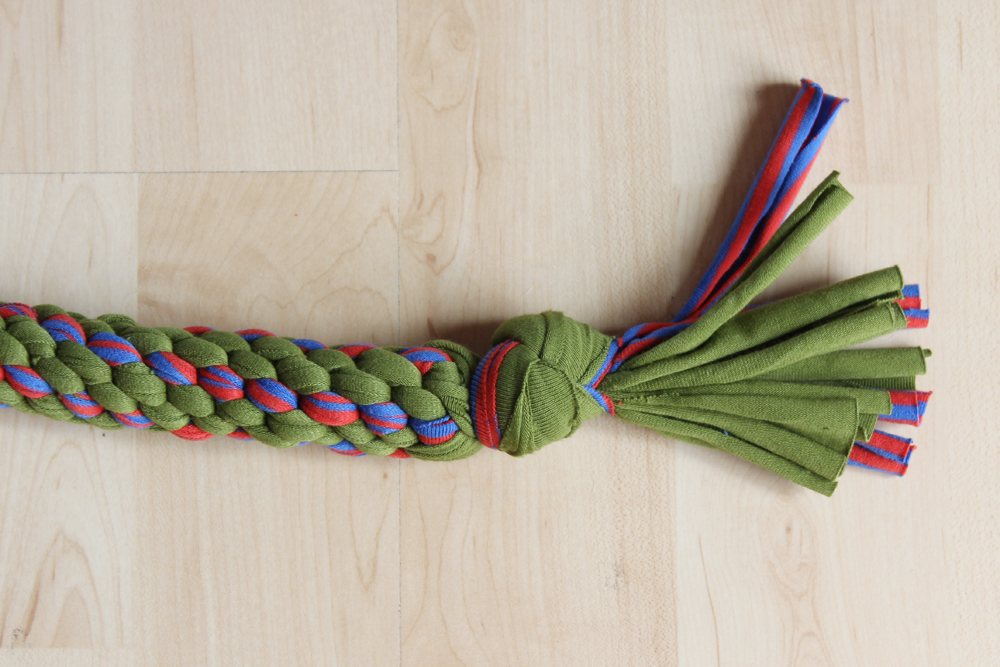
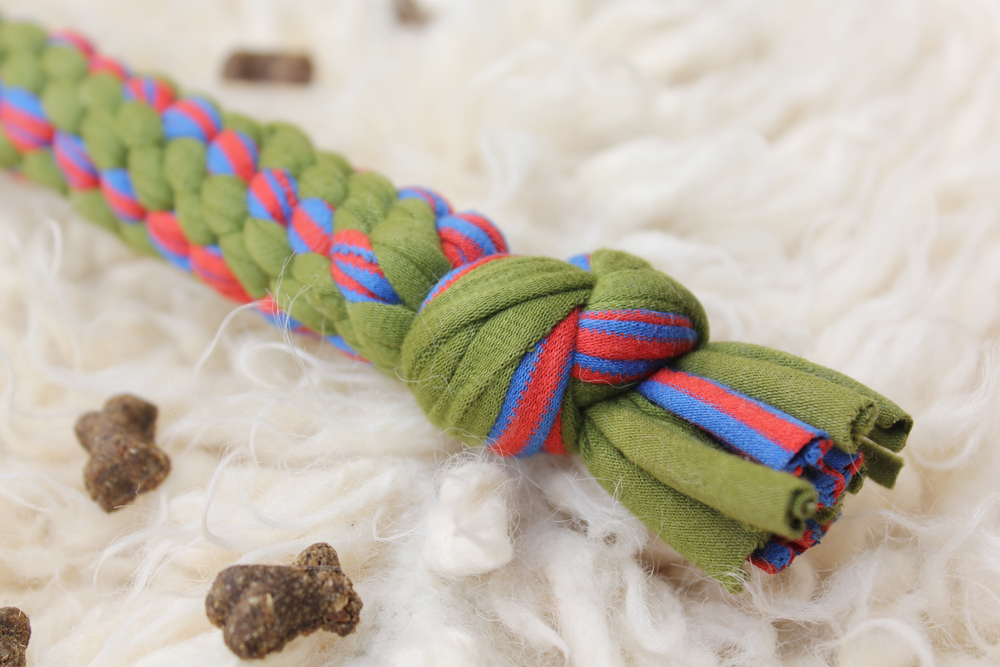
 How to finish the toy:
And that’s almost it! Work for as many rounds as you like. A smaller toy will need around 15-20 repeats until it’s long enough. It will look like this: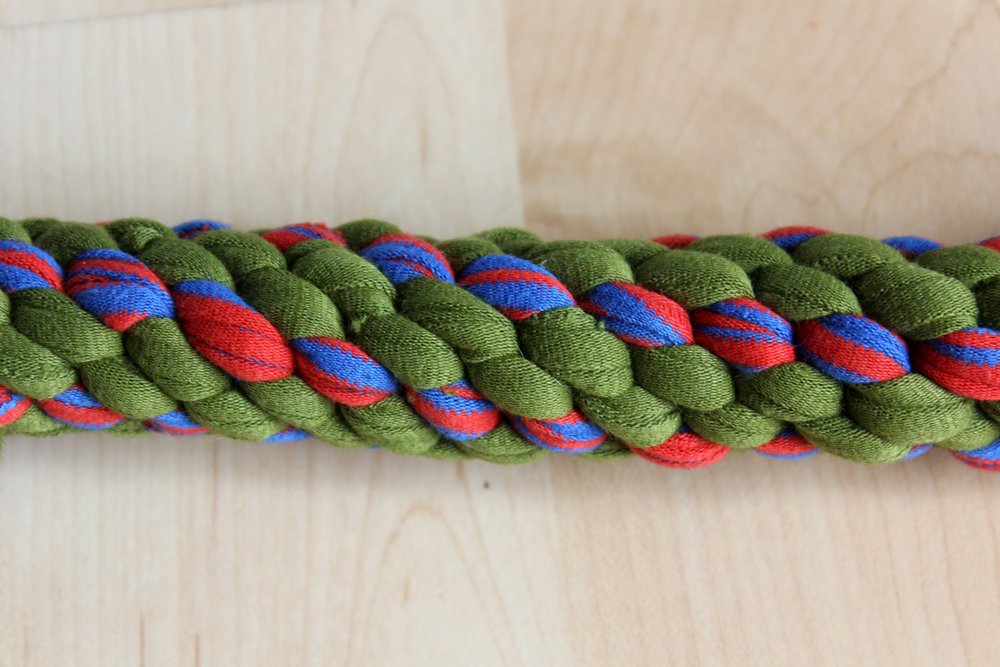
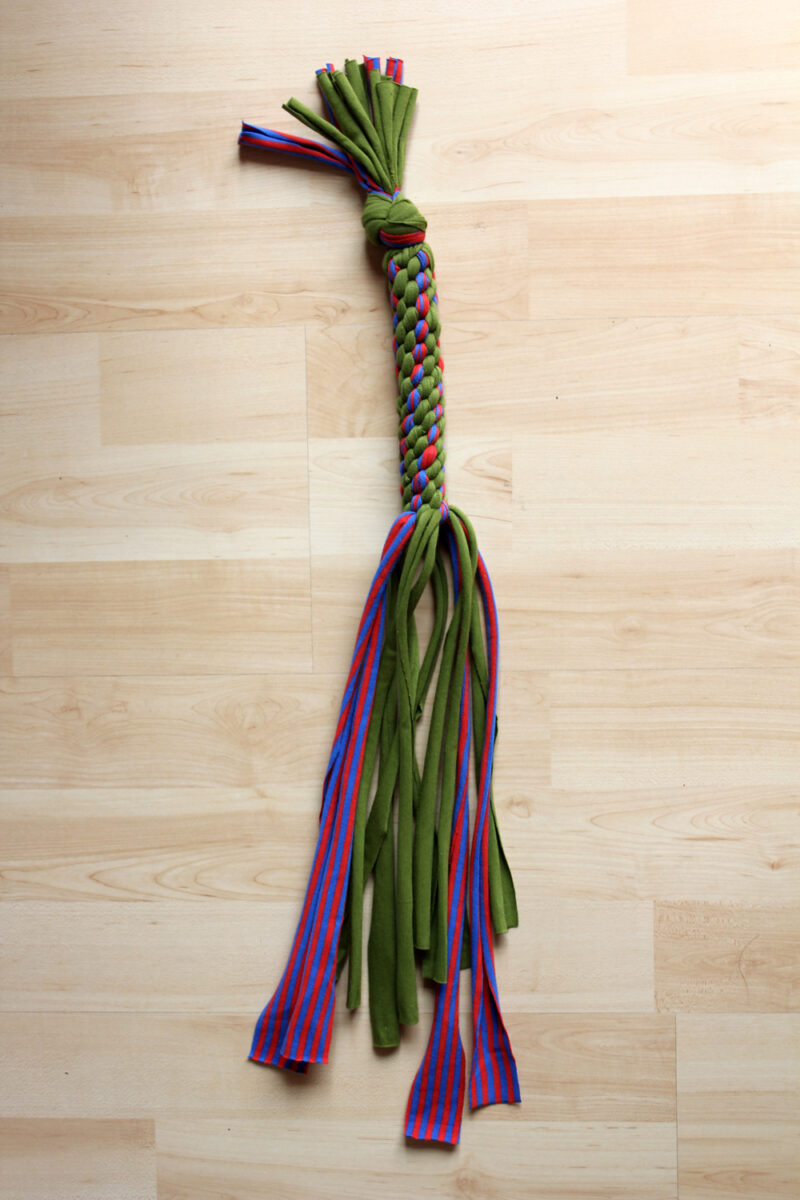
Tie another knot, just as you did at the beginning. Pull at every single end to get it really tight.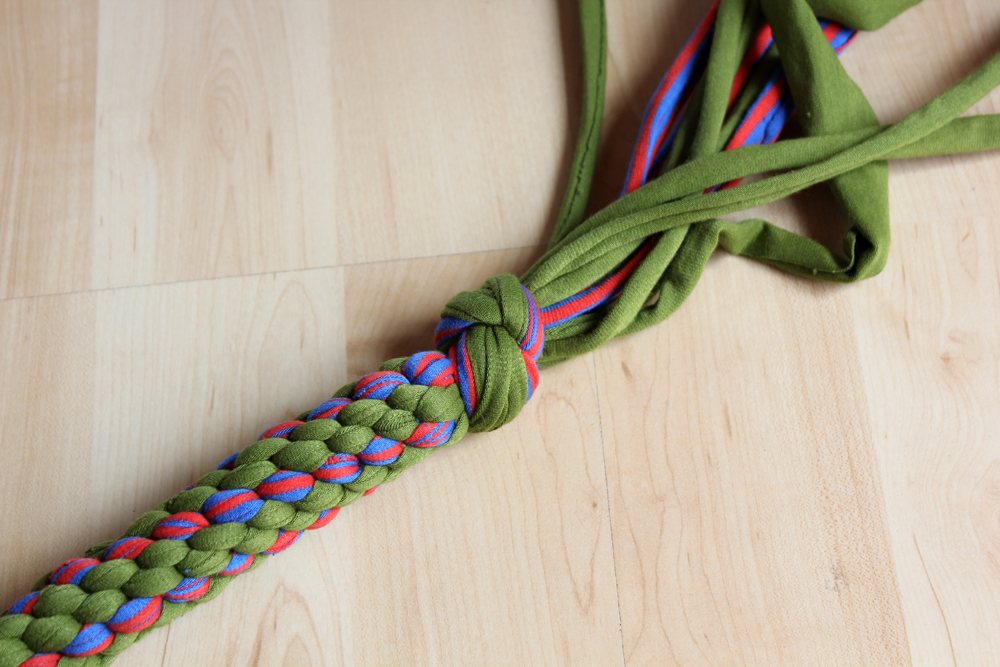
Then cut off all excess fabric… and you’re done!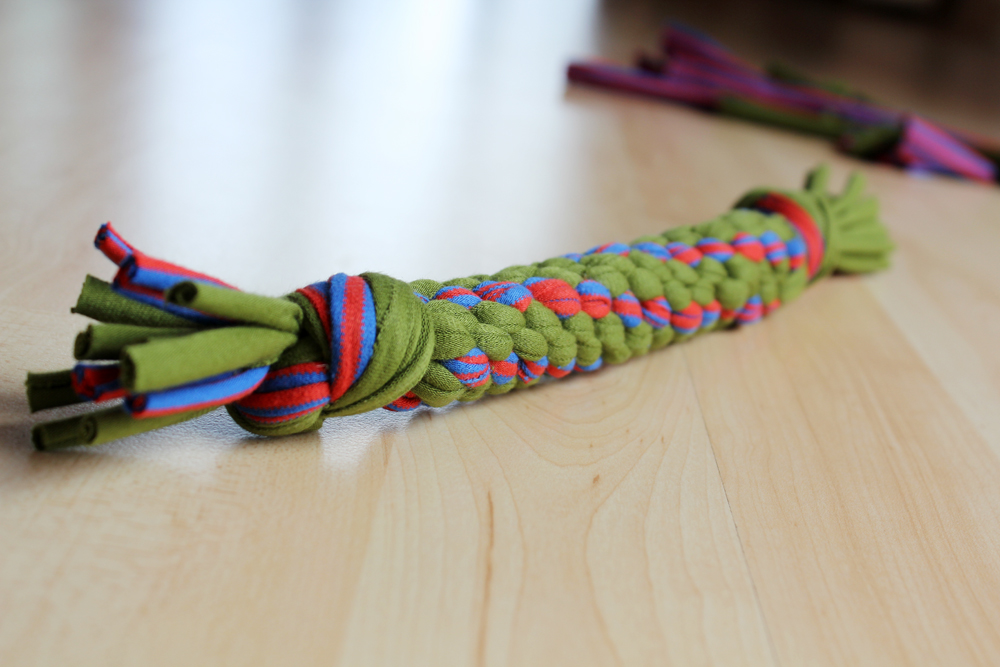
Ps.: Don’t throw away these scraps! We’ll use them as stuffing for another toy that I’ll be sharing with you soon!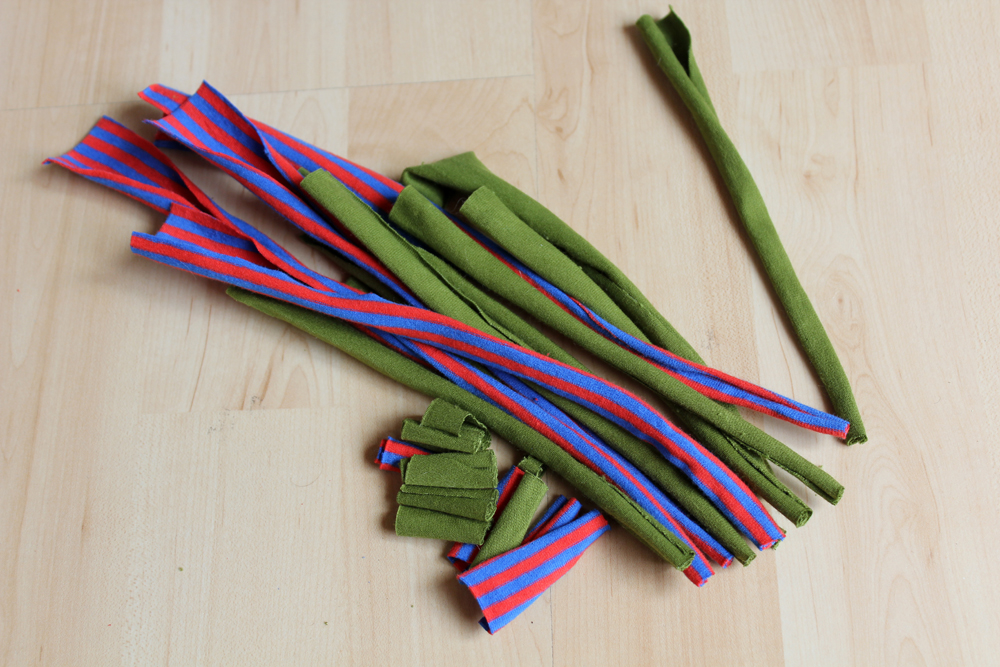
Now off to present it to your doggie!

Getting creative:
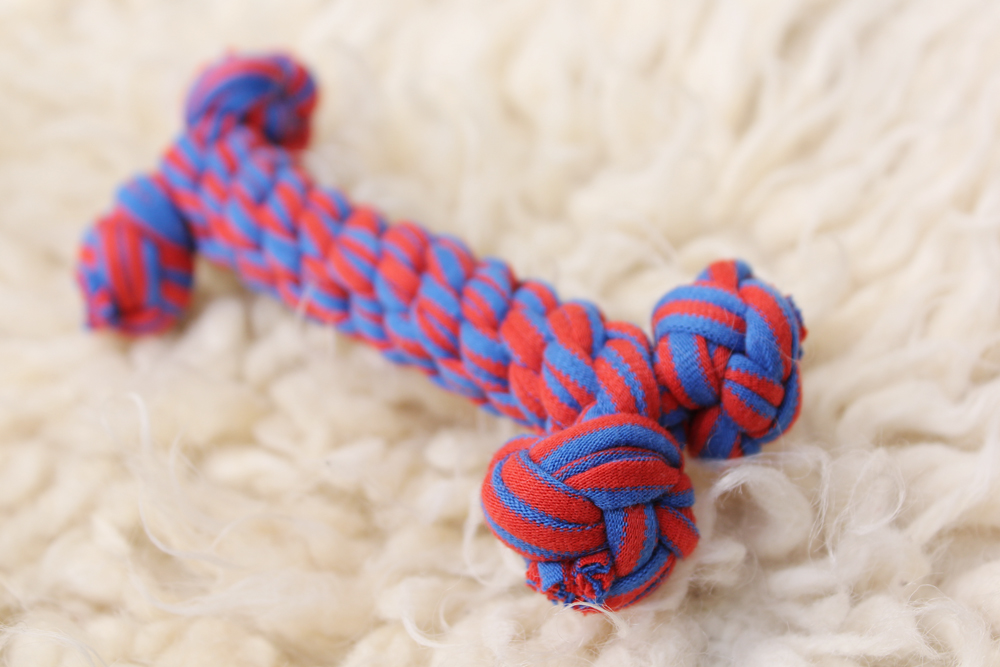
Once you got the hang of the basic technique (which is after finishing your first toy!), you can start playing around with it. You can divide the strips mid-toy into several smaller ones, add some knots or even weave two toys together into a cross. You can knot the ends together to create a doughnut-shape or learn to tie diamond knots at the ends to create this bone-shaped toy:
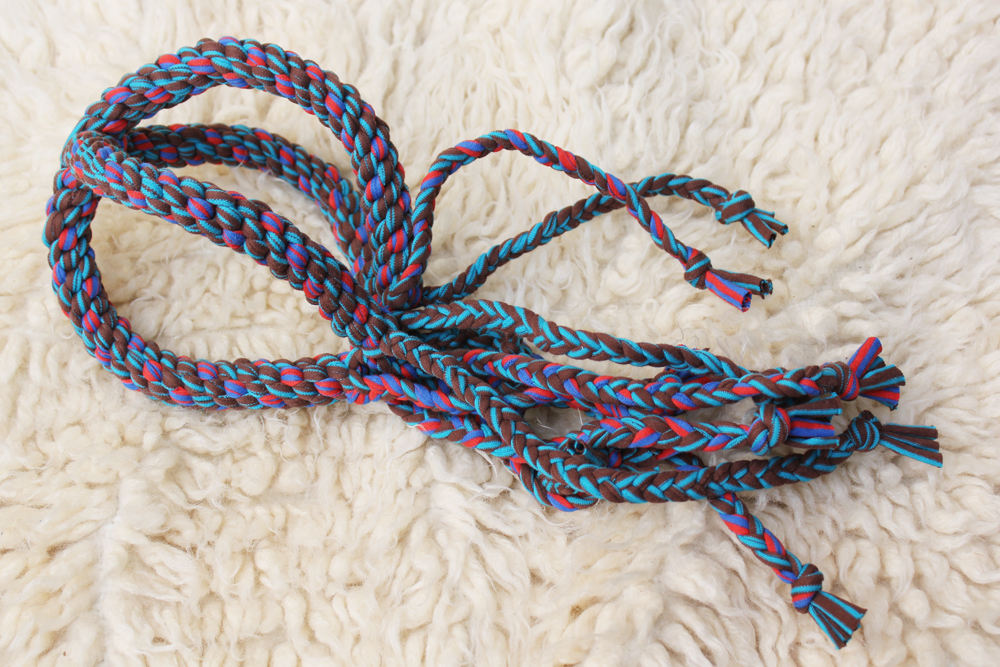
For the one above, I used strips about 150 cm long. I wove two really long toys together in the middle and tied the ends together, as well. I did not cut the ends but braided them together in threes. Now it looks like a fun octopus toy. Your dog will love the different shapes and textures, guaranteed!
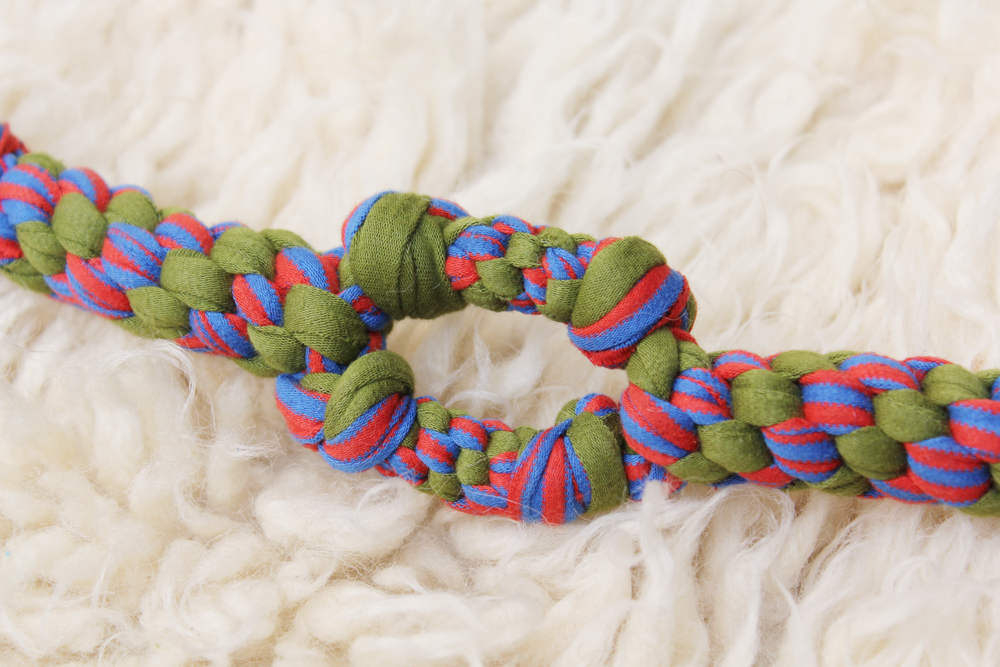
Here’s another one I created freehand. When I reached the middle of the toy (roughly after about 9-10 knots) I divided the strips into two big ones which I tied off using a basic knot. I then used the same technique (working only single strips) for a few repeats, tied another knot and then braided all four bands (8 strips) normally until reaching the end. Our puppy loves this one!
If you have any questions about making a specific toy shown above, let me know in the comments! Hope you have as much fun making these as I did!
xx
Charlie
Have fun!
♥
facebook/bloglovin/pinterest
twitter/instagram
Stay in touch!
These are lovely! Thank you for sharing.
Hi there!! I know this is an old blog but I was wondering how you connected the ends of the octopus one before doing the plaits?? What kinds of knots? I have tried making the top section but can’t figure out a neat way to join the bottom hah! Thank you!
I actually just knotted the strings together randomly in threes, to tie everything together and then plaited the ends. Hope that makes sense 🙂 It’s a bit trial and error as you go along.
How did you weave the octopus ropes together at the top to get it so flatA and neat?
May I ask how to do the bone shaped toy ? Thankyou, love that these are eco- friendly and a bit safer than store bought toys these days.
I want to commend you on your tutorial skills! The explanations, descriptions, and pictures are put together perfectly and very easy to understand. A lot of work was put into creating this and I appreciate that you are giving it for free.