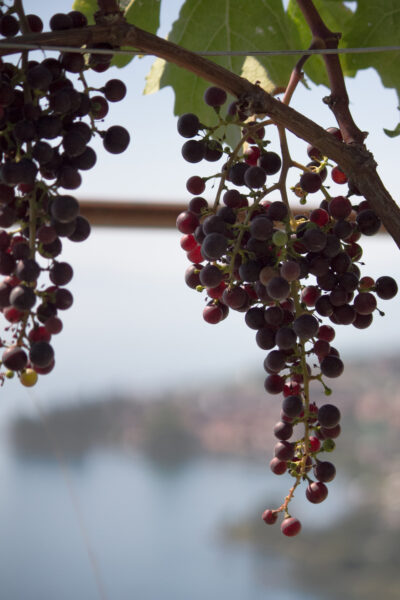
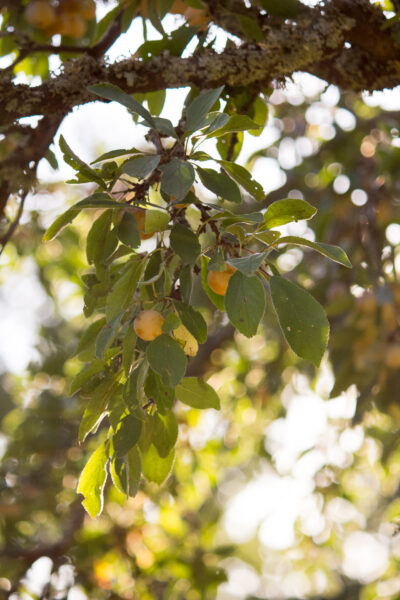
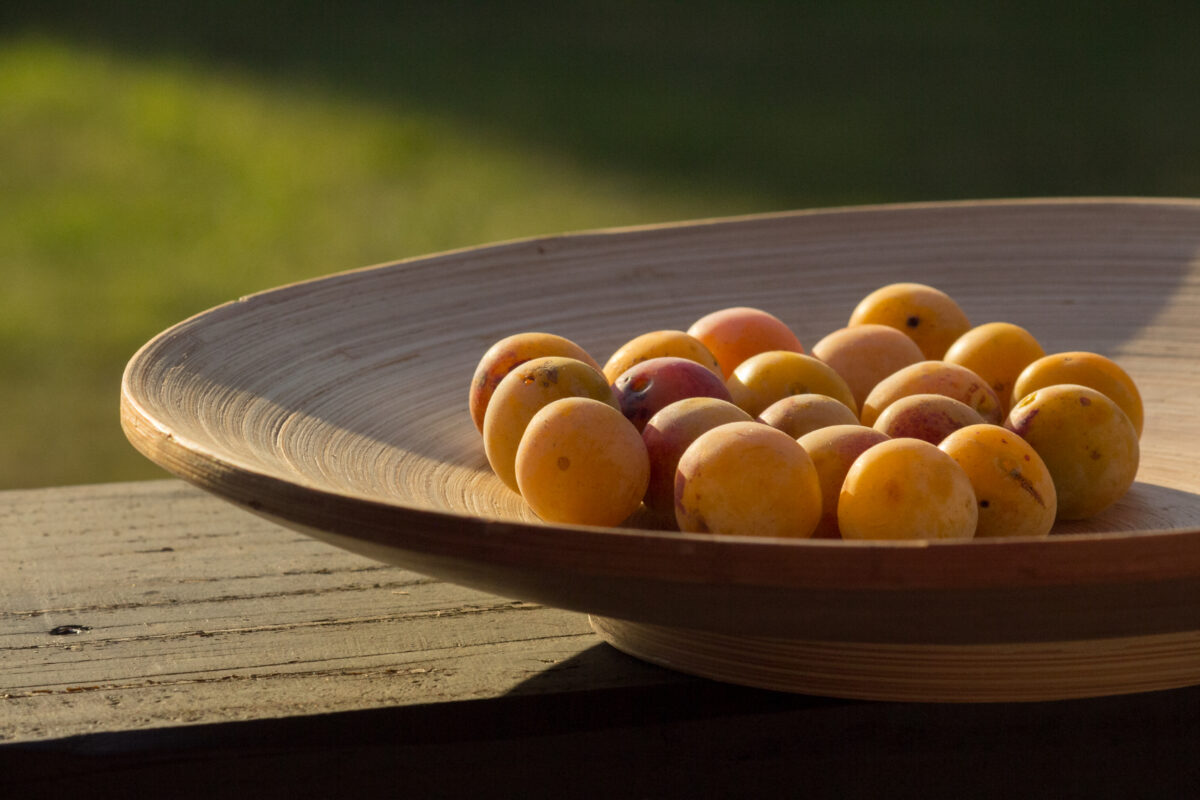
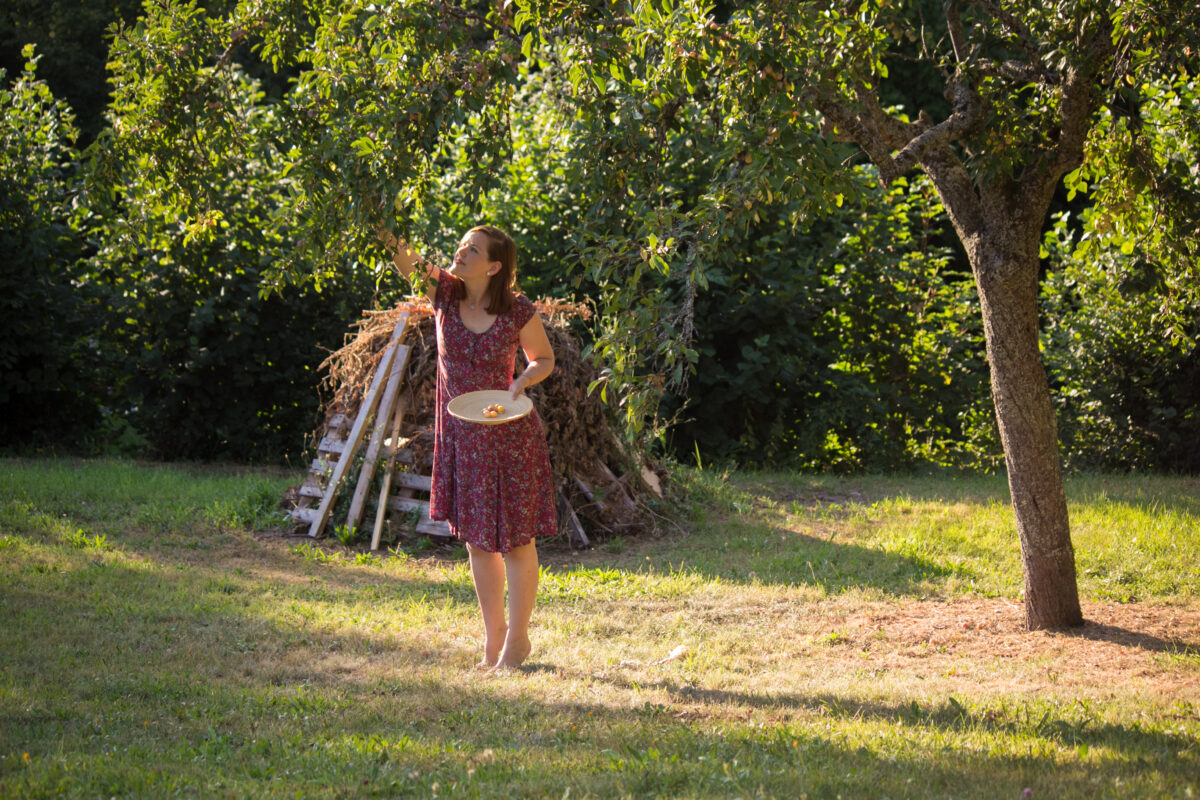
Picking Plums in France

Doris Dress Sew Over It by thisblogisnotforyou.com

Doris Dress Sew Over It by thisblogisnotforyou.com
Doris Dress Sew Over It by thisblogisnotforyoAu.com

Doris Dress Sew Over It by thisblogisnotforyou.com

Doris Dress Sew Over It by thisblogisnotforyou.com

Doris Dress Sew Over It by thisblogisnotforyou.com

Doris Dress Sew Over It by thisblogisnotforyou.com

Another Doris Dress

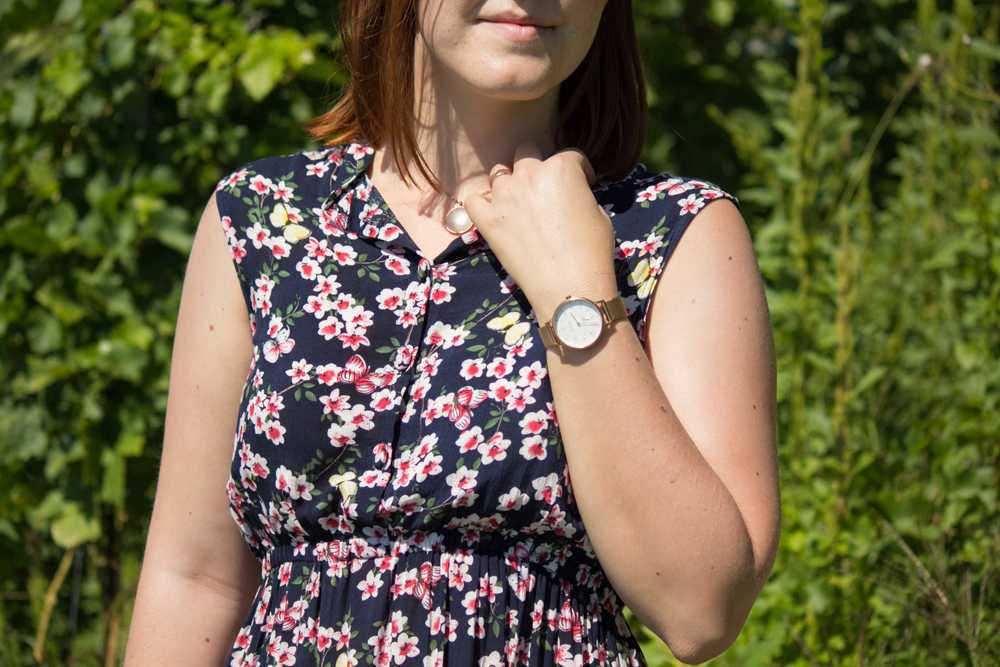
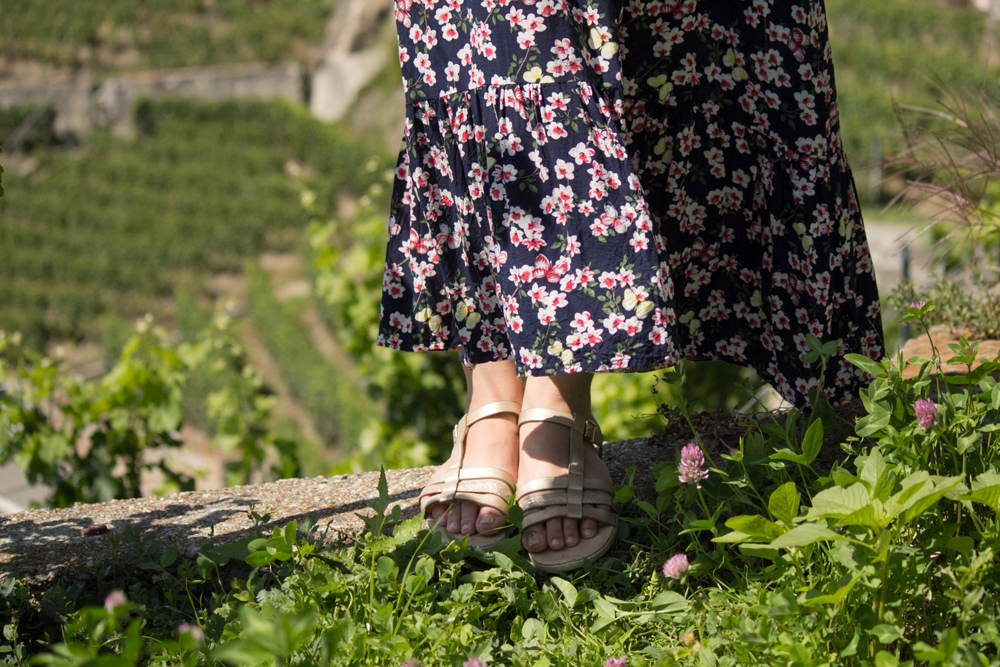
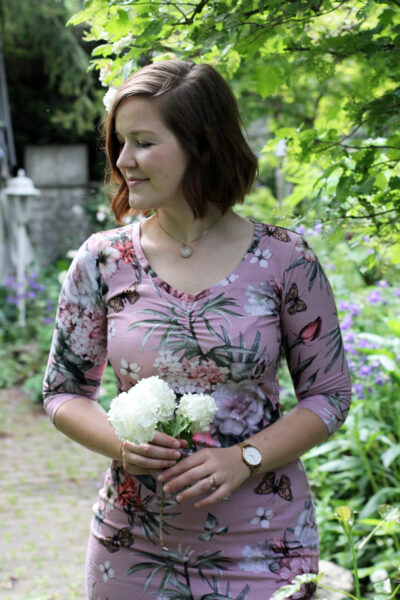
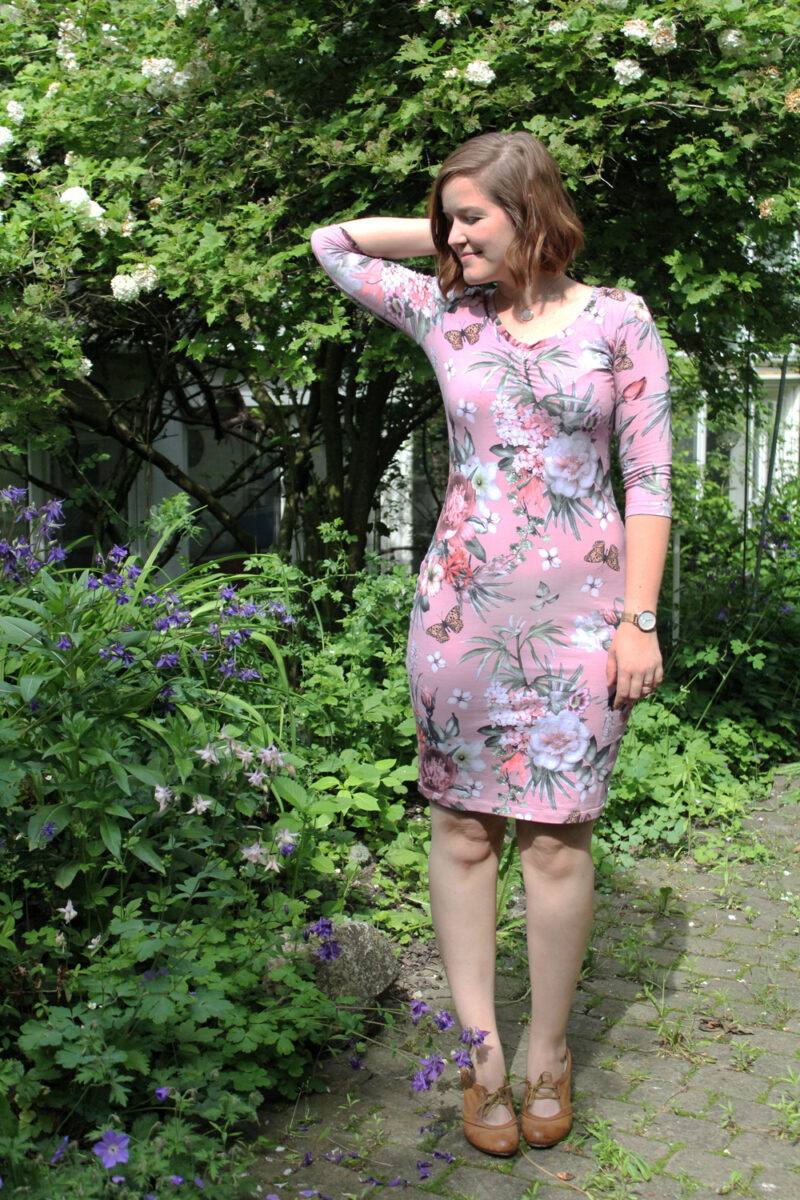
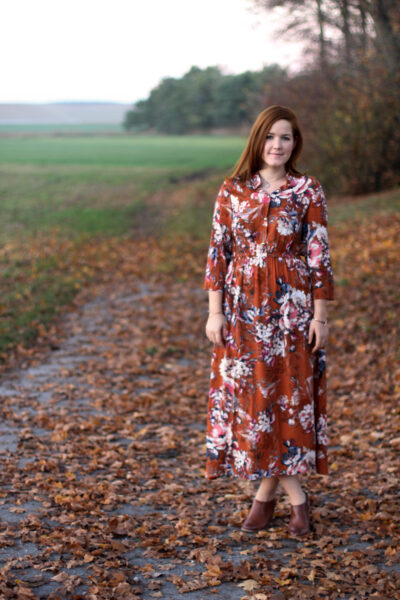
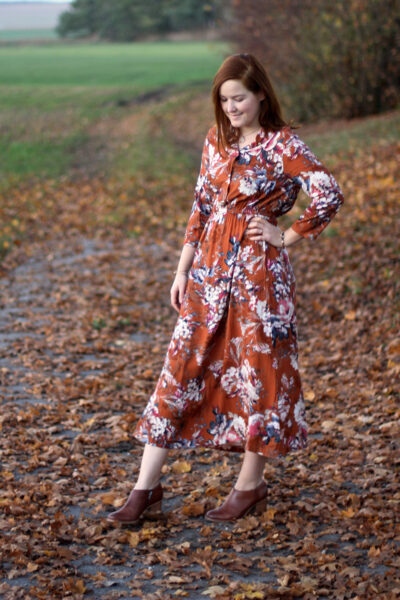
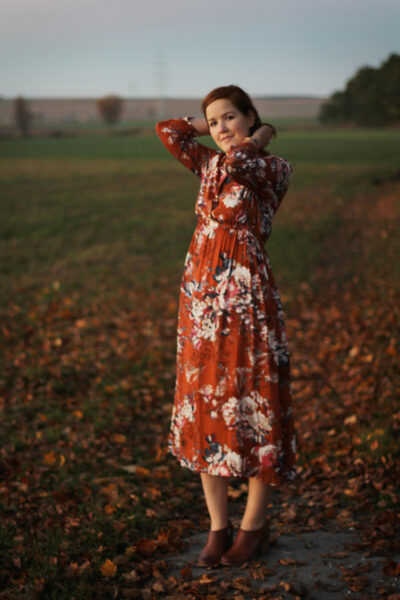
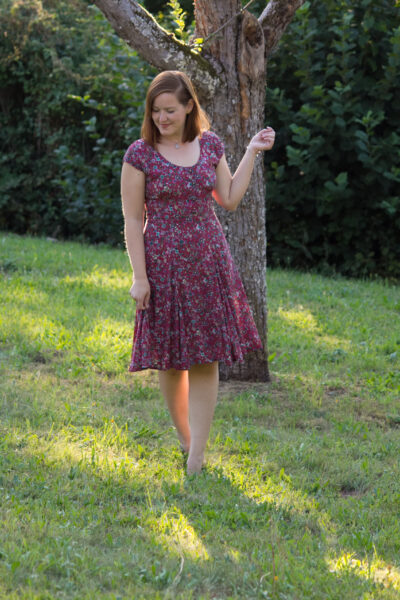
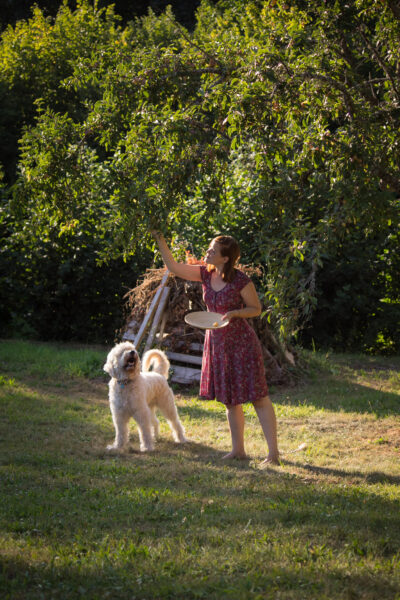
Hi there! After walking about in full-blown winter wardrobe for about two weeks now I’m mourning all my summer dresses I won’t be able to wear in the next few months. One of them is this cute red Doris Dress (by Sew Over It) I made this summer and took on our road trip to France.

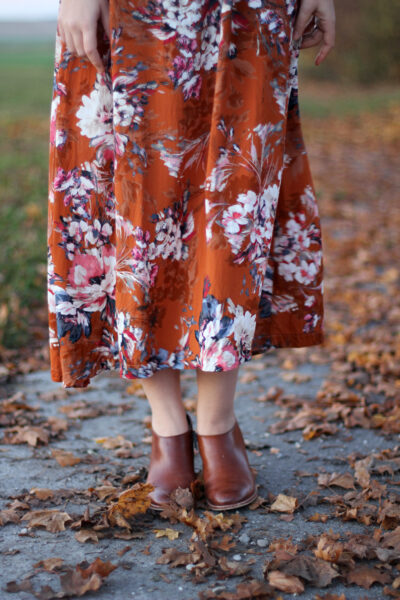
I intentionally chose a colour that would also be great for autumn and I’m planning on wearing this dress with tights and boots and layered jumpers before winter really hits.

pattern: The Doris Dress (Sew Over It), Version 1 (size 10 graded to 12 below hips)
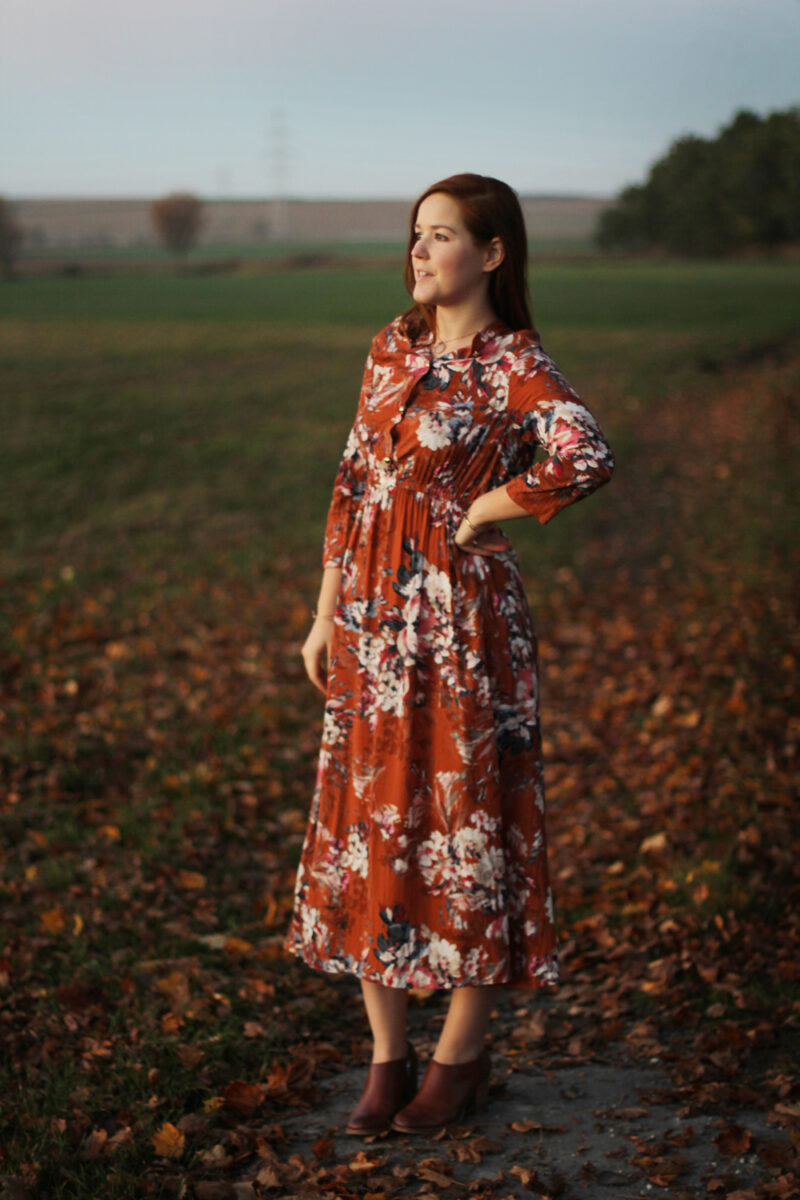
fabric: lightweight cotton viscose from a tiny sewing shop in Sweden
amount: 2,20m non-directional print
cost: bundle price per kg, less than 10€ (+ zip from my stash & handmade self-covered buttons)
duration: ~5 hr (incl. cutting out)

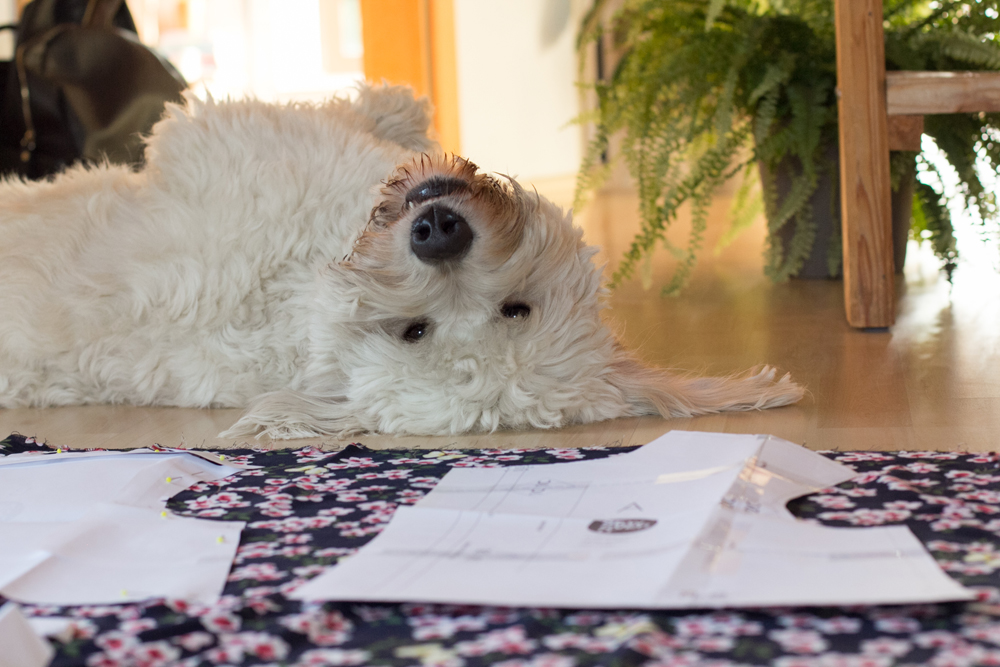
As you know, if you’ve been following this blog a while, I’m a huge fan of Sew Over It patterns. The Doris Dress was one of my favourites last year and the first version I made had lots of outings to weddings and summer parties. I immediately set out to make another one after last years trip to Sweden. It sat on my desk with just the zip left to put in for half a year and I finished it just before our holiday in August.

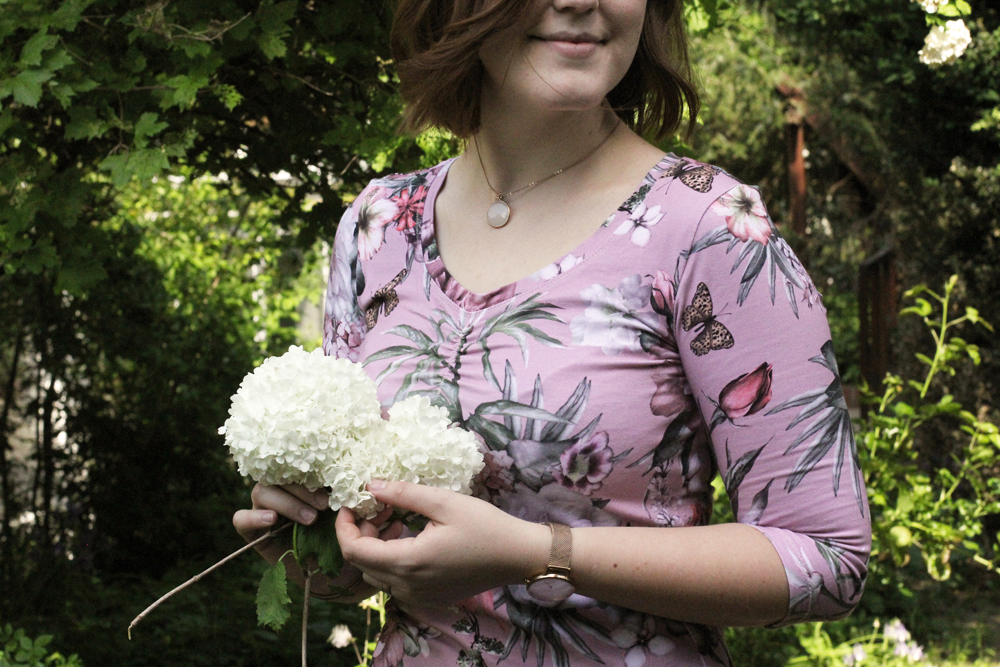
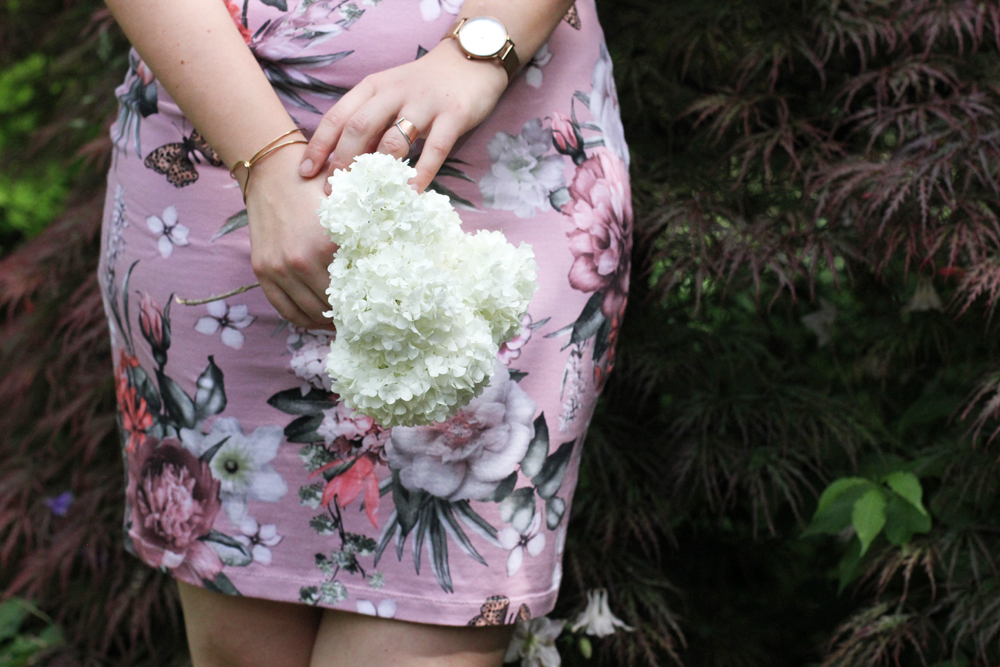
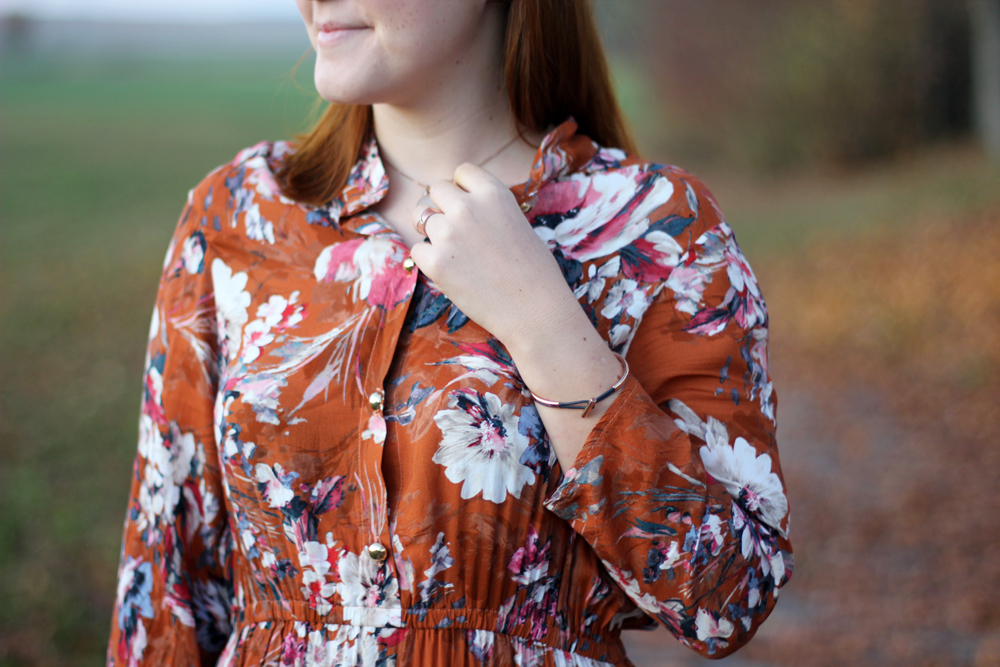
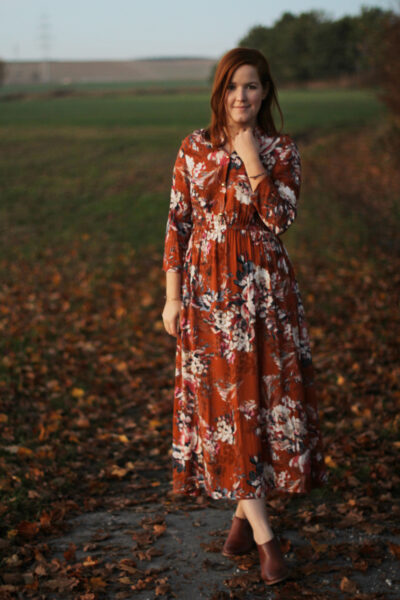
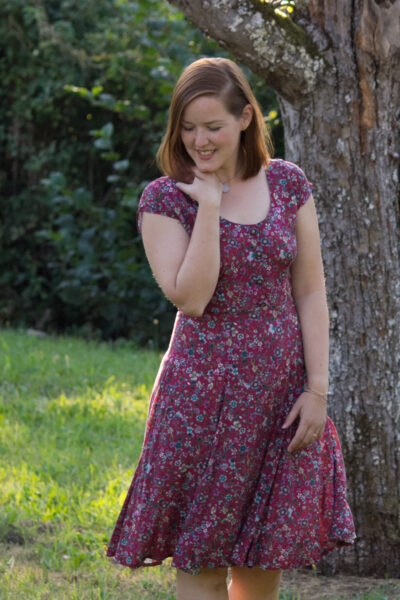
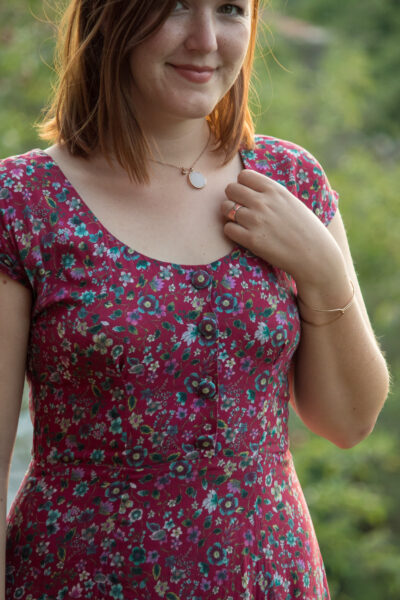
The fabric is a floral viscose I bought in Sweden last year, in a tiny shop that sold fabrics per kilogram! Viscose is the perfect fabric for this dress in my opinion. The way the skirt panels are cut works best with drapey fabrics. I used a bit over 2 metres, cutting out a UK size 10/12. I did not make any changes to the pattern, except that I cheated a bit and made a fake button placket. Since the dress has a invisible side zip put in, there really is no need to insert buttonholes, at least for size 10/12. I’d be curious, does this work for all sizes?

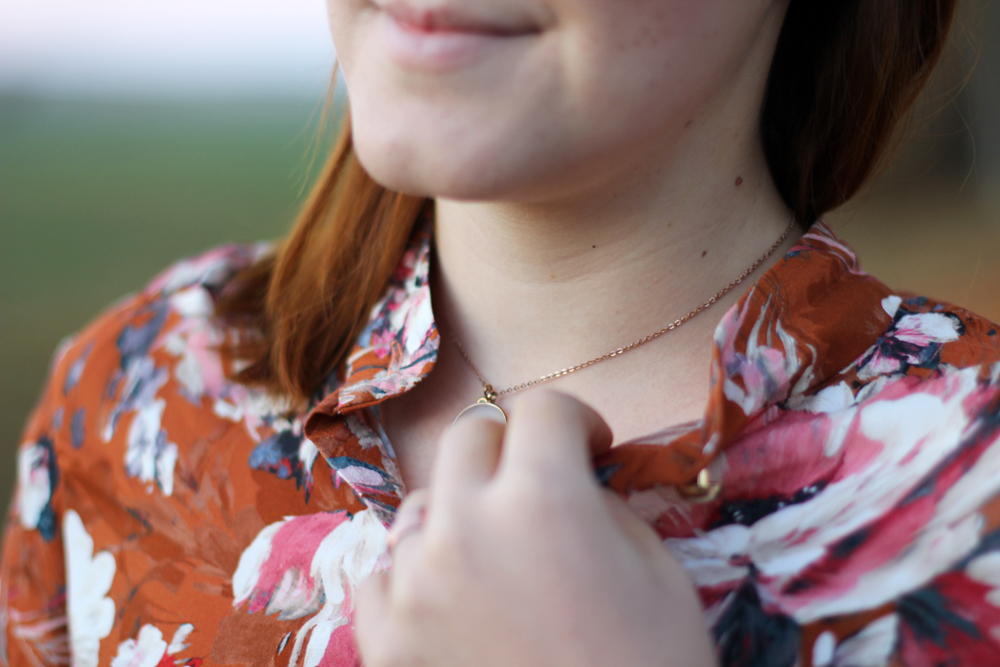
Anyway, it’s obviously way faster to construct if you just sew on decorative buttons. I made self-covered ones again as I could not find any buttons that worked with the style of the dress and fabric. If you look closely you can see I used the blue/purple flower print from the fabric to place on the 20mm buttons.

Doris Dress Sew Over It by thisblogisnotforyou.com

Doris Dress Sew Over It by thisblogisnotforyou.comDoris Dress Sew Over It by thisblogisnotforyou.comDoris Dress Sew Over It by thisblogisnotforyou.comDoris Dress Sew Over It by thisblogisnotforyou.com

Doris Dress Sew Over It by thisblogisnotforyou.com

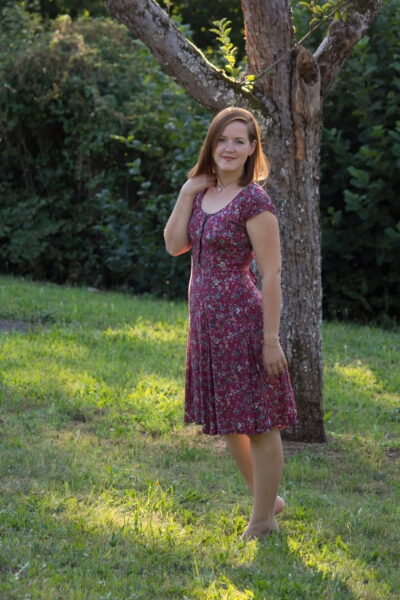
Just as I did with the other one, I love this dress to bits! It’s beautifully femine, classic and works for almost any occasion. I’m also a really big fan of viscose fabrics, especially for your summer holiday wardrobe. The fabrics are really lightweight, a cotton-blend is perfect for hot summer days. Viscose does crease quite easily but I also find that the creases go away without pressing just by hanging it in a moist bathroom (hang it in there while you shower!) or when you spray it with a diffuser water bottle and hang it up to dry.

Doris Dress Sew Over It by thisblogisnotforyou.comDoris Dress Sew Over It by thisblogisnotforyou.com

To be able to wear these lovely viscose dresses over tights, I will have to make a few more slip dresses or skirts to help with the static. I only have one so far, which does not work with all my dresses. Do you have any pattern or fabric recommendations for slip dresses?

xx

Charlie


Happy sewing!

facebook/bloglovin/pinterest
twitter/instagram

Stay in touch!

Florence Dress & Vineyards

Florence Dress Sew Over It by thisblogisnotforyou.com

Florence Dress Sew Over It by thisblogisnotforyou.com

Florence Dress Sew Over It by thisblogisnotforyou.comFlorence Dress Sew Over It by thisblogisnotforyou.com

Florence Dress Sew Over It by thisblogisnotforyou.com

Florence Dress Sew Over It by thisblogisnotforyou.comFlorence Dress Sew Over It by thisblogisnotforyou.com

Florence Dress Sew Over It by thisblogisnotforyou.com

Florence Dress Sew Over It by thisblogisnotforyou.com

SUMMER IN SWITZERLAND

The official first day of autumn has passed already. Although it’s still warm enough to live in t-shirts and dresses, foggy mornings and falling leaves indicate the cold season is just around the corner. Perfect time to share one of my favourite summer makes and vacation pictures. I’m feeling a little wistful summer is ending again…consoling myself with butternut squash and pumpkin soup really does help, though.

We spent part of the summer vacation at Lake Geneva, Switzerland. We took these pictures on one of several trips to the gorgeous vineyards near Grandvaux. Hot summer sun, breathtaking view and hazy mountain tops above the lake – a place of quite unbelievable beauty.

pattern: hacked Florence Dress (Sew Over It), size 10
fabric: 2+m of printed viscose (gifted)
cost: next to nothing: fabric was gifted, 70cm elastic (1.99€/m),  matching thread from my stash, fabric covered buttons (handmade, base from stash)
duration: ~4 hours

This maxi dress I made especially for our vacation, as I wanted to take something lightweight and pretty that would get me through the very hot end-of-August days in Switzerland and France. It’s made from a very ligthweight, soft viscose with a cherry blossom and butterfly print. It was gifted to me by my mother-in-law, so I can’t tell you where it was bought and how much it cost, unfortunately. I love viscose for travelling as it does not take up much space and weighs next to nothing. The fabric wrinkles quite easily, but I usually spray it with a bit of water after taking it out of the suitcase and hand it up to dry on a hanger. It pretty much looks freshly ironed afterwards!

For the pattern I used the Sew Over It Florence Dress, one of my favourite patterns last year, and added a few minor changes to the pattern. For the most part, I sewed a UK size 10 straight from the envelope and ditched the sleeves. By the way, this really helped with the fit of the bodice. I did have some minor fit issues with the 3/4 sleeve version last time. Since they were a tad tight, the whole bodice sat a bit tight around the bust when I moved. Making it sleeveless solved the problem for now, I will probably have to return to that pattern and fit it properly at some point. I bias bound the edges of the armscye.

I had more than 3 metres of fabric to play around with, and with all the Myosotis Dresses around at that time I was inspired to add some ruffled tiers. ( I actually found a print copy of the Myosotis Dress pattern in a tiny sewing shop in France and treated myself to a copy!) Here’s the two versions I sketched out before cutting out:

Florence Dress Sew Over It by thisblogisnotforyou.com

I really dig the right version, but the hubby had a vote and set his mind on the left one. Which was probably the only reasonable choice anyways. I later thought the horizontal seams might not have complimented the soft drape of the viscose fabric. What do you think? Should I try the other one, too?

To make the left design, I shortened the skirt panels and cut out two rectangles twice the width of the skirt’s hem. I gathered the fabric with two rows of stitching and overlocked the raw edges after sewing the gathered tier to the skirt. The added panel was cut out generously so that I could shorten it to the perfect length after the dress was finished and waiting to be hemmed. It hits at just the right height, so that I can wear it with both flats and high heels.

I tried quite a few options for the buttons and couldn’t find any that matched the style of the dress or pattern of the fabric. It’s quite a busy print already. This seems to happen to me with all the button-down-front dresses I made over the last year. I always end up making matching fabric covered buttons instead, and it always turns out to look best this way.

This dress is so versatile! I pretty much lived in it throughout the vacation. It’s perfect for every occaison and I wore it at home, in the restaurant, for shopping trips etc. I have a navy blue cardigan that matched perfectly for the cooler days and evenings. It’s a lovely pattern and changing it up a little this time only makes me want to try more hacks in the future!

Florence Dress Sew Over It by thisblogisnotforyou.comFlorence Dress Sew Over It by thisblogisnotforyou.comFlorence Dress Sew Over It by thisblogisnotforyou.comFlorence Dress Sew Over It by thisblogisnotforyou.com

Florence Dress Sew Over It by thisblogisnotforyou.com

Florence Dress Sew Over It by thisblogisnotforyou.comFlorence Dress Sew Over It by thisblogisnotforyou.com

Aslan not only enjoyed the long vineyard walks but also the making of this dress. He has a bad habit of stepping on carefully placed fabric or even falling asleep on it while I’m in the middle of cutting out my patterns. He might have been a cat in a former life, I think.

I’m still dreaming about making all those summer dresses while the leaves start falling outside…Do you have any pattern suggestions for starting an autumn wardrobe to get me out of this wistful mood?

xx

Charlie


Happy sewing!

facebook/bloglovin/pinterest
twitter/instagram

Stay in touch!

A Floral Agnes Dress

Agnes Dress by thisblogisnotforyou.comAgnes Dress by thisblogisnotforyou.com

Agnes Dress by thisblogisnotforyou.com

Agnes Dress by thisblogisnotforyou.comAgnes Dress by thisblogisnotforyou.comAgnes Dress by thisblogisnotforyou.com

Oh, hello there!

It’s embarrassing how long it took me to write up a post this time! I have to blame a whole new bunch of hobbies for it. I’ve discovered wool spinning and all that comes with it and have spent the last couple months pretty much doing nothing else than handling wool in all shapes and forms. It’s really fun and distracts me from sewing at the moment. I’ve been making all sorts of little projects for the kids in my family, as well. So I’ve been very much involved with all things creative. People ask me all the time how I have the time to do so many things at once and, well, I haven’t. I really have to make time to be able to explore so many creative activities and some things have to get pushed to the bottom of the list. In the last few months it’s been mostly working out (the most likely candidate) and blogging. Preparing a blog post eats up a lot of time and, to be honest, isn’t always the most creative part of the process for me.

Just before discovering the joy of old spindles and raw fibres I finished a couple of really cute outfits which we photographed months ago. One of these was this really lovely jersey dress, which I’ve worn endlessly since then.

pattern: hacked Agnes Top (Tilly and the Buttons), size 10
fabric: 1.5m of printed jersey (gifted)

cost: next to nothing: fabric was gifted, 10cm elastic (1.99€/m), 
matching thread from my stash
duration: ~2 hours

I used the Agnes Top pattern by Tilly and the Buttons and lengthened it into a dress. It’s the third time I made myself an Agnes dress, the other two dresses (here and here) are some of my favourite garments to date. It’s fairly easy to do this freehand. I usually use the Sew Over It Cowl Neck Dress as a base for the skirt part, since I really like the fit and length. As I said, you don’t necessarily need a skirt pattern for this. You could simply drop the hem down to knee-length and curve the side seams a bit following the shape of your thighs. 

An Agnes dress is super comfy, but doesn’t look too slouchy. You can easily dress it up with some heels or dress it down by wearing trainers. It’s also one of my favourite garments to take on holidays, as it’s such an allrounder and fits easily in any bag without creasing. 

I love the feminine shape of the neckline. It’s such a simple, but effective trick to use a short length of elastic to ruche the centre front and turn it from a scoop neck into a pretty v-shape. This technique is included in the pattern booklet and can also be easily applied to other garments. You could also use this trick on other tops you would like to update. Any scoop neck would be perfect for this. The elastic is stitched down with a zigzag stitch, which only takes a minute or two.

Agnes Dress by thisblogisnotforyou.comAgnes Dress by thisblogisnotforyou.comAgnes Dress by thisblogisnotforyou.com

I would really love to get my sewing juices flowing again! I’ve been browsing a bit for new indie sewing patterns and bought a couple Sew Over It dress patterns recently. I would really like to explore other brands as well, since I feel I’ve been missing out on all the latest pattern crazes (Myosotis Dress anyone? I’ve been eyeballing you!).

Do you have any recommendations for patterns and indie pattern designers which I should check out? Please let me know in the comments!

xx

Charlie


Happy sewing!

facebook/bloglovin/pinterest
twitter/instagram

Stay in touch!

Autumnal Florence Dress

Sew Over It Florence Dress by thisblogisnotforyou.com

Sew Over It Florence Dress by thisblogisnotforyou.com

Sew Over It Florence Dress by thisblogisnotforyou.com

Sew Over It Florence Dress by thisblogisnotforyou.com

Sew Over It Florence Dress by thisblogisnotforyou.com

leaves as golden as the buttons on my dress

Every year I’m sad at the end of summer for exactly five seconds until I remember how much I love autumn. I find beauty in every season and autumn has its very own special appeal. Hot chocolate and cosy blankets, long walks with muddy dogs and wellies, the smell of burning wood fire and red wine and books. Oh, and long dresses and boots. Why complain about the weather then?

Remember how I gushed over the Doris Dress in one of my recent posts? The only dress that got me more comments and compliments this summer was this gorgeous floral Florence number. And I am so glad how well this lady transitioned into the cooler season. Just add boots and denim jacket and you’re good to go.

pattern: The Florence Dress (Sew Over It), Version 1 (size 10)
fabric: lightweight cotton viscose from a Swedish sewing shop in Ljungby
amount: ~2,75 m
cost: less than 15€ (it was price per kg, buttons from my vintage stash)
duration: ~4 hr

I’m having a massive Sew Over It sewing spree this year and Florence is one of their more recent patterns. From its release on I had my eyes on this pattern and couldn’t wait to find the right fabric. I found this lovely viscose maxi flower print during our holiday in Sweden and it was perfect for this pattern. The shop sold pre-cut fabrics (price per kg) and I had a little less than needed for the Florence. As I’m super stubborn I went ahead anyway and just shortened the skirt pattern to fit my fabric. I love the midi length as it keeps the elegance but make for a much more casual, work-appropriate style.

Apart from changing the length, I sewed the pattern straight from the envelope without further adjustments. I got a pretty decent fit. (The shaping at the waist happens automatically due to the elastic sewn into the waist seam.) There appears to be some excess on the shoulders towards the neck, especially at the front, but since I wear the dress with the top unbuttoned it’s pretty much unnoticeable (to the untrained eye!) Now you go ahead and spot it!

I will certainly try and fix this when I make this dress again, which I most definitely will do!

Sew Over It Florence Dress by thisblogisnotforyou.comSew Over It Florence Dress by thisblogisnotforyou.com

Sew Over It Florence Dress by thisblogisnotforyou.com

Sew Over It Florence Dress by thisblogisnotforyou.com

Sew Over It Florence Dress by thisblogisnotforyou.com

Sew Over It Florence Dress by thisblogisnotforyou.com

Sew Over It Florence Dress by thisblogisnotforyou.com

Sew Over It Florence Dress by thisblogisnotforyou.com

Do you wear your summer dresses during the cold season?
Or do you have a separate winter wardrobe?

xx

Charlie


Happy sewing!

facebook/bloglovin/pinterest
twitter/instagram

Stay in touch!

Make Zero Waste Reusable Cotton Pads from Recycled Towels!

Zero Waste Reusable Cotton Pads tutorial by thisblogisnotoforyou.comZero Waste Reusable Cotton Pads tutorial by thisblogisnotoforyou.comZero Waste Reusable Cotton Pads tutorial by thisblogisnotoforyou.comZero Waste Reusable Cotton Pads tutorial by thisblogisnotoforyou.com

Reducing waste with ecoconscious DIYs

I can’t tell you how excited I am about this little Sunday morning project! I’ve been trying to incorporate more and more Zero Waste strategies in our daily routine and be more conscious about waste reduction in my shopping decisions. Talking to my friend the other day, I told her that I’d heard about washable cotton pads and whether that wasn’t a bit too out-there to try. She laughed and said she just bought some on Amazon the other day and loved them. I loved the simplicity of the idea but was shocked how much money a bunch of terrycloth cotton pads cost online.

This is why I made my own recycling an old white towel. This was so simple and easy, it’s absolutely mind-blowing. I never thought of this before seeing the ready-made ones in shops. And you know what? You can make your own, too! Here’s how simple it is:

Materials: old towel or wash cloth, organza bag, scissors, overlocker & thread (or zigzag stitch)
Duration: 5 Minutes
Costs: Zero
Benefits: no waste, no more costs, recycling old materials

Zero Waste Reusable Cotton Pads tutorial by thisblogisnotoforyou.com

Instructions

As you can see, you need just very few materials for this project. By the way, if you do not have an overlocker, you can also use a simple zigzag stitch on your machine to keep the fabric from fraying. It’s a bit slower, but works just as well.

First, I cut off the woven edges of my towel. This is really optional. If you’re feeling a bit lazy and don’t mind looks too much, you can keep them and save yourself some overlocking time of those edges. The fastest way to do the overlocking is by cutting long strips of your towel and overlock these before cutting them into smaller rectangles. Finish all four sides and you’re done! It’s that easy.

Zero Waste Reusable Cotton Pads tutorial by thisblogisnotoforyou.comZero Waste Reusable Cotton Pads tutorial by thisblogisnotoforyou.comZero Waste Reusable Cotton Pads tutorial by thisblogisnotoforyou.com

You will need a little organza or cotton bag to put the used pads in. Just let them sit in the bag and throw it in with your next wash. The bag also keeps the pads together in the washing machine. I found a cute wooden tray (IKEA) to put my new cotton pads in and it looks really pretty in the bathroom now! You could also just use a little box or porcelain plate to keep them together and keep them clean. Just as your towels, you can wash these with up to 95°C. If you use them dry on your clean skin, you can also use them to exfoliate.

This was just a whole 35€ cheaper than my friend’s alternative from Amazon and she got just 7 pads in total. I made about 50 and will give some away as my mum and sister are also keen to try this. Nice, right?

Zero Waste Reusable Cotton Pads tutorial by thisblogisnotoforyou.comZero Waste Reusable Cotton Pads tutorial by thisblogisnotoforyou.comZero Waste Reusable Cotton Pads tutorial by thisblogisnotoforyou.com

What do you think? Do you feel like this could be something you might want to try? Do you have other suggestions for zero waste DIYs? Please let me know!

xx

Charlie


Happy sewing!

facebook/bloglovin/pinterest
twitter/instagram

Stay in touch!