Adventures in Amigurumi

Pica Pau Crochet Amigurumi Animals by Thisblogisnotforyou.com

Pica Pau Crochet Amigurumi Animals by Thisblogisnotforyou.com

Pica Pau Crochet Amigurumi Animals by Thisblogisnotforyou.comHaving a knack for creative hobbies can lead to a serious passion of collecting new hobbies and skills (and sometimes ditching them shortly after). I’m certainly guilty of hobby hoarding. During my blogging break this winter I had the urge to try something new. I’ve always adored Amigurumi figures and as they look incredibly complicated to make I never thought I had the time to learn how to make them myself.

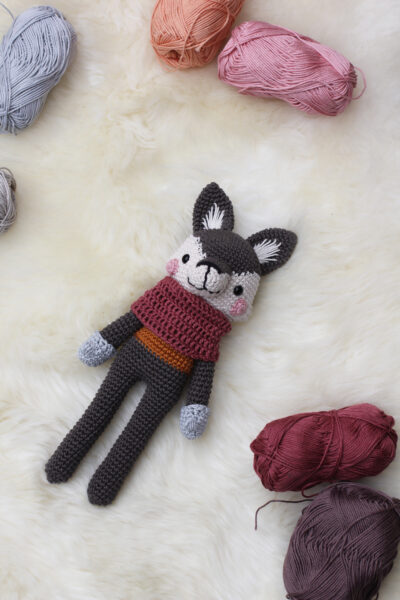
One evening I had sat down with an old crochet hook and some leftover yarn and watched a couple of YouTube videos on making Amigurumi bunnies. A few weeks later I’d made three bunnies for my nieces and nephew and was so in love with this new hobby that I treated myself to some more supplies. See, with collecting hobbies there always comes a massive collection of supplies with it and since I will run out of space sooner rather than later, I try to be more selective about what I really need to buy. I loved this technique so much that I knew I wanted to spend more time making crochet animals and found the amazing Yan online, an Amigurumi pattern designer on Instagram. Luckily, she’s got some books out already which had really great reviews.

Pica Pau Crochet Amigurumi Animals by Thisblogisnotforyou.com

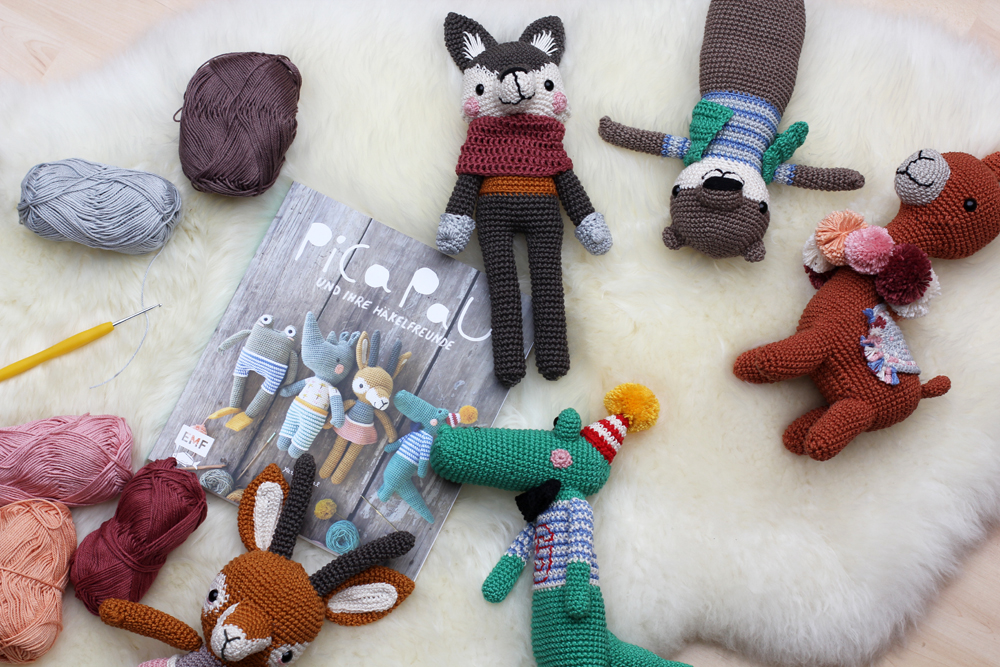
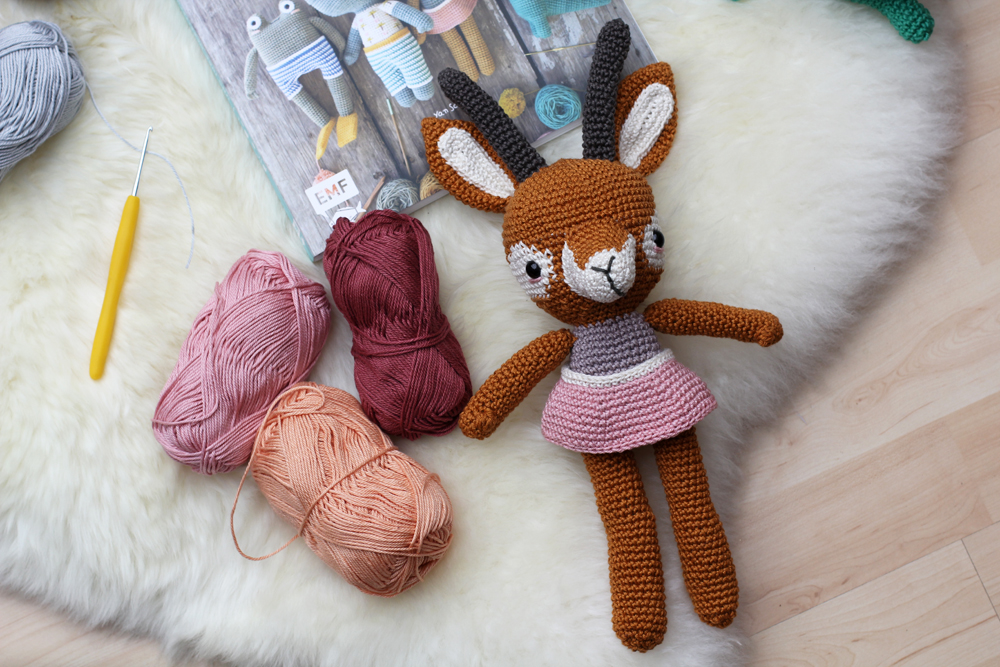
I bought the pattern book “ANIMAL FRIENDS OF PICA PAU” as well as a basic set of crochet hooks and was addicted from the first second.  I’ve made almost half of all the patterns in the book and the enthusiasm doesn’t seem to run out!

What I love most about the book  – apart from the amazingly cute patterns – is that it doesn’t leave any gaps. As an absolute beginner I was able to recreate the animals as shown in the photos just following the step-by-step patterns with the help of a crochet 101 guide also included in the pattern book. The instructions are really well photographed so that even the more complicated bit and bobs weren’t that hard to wrap my head around.

Pica Pau Crochet Amigurumi Animals by Thisblogisnotforyou.com

Pica Pau Crochet Amigurumi Animals by Thisblogisnotforyou.com

Pica Pau Crochet Amigurumi Animals by Thisblogisnotforyou.com

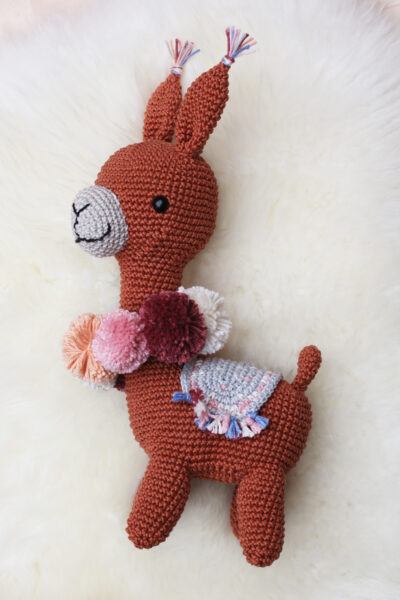
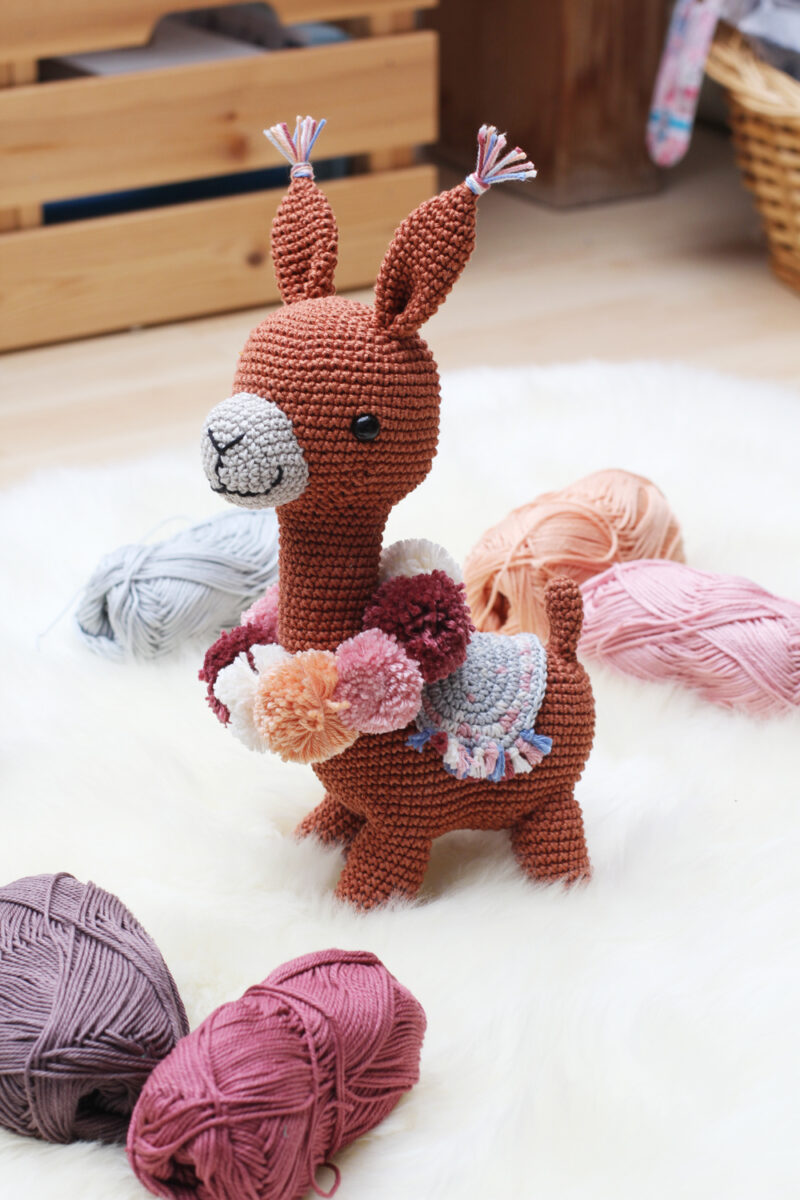
I was a bit worried about what wool to use, but learned that I doesn’t need to be the exact same wool as used in the book. You could use pretty much any wool you’d like as long as you used the same one in different colours for one project. The animals turn out bigger or smaller depending on the yarn and hooks you pick. Using a similar yarn and hook size as recommended, my animals measured pretty much the same size as the ones in the book. I got hooked on (bad pun intended) a really nice cotton yarn from Schachenmayr, called “Catania”, which is perfect for Amigurumi as it is silky smooth and slightly shiny. On German Amazon it is about 2,50€ per ball, quite a reasonable price for the quality you get. I used approximately 1-2 balls of yarn (main colour) for the animals plus small amounts of all the other colours.  They have a really nice range of nice brown, cinnamon and taupe tones. They also have really lovely pastel and vintage looking colours that I prefer to bright and glaring reds, yellows etc.
Here in Germany they sell Schachenmayr Catania in pretty much any wool and sewing shop I found out, so this is sort of my go-to brand now. The only thing that annoyed me a bit is that they apparently release limited series of “seasonal” colour ranges, which they stop selling online after a while. Naturally, I ran out of one of these mid-project and had troubles finding it online. I bought some of off Ebay, which was alright but annoying nonetheless.

So all supplies considered, the cost of making an animal is somewhere between 5-10€. For the stuffing I recycled some Ikea pillow stuffing, which works perfectly and is much cheaper than the plush toy stuffing they offer in stores.

Pica Pau Crochet Amigurumi Animals by Thisblogisnotforyou.comPica Pau Crochet Amigurumi Animals by Thisblogisnotforyou.com

So, in case you’ve been itching to learn how to make Amigurumi yourself, I can only encourage you to try! It’s fairly easy and soooo relaxing! Another plus: lots of cute presents for you friends and family!

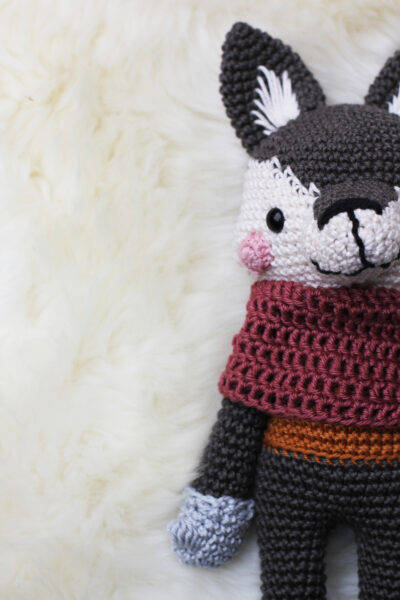
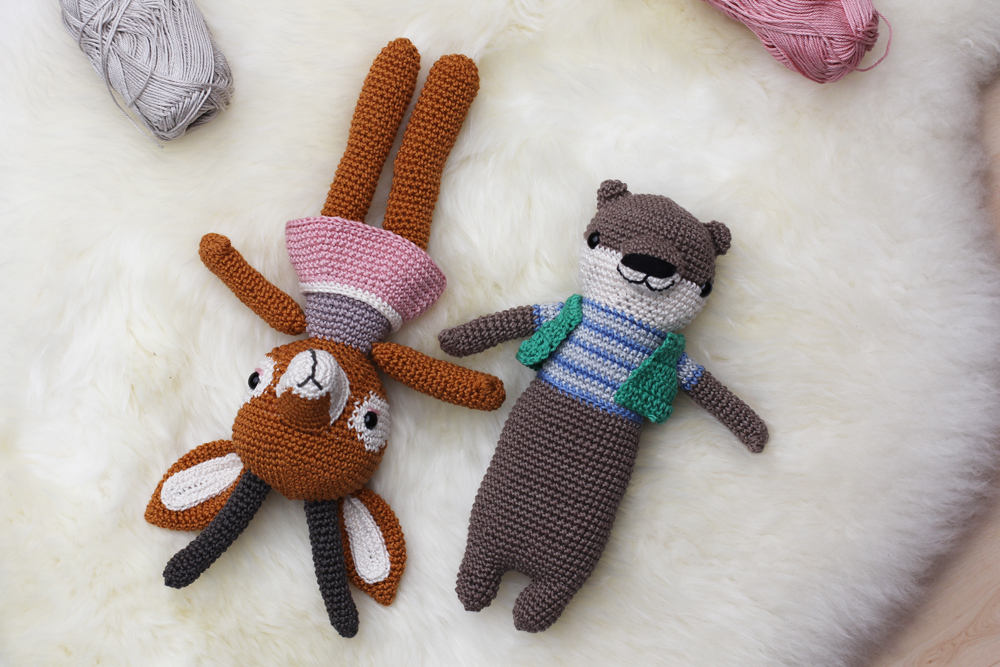
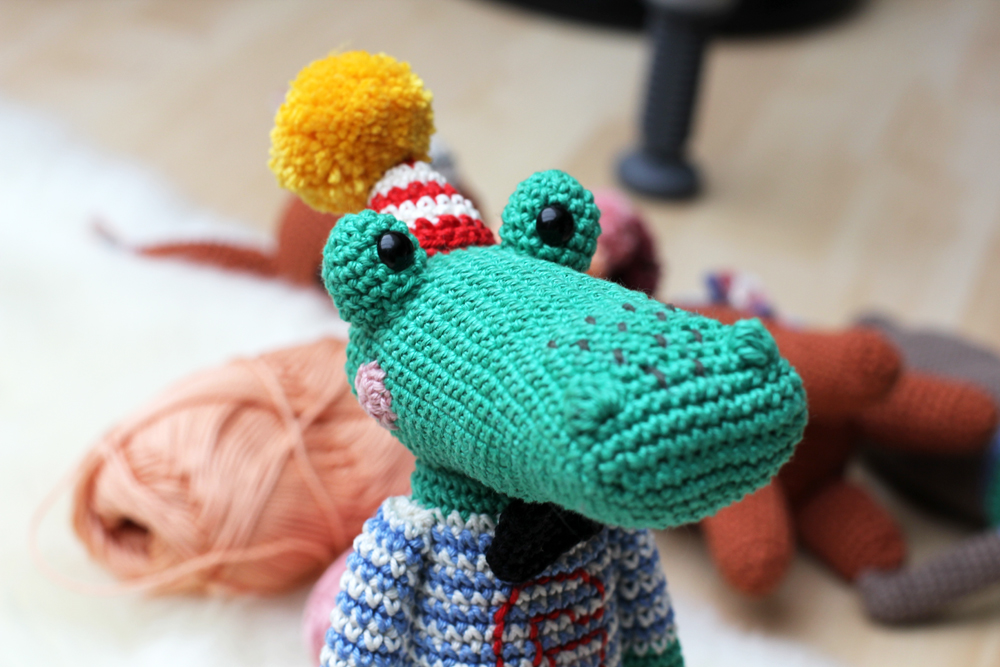
The ones in the pictures I’ve given all away except for the wolf which I cannot part with. I’ve made a couple more that I didn’t photograph which also found happy new owners already.  They bring so much joy, it’s incredible!

Have you meddled with new hobbies lately? Anything you’ve fallen in love with and would like to recommend?

xx

Charlie


Happy sewing!

facebook/bloglovin/pinterest
twitter/instagram

Stay in touch!

Make It Your Own: Updating a T-Shirt with Stencils

Stencil Refashion by Thisblogisnotforyou.com

Hello there! Today I want to share a really fun & quick project to personalise or update your t-shirts! This is really easy to do and the perfect project if you feel like a creative project but don’t have a lot of time on your hands. It only took me a couple of minutes plus the time it needs to dry. I love those little projects that you can squeeze in after work.

The lovely folks over at Stencil Revolution offered to send some stencils for me to try. What I love about their company is that it’s a small, family-owned operation that developed out of what originally was a street art forum. I love supporting upcoming creative businesses and I really had a great experience with them. They offer a large variety of designs and sizes (for decorating walls etc), I stuck to smaller sizes as they seemed a better fit for decorating shirts, fabrics and tote bags.

These stencils are not very expensive but are very long lasting. It’s a hard plastic sheet that you can wipe and wash and reuse many times. I had specific project ideas in mind when ordering the three larger stencils. But I picked the arrow stencils knowing this would be a motif I will probably use over and over again! Obviously, you can use these for walls, furniture, bags etc., too. I just love a t-shirt refashion and I buy plain white & black t-shirts every once in a while for exactly these kind of projects.

Stencil Refashion by Thisblogisnotforyou.comStencil Refashion by Thisblogisnotforyou.com

So, how does it work?

First of all, here’s what you need:

– stencil templates 
– fabric paint (I used black and light blue/turquoise)
– small dry sponge
– old plate or plastic container to pour the paint in
– masking tape
– a piece of cardboard (big enough to place under the area you are using colour on)
– iron & iron board

Stencil Refashion by Thisblogisnotforyou.com

  1. Prepare the shirt/fabric and template.
    If necessary, you might want to iron the shirt to make sure there are no creases. Clean the template if you used it before, to make sure it’s dry and there no residue colour. Use some masking tape to tape the template into place. It’s very important that it doesn’t move once you start with the colour.
    If using this on a shirt, place a piece of cardboard between both fabric layers. Otherwise, the colour might come through and leave stains on the back. A hard, smooth surface also makes it easier to get a neat result.
  2. Pour fabric paint onto your dish and dab your dry sponge in it. Dab it a couple times more onto the plate to have some of the paint come off. Using too much paint might need to colour bleeding. If you want to get crisp edges, make sure you use less paint and apply it in several layers.
  3. Dab the paint onto the fabric. Try not to use stroking motions as this might lead to blotches and colour bleeding as it gets under the template. This will also give the paint more of a sprayed “graffiti” look.
    If you want an ombre effect as I did with my project, start with the lighter colour. I used the light blue for the first layer, let it dry a bit and then dabbed over it with black again. For the colours to blend softly you really want to use as little paint on the sponge as possible. Work in layers until you get the opacity that you like.
  4. Let it dry. I usually remove the template afterwards. If you remove it while the paint is still wet it might smudge and blur.
  5. Once it’s dry remove the template and iron your fabric from the wrong side to set the colour.
    That’s it, you’re done!

Stencil Refashion by Thisblogisnotforyou.comStencil Refashion by Thisblogisnotforyou.com

I’m planning more projects with these stencils. They would also make a great project to do with kids. That Bill Murray will go on a tote bag for sure!

I’m looking for some nice gold or rose gold textile paint. Do you have any recommendations?

xx

Charlie

Please note: As always, all opinions are my own. All my product reviews are completely honest. I was gifted this product, but not asked to review it or given compensation for doing it.

Happy crafting!

facebook/bloglovin/pinterest
twitter/instagram

Stay in touch!


What to Sew When You Have an Evening vs. a Weekend

Pattern Standoff Evening vs. Weekend
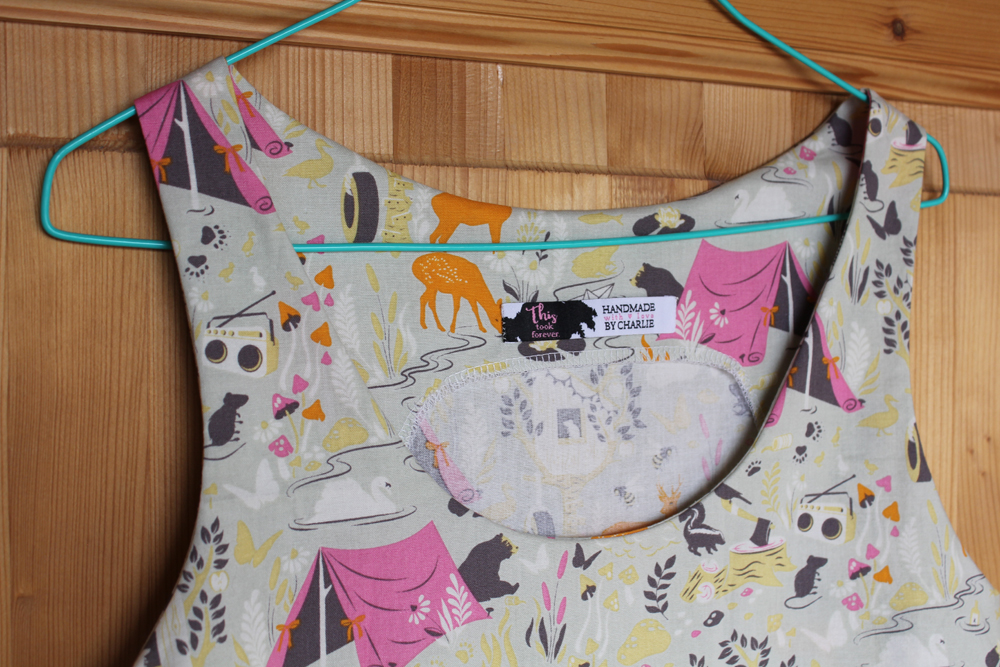
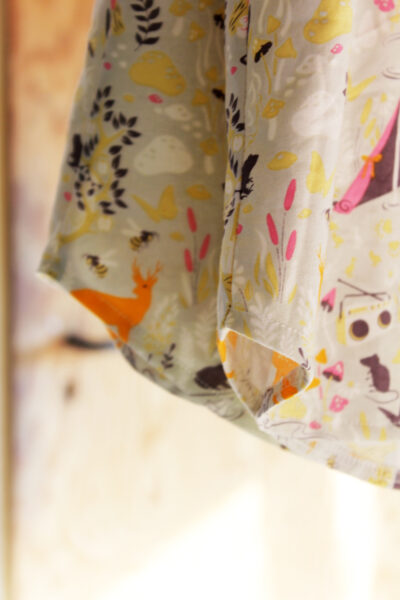
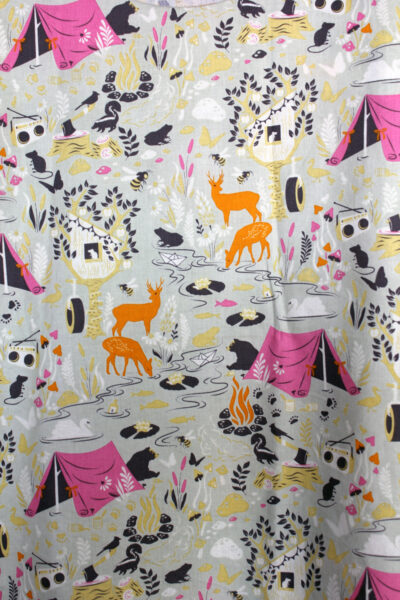
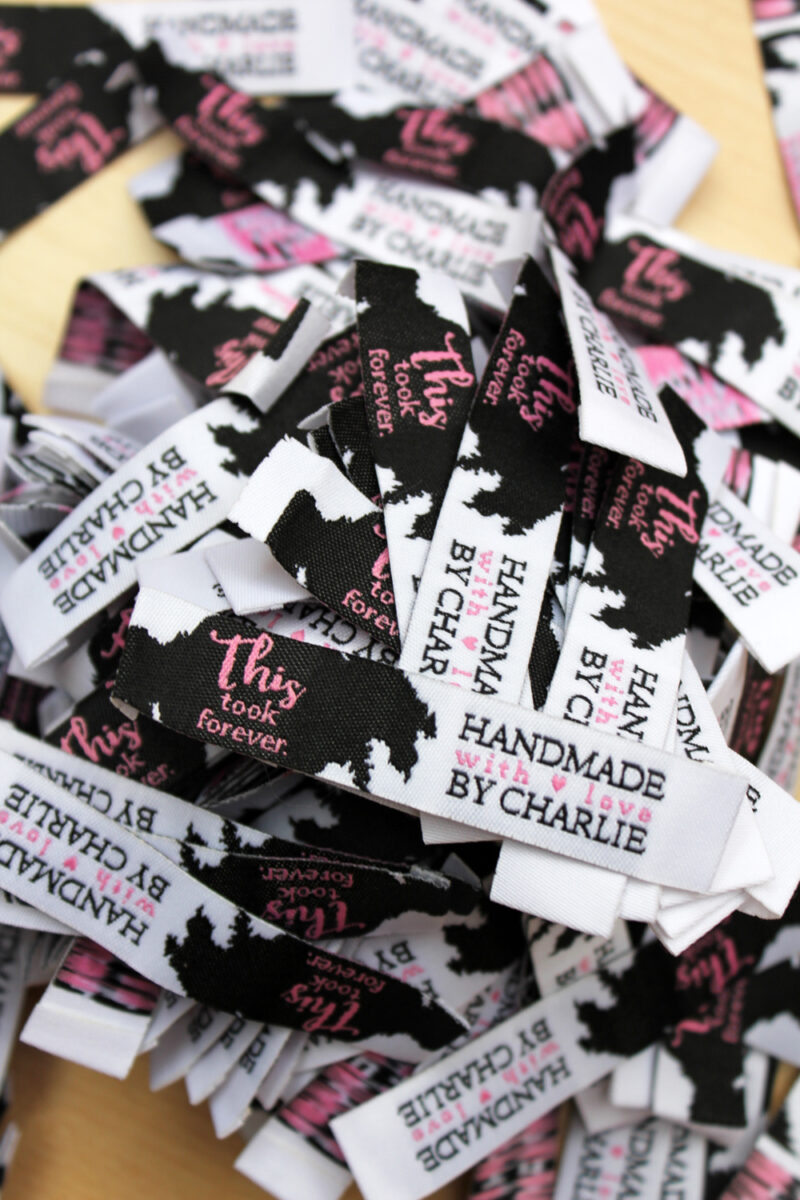
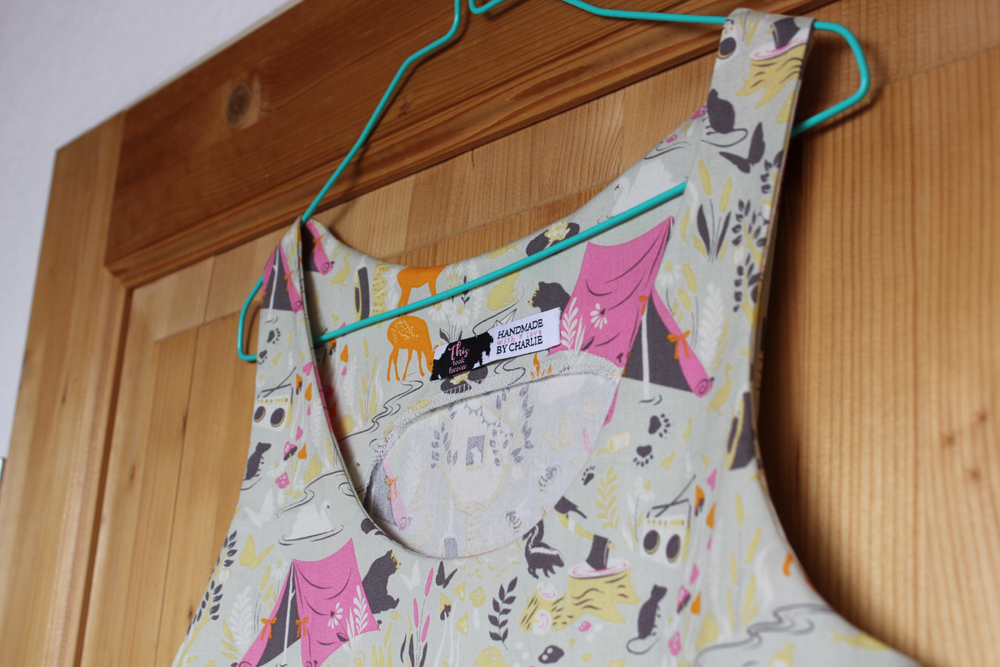
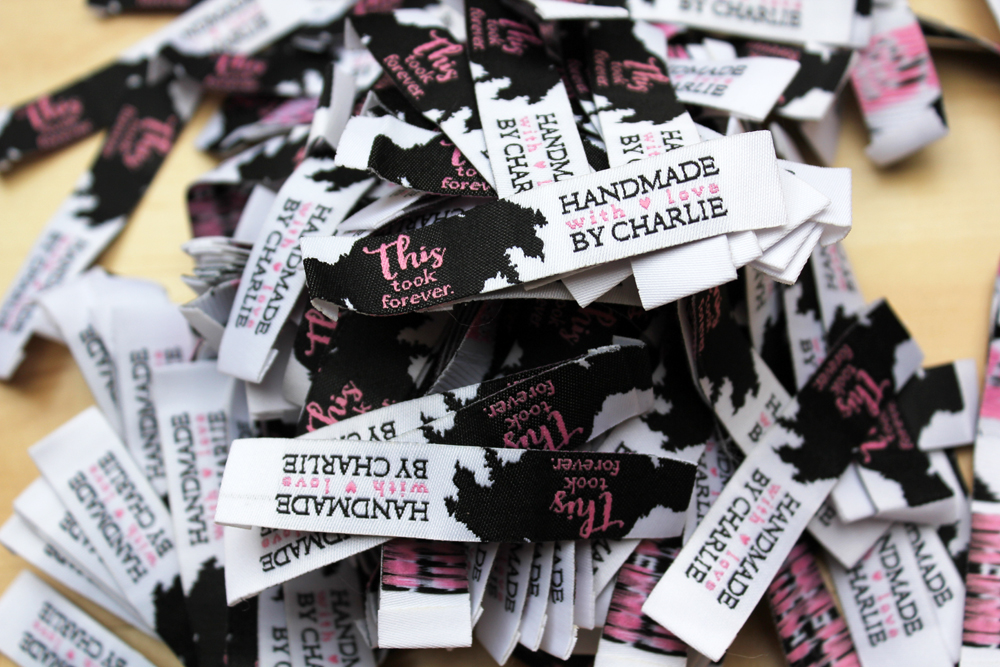
Hello there! Today we’re talking pattern standoffs!

Do you have sewing cravings? Sometimes I want to sew just for fun, some days I really want to make something that I urgently need in my wardrobe and, well, sometimes I want to take up a masterpiece project. Most of the time the particular craving depends a lot on the time I have on my hands.

Time is actually quite an important factor when choosing a pattern for your next project. There are a hundred ways to sew a skirt. I can be done in half an hour or it might take a couple of days. That’s completely up to you and the pattern you pick.

I thought it would be fun having a look at some unlikely couples. I’ll share two pattern options for sewing projects – one that can be done in an evening and one that will keep you busy for a weekend. Shall we have a look?

Jeans: Mia vs. Ginger

Mia Jeans by thisblogisnotofryou.com

Speedy

Are you looking for the perfect jeans project? If you need a new pair of jeans by tomorrow – Mia to the rescue! The Mia Jeans pattern by Sew Over It (included in the ebook My Capsule Wardrobe) is the perfect ‘very quick & perfect fit’ pattern for you. I have made 4 pairs so far and they all turned out amazing. The pattern comes together really quick, the only two trickier bits being the front fly and the patch pockets in the back. Fitting is made very easy with a generous seam allowance that’s included in the pattern. I really recommend checking out Sew Over It’s Youtube channel for the video on constructing the front fly.

My tip: choose a stretch denim fabric to make fitting even easier!

Slow & Steady:

You finally want to tackle that masterpiece jeans project of yours that’s been on your list for ages? The Ginger Jeans by Closet Case Patterns is a very well designed five-pockets-jeans pattern with a higher back rise, belt loops, rivets and all! The pattern is incredibly popular and known for a flattering fit and a professional look. You’ll need more supplies compared to Mia, but this is a project of love and a masterpiece you will be proud of! In Germany we say it’s for those with “patience and spittle”.

My tip: Make sure you have all the supplies ready by the time your sewing weekend starts, so you can work without frustrating shopping runs. Take your time and enjoy the ride!

Blouses: Silk Cami  vs. Carme Blouse

There are just soo many great blouse patterns, but these two are my current favourites.

Speedy:

The Silk Cami (Sew Over It) is such a satisfying quick sew. I can’t recommend it enough. It comes together very quick: no fastenings, bias binding or darts! It’s a basic French seamed sleeveless cami top finished at the neckline with a facing. You’ll need very little fabric and very little time! I love to use this pattern for hacks, such as this dress. It probably doesn’t even count as a blouse, as there are no sleeves or anything involved. But this is such an elegant little garment, it is more than just a top.

My tip: Spend some money on a high quality polyester, cotton lawn or silk fabric. You won’t need much fabric, so you can go for quality over quantity.

Slow & Steady:

If you want to take your time and get into more technical handiwork, the Carme Blouse by Pauline Alice Patterns is a great project. It’s a sophisticated-looking, but versatile blouse. It offers a couple of challenges such as pin tucks, a small mao collar, a front yoke, a button placket and sleeve tabs. The instructions are very easy to follow and you’ll also find sewalong videos for this project on Youtube.

My tip: Instead of just following the pattern markings for the pin tucks, take your time and measure – press – sew one by one. I found that measuring the intervals gives a much neater outcome.

Coats: Burdastyle Wool Coat vs. Ellsworth Coat

Burda 09/2015 #117 and Mia Jeans by thisblogisnotforyou.com

Speedy:

The Burdastyle pattern 09/2015 #117A is such a rewarding little project. Not much effort but making a big impact. View B is belted and slightly shorter than View A. The pattern is pretty brilliant as long as you use the right fabric. They’re asking for double-sided wool because it comes without lining. Therefore, it’s a really quick, simple sew. No interfacing, no lining, no bindings. It’s pretty much just three pattern pieces: front, back and back sleeve (plus pockets). The sleeves are two pieces. The front one is cut as a kimono sleeve and part of the front bodice pattern. I got many compliments on this coat and people can’t believe I made it myself. You can check out my version here. No-sweat coat making with this little number!

My tip: Find a show-stopper fabric in a bold colour. Make sure your fabric is double-sided!

Slow & Steady:

The Ellsworth Coat by Christine Haynes is a fully lined classic 1960’s-inspired double breasted overcoat. You can go topstitching galore on this one! There’s a collar, lots of buttons and buttonholes, pockets, lining… basically everything you want and more when your sewing mojo is top-notch and you have the whole weekend in front of you. Add a season of Game of Thrones or Homeland to the mix and you’re good to go!

My Tip: If you’re planning on using a patterned fabric, buy a little extra and take your time before you cut to get the pattern matching right.

Skirts: Ultimate Pencil Skirt vs. Hepburn Skirt

Ultimate Pencil Skirt by Thisblogisnotforyou.com
The Hepburn Skirt by thisblogisnotforyou.com

Skirts are generally easygoing and quick projects. It depends on pleating, button plackets, zips or pockets how much time you’ll need.

Speedy:

The Ultimate Pencil Skirt by Sew Over It is one of my all-time favourite patterns. It’s very elegant but simple, works also as a mini skirt and can be made in woven or knitted fabrics (I tested this!). The trickiest part of this skirt is at most the concealed side zip. I made a version with a exposed front zip which also worked brilliantly. I’ve made many versions and hacks of this skirt, it’s the perfect base once you got the fit right. I made a faux-wrap hack with belt-and-all. I even based the design of my wedding dress on this pattern! It’s so very versatile, it’s definitely worth buying.

My Tip: Find a fabric with a little stretch and focus on getting a perfect fit. It’s a great base for many future skirt projects.

Slow & Steady:

My very own Hepburn Skirt PDF pattern is another great option for a high-waisted pencil skirt. The vertical and horizontal seam lines are perfect for colour-blocking and give you some options for experimenting with style lines and colours. Cutting, sewing, pressing and finishing seams takes a little bit longer, although the skirt is fairly easy to sew. It’s certainly a project for a confident beginner to tackle.

My Tip: Depending on the type of fabric you choose, you might want to take the time to add a lining, as well. Thus, you prevent the skirt from riding up when you walk. 

* * *

Did you find this helpful? Would you like to see more content like this? And what are your evening vs. weekend pattern recommendations? Please don’t be shy and let me know in the comments!

Next time we’ll have a look at blazers, cardigans, trousers and dresses!

xx

Charlie


Happy sewing!

facebook/bloglovin/pinterest
twitter/instagram

Stay in touch!

A Festive Party Outfit – Two Ways

LaLinna Schnittgeflüster and Sew Over It Pencil Skirt by thisblogisnotforyou.com

LaLinna Schnittgeflüster and Sew Over It Pencil Skirt by thisblogisnotforyou.com

LaLinna Schnittgeflüster and Sew Over It Pencil Skirt by thisblogisnotforyou.com

LaLinna Schnittgeflüster and Sew Over It Pencil Skirt by thisblogisnotforyou.com

LaLinna Schnittgeflüster and Sew Over It Pencil Skirt by thisblogisnotforyou.com

Classy Comfort

Happy New Year, everyone! Hope you all had a great start into the new year. In Germany we say ‘Have a great Rutsch‘, whishing you a lovely skid into the new year… I’m starting 2018 by sharing my Christmas and NYE outfit. I sincerely hope you guys are not too tired of hearing about holiday outfits by now!

Isn’t this a beautiful combination of patterns? Before I get into too much self-praise, let me tell you how this outfit came together.

Last December I was approached by the lovely folks over at Stoffe.de (also known as myfabrics.co.uk) offering to sponsor my holiday outfit. Yup, December and I didn’t already have one. I’m a classic last-minute sewer, so I had neither an outfit nor plans for one (yet).

I wanted to create a festive look that would work both for Christmas and New Years Eve. But how to do formal and casual in one?

I went for quite festive fabrics, combined with a more minimalist and casual cut. Well, you know I love my pencil skirts for every occasion. They can be worn two ways – top tucked in or left out. It creates two very different looks.

I paired it with a jumper pattern – mostly for comfort (and to have enough room for all the holiday meals).  I’ve followed the newly arisen velvet craze and wasn’t too big a fan at first. Velvet can look outdated very, very quickly. But I thought I’d challenge myself a little and use fabrics I hadn’t used before: animal print plus velvet. If this isn’t stepping out of your comfort zone, then I don’t know what is.

LaLinna Schnittgeflüster and Sew Over It Pencil Skirt by thisblogisnotforyou.com

LaLinna Schnittgeflüster and Sew Over It Pencil Skirt by thisblogisnotforyou.com

A Pattern Dream Team

Let’s get into all the details, right? Pattern-wise I combined an old love with a new one! My beloved, fitted-to-death  Ultimate Pencil Skirt pattern by SEW OVER IT, which I loooove to pieces. I stopped keeping track of how many I made so far. Roughly ten, I guess. I suppose I could sew it in my sleep now. I won’t go into too much detail, as I’ve been gushing over this skirt for years now. Well, it’s a classic and therefore qualifies as perfect base for any two-piece outfit.

Since moving back to Germany, I slowly make my way around German sewing blogs and indie pattern companies. There are so many amazingly talented people out there, it’s unbelievable. I wish I had the time to follow more and try more patterns.

For this project, I tried the wonderful LaLinna jumper pattern by SCHNITTGEFLÜSTER (‘pattern whisperings’), who’s made it her goal to create super minimalist, basic patterns for all sizes. Their patterns range normal to plus size and are available as PDF-Download. They’re also very affordable and easy makes for beginners. As an advanced sewer, I had a lot of fun to use this cut as a foundation to add some fun details. Man, they have just SO many gorgeous patterns to gush over, I bet from now on you’ll never hear the end of it. I see a whole Schnittgeflüster year coming. Brace yourselves, I warned you.

LaLinna is perfect tucked in or casually worn over the skirt. The batwing-sleeves are very comfy, add to a beautiful drape and look quite elegant with narrow cuffs. I changed the neckline to a boat neckline and lengthened the cuffs to make them appear even narrower. The hemline drops down at the back, adding even more volume and creating a gorgeous silhouette. The jumper looks great worn over skinny jeans, too. I wouldn’t mix it with really wide-fitting trousers or A-line skirts, though.

LaLinna Schnittgeflüster and Sew Over It Pencil Skirt by thisblogisnotforyou.comLaLinna Schnittgeflüster and Sew Over It Pencil Skirt by thisblogisnotforyou.comLaLinna Schnittgeflüster and Sew Over It Pencil Skirt by thisblogisnotforyou.com

LaLinna Schnittgeflüster and Sew Over It Pencil Skirt by thisblogisnotforyou.com

LaLinna Schnittgeflüster and Sew Over It Pencil Skirt by thisblogisnotforyou.com

Who Said Animal Print and Velvet Isn’t Cool?

Let’s talk about these fabrics now, shall we? I really went for something I haven’t tried before and picked a crushed stretch velvet in antique silver (HERE‘s the link for you German folks) and a leopard print stretch jacquard in black (which appears to be out of stock, unfortunately!). Both fabrics are courtesy of Stoffe.de (also known to UK folks as myfabrics.co.uk).

Despite having heard many horror stories about sewing with velvet, this wasn’t one of them. The velvet sewed like a breeze and wasn’t sliding around at all. It’s got a very lovely soft texture with an elegant shine.

The leopard jacquard is perfect for sewing close-fitting skirts (or trousers) as it has a nice amount of stretch. I used a stretch lining fabric (link for Stoffe.de) to go with it. The jacquard has a nice sheen and matches the velvet perfectly.

LaLinna Schnittgeflüster and Sew Over It Pencil Skirt by thisblogisnotforyou.com

LaLinna Schnittgeflüster and Sew Over It Pencil Skirt by thisblogisnotforyou.com

So far so good, I’m VERY happy with this combo. I’ve worn the LaLinna jumper loads since the holidays, mostly with skinny jeans to work and can’t wait to rock that skirt again some time soon.

Did you make something for the holidays? Also, if you have some great pattern recommendations for me to try in 2018, please share!

xx

Charlie


Happy sewing!

facebook/bloglovin/pinterest
twitter/instagram

Stay in touch!

New clothes labels & SEW OVER IT Silk Cami

Sew Over It Silk Cami by thisblogisnotforyou.comSew Over It Silk Cami by thisblogisnotforyou.comSew Over It Silk Cami by thisblogisnotforyou.com

Summer is almost over and I haven’t even shown you any of my summer makes yet! I made a couple cute summer tops this year I’ll share nonetheless, because they’re just too cute not to.

This one is an oldie but goldie! You all probably know the Sew Over It Silk Cami by now. I’m pretty late to join the party – but as I said, better late than never. I always knew this little pattern had massive potential to become a wardrobe staple in many ways, but for some reason it took me a couple of years until I finally bought it. I have no excuses. I probably thought this pattern was too basic to spent money on, but these are actually the patterns you want to invest in! A basic, well-drafted pattern is perfect to first get to fit right and then use as base for endless variations.

The Silk Cami comes together super quick and is perfect to show off really cute prints that don’t work well with garments that have a lot of seams, darts and pleats.

So this top was the right companion for this super cute fabric I have had in my stash for a few years now. I bought it at the first SewBrum Meetup in Lauren’s shop, Guthri & Ghani in Birmingham. It’s 100% cotton and was something around 18£/metre. I normally don’t spend that much money on cottons, but the print was love at first sight. I kept it in my stash for ages, because I was waiting for the right project to come along.

For me, the longer a fabric sits in my stash the less “valuable” it becomes. At first, I hesitate and dare not cut into the more expensive ones, but give it a few years and I will use them for wearable (well, mostly wearable) muslins. I know this makes no sense.

Well, this is why this gorgeous cotton ended up being used for my silk cami muslin. And guess what? It doesn’t fit! Good thing is, it fits my best friend perfectly and she’s more than happy to take it off my hands.

It’s just too tight around the bust and gaping a bit at the back neckline. I adapted the pattern accordingly and the second and third top I made are a great fit. But I have to say goodbye to my bear-behind-a-tent-fabric. Life is tough!

Sew Over It Silk Cami by thisblogisnotforyou.com

Another great thing about this top – it colour-matches perfectly with my new labels. I’m so, so happy about them that I had to give them some more screen time on the blog. Here we go!Sew Over It Silk Cami by thisblogisnotforyou.comSew Over It Silk Cami by thisblogisnotforyou.comSew Over It Silk Cami by thisblogisnotforyou.com

These wonderful labels are courtesy of The Dutch Label Shop who kindly approached me and offered to try out their costum-design labels. I was getting tired of my old ones that I’d been planning to update for a while, anyway.

I picked a sew-on label with very practical end folds –  so I could use these as a coat hook for lightweight cardigans, as well. I’m very happy about going back to the sew-on type. I had some iron-on ones made a few years ago by a different brand, that come loose after a few washing circles.

These labels might certainly be quite an investment for some, but the quality really shows compared to other brands.

What I really love about the ones from Dutch Label Shop is that you can upload your own design, costumising fonts and colours as well. This made it possible to incorporate parts of my blog’s design into the labels. Don’t they look fantastic?
Sew Over It Silk Cami by thisblogisnotforyou.comSew Over It Silk Cami by thisblogisnotforyou.com

I have 200 labels now – I’m probably not anywhere close to having sewn 200 garments over the years – so these will last me a looooong time! I already started to sew these into some of my older handmade garments, just to take off some of the pressure, hehe.

Falling leaves or not, I’ll share some of my other summer makes soon!

Have a great week,

xx

Charlie


Happy sewing!

facebook/bloglovin/pinterest
twitter/instagram

Stay in touch!