My Favourite All-Rounder This Last Summer: The Doris Dress

Sew Over It Doris Dress by thisblogisnotforyou.com

Sew Over It Doris Dress by thisblogisnotforyou.com

Sew Over It Doris Dress by thisblogisnotforyou.com

Sew Over It Doris Dress by thisblogisnotforyou.com

Goodbye Summer

Summer now has finally ended this last week here in the south of Germany after a gloriously hot September and October. I’m quite behind in posting my summer and early autumn makes so you’ll have to endure some off-season posts this year! I want to introduce you to my absolute favourite garment of this whole summer. I’ve worn this dress to death. It’s seen so many washing cycles that I’m very much surprised it’s still holding up really well.

So, who are we talking about? Doris!

She’s the perfect summer party companion, gets you lots of compliments on family get-togethers, squeezes into your vacation suitcases in no time and is your best friend on the hottest of hot summer days. She even did well as a wedding guest, but she doesn’t know where to stop with the free drinks, so beware. She could pull herself together when needed at work and depending on her mood didn’t even need a press before being worn. She does that nice trick with the back ties when you’ve eaten more than you probably should have and gets all her Marilyn vibes in the faintest breezes. To sum it up, Doris is your perfect wing-woman.

pattern: The Doris Dress (Sew Over It), Version 1 (size 10 graded to 12 below hips)
fabric: lightweight cotton viscose from a local sewing shop
amount: 2,45 m (end of roll, I just paid for 2 metres, 18€/m), directional print
cost: 36€ (+ zip from my stash & handmade self-covered buttons)
duration: ~5 hr

Pattern & Fabric:  Oh, and you can get her – guess what – as a PDF or printed pattern at Sew Over It. (Disclaimer: I’m REALLY not being paid by them I just have a massive style crush on their patterns!) This pattern has been sitting in my stash for quite a while. It didn’t really inspire me until I saw some made-up version of it and Lisa Comfort showing it on her YouTube channel. I noticed that perfect silhouette and had the perfect fabric for it: a gorgeous blush-pink stag print viscose my husband got me for our wedding anniversary. I did a crazy thing where I just cut into the very expensive fabric without having sewn this pattern before and I was super lucky that it fit straight out of the envelope. I do not have a lot of fitting issues with Sew Over It patterns, which is one of the reasons I’m drawn to them. I usually make them without trying a muslin or cheaper fabric first. Doris is a little fabric eater, especially if you use a directional print as I did. I used the whole 2,45 metres I had and couldn’t have cut it out with less fabric. (I made a second version with just a bit over 2 metres of fabric – non-directional – but it’s a lot easier if you have a little extra fabric to handle.) I’ve attached a picture below for you to see the layout for my size (UK 10 at the top graded to a 12 from hips down). It took quite a while until I had this layout figured out. I don’t often have more than 2 metres of fabric length in my stash, so I was super lucky that the lady cut me some extra as it was end of roll fabric.

The construction part was fairly easy. The most time-consuming bit is certainly overlocking and sewing together the seven skirt panels and inserting an invisible side zip. Apart from this, the dress came together very quickly. I chose a faux button-up front, which means I did not sew real button holes and just put on the self-covered buttons stitching through all layers. The dress isn’t fully lined and comes with a very uncomplicated facing instead, which is much more convenient for hot summer days. Fitting is not much of an issue, as the skirt is super wide and the top is shaped by tying a bow in the back. It might certainly be a challenging project for beginners but just a half-a-day project for the intermediate sewer.

Sew Over It Doris Dress by thisblogisnotforyou.com

Sew Over It Doris Dress by thisblogisnotforyou.com

Sew Over It Doris Dress by thisblogisnotforyou.com

My favourite place I wore this dress in – a very close second place goes to my mum and dad’s legendary summer party is all I say – was at the childhood home of Astrid Lindgren in Vimmerby, Sweden. We had such a blast on our summer vacation in Sweden and visiting this amazing place where one of my absolute favourite authors grew up was such an amazing, inspiring experience. Aslan also did pretty well posing for pictures! Sew Over It Doris Dress by thisblogisnotforyou.comSew Over It Doris Dress by thisblogisnotforyou.com

Will I make it again? This is easy to answer. I already sewed a second one that’s just missing the zip and some buttons. I made it in a more autumnal fabric and hope to wear it with tights this winter!

I really need to get started with my winter wardrobe now, though… Any suggestions?

xx

Charlie


Happy sewing!

facebook/bloglovin/pinterest
twitter/instagram

Stay in touch!

Make It Your Own: Updating a T-Shirt with Stencils

Stencil Refashion by Thisblogisnotforyou.com

Hello there! Today I want to share a really fun & quick project to personalise or update your t-shirts! This is really easy to do and the perfect project if you feel like a creative project but don’t have a lot of time on your hands. It only took me a couple of minutes plus the time it needs to dry. I love those little projects that you can squeeze in after work.

The lovely folks over at Stencil Revolution offered to send some stencils for me to try. What I love about their company is that it’s a small, family-owned operation that developed out of what originally was a street art forum. I love supporting upcoming creative businesses and I really had a great experience with them. They offer a large variety of designs and sizes (for decorating walls etc), I stuck to smaller sizes as they seemed a better fit for decorating shirts, fabrics and tote bags.

These stencils are not very expensive but are very long lasting. It’s a hard plastic sheet that you can wipe and wash and reuse many times. I had specific project ideas in mind when ordering the three larger stencils. But I picked the arrow stencils knowing this would be a motif I will probably use over and over again! Obviously, you can use these for walls, furniture, bags etc., too. I just love a t-shirt refashion and I buy plain white & black t-shirts every once in a while for exactly these kind of projects.

Stencil Refashion by Thisblogisnotforyou.comStencil Refashion by Thisblogisnotforyou.com

So, how does it work?

First of all, here’s what you need:

– stencil templates 
– fabric paint (I used black and light blue/turquoise)
– small dry sponge
– old plate or plastic container to pour the paint in
– masking tape
– a piece of cardboard (big enough to place under the area you are using colour on)
– iron & iron board

Stencil Refashion by Thisblogisnotforyou.com

  1. Prepare the shirt/fabric and template.
    If necessary, you might want to iron the shirt to make sure there are no creases. Clean the template if you used it before, to make sure it’s dry and there no residue colour. Use some masking tape to tape the template into place. It’s very important that it doesn’t move once you start with the colour.
    If using this on a shirt, place a piece of cardboard between both fabric layers. Otherwise, the colour might come through and leave stains on the back. A hard, smooth surface also makes it easier to get a neat result.
  2. Pour fabric paint onto your dish and dab your dry sponge in it. Dab it a couple times more onto the plate to have some of the paint come off. Using too much paint might need to colour bleeding. If you want to get crisp edges, make sure you use less paint and apply it in several layers.
  3. Dab the paint onto the fabric. Try not to use stroking motions as this might lead to blotches and colour bleeding as it gets under the template. This will also give the paint more of a sprayed “graffiti” look.
    If you want an ombre effect as I did with my project, start with the lighter colour. I used the light blue for the first layer, let it dry a bit and then dabbed over it with black again. For the colours to blend softly you really want to use as little paint on the sponge as possible. Work in layers until you get the opacity that you like.
  4. Let it dry. I usually remove the template afterwards. If you remove it while the paint is still wet it might smudge and blur.
  5. Once it’s dry remove the template and iron your fabric from the wrong side to set the colour.
    That’s it, you’re done!

Stencil Refashion by Thisblogisnotforyou.comStencil Refashion by Thisblogisnotforyou.com

I’m planning more projects with these stencils. They would also make a great project to do with kids. That Bill Murray will go on a tote bag for sure!

I’m looking for some nice gold or rose gold textile paint. Do you have any recommendations?

xx

Charlie

Please note: As always, all opinions are my own. All my product reviews are completely honest. I was gifted this product, but not asked to review it or given compensation for doing it.

Happy crafting!

facebook/bloglovin/pinterest
twitter/instagram

Stay in touch!


Another Sew Over It Love Affair: Mia Jeans & Juliette Blouse

SEW OVER IT Juliette Blouse and Mia Jeans by thisblogisnotforyou.comSEW OVER IT Juliette Blouse and Mia Jeans by thisblogisnotforyou.comSEW OVER IT Juliette Blouse and Mia Jeans by thisblogisnotforyou.com

SEW OVER IT Juliette Blouse and Mia Jeans by thisblogisnotforyou.com

SEW OVER IT Juliette Blouse and Mia Jeans by thisblogisnotforyou.com

Hello there. I hope you’re not getting tired of me sharing Sew Over It makes 100% of the time. I’ve been wondering myself what draws me to these patterns (after just buying and cutting out a bunch of new ones…) and I think it’s the simplicity of the construction, the versatility and having found that for most of their patterns I do not need to make any adjustments. And that’s just such a huge time saver! I rarely have these moments anymore where I feel like picking a super complicated Burda masterpiece that I most likely will only wear once or twice. I crave patterns that I can make in a day over the weekend and can wear to work on Monday.

The Juliette Blouse took me a bit more than a day, as I needed to wait until the sewing shop opened on Monday to find matching buttons! I actually found the exact same colour, a peachy pastel pink, which was a little weird but I carried those two buttons home as if I found the most precious treasure, I can tell you.

This was the first time making this pattern and I really like it. I had no adjustments to make, as it’s quite loose-fitting. The fabric is a peachskin polyester with a little bit of weight to it, which works really nicely with the drape on the front detail. I love those little sleeve cuffs, they make the blouse look so elegant. We had a super hot summer, so I haven’t worn it often yet. I already see myself wearing this to death in autumn.
SEW OVER IT Juliette Blouse and Mia Jeans by thisblogisnotforyou.com

SEW OVER IT Juliette Blouse and Mia Jeans by thisblogisnotforyou.com

SEW OVER IT Juliette Blouse and Mia Jeans by thisblogisnotforyou.comSEW OVER IT Juliette Blouse and Mia Jeans by thisblogisnotforyou.comSEW OVER IT Juliette Blouse and Mia Jeans by thisblogisnotforyou.com

The Mia Jeans does not need an introduction, I guess. I stopped counting how many Mias I’ve made and plan to make. It might soon overtake my Ultimate Pencil Skirt collection in numbers. I found this really cool stretch cotton in our local sewing shop. I wasn’t too sure about the print when I saw it on the roll, but I went for it and I really love it now. Such a cool trouser fabric! I got a lot of compliments wearing this. And it’s also really comfy to wear because of the stretch.SEW OVER IT Juliette Blouse and Mia Jeans by thisblogisnotforyou.comSEW OVER IT Juliette Blouse and Mia Jeans by thisblogisnotforyou.comSEW OVER IT Juliette Blouse and Mia Jeans by thisblogisnotforyou.com

Oh, and here’s a picture of me changing in the car, hehe. Anyone else do that when they take pictures for the blog? I’m being honest here – we do not take pictures just before I head out to work wearing my outfits. I would not have the nerve. Also it takes a lot of coaxing for the husband to comply with all this. (The current price is one round of board games per outfit…)We take an afternoon and drive somewhere and take pictures of several outfits during those sessions, so I sometimes have to get dressed in the car. This way I only have to get my hair done and apply makeup once! I noticed that I really need this as I feel much more comfortable having my picture taken when I had time to doll myself up a little.

What are you making on the weekend? I currently have cut out a Florence Dress and a Doris Dress (both Sew Over It), which I’m really exited about. The Florence will be a first. I have already made a beautiful Doris, which I’ll share real soon!

xx

Charlie


Happy sewing!

facebook/bloglovin/pinterest
twitter/instagram

Stay in touch!

The Impact of Sewing on Body Image

Sewing and Body Image by thisblogisnotforyou.com
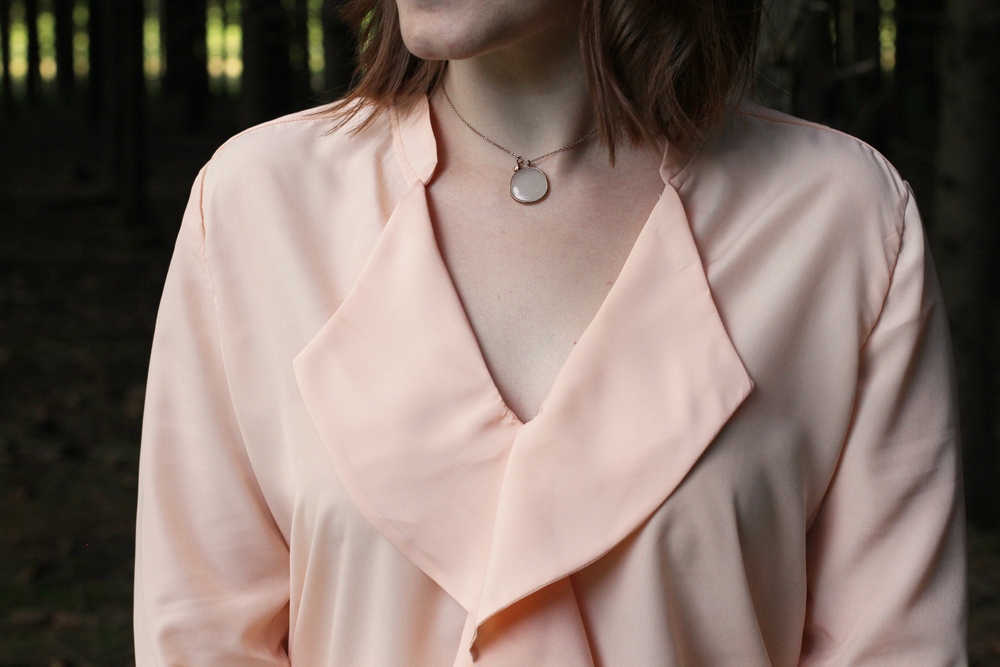
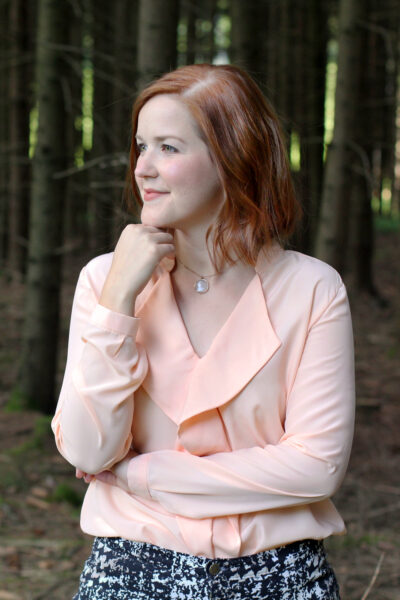
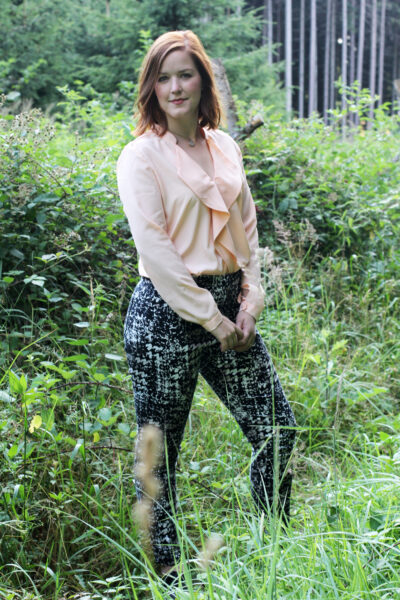
When I’m not sitting behind the sewing machine, I work full-time as a psychologist. This is why I every once in a while share a mental health-related post on this blog. Please grab a coffee and join the conversation!

***

This isn’t a scientific research article. As there is very little research to review on this topic, information given in this post is largely based on my work experience and training as a mental health professional. 

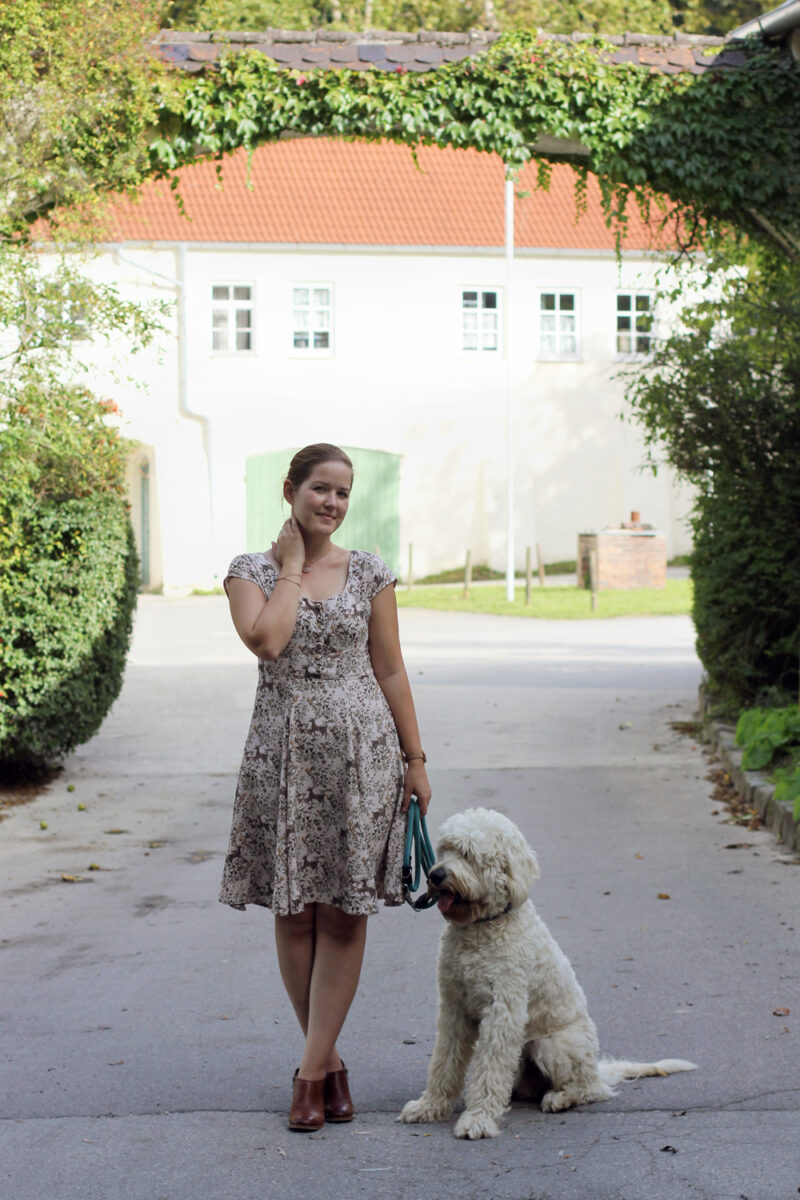
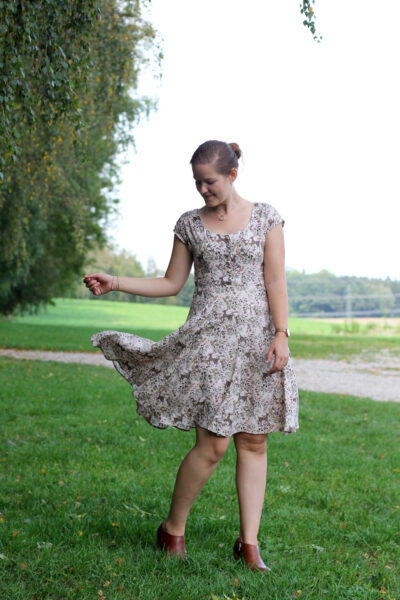
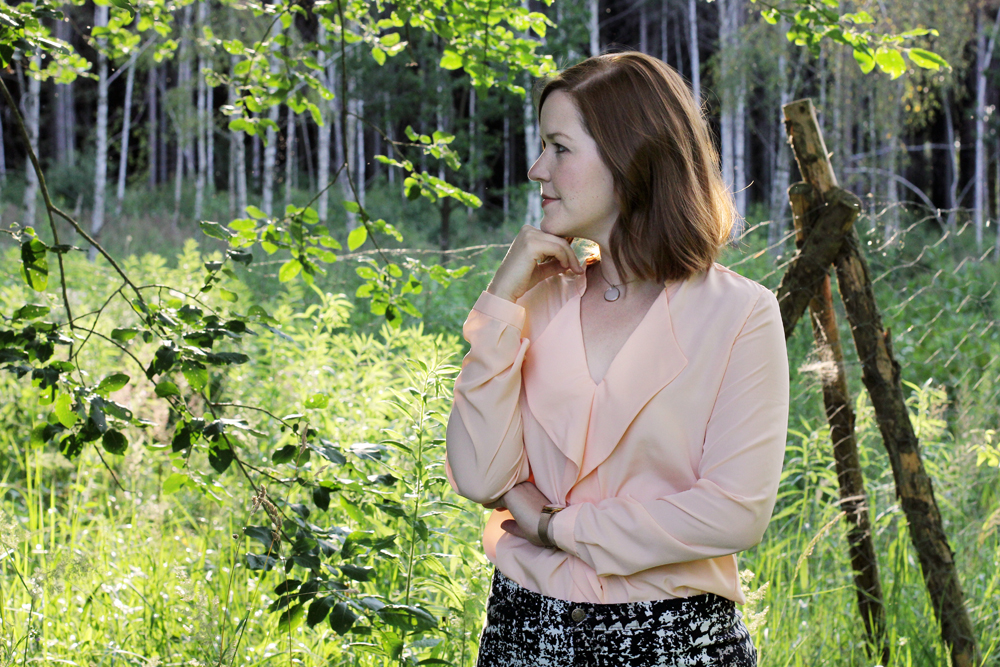
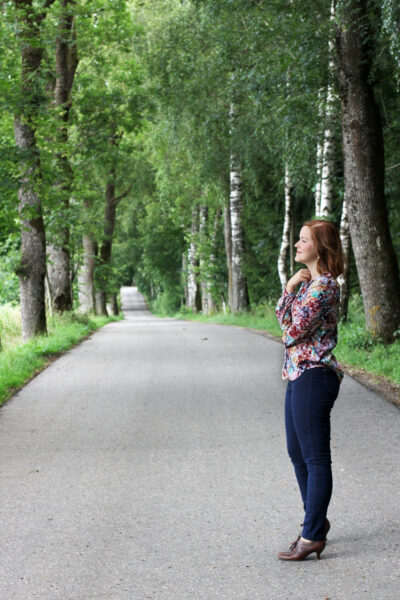
For a long time I have been wanting to write about making your own clothes and its relationship to body image. While sewing encompasses our skills, tools and materials, our bodies are the foundation when it comes to making and wearing garments. I myself feel like I developed a healthier body image of myself since starting to sew my own clothes. There are many other sewing bloggers who have written about how they feel sewing affected their perception of themselves. (I’ve put together a list of blog posts I could find at the end of the article.)

Why is that? And how can sewing help to see ourselves in a more positive light?  First, let’s have a look at the term “body image” to know what exactly we’re talking about.

Body image is the mental representation you create of yourself and the way you look. It consists of the mental image you have of your own physical body, meaning your size, shape and appearance, as well as your personal attitude toward that physical self. Your attitude is made up of your thoughts and feelings and also beliefs about your body. All this together is your “body image”. And, this mental image of your body does not necessarily represent reality.  It is also not super stable and can change as it is subject to all kinds of distortion from moods, perceptions, feelings as well as a number of social factors.

Sewing and Body Image by thisblogisnotforyou.com

Healthy body image has to do with self-acceptance and self-compassion. It means you are comfortable with the body you have, even when you do not think that you are perfect. It is about accepting flaws, embracing the body that is given to you and caring well for it.

When someone has a negative or unhealthy body image they find it very hard to accept and think positive about the way they look. They might be very preoccupied with perceived flaws. They might experience discomfort, disgust and shame, as they will also believe that others think about them in the same way. Severe dissatisfaction may result in a constant desire to change their body, even when such changes are not achievable. Negative body image may contribute to low self-esteem, unhealthy eating behaviour and therefore might affect your well-being. In severe cases unhealthy body image might cause severe distress,  contribute to depression, eating disorders, body dysmorphic disorder, self harm etc. In those cases the help of mental health professionals is needed as it seriously affects functioning and quality of life.

Healthy body image is not synonymous with healthy body weight. It this case we’re  differentiating between physical and mental health (although these two are very much connected). Even if you’re over- or underweight, it is important that you find ways to accept yourself the way you are, whether there is a need to get to a healthier body weight or not. A diet or lifestyle change will be more successful and long lasting if you do it out of self-love and self-care instead of disgust and self-hate.

The term “body positivity” appears to be now used interchangeably with the term body image, whereas body positivity sounds “trendier” and appears less connected to mental health problems such as eating disorders and body image disorders, self harming etc. I am a bit cautious using both terms as synonyms, as body image is a very complex term consisting of many factors and variables, whereas body positivity mainly focusses on loving yourself unconditionally. Your body image will always contain negative perceptions, too, as it is normal to be critical of yourself. The extreme promotion of body positivity seems to lead to a converse trend of not allowing body negativity. People that are “objectively” perceived as beautiful (if there even is a chance that we can speak of being objectively beautiful…) are often openly and very harshly reprimanded on social media for “attention seeking behaviour” when they open up about not liking themselves. But this isn’t my topic today (I’ll save it for some other time, though.)

Many of skills we use when sewing a garment for ourselves are similar to certain therapeutic techniques used for building positive body image.

In my profession as a psychologist, I used to mainly work with eating disorder patients for a while, a group suffering from one of the more severe forms of body image disturbance. There are various methods and techniques to try and help someone change their perception of themselves. I’ve noticed that many of these techniques that focus on observation, non-judgment, neutrality, acceptance and self-compassion are  similar to certain skills we use when sewing a garment for ourselves.

I found this very exciting, as I’ve shared the opinion that sewing changes body image in a healthy way, but there is pretty much no research on this topic so it is hard to pinpoint the causalities and correlations.

When sewing, instead of rejecting your body, you are working with it.

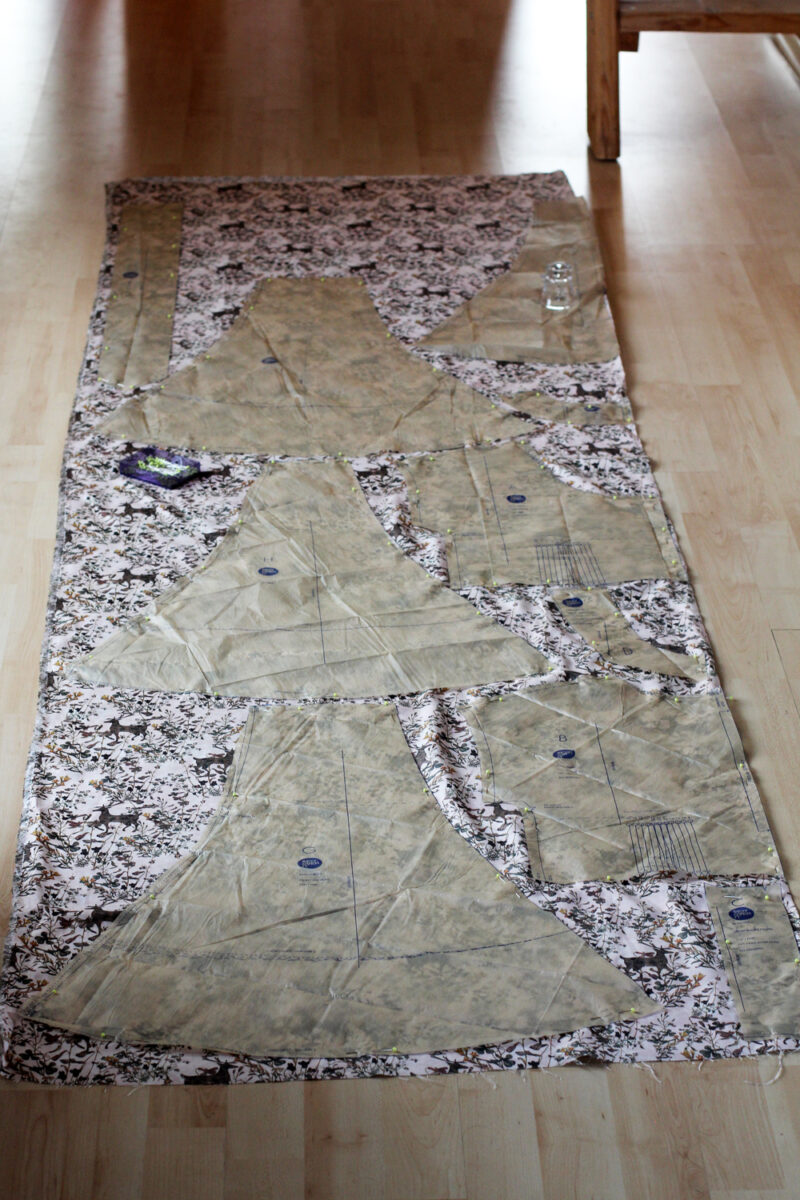
It’s hard to reject your body when you sew. As it is our foundation, we have to work with it. Working with instead of rejecting it means we are a big step closer to embracing our bodies and what we look like. To make a garment fit your body, you have to go beyond the “I don’t like the way it looks on me” or “my body doesn’t fit the pattern”. You have to take a step back and look at yourself from a more objective angle. You’re looking at general forms and thinking in shapes instead. You’re on a very different level of judgement. Instead of judging the way you look and whether or not you like the overall image of yourself, you’ll be judging whether one shape matches the other shape and if not, where and what you have to mathematically tweak in order to make it fit. This is a healthy way of observing yourself in a more neutral, constructive way and taking a step back from judging yourself in unhelpful ways.

Sewing and Body Image by thisblogisnotforyou.com

We tend to compare ourselves to others all the time. This is reinforced through social media. The sewing community is no exception, but it’s certainly a „slightly healthier crowd“ to compare yourself with. It’s about achievable goals, constructive skills and support. You might notice that almost no one has a perfect body. Everyone has to make adjustments. It’s a very rare thing to fit into the ‘average size’. Reading about other people’s experience when sewing a certain pattern and learning about their struggles with fit, can help to develop some self-compassion toward your own body shape.

There has been research on the link between body image and self-esteem and the link between self-esteem and creativity. Body image and self-esteem are different concepts, as self-esteem focuses more on personal strengths and self-worth which can be valued on more factors than just your physical appearance. According to research, body image and self-esteem are linked, but the direction of the relationship is not clear. They affect each other in many ways. Making your own clothes certainly influences the way you gauge your self-worth. Making and wearing handmade clothes might lead to higher feelings of self-efficacy as well as self-sufficiency which are quite empowering. This, in turn, might influence, but it doesn’t necessarily need to lead to, a better body image. There is good cause to believe that having a number of different things that you value about yourself leads to a more stable and solid perception of yourself and your self-worth.

Research definitely supports the hypothesis that creativity and self-esteem are directly linked (even stronger for females than for males). Our creative skills might also help us to deal with body dissatisfaction in other ways. For example, let’s look at fluctuating weight and sewing.

If the clothes don’t fit you, put your energy into changing the clothes, not your body.

Obviously, when we sew garments, we have to measure ourselves regularly. One inch more or less makes a difference. Changes in weight and shape are much more noticeable. But there are also many more options of dealing with those changes. We sewers have a very empowering set of tools!
Sewing blogger Tasha says “When I’m standing in front of a dressing room mirror and no pair of pants I try on looks good or feels right, I think that encourages me to feel like I need to change, like my body is not right” But, with making your own clothes, you have the tool to change the garment, not your body. Your body is fine as it is – the clothes do not fit! And that is changeable. You know how to do that: you can cut out a size bigger or smaller, pick more flattering shapes and fabrics, let out or take in some seam allowance, etc. You have a set of skills to make body changes count less and make self-efficacy count more.

Sewing clothes instead of going shopping saves us from exploitative marketing strategies that feed on women’s body dissatisfaction, self-consciousness and low self-esteem.

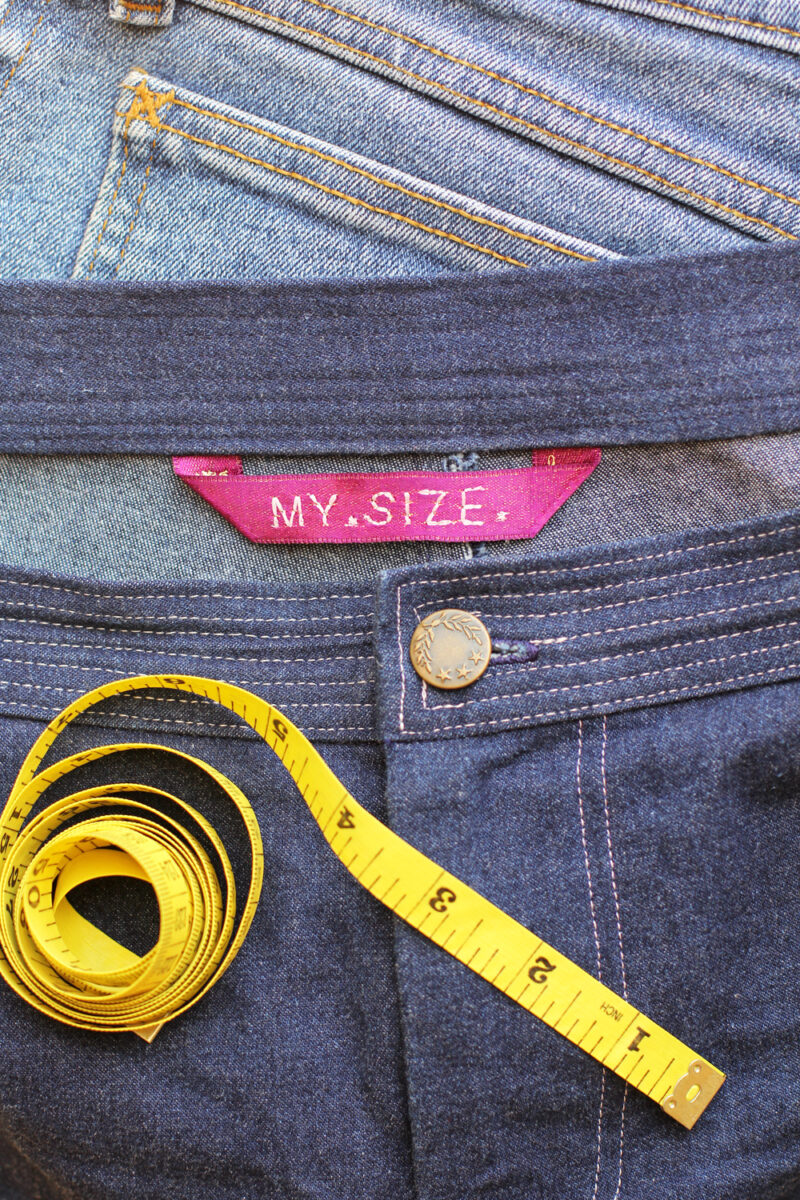
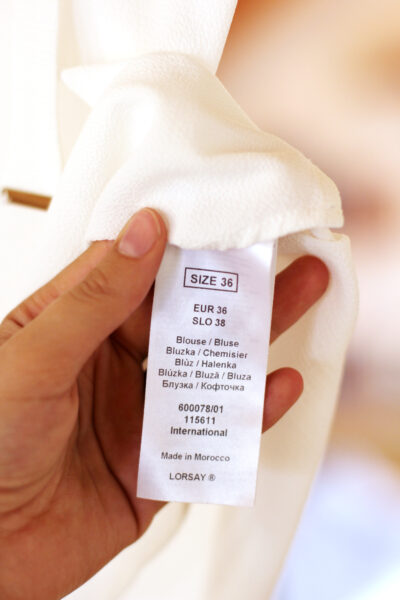
Being able to make your own clothes also saves you some really frustrating shopping trips. Clothes sizes play a major role in pigeonholing ourselves into “good or desirable” sizes and undesirable sizes. What makes this even more frustrating is the fact, that there is no standard for sizing when it comes to women’s clothes. Unlike men’s clothing, there are no direct measurements, but categories such as a “size 6/32”, a “size 12/38” etc. Different countries, and even different brands, use different sizing for those categories. Unfortunately, consumer culture shows an unhealthy trend of making those categorical sizes smaller over time. That means a woman with a size 12 might be a size 14 after a while, without gaining a single pound. As clothes and beauty ideals are very much connected, so are clothes and body image. Women tend to see clothing size in direct relation to their body size. The size she is wearing might very much affect how beautiful a woman feels. To make this even more confusing, there are marketing tactics such as “vanity sizing”, scaling down clothing sizes, so that consumers suddenly fit in smaller sizes. This strategy feeds on women’s body dissatisfaction and low self-esteem – counting on women to pay more for a smaller size.

Sewing and Body Image by thisblogisnotforyou.com

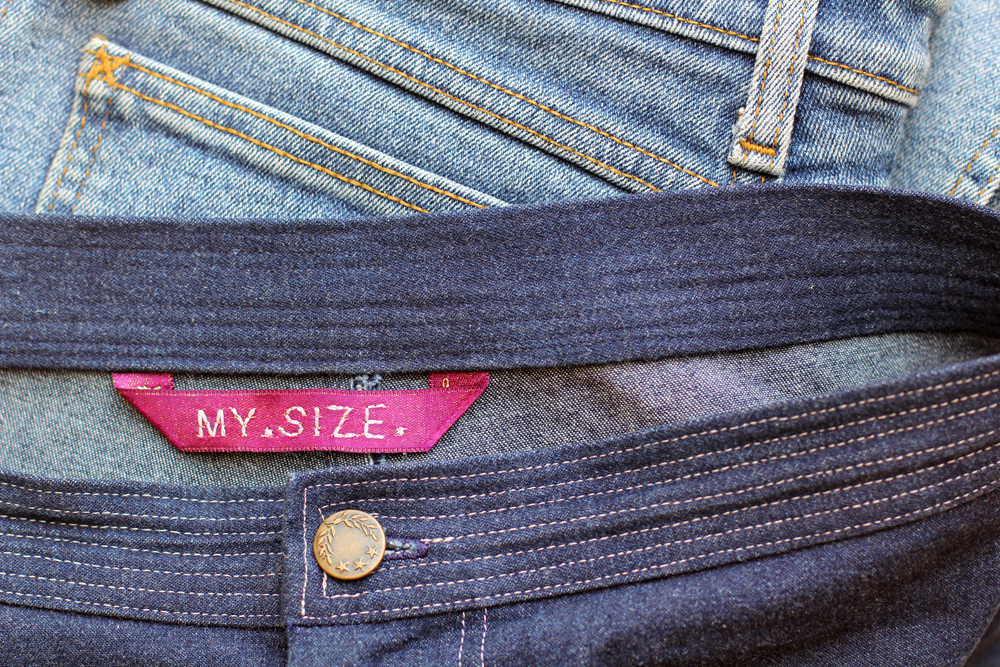
By the way, there is also no consistent sizing when it comes to different sewing pattern brands. But size becomes less important and “just a number” once you start seeing through this system. We are also able to cut between sizes, merge sizes or alter patterns altogether. I mainly use sizing as a rough guide to cut out a pattern. I often cut out one size larger and take in the seam allowance where necessary. So, when making garments, we do not sew a Size 10 or a Size 36, we sew a “my size”. Decreasing the overemphasis on size and numerical identities boosts confidence and satisfaction with self. Furthermore, this helps to focus more on individual style and personal traits as key components of beauty. So let’s create some garments at home and save us some frustrating shopping trips!

There are various ways in which making handmade clothes can help with a healthier body image. Sewing might not necessarily lead to 100% self acceptance and uncompromised body positivity, but it might help to develop a more holistic, stable mental image of yourself and your body, that is less prone to quick fluctuations.

After all this talk about positive body image … don’t forget: It’s ok to feel body negative, too. It’s hard when we look in the mirror constantly and don’t like what we see, it’s hard when your handmade clothes suddenly don’t fit anymore, it’s hard to run around with a measuring tape all day. It’s hard if you feel like a pattern you love looks better on everyone else. It’s hard to have to cut out a larger size. There will be days like that, too, and sometimes even sewing won’t change that. And that’s ok.

All in all, sewing is good for you! It is not only a fun, creative hobby, it also helps in unexpected ways. It’s healthy and pays off in all kinds of good ways.

Sewing and Body Image by thisblogisnotforyou.com

So next time you feel guilty for spending too much time behind the sewing machine, remind yourself that sewing may be a little like taking a trip to a spa – and what can be wrong with some spa time?

***

If you found this article interesting, I think you might enjoy reading the following posts:

Interesting articles by other sewing bloggers on the topic:

xx

Charlie


Happy sewing!

facebook/bloglovin/pinterest
twitter/instagram

Stay in touch!


Research & Further Reading:
Ronald E. Goldsmith & Timothy A. Matherly (1988) Creativity and Self-Esteem: A Multiple Operationalization Validity Study, The Journal of Psychology, 122:1,47-56, DOI: 10.1080/00223980.1988.10542942
Tiffany M. Stewart (2004) Light on Body Image Treatment: Acceptance Through Mindfulness, Behavior Modification, Vol 28, Issue 6, pp. 783 – 811, DOI: 10.1177/0145445503259862
Kinley, T. R. (2010), The Effect of Clothing Size on Self‐Esteem and Body Image. Family and Consumer Sciences Research Journal, 38: 317-332. DOI: 10.1111/j.1552-3934.2009.00027.x
Kumar Tiwari, Gyanesh & Kumar, Sanjay. (2015). Psychology and Body Image : A Review. SHODH PRERAK: A Multidisciplinary Quarterly International Refereed Research Journal. 5. 1-9.
Grogan, S. (2008). Body image: Understanding body dissatisfaction in men, women and children (2nd ed.). New York, NY, US: Routledge/Taylor & Francis Group.

Feeling Great in Mia Jeans & Carme Blouse

Mia Jeans and Carme Blouse by thisblogisnotforyou.com

Mia Jeans and Carme Blouse by thisblogisnotforyou.com

Mia Jeans and Carme Blouse by thisblogisnotforyou.comMia Jeans and Carme Blouse by thisblogisnotforyou.com

Mia Jeans and Carme Blouse by thisblogisnotforyou.com

Mia Jeans and Carme Blouse by thisblogisnotforyou.com

Mia Jeans and Carme Blouse by thisblogisnotforyou.com

Mia Jeans and Carme Blouse by thisblogisnotforyou.com

A Winning Team

Hello & meet my new two favourite pieces in my wardrobe! Can you tell how much I love this outfit from the photos? I just love the combination of textures, colours and silhouettes. Let’s have a look at those fantastic team members, shall we?

pattern: Carme Blouse by Pauline Alice Patterns
fabric: cotton lawn from local shop
amount: 1,5 m
other materials: 10 buttons, interfacing optional
cost:
Zero as fabric and buttons both were gifted to me. (+8€ for the pattern)
duration: It took me almost two full days.

First, there’s the versatile, but high-maintenance Carme Blouse. I’ve had this pattern in my stash for ages and knew by the look of it that this wouldn’t be a quick and easy make. It a PDF/paper pattern by Pauline Alice Patterns, who have a small but growing gorgeous range of patterns in their shop. I sewed this pattern without making any fitting alterations, so it’s basically straight from the envelope!

After so many years of sewing my own clothes you should think I could more or less tackle any technique, right? Well, say hello to pin tucks. Let’s just say there’s still oh-so many things to learn. Man, these pin tucks were some real suckers, especially constructing them with such a lightweight fabric. Luckily the print is crazy enough to hide the uneven pleats! Otherwise you could see that I struggled on the left front yoke and had it figured out reaching the far right side of the yoke. My tip: instead of following the pattern markings for the pin tucks, measure them out one by one as you go. This way you’ll get evenly spaced pleats. In the beginning I tried to follow the pattern markings – but if you’re off by just a millimetre the inaccuracy becomes very noticeable after a couple of pleats and it’s increasingly difficult to correct.

I used this luscious cotton lawn, which was a gift from the Mr for our wedding anniversary. He bought it at a local fabric shop, so I can’t give you any more info than that it’s fa-bu-lous. It might be a bit too noisy for such details as pin tucks, but it was an experiment and I love how it turned out. Together with some simple skinny jeans it’s not too crazy, right?

The pattern comes with really cool sleeve taps and a button-down front, which make the blouse quite versatile. I like to wear the top unbuttoned and sleeves rolled up. It looks a lot more casual and the white back of the fabric gives a nice contrast. The cute buttons were a gift from my sister which she bought on a trip to Korea.

***

Let’s check out team member number two!

pattern: Mia Jeans by Sew Over It (Capsule Wardrobe ebook, £20)
fabric: stretch denim from Alfatex.de (12,90€/m)
amount: 1,5 m
other materials: 12,5 cm long zip, one jeans button, fusible interfacing
cost: ~ 20€ (the ebook was courtesy of Sew Over It)
duration: ~ 3 hours

It’s the very low-maintenance Mia Jeans! It’s my fourth pair of Mia Jeans, a pattern by Sew Over It. It’s made from a stretch denim fabric and the only main alteration I did (and which I do with all my Mias) is that I lengthened them to full-length instead of ankle-length.

The top-stitching at the waistband got a bit out of hand. There are days when I love me some top-stitching and this was one of them. I think it looks really nice and it also gives a bit more structure to the waistband. The best part about making jeans is that I get to try new decorative stitches on the pockets every time. My sewing machine has loads of different ones which I sadly never really need or use, so I make an extra effort of putting them on all the pairs of jeans I make.

I used blush pink thread for the top-stitching and overlocked seams. You can’t really see it in the pictures, but it looks really nice up close.

The easy fitting and quick construction is what I love about the Mia Jeans. As the cut is quite simple, the fitting options are limited. I always use stretch fabrics and try to really stabilise the waistband so it doesn’t start gaping after a couple of wears. As it’s a quite high-waisted pair of  jeans it’s flattering as long as you haven’t had a big lunch. But I don’t mind, life’s too short to suck in your tummy!

Mia Jeans and Carme Blouse by thisblogisnotforyou.com

Mia Jeans and Carme Blouse by thisblogisnotforyou.com

Mia Jeans and Carme Blouse by thisblogisnotforyou.com

Mia Jeans and Carme Blouse by thisblogisnotforyou.com

Mia Jeans and Carme Blouse by thisblogisnotforyou.com

Mia Jeans and Carme Blouse by thisblogisnotforyou.com

jeans & blouse: handmade | shoes: second-hand Clarks | watch & jewellery: Skagen

I tried to wear this outfit as often as seemed appropriate recently without appearing like I have nothing else in my closet. I will definitely make a few more Carme Blouses, I’m sure! I might skip the pin tucks here and there and do a hack without them. I just really like the sleeve taps and button front.

As for the Mia Jeans – of course there will be more. My first pair was just about to come apart after two years of constant wear when I finished this one. So this is a constant cycle of sewing, wearing and burying the dead.

It’s crazy what a successfully handmade outfit does to your confidence. I’ve written about sometimes disliking myself in pictures in my last blog post. Well, not this time! Thumbs up to sewing boosting self-esteem, I guess.

xx

Charlie


Happy sewing!

facebook/bloglovin/pinterest
twitter/instagram

Stay in touch!