Organising with Chalkboard Paint

chalkboard paint organising jars by thisblogisnotforyou.com

This is a very quick DIY I did on the weekend. My messy boxes full of sewing supplies had been bothering me for quite a while. Normally I use plastic organising containers or empty cookie boxes, but buying containers can be quite expensive when you need a lot of them and I never find things after I put them in cookie boxes. I just have too many of them.

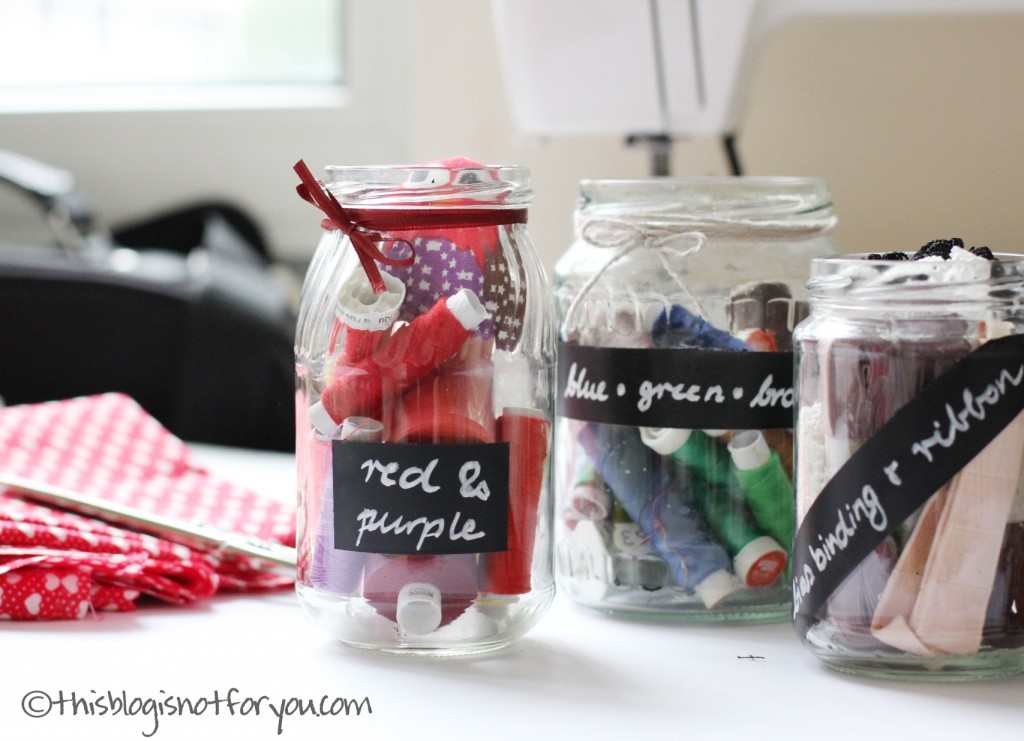
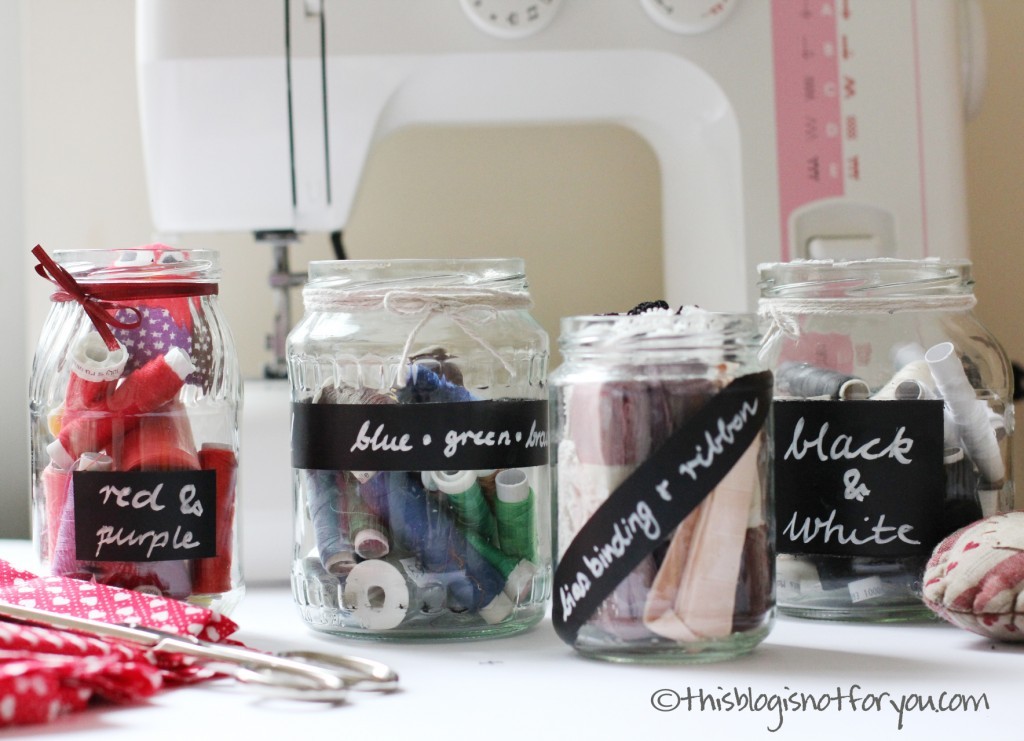
This DIY was inspired by a friend who sent me a picture of a craft/sewing room at IKEA Berlin. They had thread sorted in jars by colour. I liked the idea a lot – it looks so much better than plastic containers, is see-through (which is great for finding stuff!) and inexpensive.

I still had some chalkboard paint spray left from my previous chalkboard DIYs that I wanted to use for a weekend project.

It’s super simple, quick, decorative and inexpensive – sounds good?

chalkboard paint organising jars by thisblogisnotforyou.com

chalkboard paint organising jars by thisblogisnotforyou.com

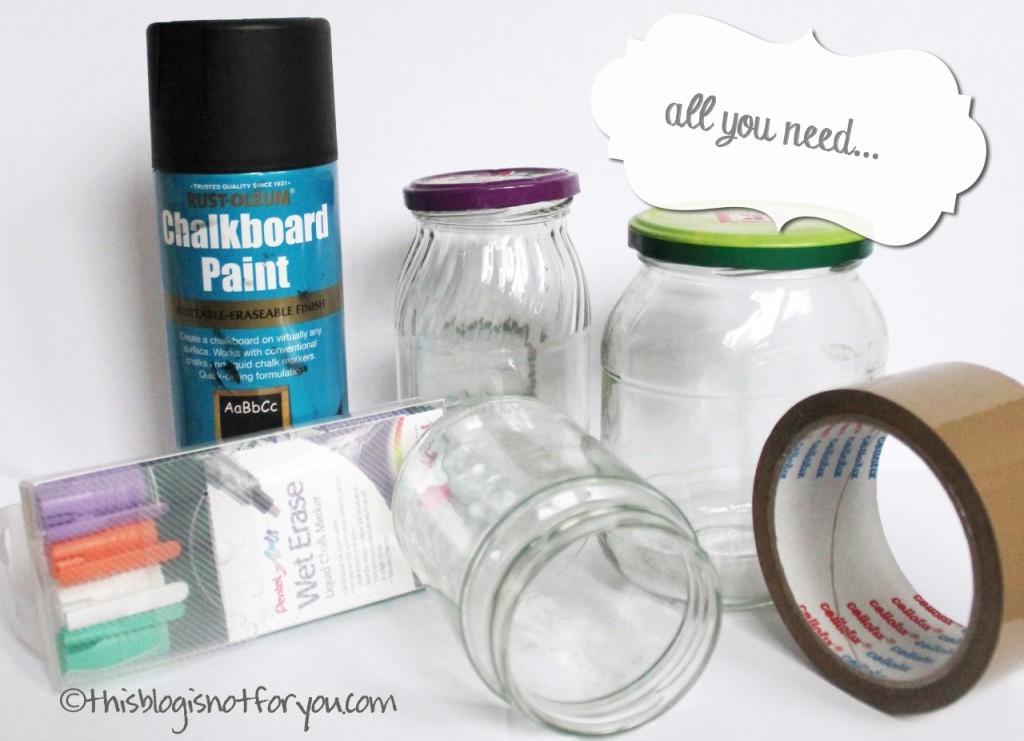
I covered the jars with tape and left out the different shapes for the labels. I sprayed it with chalkboard paint spray (2 coats) which only takes a few minutes. I let it dry for a few hours – just to be on the safe side (you don’t want to have fingerprints on it, do you?). You can spray the lids as well, if you want to.

I removed the tape (carefully!) and labelled the jars with wet-erase liquid chalk marker.

Tip: You can make corrections to the chalkboard paint using cotton buds and nail polish remover.

chalkboard paint organising jars by thisblogisnotforyou.comchalkboard chalkboard paint organising jars by thisblogisnotforyou.comorganising jars by thisblogisnotforyou1chalkboard paint organising jars by thisblogisnotforyou.com


DIY chalkboard hairslides

DIY chalkboard hairslides by thisblogisnotforyou.com
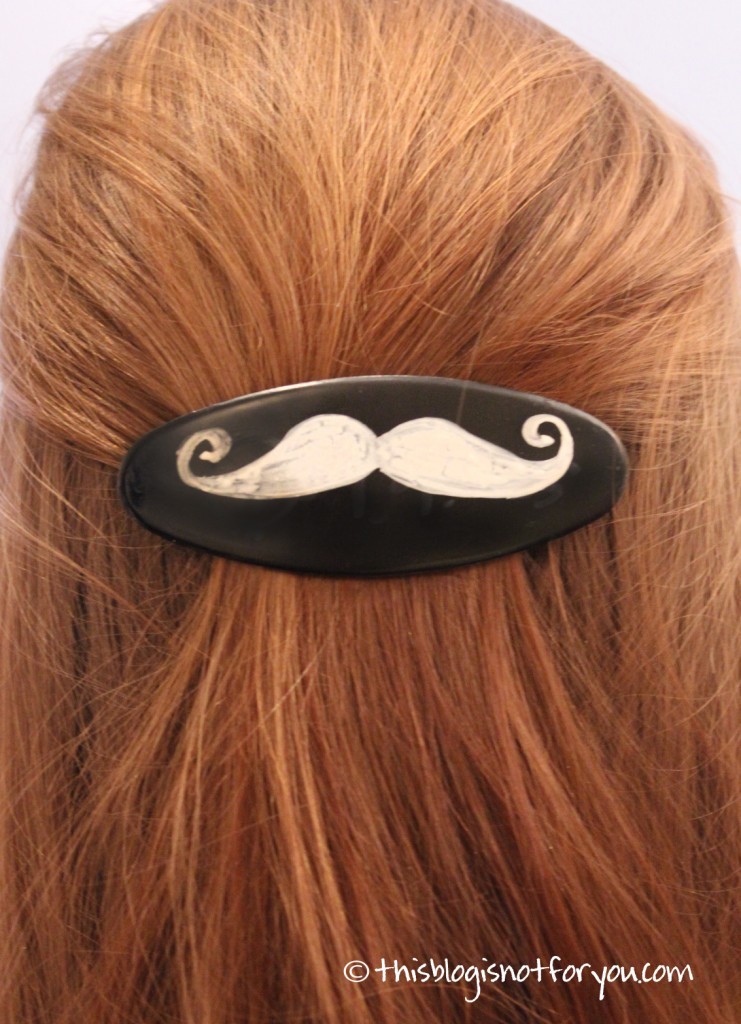
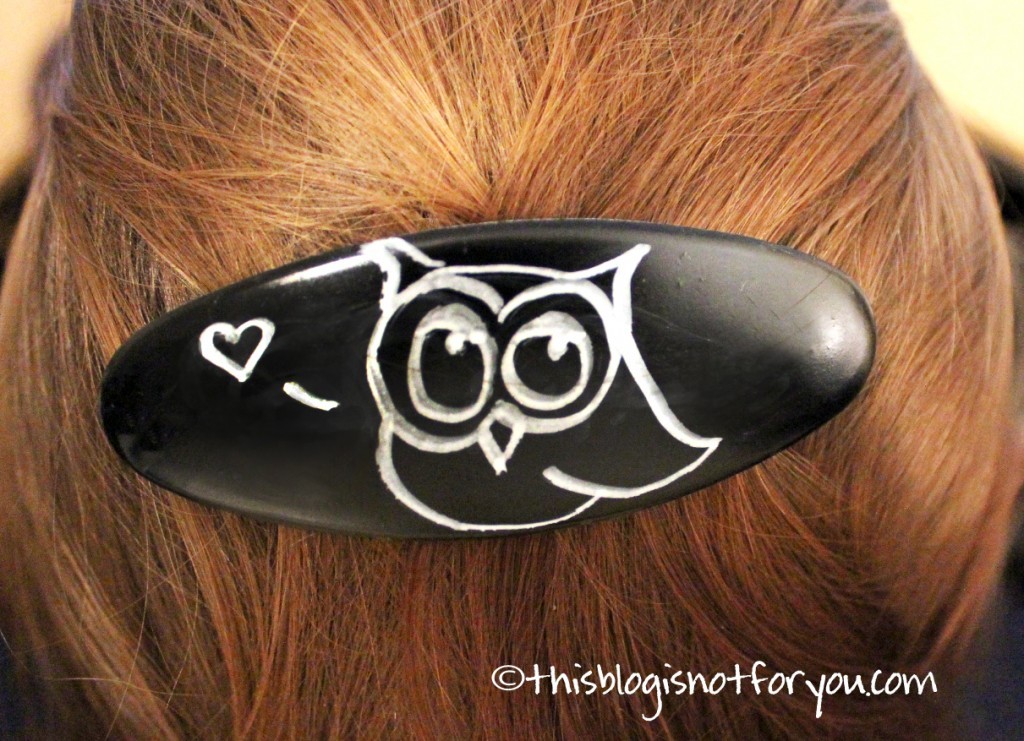
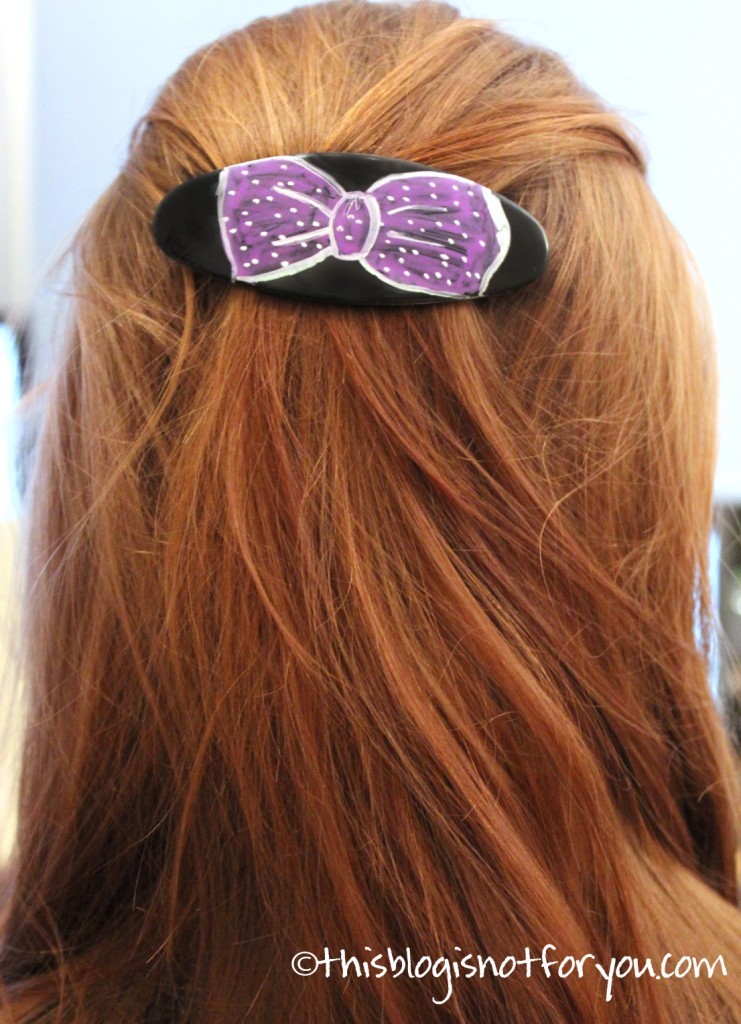
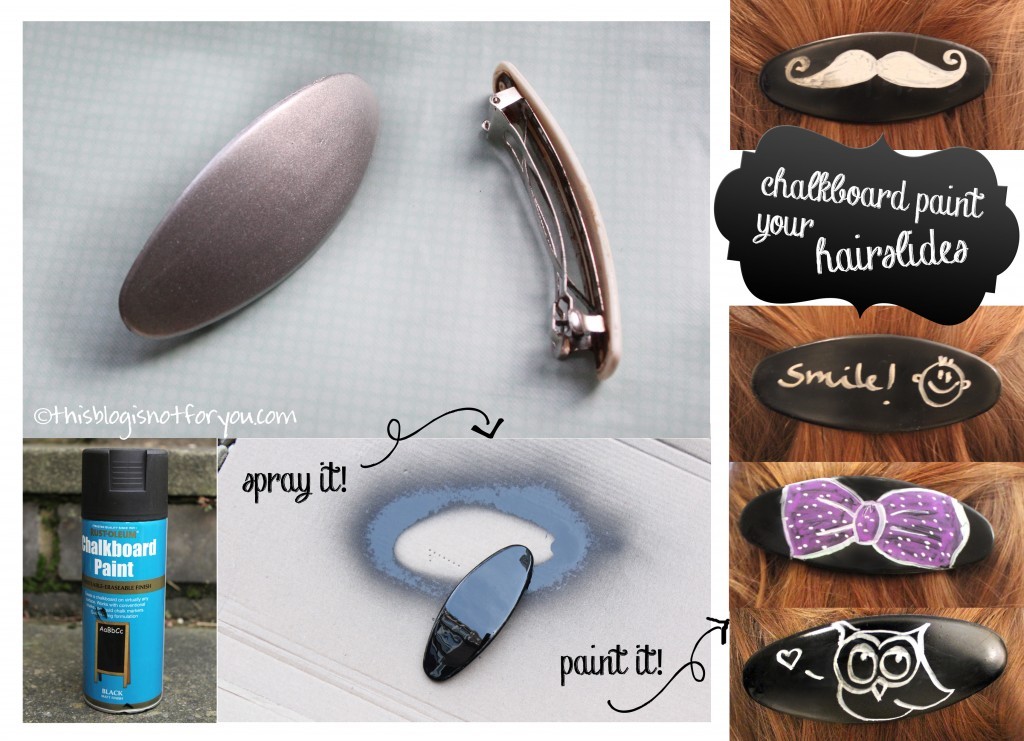
Here’s another chalkboard project! It’s super quick and super simple and so much fun!
Just find some old hairslides or clips (I’m pretty sure you have them!) and spray paint them with chalkboard paint. In my last chalkboard paint project I explained briefly how to do this (please don’t spray inside the house!!)

The fun part is painting the hairslides after the spray paint is dry. (Let it rest for a few hours or over night, depending on how many layers you put on – just to be on the safe side! You don’t want to have permanent fingerprints on it – although that could be a fun DIY idea…) For painting them I used liquid chalk markers, you can easily get them online or in craft stores and they are quite inexpensive. Sure, you could use normal chalk instead but it smudges very quickly.

Let the pictures speak for themselves:

thisblogisnotforyou.comthisblogisnotforyou.com

sweet dreams are made of this [bedtime candy, chalkboard paint project #1]

“It is one of life’s bitterest truths that bedtime so often arrives just when things are really getting interesting.”

— Lemony Snicket (A Series of Unfortunate Events, #11)

After seeing some pretty awesome chalkboard paint projects we wanted to do some chalkboard painting ourselves. So we ordered the cheapest paint we could find on Amazon. It finally arrived today and we started right away! We have guests over the weekend and I love to prepare Betthupferl (German for bedtime candy), so I had the idea of upcycling some old jam jars. I keep loads and loads of jars, sometimes they come in pretty handy. Since I never used chalkboard paint before, it wouldn’t have been great damage if the paint wasn’t good at all.

Here’s how I did it:

I used this brand, mainly because it was quite inexpensive. It was really easy to use and worked out well. I wouldn’t use it indoors, since it’s a spray and as you can see on the picture below it scatters the paint on a large scale. It’s best to hold it about 30cm from the surface and whilst spraying keep the can in motion. After applying the first layer wait at least 3-5 minutes until the next. For the jars one layer was enough, I did two though just to be on the safe side.

For labelling I used a liquid chalk marker. Fill with candy, apply ribbon – and you’re done! A cute idea and pretty simple to copy – our guests loved it!

So here they are – stuffed with goodies, sweet dreams guaranteed!

I’m afraid I’m a chalkboard paint addict now… There will be more chalkboard paint projects coming up for sure!