Florence Dress & Vineyards

Florence Dress Sew Over It by thisblogisnotforyou.com

Florence Dress Sew Over It by thisblogisnotforyou.com

Florence Dress Sew Over It by thisblogisnotforyou.comFlorence Dress Sew Over It by thisblogisnotforyou.com

Florence Dress Sew Over It by thisblogisnotforyou.com

Florence Dress Sew Over It by thisblogisnotforyou.comFlorence Dress Sew Over It by thisblogisnotforyou.com

Florence Dress Sew Over It by thisblogisnotforyou.com

Florence Dress Sew Over It by thisblogisnotforyou.com

SUMMER IN SWITZERLAND

The official first day of autumn has passed already. Although it’s still warm enough to live in t-shirts and dresses, foggy mornings and falling leaves indicate the cold season is just around the corner. Perfect time to share one of my favourite summer makes and vacation pictures. I’m feeling a little wistful summer is ending again…consoling myself with butternut squash and pumpkin soup really does help, though.

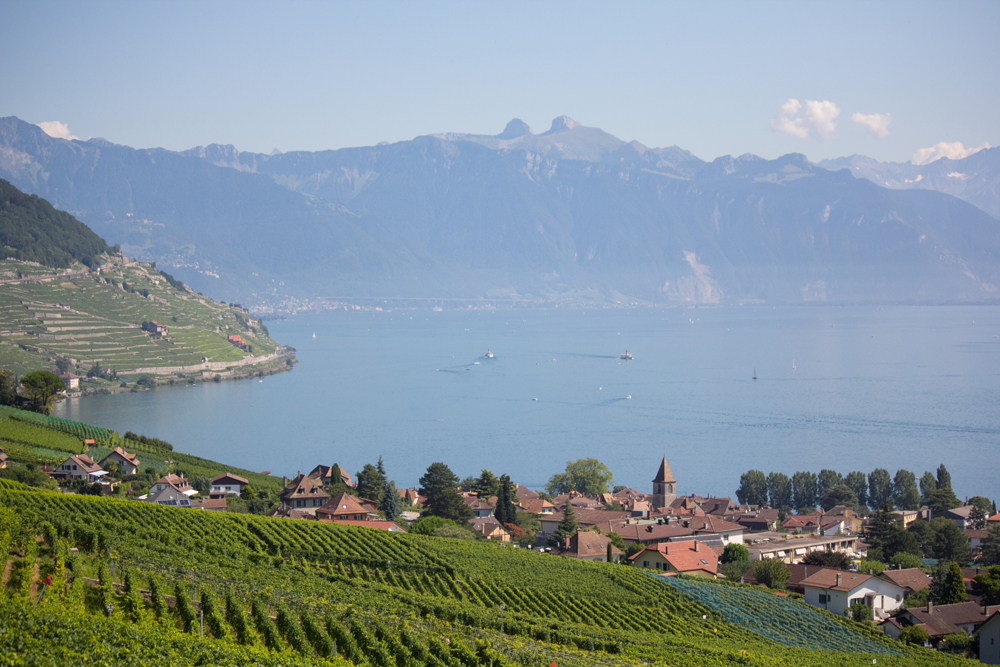
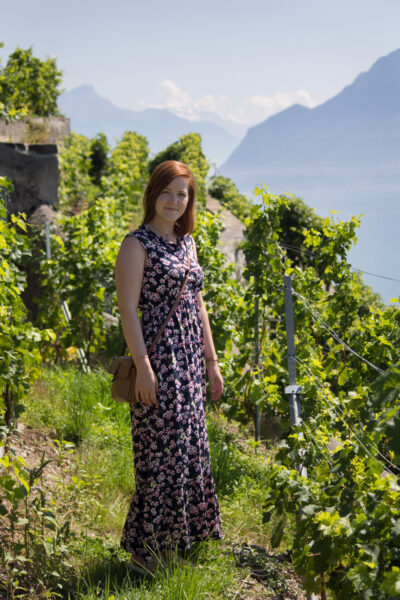
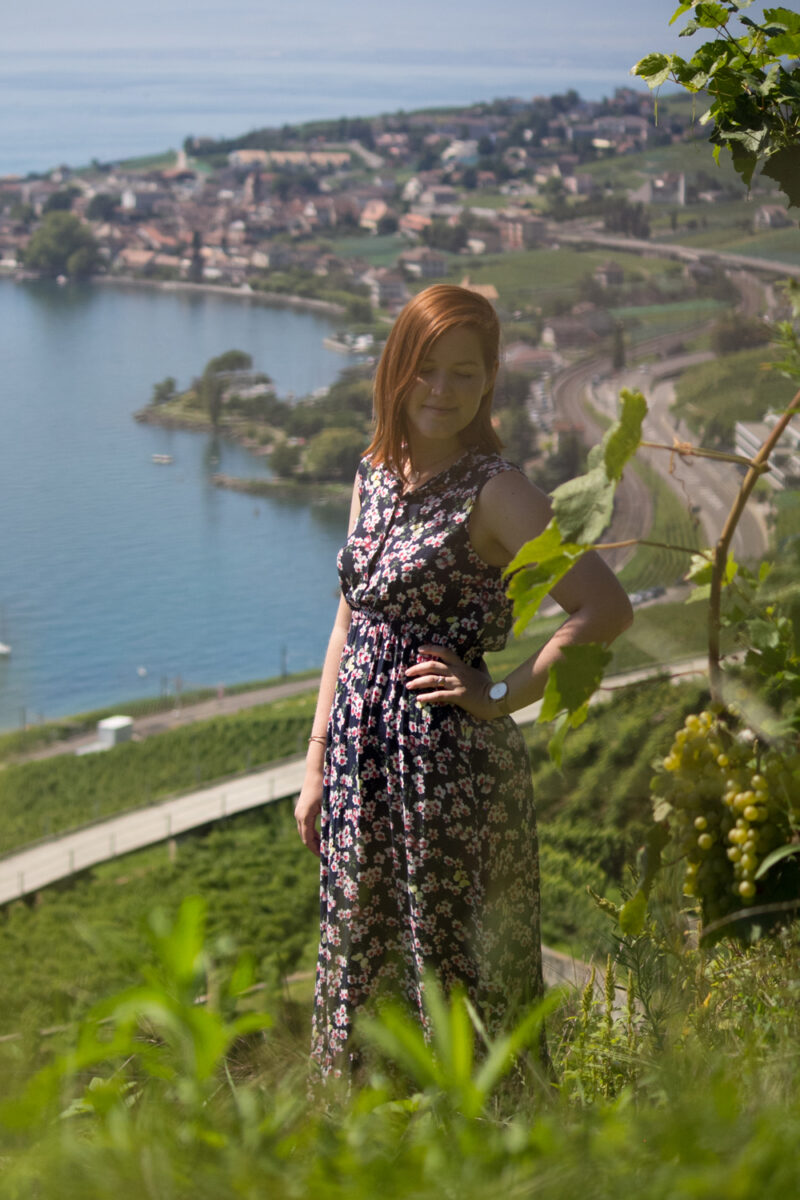
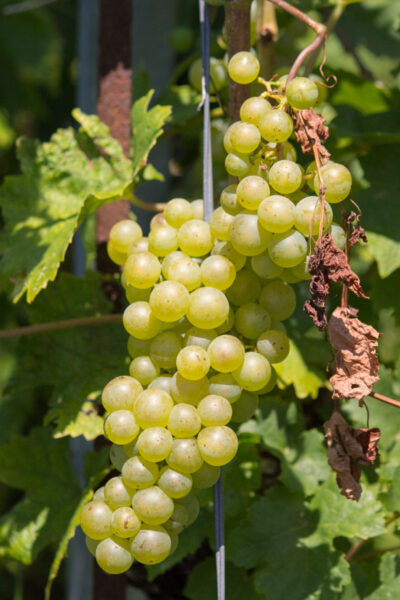
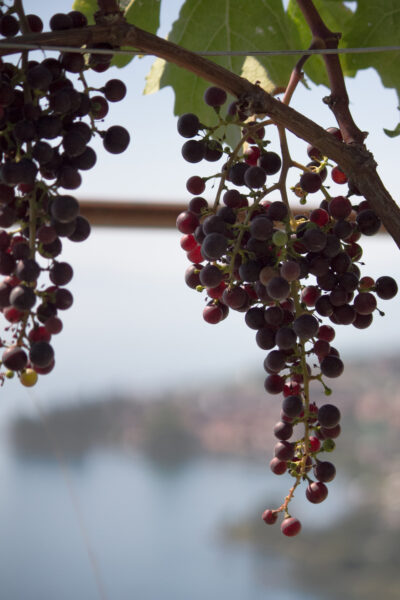
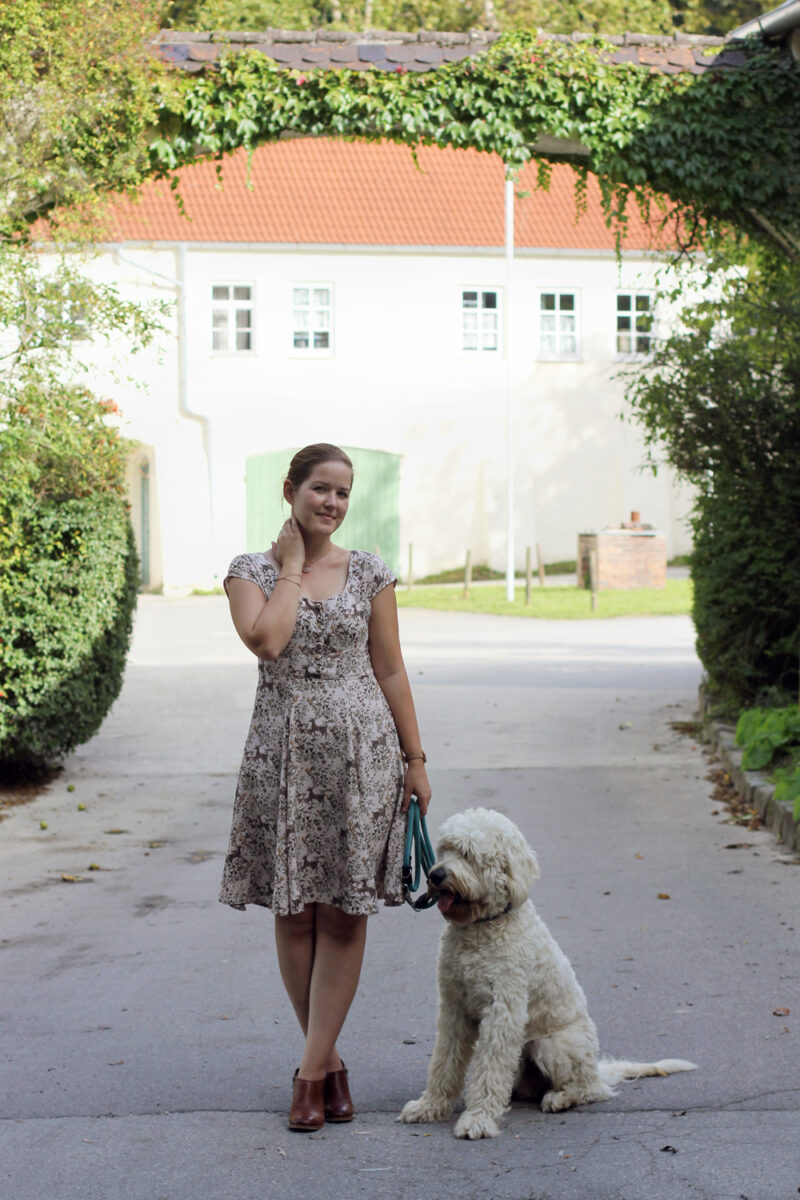
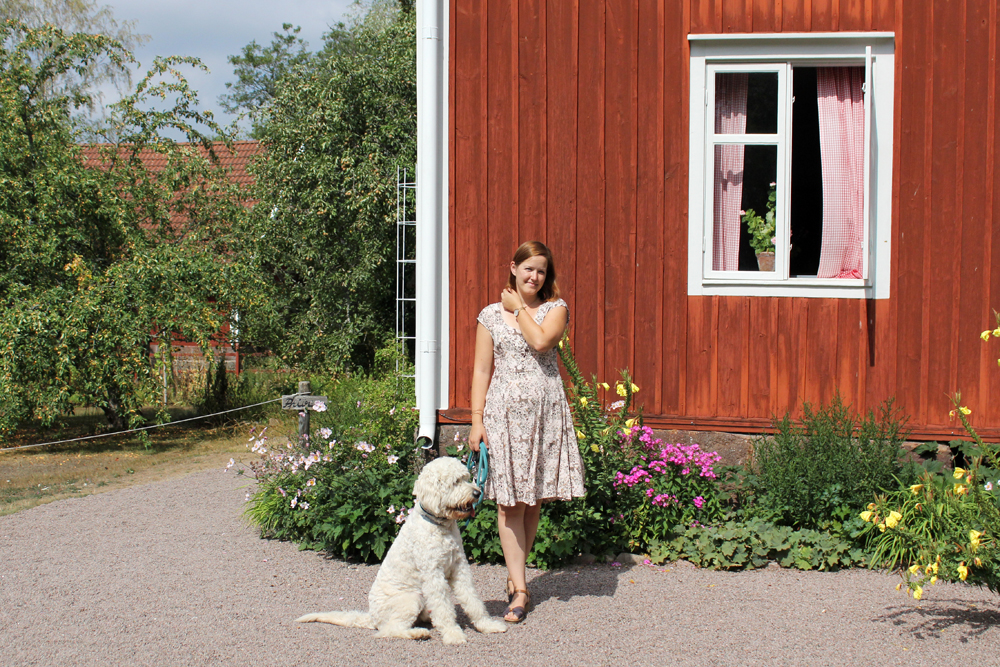
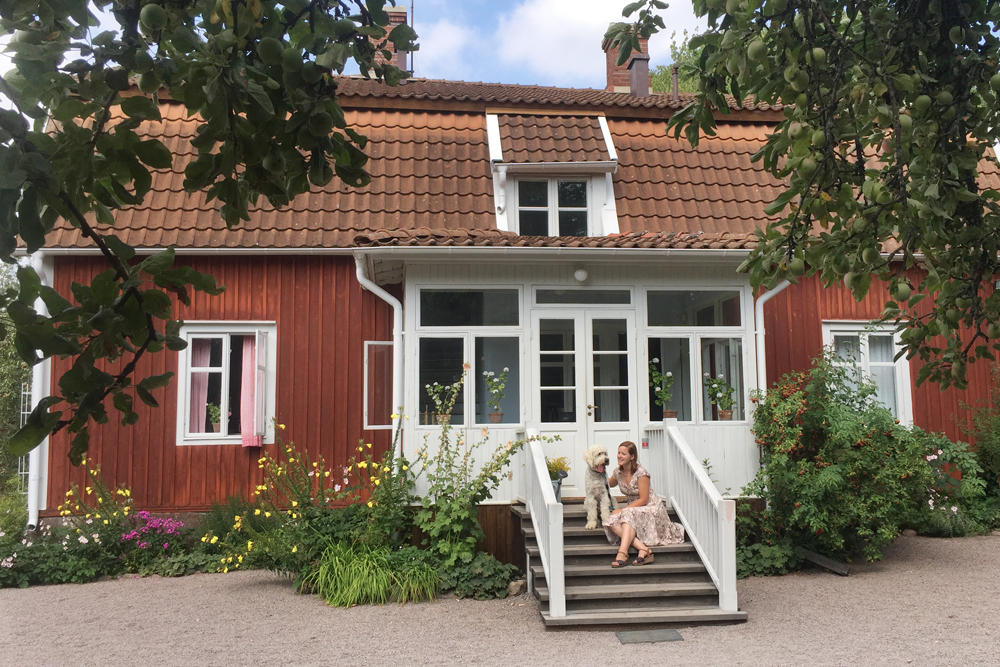
We spent part of the summer vacation at Lake Geneva, Switzerland. We took these pictures on one of several trips to the gorgeous vineyards near Grandvaux. Hot summer sun, breathtaking view and hazy mountain tops above the lake – a place of quite unbelievable beauty.

pattern: hacked Florence Dress (Sew Over It), size 10
fabric: 2+m of printed viscose (gifted)
cost: next to nothing: fabric was gifted, 70cm elastic (1.99€/m),  matching thread from my stash, fabric covered buttons (handmade, base from stash)
duration: ~4 hours

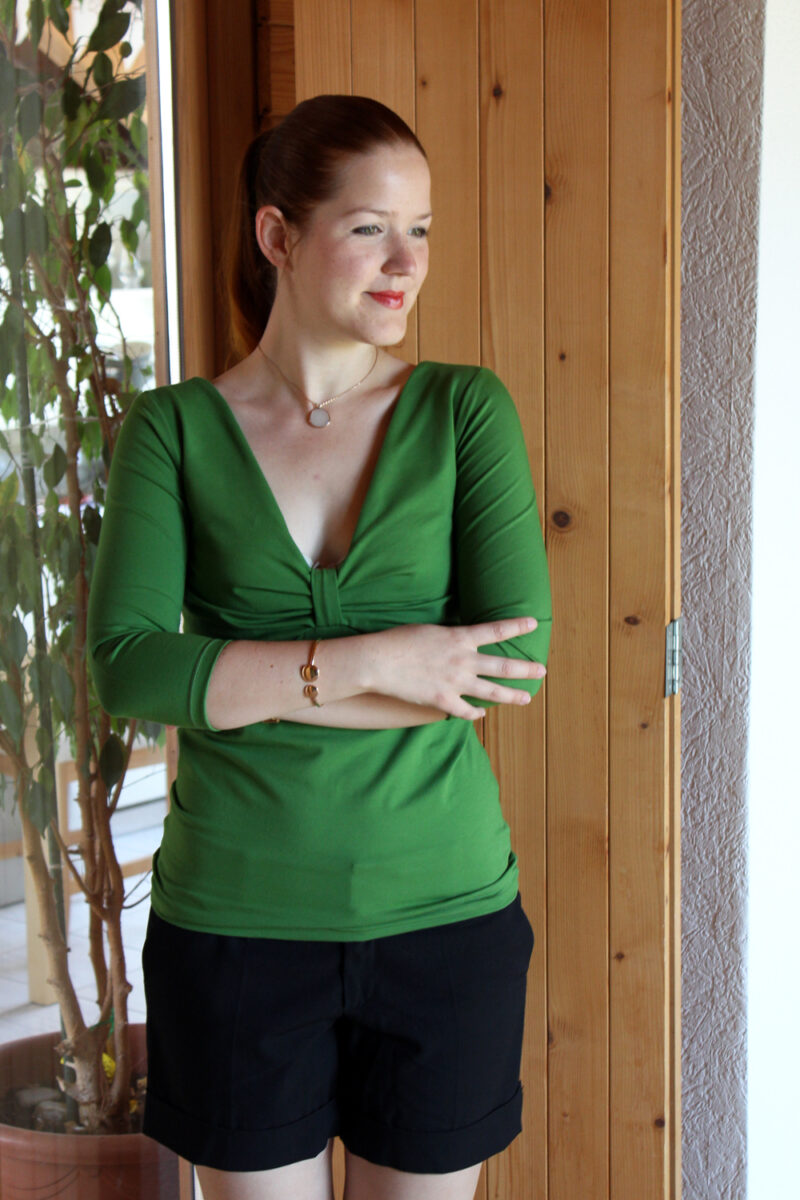
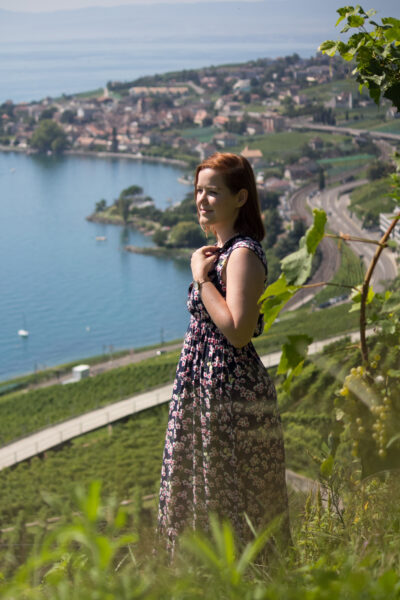
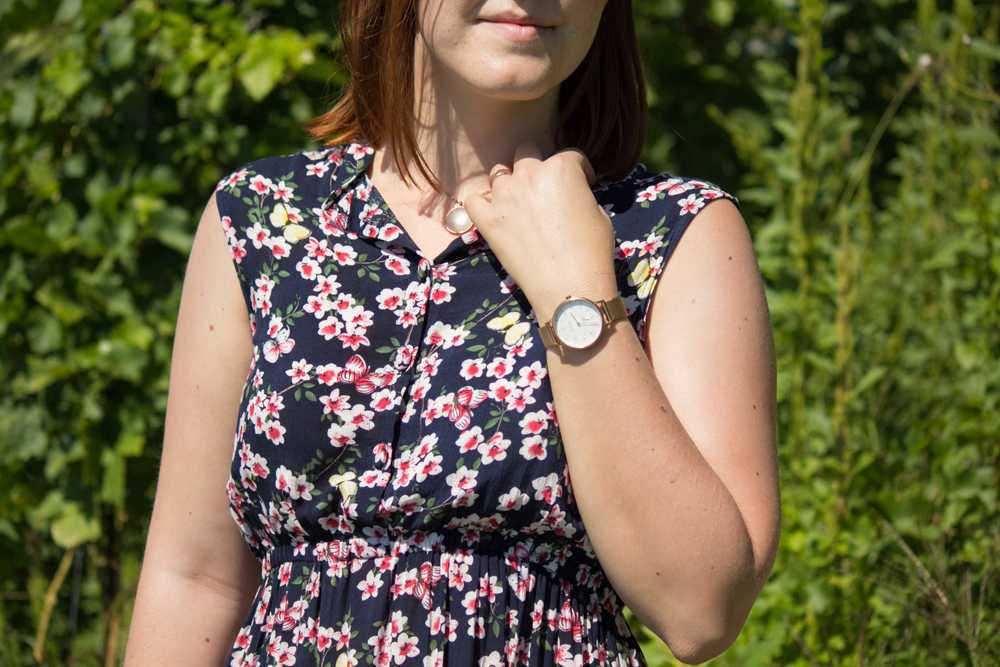
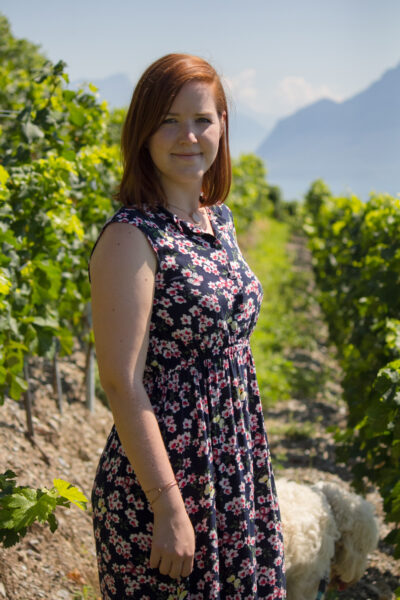
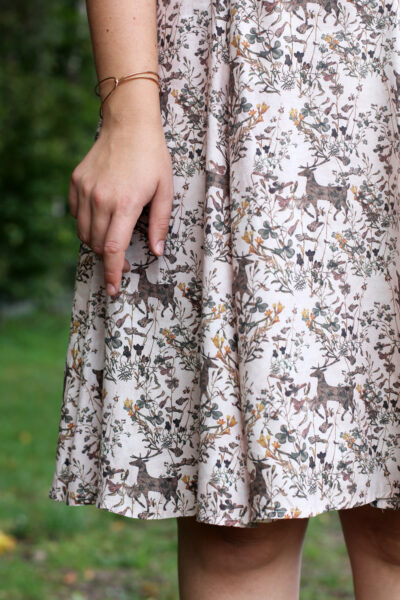
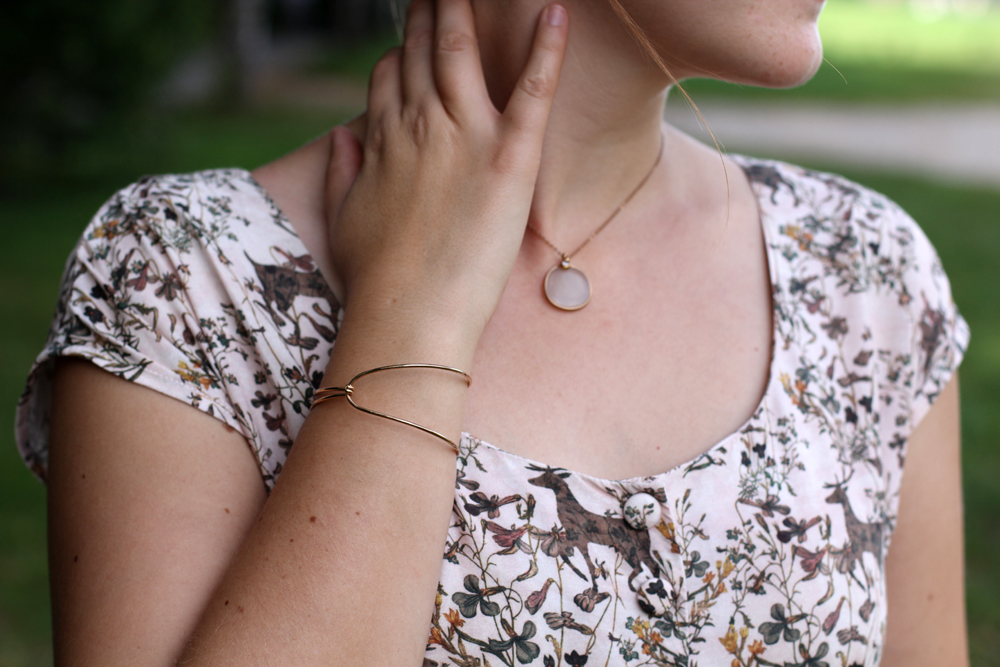
This maxi dress I made especially for our vacation, as I wanted to take something lightweight and pretty that would get me through the very hot end-of-August days in Switzerland and France. It’s made from a very ligthweight, soft viscose with a cherry blossom and butterfly print. It was gifted to me by my mother-in-law, so I can’t tell you where it was bought and how much it cost, unfortunately. I love viscose for travelling as it does not take up much space and weighs next to nothing. The fabric wrinkles quite easily, but I usually spray it with a bit of water after taking it out of the suitcase and hand it up to dry on a hanger. It pretty much looks freshly ironed afterwards!

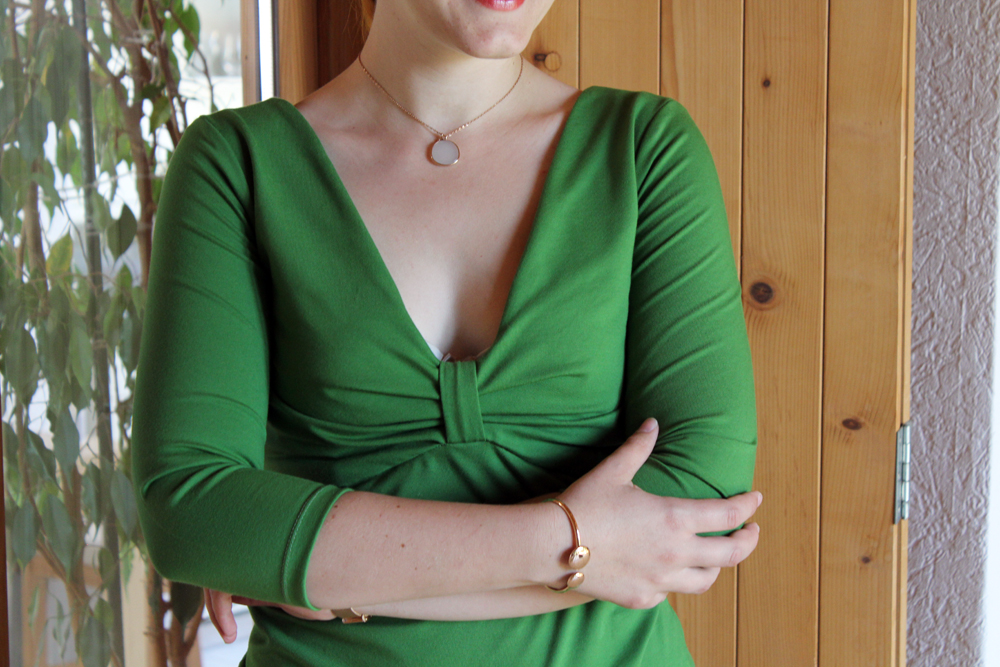
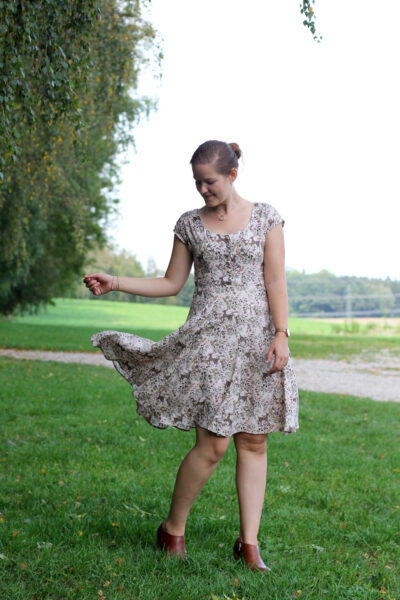
For the pattern I used the Sew Over It Florence Dress, one of my favourite patterns last year, and added a few minor changes to the pattern. For the most part, I sewed a UK size 10 straight from the envelope and ditched the sleeves. By the way, this really helped with the fit of the bodice. I did have some minor fit issues with the 3/4 sleeve version last time. Since they were a tad tight, the whole bodice sat a bit tight around the bust when I moved. Making it sleeveless solved the problem for now, I will probably have to return to that pattern and fit it properly at some point. I bias bound the edges of the armscye.

I had more than 3 metres of fabric to play around with, and with all the Myosotis Dresses around at that time I was inspired to add some ruffled tiers. ( I actually found a print copy of the Myosotis Dress pattern in a tiny sewing shop in France and treated myself to a copy!) Here’s the two versions I sketched out before cutting out:

Florence Dress Sew Over It by thisblogisnotforyou.com

I really dig the right version, but the hubby had a vote and set his mind on the left one. Which was probably the only reasonable choice anyways. I later thought the horizontal seams might not have complimented the soft drape of the viscose fabric. What do you think? Should I try the other one, too?

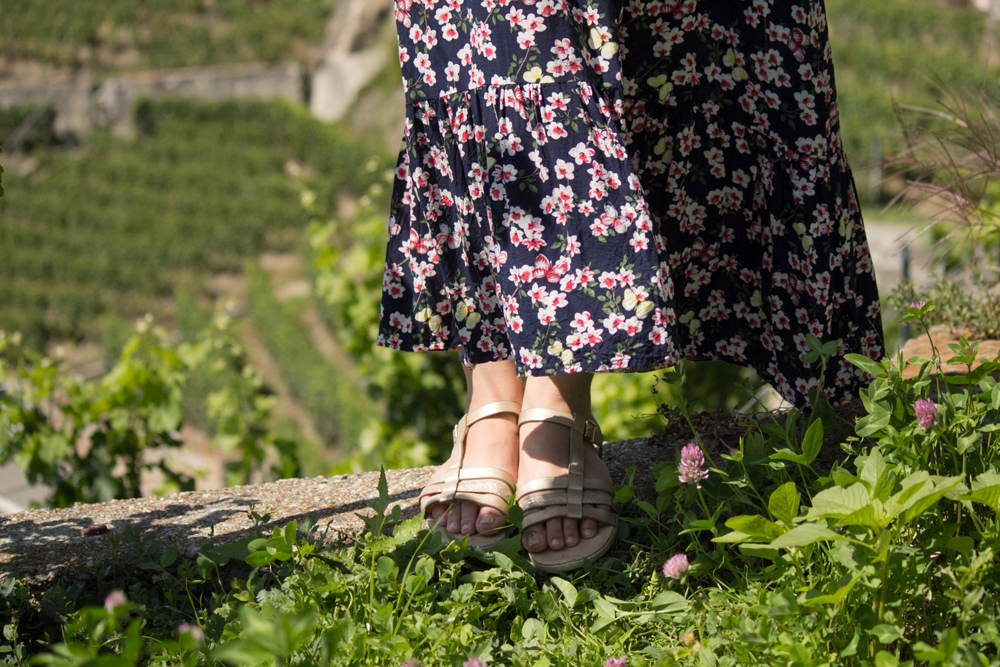
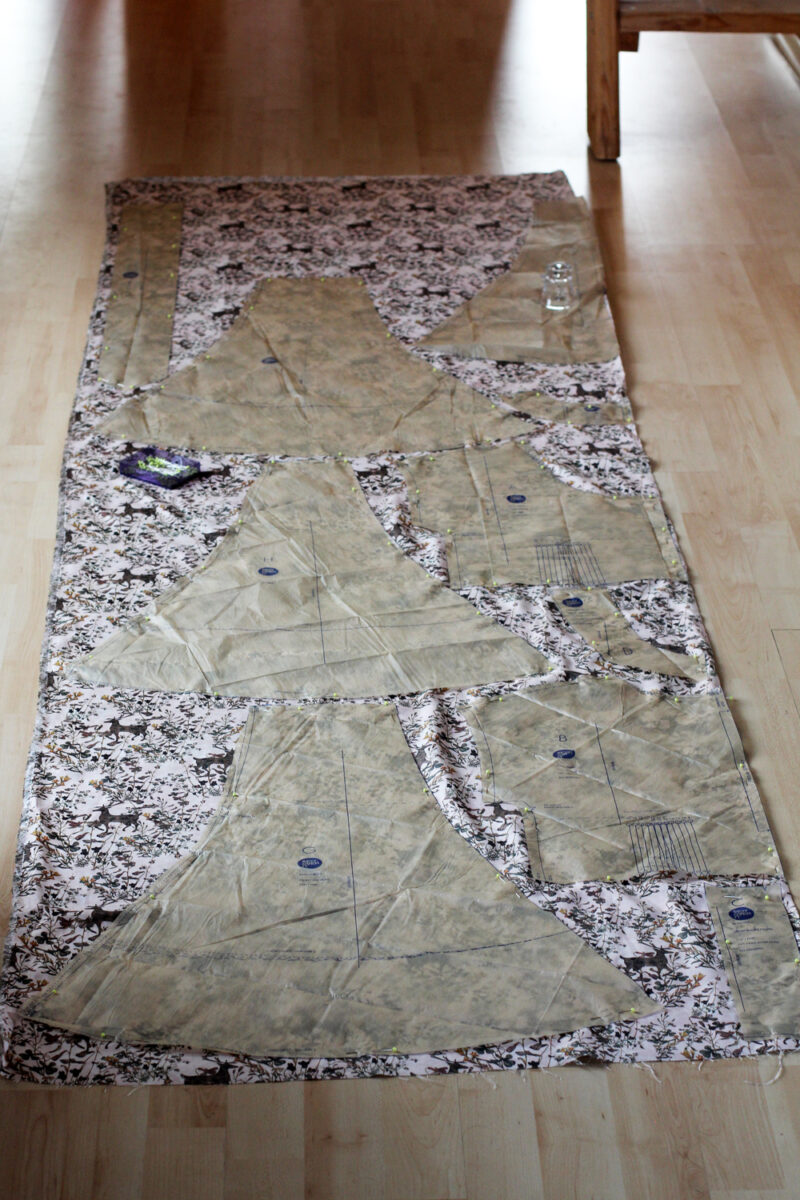
To make the left design, I shortened the skirt panels and cut out two rectangles twice the width of the skirt’s hem. I gathered the fabric with two rows of stitching and overlocked the raw edges after sewing the gathered tier to the skirt. The added panel was cut out generously so that I could shorten it to the perfect length after the dress was finished and waiting to be hemmed. It hits at just the right height, so that I can wear it with both flats and high heels.

I tried quite a few options for the buttons and couldn’t find any that matched the style of the dress or pattern of the fabric. It’s quite a busy print already. This seems to happen to me with all the button-down-front dresses I made over the last year. I always end up making matching fabric covered buttons instead, and it always turns out to look best this way.

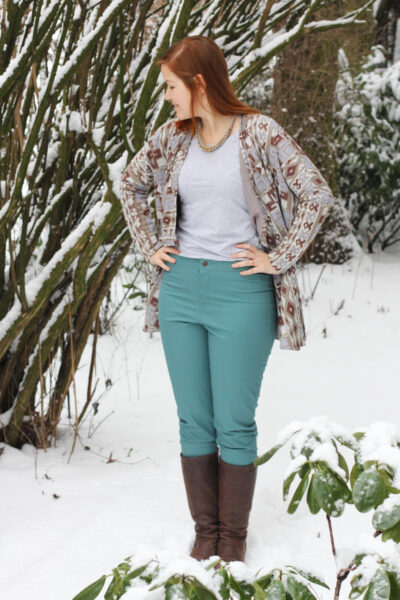
This dress is so versatile! I pretty much lived in it throughout the vacation. It’s perfect for every occaison and I wore it at home, in the restaurant, for shopping trips etc. I have a navy blue cardigan that matched perfectly for the cooler days and evenings. It’s a lovely pattern and changing it up a little this time only makes me want to try more hacks in the future!

Florence Dress Sew Over It by thisblogisnotforyou.comFlorence Dress Sew Over It by thisblogisnotforyou.comFlorence Dress Sew Over It by thisblogisnotforyou.comFlorence Dress Sew Over It by thisblogisnotforyou.com

Florence Dress Sew Over It by thisblogisnotforyou.com

Florence Dress Sew Over It by thisblogisnotforyou.comFlorence Dress Sew Over It by thisblogisnotforyou.com

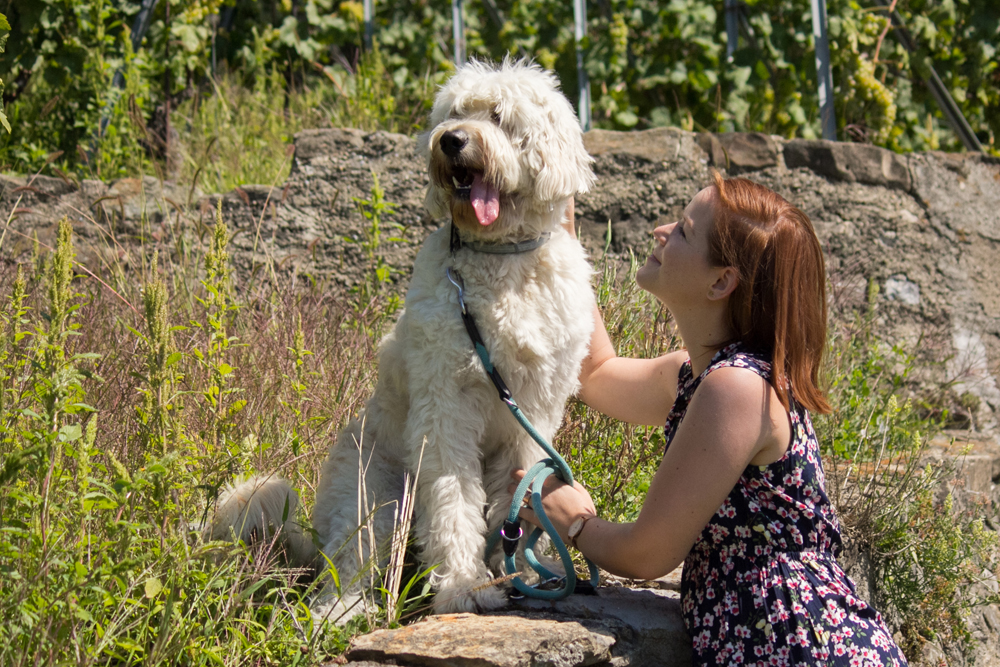
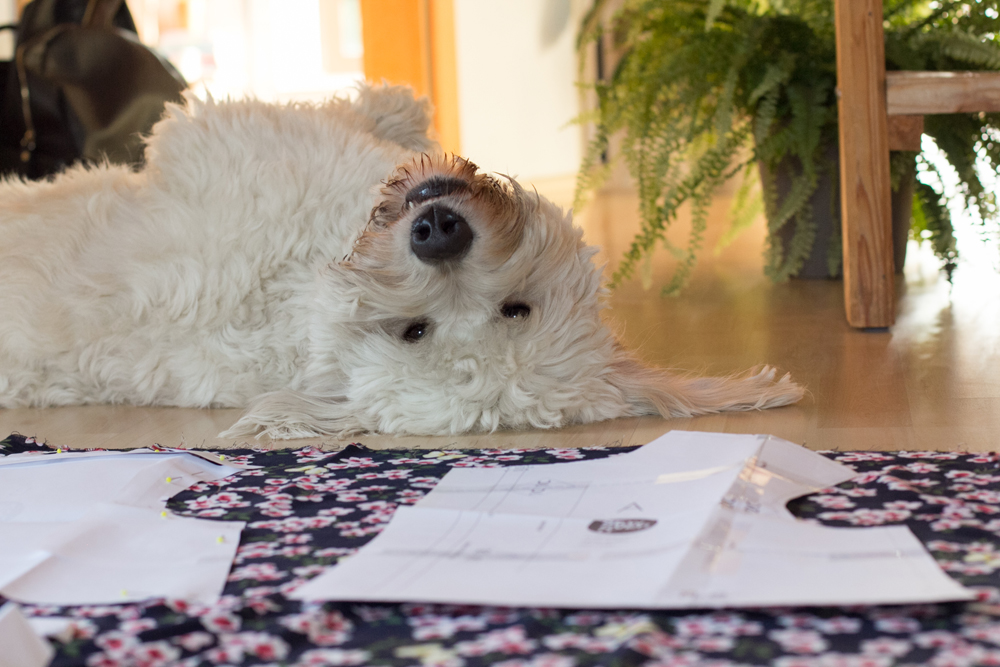
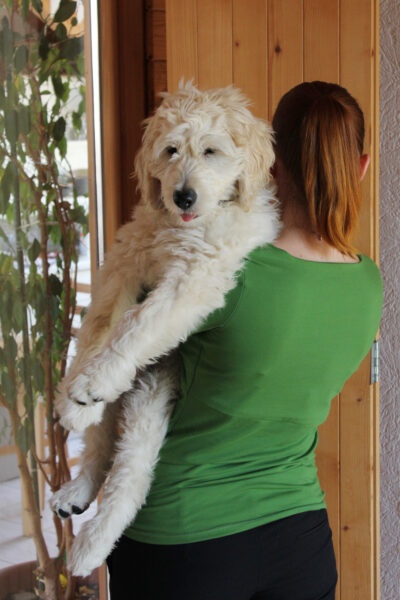
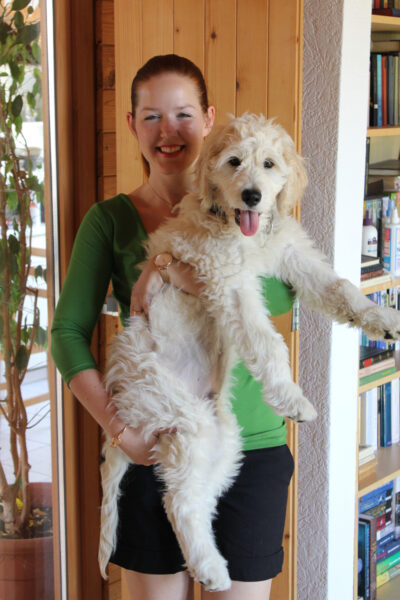
Aslan not only enjoyed the long vineyard walks but also the making of this dress. He has a bad habit of stepping on carefully placed fabric or even falling asleep on it while I’m in the middle of cutting out my patterns. He might have been a cat in a former life, I think.

I’m still dreaming about making all those summer dresses while the leaves start falling outside…Do you have any pattern suggestions for starting an autumn wardrobe to get me out of this wistful mood?

xx

Charlie


Happy sewing!

facebook/bloglovin/pinterest
twitter/instagram

Stay in touch!

Adventures in Amigurumi

Pica Pau Crochet Amigurumi Animals by Thisblogisnotforyou.com

Pica Pau Crochet Amigurumi Animals by Thisblogisnotforyou.com

Pica Pau Crochet Amigurumi Animals by Thisblogisnotforyou.com
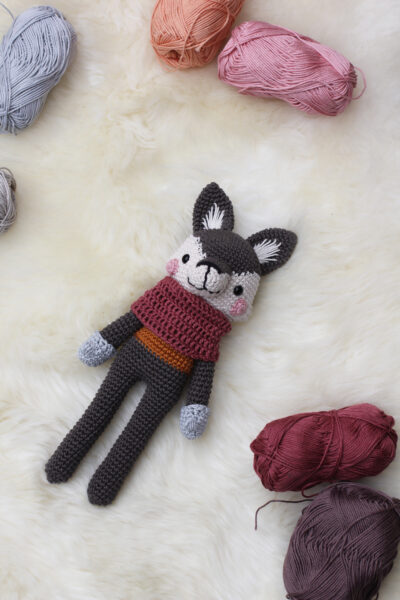
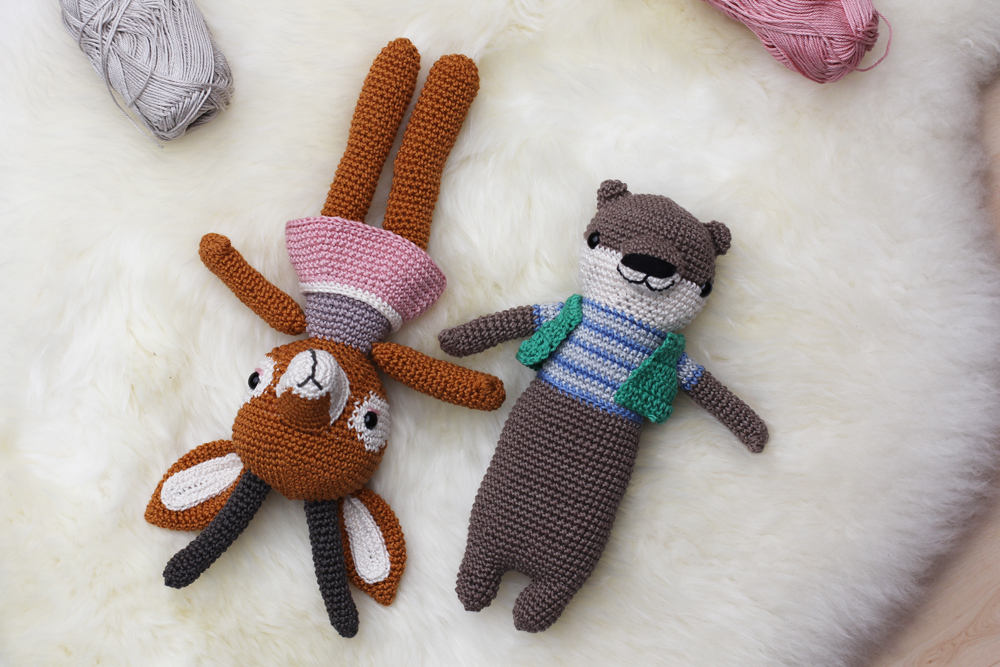
Having a knack for creative hobbies can lead to a serious passion of collecting new hobbies and skills (and sometimes ditching them shortly after). I’m certainly guilty of hobby hoarding. During my blogging break this winter I had the urge to try something new. I’ve always adored Amigurumi figures and as they look incredibly complicated to make I never thought I had the time to learn how to make them myself.

One evening I had sat down with an old crochet hook and some leftover yarn and watched a couple of YouTube videos on making Amigurumi bunnies. A few weeks later I’d made three bunnies for my nieces and nephew and was so in love with this new hobby that I treated myself to some more supplies. See, with collecting hobbies there always comes a massive collection of supplies with it and since I will run out of space sooner rather than later, I try to be more selective about what I really need to buy. I loved this technique so much that I knew I wanted to spend more time making crochet animals and found the amazing Yan online, an Amigurumi pattern designer on Instagram. Luckily, she’s got some books out already which had really great reviews.

Pica Pau Crochet Amigurumi Animals by Thisblogisnotforyou.com

I bought the pattern book “ANIMAL FRIENDS OF PICA PAU” as well as a basic set of crochet hooks and was addicted from the first second.  I’ve made almost half of all the patterns in the book and the enthusiasm doesn’t seem to run out!

What I love most about the book  – apart from the amazingly cute patterns – is that it doesn’t leave any gaps. As an absolute beginner I was able to recreate the animals as shown in the photos just following the step-by-step patterns with the help of a crochet 101 guide also included in the pattern book. The instructions are really well photographed so that even the more complicated bit and bobs weren’t that hard to wrap my head around.

Pica Pau Crochet Amigurumi Animals by Thisblogisnotforyou.com

Pica Pau Crochet Amigurumi Animals by Thisblogisnotforyou.com

Pica Pau Crochet Amigurumi Animals by Thisblogisnotforyou.com

I was a bit worried about what wool to use, but learned that I doesn’t need to be the exact same wool as used in the book. You could use pretty much any wool you’d like as long as you used the same one in different colours for one project. The animals turn out bigger or smaller depending on the yarn and hooks you pick. Using a similar yarn and hook size as recommended, my animals measured pretty much the same size as the ones in the book. I got hooked on (bad pun intended) a really nice cotton yarn from Schachenmayr, called “Catania”, which is perfect for Amigurumi as it is silky smooth and slightly shiny. On German Amazon it is about 2,50€ per ball, quite a reasonable price for the quality you get. I used approximately 1-2 balls of yarn (main colour) for the animals plus small amounts of all the other colours.  They have a really nice range of nice brown, cinnamon and taupe tones. They also have really lovely pastel and vintage looking colours that I prefer to bright and glaring reds, yellows etc.
Here in Germany they sell Schachenmayr Catania in pretty much any wool and sewing shop I found out, so this is sort of my go-to brand now. The only thing that annoyed me a bit is that they apparently release limited series of “seasonal” colour ranges, which they stop selling online after a while. Naturally, I ran out of one of these mid-project and had troubles finding it online. I bought some of off Ebay, which was alright but annoying nonetheless.

So all supplies considered, the cost of making an animal is somewhere between 5-10€. For the stuffing I recycled some Ikea pillow stuffing, which works perfectly and is much cheaper than the plush toy stuffing they offer in stores.

Pica Pau Crochet Amigurumi Animals by Thisblogisnotforyou.comPica Pau Crochet Amigurumi Animals by Thisblogisnotforyou.com

So, in case you’ve been itching to learn how to make Amigurumi yourself, I can only encourage you to try! It’s fairly easy and soooo relaxing! Another plus: lots of cute presents for you friends and family!

The ones in the pictures I’ve given all away except for the wolf which I cannot part with. I’ve made a couple more that I didn’t photograph which also found happy new owners already.  They bring so much joy, it’s incredible!

Have you meddled with new hobbies lately? Anything you’ve fallen in love with and would like to recommend?

xx

Charlie


Happy sewing!

facebook/bloglovin/pinterest
twitter/instagram

Stay in touch!

My Favourite All-Rounder This Last Summer: The Doris Dress

Sew Over It Doris Dress by thisblogisnotforyou.com

Sew Over It Doris Dress by thisblogisnotforyou.com

Sew Over It Doris Dress by thisblogisnotforyou.com

Sew Over It Doris Dress by thisblogisnotforyou.com

Goodbye Summer

Summer now has finally ended this last week here in the south of Germany after a gloriously hot September and October. I’m quite behind in posting my summer and early autumn makes so you’ll have to endure some off-season posts this year! I want to introduce you to my absolute favourite garment of this whole summer. I’ve worn this dress to death. It’s seen so many washing cycles that I’m very much surprised it’s still holding up really well.

So, who are we talking about? Doris!

She’s the perfect summer party companion, gets you lots of compliments on family get-togethers, squeezes into your vacation suitcases in no time and is your best friend on the hottest of hot summer days. She even did well as a wedding guest, but she doesn’t know where to stop with the free drinks, so beware. She could pull herself together when needed at work and depending on her mood didn’t even need a press before being worn. She does that nice trick with the back ties when you’ve eaten more than you probably should have and gets all her Marilyn vibes in the faintest breezes. To sum it up, Doris is your perfect wing-woman.

pattern: The Doris Dress (Sew Over It), Version 1 (size 10 graded to 12 below hips)
fabric: lightweight cotton viscose from a local sewing shop
amount: 2,45 m (end of roll, I just paid for 2 metres, 18€/m), directional print
cost: 36€ (+ zip from my stash & handmade self-covered buttons)
duration: ~5 hr

Pattern & Fabric:  Oh, and you can get her – guess what – as a PDF or printed pattern at Sew Over It. (Disclaimer: I’m REALLY not being paid by them I just have a massive style crush on their patterns!) This pattern has been sitting in my stash for quite a while. It didn’t really inspire me until I saw some made-up version of it and Lisa Comfort showing it on her YouTube channel. I noticed that perfect silhouette and had the perfect fabric for it: a gorgeous blush-pink stag print viscose my husband got me for our wedding anniversary. I did a crazy thing where I just cut into the very expensive fabric without having sewn this pattern before and I was super lucky that it fit straight out of the envelope. I do not have a lot of fitting issues with Sew Over It patterns, which is one of the reasons I’m drawn to them. I usually make them without trying a muslin or cheaper fabric first. Doris is a little fabric eater, especially if you use a directional print as I did. I used the whole 2,45 metres I had and couldn’t have cut it out with less fabric. (I made a second version with just a bit over 2 metres of fabric – non-directional – but it’s a lot easier if you have a little extra fabric to handle.) I’ve attached a picture below for you to see the layout for my size (UK 10 at the top graded to a 12 from hips down). It took quite a while until I had this layout figured out. I don’t often have more than 2 metres of fabric length in my stash, so I was super lucky that the lady cut me some extra as it was end of roll fabric.

The construction part was fairly easy. The most time-consuming bit is certainly overlocking and sewing together the seven skirt panels and inserting an invisible side zip. Apart from this, the dress came together very quickly. I chose a faux button-up front, which means I did not sew real button holes and just put on the self-covered buttons stitching through all layers. The dress isn’t fully lined and comes with a very uncomplicated facing instead, which is much more convenient for hot summer days. Fitting is not much of an issue, as the skirt is super wide and the top is shaped by tying a bow in the back. It might certainly be a challenging project for beginners but just a half-a-day project for the intermediate sewer.

Sew Over It Doris Dress by thisblogisnotforyou.com

Sew Over It Doris Dress by thisblogisnotforyou.com

Sew Over It Doris Dress by thisblogisnotforyou.com

My favourite place I wore this dress in – a very close second place goes to my mum and dad’s legendary summer party is all I say – was at the childhood home of Astrid Lindgren in Vimmerby, Sweden. We had such a blast on our summer vacation in Sweden and visiting this amazing place where one of my absolute favourite authors grew up was such an amazing, inspiring experience. Aslan also did pretty well posing for pictures! Sew Over It Doris Dress by thisblogisnotforyou.comSew Over It Doris Dress by thisblogisnotforyou.com

Will I make it again? This is easy to answer. I already sewed a second one that’s just missing the zip and some buttons. I made it in a more autumnal fabric and hope to wear it with tights this winter!

I really need to get started with my winter wardrobe now, though… Any suggestions?

xx

Charlie


Happy sewing!

facebook/bloglovin/pinterest
twitter/instagram

Stay in touch!

What to Sew When You Have an Evening vs. a Weekend

Pattern Standoff Evening vs. Weekend
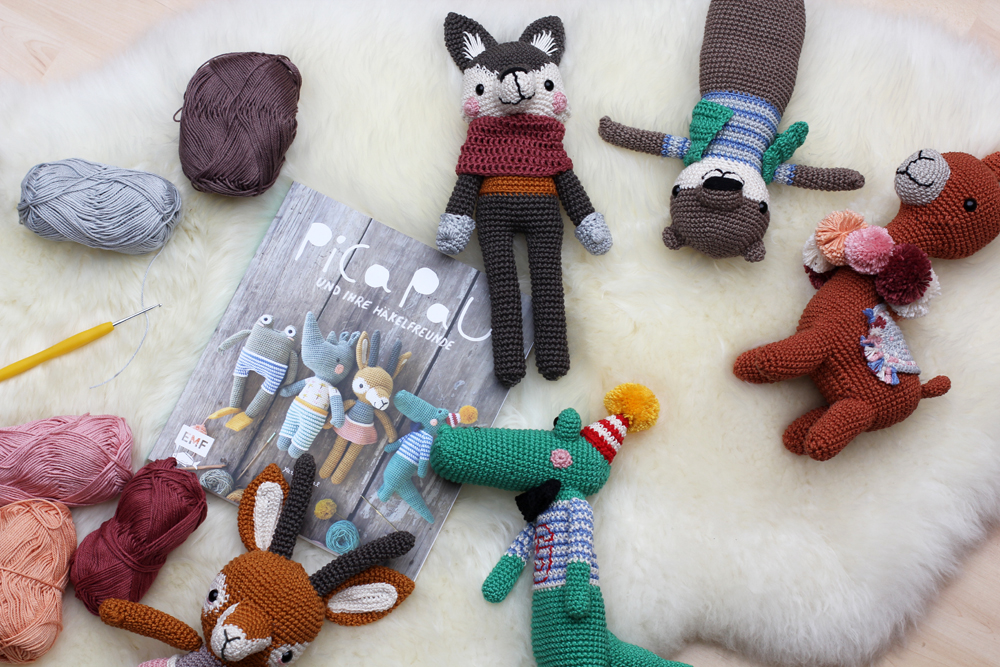
Hello there! Today we’re talking pattern standoffs!

Do you have sewing cravings? Sometimes I want to sew just for fun, some days I really want to make something that I urgently need in my wardrobe and, well, sometimes I want to take up a masterpiece project. Most of the time the particular craving depends a lot on the time I have on my hands.

Time is actually quite an important factor when choosing a pattern for your next project. There are a hundred ways to sew a skirt. I can be done in half an hour or it might take a couple of days. That’s completely up to you and the pattern you pick.

I thought it would be fun having a look at some unlikely couples. I’ll share two pattern options for sewing projects – one that can be done in an evening and one that will keep you busy for a weekend. Shall we have a look?

Jeans: Mia vs. Ginger

Mia Jeans by thisblogisnotofryou.com

Speedy

Are you looking for the perfect jeans project? If you need a new pair of jeans by tomorrow – Mia to the rescue! The Mia Jeans pattern by Sew Over It (included in the ebook My Capsule Wardrobe) is the perfect ‘very quick & perfect fit’ pattern for you. I have made 4 pairs so far and they all turned out amazing. The pattern comes together really quick, the only two trickier bits being the front fly and the patch pockets in the back. Fitting is made very easy with a generous seam allowance that’s included in the pattern. I really recommend checking out Sew Over It’s Youtube channel for the video on constructing the front fly.

My tip: choose a stretch denim fabric to make fitting even easier!

Slow & Steady:

You finally want to tackle that masterpiece jeans project of yours that’s been on your list for ages? The Ginger Jeans by Closet Case Patterns is a very well designed five-pockets-jeans pattern with a higher back rise, belt loops, rivets and all! The pattern is incredibly popular and known for a flattering fit and a professional look. You’ll need more supplies compared to Mia, but this is a project of love and a masterpiece you will be proud of! In Germany we say it’s for those with “patience and spittle”.

My tip: Make sure you have all the supplies ready by the time your sewing weekend starts, so you can work without frustrating shopping runs. Take your time and enjoy the ride!

Blouses: Silk Cami  vs. Carme Blouse

There are just soo many great blouse patterns, but these two are my current favourites.

Speedy:

The Silk Cami (Sew Over It) is such a satisfying quick sew. I can’t recommend it enough. It comes together very quick: no fastenings, bias binding or darts! It’s a basic French seamed sleeveless cami top finished at the neckline with a facing. You’ll need very little fabric and very little time! I love to use this pattern for hacks, such as this dress. It probably doesn’t even count as a blouse, as there are no sleeves or anything involved. But this is such an elegant little garment, it is more than just a top.

My tip: Spend some money on a high quality polyester, cotton lawn or silk fabric. You won’t need much fabric, so you can go for quality over quantity.

Slow & Steady:

If you want to take your time and get into more technical handiwork, the Carme Blouse by Pauline Alice Patterns is a great project. It’s a sophisticated-looking, but versatile blouse. It offers a couple of challenges such as pin tucks, a small mao collar, a front yoke, a button placket and sleeve tabs. The instructions are very easy to follow and you’ll also find sewalong videos for this project on Youtube.

My tip: Instead of just following the pattern markings for the pin tucks, take your time and measure – press – sew one by one. I found that measuring the intervals gives a much neater outcome.

Coats: Burdastyle Wool Coat vs. Ellsworth Coat

Burda 09/2015 #117 and Mia Jeans by thisblogisnotforyou.com

Speedy:

The Burdastyle pattern 09/2015 #117A is such a rewarding little project. Not much effort but making a big impact. View B is belted and slightly shorter than View A. The pattern is pretty brilliant as long as you use the right fabric. They’re asking for double-sided wool because it comes without lining. Therefore, it’s a really quick, simple sew. No interfacing, no lining, no bindings. It’s pretty much just three pattern pieces: front, back and back sleeve (plus pockets). The sleeves are two pieces. The front one is cut as a kimono sleeve and part of the front bodice pattern. I got many compliments on this coat and people can’t believe I made it myself. You can check out my version here. No-sweat coat making with this little number!

My tip: Find a show-stopper fabric in a bold colour. Make sure your fabric is double-sided!

Slow & Steady:

The Ellsworth Coat by Christine Haynes is a fully lined classic 1960’s-inspired double breasted overcoat. You can go topstitching galore on this one! There’s a collar, lots of buttons and buttonholes, pockets, lining… basically everything you want and more when your sewing mojo is top-notch and you have the whole weekend in front of you. Add a season of Game of Thrones or Homeland to the mix and you’re good to go!

My Tip: If you’re planning on using a patterned fabric, buy a little extra and take your time before you cut to get the pattern matching right.

Skirts: Ultimate Pencil Skirt vs. Hepburn Skirt

Ultimate Pencil Skirt by Thisblogisnotforyou.com
The Hepburn Skirt by thisblogisnotforyou.com

Skirts are generally easygoing and quick projects. It depends on pleating, button plackets, zips or pockets how much time you’ll need.

Speedy:

The Ultimate Pencil Skirt by Sew Over It is one of my all-time favourite patterns. It’s very elegant but simple, works also as a mini skirt and can be made in woven or knitted fabrics (I tested this!). The trickiest part of this skirt is at most the concealed side zip. I made a version with a exposed front zip which also worked brilliantly. I’ve made many versions and hacks of this skirt, it’s the perfect base once you got the fit right. I made a faux-wrap hack with belt-and-all. I even based the design of my wedding dress on this pattern! It’s so very versatile, it’s definitely worth buying.

My Tip: Find a fabric with a little stretch and focus on getting a perfect fit. It’s a great base for many future skirt projects.

Slow & Steady:

My very own Hepburn Skirt PDF pattern is another great option for a high-waisted pencil skirt. The vertical and horizontal seam lines are perfect for colour-blocking and give you some options for experimenting with style lines and colours. Cutting, sewing, pressing and finishing seams takes a little bit longer, although the skirt is fairly easy to sew. It’s certainly a project for a confident beginner to tackle.

My Tip: Depending on the type of fabric you choose, you might want to take the time to add a lining, as well. Thus, you prevent the skirt from riding up when you walk. 

* * *

Did you find this helpful? Would you like to see more content like this? And what are your evening vs. weekend pattern recommendations? Please don’t be shy and let me know in the comments!

Next time we’ll have a look at blazers, cardigans, trousers and dresses!

xx

Charlie


Happy sewing!

facebook/bloglovin/pinterest
twitter/instagram

Stay in touch!

Green Jersey Alice Top (SEW OVER IT online class)

Sew Over It Alice Top by thisblgoisnotforyou,comSew Over It Alice Top by thisblgoisnotforyou,com

Sew Over It Alice Top by thisblgoisnotforyou,com

Hi everyone!

A few weeks ago, I got to try out the new SEW OVER IT online class ‘Intro to Sewing with Knit Fabrics’. (As always, all opinions are my own!) I’ve never really made use of online courses before. I bought a couple on Craftsy ages ago but never actually made anything from it.

When the lovely ladies over at SEW OVER IT approached me, I immediately wanted to try after getting a glimpse at the patterns included in the class. I love their work and most of my favourite patterns are from SEW OVER IT. The Alice Top, with a faux bow front, was incredibly tempting! (There’s another pattern included, the Emma dress, which looks lovely, but I haven’t tried it yet.)

About the class:

It was pure joy to follow this online course. It’s always great to see lovely Lisa in action and she perfectly explains all the steps involved in making this cute top. The construction is not too tricky, but a bit unconventional and seeing it being put together on camera helps a lot. There’s a lot of useful information about sewing with knits included. As a more experienced sewer, I really enjoyed this class, none-the-less. It’s delightfully relaxing, as you really get immersed in the project.

My first Alice Top:

I used a green lightweight jersey, as was recommended in the class. (The fabric was gifted to me by my mother-in-law, so I’m afraid I cannot tell you where to buy it!)

For this first version of the Alice Top I went through the class step-by-step, pretty much cutting a straight size 10 without making any fit adjustments. It turned out really well! There were a couple of minor fit issues, I could easily fix before cutting another version of this pattern:
(Remember, these have nothing to do with the pattern itself, but are specific to my body measurements and posture)

  • The front neckline is gaping ever so slightly
  • The sleeve were rather tight
  • The fit at the waist was quite loose

The only thing I adjusted on the green top was taking in the waist by approximately 2 cm on each side. I’ll show you the fitted version of this top in the next post!

But perfect fit or not, this trial round went really well, don’t you think? The top is perfectly wearable and I’m really happy with it.

A few words about the construction: The Alice Top is fully faced, front and back, to create a perfect, close-fitting V-neckline and stabilise the gathers at the front. With the very detailed video instructions, this rather unconventional pattern isn’t very hard to construct. Once I finished the first top, I hardly had to revisit the course to make the second one.
The construction takes a bit longer than the average jersey top, as you have to stabilise the neckline and sew a couple more seams because of the facing. But the finishes look incredibly neat and professional.

No overlocker needed!

For this first top, I only used my sewing machine. So if you do not have access to an overlocker, this is the perfect project for you. Because of the specific construction techniques used in this course, you’ll get very neat finishes without having to use any professional equipment.

Sew Over It Alice Top by thisblgoisnotforyou,com

This was also the first project Aslan very helpfully assisted with modelling. I didn’t realise he might be a bit too big to use as accessory until after seeing these photos! Man, he’s grown so much in the past two months!

As I don’t want to post too many sewing-unrelated pics on my blog’s social media accounts, Aslan now has got his very own…For those of you, who want to see more of this cute little face, you can FOLLOW ON INSTAGRAM to watch him grow up!

Sew Over It Alice Top by thisblgoisnotforyou,com

What are your thoughts about online classes? Are you a fan?

xx

Charlie


Happy sewing!

facebook/bloglovin/pinterest
twitter/instagram

Stay in touch!