Wedding Dress Part II: Inspiration & Design
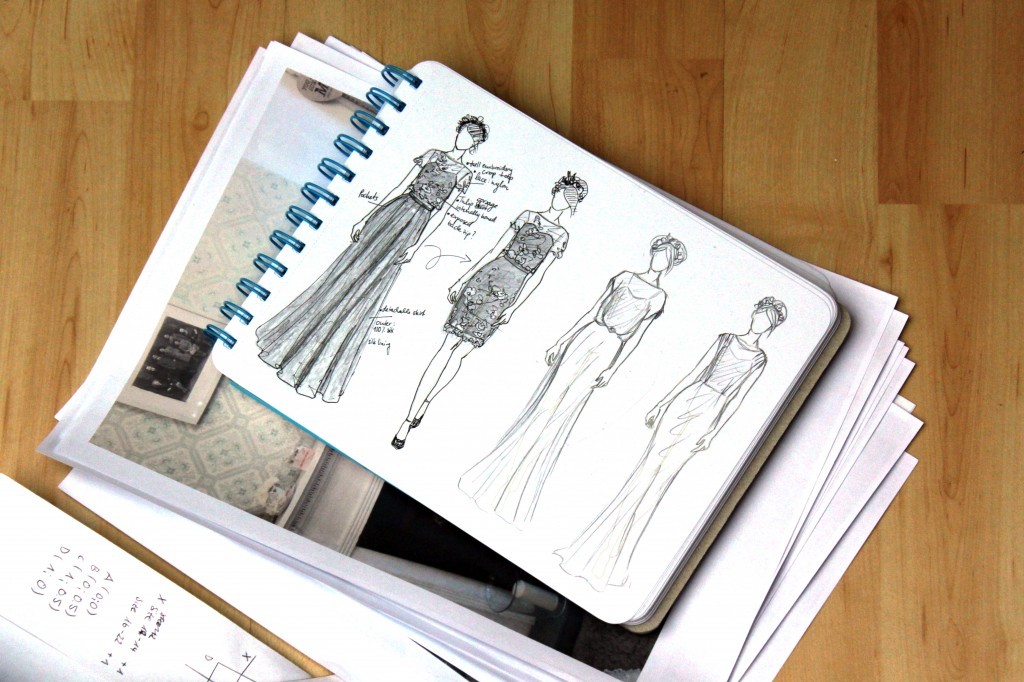
Wedding Dress design by thisblogisnotforyou.com

Helloooo everyone! I’m back after my thee-month-blogging-break….and I’m married!

It still sounds pretty unbelievable, but we had the most amazing wedding anyone could imagine. And… I actually wore a handmade wedding dress.

I have to admit, there were times when I did not believe this would happen as it wasn’t an easy process and things didn’t always go too smoothly, but in the end I wore a dress I made. A dress I am very happy with and super proud of.

I promised to share the process of making my wedding dress myself, and, of course, pictures of me in my wedding dress. I didn’t share much before the wedding as I didn’t want my friends and family know too many details about the project. Of course they sort of knew about it and it was sweet of them and annoying af to ask me about my progress constantly.

In this post I’ll share some of my favourite designs that inspired me and (scroll down if you’re impatient)  the design I went for in the end.

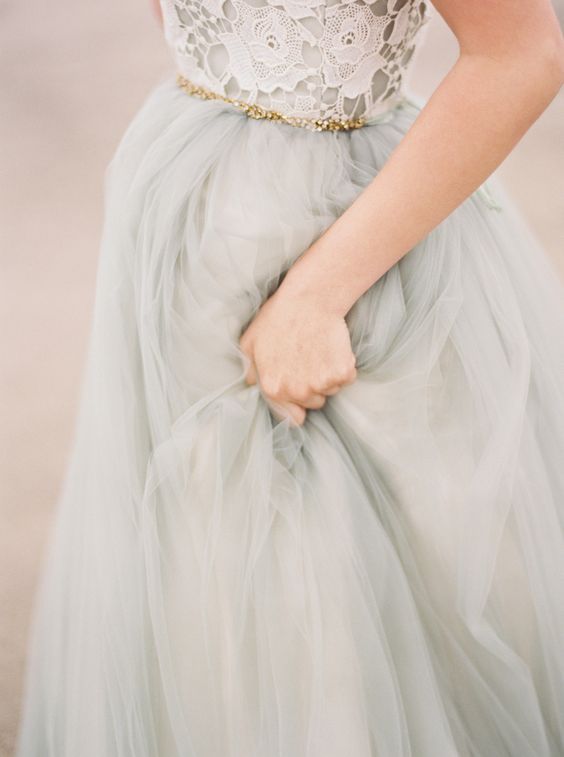
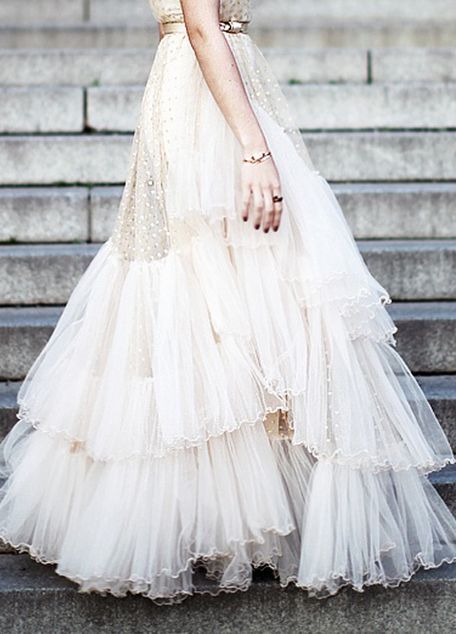
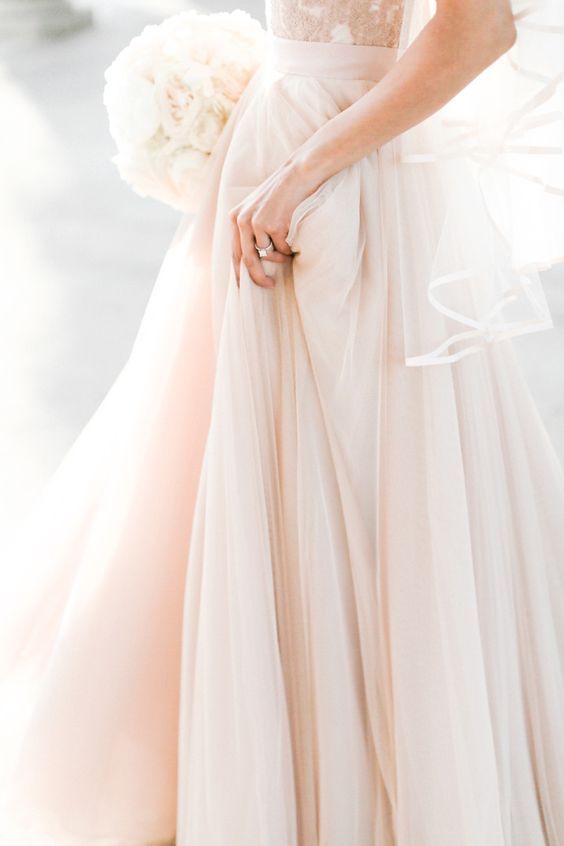
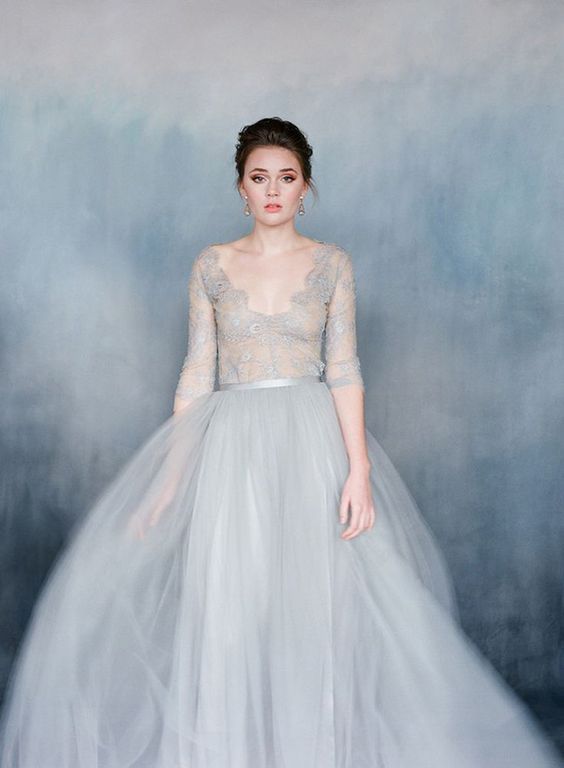
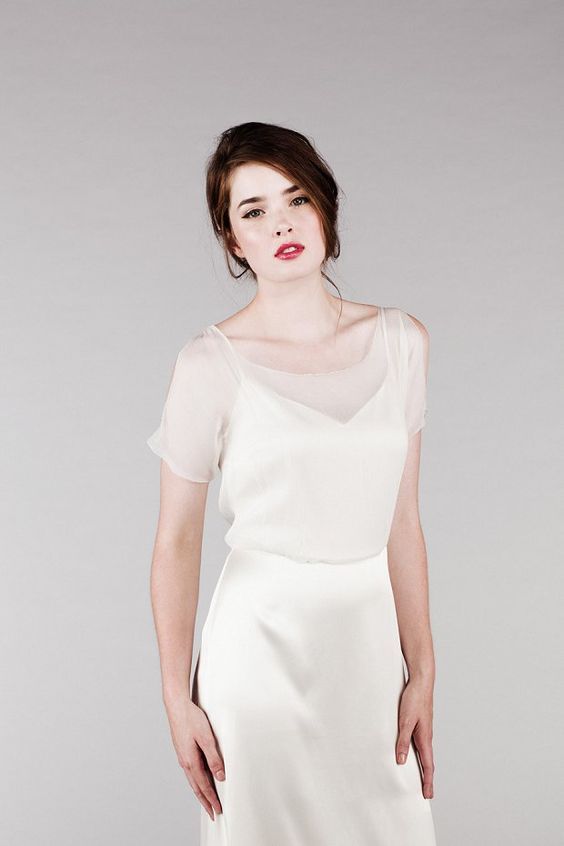
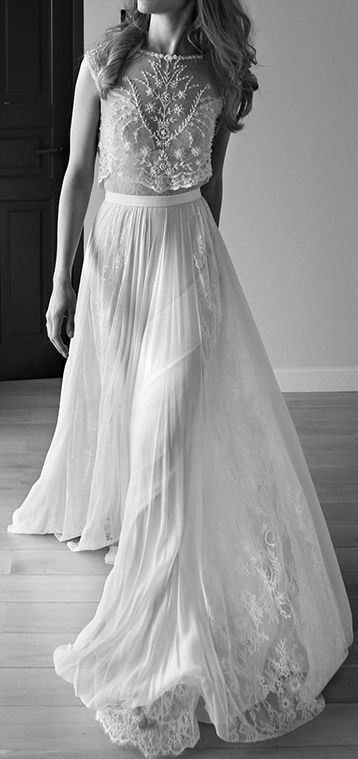
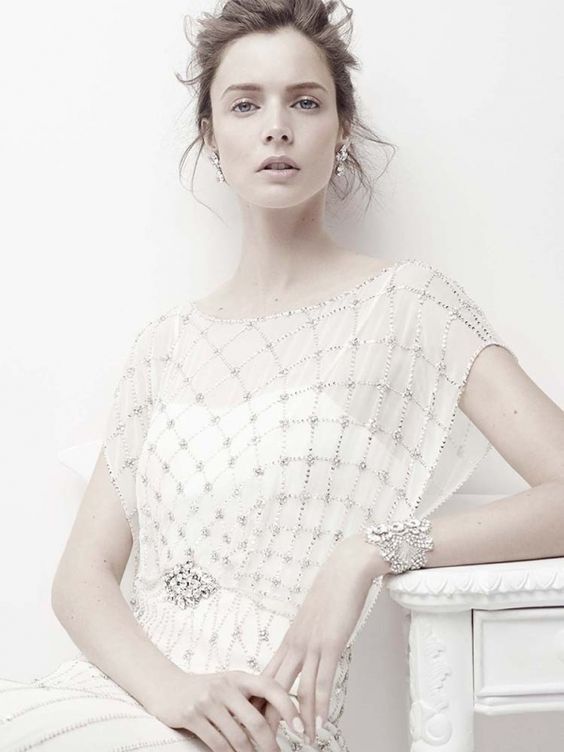
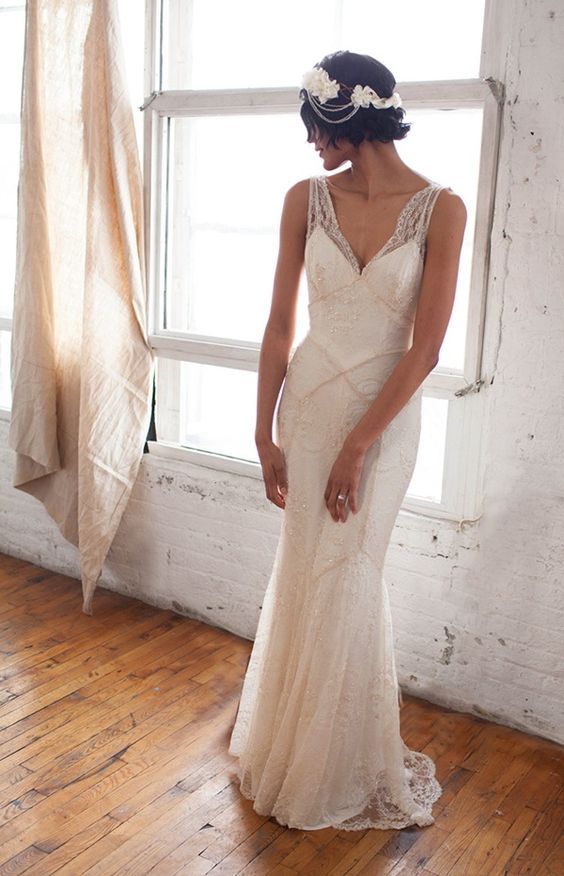
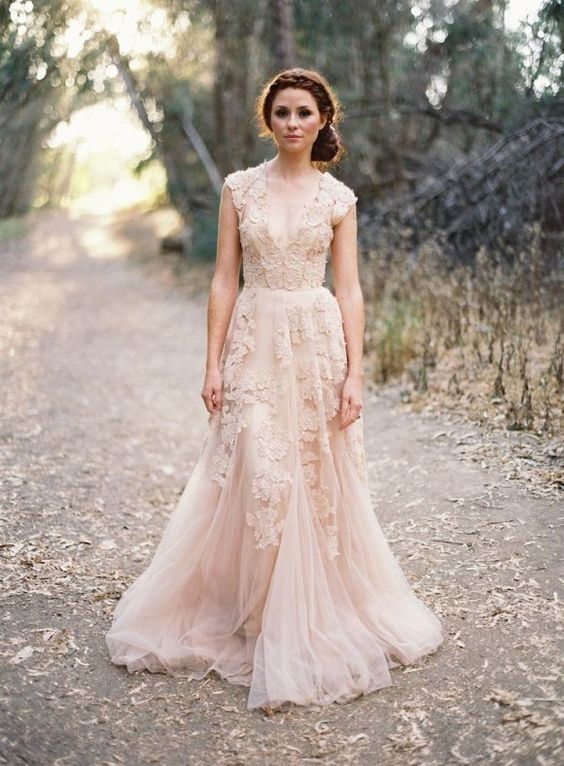
Here’s a selection of my favourite designs from my many Pinterest sprees:
12 5

298

As you can see, one side of me was really inspired by very romantic, fairy-like dresses with long tulle skirts and lacey tops. I really love this look and was so close to making a dusty blue tulle dress! Luckily, I talked to the Mr. before and learned that he wasn’t fond of neither tulle nor lace. Happy that I asked.

It was important to me to make something he’d love as well, and this also helped me to narrow down some options. I had another design vision which was very different to the layers and layers of tulle. There would’ve been no way of combining both styles, so having the Mr speak his mind was more than helpful for my peace of mind.
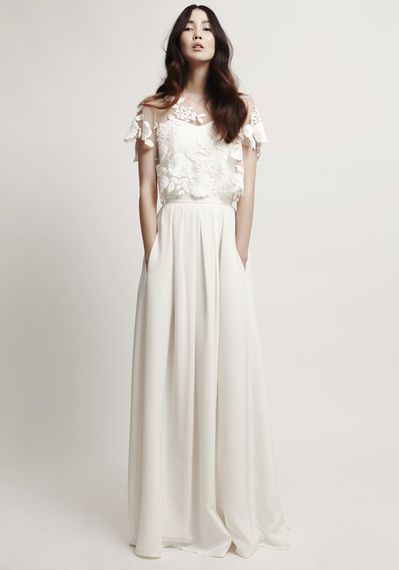
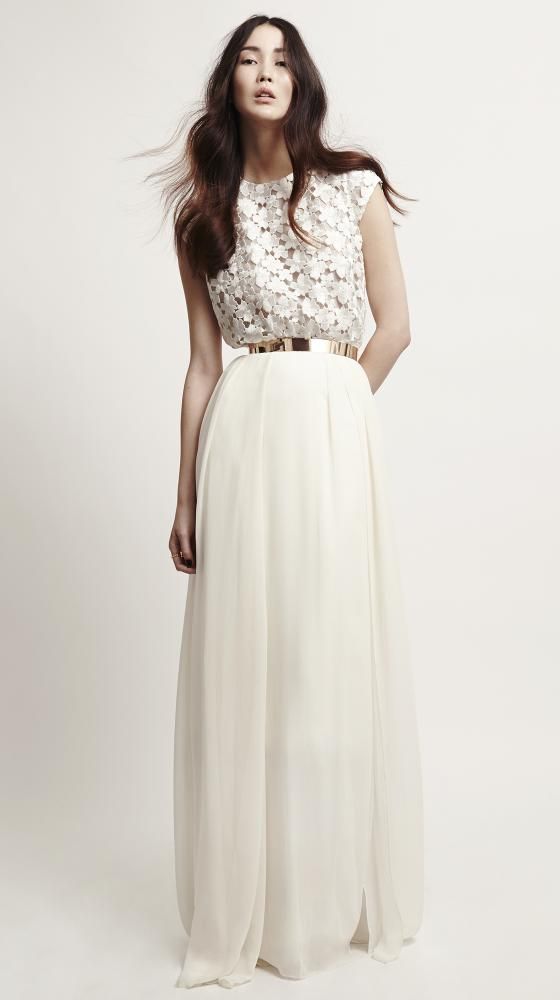
104117131715

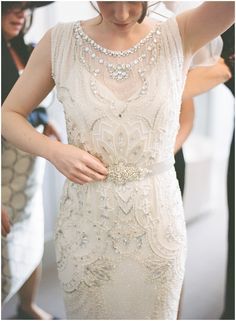
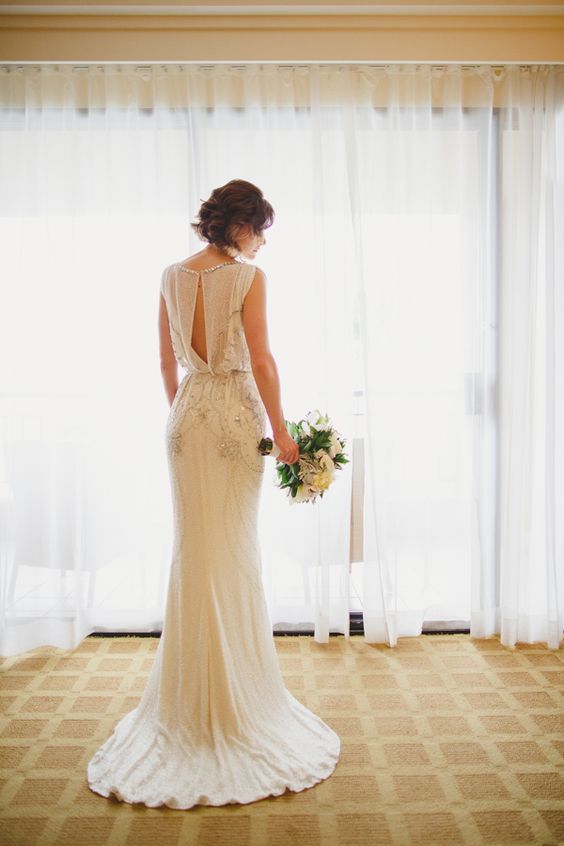
While looking for the perfect dress, I really fell in love with designers like Kaviar Gauche and Jenny Packham. I love the classic, elegant style and vintage vibe of those dress designs. The silhouette is very clear and the fabrics are very effective.

Also, on a practical matter: It’s hard to find luxurious-looking tulle in the perfect not-tacky-looking colour that also is affordable. It’s near impossible I can tell you that much! I didn’t completely ditch the tulle skirt as I made one for my hen do, but I wouldn’t have found anything wedding-dress worthy within my budget.

Anyway…

This is all good and all that, but I’m pretty sure you’re much more interested in the design I used eventually.

Once I decided to go with the more elegant, simple silhouette, I did a lot of sketching. And again I couldn’t make my mind up. Until I found THE MOST PERFECT dress of all time. It’s so perfect (in my opinion) I would’ve bought it of the rack if it wasn’t for the price tag.

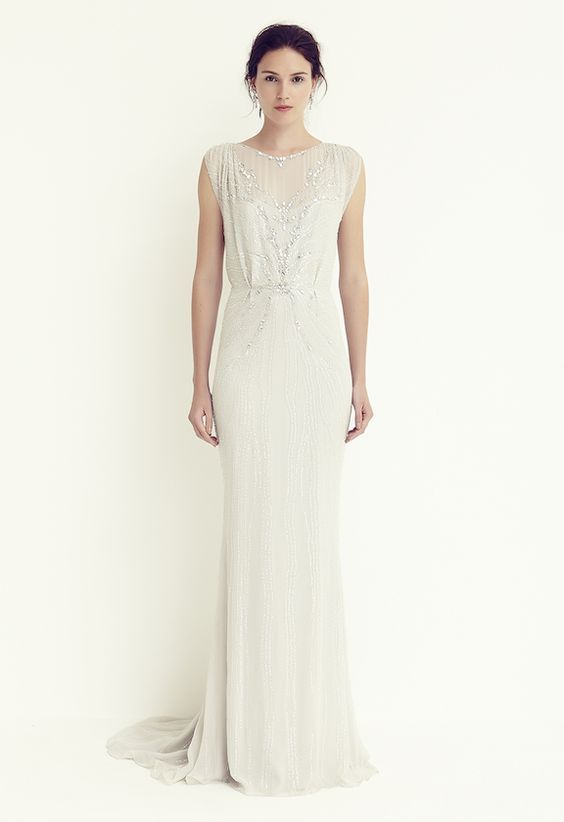
I absolutely fell in love with the Jenny Packham dress design called “Esme”. (“Alicia” and “Bardot” fell in second place). 162018
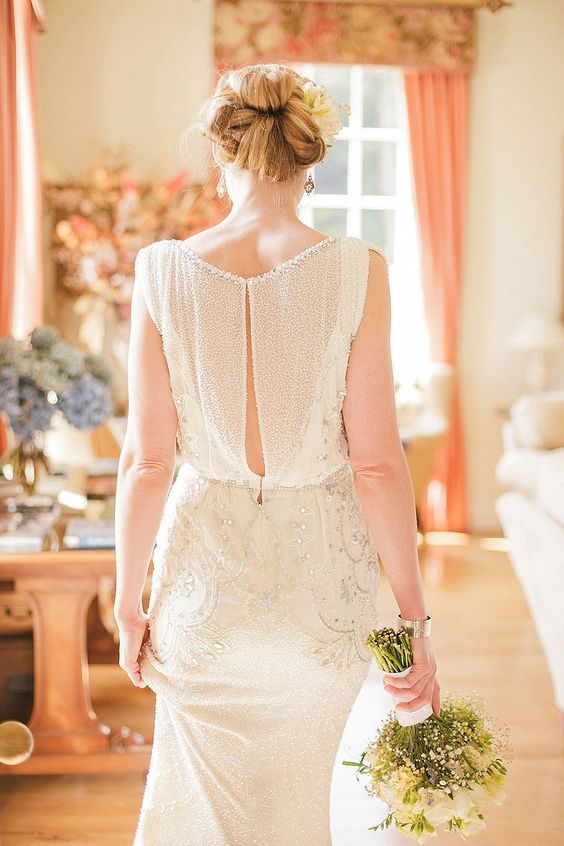
This Jenny Packham design is so so elegant and has that 1930’s feel to it which I absolutely love. I love 1920’s and 30’s Hollywood gowns and this seems to be the incarnation of all those beautiful art deco dresses.

Since I didn’t want to pay for it, I had no other option than to make it myself. Luckily, I know how to sew. What a coincidence!

I decided to incorporate the following aspects into my dress design:

  • simple, elegant silhouette
  • long skirt (maybe a short train)
  • sheer layer over a spaghetti top
  • embroidery (provided I manage that technically)
  • plunging back neckline 
  • pastell colour (either champagne, blush pink or dusty blue)

That’s enough for today. I hope you enjoyed this post!
I’ll share more about the draping, drafting, muslining and sewing as well as the understructure with you in the next posts. For now, I can tell you that much: I managed to tick everything off that list, eventually!

xx

Charlie


Happy sewing!

facebook/bloglovin/pinterest
twitter/instagram

Stay in touch!
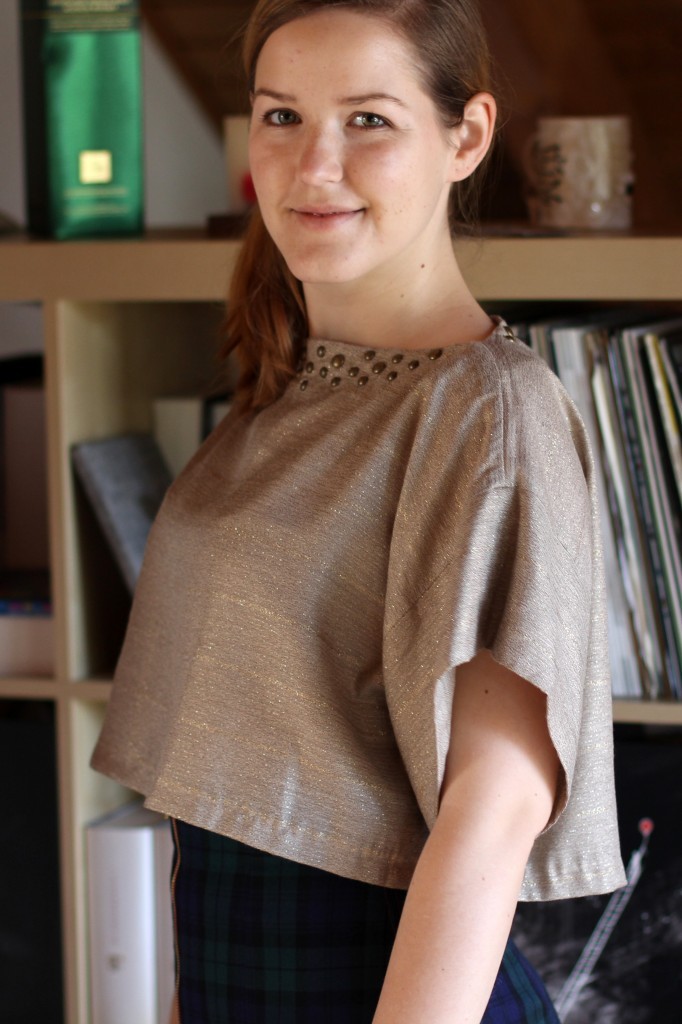
Refashion it! Golden Vintage Dress to Embellished Crop Top

vintage dress to crop top by thisblogisnotforyou.com

Hallöchen, ihr Lieben!

Hope you’re having a great week so far! I’m starting to get a bit stressed by the wedding preparations, especially with things involving the dress. A blog post was long overdue, though, so I’m trying to squeeze this one in between all the fittings and muslins and whatnot.

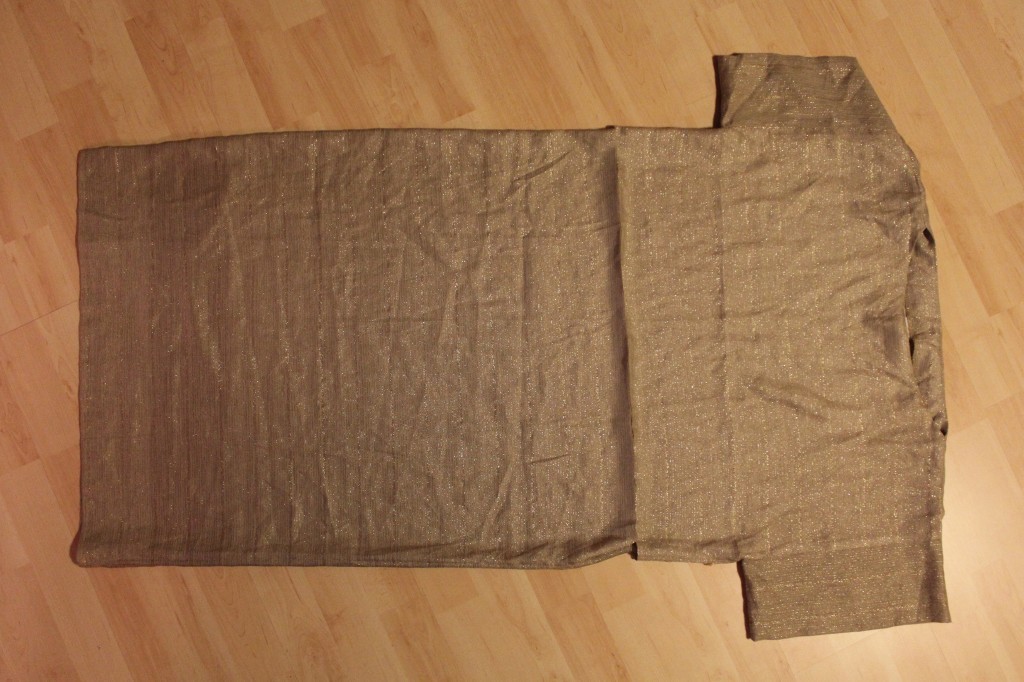
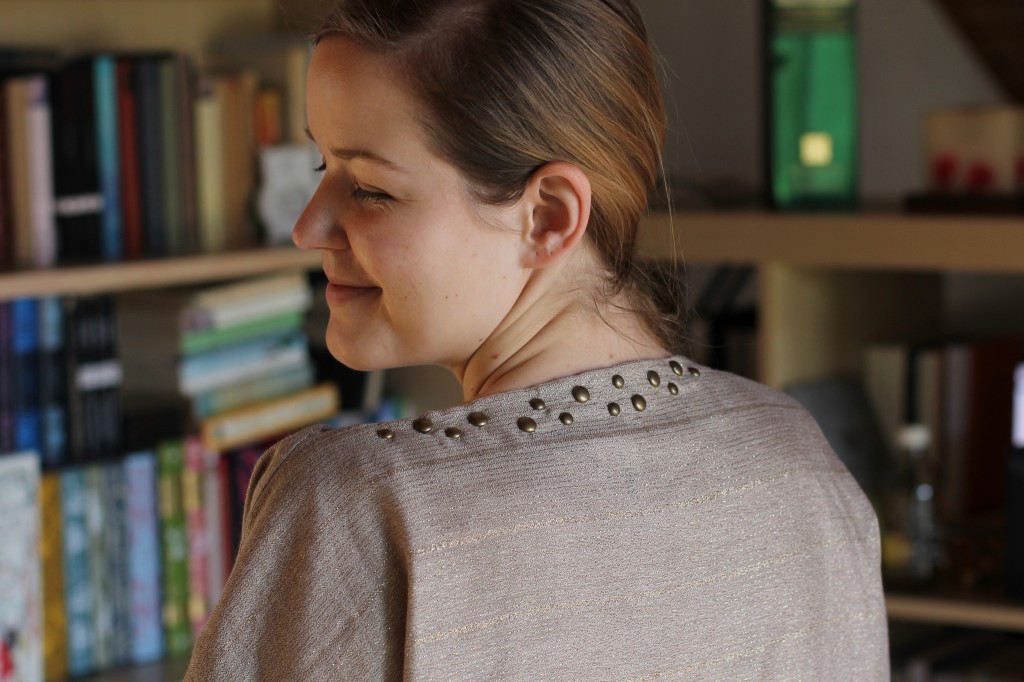
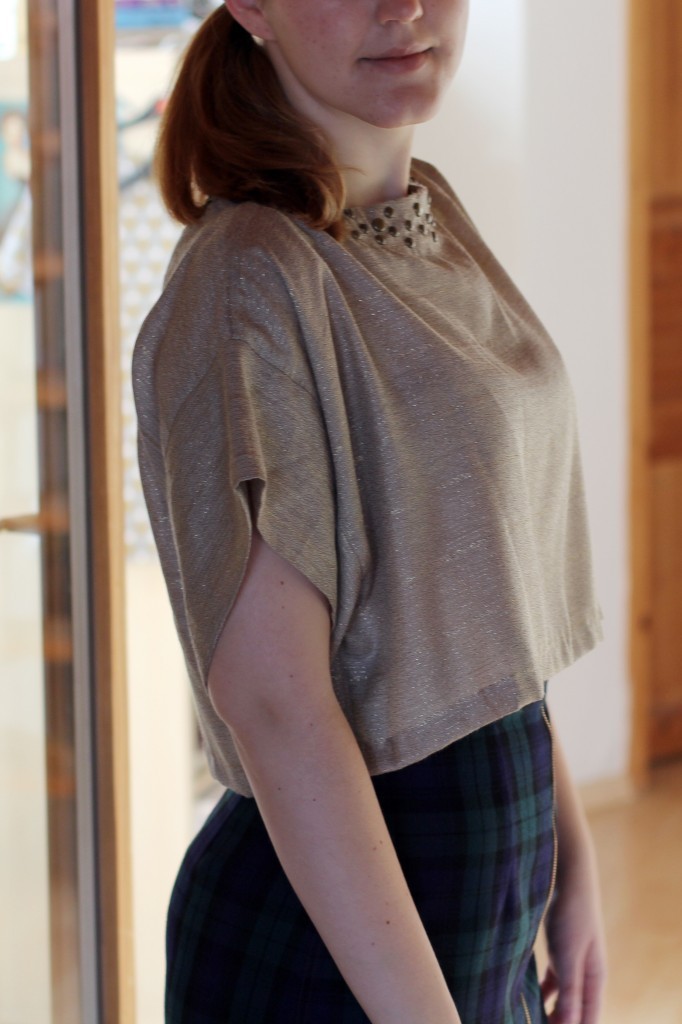
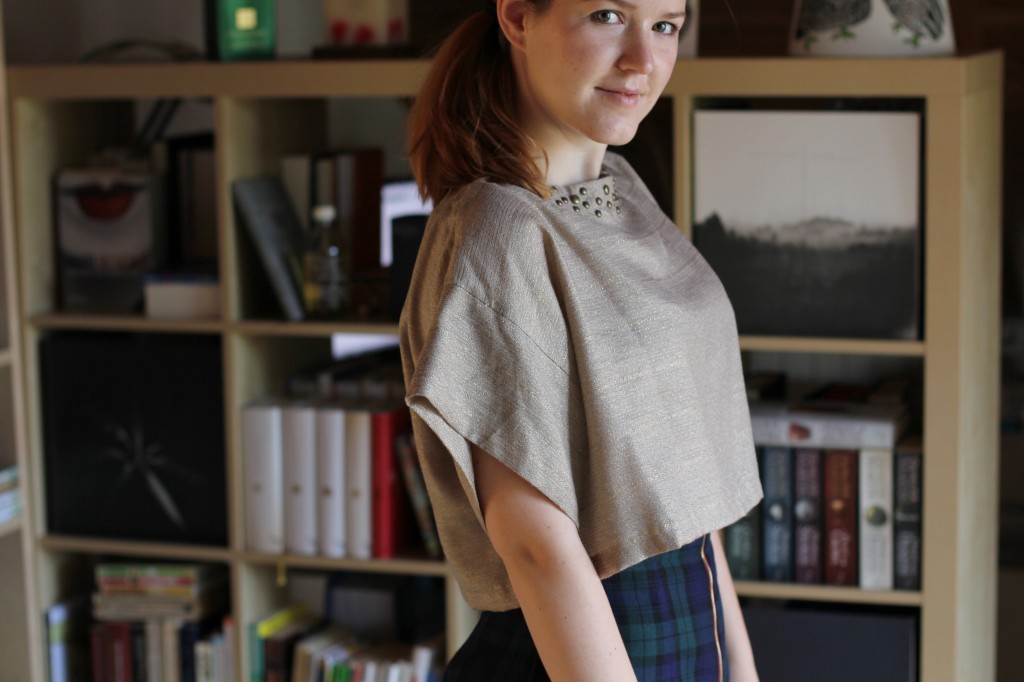
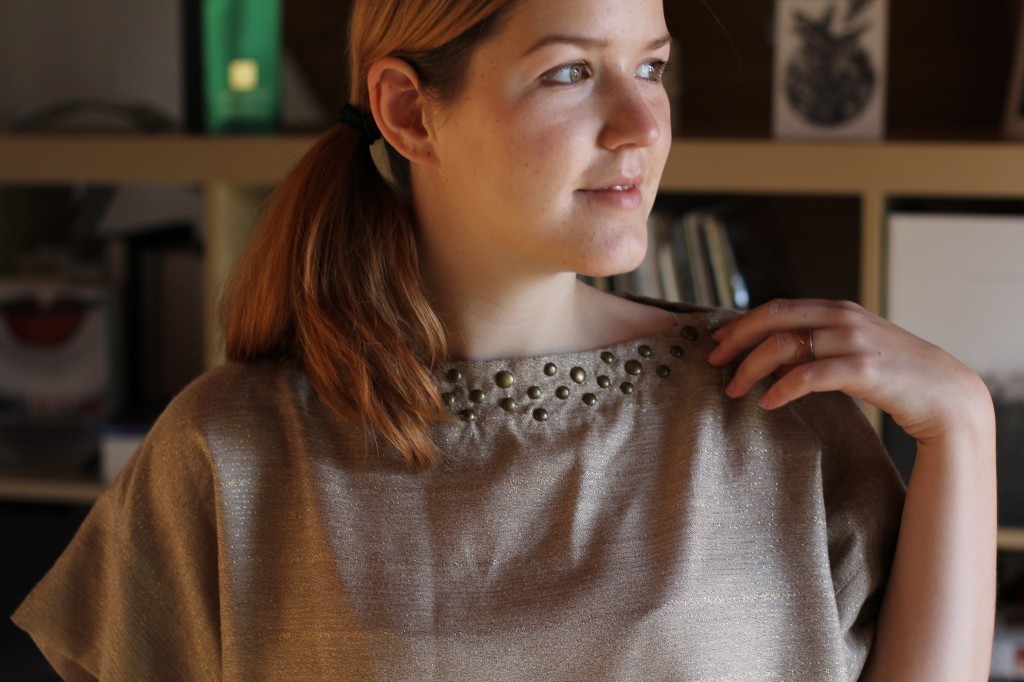
This is a really quick refashion project I wanted to share with you. It’s a loose-fitting embellished crop top I made from a dress that the Mr’s grandma gave me a little while ago. (scroll further down for before pics!).

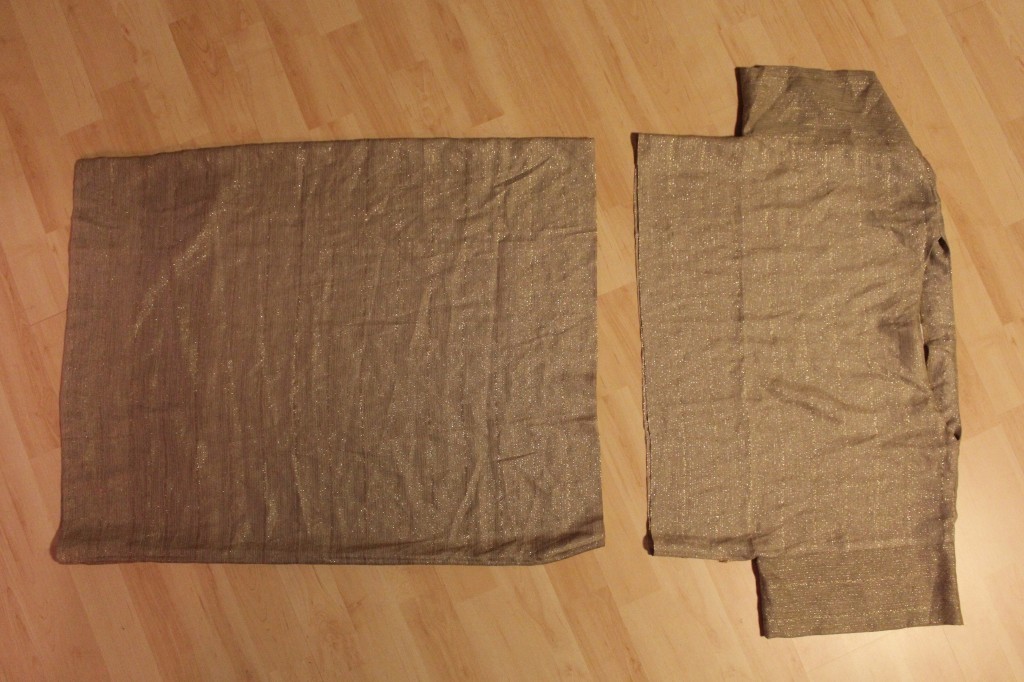
vintage dress to crop top by thisblogisnotforyou.comIt was basically a rectangular, light-weight long dress that looked suspiciously handmade, but had some sort of label in it, so I’m not too sure about that fact. The dress itself had no shape whatsoever, the hem going way below knee-length. At first I thought it might be edgy and cool but when I put it on it simply looked horrible and I felt like wearing a potato sack.

As it so often happens, I forgot to take proper before pictures (which is really stupid when planning an before & after project, I know!), so this is all I have:vintage dress to crop top by thisblogisnotforyou.comThe dress was too narrow to give me enough fabric for cutting out a whole new garment, so I decided to take the easy way out and cut the bottom off. Chop, chop!
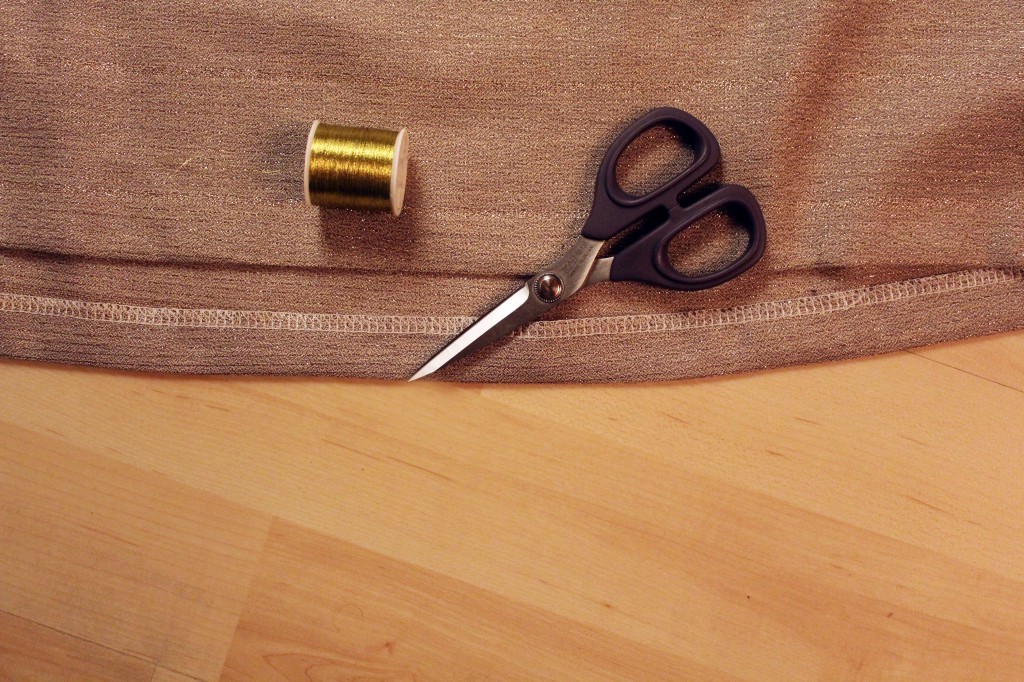
vintage dress to crop top by thisblogisnotforyou.comI overlocked the raw seam and hemmed it by hand using matching gold thread.vintage dress to crop top by thisblogisnotforyou.com

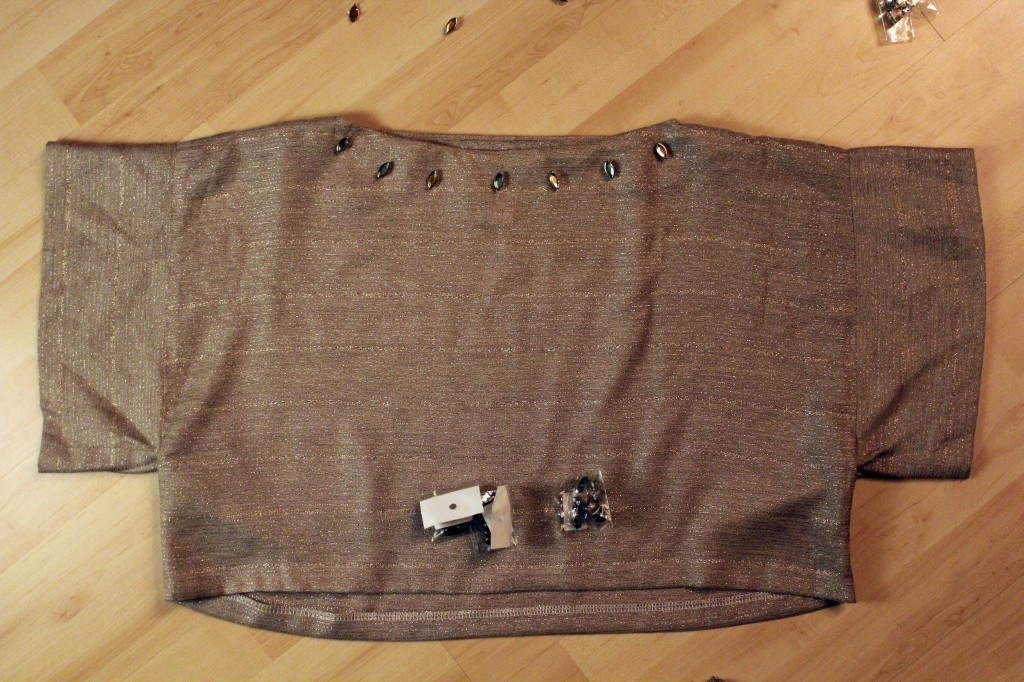
The fit was ok-ish, but the top still lacked something. Since it’s a really simple shape, I thought I might add some embellishments to add some bling and make it a bit less boring.

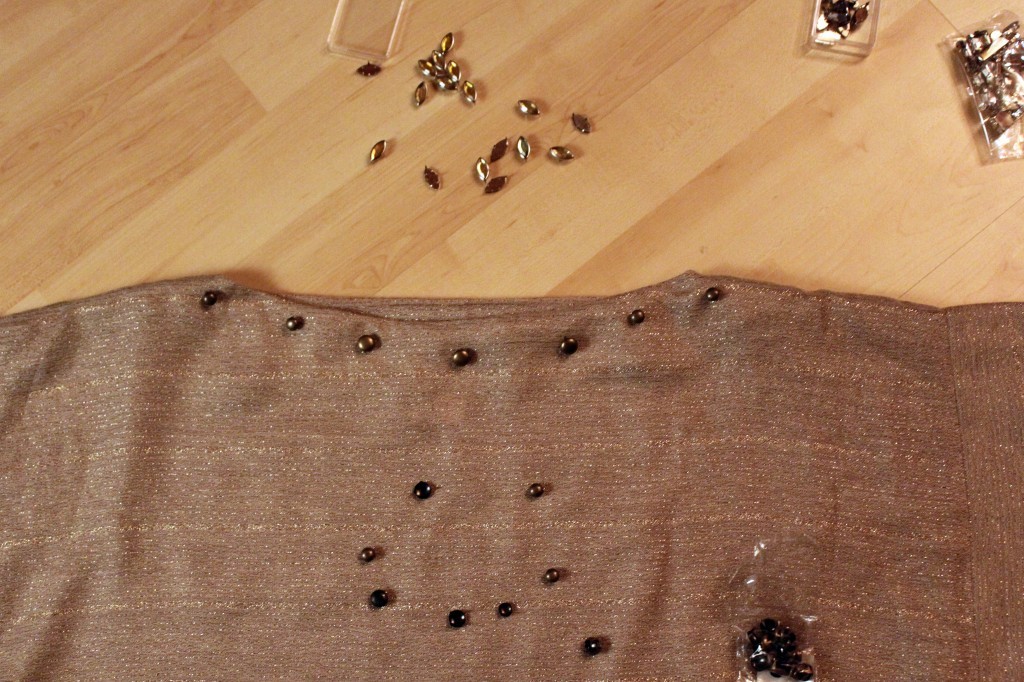
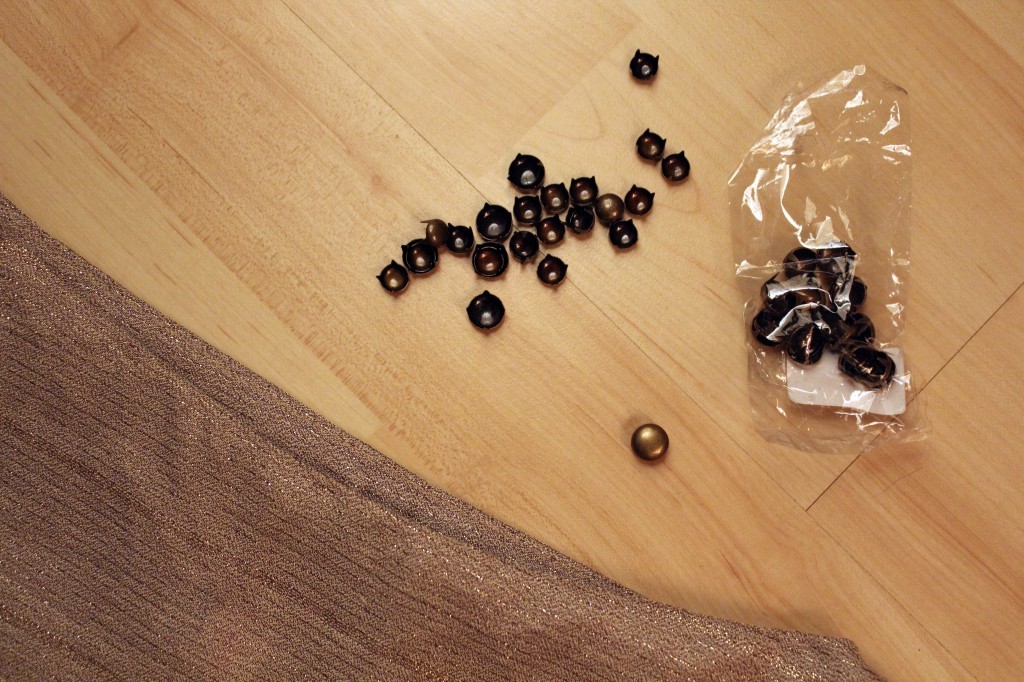
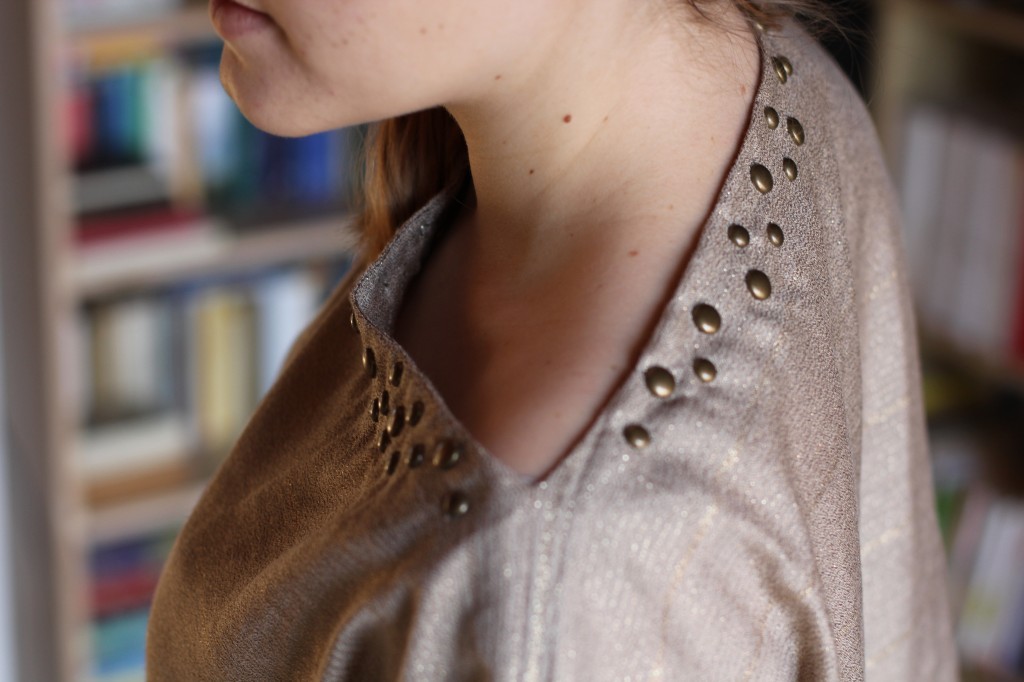
I played around with different embellishments I had at home, like studs and acrylic diamonds.
vintage dress to crop top by thisblogisnotforyou.comvintage dress to crop top by thisblogisnotforyou.comvintage dress to crop top by thisblogisnotforyou.com

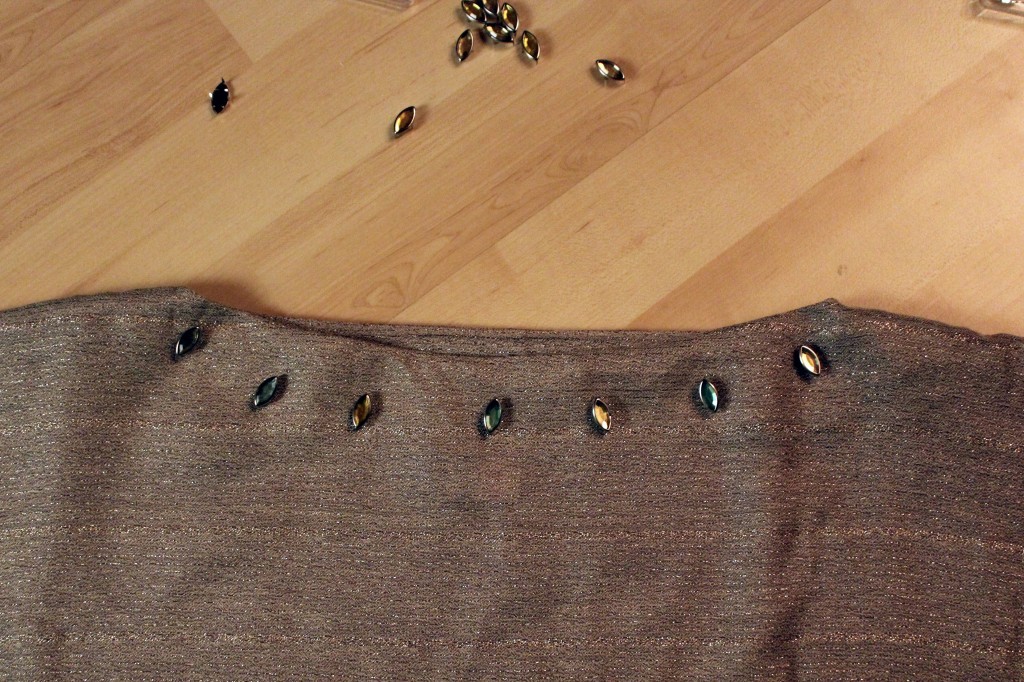
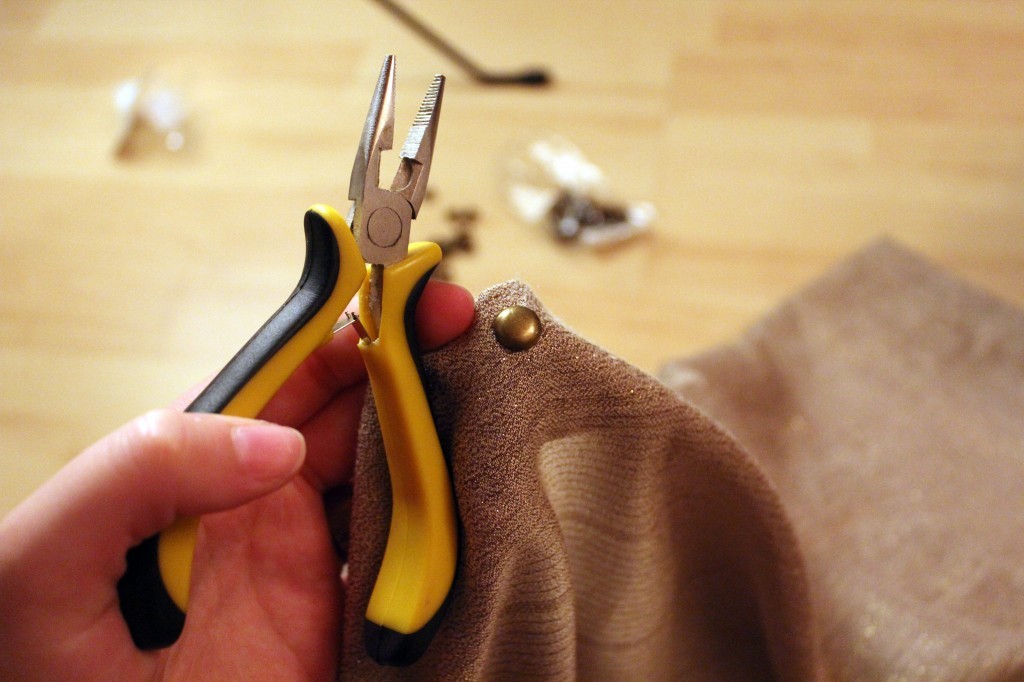
I liked the studs best and started placing them on the neckline. Once I liked what I saw, I attached them using my pliers. I added more and more until I was happy with the end result.vintage dress to crop top by thisblogisnotforyou.comvintage dress to crop top by thisblogisnotforyou.comvintage dress to crop top by thisblogisnotforyou.comvintage dress to crop top by thisblogisnotforyou.comvintage dress to crop top by thisblogisnotforyou.comvintage dress to crop top by thisblogisnotforyou.com

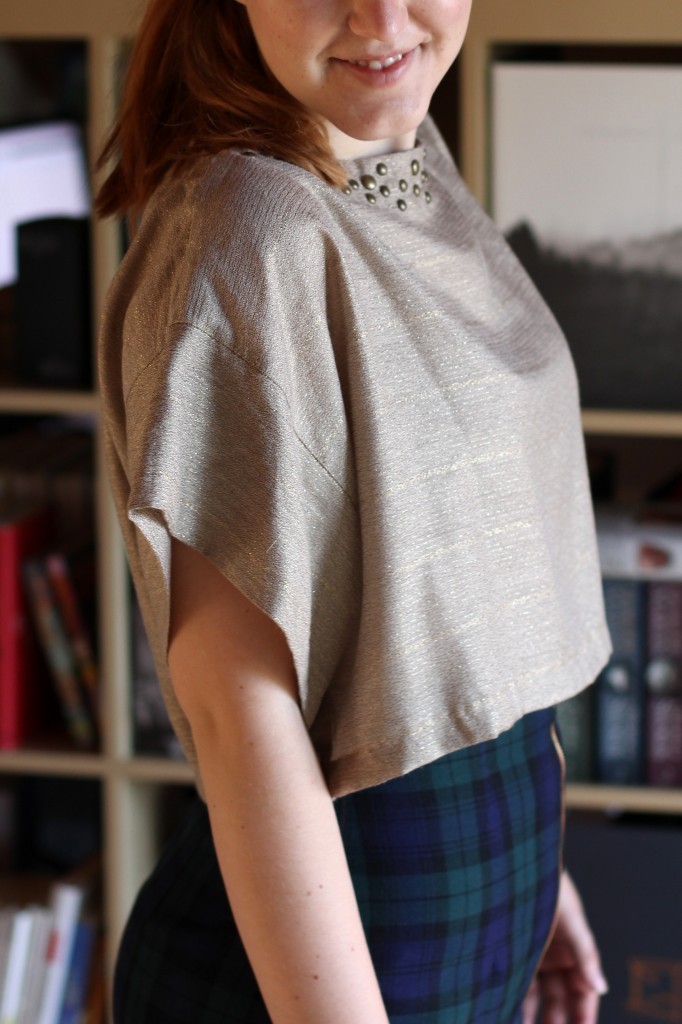
Since the crop top is very wide, I love wearing it with my pencil skirts. Since they have a high waist, my belly won’t show which makes this look pretty work appropriate. Also, I can wear a tank top underneath during the cold season which is neat.

Personally, I love the tight skirt – loose top combination which is quite flattering as it makes your waist appear smaller than it is!

vintage dress to crop top by thisblogisnotforyou.comvintage dress to crop top by thisblogisnotforyou.com

It’s amazing how such small changes can make a big difference to a garment. Take an hour and an unloved garment and turn it into something you love wearing. Instant happiness!

I would love to hear about your experiences with transforming your old or vintage clothes!

xx

Charlie


Happy sewing!

facebook/bloglovin/pinterest
twitter/instagram

Stay in touch!
Sew Over It pencil skirt with front zip

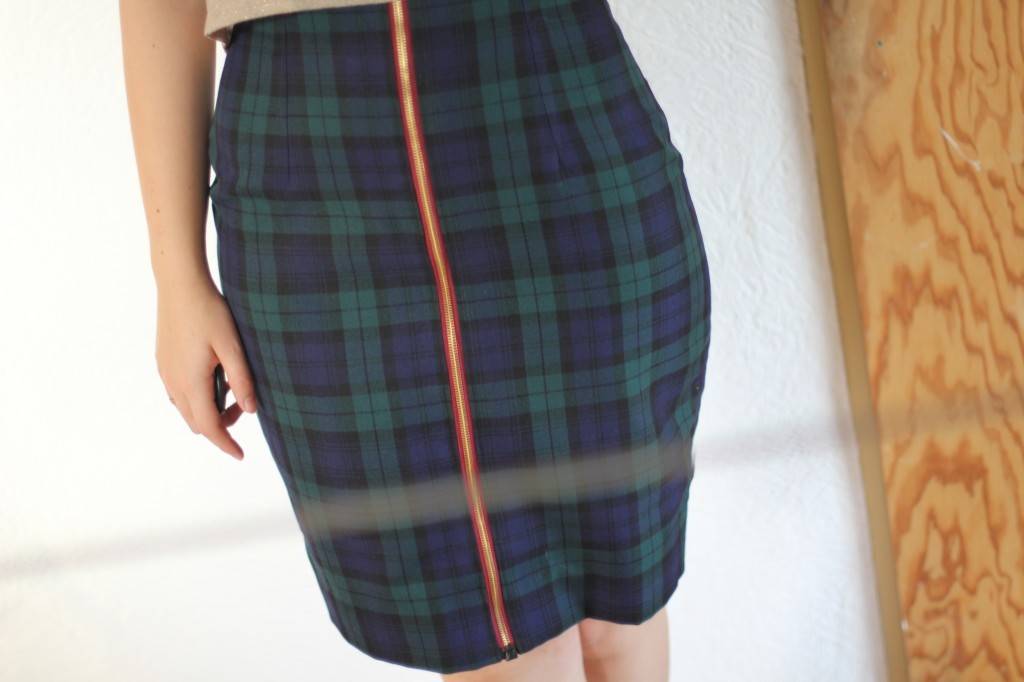
pencil skirt with front zip by thisblogisnotforyou.compencil skirt with front zip by thisblogisnotforyou.comOh hay!

After three months I finally came around to posting this neat little pencil skirt I made in December (or was it November?) last year. I’m way too much caught up in wedding planning and my new job, so I have to dig up last years projects (thankfully we took pictures already). On my sewing table there’s only the wedding dress at the moment. And it’s probably better if it stays like this.

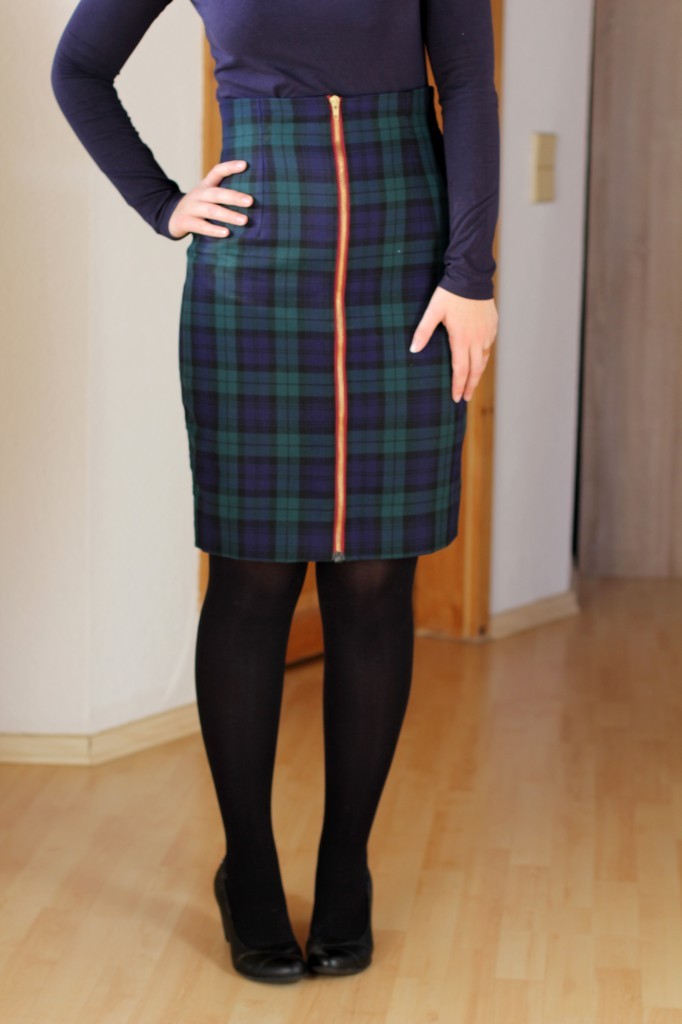
Soo, this is another Sew Over It “Ultimate Pencil Skirt”. If you’ve been following This Blog for a while you know how much I dig this pattern. It might be even my favourite of all time. Over the last year I realised just how versatile it is, from full-on vintage to very modern you can make hundreds of very different looking skirts. I’ve made a mini as well as a faux wrap (yet to be blogged), a wool and also a jersey version.

pencil skirt with front zip by thisblogisnotforyou.com

pencil skirt with front zip by thisblogisnotforyou.com

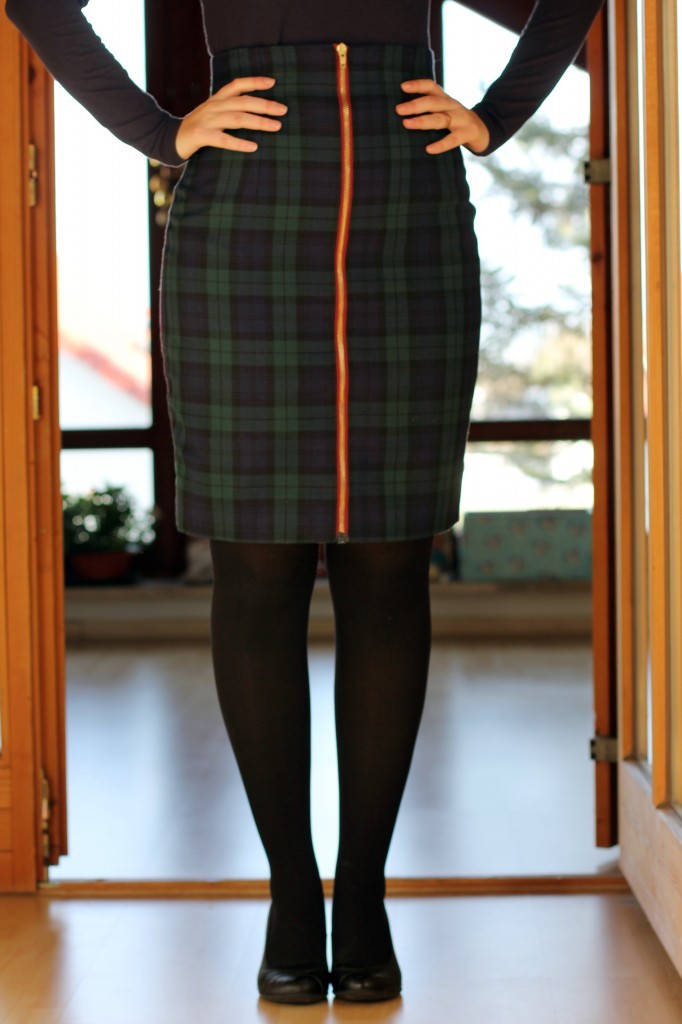
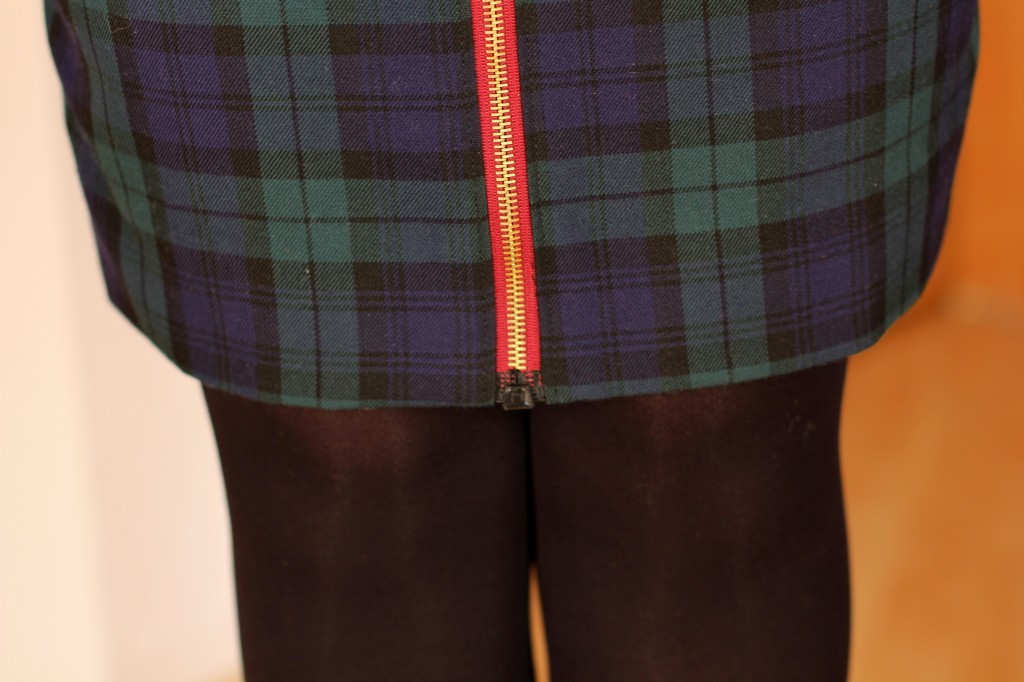
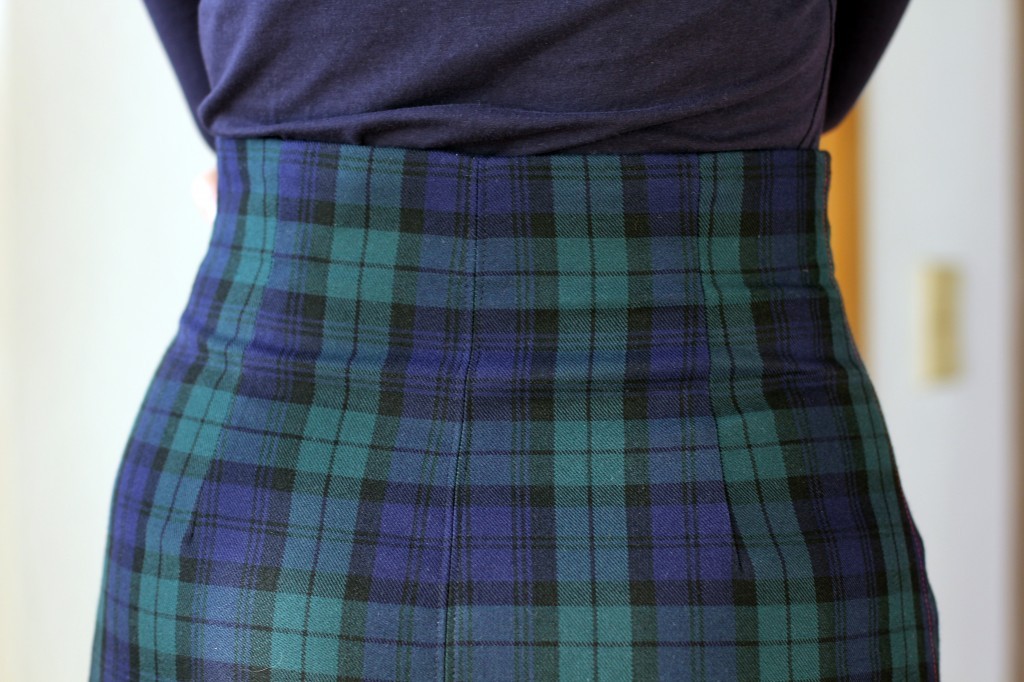
This time I used the fabric included in the Ultimate Pencil Skirt Kit. It’s a gorgeous green/navy wool tartan, which I absolutely love. I used a very similar fabric for one of my very first sewing projects, a 50’s dress.

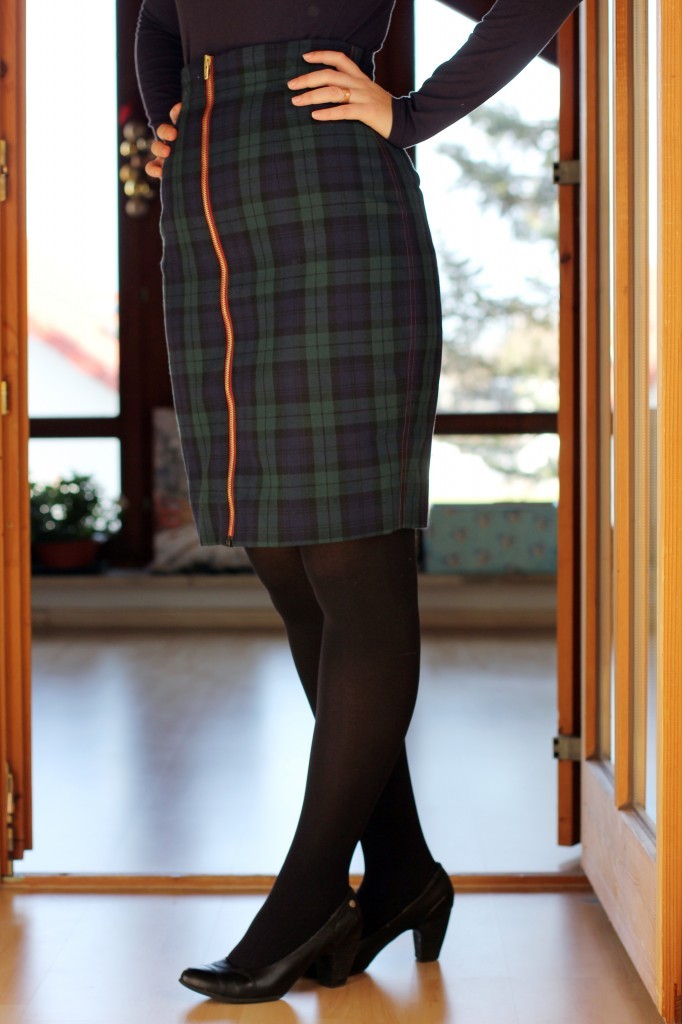
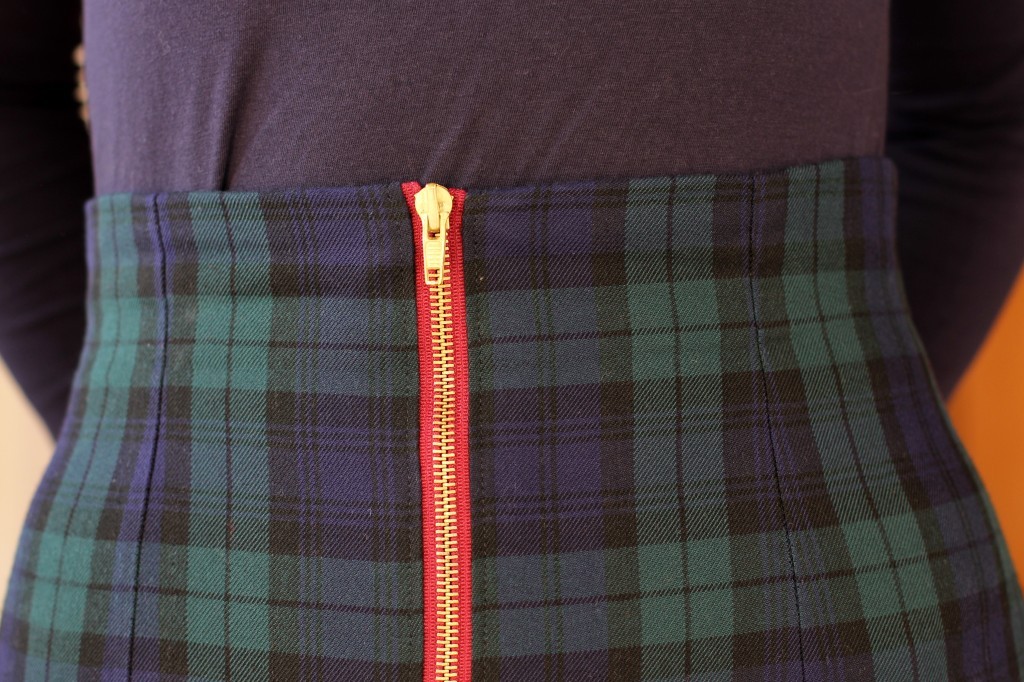
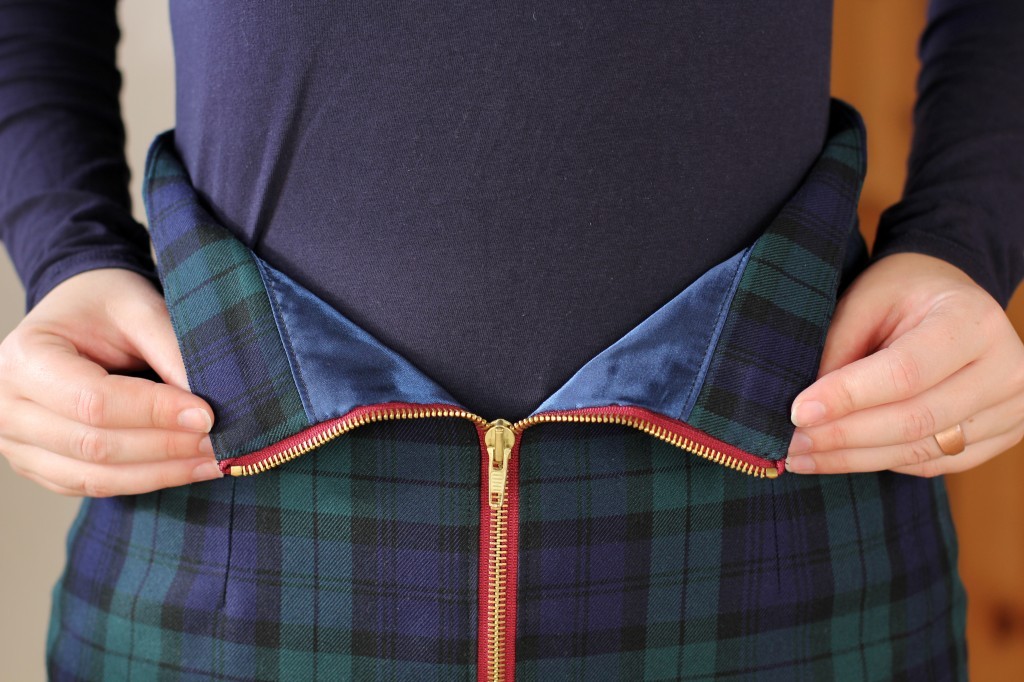
Instead of using the matching-colour invisible zip (incl. in the kit) I used a separating exposed zip in a contrast colour. Also, in the original pattern the zip is inserted in the centre back seam whereas I decided to insert it in the centre front. I simply added seam allowance to the centre front, not cutting it on fold.

It’s quite an eye-catcher, but I really really like it this way.

pencil skirt with front zip by thisblogisnotforyou.compencil skirt with front zip by thisblogisnotforyou.compencil skirt with front zip by thisblogisnotforyou.com

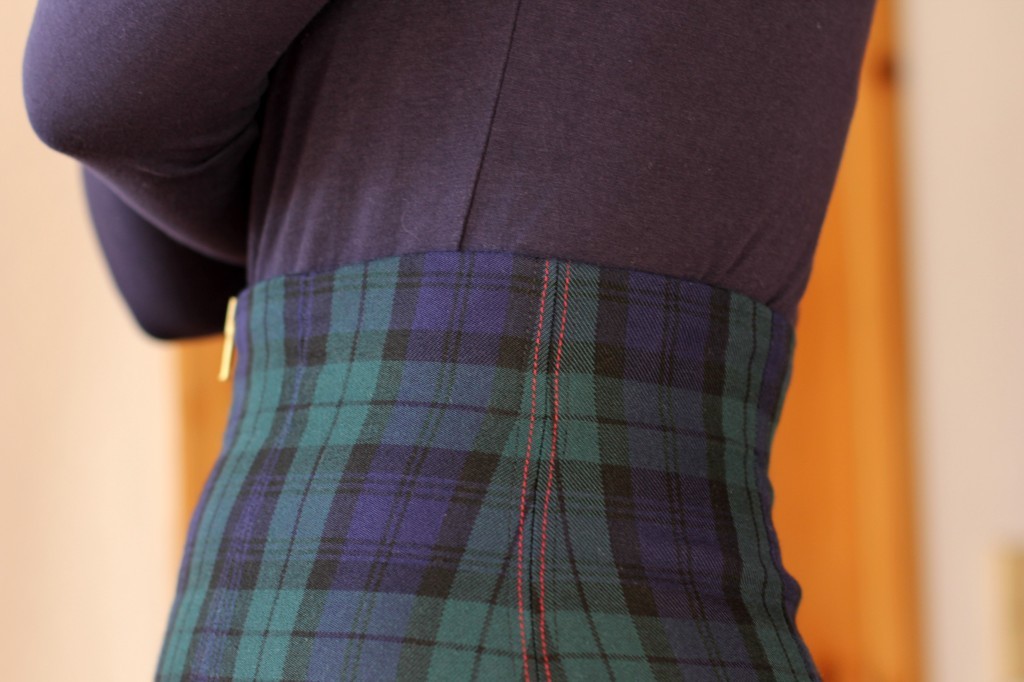
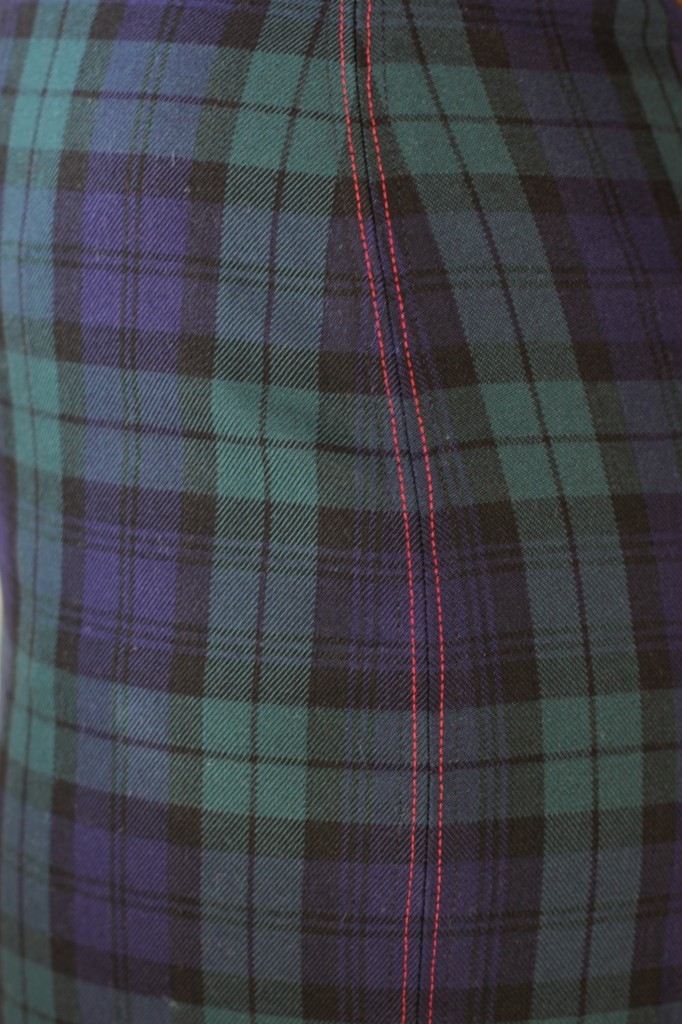
To match the zip, I used red thread for some topstitching at the side seams. I added two rows of red stitching, and two rows of black topstitching next to it (which is really hard to see in the pictures). It also really helps the side seams to lie nice and flat.pencil skirt with front zip by thisblogisnotforyou.compencil skirt with front zip by thisblogisnotforyou.com

I tried my best at pattern matching – cutting the fabric in a single layer really helps. I love how the tartan adds to the silhouette of the skirt.

I lined the skirt with royal blue satin. This is really simple – I just sewed it onto the facing, understitched the seam and machine-stitched the hem. I also cut it a lot shorter than the actual skirt, so I didn’t have to worry about the lining peeping out under the kick pleat. I sewed the lining to the zip by hand.

It’s so much better than my unlined pencil skirts. I even went back and lined some of them after that. Although the skirt usually stays in place as it is really fitted at the waist, it tends to crease a bit or clings to your tights. Also, I prefer to line wool garments as they’re not as itchy that way.
pencil skirt with front zip by thisblogisnotforyou.compencil skirt with front zip by thisblogisnotforyou.compencil skirt with front zip by thisblogisnotforyou.com

Will I make it again? Oh yes! I love the front zip detail, it gives the retro shape a bit of an edgy look. Also it’s too cool to be able to pull the zip all the way down – instant picnic blanket!

xx

Charlie


Happy sewing!

facebook/bloglovin/pinterest
twitter/instagram

Stay in touch!

Two Agnes Tshirts

Agnes Top by thisblogisnotforyou.com

A (slightly late) Happy New Year everyone!
As you might have (not) noticed, I took a little blogging break after Christmas, which was necessary due to being away over the Holidays and starting a new job this month. But now I’m back and filled with an endless amount of sewing mojo!

Too bad I mostly only have the weekends now and the wedding is coming closer, so I am (hopefully) channelling all this energy into making a gorgeous wedding gown. Don’t get too excited, I’ve only just started (shame on me!). I’ve been procrastinating for months and now really have to get going. I’m not yet worried as I work best under pressure. Right now I’m working on the muslin, but this will be a seperate blog post.

Although I won’t have time to sew much else, there will be quite a few garment posts soon. My 2015 me was clever enough to sew and photograph loads of projects before Christmas, so I’ve got some blog posts lined up.

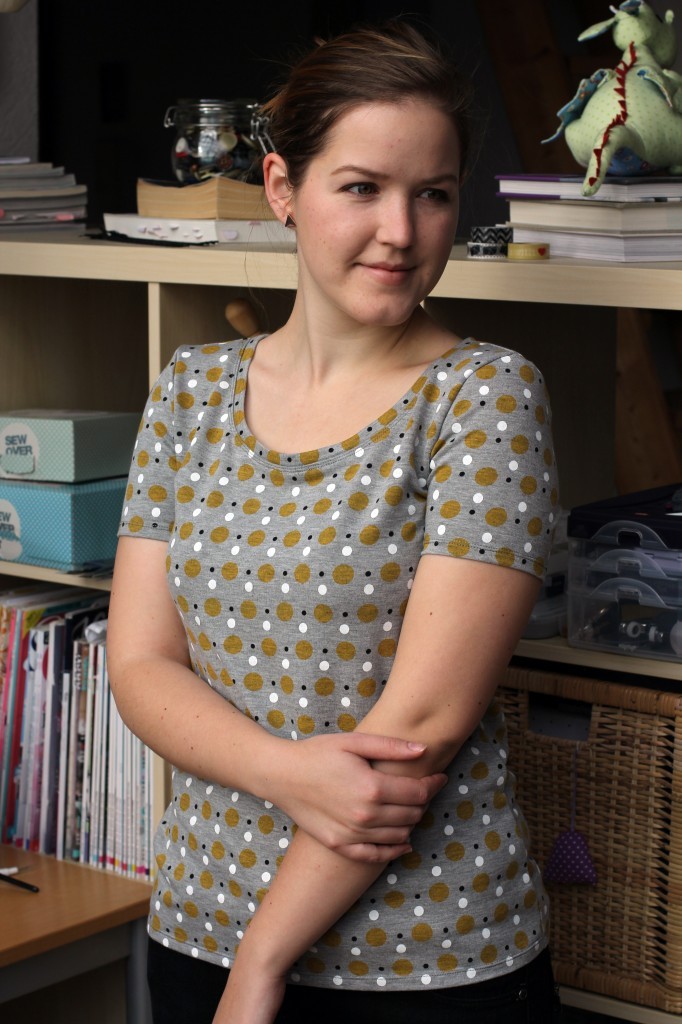
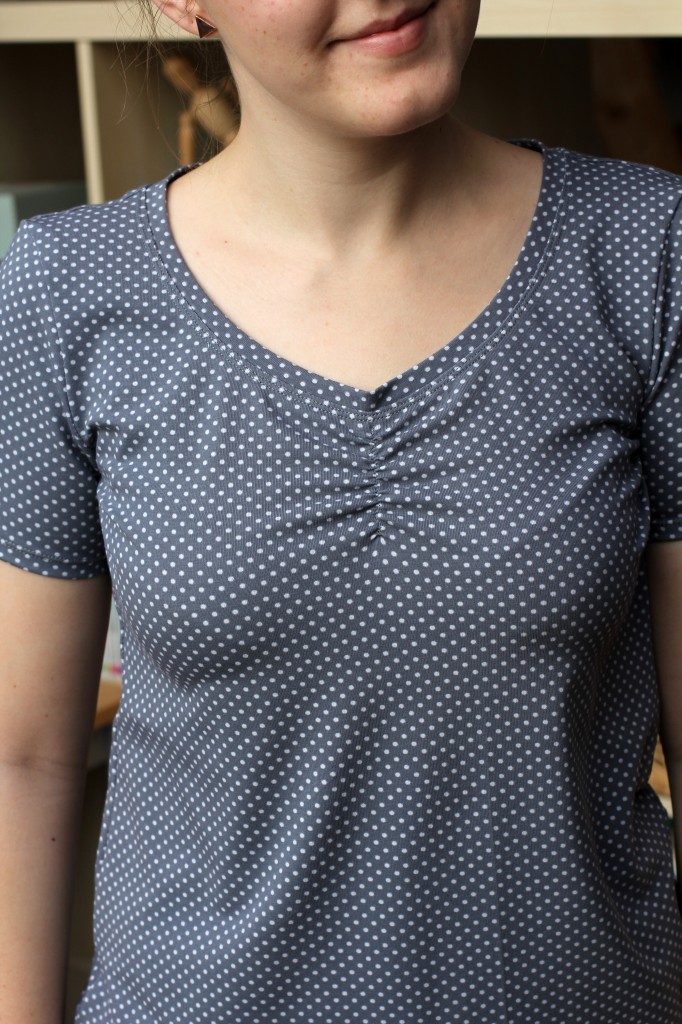
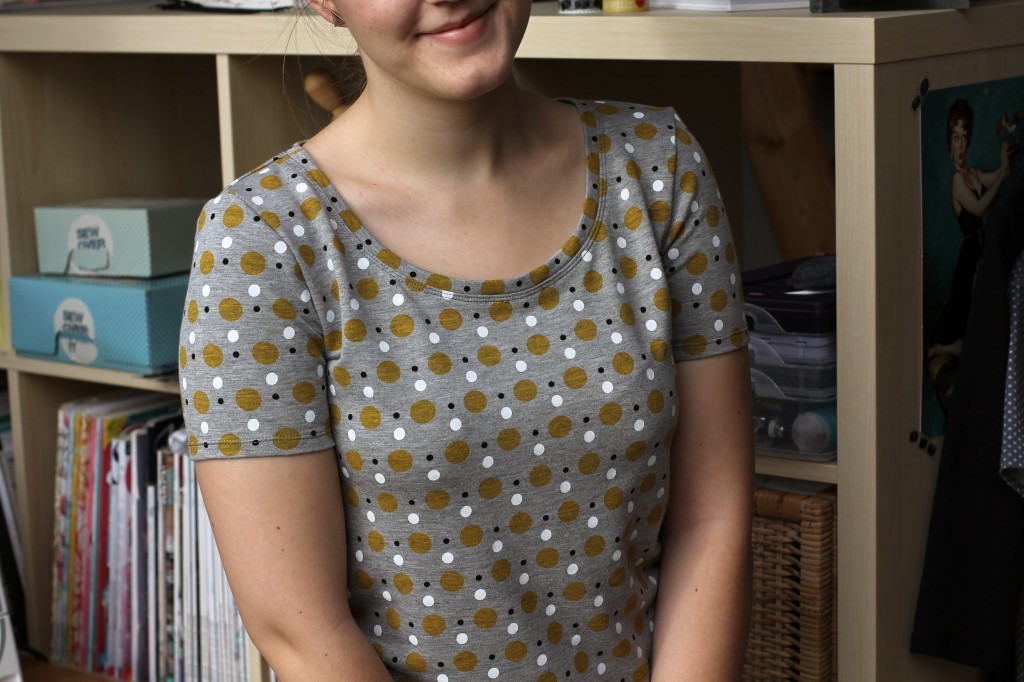
Agnes Top by thisblogisnotforyou.comThe two Tilly & The Buttons Agnes tops I’m showing you today were Christmas presents for my bff. So, please ignore the fit! We are similar sizes and shapes but the tops were ultimately made for her and not a perfect fit on me.
I won’t say more about the pattern, because I already told you how much I love it here and here and here.

Adjustments:

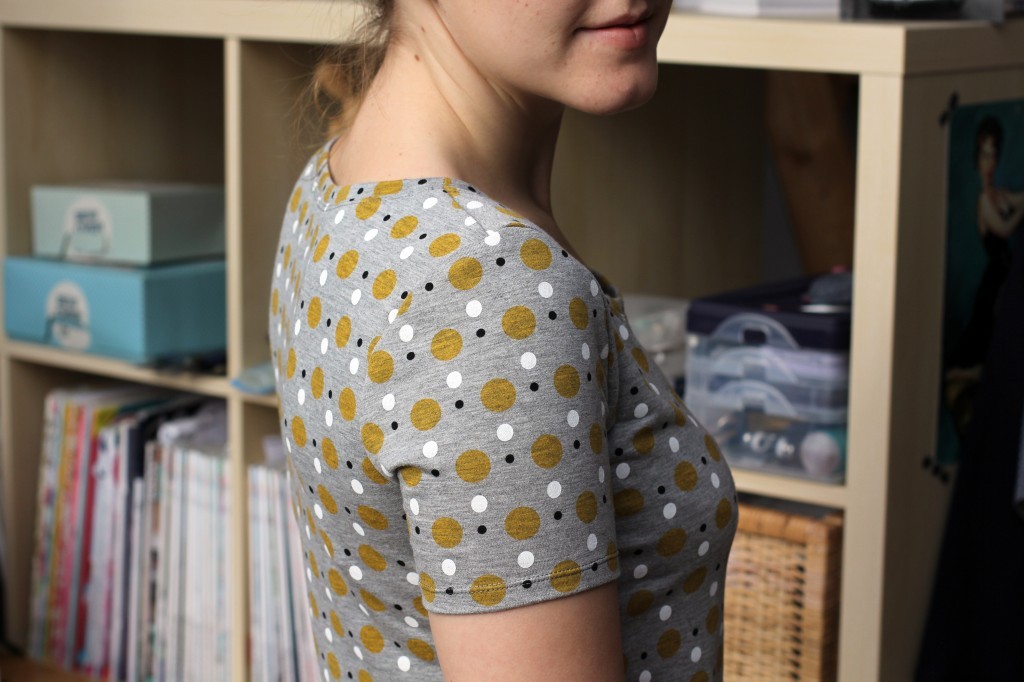
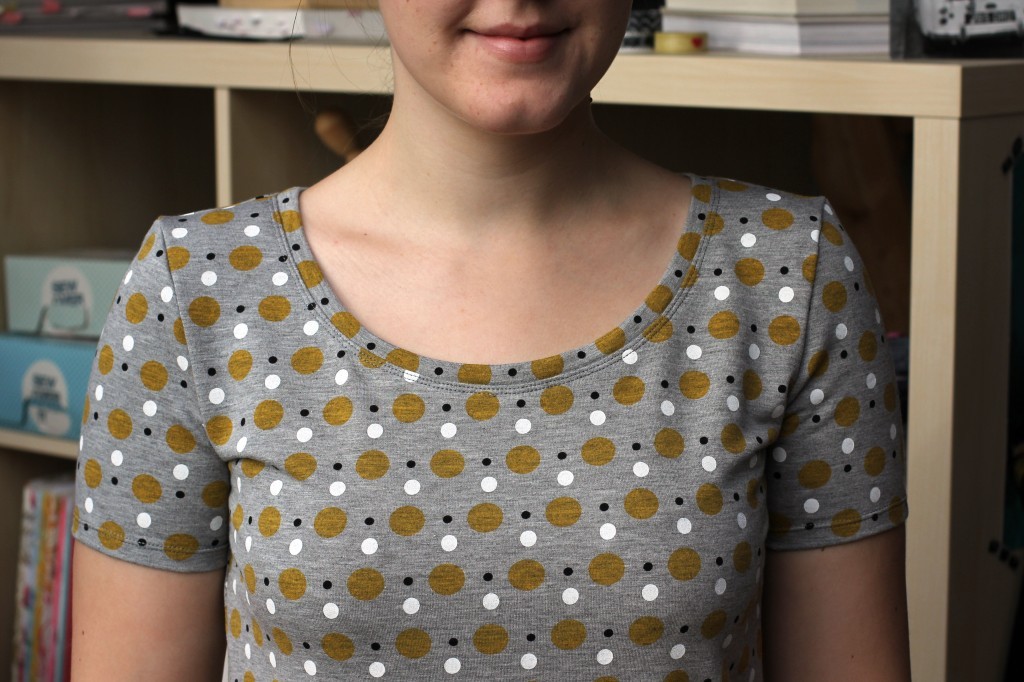
These two tops are again variations of the original pattern. As you might have noticed they are not as figure-hugging as the pattern is intended to be. My friend doesn’t like super tight tops although she’s got a gorgeous figure, so I went with quite a common Tshirt silhouette. For this I simply added more ease around the waist. I redrew the side seams so they were more of a straight line starting at the armhole.

Also, I shortened the sleeves and made them a tiny bit wider around the hem. I left the neckline as it was. For the second top I went with the ruched sweetheart neckline.

Agnes Top by thisblogisnotforyou.comAgnes Top by thisblogisnotforyou.comThe Fabric:

For the first Tshirt I used a slightly heavier cotton knit fabric with a yellow/white/black dots print. My bestie loves dots, but I wasn’t quite sure about the colours and the texture, so I made a second top just to be on the safe side!

This fabric is very soft but quite heavy and reminded me of a cozy warm pyjama. The finished Tshirt looks really cool, though and doesn’t scream pyjama to me. As the fabric was quite thick, I made the simple scooped neckline as I wasn’t sure whether the ruching would work with this fabric.Agnes Top by thisblogisnotforyou.comAgnes Top by thisblogisnotforyou.comAnyway, I had already bought the second & safe fabric, so I made another one. These tops are so easy and quick to sew, it didn’t even make much of a difference.
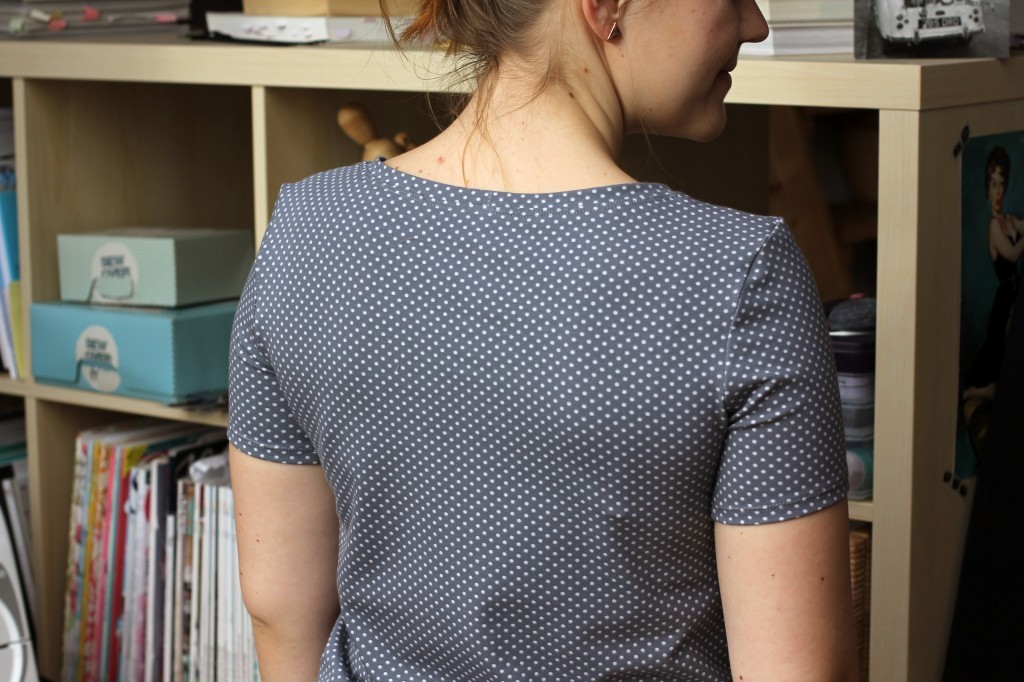
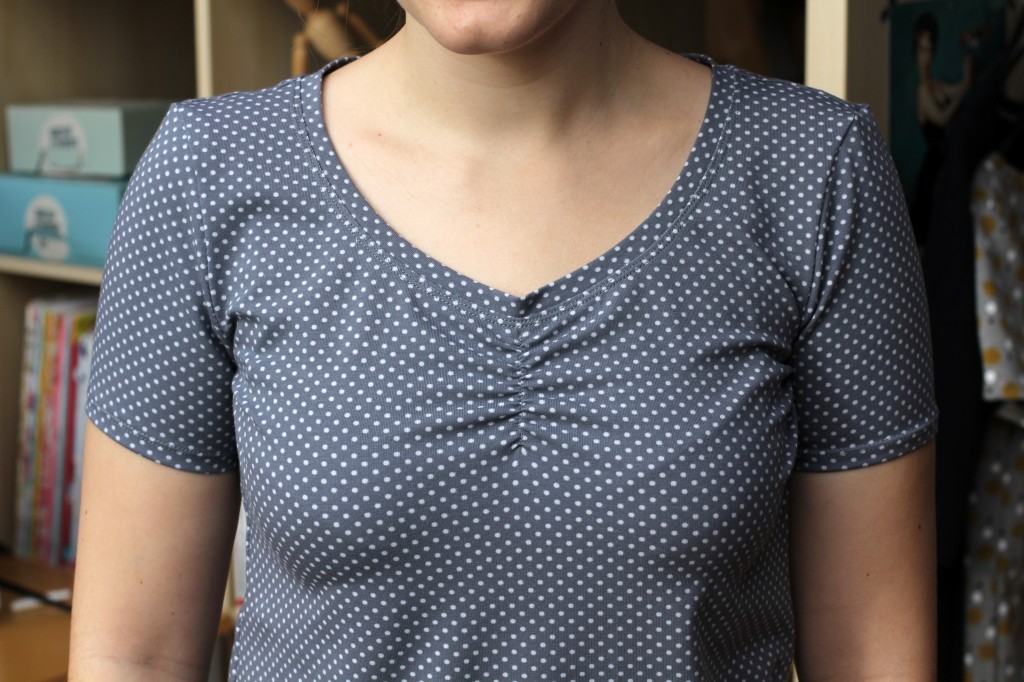
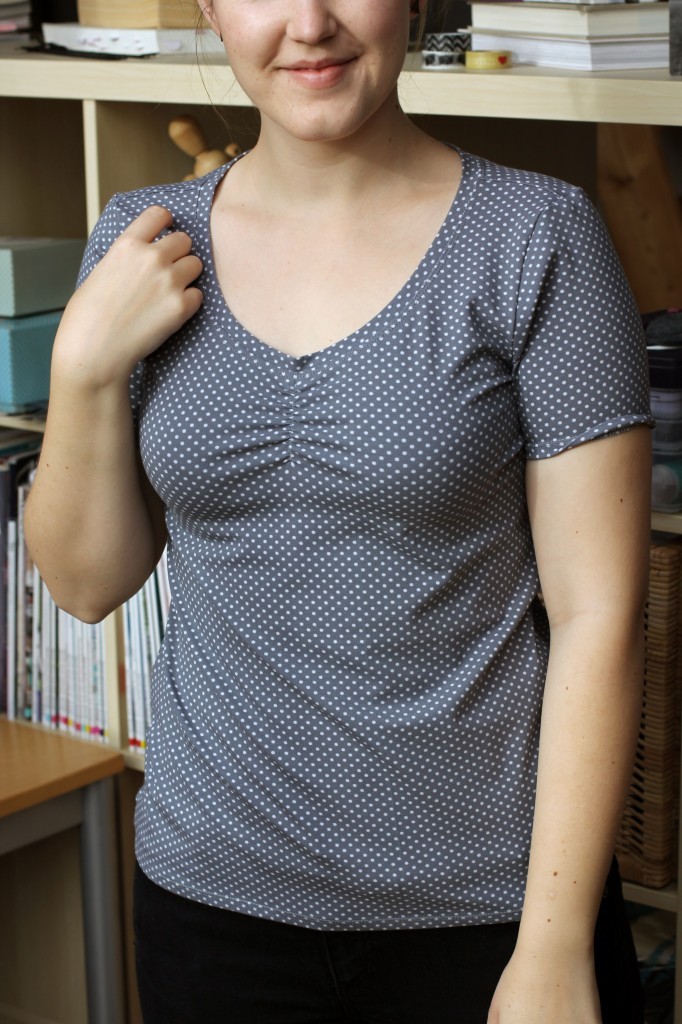
This jersey fabric is super thin and very stretchy. It’s cotton, as well, but a much better quality. The ruching at the neckline worked really well on this and I love the result! Too bad I had to give it away!Agnes Top by thisblogisnotforyou.comAgnes Top by thisblogisnotforyou.comAgnes Top by thisblogisnotforyou.com(Ignore the turned up sleeve, I don’t know how to dress myself!)Agnes Top by thisblogisnotforyou.com
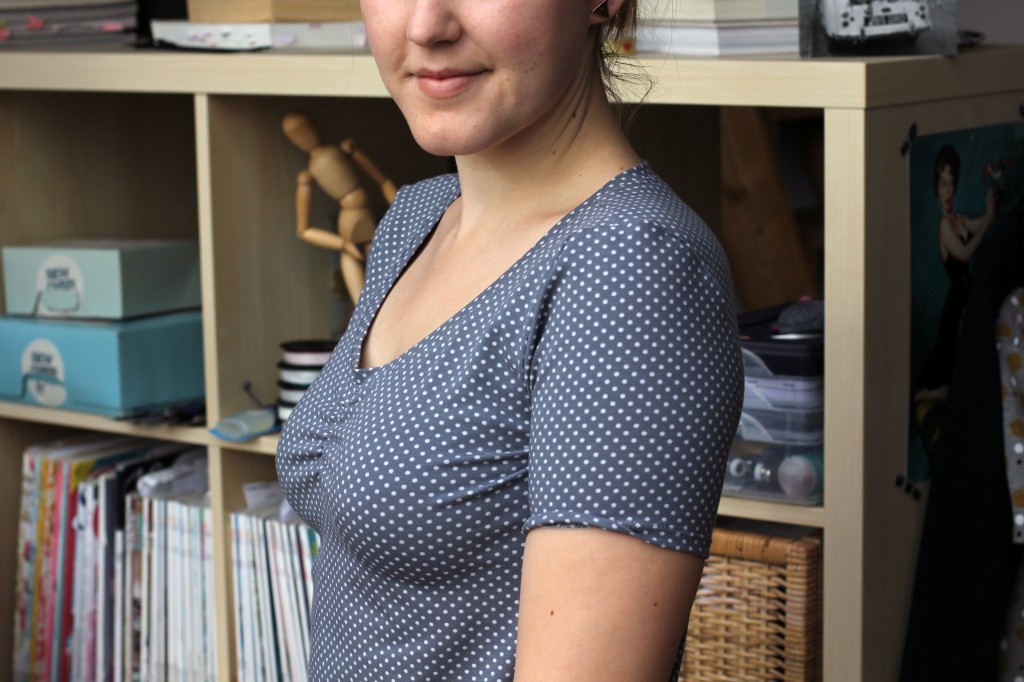
Soo, as you can see the Agnes Top works as a simple Tshirt, as well! I can’t stress the versatility of this pattern enough. I’ll probably make even more just for the fun of it. When you have little time, quick sewing projects are so so satisfying!

xx

Charlie


Happy sewing!

facebook/bloglovin/pinterest
twitter/instagram

Stay in touch!

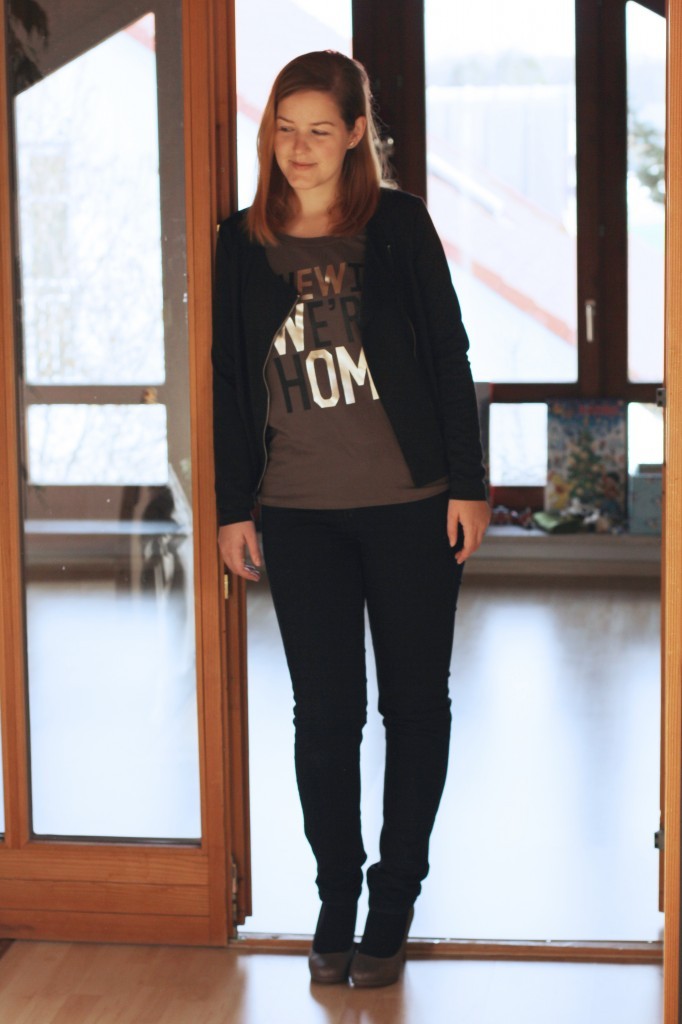
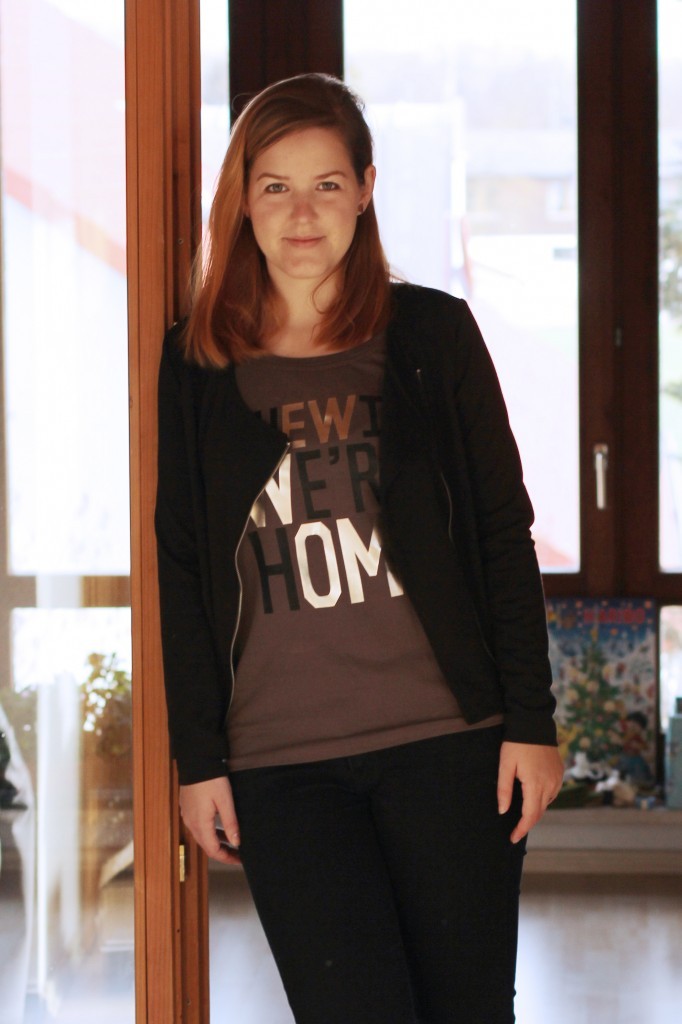
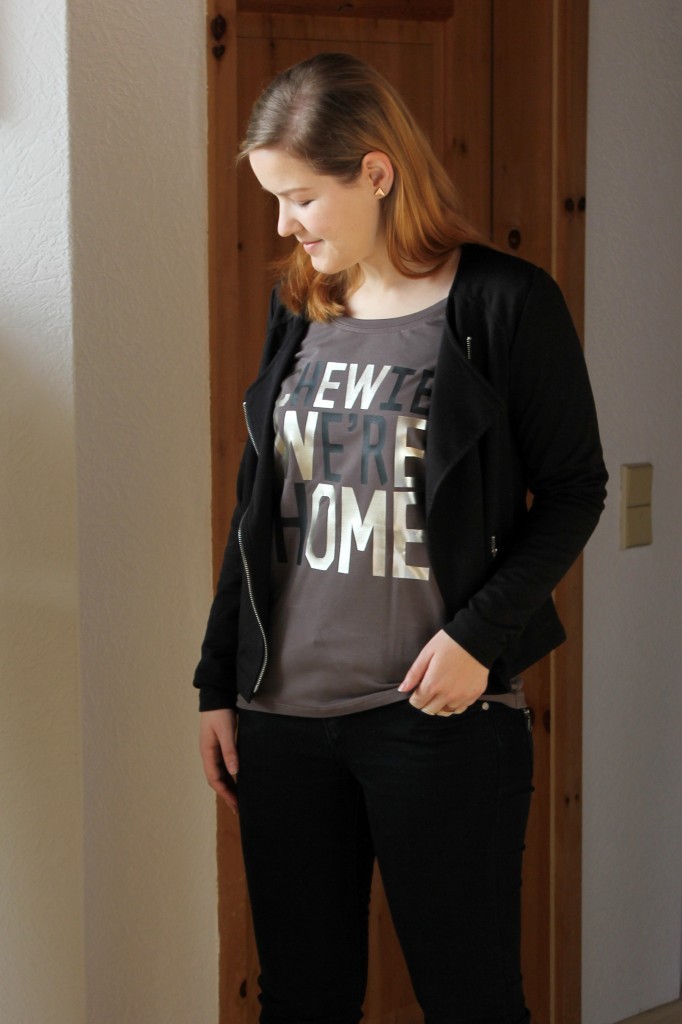
DIY Star Wars: The Force Awakens Christmas Sweater!

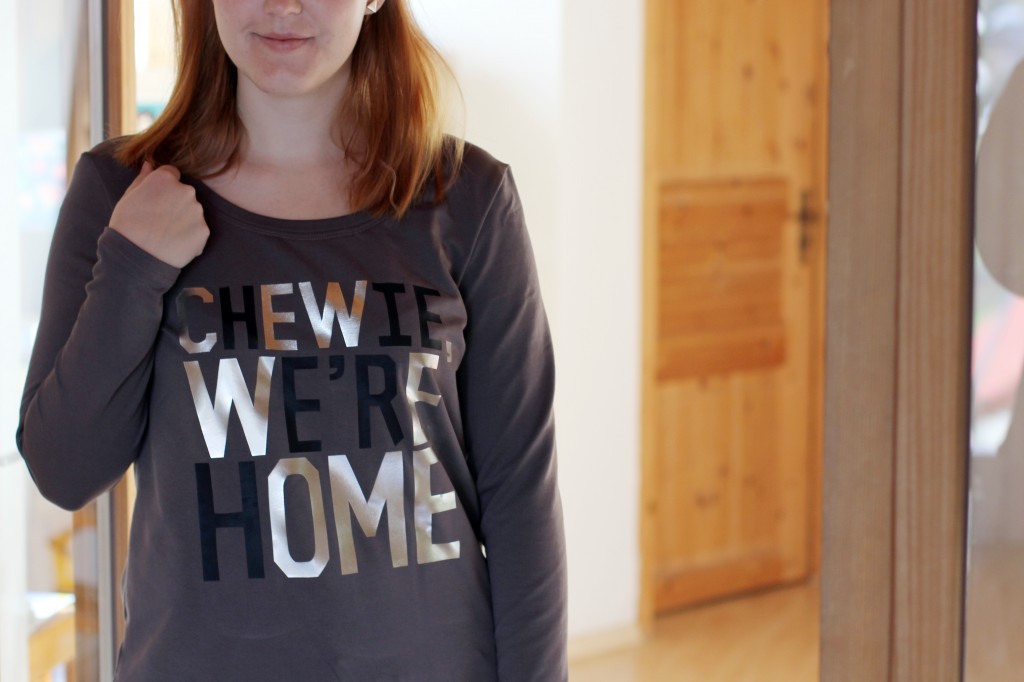
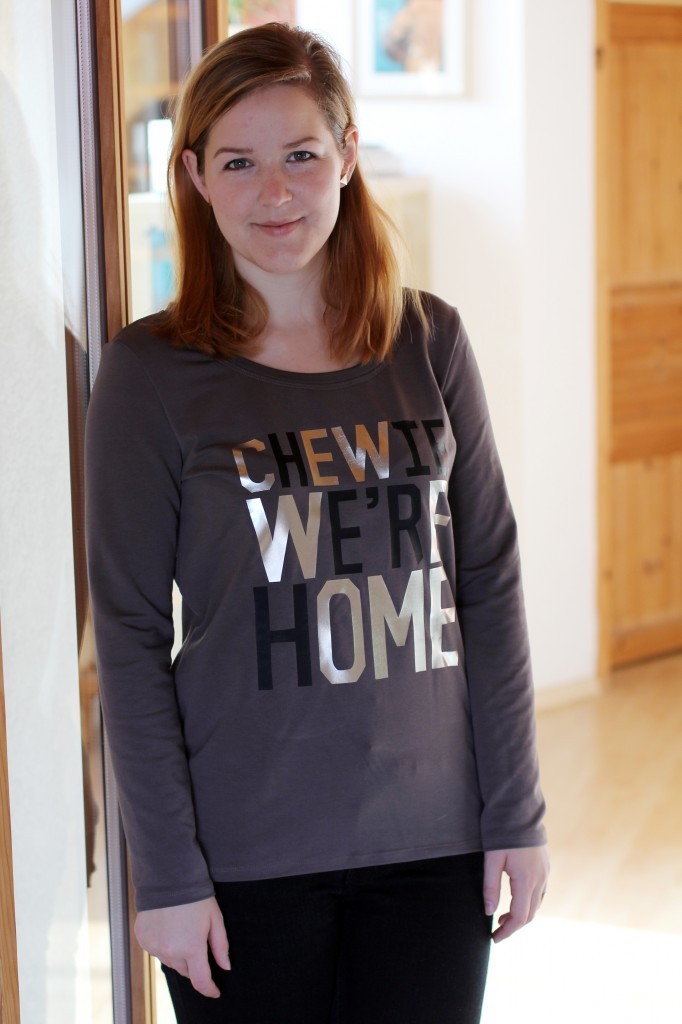
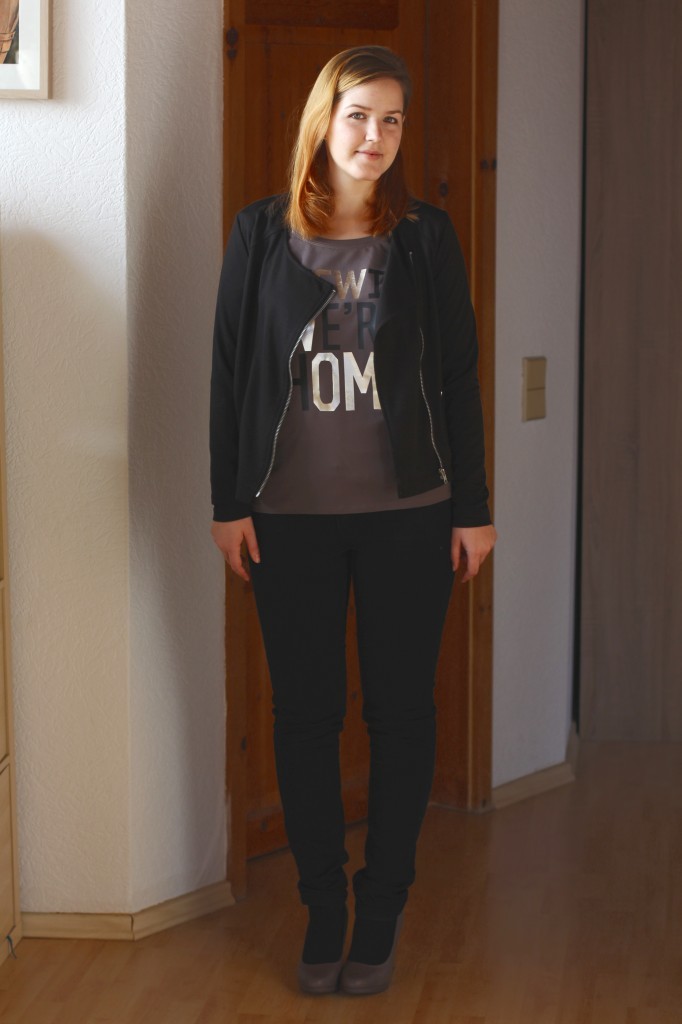
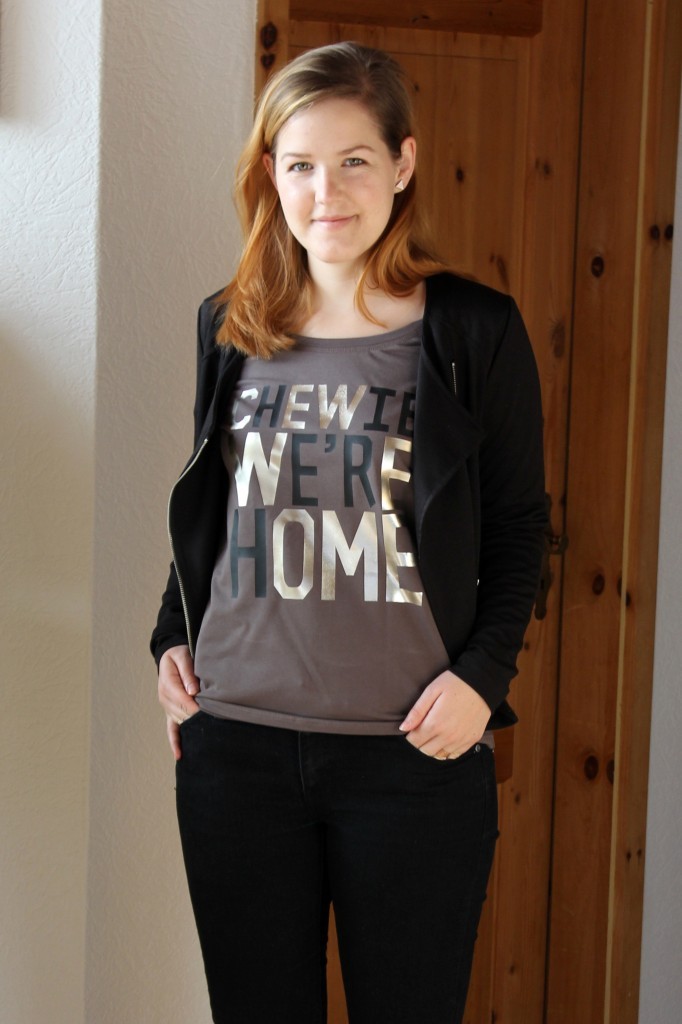
DIY Star Wars Tshirt by thisblogisnotforyou.comDIY Star Wars Tshirt by thisblogisnotforyou.comHappy Holidays everyone!

A quick word about the sweater I used for this project. It’s, what a surprise, handmade! This is the reason why I got the Agnes pattern in the first place! I wanted to have a simple shirt pattern that could easily be turned into a sweater.

I added about 2cm to the sleeve and bodice pattern pieces and also squared down the bodice for a looser fit. The close fit of the original pattern would’ve been unsuitable for the lettering. I always find it somewhat weird to have bold lettering right across the bust if the shirt’s a tad too tight. I used a slightly heavier jersey knit fabric in taupe which I bought in a little sewing café in Germany last winter.DIY Star Wars Tshirt by thisblogisnotforyou.comDIY Star Wars Tshirt by thisblogisnotforyou.comDIY Star Wars Tshirt by thisblogisnotforyou.com

PERSONALISE A SHIRT USING IRON-ON FOIL

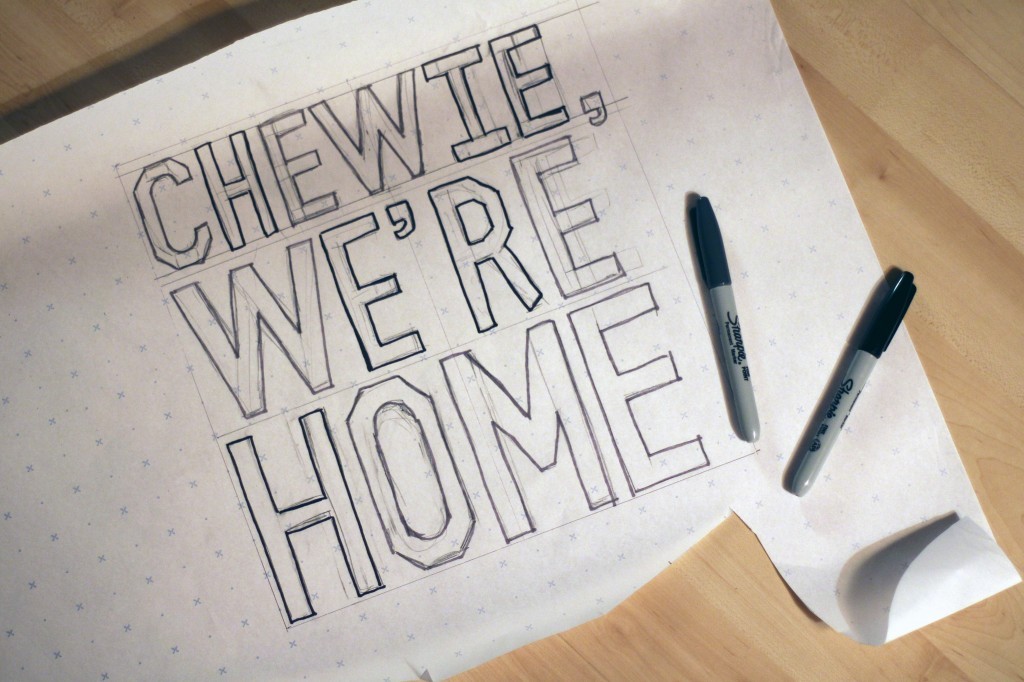
This is a super easy way to personalise or embellish any kind of garment. If you have templates for letters or shapes, it’s even easier. (It took me a while to draw all those letters and get them in perfect shape).

All you need is a shirt and some iron-on foil that you can order online.
DIY Star Wars Tshirt by thisblogisnotforyou.com

Some tips:

– Use a shirt with a smooth surface (jersey or cotton works best)
– You need to be able to iron your garment on a very hot temperature setting (I wouldn’t recommend using silk or polyester!)
– Read the instructions that comes with the iron-on foil carefully
– Keep in mind that all shapes and letters have to be mirrored!

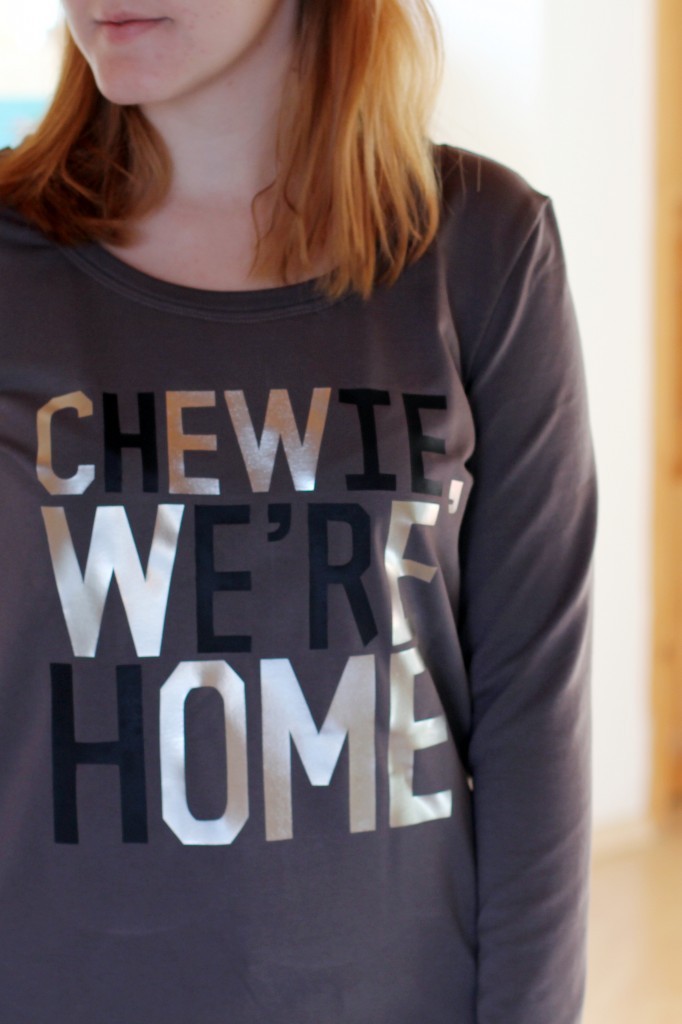
I ordered silver and matt black foil online which came in different sizes. The A4 size had the best cost-benefit ratio and also I wasn’t sure how much I needed. In the end, I used less than half of a sheet of each colour. I have plenty left for other projects.

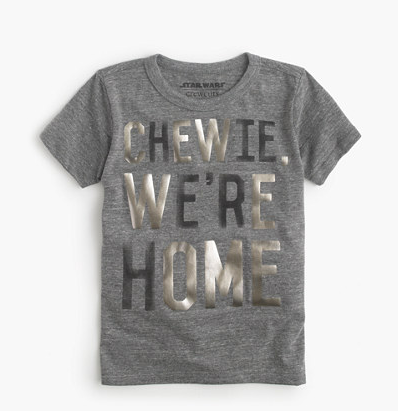
For this project I was inspired by this jcrew kids tshirt which unfortunately doesn’t come in adult size!

source: jcrew.com
source: jcrew.com

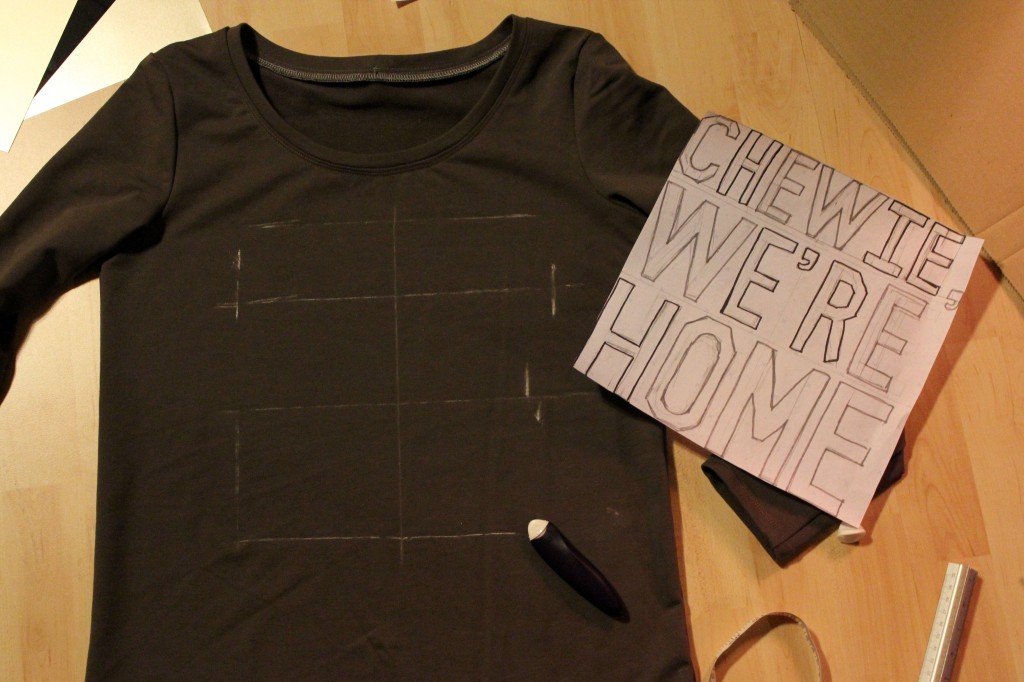
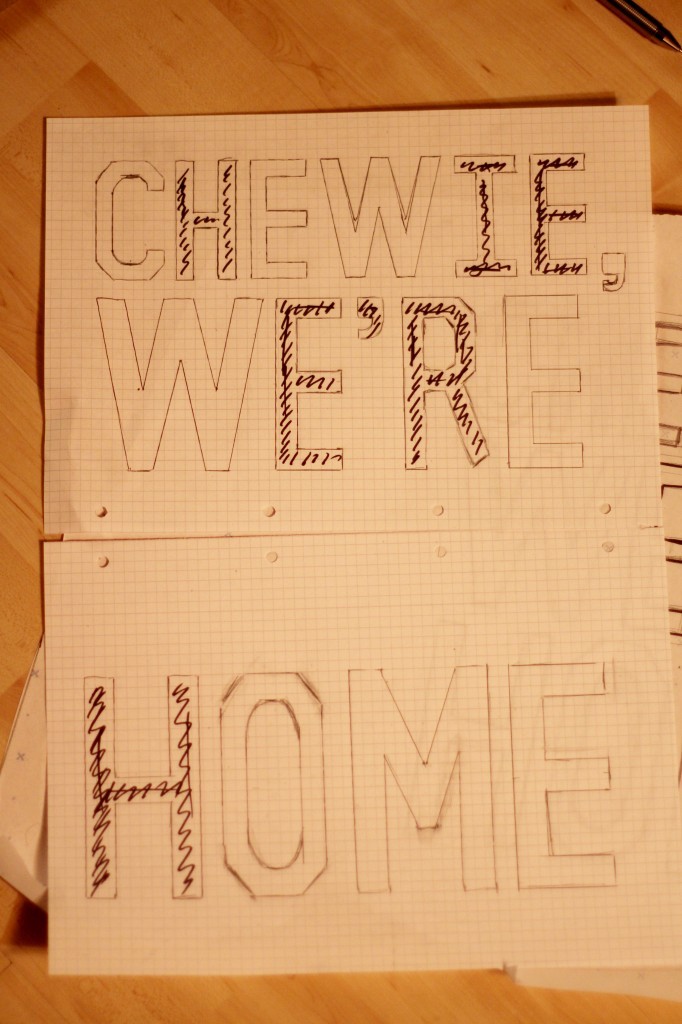
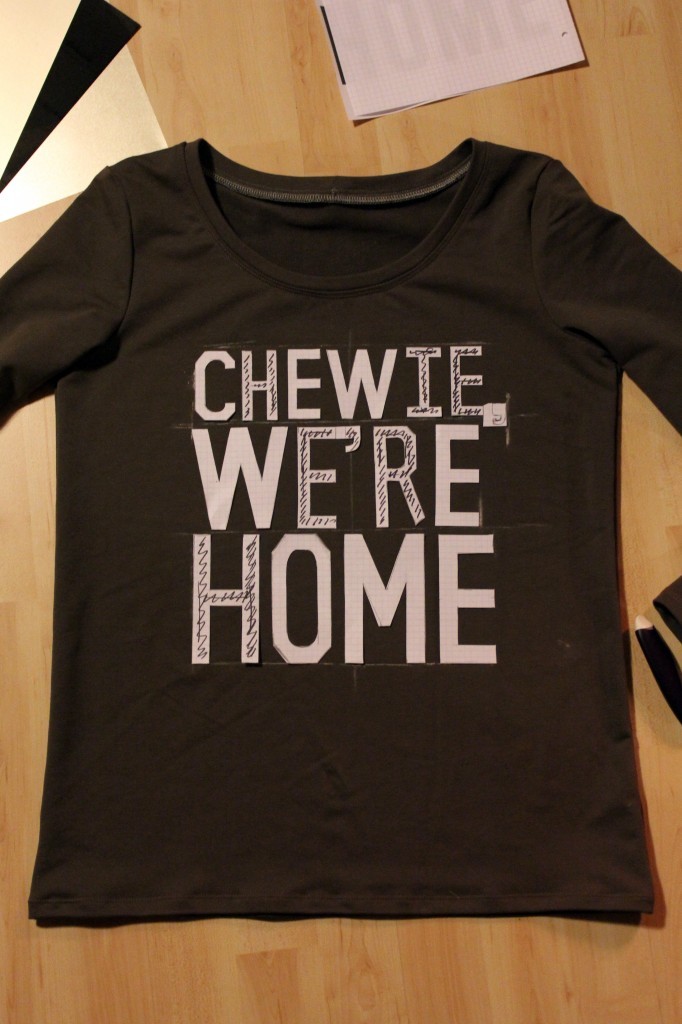
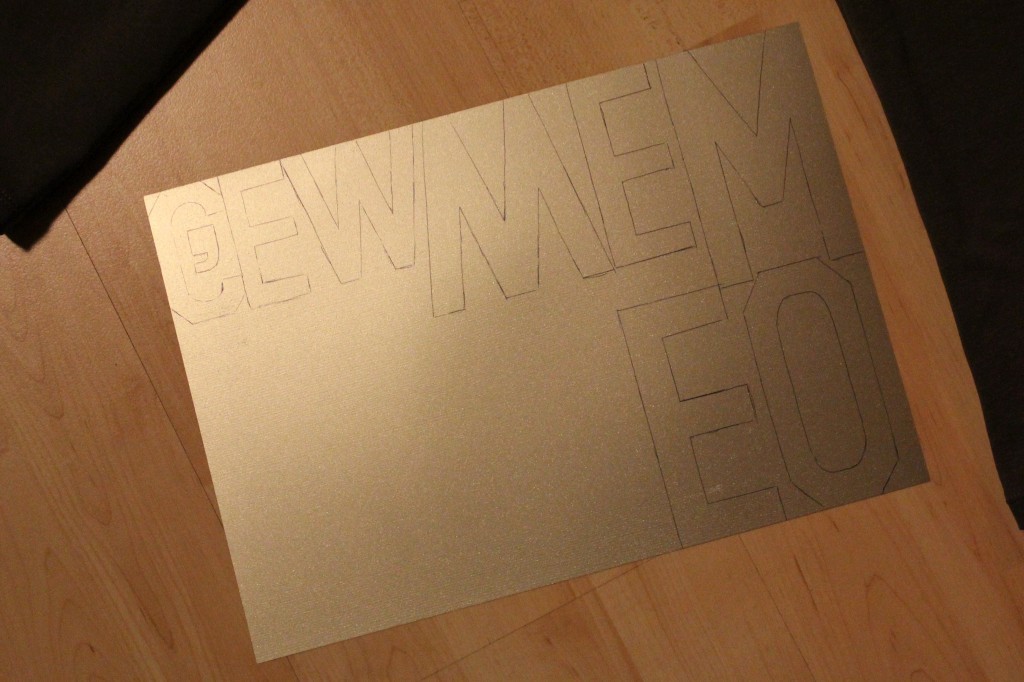
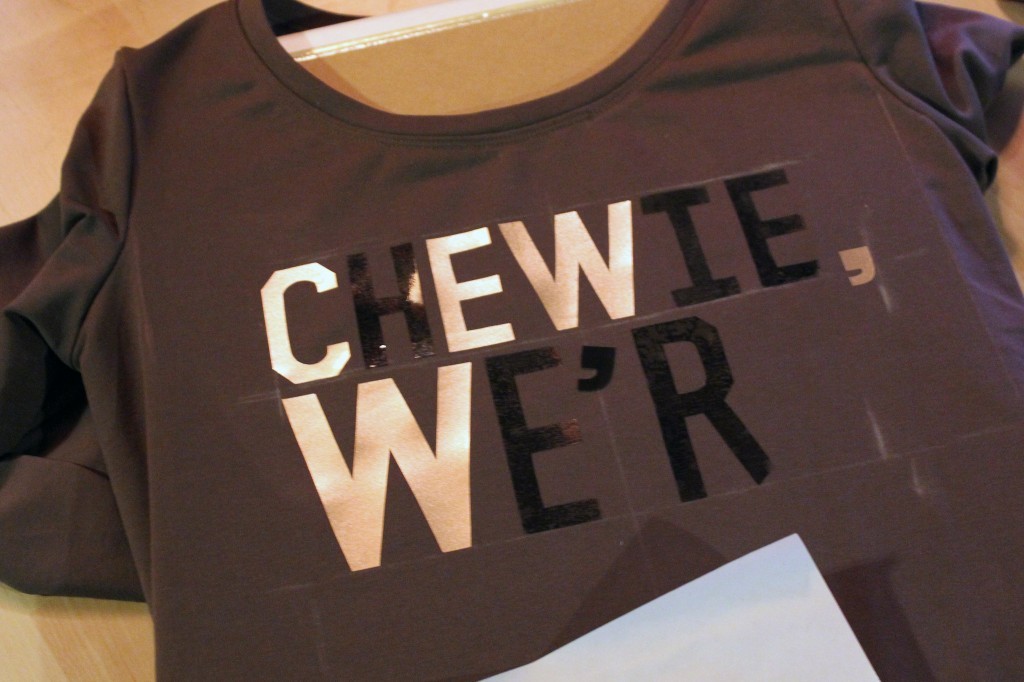
DIY Star Wars Tshirt by thisblogisnotforyou.comStart of by sketching out the shape or letters you want to create. Alternatively, you can use Word or Photoshop to create a layout you can print off and cut out.DIY Star Wars Tshirt by thisblogisnotforyou.comI used the sketch to check if the size was right and to mark the position on the shirt.DIY Star Wars Tshirt by thisblogisnotforyou.comBecause I couldn’t find a good font and sketched my own, I copied them onto squared paper to make sure they were even and all the exact same size. I positioned them on the shirt and used chalk for markings.DIY Star Wars Tshirt by thisblogisnotforyou.comWhen transferring the template onto the foil, make sure everything is mirrored. Draw the shape onto the matt side of the foil, you can use pen or pencil. If you don’t want to mirror your letters, you can try to draw them onto the “right” side, but since it has a protective film it might be a bit tricky and the ink of your pen might come off and ruin your iron.DIY Star Wars Tshirt by thisblogisnotforyou.comCut out the letters, place the onto your shirt and press the iron onto them one by one to prevent them from slipping out of positon. Don’t remove the protective film until all the letters are firmly applied and have cooled off. DIY Star Wars Tshirt by thisblogisnotforyou.comDIY Star Wars Tshirt by thisblogisnotforyou.comYou can now remove the plastic film and use the extra sheet of protective paper that comes with the foil to set the glue a second time. Never iron without the paper after that otherwise the foils sticks to your iron and the whole this is ruined. You can wash the shirt at 60° and iron it from the wrong side if necessary. DIY Star Wars Tshirt by thisblogisnotforyou.comDIY Star Wars Tshirt by thisblogisnotforyou.comDIY Star Wars Tshirt by thisblogisnotforyou.comDIY Star Wars Tshirt by thisblogisnotforyou.comDIY Star Wars Tshirt by thisblogisnotforyou.com
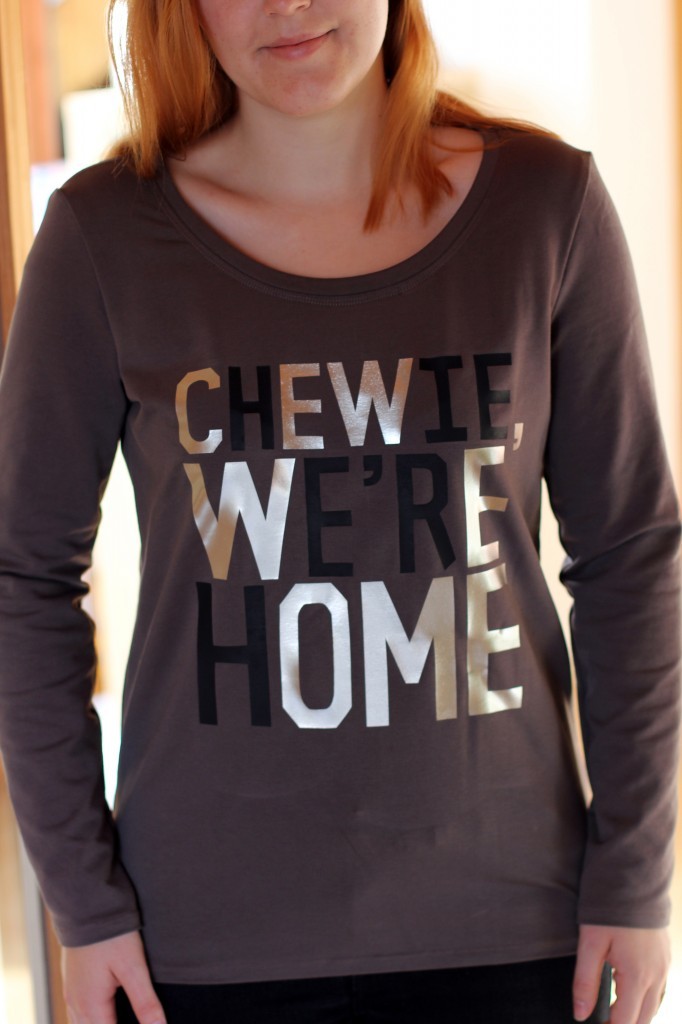
Will I make it again? Yessss! I love this shirt, especially because it’s not so obviously Star Wars themed as many of the Christmas sweaters you can buy online. It’s actually quite glamourous and someone not familiar with the Star Wars franchise might not even notice. The foil was super easy to use and I love the result. You can use it to transform an old shirt or jumper or to personalise presents.

Merry Christmas and may the force be with you in the New Year!

xx

Charlie


Happy sewing!

facebook/bloglovin/pinterest
twitter/instagram

Stay in touch!