
Make Your Own Soap!
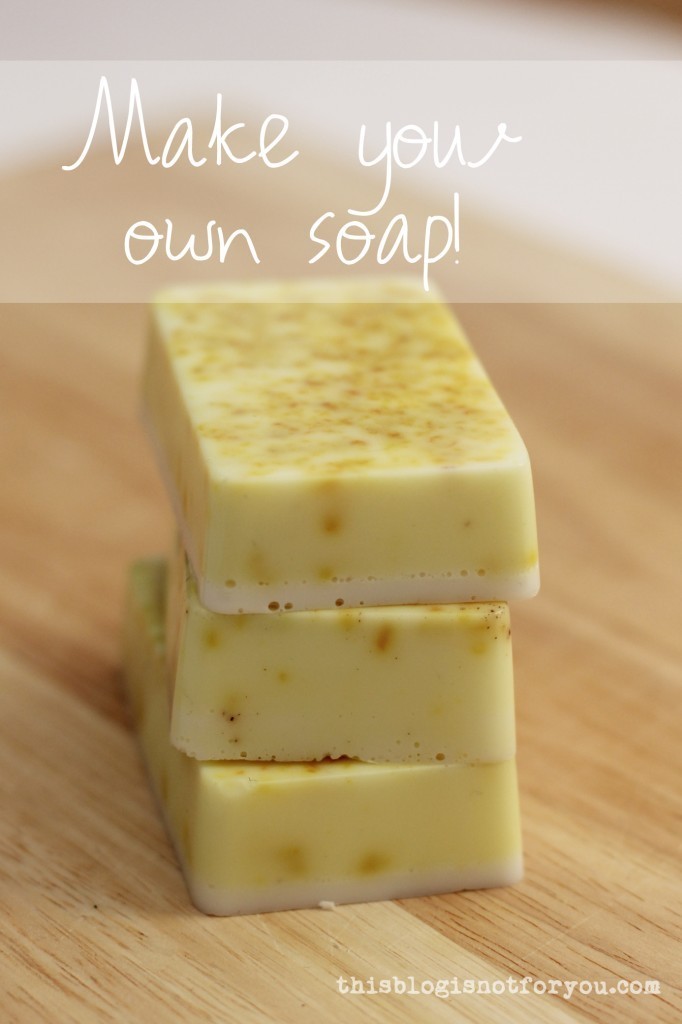 Ahhh, our flat smells heavenly! One of the many benefits of making your own soap. I love making soap because you can create the perfect soap bar with your favourite fragrances and ingredients. And, believe me, picking up the finished soap bar for the first time and smelling it is such a bliss!
You can make soap-making as easy or hard as you want. I decided to go the easy way, inspired by the ladies over at A Beautiful Mess and bought a goat’s milk soap base. If you want to make soap the hardcore way you can create your own base; there are some fab recipes out there. But it’s much more complicated and you will need a lot more ingredients. If you are trying to make soap for the first time, I would recommend starting with a melt-and-pour soap base. 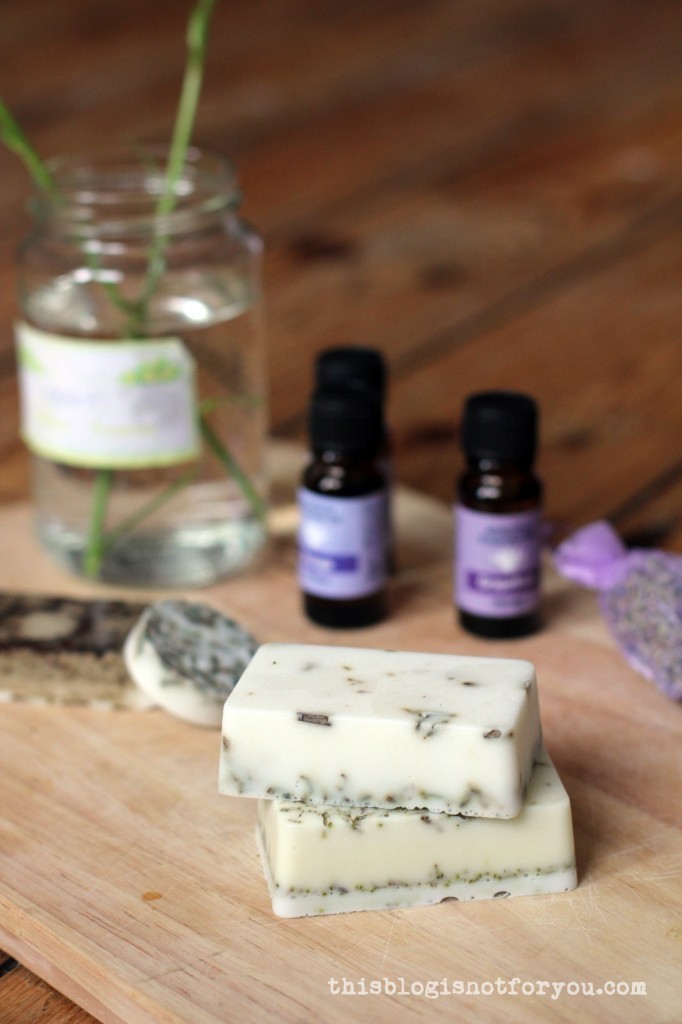

How To Make Your Own Soap
First of all, some basic supplies and ingrediences you will need for making your own soap:
– bowl for melting the soap base (microwave/double boiling)
– grater (for orange/grapefruit zest)
– silicone mould (brownie/cupcake molds are often cheaper than soap molds, but are the same thing)
– wooden spoon/cocktail stick for stirring
– melt-and-pour soap base (You can buy containers in different sizes. I bought 1kg and used about 500g so far from which I got about 12 bars) I bought goat’s milk soap base and really loved it. I’m sure there are also some vegan alternatives out there.
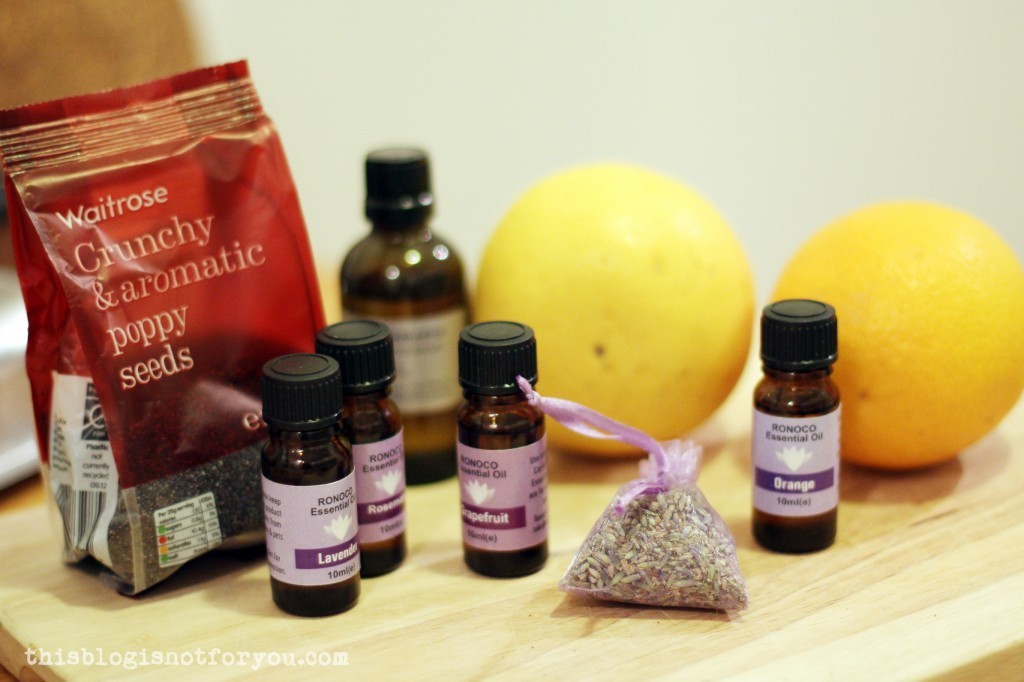
Ingredients you can use:
– orange/grapefruit zest
– various essential oils (lavender, orange, grapefruit, mint, rosemary etc.)
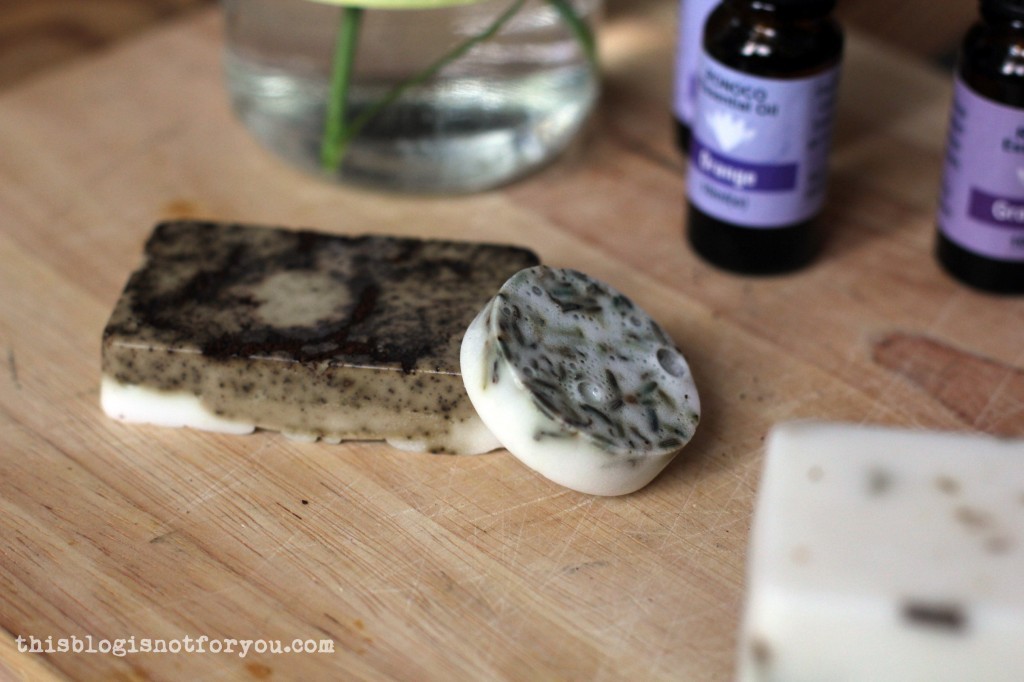
– poppy seeds
– coffee powder or beans
– dried lavender (also great for keeping your closet moth-free)/rosemary
You can basically use whatever fragrances you like. Using essential oils works best, as you only need a few drops to get a long-lasting scent. Dried herbs or blossoms are also nice. Using zest is fine, as the soap base preserves and keeps it from going moldy, but don’t go to crazy with adding fresh ingredients and don’t use more than a couple of teaspoons.
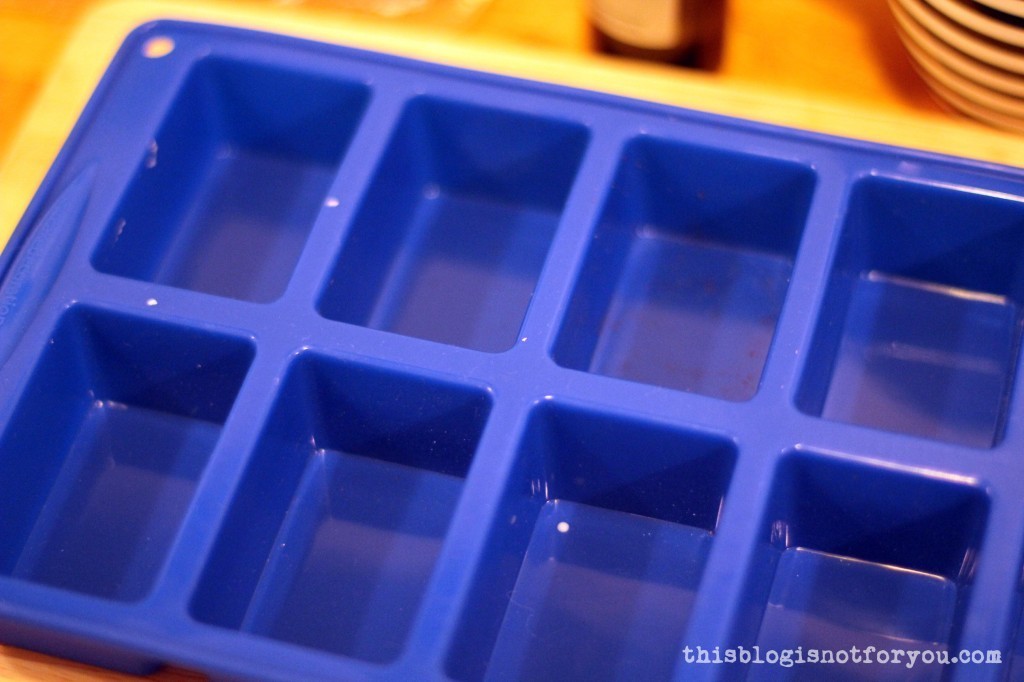 1. Make sure your silicone mould is clean and dry. I placed it on a wooden board, so I could move it while the soap wasn’t completely hardened yet.
 2. Cut your soap base into smaller cubes with a knife and place them in a clean bowl.
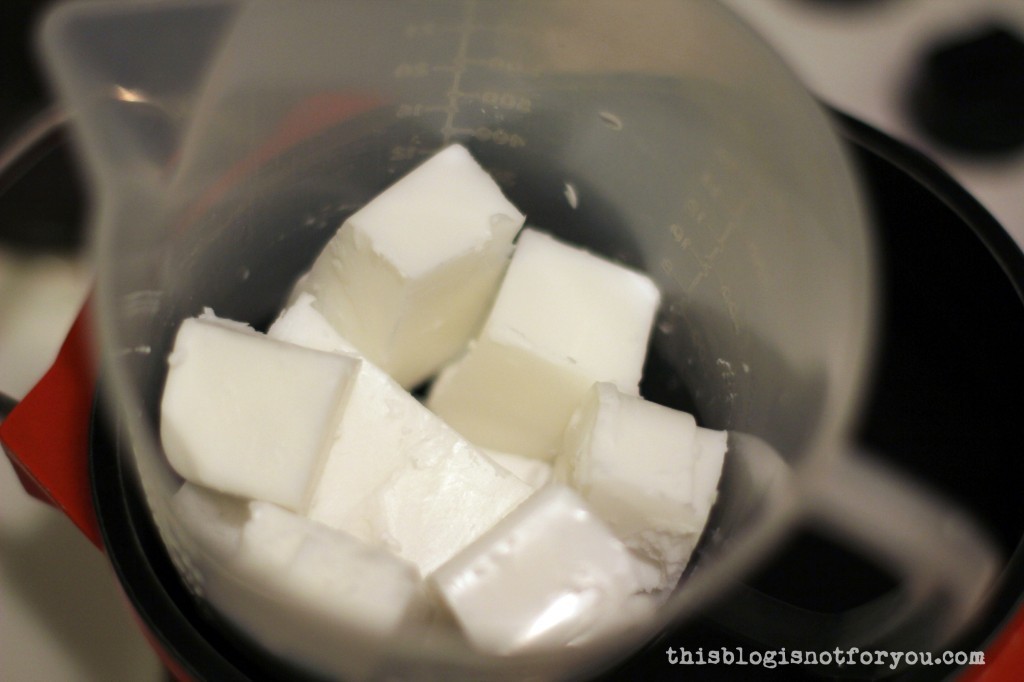 3. Before you melt the soap base, make sure you have all ingredients handy. The soap hardens quite quickly, so it’s better to zest the orange/grapefruit and open any plastic bags before you start melting the base.
If you want to make different soaps, prepare a few clean bowls you can use for the different soap mixes. I did not melt the whole amount of soap base at once but only melted enough to make 3-4 bars at a time, so I could try different recipes without having to hurry too much.
4. Melt the soap base by double boiling or in the microwave. For some reason double boiling did not work with my soap base, so I heated it in the microwave. It melts pretty quickly, so be careful. Mircowave for no longer than 30 seconds at a time. With either method, make sure you don’t burn the soap (or have it explode in the microwave – ask me how I know this!).
5. Once the soap base is melted completely, add your ingredients and stir with a wooden spoon before pouring it into your silicone mould. Stir the soap slowly, otherwise it might form bubbles.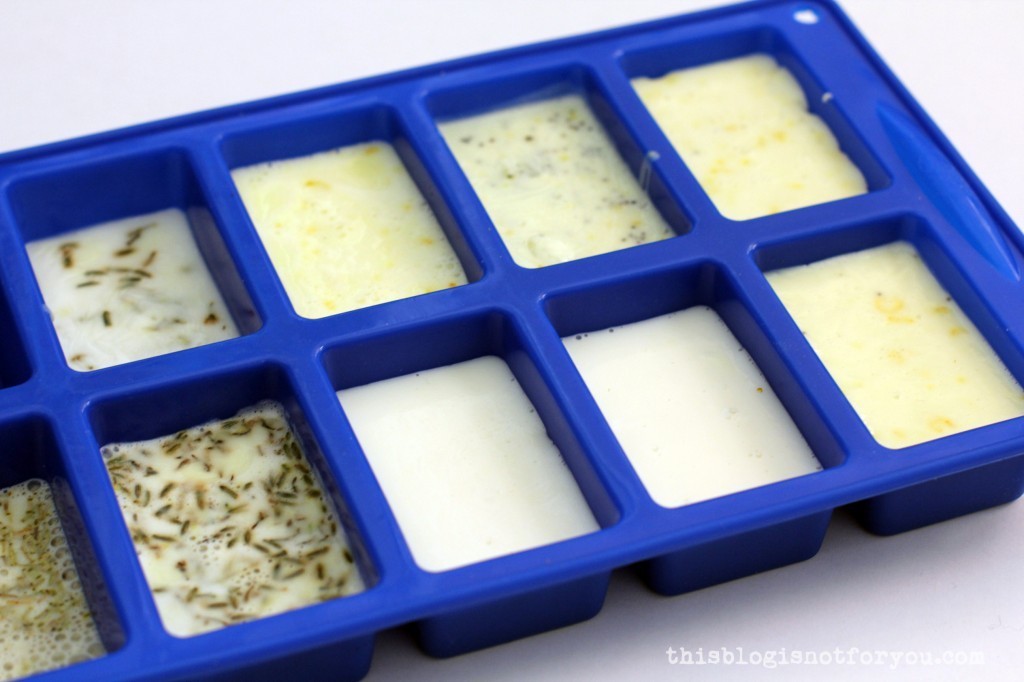 6. Let the soap harden. It only takes a couple of hours, but if you want to be on the safe side you can leave it in there over night. I put a piece of paper over the silicone mold to keep the soap dust-free.
7. Once the soap was hardened I put it in the fridge for a couple of minutes before popping the bars out of the mold.
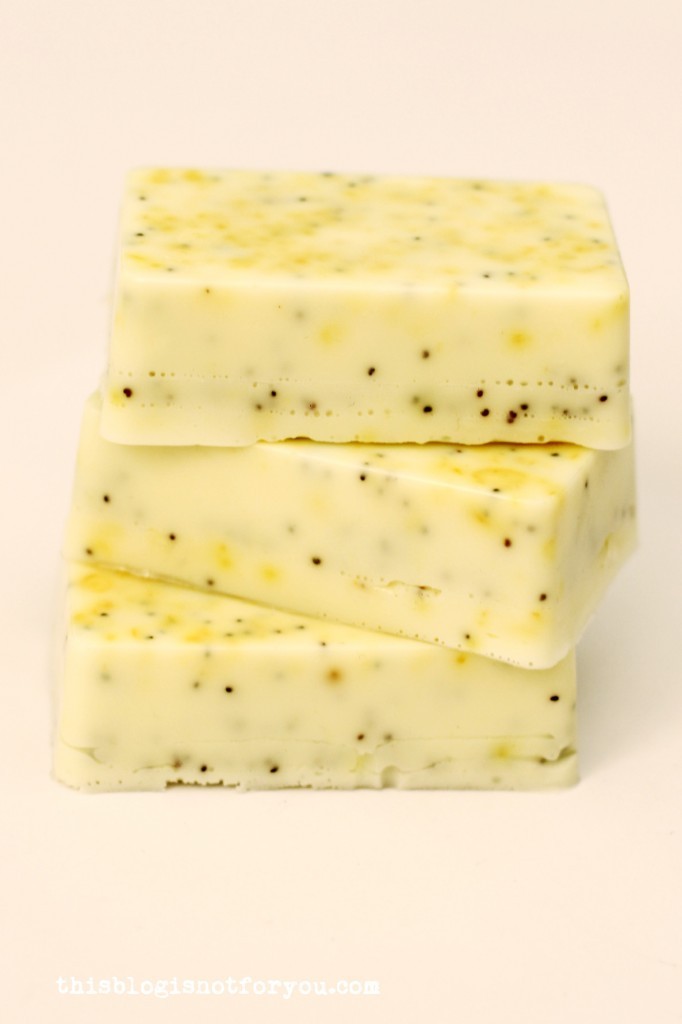
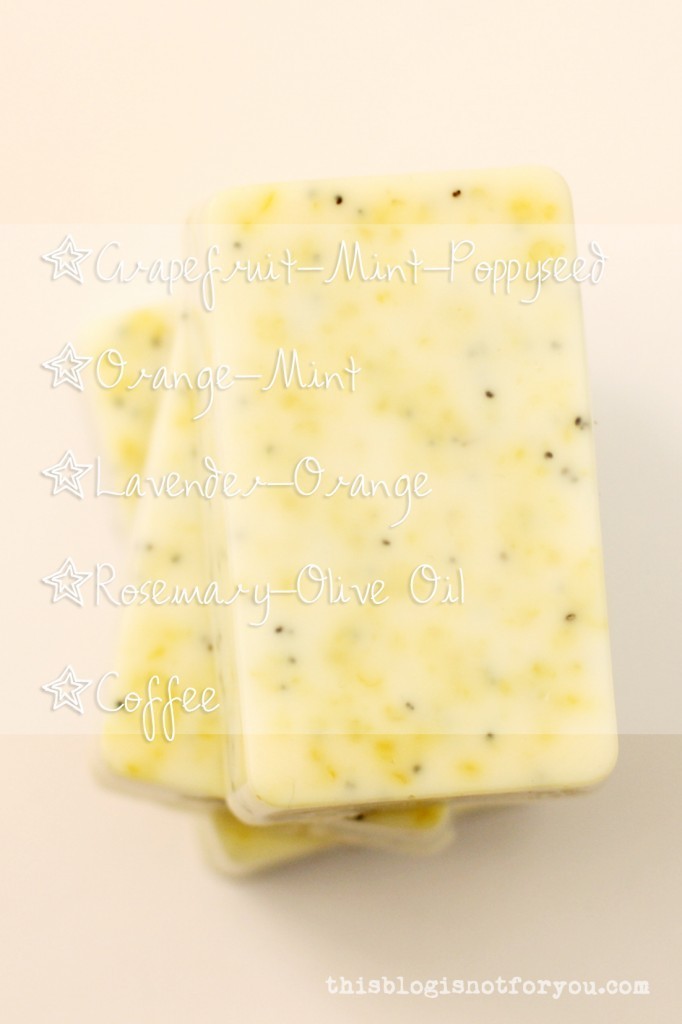 Grapefruit / mint / poppy seed: zest of half a grapefruit, 10 drops of grapefruit oil, 3 drops of mint oil, 1tbsp poppy seeds.
Orange / mint: zest of half an orange, 10 drops of orange oil, 4 drops of mint oil.
Lavender / orange: 1 tbsp dried lavender buds, 10 drops of lavender oil, 5 drops of orange oil.
Rosemary / olive oil: 1 tbsp dried rosemary, 1tsp olive oil, 5 drops of rosemary oil.
Coffee: 1 tbsp of coffee powder.
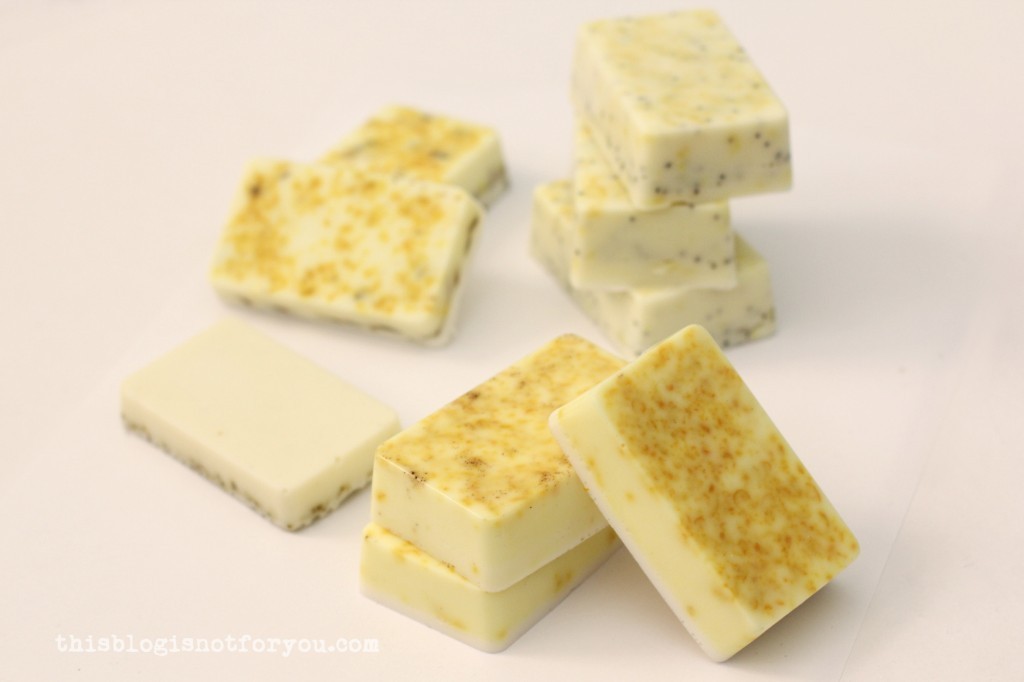
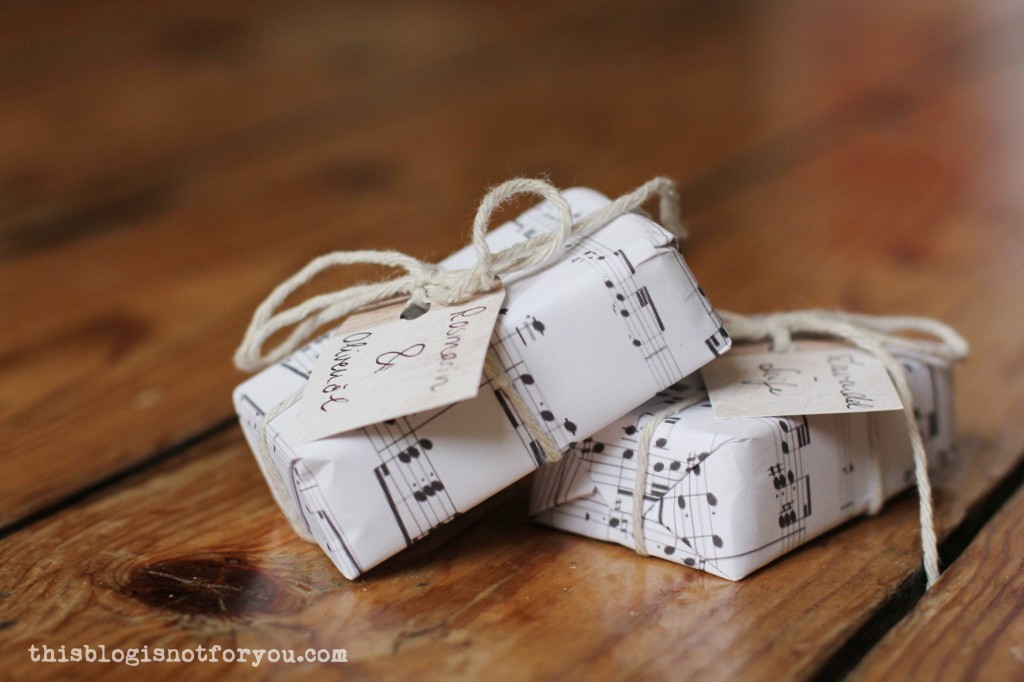
Grapefruit/Poppyseed/Mint (above) and Orange/Mint (below) are my favourites! I created the narrow white layer on the orange/mint bars below by pouring some clear melted soap base on top of the first layer after it was hardened.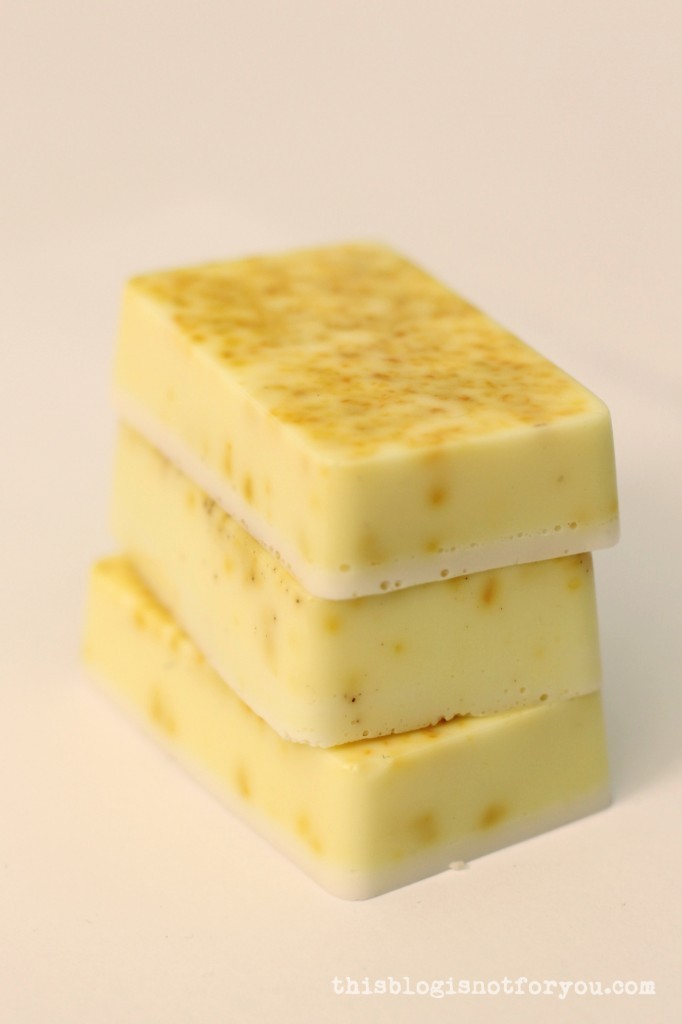 I wrapped the soap bars in recycled paper (I cut strips out of a shopping bag), which I taped together on the bottom.
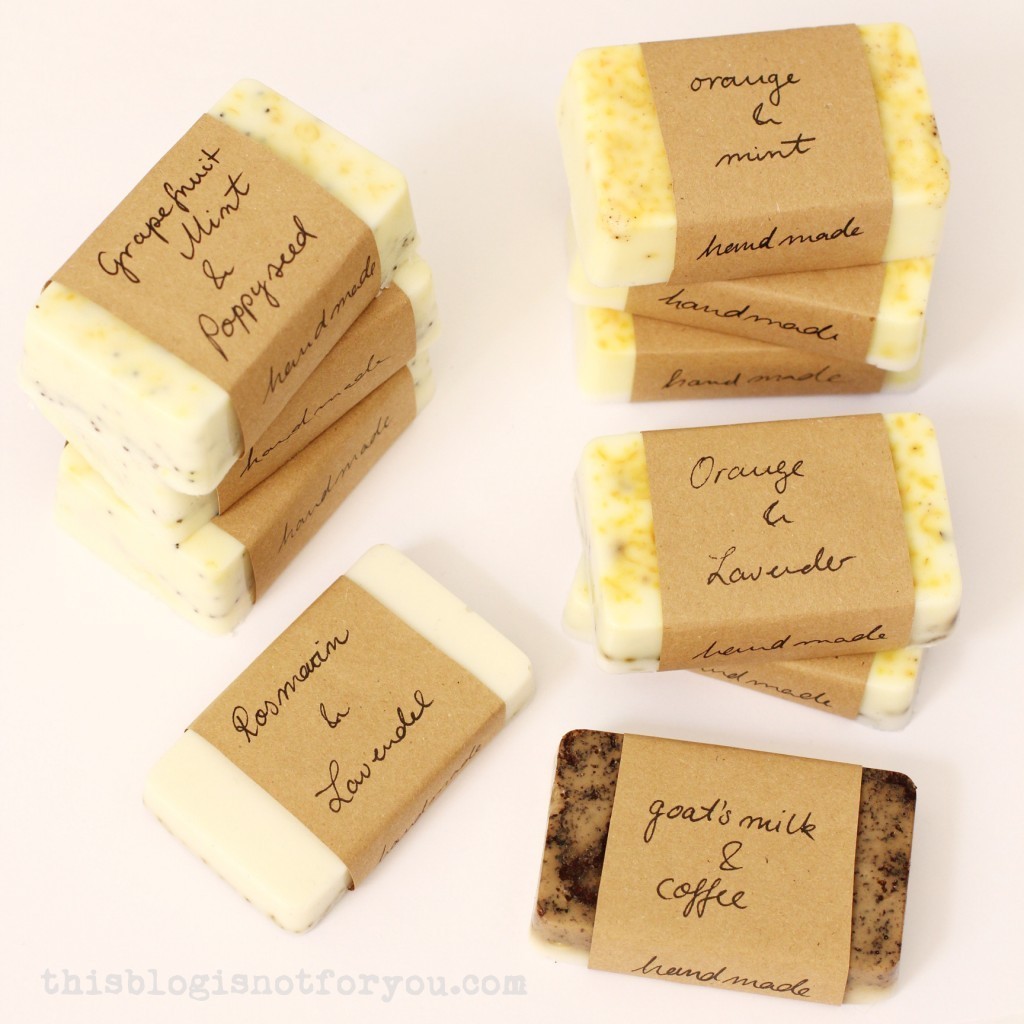 Before I gave some of the soap bars away to friends and family, I wrapped them in music paper (which I had printed out) and attached small labels with twine.
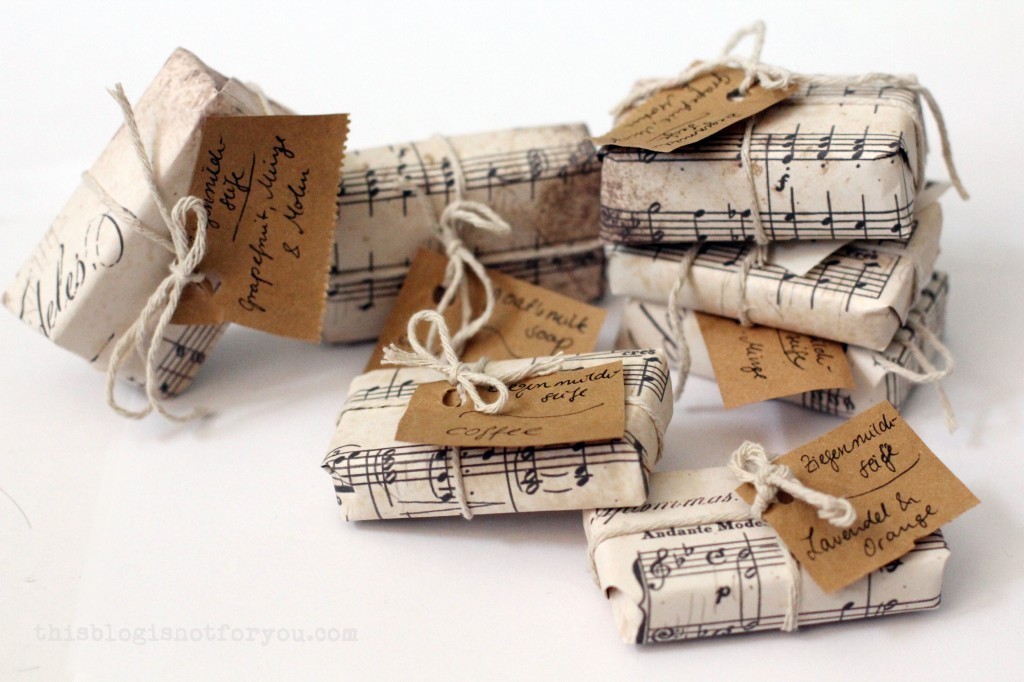
Happy soap making!
♥
facebook/bloglovin/pinterest
twitter/instagram
Stay in touch!
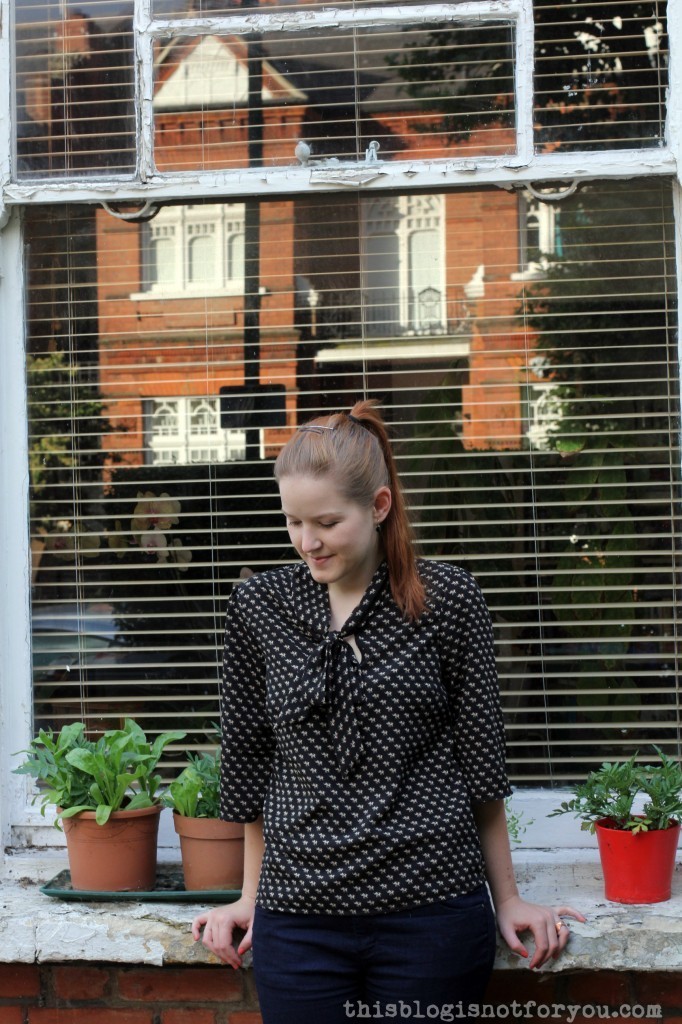
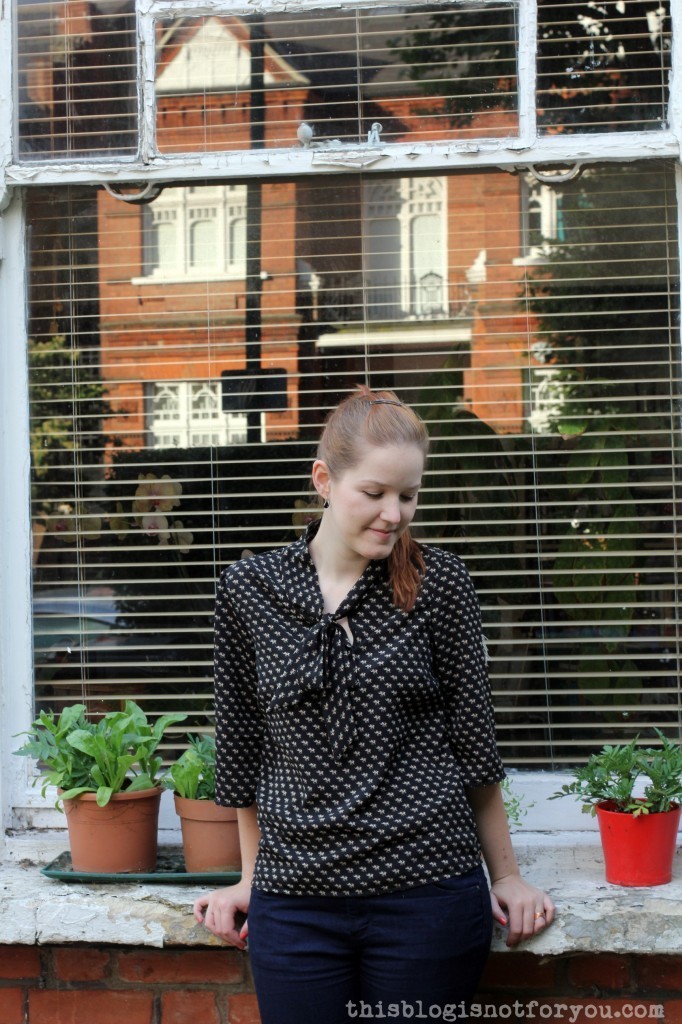 May I present to you – the Lottie blouse! Probably my new favourite pattern. It hasn’t been featured too much in the online sewing community, though, perhaps because the only chance to get hold of it is by buying the latest issue of Love Sewing Magazine. I didn’t like the magazine too much (it’s only their second issue) and mainly bought it because of the Lottie pattern set (skirt and blouse) and the cute tape measure that came with it.

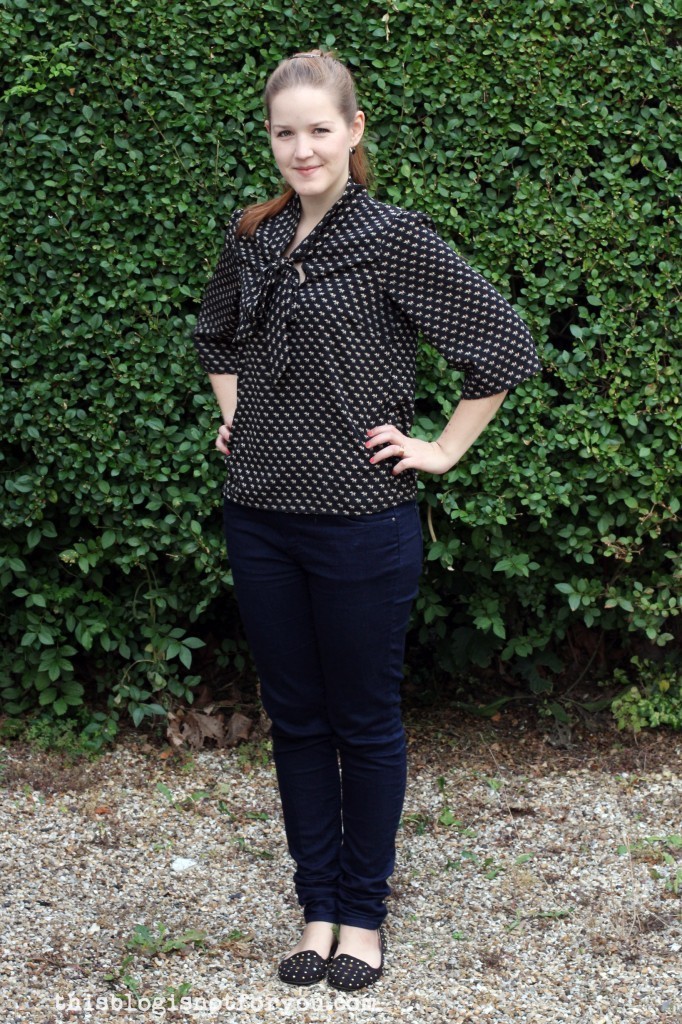
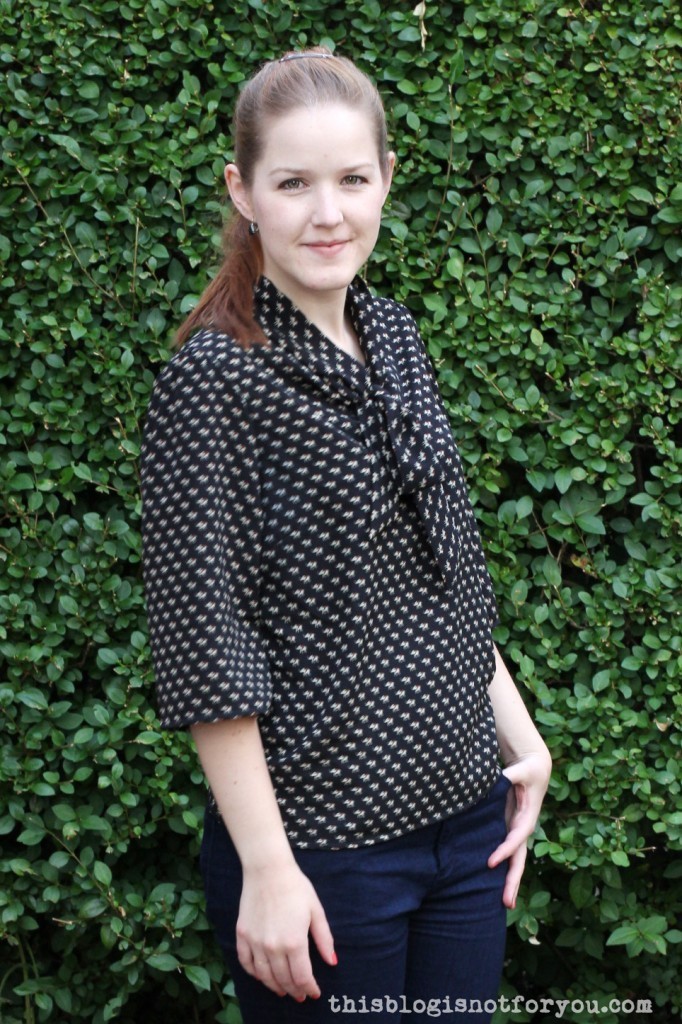 I really love the fit of the blouse and the pattern probably works best with drapey fabrics. For this blouse I used a viscose/polyester fabric with an elephant print, that didn’t drape as well as I thought it would, but I still like how the blouse turned out. I also made a bright red version with a very lightweight rayon fabric (my favourite of the three I’ve made so far); I will share this one with you another time.
 I bought the fabric on Walthamstow Market the other day when I was shopping with Dani. Next to the elephants I also got the same fabric in a different colour and a super adorable scottie print. I suppose the scotties will be used for a Mimi blouse, which is on top of my to-sew list at the moment.
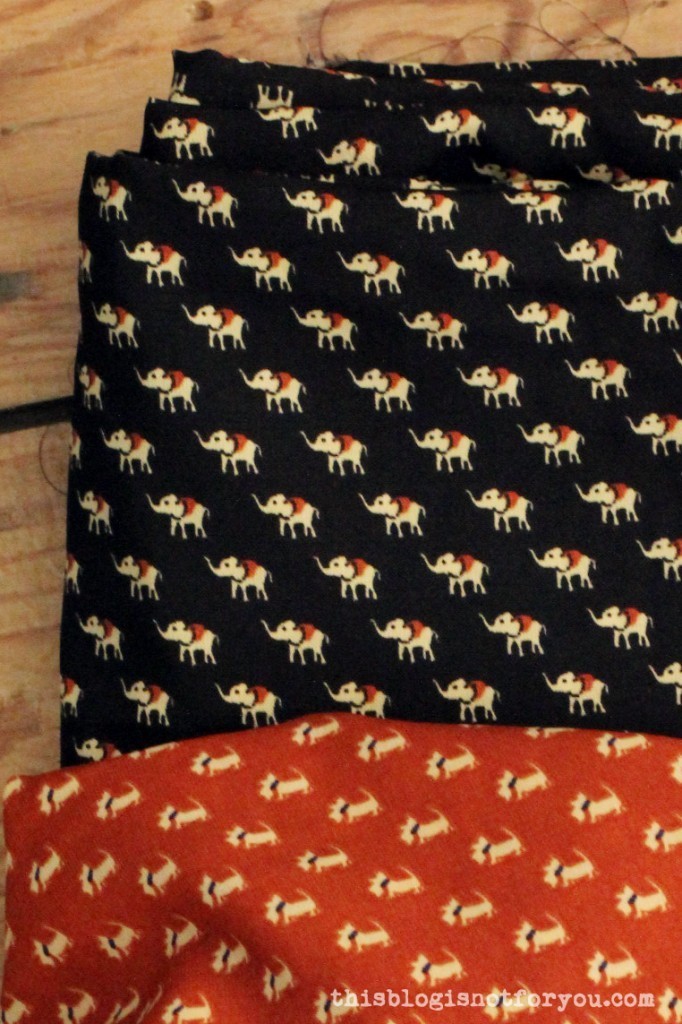
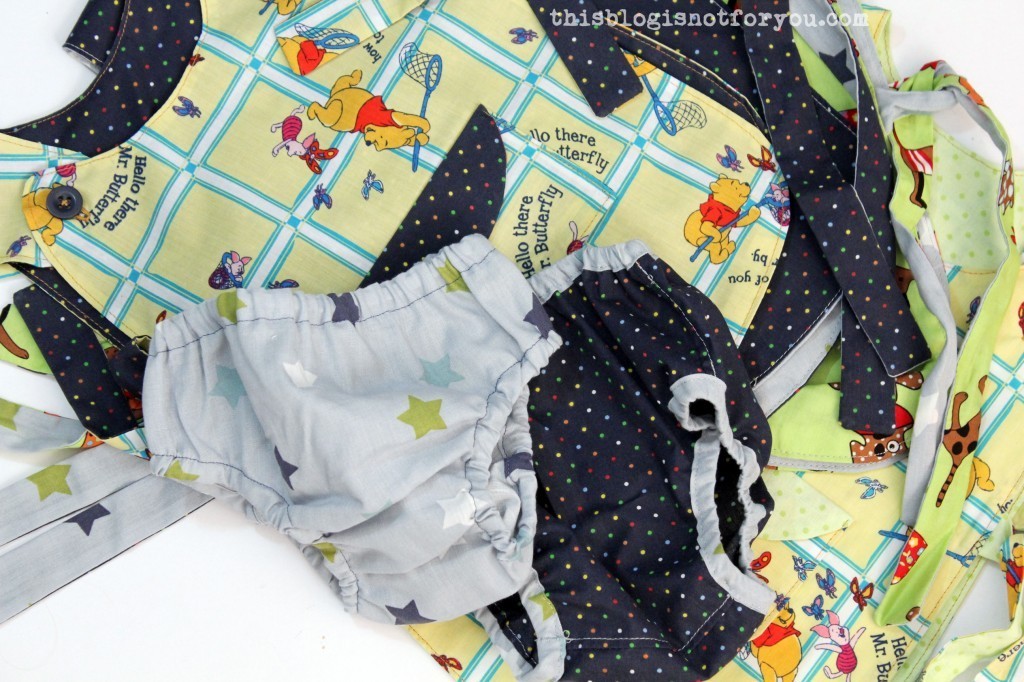
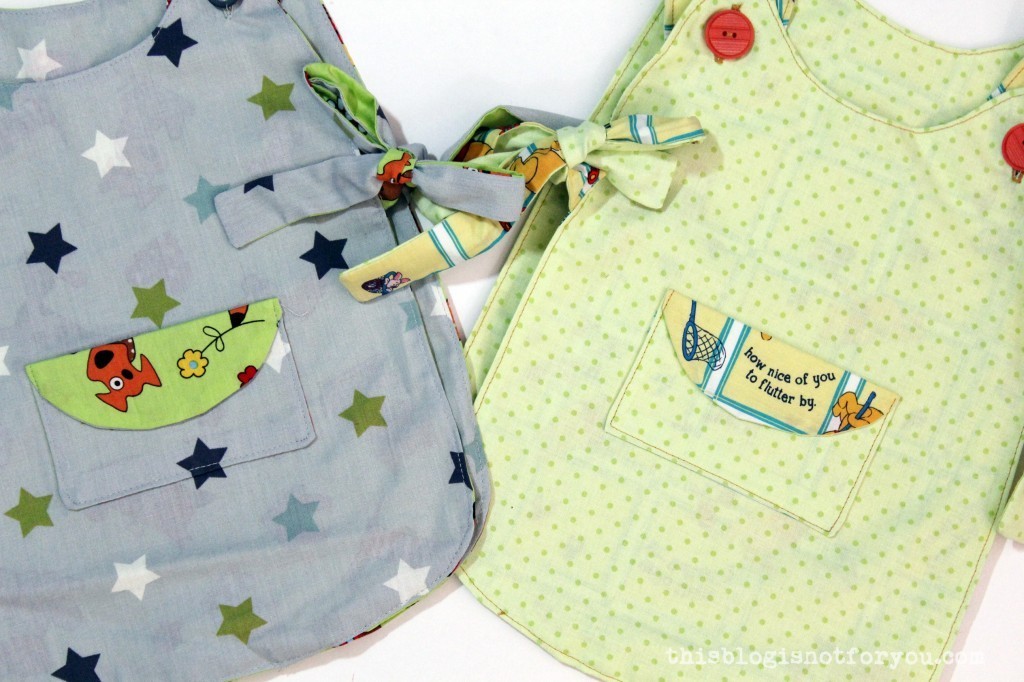
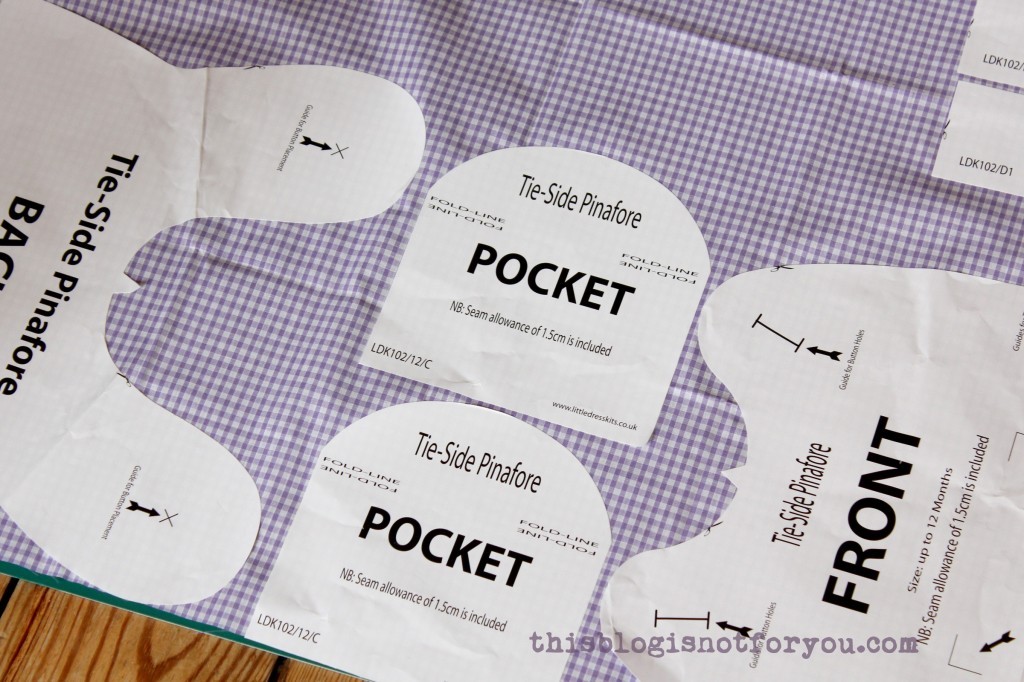 I used the Tie-Side Pinafore pattern from
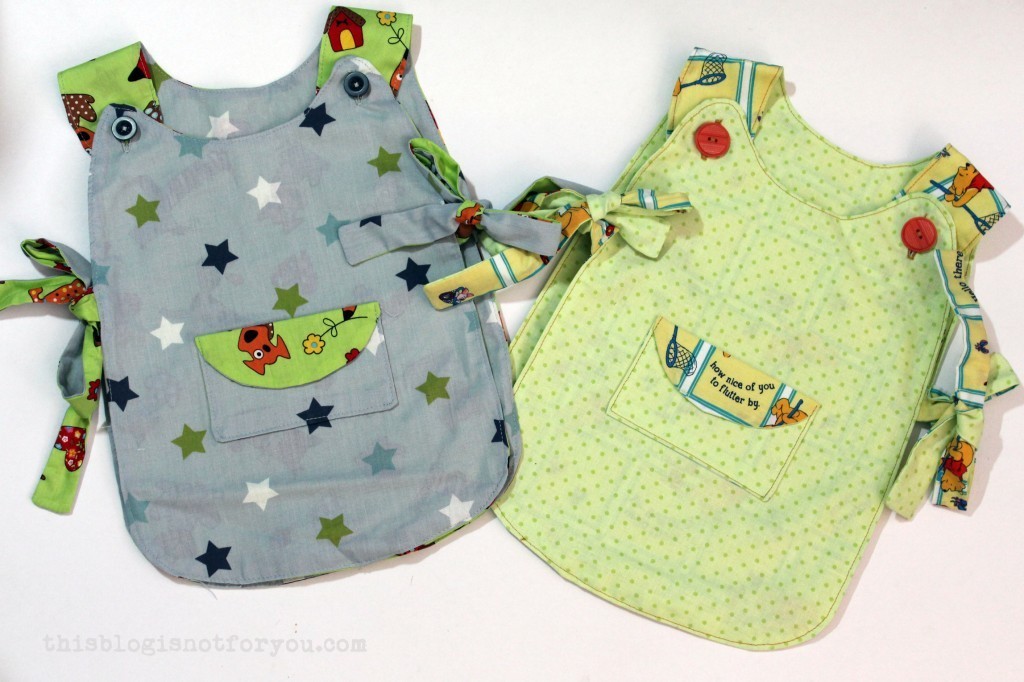
 Four fronts and backs, eight pockets and sixteen straps later…
 The front is not only reversible, but you can also switch the fronts between the different pinafores in whatever combination you want. I also made some matching diaper covers, but I still have to figure out sizes. The first one was a bit too small the second way too big.
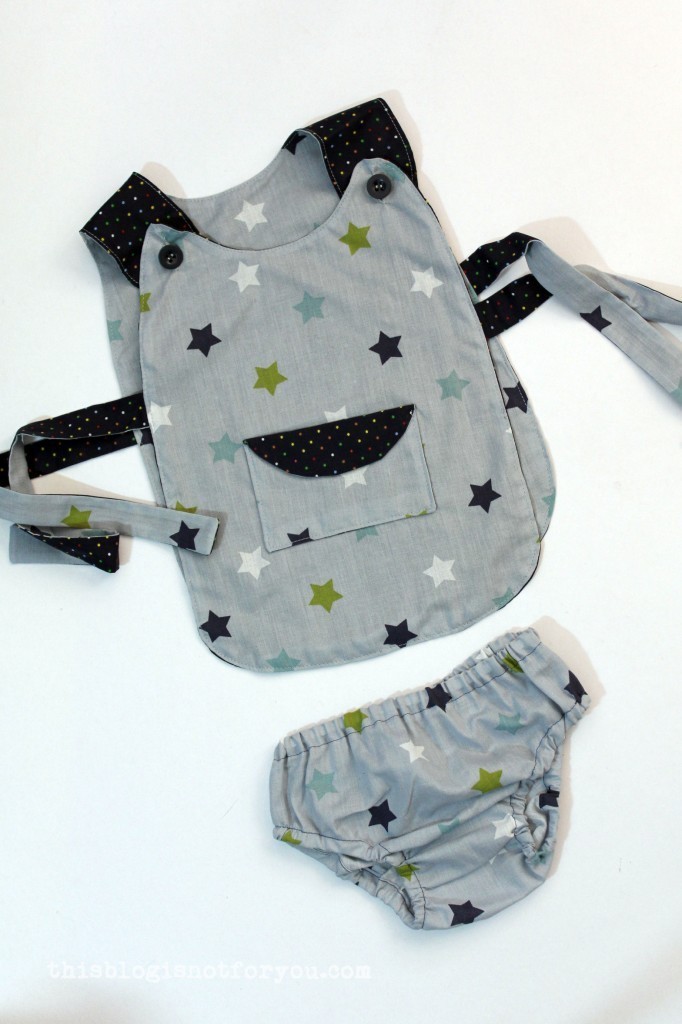
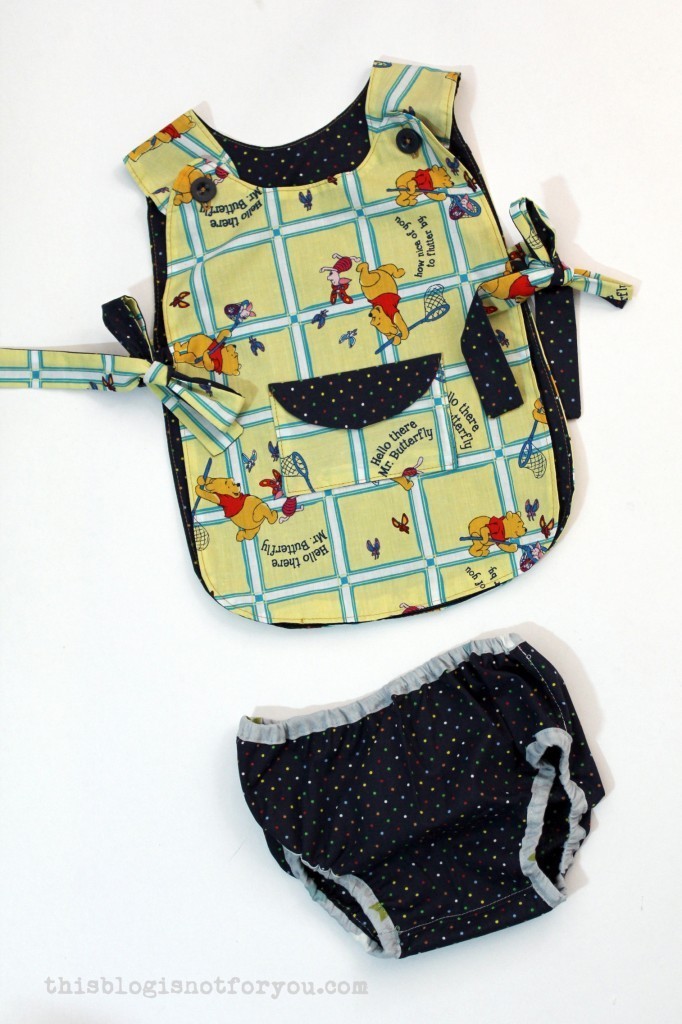 I looooove the Winnie the Pooh fabric, it’s just too adorable. I have so much left that I will probably make a quilted playing mat. I always wanted to try quilting and I think this would be a good project to start with.
 Heeeelllo! It’s been a while (well, not too long actually) since my last garment post as I am about to start a new job which is keeping me quite busy at the moment. But nevertheless, I have been sewing like a maniac. I just simply couldn’t get around to take pics for the blog because of a) nightshifts and b) everything always being in the laundry (because I love wearing it so much).
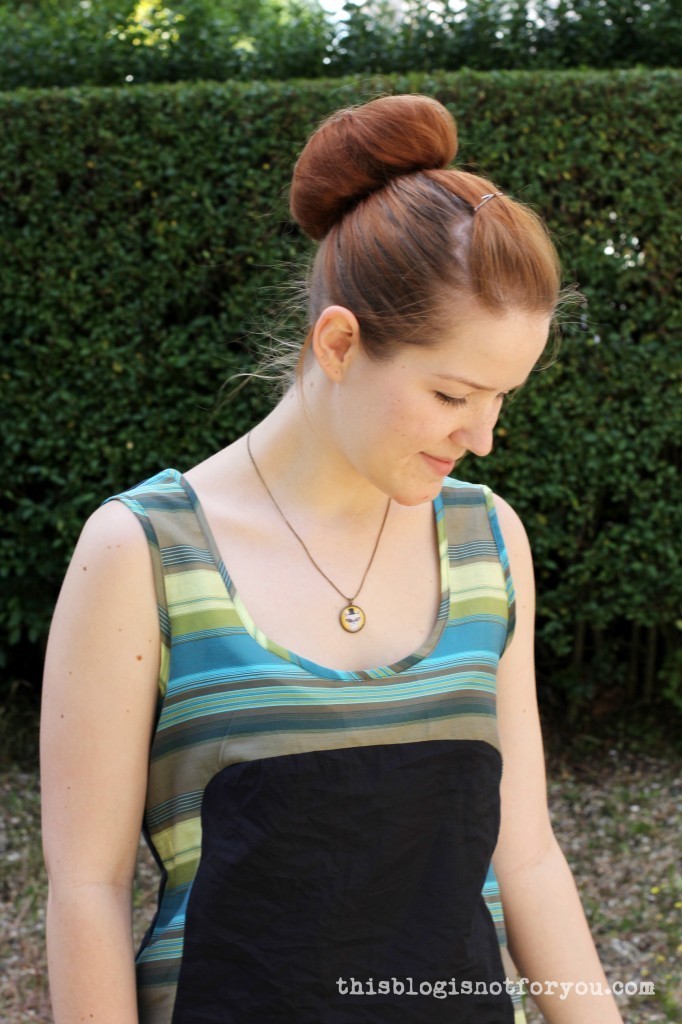
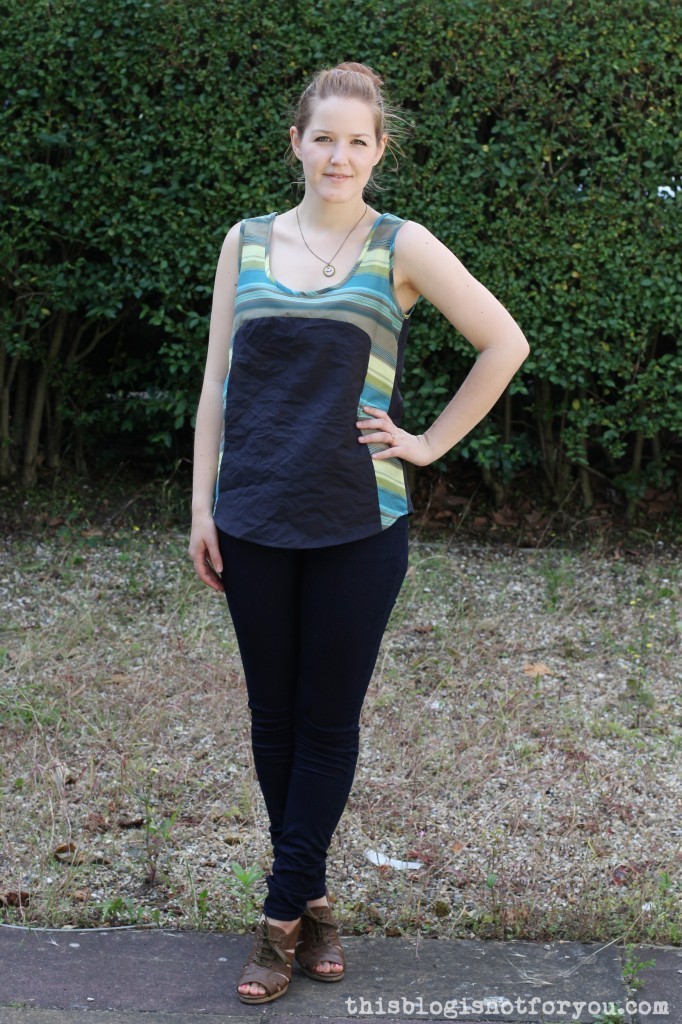
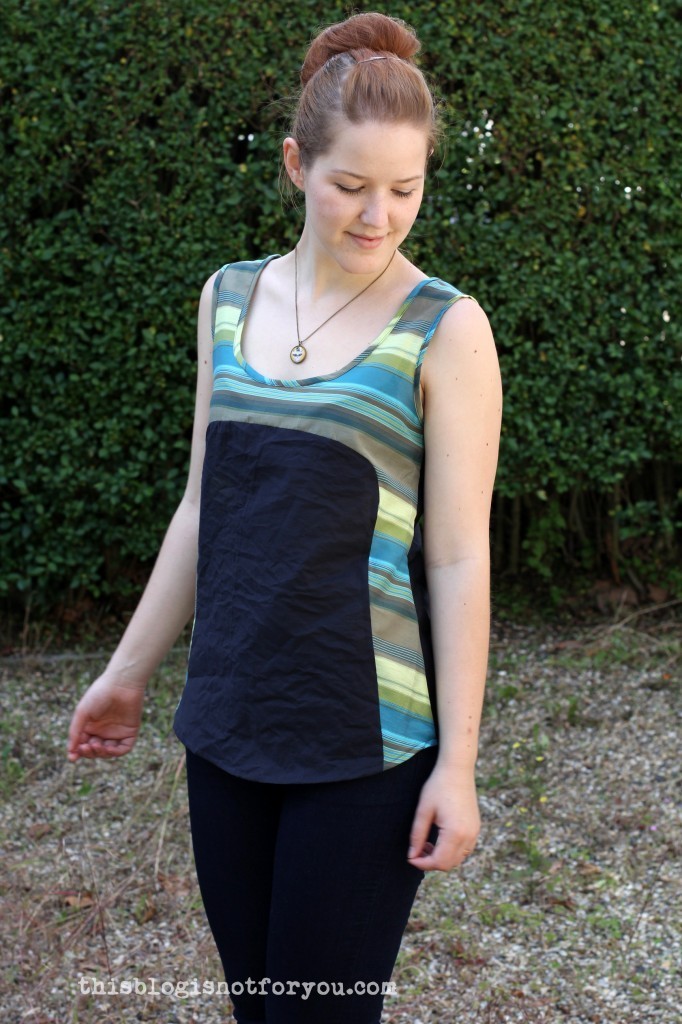
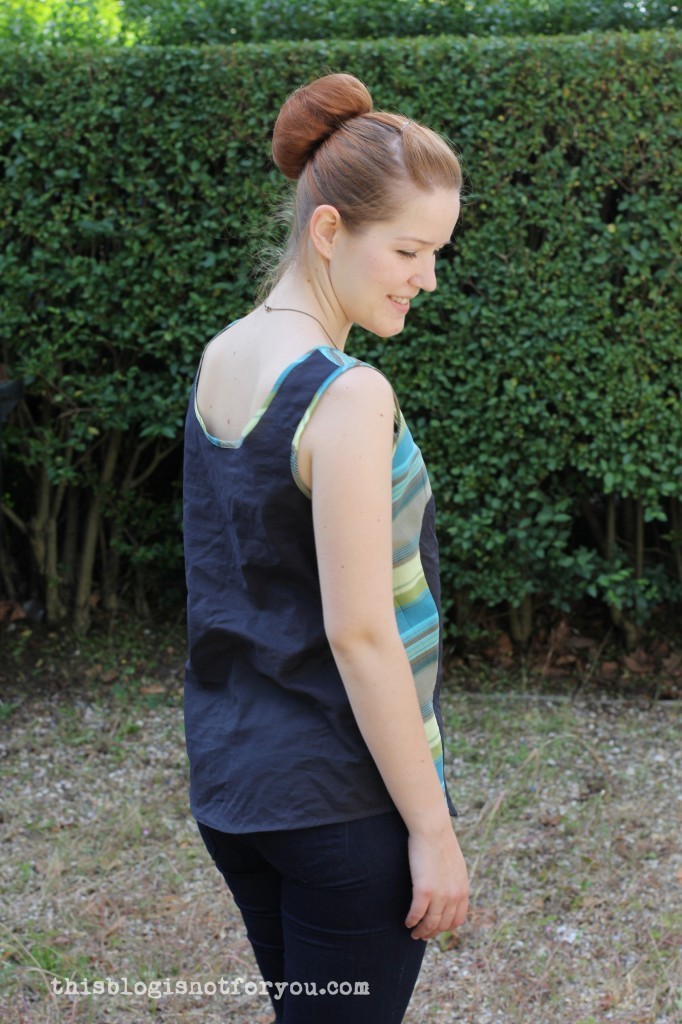 The first (of my many new tops and blouses) is the BHL Polly top which you can
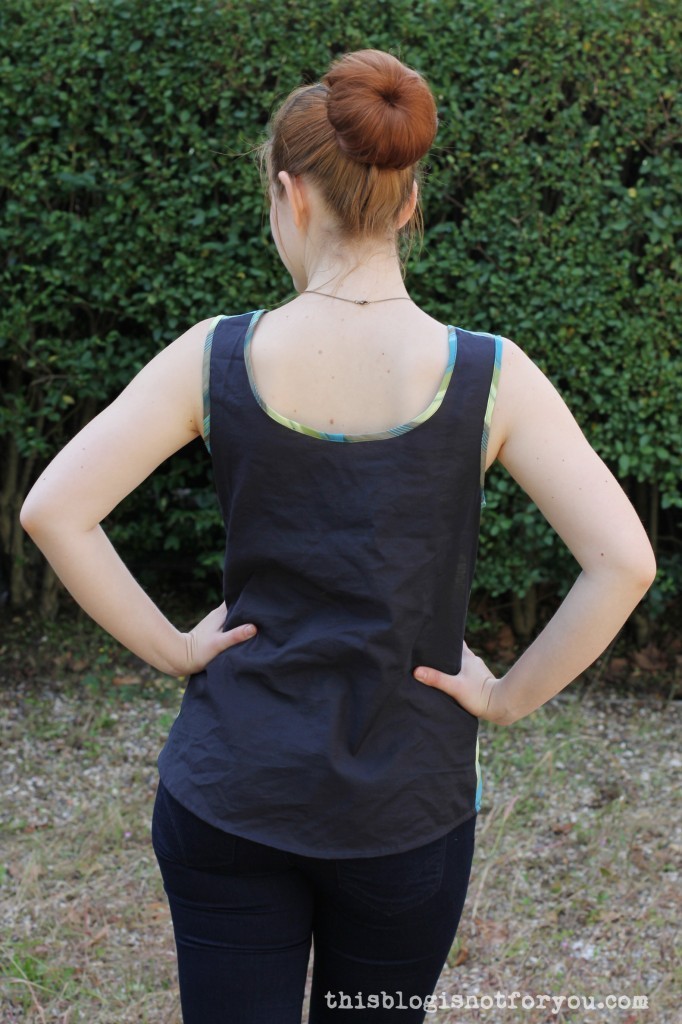

 I have worn this top already and will probably make more. I’m also a big fan of BHL lady Victoria’s Polly pattern hack (she made a dress)! So maybe you’ll see a Polly Dress soon 😉
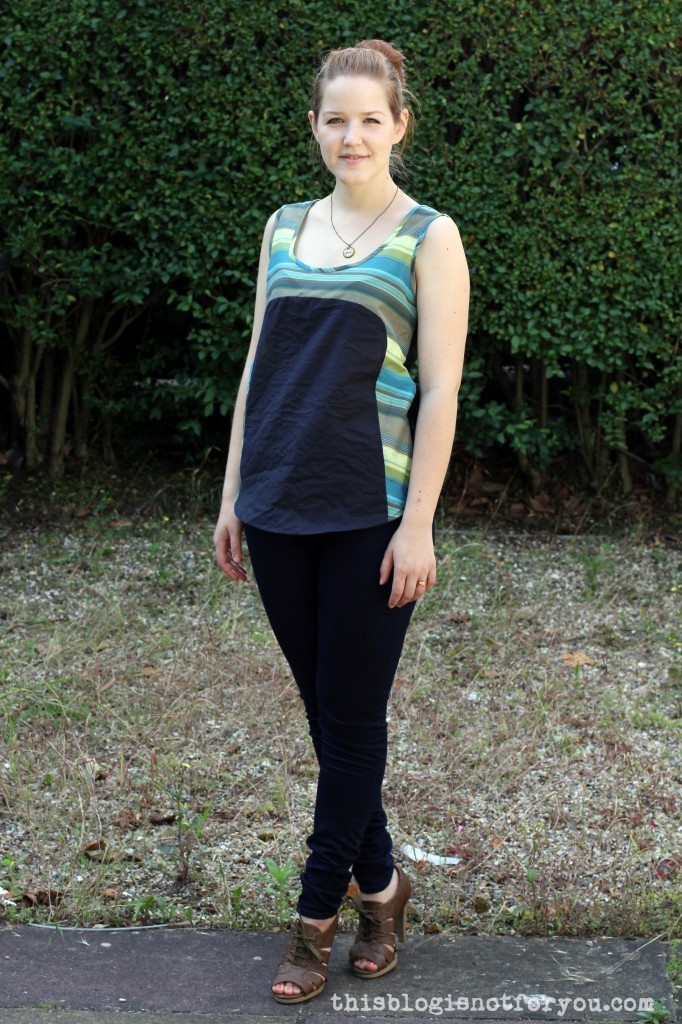

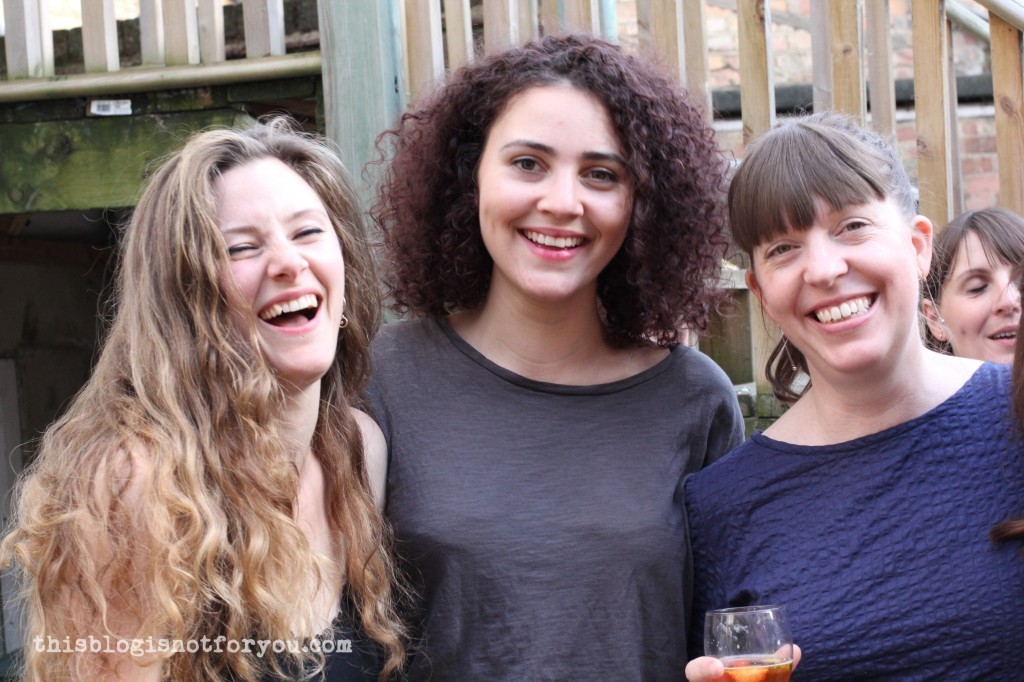

 I loved meeting
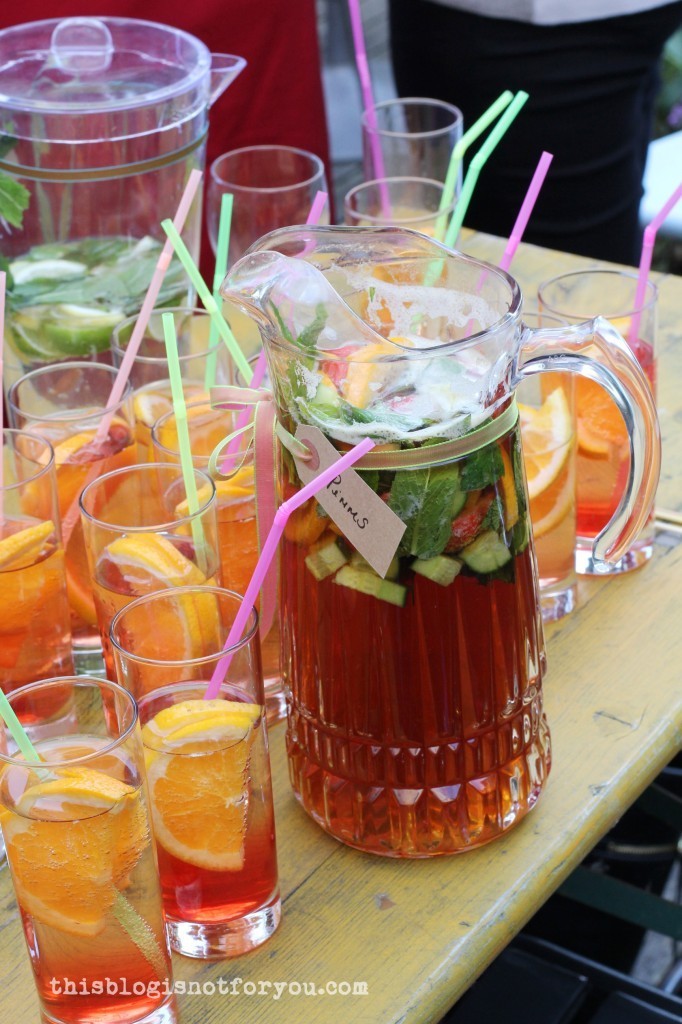


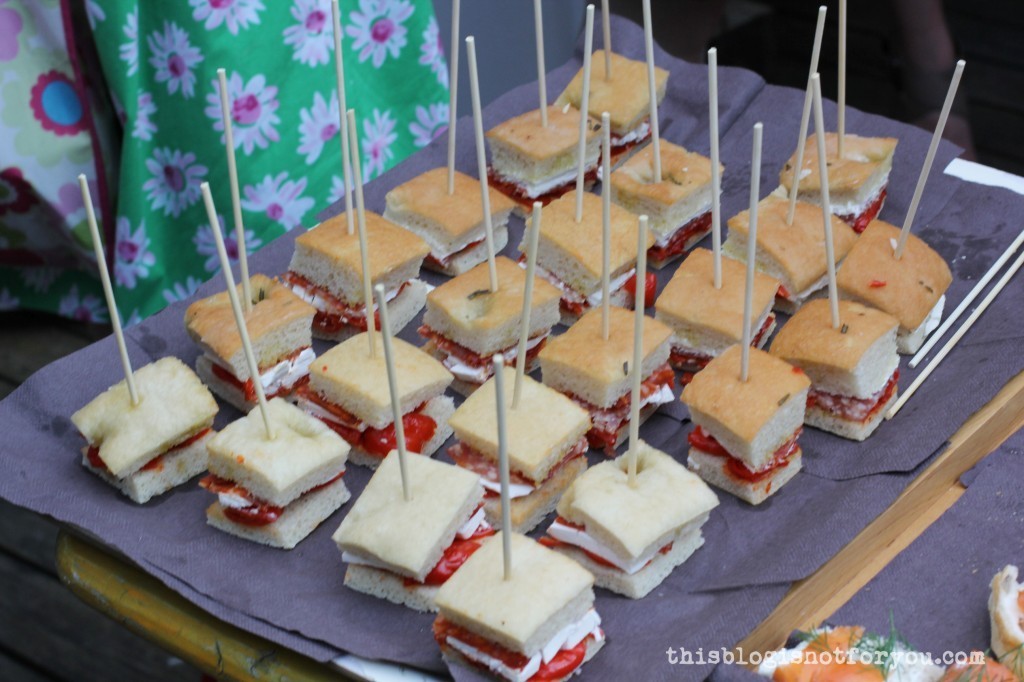 Loads of drinks and nibbles!