Super easy bag storage idea – take good care of your babies :)

how to store your shopper bags by thisblogisnotforyou.com

I had this idea when unpacking all my bags after moving houses. It’s been bothering me for a while now that some of my shopper bags just crumple up, which is not good for the leather or imitation leather either.
This idea is so simple that a picture tutorial is pretty much unnecessary, but we all love pictures better than words, so here we go:
how to store your shopper bags by thisblogisnotforyou.com

Naaaah. See how sad she looks?how to store your shopper bags by thisblogisnotforyou.comhow to store your shopper bags by thisblogisnotforyou.comhow to store your shopper bags by thisblogisnotforyou.com

She loves it! 🙂

Refashion It! The Thrift Store Dress

refashion sheath dress by thisblogisnotforyou.com

I can’t believe it! After all these years I actually never bought and refashioned a thrift store dress! Normally I just buy oversized shirts or dresses at Primark or H&M, but this time I gave it a try. Since we just moved I walked around the area a little yesterday and found a small thrift store. I figured that with a bit of patience I might find a good-quality fabric for a few pounds and I was right. I found a Berkertex dress, size 16, for only 5 pound. Normally these dresses are really expensive and the fabric was a really lovely light blue Idontreallyknowwhatitis. The tag on the inside says chambray/100% Polyester, but it doesn’t really look like chambray to me. Someone help me please?

refashion sheath dress by thisblogisnotforyou.com

Anyway the fabric is awesome. It dries super quick (basically came out of the washing machine dry) and doesn’t wrinkle at all – no pressing needed!

Yeah, I know. Stop talking and show us the pictures! So here’s what I did!

refashion sheath dress by thisblogisnotforyou.com

First of all I did some pinning on the dress form. As I’m a size 8-10 I obviously had to take in the sides. The front darts weren’t quite right and a bit too low. I decided to take in the straps and the dart problem was gone!
To give the bodice a bit more shape I took in the front darts a little.

refashion sheath dress by thisblogisnotforyou.com

After pinning I tried it on and the fit was really good (yay! no changes needed!) Before removing the pins I transferred all changes with a pencil.

refashion sheath dress by thisblogisnotforyou.comrefashion sheath dress by thisblogisnotforyou.com

Chop, chop!

refashion sheath dress by thisblogisnotforyou.com

Here’s the finished bodice!

refashion sheath dress by thisblogisnotforyou.com

Now comes the pinning!

I had no idea what to do with the skirt, so I tried a few things. This version definitely wasn’t working…

refashion sheath dress by thisblogisnotforyou.com

…it made my hips look twice their size! Meh!

I decided to play safe and simply make a gathered skirt. This looked best with the rest of the dress.

refashion sheath dress by thisblogisnotforyou.com

Pinning and stitching. I used white cotton bias binding to finish the raw edges since the fabric was fraying like f%$§&f!.

I sewed in the rest of the zipper  – and was finished!

It’s super comfy and although I NEVER wore light blue before, I just love it!

refashion sheath dress by thisblogisnotforyou.com

Sorry, blurry selfies today! My other half wasn’t around this time 🙂

refashion sheath dress by thisblogisnotforyou.comrefashion sheath dress by thisblogisnotforyou.com

I made the belt from white cotton and lace fabric using Tilly’s awesome bow belt tut!

refashion sheath dress by thisblogisnotforyou.comrefashion sheath dress by thisblogisnotforyou.com

Unfortunately, this dress doesn’t count regarding the 27 Dresses Challenge – it’s not made from scratch! (Too easy folks!)

Well, but I love it anyway 🙂

In case you’d like to have the chance to see sneak peeks of my project or just want to follow me for fun, just click on the very subtle button below 🙂

thisblogisnotforyou facebook


Sewing with chiffons – Baby seams

baby seams tutorial by thisblogisnotforyou.com
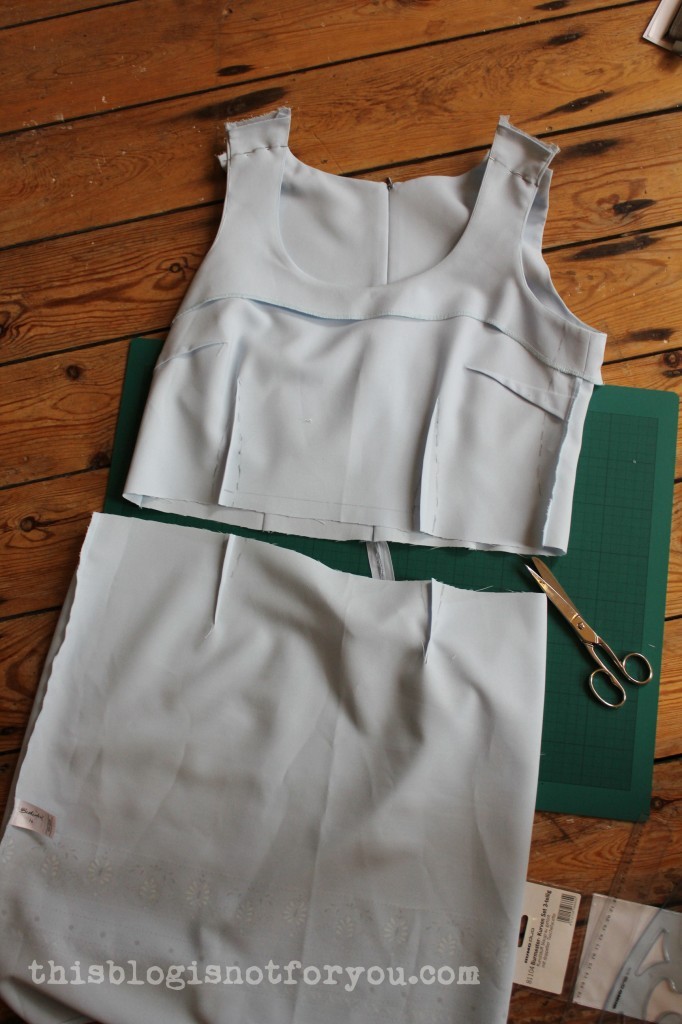
Hi everyone! It’s incredibly warm here in London at the moment, one of the reasons why I haven’t been sewing a lot lately.But the fridge loaded with ice cream and cool drinks, I finally got around to editing the pictures for the baby seams tut! So here it is!

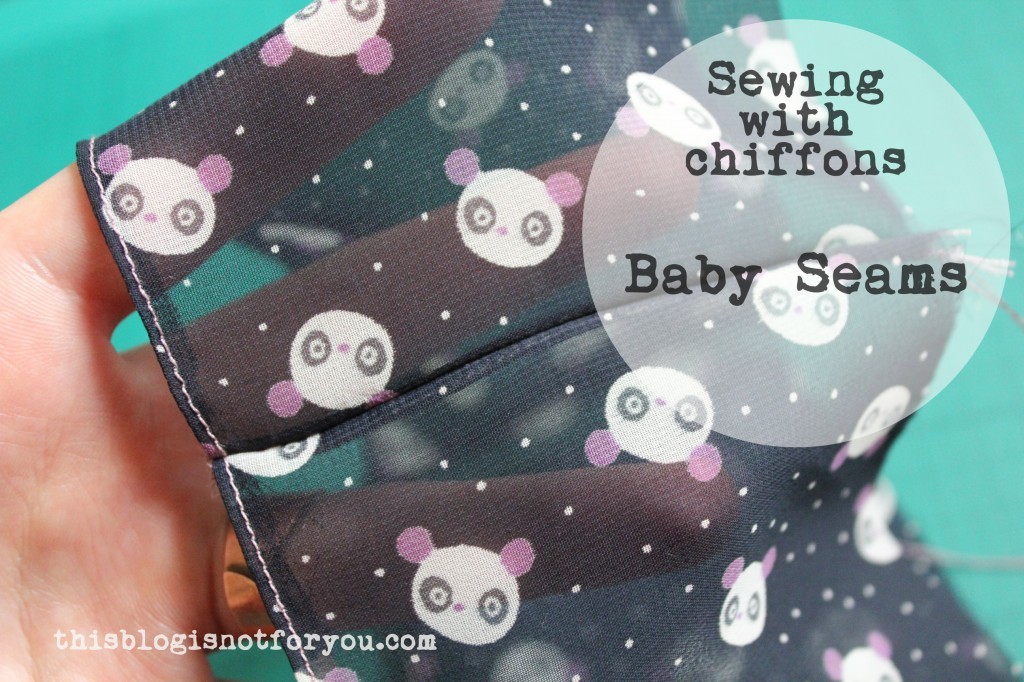
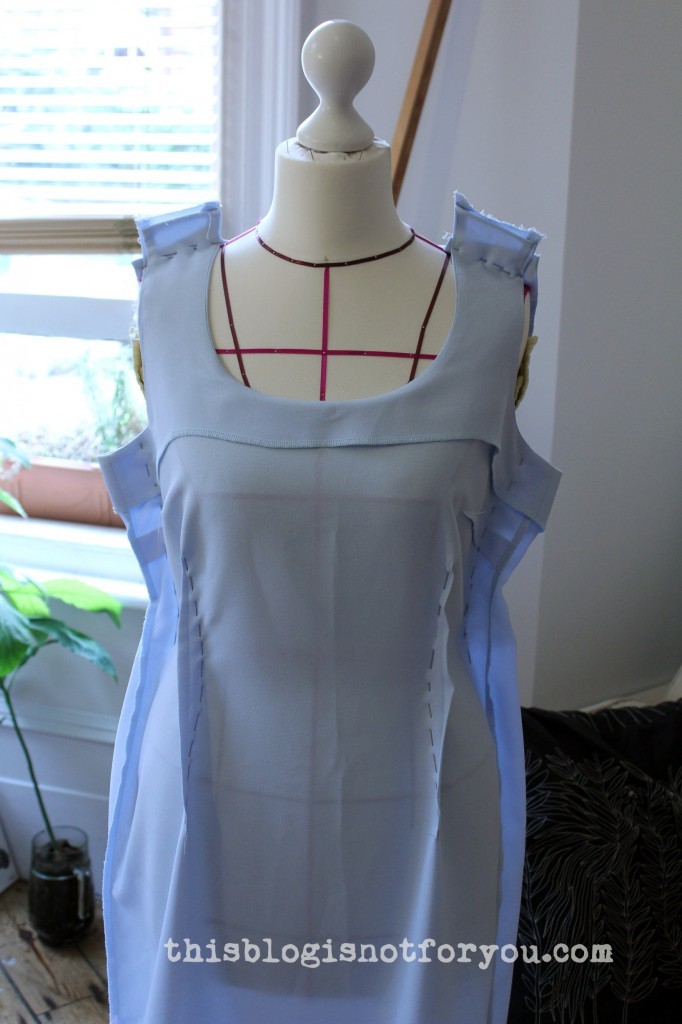
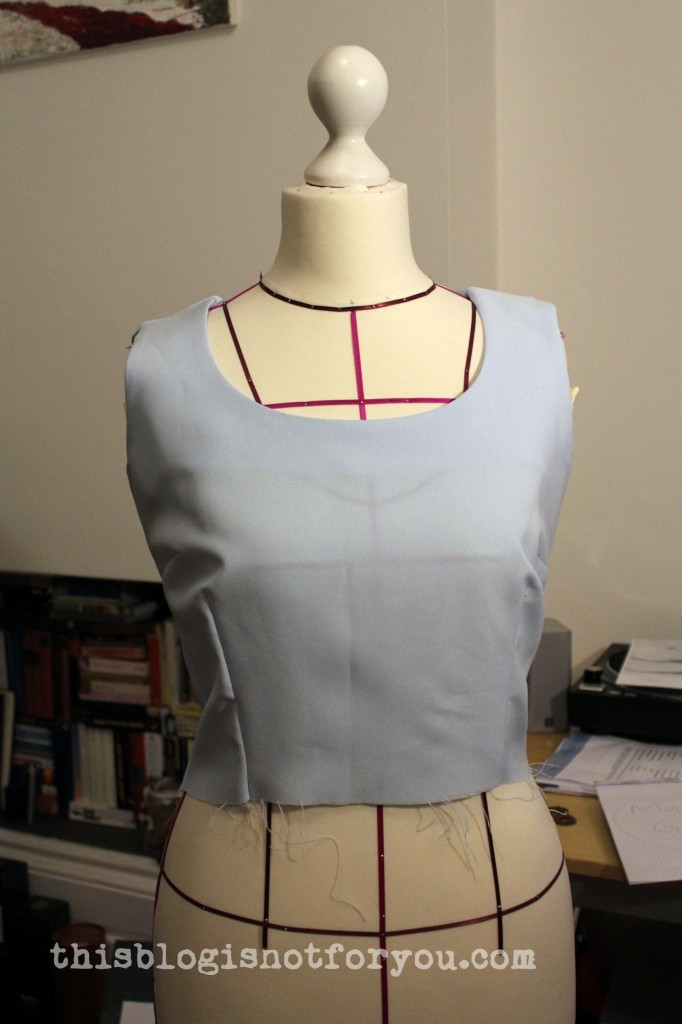
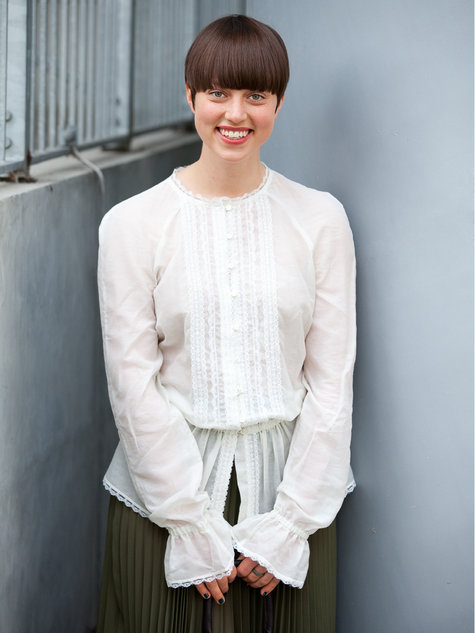
Baby seams, a specific seam finish, are particularly helpful when sewing with very lightweight and sheer fabrics, like chiffon. Bill Travilla, designer for many Hollywood actresses, used this technique for Marilyn Monroe famous white halter bodice dress from The Seven Year Itch.

When sewing with transparent fabrics, it’s often difficult to hide the raw edges of the seam. This technique perfectly hides the raw edges.

Step 1

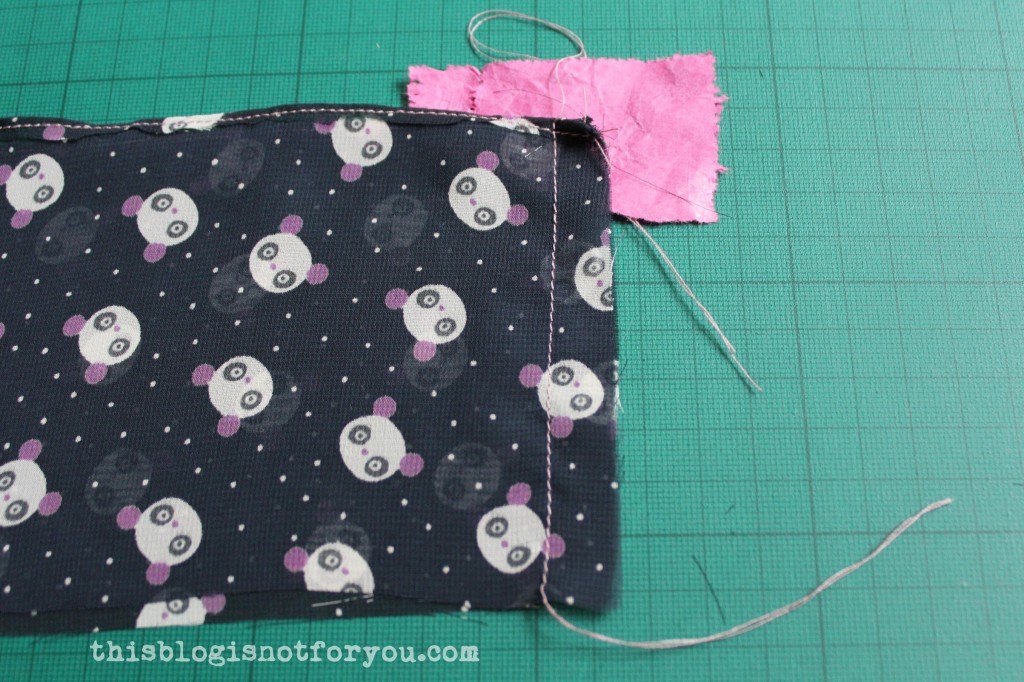
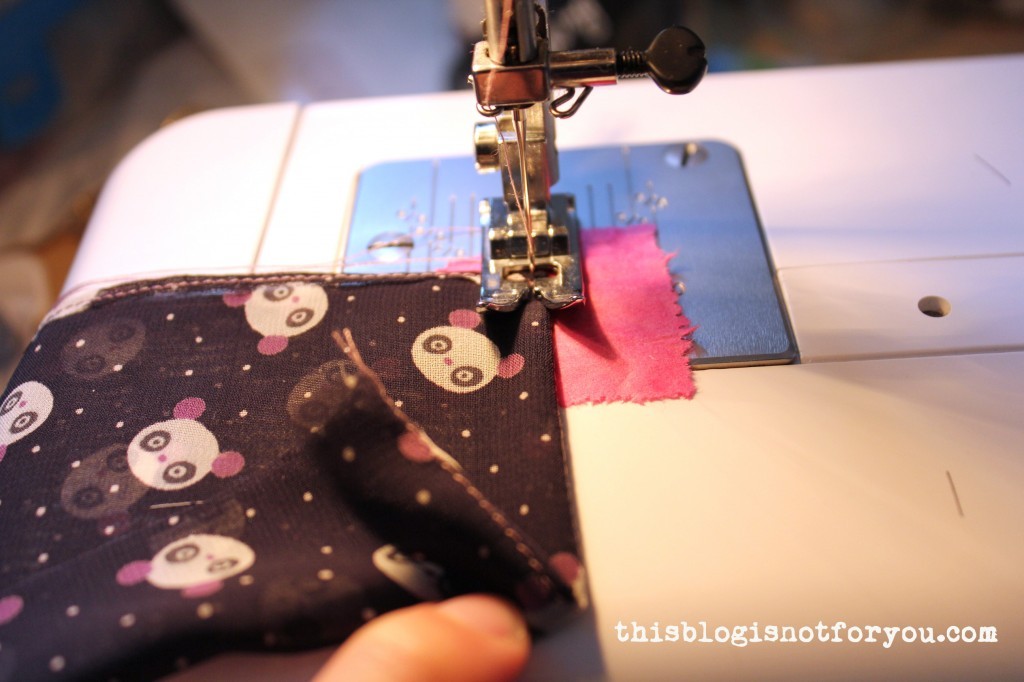
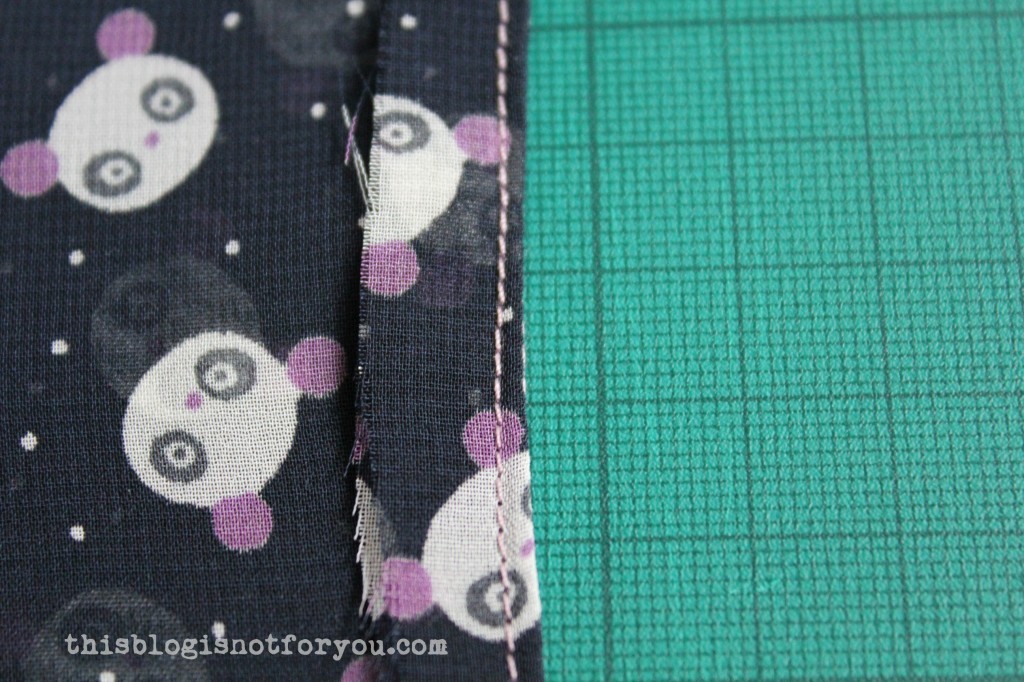
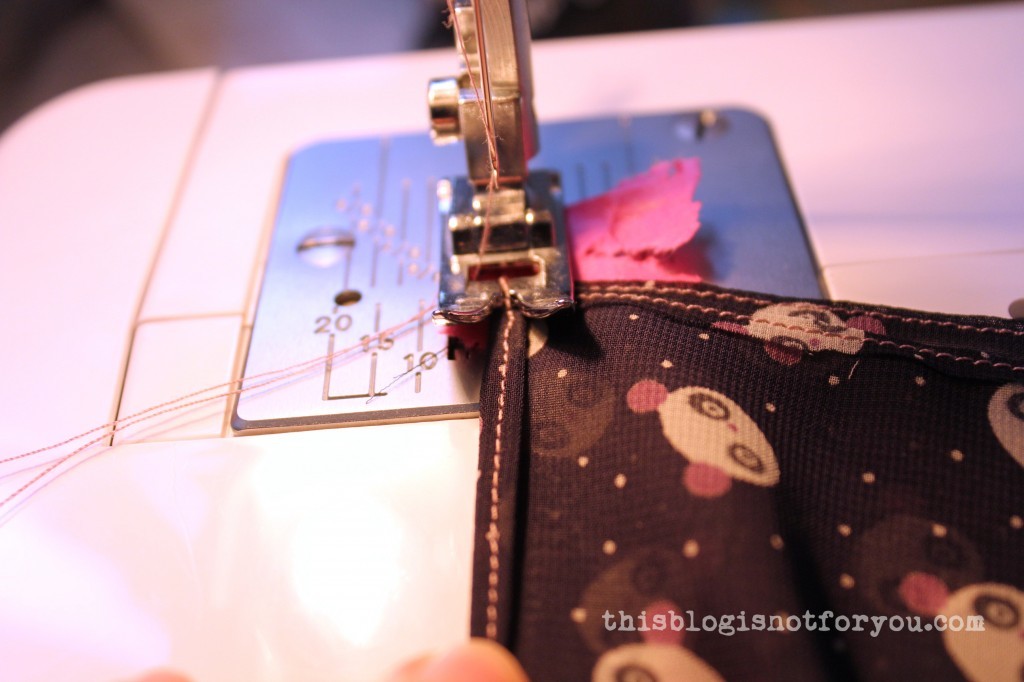
You will need  about 5/8 inch or 1.5 cm of seam allowance.(Less does also work if you already cut out your garment. But it’s easier to work with a bit more). Straight stitch 1/2 inch or 1.3 cm from the edge, right sides together.

baby seams tutorial by thisblogisnotforyou.com

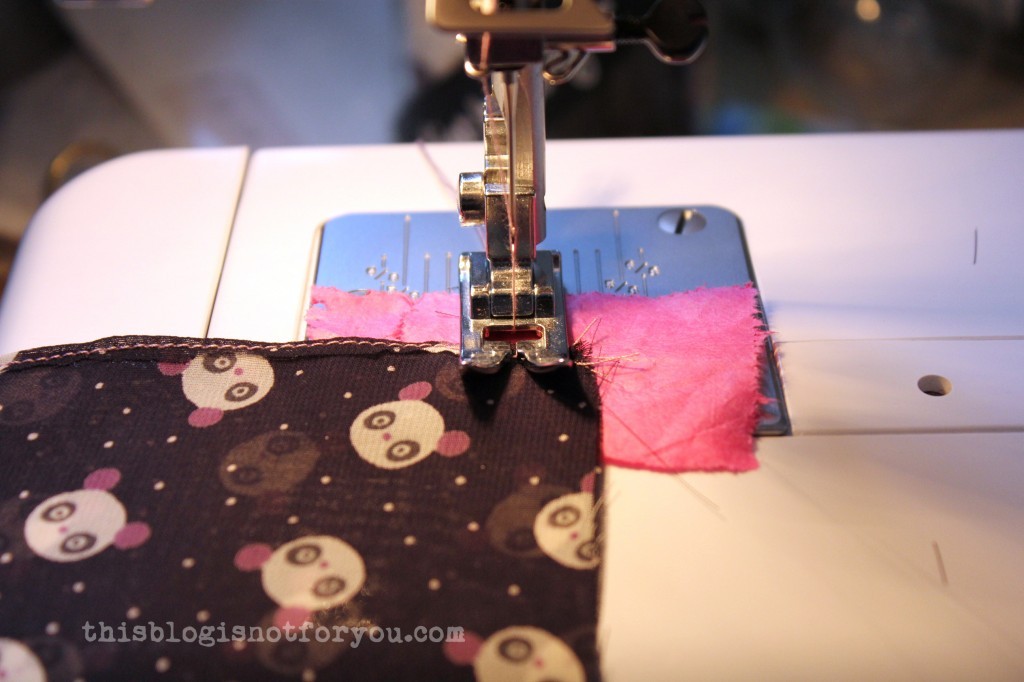
When sewing with very lightweight fabrics like chiffon, there’s  the risk that your machine eats the fabric by pulling the end of the seam into the needle hole. To prevent that from happening you can use a straight stitch foot. If you don’t have one, you can simply place a small piece of tissue paper under the end of the seam to give it a bit more strength (see picture above).

A straight stitch foot is quite inexpensive and very useful if you sew with lightweight fabrics like chiffons, silks or satins often.

sewing with chiffons straight stitch foot by thisblogisnotfotyou

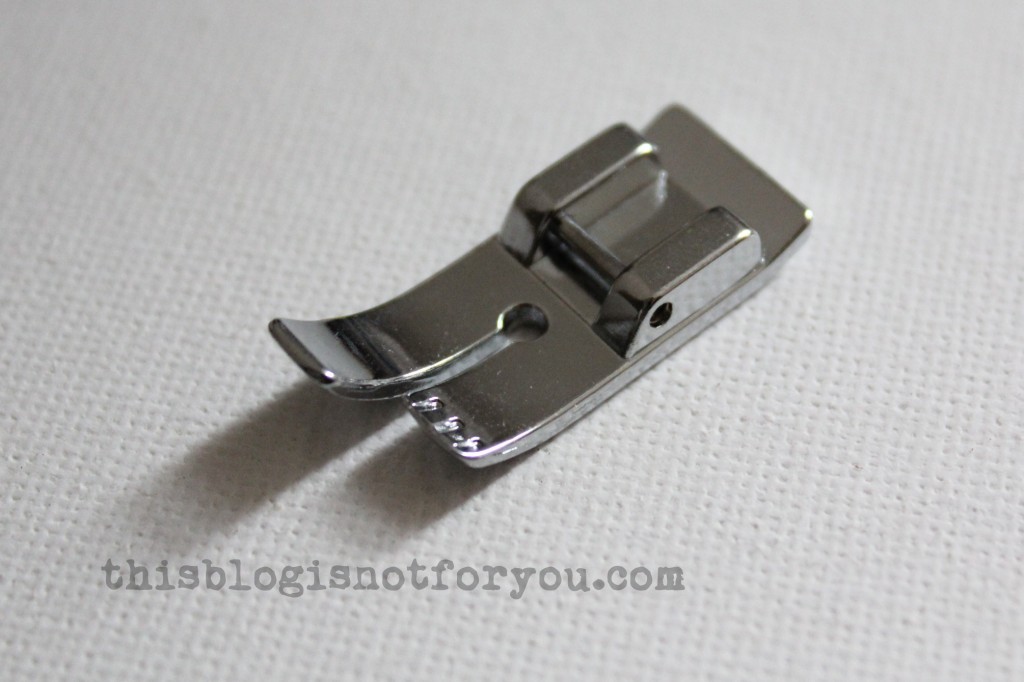
The small hole keeps the fabric from being pulled into the needle hole. It also helps the fabric from sliding away when sewing. I just bought one (after sewing the panda blouse and I love it!) Just be careful with your machine settings. With this presser foot you can only use the straight stitch (the name says it all 😛 ). The needle might break if you accidentally set your machine to zigzag stitching.
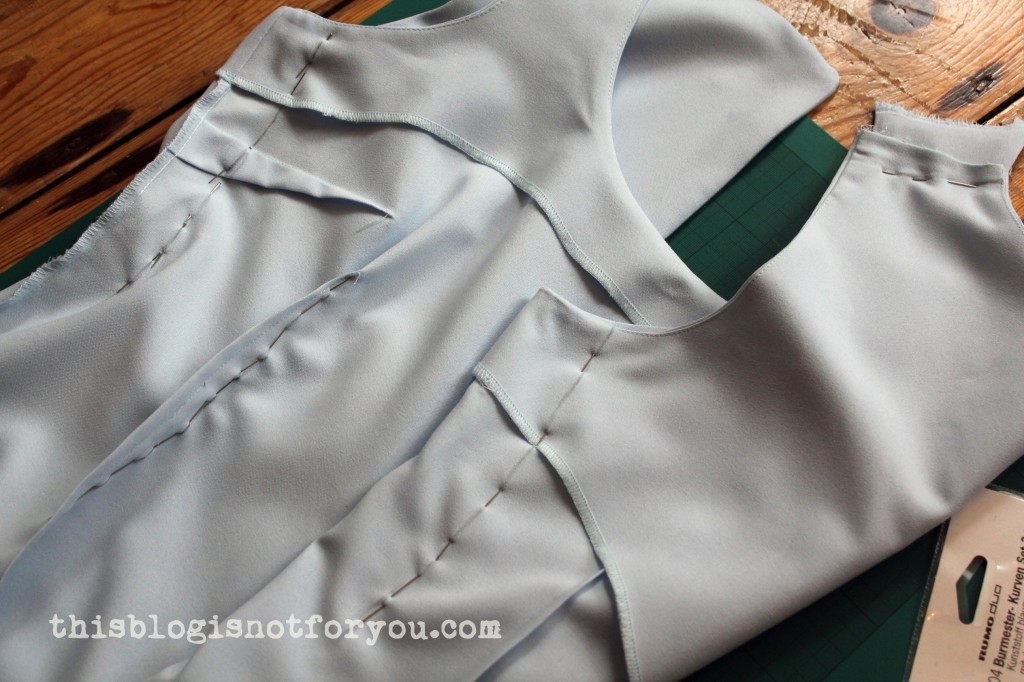
Step 2

baby seams tutorial by thisblogisnotforyou.com

Fold the seam on the stitched seamline. Press it flat if you want to, it might help to keep things in place (I always prefer getting it done quickly…). Then edgestitch 1/16 inch or 1-2mm from the folded edge.

baby seams tutorial by thisblogisnotforyou.com

baby seams tutorial by thisblogisnotforyou.com

baby seams tutorial by thisblogisnotforyou.com baby seams tutorial by thisblogisnotforyou.com

Hehe, see what happens if you don’t press it? The stiched line is not perfectly parallel to the other, but that’s only for the perfectionists.
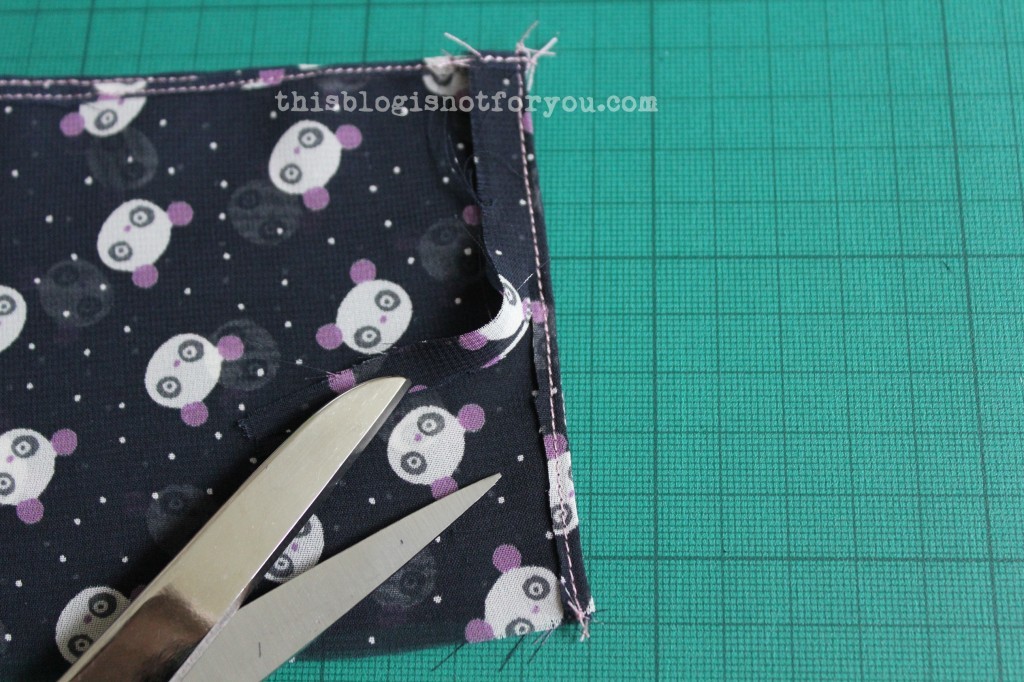
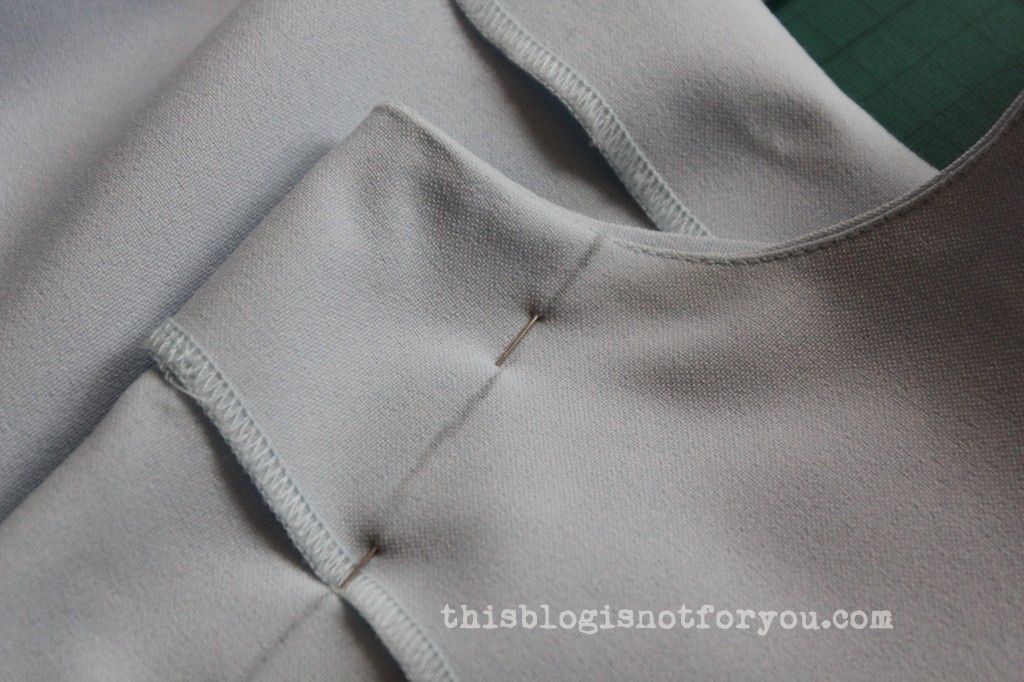
Step 3

Now trim very closely to the edgestitching. Use your fabric scissors (I tried the cutter and accidentally cut into the seam. Not a good idea). Try to keep the scissors parallel to the fabric.

baby seams tutorial by thisblogisnotforyou.com

Step 4

Now fold the seam again so that the raw edges are enclosed and hidden. Edgestitch on top of the last stitching line.

baby seams tutorial by thisblogisnotforyou.com

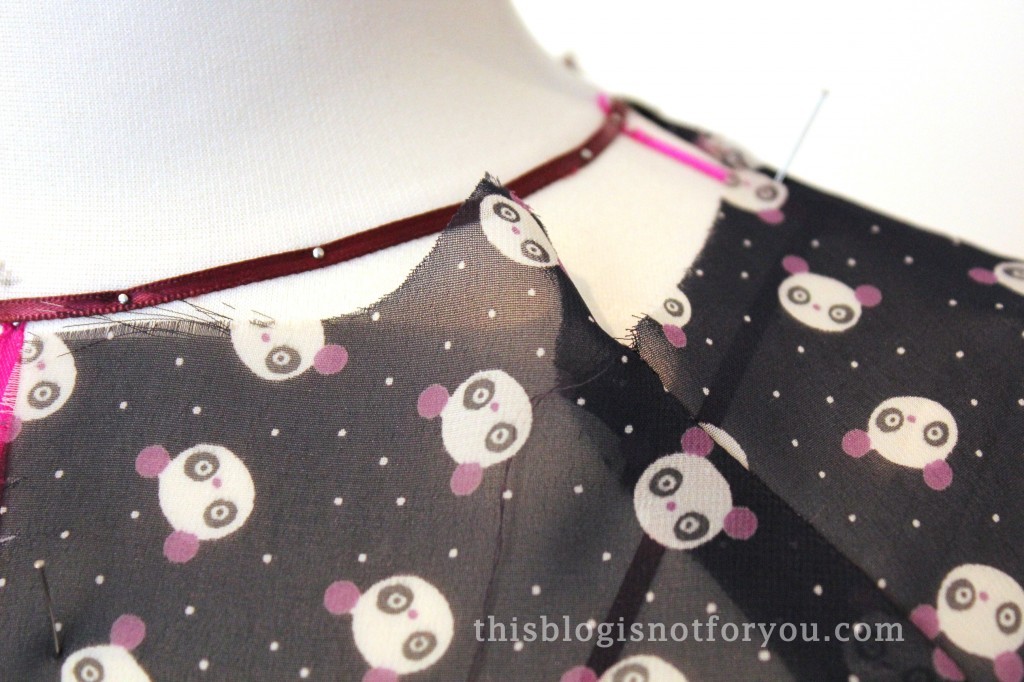
Don’t get confused by this picture. I had turned the fabric 180 degrees, thats why the folded seam is facing in the wrong direction.

Step 5

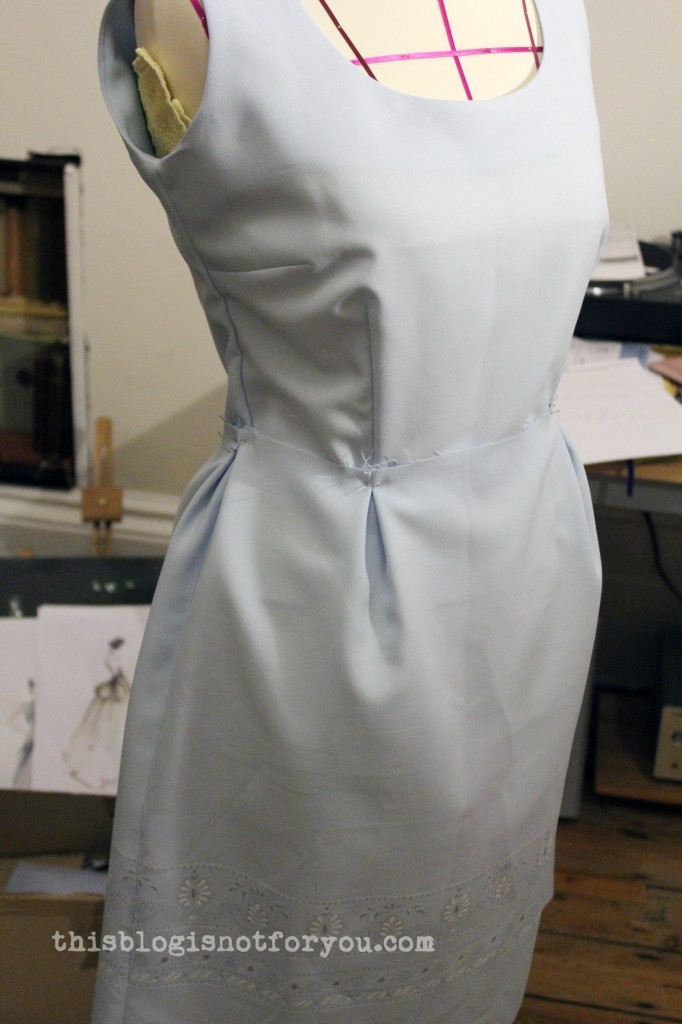
Now you’re almost done. Just press the seam flat and start admiring how nice it looks!

baby seams tutorial by thisblogisnotforyou.combaby seams tutorial by thisblogisnotforyou.com

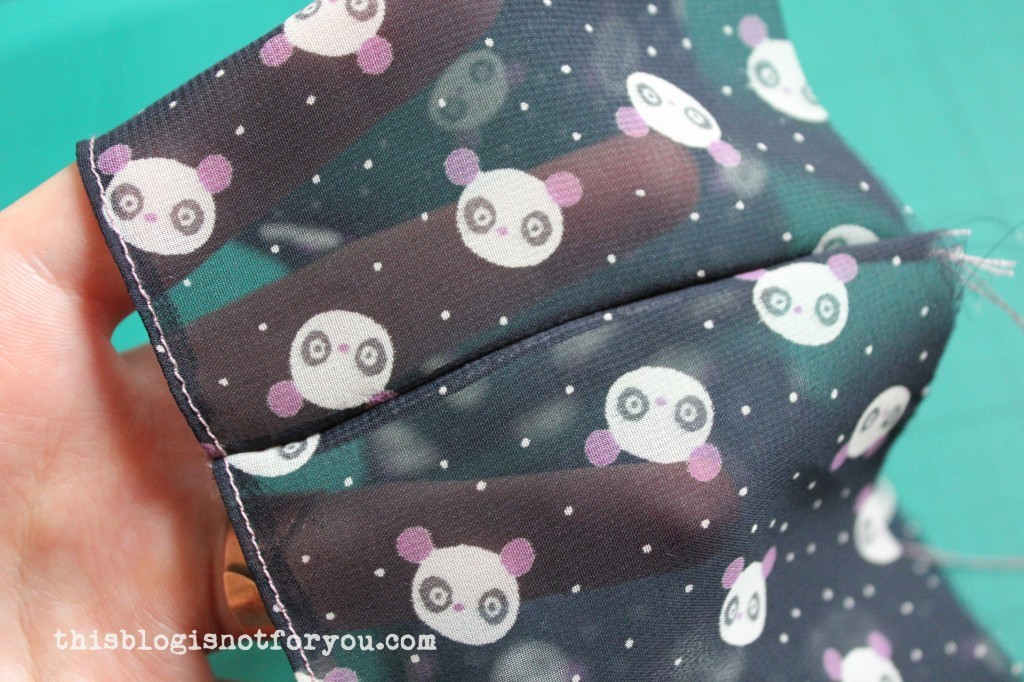
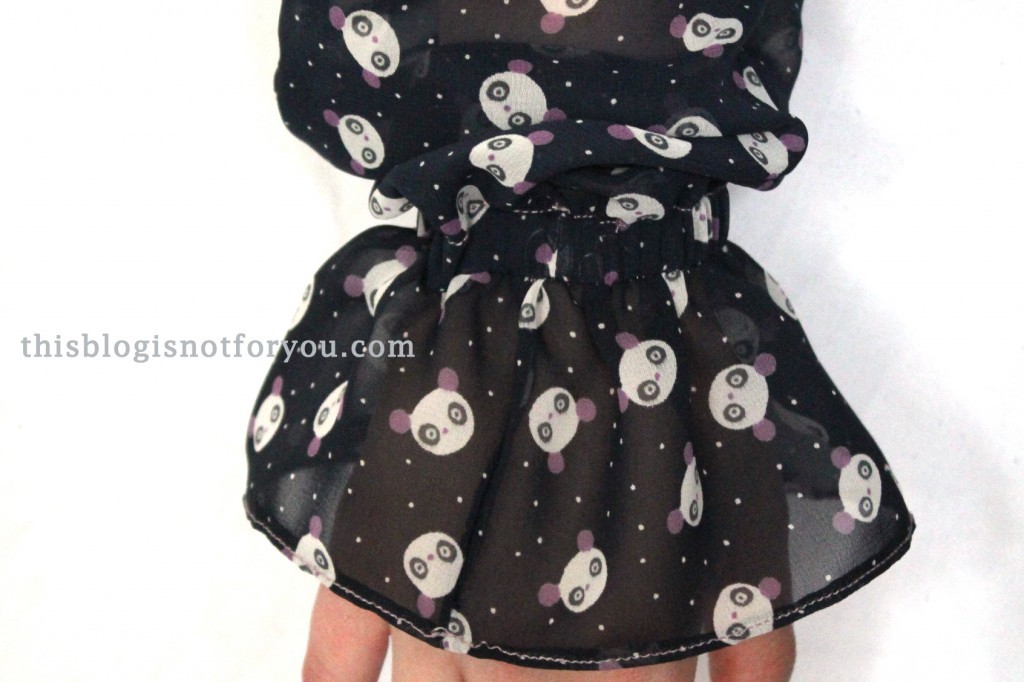
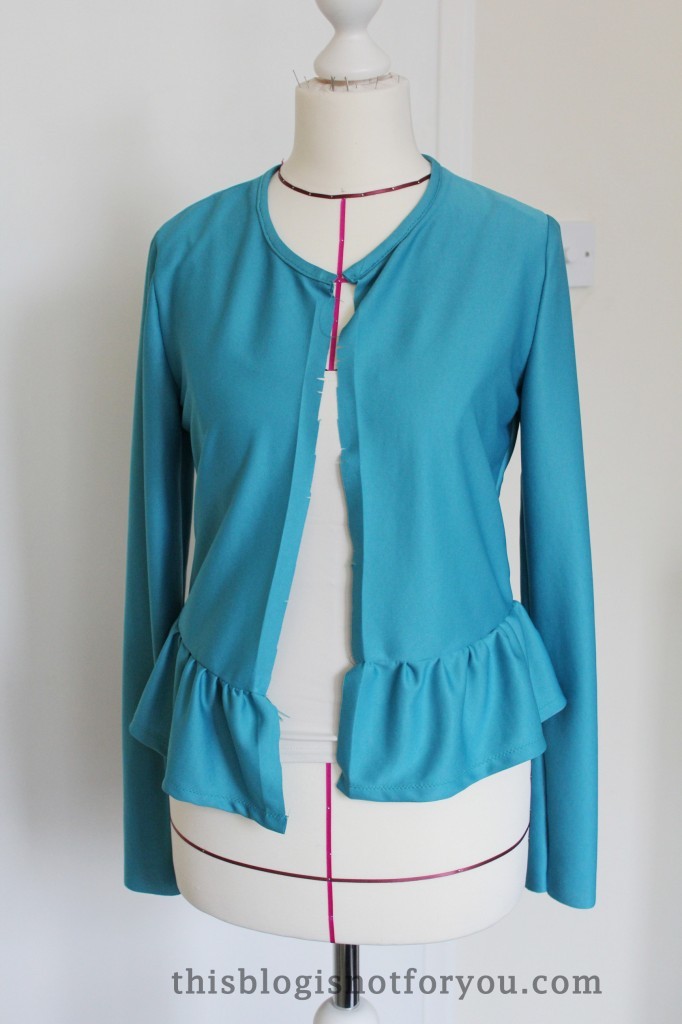
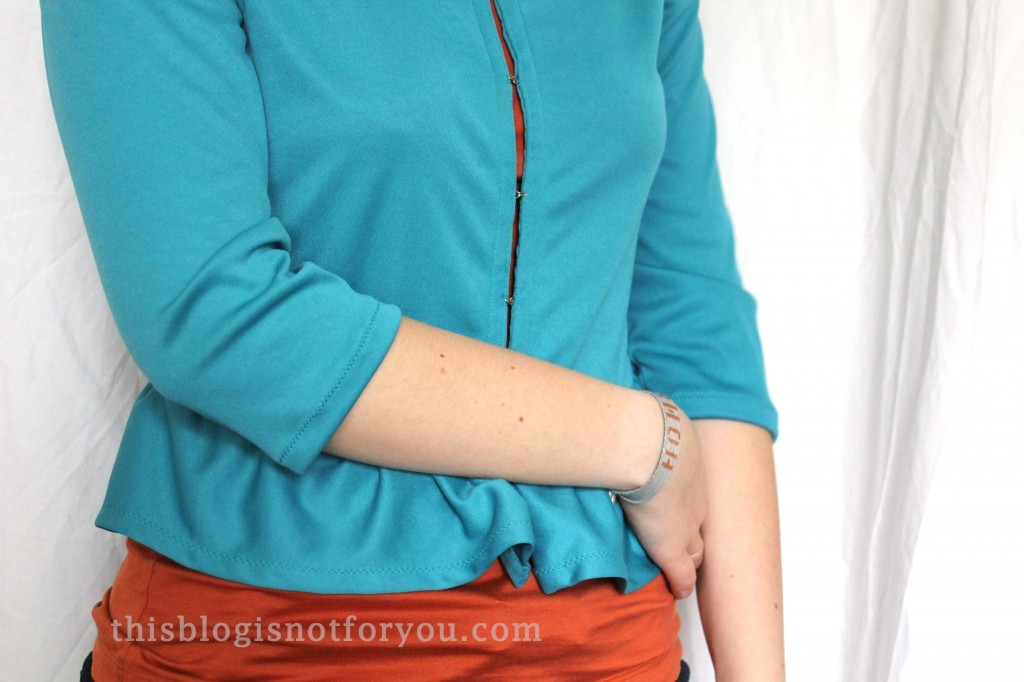
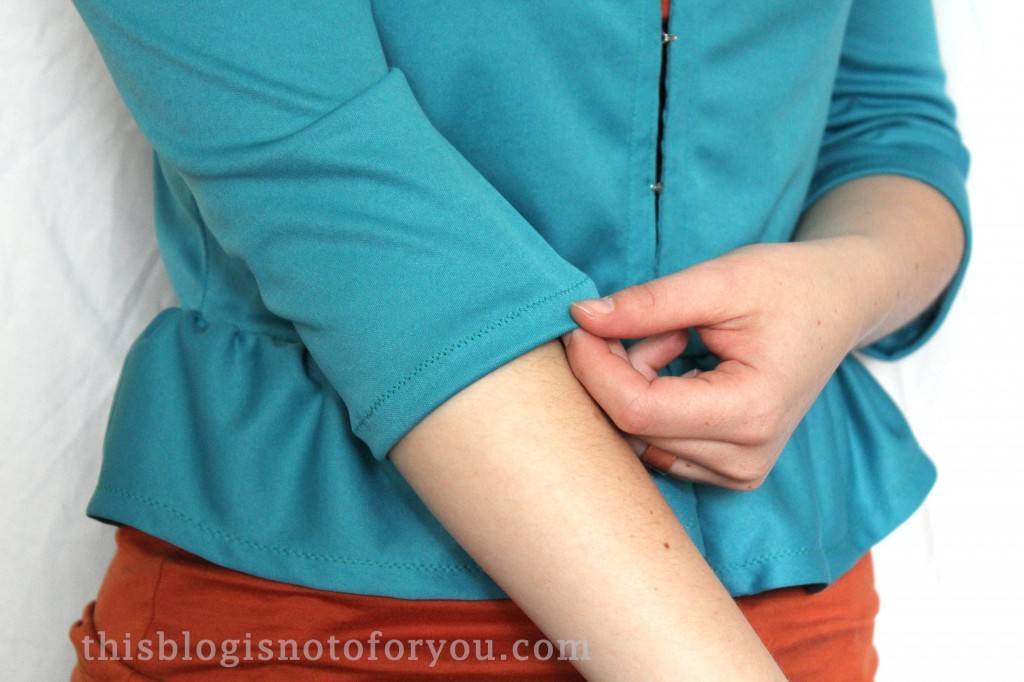
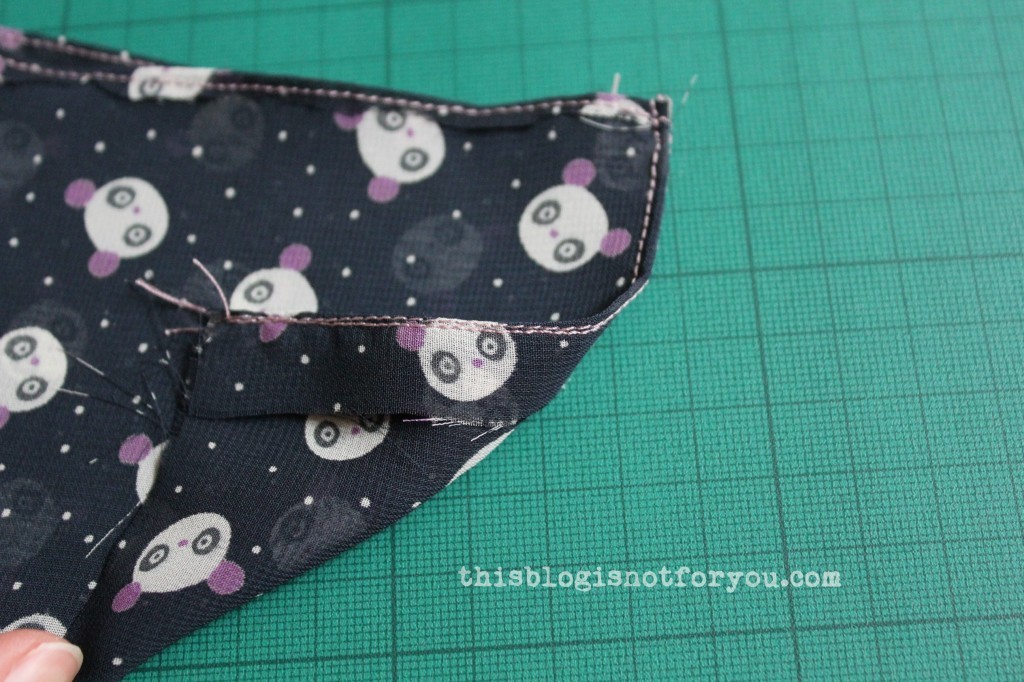
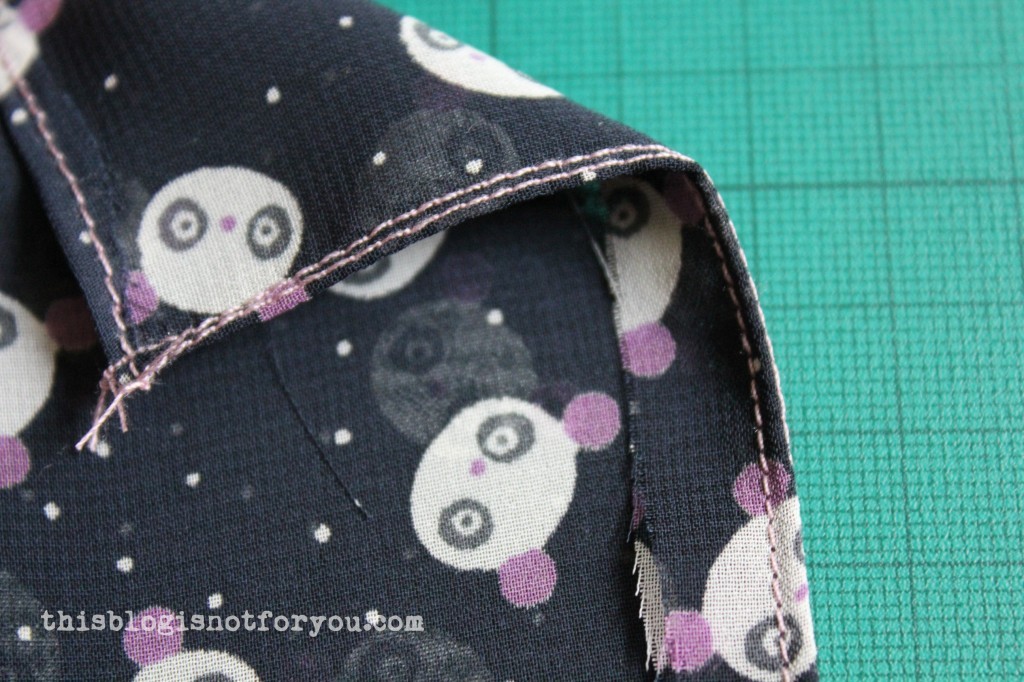
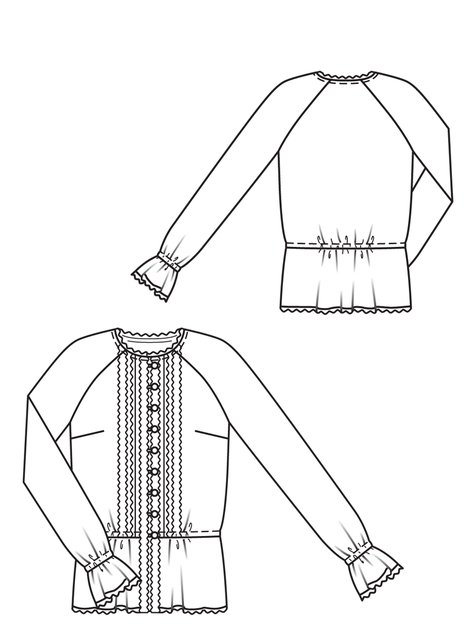
I used this technique for all seams of the Panda Blouse. The above picture shows the peplum of one of the sleeves. I first edgestitched the hem and trimmed the raw edges, then sewed the side seams with the baby seam technique. After pressing the baby seams I folded the hem on the stitched line, enclosing the raw edges and edgestitched.

Burda 128 8/2012 by thisblogisnotforyou.com

You can barely see the side seams in this picture -nice, eh? (Don’t look too closely though, I screwed up the hem at one point… :P)


I love this technique! I know you’re going to ask if it takes much longer than other seam finishes. NO, it doesn’t! You’re basically sewing the seams and the seam finish at once, so it’s not more complicated than other techniques. And since you’re straight stitching it’s much faster than finishing the raw edges with a zigzag or overlock stitch!

And seeing the results you’ll find it’s totally worth th effort!

Panda Chiffon Blouse

Burda #128 8/2012 by thisblogisnotforyou.com

Hello my lovely readers – hope you had a great week so far!

I finally had time to edit the pictures I took of #11 of my 27 Dresses Challenge! Wow, it’s 11 already and there are more lovelies lying around here waiting to be finished (I guess I have to start saving some money for the overlock sewing machine soon:) )!

This chiffon blouse  was made from a cute panda fabric I got for  £1.20/m! No, fabrics normally aren’t that cheap here in London (too bad!), but there are some really inexpensive fabric stores near Walthamstow Central Station which, I guess, is no secret to London sewists. The downside is that the fabrics are not the very best quality and although they have a huge selection, I often can’t find want I am looking for.

For this blouse I actually wanted to go with the original Burdastyle pattern, using a white batiste and lace trim. Finding a nice lightweight white fabric shouldn’t be that hard, eh? Wrong! Couldn’t find it after being in at least five different fabric stores in Walthamstow.

This is the original “lace trim blouse”. You can get the pattern at burdastyle.

No white fabric, no lace trim! But I came across this cute Panda chiffon I couldn’t resist.

I basically, used the pattern as it was, ignoring the lace trims and using baby seams as seam finish. I’ll explain how to make baby seams in my next post!

The only problem I had with the pattern (or rather the chiffon fabric) was that the fabric pieces of the sleeves did not quite fit together at the edge. Look at this mess (and the cute pandas)!Burda #128 8/2012 by thisblogisnotforyou.com

After nagging at this for a while, I just trimmed off the excess fabric, widening the neckline a bit.

I love how versatile this version of the Burda blouse is! I tried to style it in different ways – let the pictures speak for themselves!

Burda #128 8/2012 by thisblogisnotforyou.com

The classic sheer look! With the high-cut neckline and the cuteness of the pandas this isn’t too bold.

Burda #128 8/2012 by thisblogisnotforyou.com

Also looks great with a belt!

Burda #128 8/2012 by thisblogisnotforyou.com

Burda #128 8/2012 by thisblogisnotforyou.com

Or all tied up!
Burda #128 8/2012 by thisblogisnotforyou.comBurda #128 8/2012 by thisblogisnotforyou.com

It’s super comfy and perfect for summer evenings!

Burda #128 8/2012 by thisblogisnotforyou.com
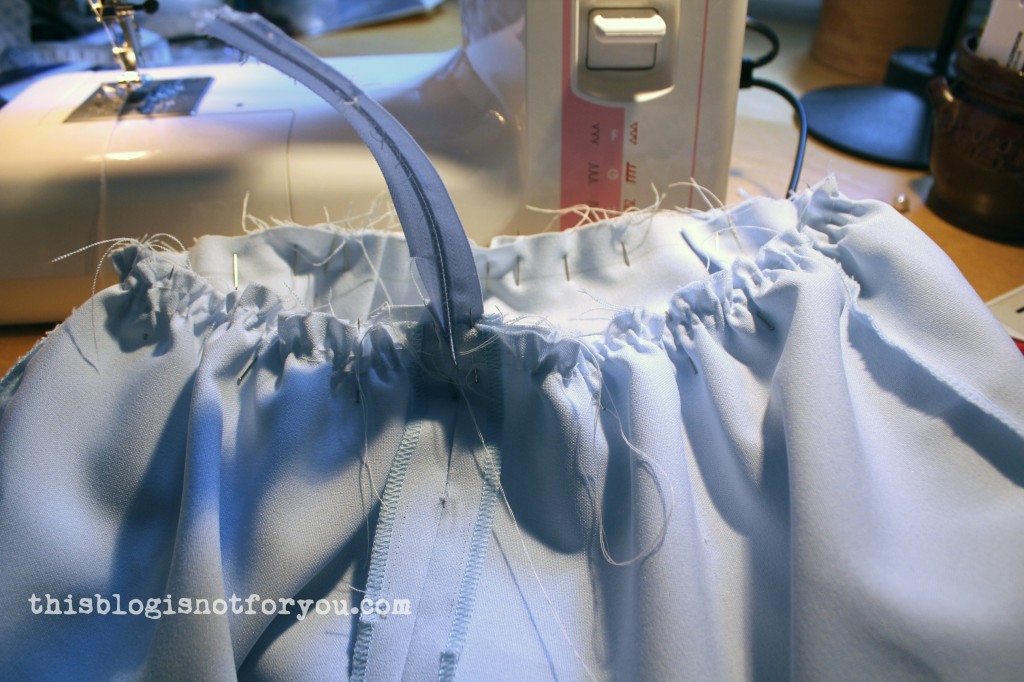
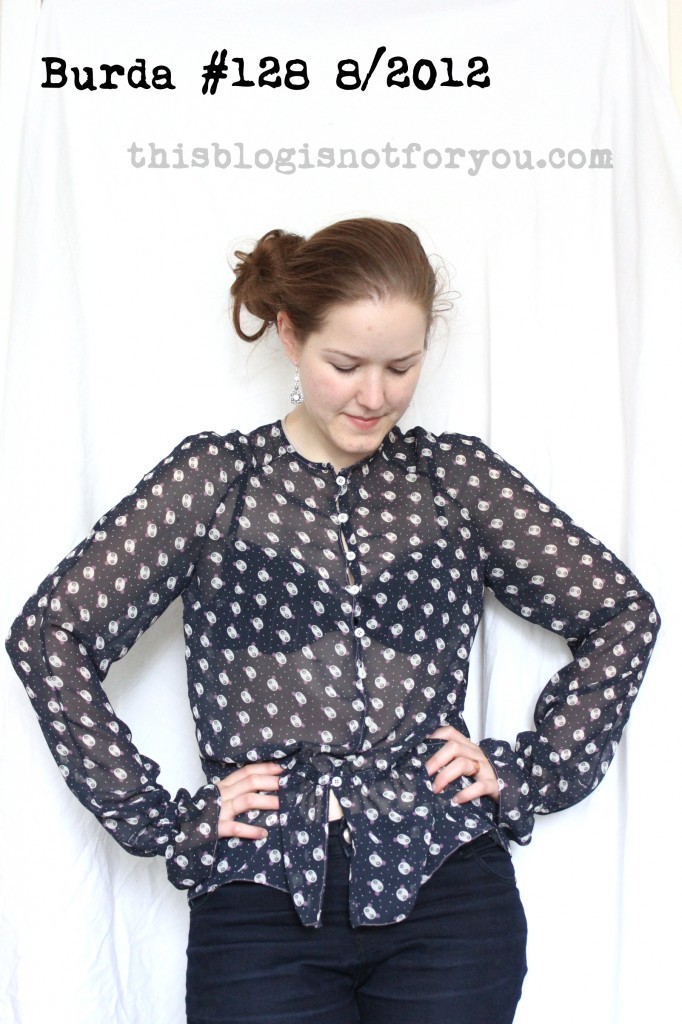
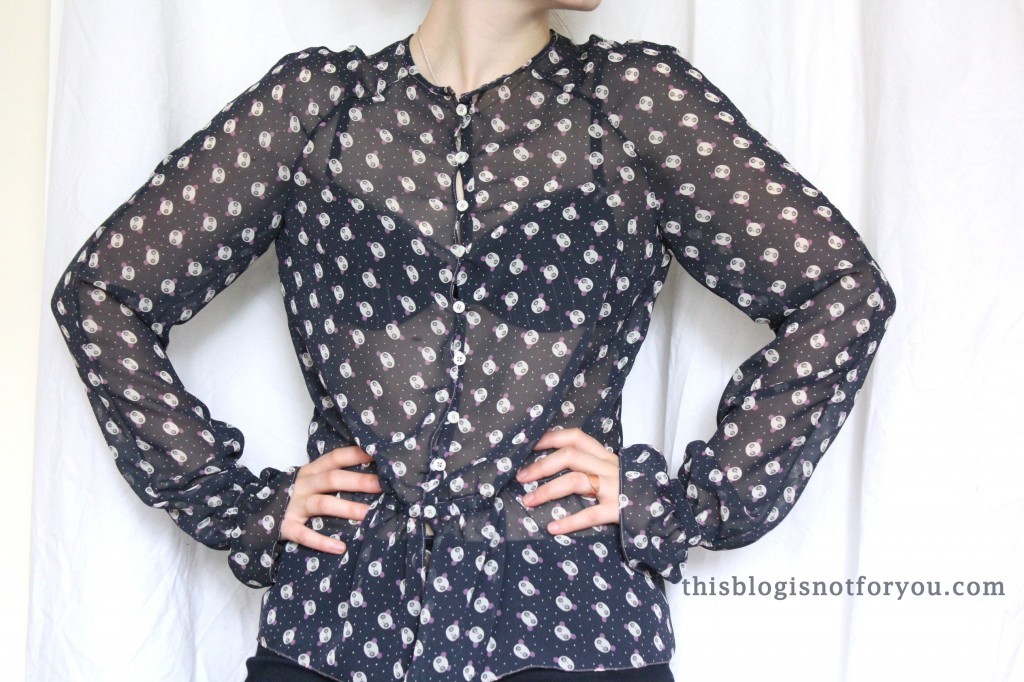
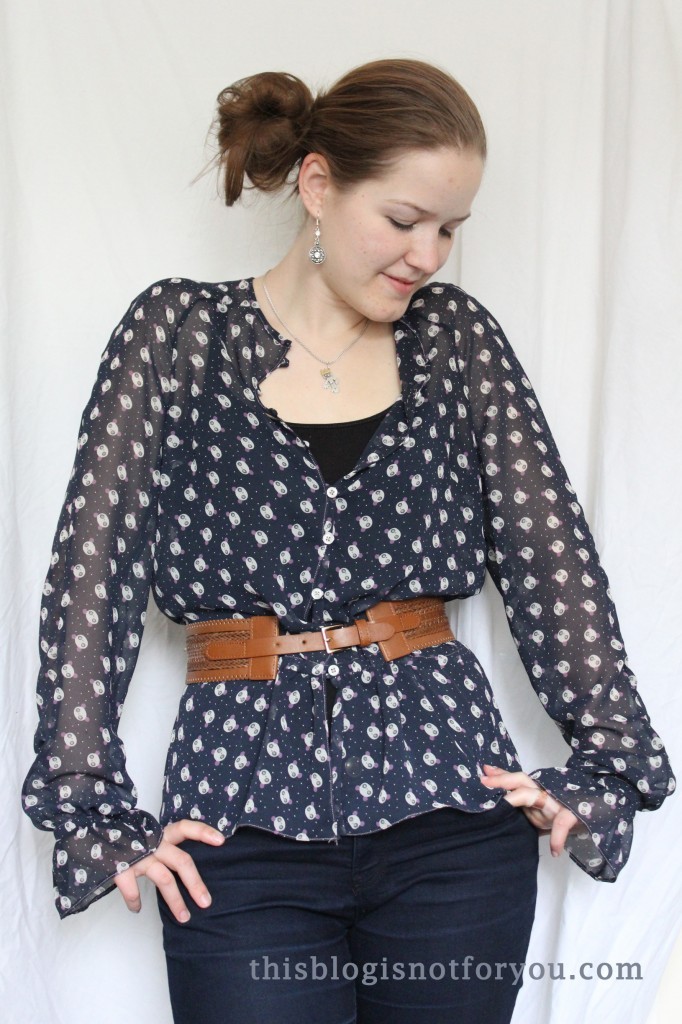
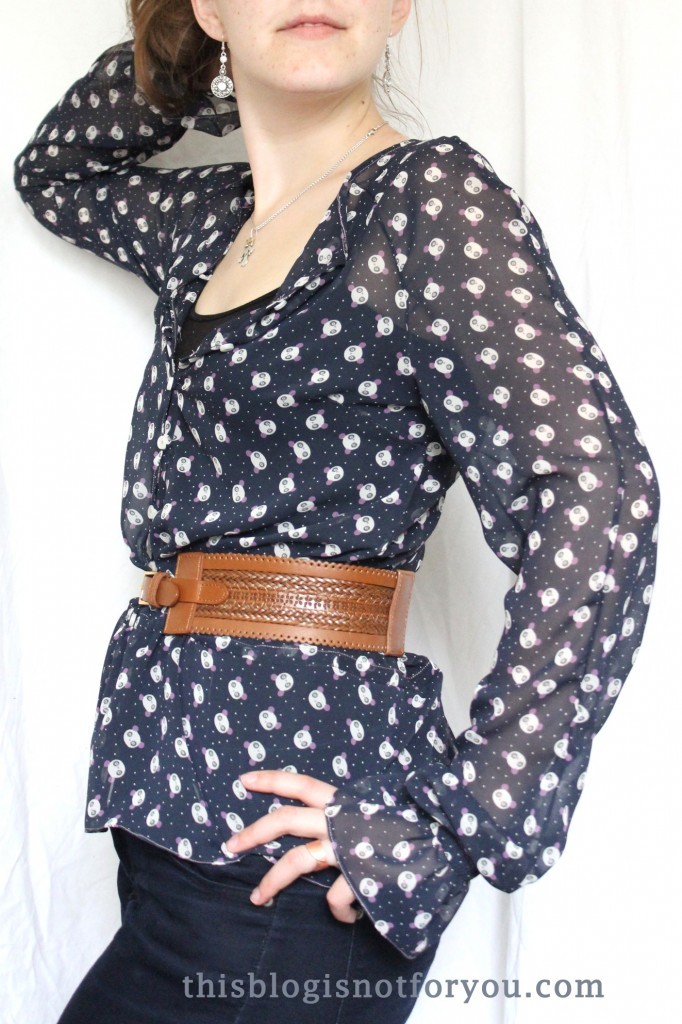
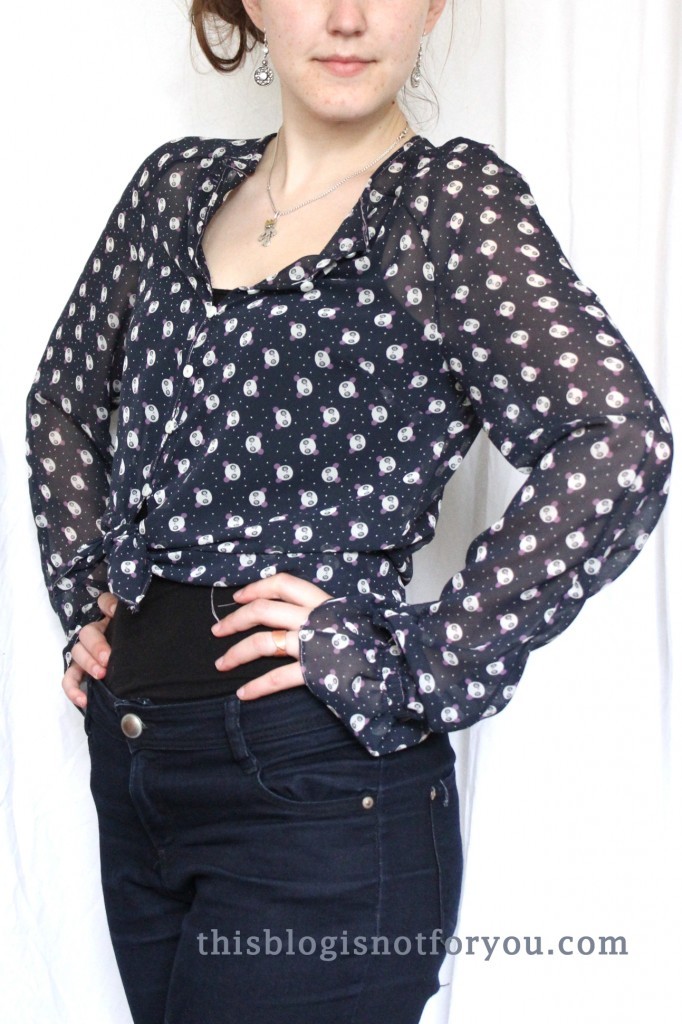
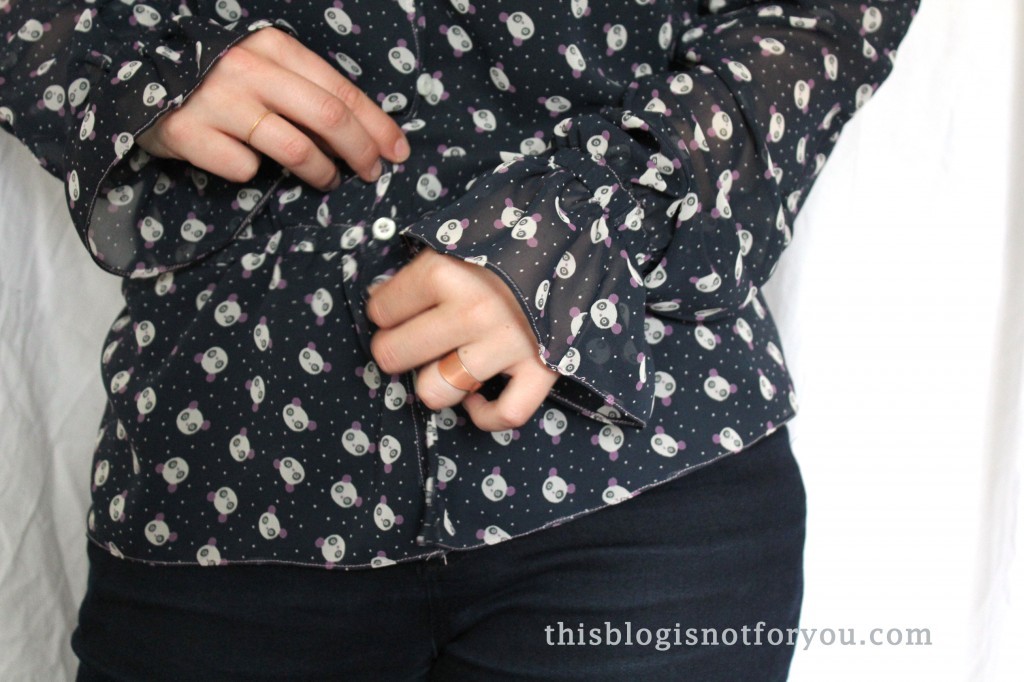
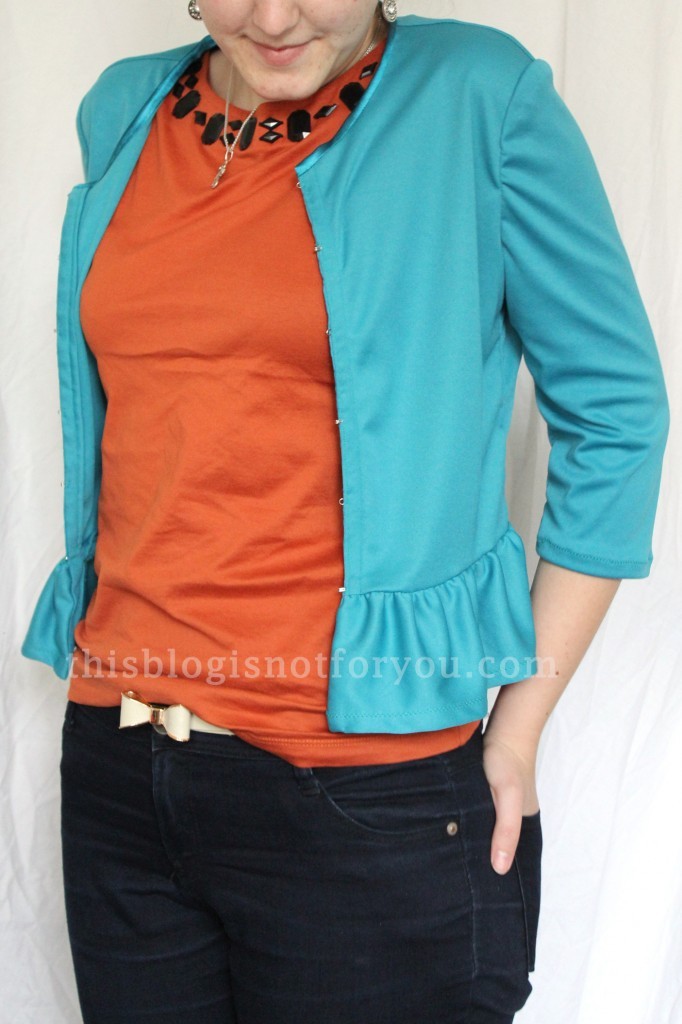
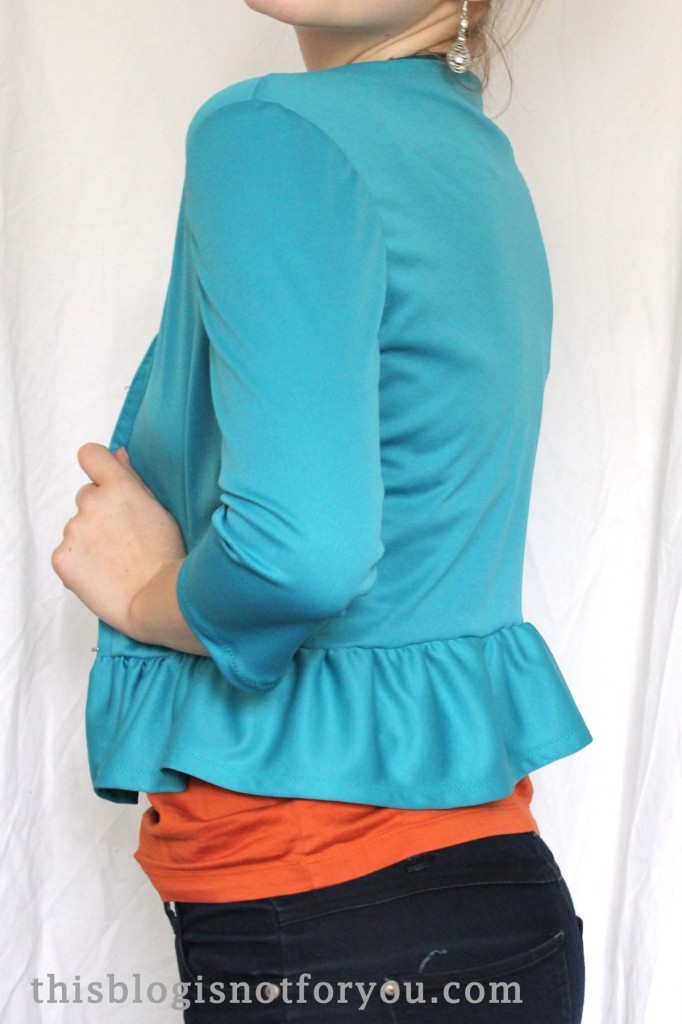
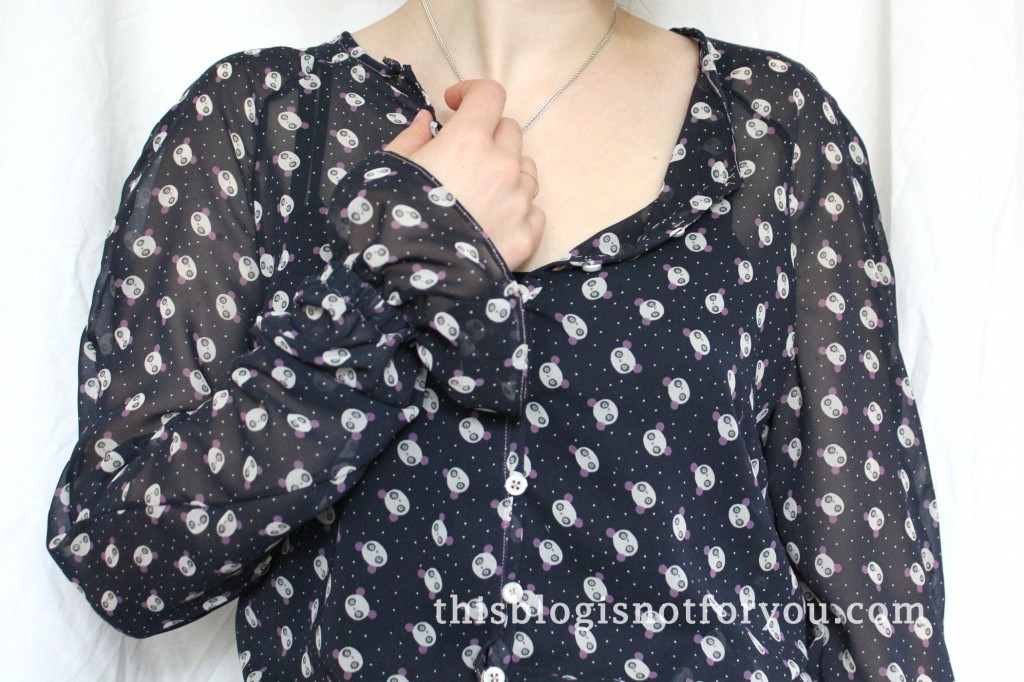
I used 7mm elastic for the sleeves and at the waist in the front and back as well as 9 small buttons. I decided to use light pink thread instead of dark blue, to match the panda ears and to make the blouse look a bit more interesting.

Burda #128 8/2012 by thisblogisnotforyou.com

Burda #128 8/2012 by thisblogisnotforyou.com

For the button fasteing I made small loops out of the same fabric and sewed them on between the front edge and the facing strip/binding. Sewing on the buttons wasn’t too much fun when I want to finally get done! 🙂

Burda #128 8/2012 by thisblogisnotforyou.com

I love how easy it was to tweak the original pattern just a bit to make it look so different! Sometimes using fabric which is totally different from the one suggested can bring about awesome results. Just make sure you choose a fabric that is of about the same weight.

But be careful! If the pattern says you should use stretch fabric like knits or jersey, you really should. The fit of the garment is different when using pattern made for stretch fabrics. You might end up sewing a garment that is way too tight. When using non-stretch fabrics you will most often have to add a zipper or some other fastening. Keep that it mind when choosing a fabric for your pattern!


first cardigan (which is actually the second)

Burda 109B 5/2013 by thisblogisnotforyou.com

Finally, here are the pictures of the jersey cardigan I made back in May/June. It’s #10 of my 27 Dresses Challenge and I made it for someone else this time!

I used the Burda pattern #109B from the May issue this year (5/2013) and it is probably the first time I managed to sew something in the same month the issue was out.

Burda 109B 5/2013 by thisblogisnotforyou.com

I couldn’t find the #109B pattern as download but the burdastyle.com website has the pattern for 109A for a fiver, which is basically the same pattern with short sleeves (and it suggests a button closure, the 109B pattern uses hooks):

It is also the first cardigan I’ve sewn so far and at the same time my second, I guess.

A little while ago I showed you pictures of the ugly dress and promised to  confess some more of my sewing mistakes. This is one.

When dealing with stretch fabric, concentrate! I basically cut it out in the wrong direction, started sewing everything together. After hours and hours of sewing I started to get a bit worried since the cardigan was getting way to tight. This was really weird because Burda patterns normally end up being a bit too large. I was swearing my head off, first blaming the pattern, then the fabric (“it’s not stretchy anymore!”).  Well, after a while I noticed that it was stretchy, just not where I wanted it to be stretchy. Burda 109B 5/2013 by thisblogisnotforyou.comBurda 109B 5/2013 by thisblogisnotforyou.com

See? Nice and stretchy lengthways, but no stretch at all in the crosswise direction. FAIL. You can see how lopsided it looks on the dummy. In the first picture you can the the sewing annoying mistake I made. Sewing the peplum onto the bodice, I accidentally caught some fabric from the back panel and had to open the seam again. This wouldn’t have been so bad if it wasn’t for the jersey fabric. Unpicking the seam left ugly little holes in the fabric. ARGH! I managed to solve the problem sewing on a piece of fabric that looked a bit like a belt, to hide the holes. This had to be done with hand sewing, since I didn’t want to top stitch and make it even more obvious.
The worst part? Realising that all my effort had been in vain after noticing that the problem was that I screwed up when cutting out the fabric. ARGH!

Even worse? Realising that I didn’t have enough fabric left to make another one. As mentioned before, it was for someone else (a birthday present) and I had to get it done on time – not enough time to go back and buy new fabric!
Burda 109B 5/2013 by thisblogisnotforyou.com

In the end I decided to shorten the sleeves so that the pattern pieces just fit on the piece of fabric I had left. After thinking you were almost done, starting all over again is NOT FUN.

Burda 109B 5/2013 by thisblogisnotforyou.comBurda 109B 5/2013 by thisblogisnotforyou.com


I managed to finish it anyway and am quite satisfied with how it turned out. There’s some puckering at the sleeves, but apart from that it’s ok (and really comfy).

Burda 109B 5/2013 by thisblogisnotforyou.com

I finished the seams at the sleeves with a narrow zig zag stitch.

Burda 109B 5/2013 by thisblogisnotforyou.com

I found some matching bias binding I used for the seam finish at the neckline.

Burda 109B 5/2013 by thisblogisnotforyou.com

Last but not least, I added my little tag by sewing it on one of the side seams.

Phew, done!

Did any stretch fabric horror stories happen to you?


PS: I’m still on the look out for some under 200 follower blogs I might like to nominate for the Liebster Award. I have some favourites, but I always love discovering new blogs! If you have any suggestions, just leave a link in the comments! xx