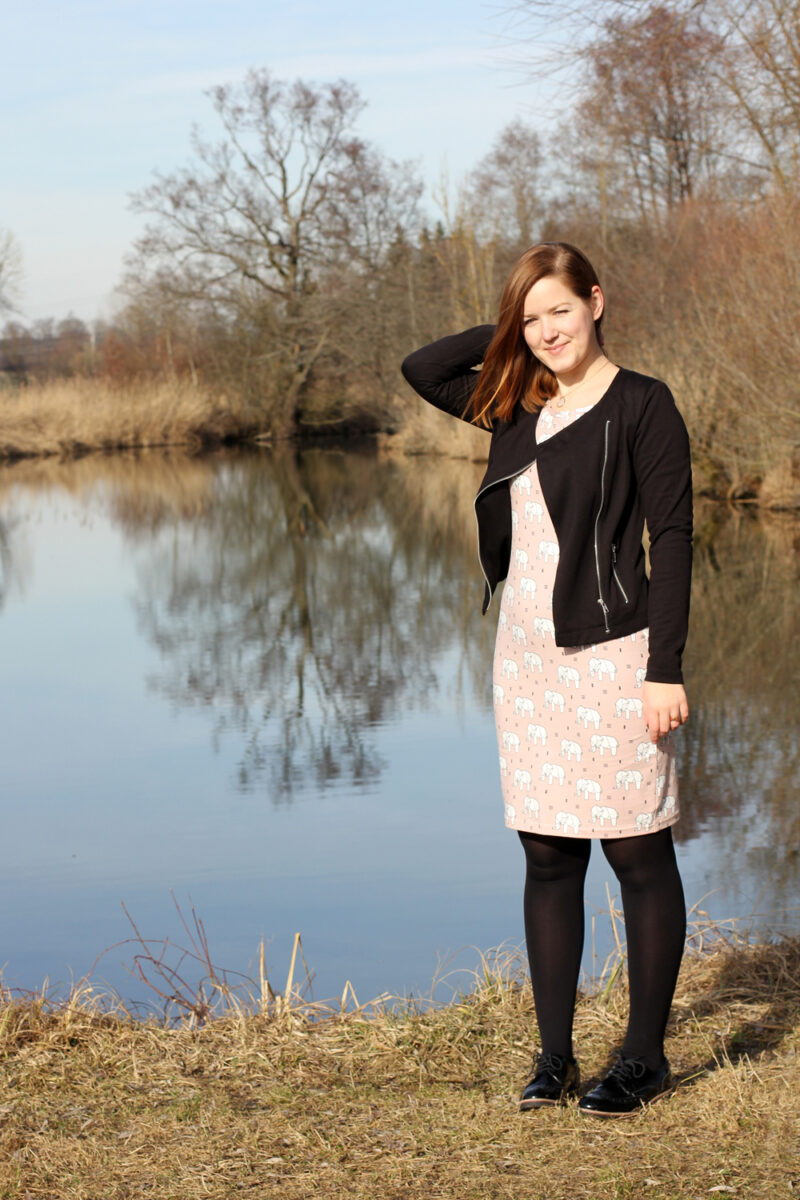
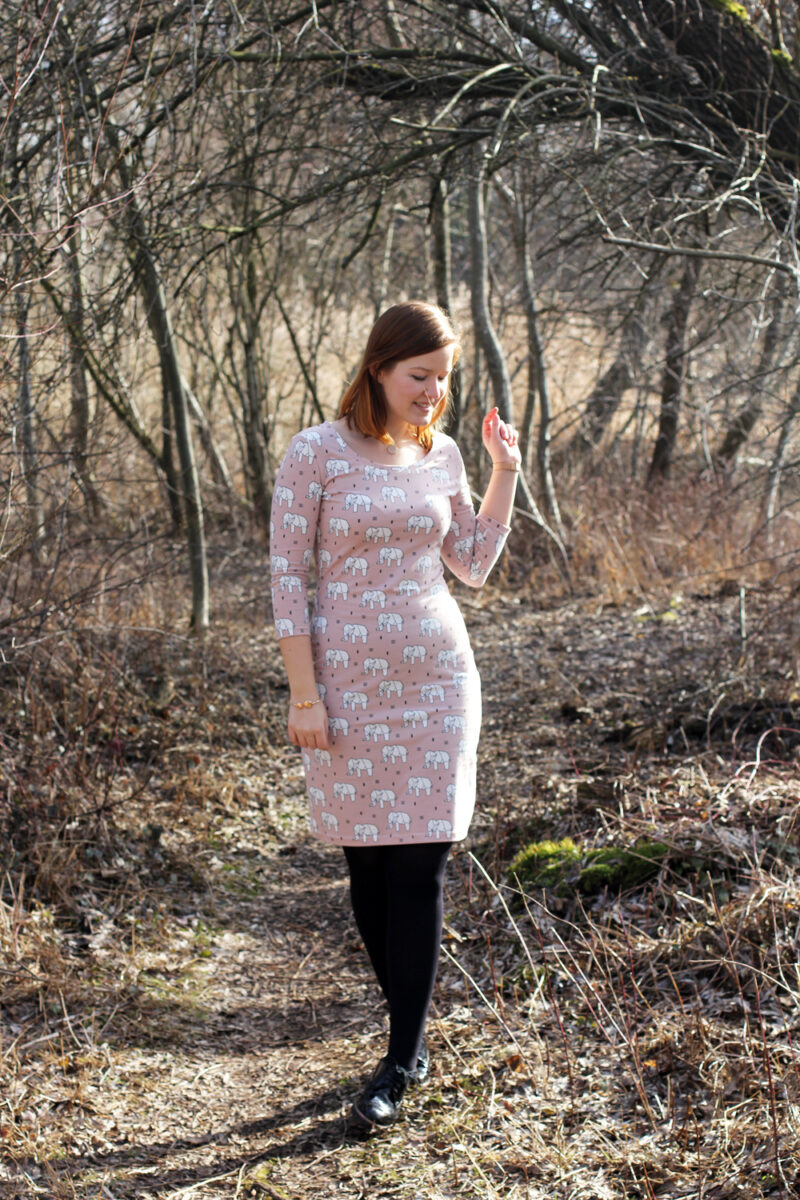
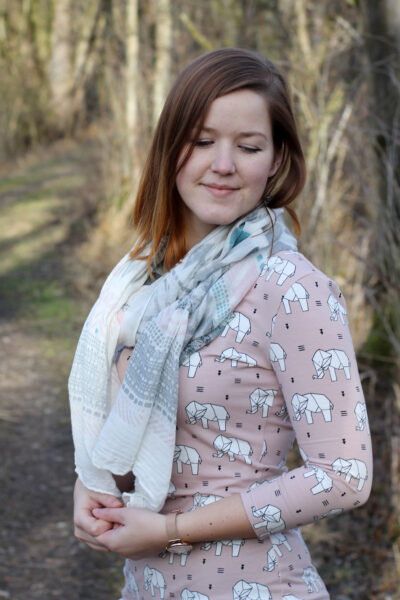
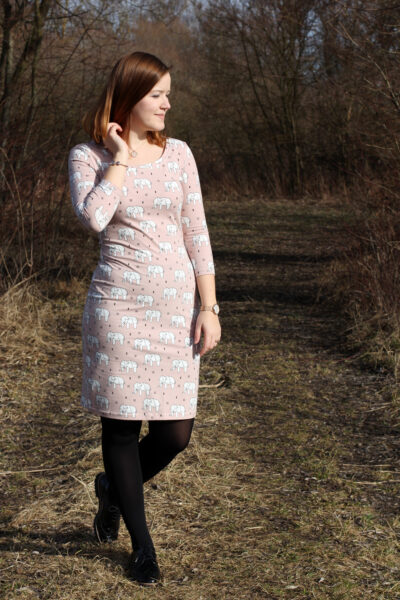
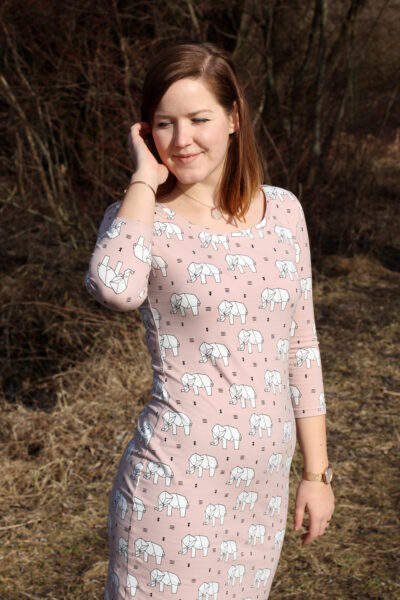
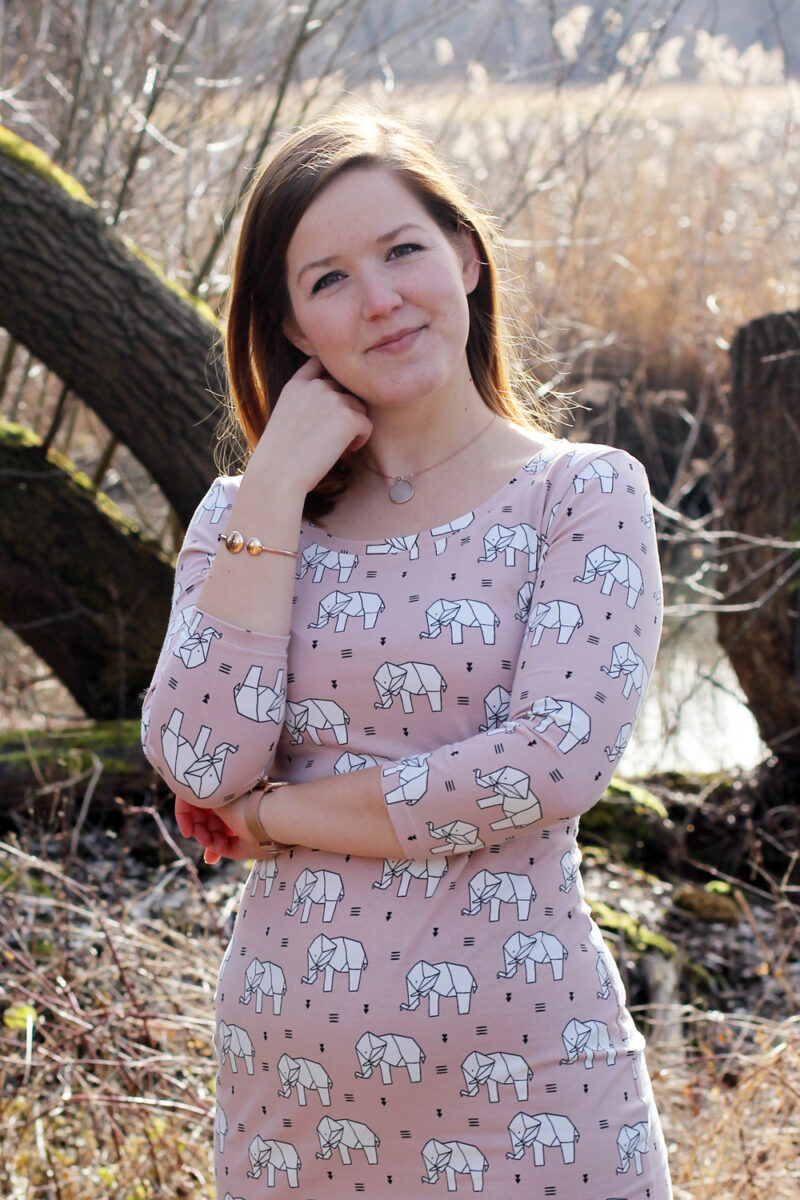
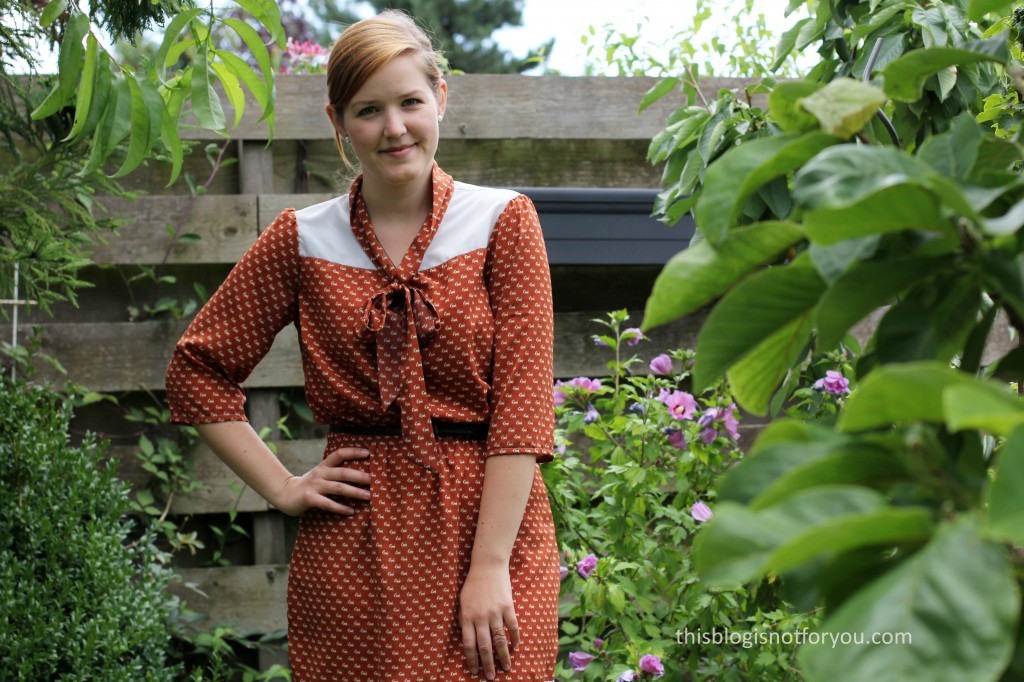
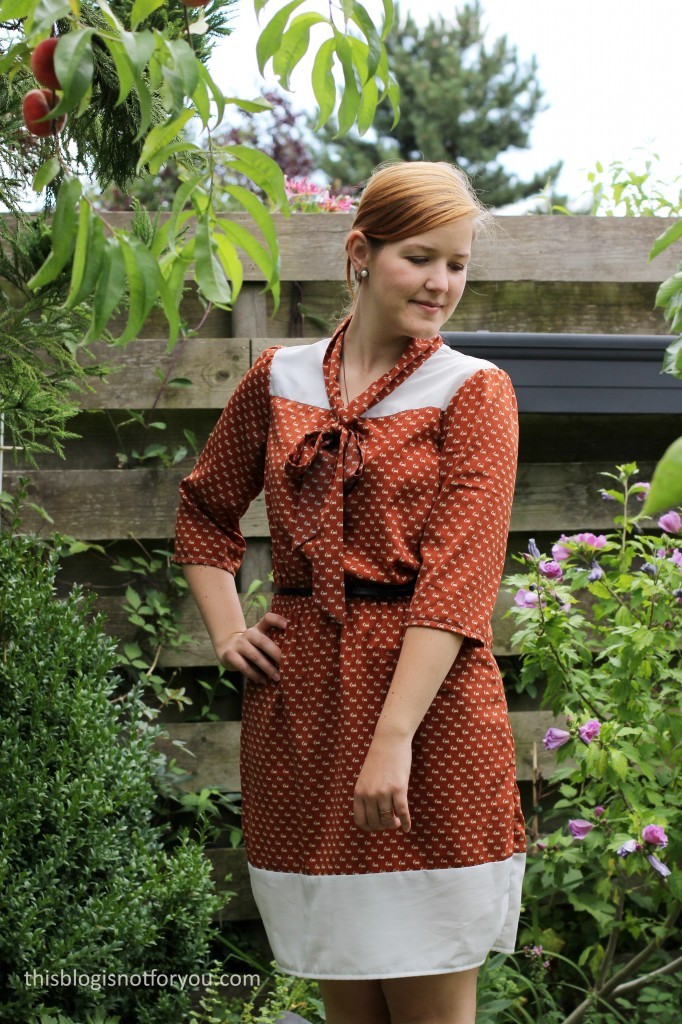
Elephant Print Agnes Dress

Agnes Dress by thisblogisnotforyou.comAgnes Dress by thisblogisnotforyou.comAgnes Dress by thisblogisnotforyou.com

Agnes Dress by thisblogisnotforyou.com

Agnes Dress by thisblogisnotforyou.comAgnes Dress by thisblogisnotforyou.com

Agnes Dress by thisblogisnotforyou.com


Hey guys, hope you’re all having a fantastic Sunday!

After spending the last couple of weeks mostly sewing for friends and family, I finally could squeeze in a sewing project for myself. I really have to be more selfish with my sewing if I want to keep wearing handmade clothes! I find it really hard to say no to requests and then also I often find myself offering my help. Sounds familiar, anyone? For some reason I can find little joy in sewing for others, especially if there’s no opportunity for a fitting. Putting a lot of work into something not knowing whether it will fit is just not enjoyable to me. (The exception is my nieces, really. Sewing for babies is always fun as fitting is easy and you can just go wild with your fabric choices and use up all your fabric scraps.)

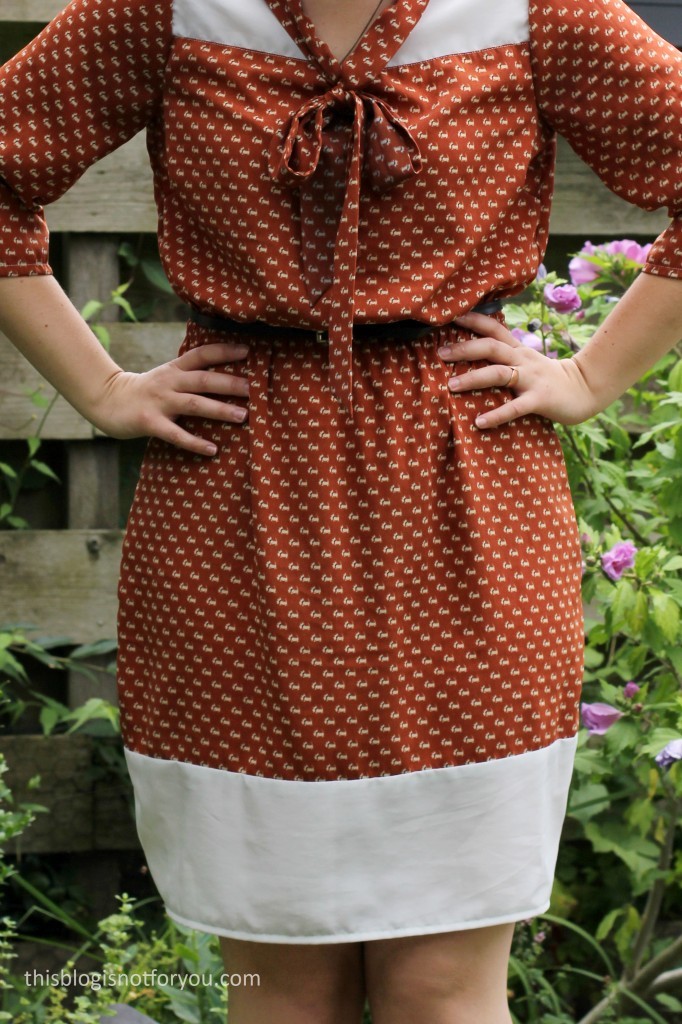
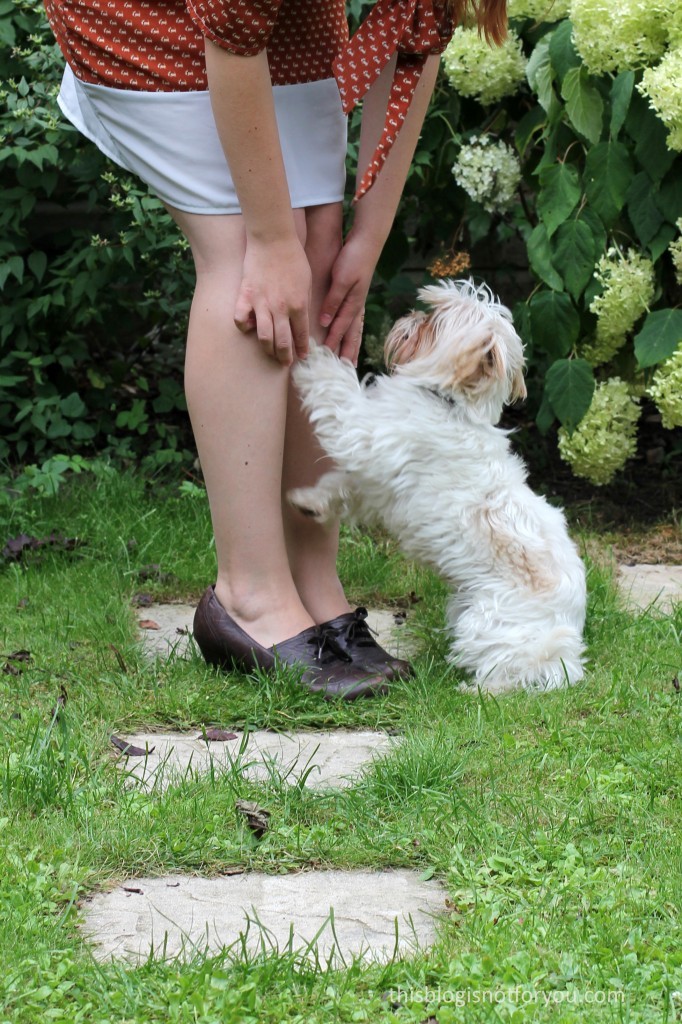
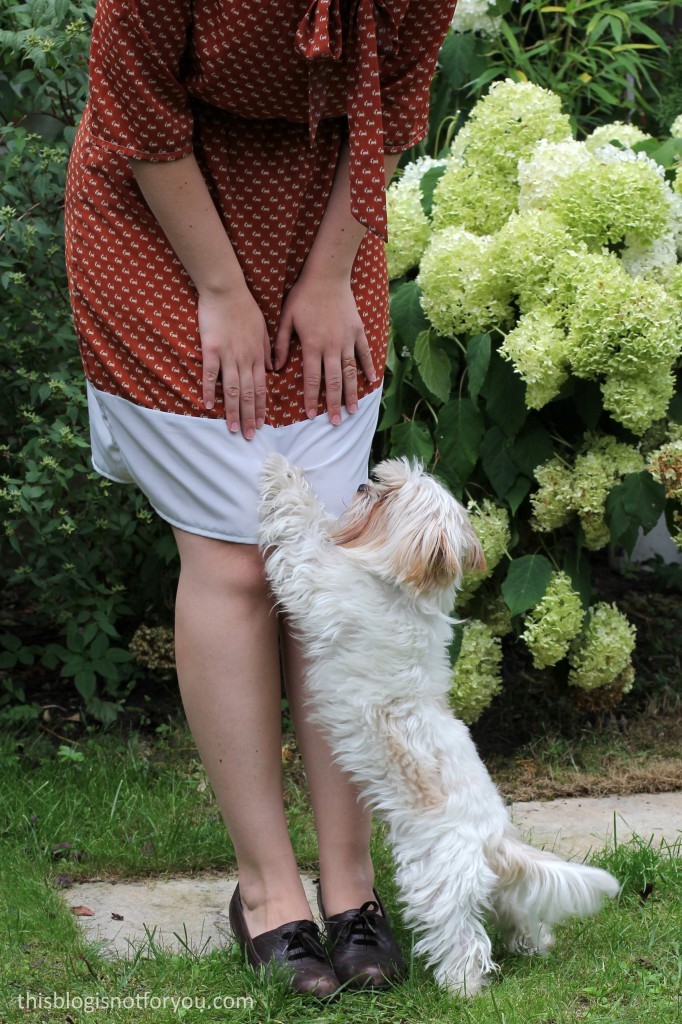
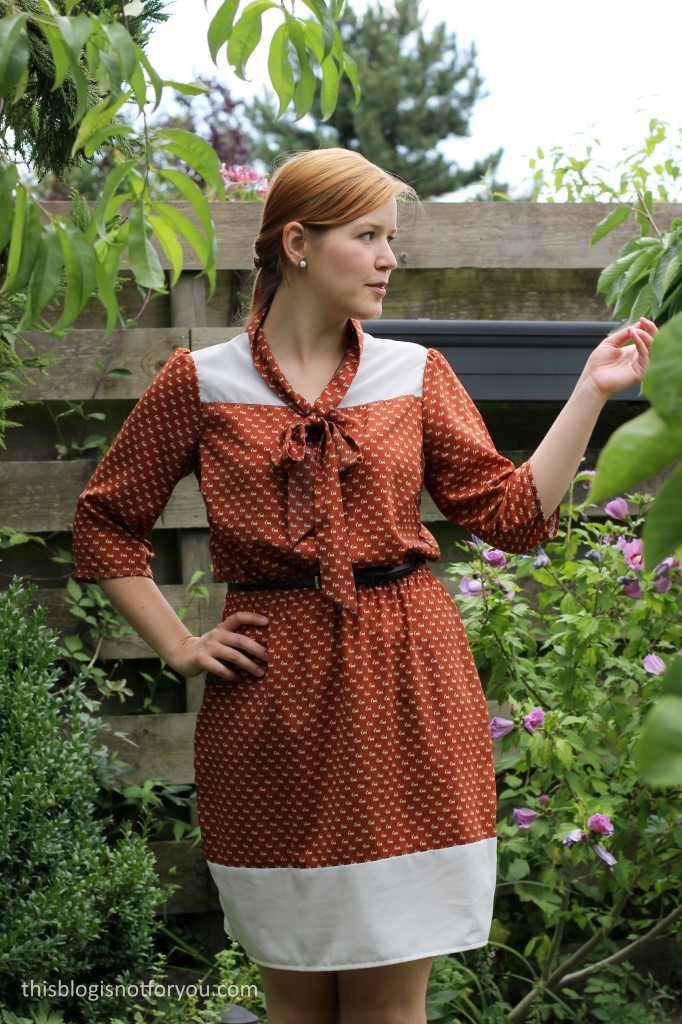
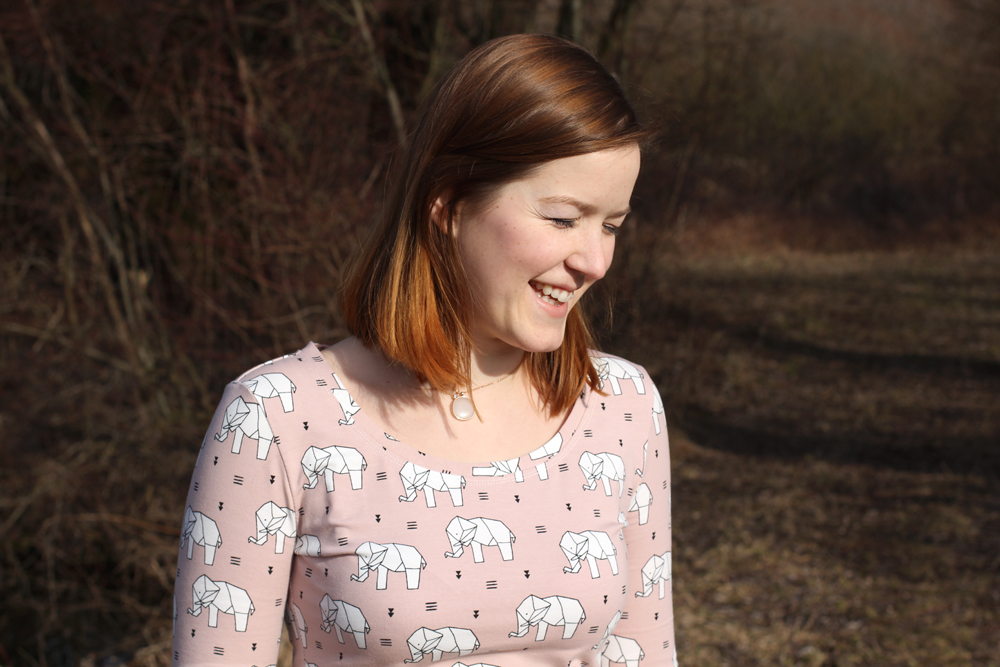
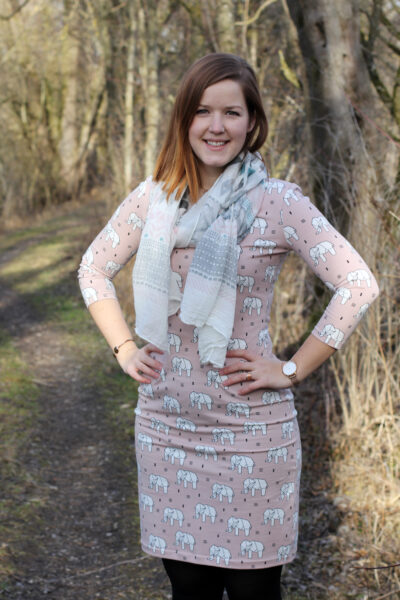
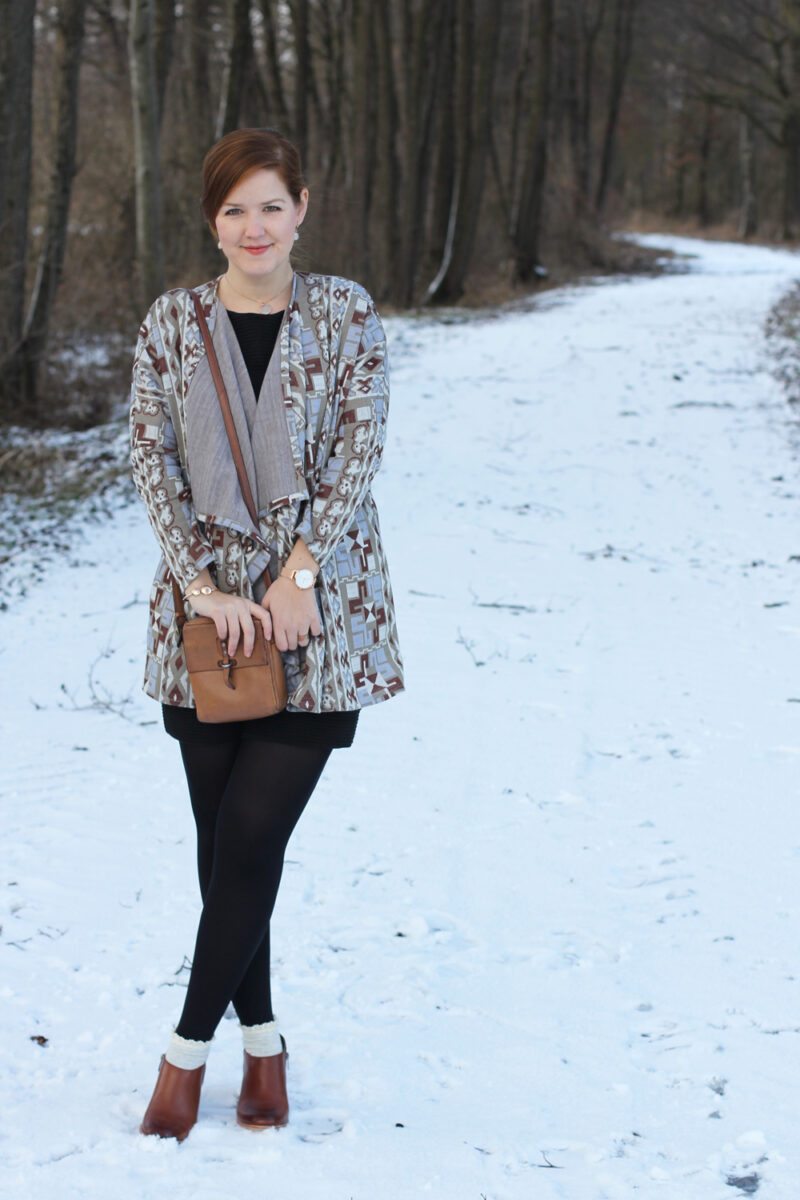
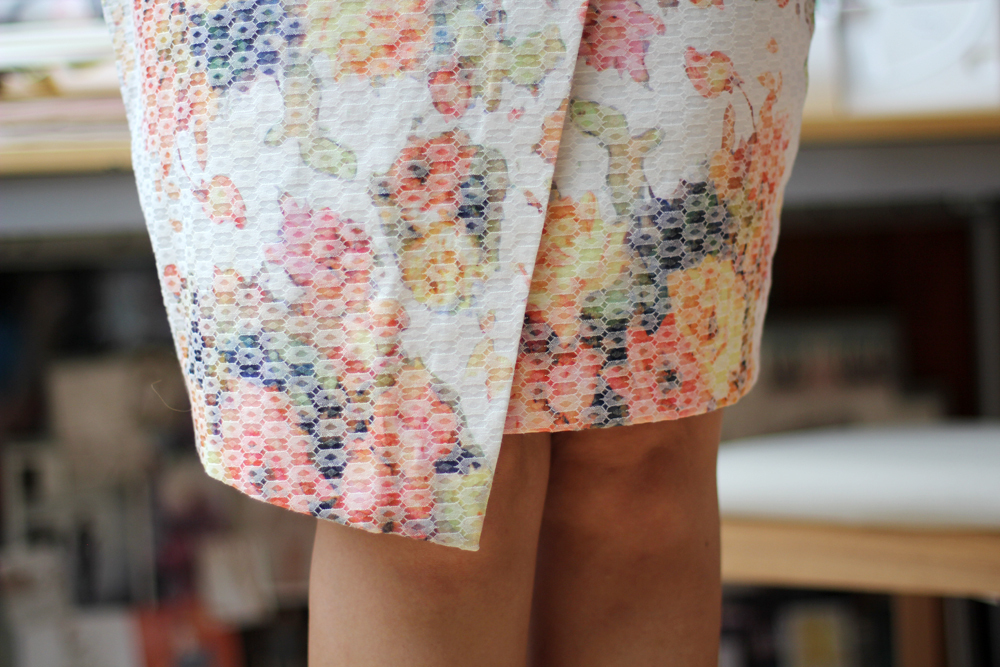
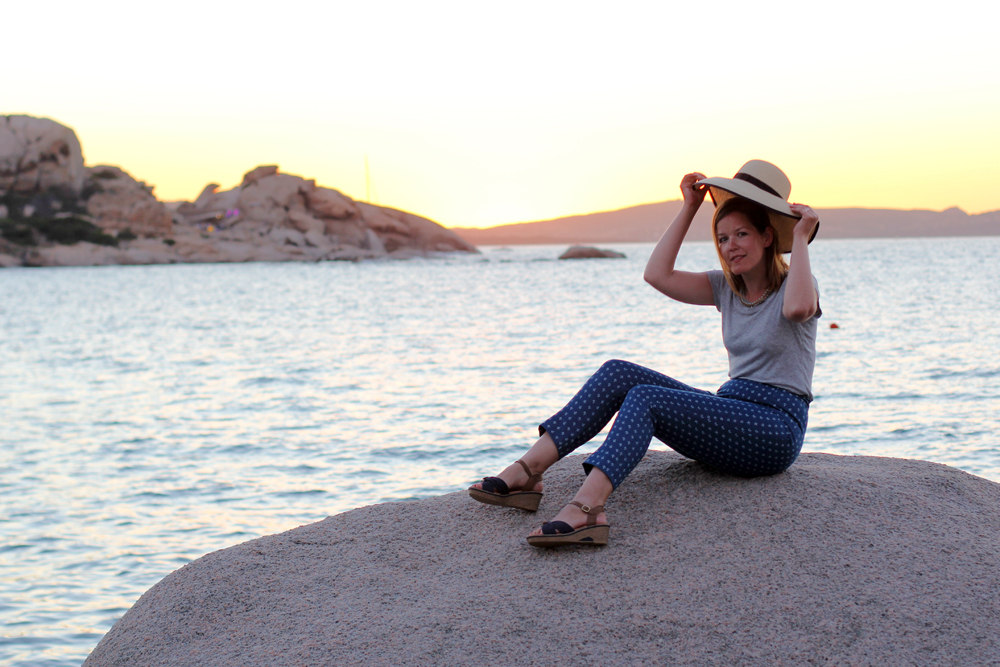
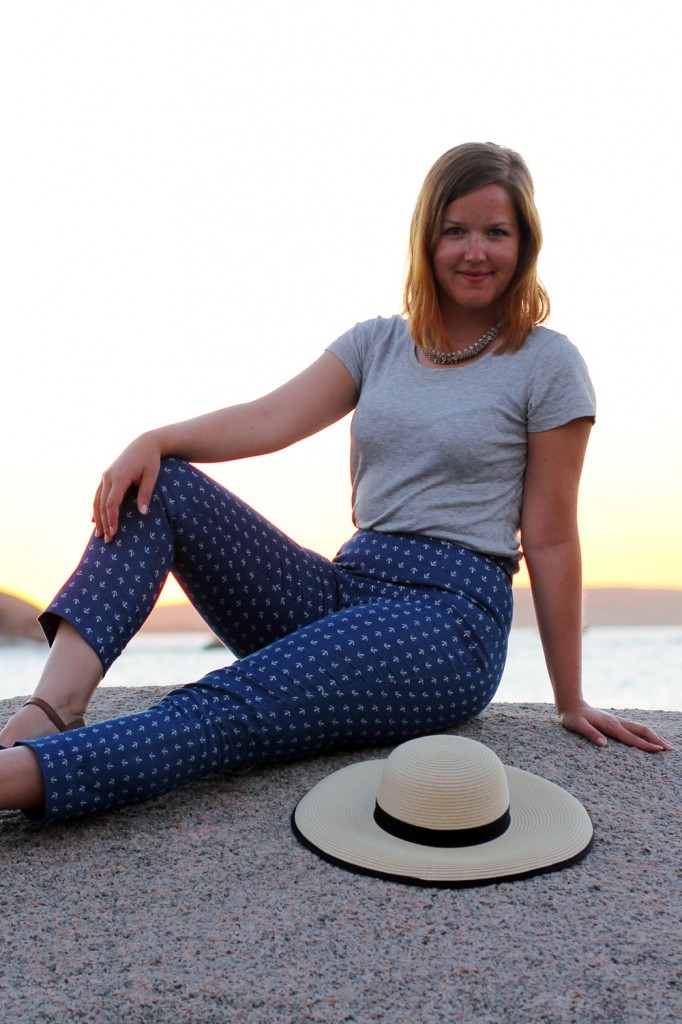
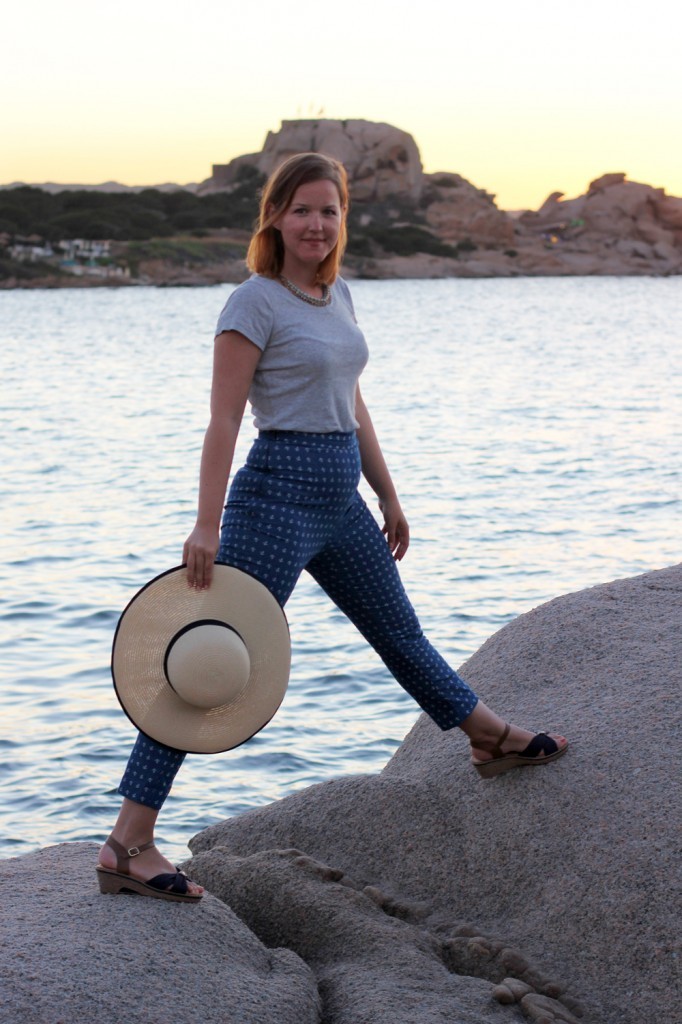
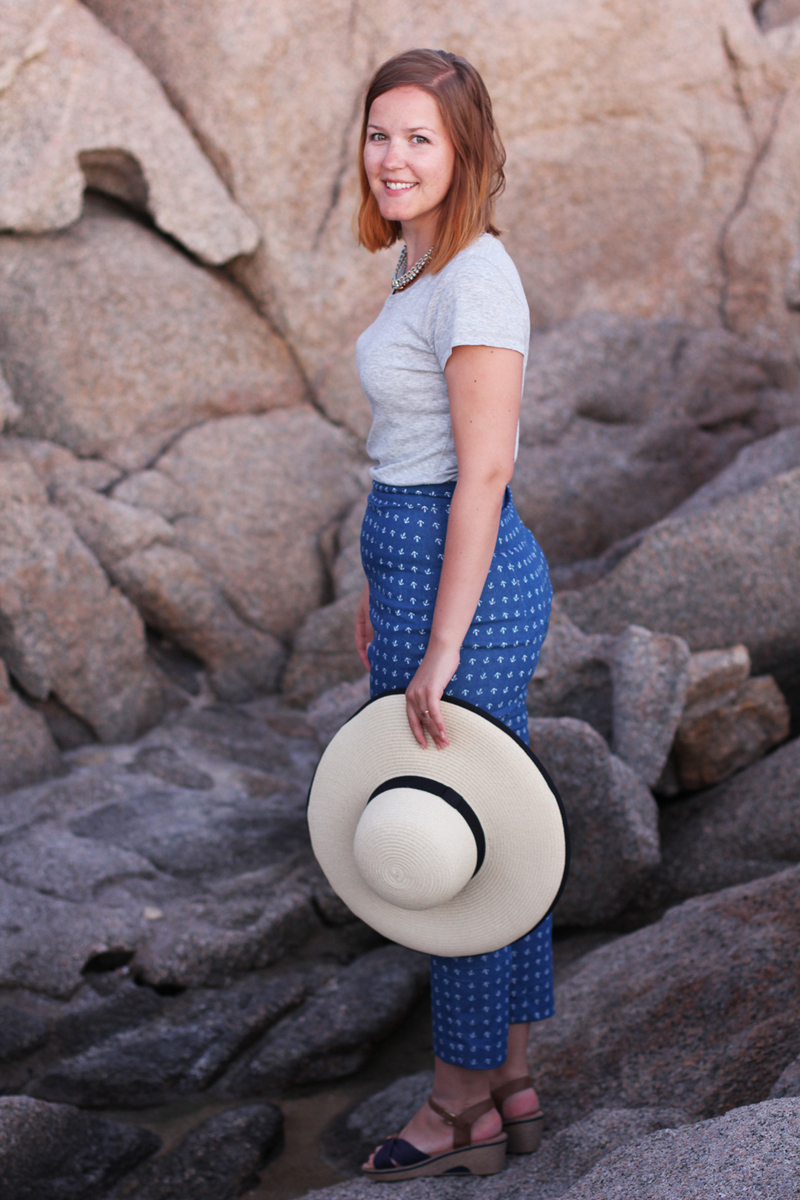
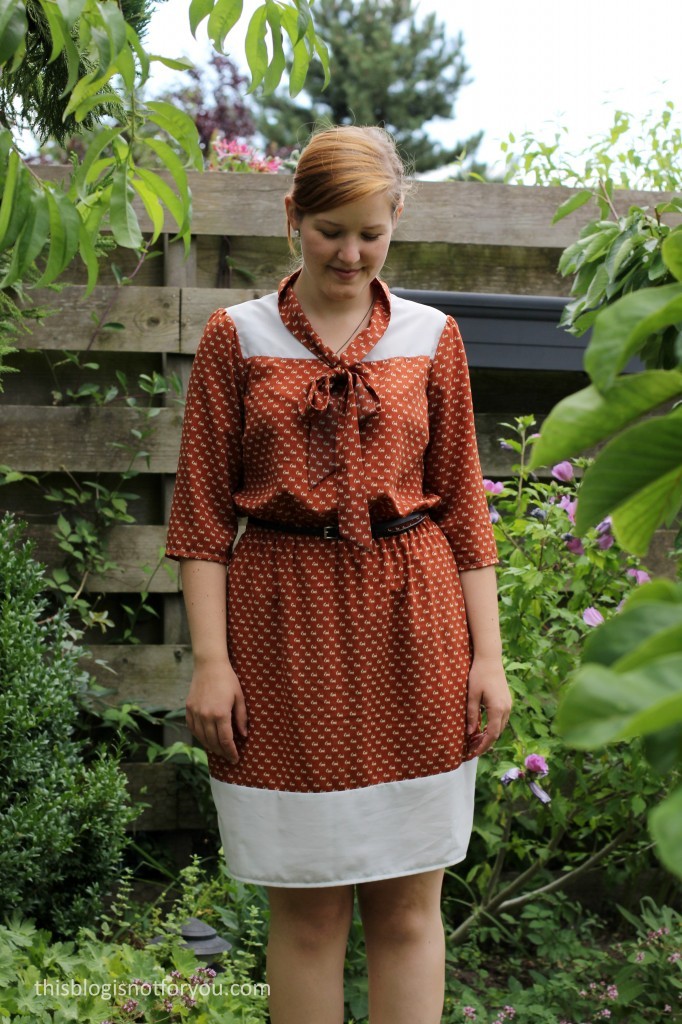
I bought this amazing elephant print jersey on Stoffe.de (myfabrics.co.uk in the UK). I loved the print right away. I wanted to make an Agnes top at first, but had enough fabric left for the dress hack. The last Agnes dress I made has become such a wardrobe staple for me, which can easily be dressed up or down for the occasion, that I had to make another one. It was my husband’s birthday that weekend, and a dress would be much cuter for the party than jeans + top.

As mentioned before, I used the Tilly & The Buttons Agnes Top pattern, which I have sewn and hacked many times before. (Check out my project gallery for all the different versions!) Hacking the top into a dress is really, really simple. I also added 3/4 sleeves and went for the simple scoop neckline, as the print was busy enough.
Agnes Dress by thisblogisnotforyou.com

Agnes Dress by thisblogisnotforyou.com


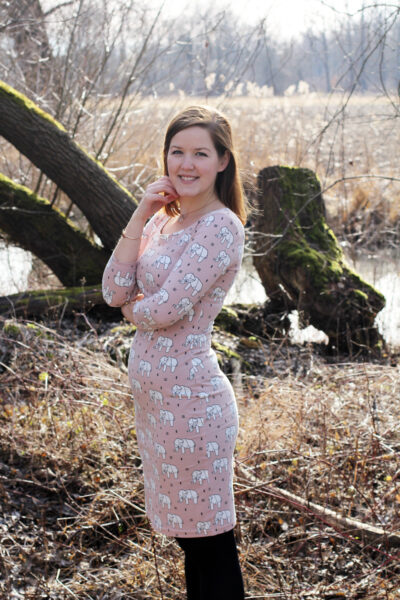
As always, the fit of the Agnes pattern is amazing. As the fabric wasn’t as stretchy as I had hoped, it was a little bit tight at first, but stretched out after the first wear. The Agnes pattern is super versatile and so quick to cut out and sew. I wasn’t really lucky with the first bunch of Tilly patterns (especially from her Love At First Stitch book), as I just couldn’t get them to fit right no matter what I tried. But Agnes really makes up for it!

The pattern is perfect for busy prints like my elephant fabric. Although I used this pattern quite a few times before, all the clothes I made with it look so different, that you can’t really tell it’s the same pattern.

Will there be more Agnes’ in the future? Hell, yeah!Agnes Dress by thisblogisnotforyou.com

Agnes Dress by thisblogisnotforyou.com

Agnes Dress by thisblogisnotforyou.comAgnes Dress by thisblogisnotforyou.comAgnes Dress by thisblogisnotforyou.com

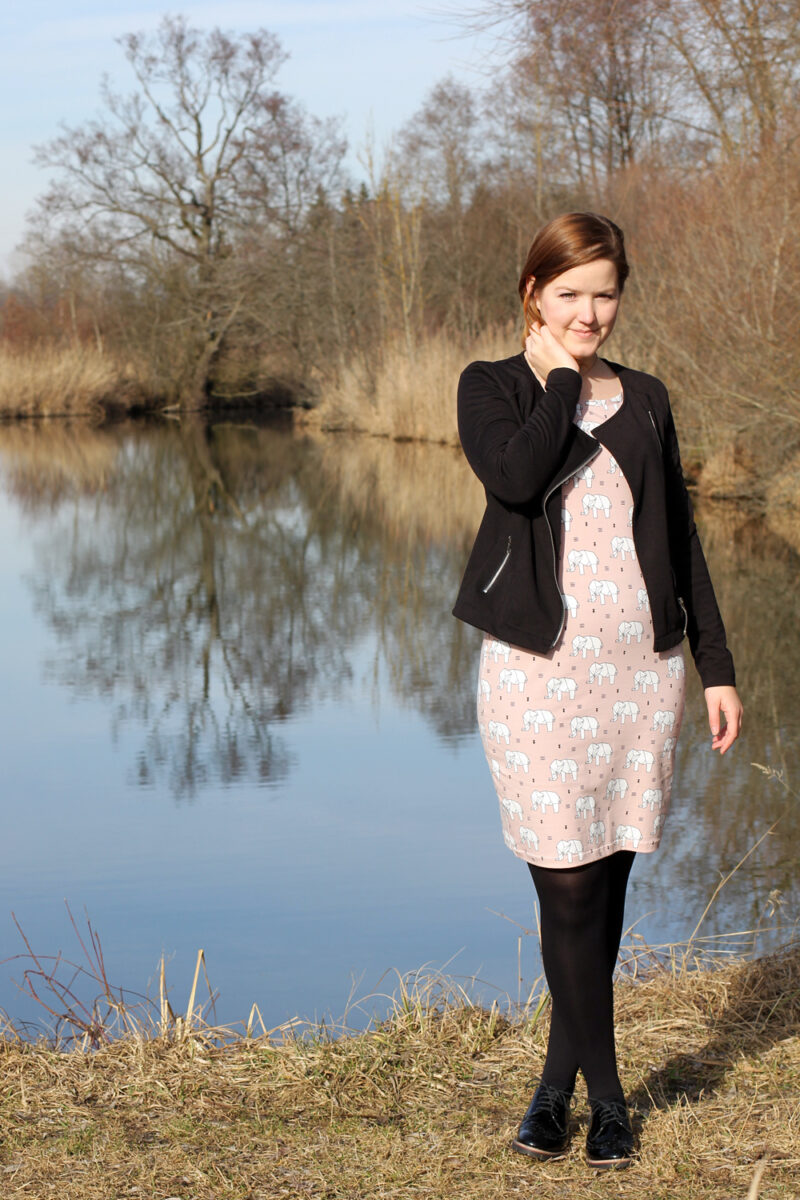
I’m so happy that spring’s back! The sun is luring me out of the house. Luckily there are enough rainy weekends still, to get some sewing done for the warmer season…

Do you have any recommendations for wardrobe staple patterns? And what are your spring sewing plans?

xx

Charlie


Happy sewing!

facebook/bloglovin/pinterest
twitter/instagram

Stay in touch!

A KEIRA Hack: The Waterfall Cardigan

Keira Cardigan free pattern by thisblogisnotforyou.comKeira Cardigan free pattern by thisblogisnotforyou.com

Keira Cardigan free pattern by thisblogisnotforyou.com

Keira Cardigan free pattern by thisblogisnotforyou.com

Hello everyone! I hope you are all cosy and warm behind the sewing machine or on the couch. As gorgeous as it looks, the weather is quite unpleasant at the moment. I spend most of the time these days on the sofa, I have to admit. As much as I love sewing, nothing beats a hot tea or coffee and a great book when it’s freezing outside. I will try and squeeze in some sewing tomorrow, though. I’m in desperate need of some thick, cosy sweaters!

Today I’m sharing another version of the KEIRA Cardigan with you. This time I tried hacking the pattern into a waterfall cardigan. They’ve been fashionable for the last few years and are super comfy during the cold season while looking quite chic. The extra fabric at the front ensures a bit more warmth even when you’re wearing the cardigan open.Keira Cardigan free pattern by thisblogisnotforyou.comKeira Cardigan free pattern by thisblogisnotforyou.comKeira Cardigan free pattern by thisblogisnotforyou.comKeira Cardigan free pattern by thisblogisnotforyou.com

The pattern hack is quite simple. First, print out and assemble the PDF pattern. (You can download it for free or pay whatever you think is appropriate.)

Once you cut out your size, you’ll need the front and back pattern pieces and a large piece of paper. Dot-and-cross paper works really well, but you can also tape together some printer paper.

As I wanted to preserve the original pattern that I had already assembled, I traced it first. I’d recommend keeping one set of original pattern pieces to use and trace for multiple hacks, if it’s a pattern you use often. If it’s a one-time project, you might as well glue additional paper onto the pattern and apply all changes directly onto it.Keira Cardigan free pattern by thisblogisnotforyou.com

Once traced, I lengthened the shoulder seam by 3.5 cm, as I did not want to add any binding. Thus, the neckline would sit a bit higher up and closer to the neck. I then moved the centre front by 36cm (14in). This is the extra fabric that will create the waterfall effect.

You will need to redraw the curved neckline which now doesn’t plunge down as far (approx. 5cm) and then proceeds as a straight, perpendicular line until it meets the centre front line. There are two style options for the hem. You could either  just draw a straight line towards the centre front or, as I did, go for a curved hem and shave off that lower corner on the new front pattern piece.

If you leave that corner, the fabric will dip down below the hemline as the fabric drapes into the waterfall. I tried that at first, but it wasn’t for me.
Keira Cardigan free pattern by thisblogisnotforyou.com

There are only minor changes to be made on the back pattern piece. Just add those extra 3.5 cm at the shoulder seam line, so both pattern pieces match up in the end. You’ll also need to redraw the neckline here.
Keira Cardigan free pattern by thisblogisnotforyou.com

And that’s basically it! You can now cut out and construct the cardigan as shown in the instructions. Instead of using a binding, I folded the hem over twice by 1 cm, stitching everything in place close to the edge of the fold. This needs a bit of skill where the hem curves. I used a lot of pins to create a smooth, even curve and gave it a thorough press before machine stitching the hem. Keira Cardigan free pattern by thisblogisnotforyou.comKeira Cardigan free pattern by thisblogisnotforyou.com

Keira Cardigan free pattern by thisblogisnotforyou.com

Keira Cardigan free pattern by thisblogisnotforyou.com

Cardigan: handmade (Keira Cardigan)
Dress: handmade
Lace trim socks: Primark
Shoes: Clarks
Jewellery: Skagen

Hope you liked this easy pattern hack! Feel free to download the pattern and try it yourself. It’s such a quick project – perfect for a lazy Sunday afternoon! I’ll definitely make another one. Next time probably is an even cosier fabric, such as wool or fleece-back jersey.

Have a great weekend & keep warm!

You can DOWNLOAD the pattern HERE.

xx

Charlie


Happy sewing!

facebook/bloglovin/pinterest
twitter/instagram

Stay in touch!

Ultimate Pencil Skirt: Faux Wrap Hack

Faux Wrap Skirt Hack by thisblogisnotforyou.comFaux Wrap Skirt Hack by thisblogisnotforyou.comFaux Wrap Skirt Hack by thisblogisnotforyou.comFaux Wrap Skirt Hack by thisblogisnotforyou.com

Faux Wrap Skirt Hack by thisblogisnotforyou.com

Faux Wrap Skirt Hack by thisblogisnotforyou.com

Faux Wrap Skirt Hack by thisblogisnotforyou.com

ANOTHER WEDDING OUTFIT

Finally I’m sharing this skirt with you! This is easily one of my favourite projects this year. Although I have to admit, that I actually finished this in 2015! I did not get around to wear or blog about it during the last winter.

Luckily, though, because when we got married in May, I needed an outfit for the registry office. I wouldn’t have wanted to wear something I wear all the time, but there wasn’t enough time to sew a whole new outfit amidst all the wedding dress making. I remembered I had this gorgeous pencil skirt number in my closet, patiently waiting for its first outing.

It’s chic but not over the top and matched our wedding colour scheme perfectly. It was only us two plus best man and maid of honor at the registry office, so a big gown would’ve been out of place.

So here it is!

PATTERN. To make this skirt, I basically hacked the SEW OVER IT Ultimate Pencil Skirt. As you know, I have a serious love affair with this pattern, I even based the skirt of my wedding dress on it. So now that I think about it, I got married twice in one weekend, both times wearing a hacked variation of the Ultimate Pencil Skirt. By looking at the skirt, the hack might seem to be quite complicated, which it is not!
I didn’t change the actual pattern, just added to it. The picture below might explain this a bit.

I added an extra layer to the front panel of the skirt and basted both layers together within the seam allowance before sewing front and back together as described in the pattern instructions. To create the asymmetrical faux wrap layer, I traced the front panel and marked the asymmetrical line down the front. It extends the original hem by about 5cm. At the top it sits on the natural waist, so slightly lower than the original pattern piece. I omitted the left front dart. I also added a 5cm hem allowance. Before basting both layers together, I needed to finish all edges of the faux wrap piece. I hemmed it and finished the top with a very narrow waistband. I made holes with a hole punch and eyelets, then sewed on the buckle. (Make sure the waistband is narrow enough to fit through!) After all these steps, I pinned it onto the front panel and constructed the skirt following the original pattern.

Faux Wrap Skirt Hack by thisblogisnotforyou.comFaux Wrap Skirt Hack by thisblogisnotforyou.com

Faux Wrap Skirt Hack by thisblogisnotforyou.com

FABRIC. The fabric got a nice stretch to it, so the skirt is super comfy to wear. For those of you wondering where I got the fabric I have to admit that I’m not entirely sure! It’s a gorgeous floral jaquard which I probably bought in our local fabric store near Munich. I think I remember running home from the fabric store with this beauty and diving into the project at once. I love that skirt so much! I even added a matching lining.

I tested wearing this skirt with some of my warmer sweaters which looked great. So it’ll definitely get some more wear this season!
Faux Wrap Skirt Hack by thisblogisnotforyou.comFaux Wrap Skirt Hack by thisblogisnotforyou.com

WILL I MAKE IT AGAIN? Oh, yes! Definitely! This was such an easy and effective hack! No fitting or muslining required, because I can make this skirt in my sleep by now. It took a bit longer, but it was fun changing up the routine a bit. It’s interesting to look at once you notice that the belt is just decorative.

I might choose a plain colour fabric next time, because I do feel a bit overdressed in this skirt for wearing it to work.

What do you think? Are you making one yourself?

xx

Charlie


Happy sewing!

facebook/bloglovin/pinterest
twitter/instagram

Stay in touch!

High-waisted Ultimate Trousers

high-waisted Ultimate Trousers by thisblogisnotforyou.com (Click through for more pics and info)high-waisted Ultimate Trousers by thisblogisnotforyou.comhigh-waisted Ultimate Trousers by thisblogisnotforyou.com

high-waisted Ultimate Trousers by thisblogisnotforyou.com

  ROCKS AND ANCHORS

I’ve been looking forward to sharing these pics with you since we got back from holiday. We took them on our last night in Sardinia at the beach of our hotel where we pretty much spent most of our time. Compared to the previous post (we took the pics on the second day of our trip) I got quite a tan in just a week! I hadn’t been to South Europe in a couple of years and after living in England I forgot how easily I tan.

I love these trousers! You know I’m a big fan of Sew Over It’s wardrobe staple patterns such as the Ultimate Pencil Skirt or the Ultimate Trousers. As much as I love the trousers and their fit, I always had issues with how low they sat. Without a waistband (the orignal pattern has a facing) they get stretched out quite easily and sit very low which isn’t very practical at work, as I sometimes play with kids on the floor and don’t want my backside to hang out.

I had plans to raise the waist and add a waistband after seeing Lisa’s numerous, beautiful versions of high-waisted Ultimate Trousers. I found the perfect fabric, a stretch-denim with an anchor print just before the holiday in a fabric shop near Munich. I made up a muslin ad raised the waist by 10cm which turned out alright, but I lowered the waistline a few centimetres again as it was a tad too high. I love the look with this pair, but I might lower it just a tiny bit more for the next pair, which I plan to make from a very busy print.

high-waisted Ultimate Trousers by thisblogisnotforyou.comhigh-waisted Ultimate Trousers by thisblogisnotforyou.comhigh-waisted Ultimate Trousers by thisblogisnotforyou.comhigh-waisted Ultimate Trousers by thisblogisnotforyou.com

high-waisted Ultimate Trousers by thisblogisnotforyou.com

high-waisted Ultimate Trousers by thisblogisnotforyou.comhigh-waisted Ultimate Trousers by thisblogisnotforyou.com

high-waisted Ultimate Trousers by thisblogisnotforyou.com

I really dig the raised waist hack of this pattern, it’s just so different from most RTW styles out there. The only downside is that it’s not the most figure flattering style – I’m certainly not a size zero but also not very big, but still you can see every lump and bump, especially with the tshirt tugged in. So after a week of feasting on Italian food pretty much non-stop, it wasn’t the most comfortable outfit to wear! But I loved it anyway – and who cares about a pizza-and-pasta-bump. It was absolutely worth it.

Oh, and I have to mention the hat – just because it’s fabulous! Especially since it’ll make another appearance in the next post as well. I’m so in love with this hat I can’t tell you. I always wanted one just like it, but never cared to buy one, because you don’t simply strut around with a hat like that unless you’re Audrey Hepburn. Right before our trip I went shopping for sunglasses and came across this hat at C&A (large German department store) and thinking of lying at the beach, sipping cocktails and nibbling olives I had a massive urge to just grab it, pay whatever they asked for (which luckily wasn’t much) and run with it. Which I did. I wore it every day on holiday, which makes up for the next few months where it will sit on my closet un-used, because – let’s be realistic – I won’t be wearing it unless I’m sitting on a beach in Italy somewhere. So that’s my excuse for that many cheesy sunhat pictures. high-waisted Ultimate Trousers by thisblogisnotforyou.com

high-waisted Ultimate Trousers by thisblogisnotforyou.com

high-waisted Ultimate Trousers by thisblogisnotforyou.comhigh-waisted Ultimate Trousers by thisblogisnotforyou.com

So what’s your favourite wardrobe staple pattern that you love to hack over and over again?

xx

Charlie


Happy sewing!

facebook/bloglovin/pinterest
twitter/instagram

Stay in touch!

Lottie Blouse hacked into a Dress with a Doggie Print

Lottie Dress by thisblogisnotforyou.comLottie Dress by thisblogisnotforyou.comLottie Dress by thisblogisnotforyou.com

A DRESS & A DOG

Apparently, it was National Dog Day yesterday. Perfect timing to show off the Scottie Dog Dress I made a little while ago. Our little doggie was kind enough to star as my fashionable accessory. He actually looks a bit like the dogs on the fabric’s print. A cute dress paired with a cute dog – could I wish for more?

The Fabric:

I bought the fabric ages ago in Walthamstow, London. For those of you who know the area, it’s the last fabric shop on the left side of the road, when you walk down the market coming from Walthamstow Station. I don’t remember the name of the shop, but it’s near Saeed’s Fabrics. It’s a tiny shop with loads of cheap polyester, chiffon and jersey fabrics. It’s perfect if you’re looking for fun prints but don’t want to spend a lot of money.

I usually use these kinds of fabric for wearable muslins and experimental projects, where everything can go wrong (but it doesn’t have to!) and you want to use fabric you won’t cry for later. And it’s acutally cheaper than proper cotton muslin fabric!

The doggie print is a £1/m polyester fabric. It’s easy to cut and sew, but you have to be careful when pressing it. It melts (and darkens) easily. Press on a low temperature using a pressing cloth! It has quite a bit of stand and doesn’t drape too well as you can see around the waist line. It adds quite a bit of volume! I also bought the same fabric in black with tiny elephants, which I used for my first Lottie Blouse.

The white, slightly sheer fabric is also a polyester which I bought on Goldhawk Road, London. I used this fabric before, for my first Lottie hack.

Lottie Dress by thisblogisnotforyou.com

Lottie Dress by thisblogisnotforyou.comThe Pattern:

The pattern is – what a surprise – the Lottie Blouse pattern from Love Sewing Magazine which I have hacked into a dress with a contrasting yoke. I’ve made the blouse loads of times using different hacks and fabrics each time (here, here, here & here). I won’t say much about the pattern, as I have reviewed it before. Check out the other posts if you want to know more about it!

Lottie Dress by thisblogisnotforyou.com

Construction & Alterations:

I more or less kept the blouse except for slashing the front and back bodice pattern to add a seamline for the contrasting yoke. This is pretty simple: you slash the pattern where you want the new seamline to be and add seam allowance to the new edges. I pressed the seam allowance downwards so you can’t see it throught the sheer white fabric. It’s topstitched into place with white contrasting thread.

I lengthened the blouse to knee-length, keeping the waist fairly straight and curving out and in a bit at the hips and knees. Again, I slashed the pattern to add the contrast panel at the hem.

To add some shape and get the cinched waist look I wanted, I added some elastic which I sewed directly onto the fabric (no casing!) using a large zigzag stitch. The elastic was sewn on slightly below the natural waist so that it pulls the skirt up and adds some more volume to the bodice. This look is super comfortable and perfect if you’re having a large meal out! 🙂

I’ve kept the bodice and skirt slightly larger than my usual size. The polyester fabric is very lightweight and nice for warmer days, but it’s not as comfy as cotton on hot summer days, so it’s better to leave a lot of ease.

Lottie Dress by thisblogisnotforyou.com

Lottie Dress by thisblogisnotforyou.com

Lottie Dress by thisblogisnotforyou.com

I’m not sure why I keep using this pattern again and again. It’s quite versatile and comes together super quickly (which is probably why). Who doesn’t love quick projects for when you have too little time to sew?

What’s the pattern you have used most often?

xx

Charlie


Happy sewing!

facebook/bloglovin/pinterest
twitter/instagram

Stay in touch!