What to Sew When You Have an Evening vs. a Weekend

Pattern Standoff Evening vs. WeekendHello there! Today we’re talking pattern standoffs!

Do you have sewing cravings? Sometimes I want to sew just for fun, some days I really want to make something that I urgently need in my wardrobe and, well, sometimes I want to take up a masterpiece project. Most of the time the particular craving depends a lot on the time I have on my hands.

Time is actually quite an important factor when choosing a pattern for your next project. There are a hundred ways to sew a skirt. I can be done in half an hour or it might take a couple of days. That’s completely up to you and the pattern you pick.

I thought it would be fun having a look at some unlikely couples. I’ll share two pattern options for sewing projects – one that can be done in an evening and one that will keep you busy for a weekend. Shall we have a look?

Jeans: Mia vs. Ginger
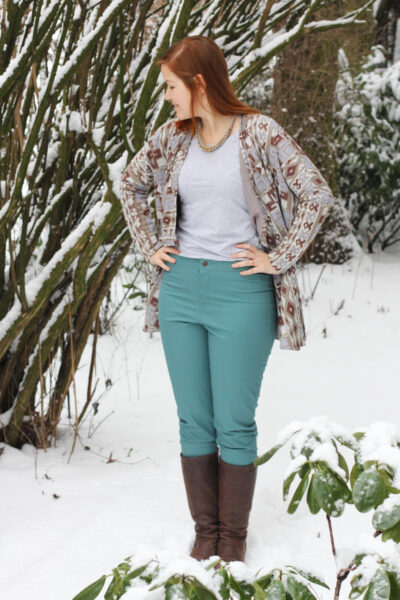
Mia Jeans by thisblogisnotofryou.com

Speedy

Are you looking for the perfect jeans project? If you need a new pair of jeans by tomorrow – Mia to the rescue! The Mia Jeans pattern by Sew Over It (included in the ebook My Capsule Wardrobe) is the perfect ‘very quick & perfect fit’ pattern for you. I have made 4 pairs so far and they all turned out amazing. The pattern comes together really quick, the only two trickier bits being the front fly and the patch pockets in the back. Fitting is made very easy with a generous seam allowance that’s included in the pattern. I really recommend checking out Sew Over It’s Youtube channel for the video on constructing the front fly.

My tip: choose a stretch denim fabric to make fitting even easier!

Slow & Steady:

You finally want to tackle that masterpiece jeans project of yours that’s been on your list for ages? The Ginger Jeans by Closet Case Patterns is a very well designed five-pockets-jeans pattern with a higher back rise, belt loops, rivets and all! The pattern is incredibly popular and known for a flattering fit and a professional look. You’ll need more supplies compared to Mia, but this is a project of love and a masterpiece you will be proud of! In Germany we say it’s for those with “patience and spittle”.

My tip: Make sure you have all the supplies ready by the time your sewing weekend starts, so you can work without frustrating shopping runs. Take your time and enjoy the ride!

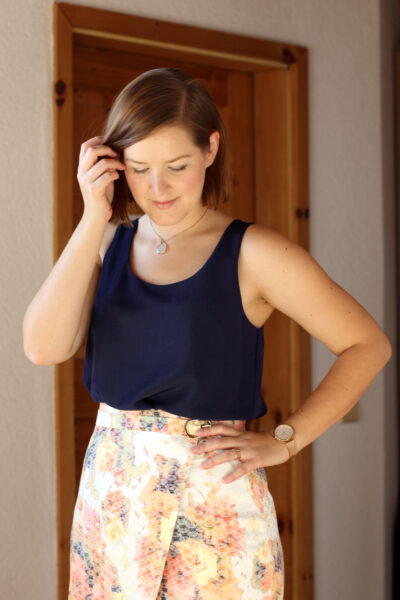
Blouses: Silk Cami  vs. Carme Blouse

There are just soo many great blouse patterns, but these two are my current favourites.

Speedy:

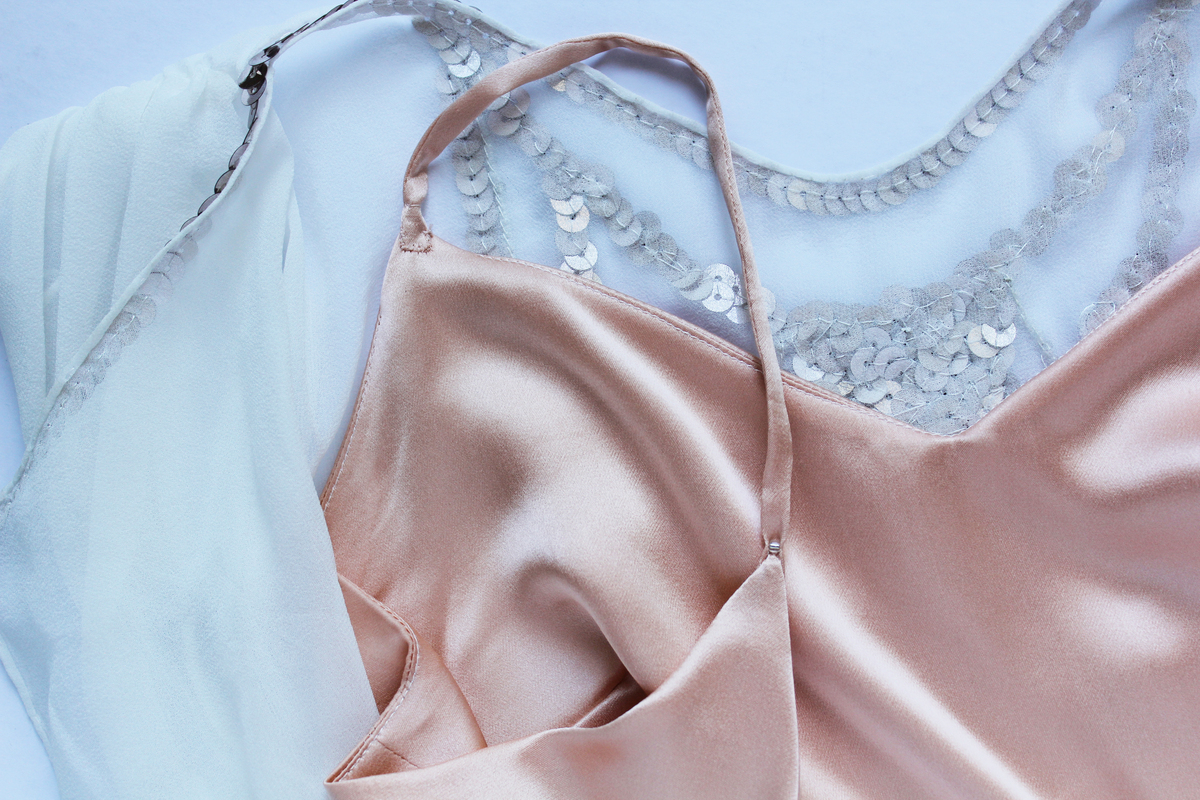
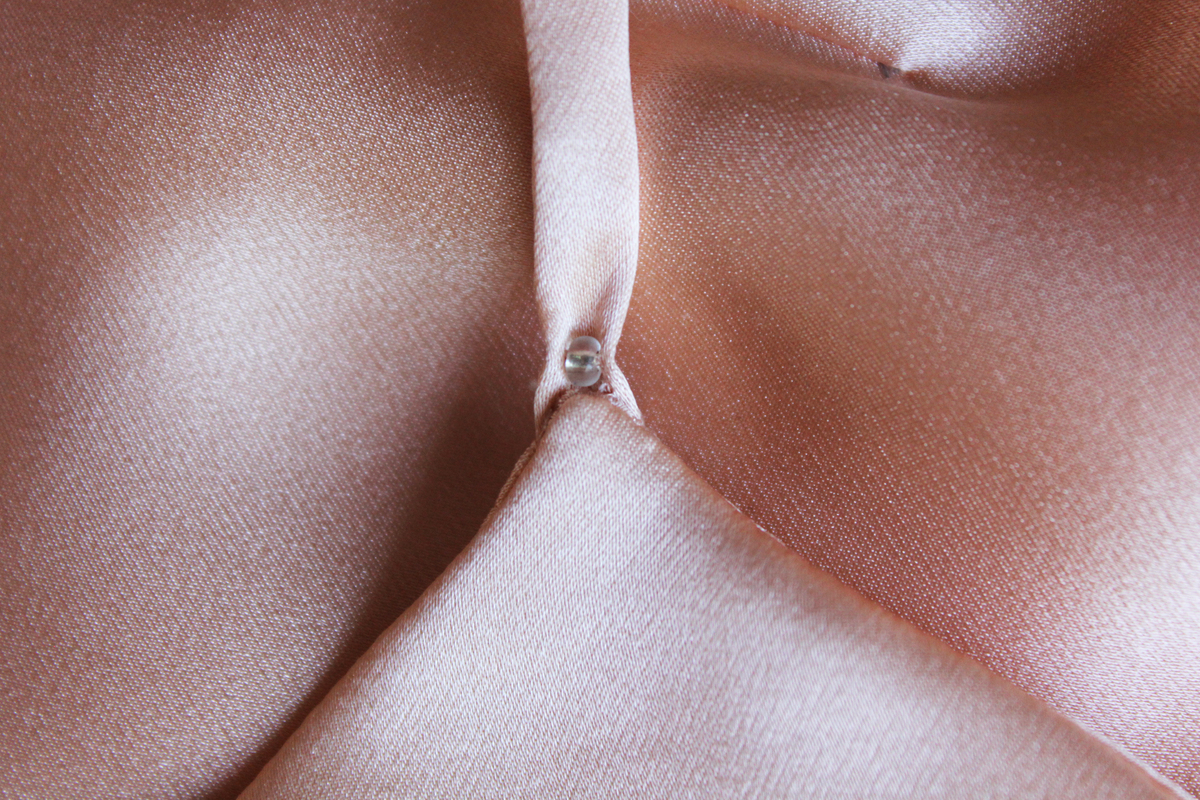
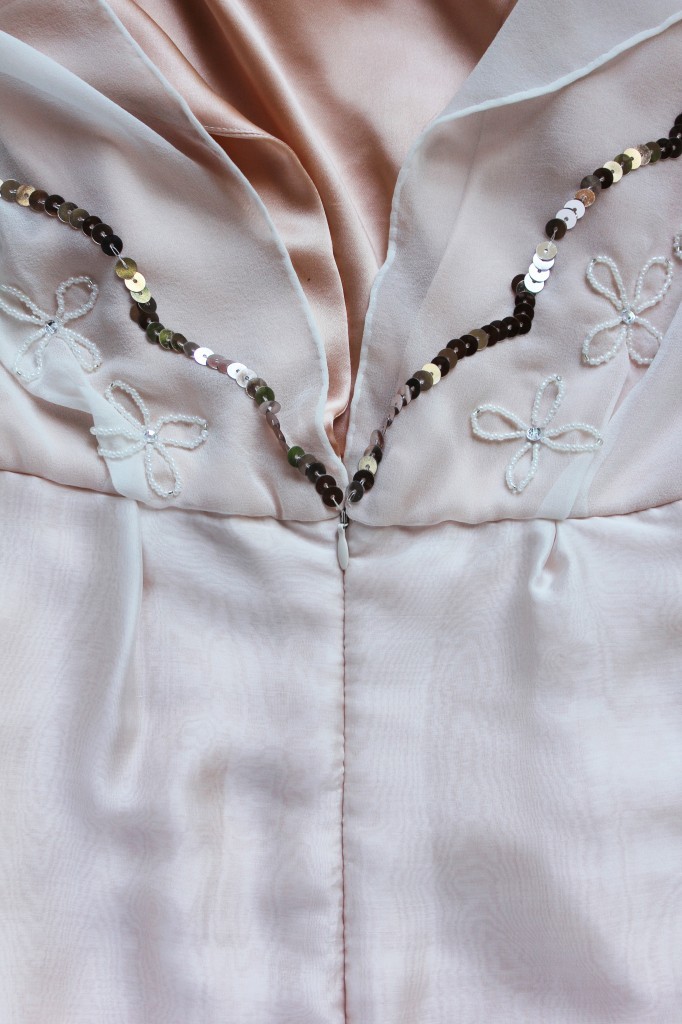
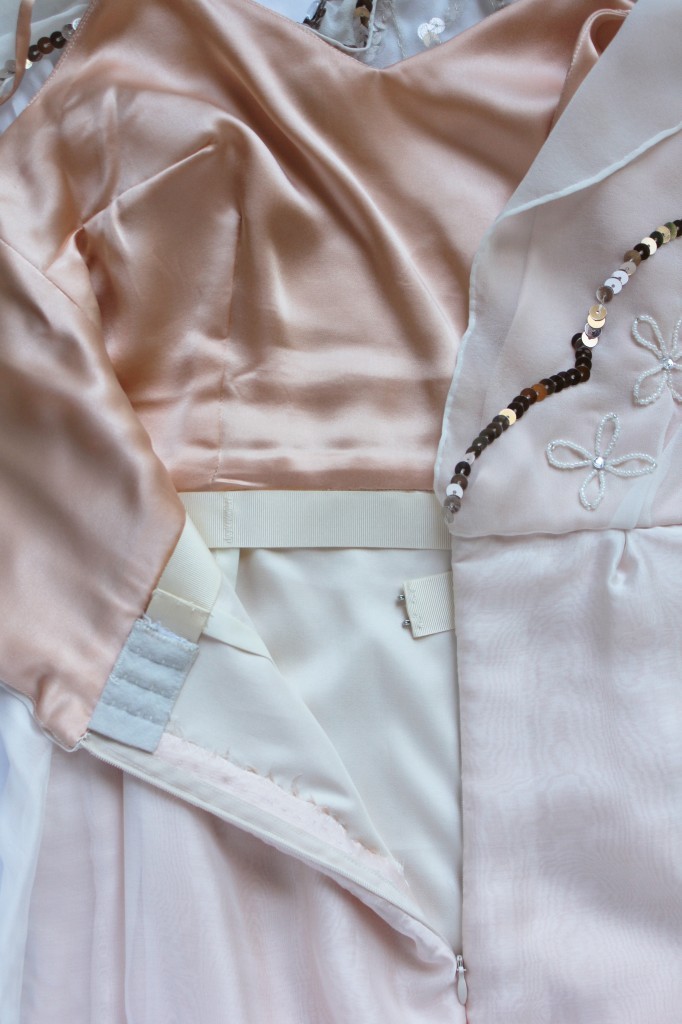
The Silk Cami (Sew Over It) is such a satisfying quick sew. I can’t recommend it enough. It comes together very quick: no fastenings, bias binding or darts! It’s a basic French seamed sleeveless cami top finished at the neckline with a facing. You’ll need very little fabric and very little time! I love to use this pattern for hacks, such as this dress. It probably doesn’t even count as a blouse, as there are no sleeves or anything involved. But this is such an elegant little garment, it is more than just a top.

My tip: Spend some money on a high quality polyester, cotton lawn or silk fabric. You won’t need much fabric, so you can go for quality over quantity.

Slow & Steady:

If you want to take your time and get into more technical handiwork, the Carme Blouse by Pauline Alice Patterns is a great project. It’s a sophisticated-looking, but versatile blouse. It offers a couple of challenges such as pin tucks, a small mao collar, a front yoke, a button placket and sleeve tabs. The instructions are very easy to follow and you’ll also find sewalong videos for this project on Youtube.

My tip: Instead of just following the pattern markings for the pin tucks, take your time and measure – press – sew one by one. I found that measuring the intervals gives a much neater outcome.

Coats: Burdastyle Wool Coat vs. Ellsworth Coat

Burda 09/2015 #117 and Mia Jeans by thisblogisnotforyou.com

Speedy:

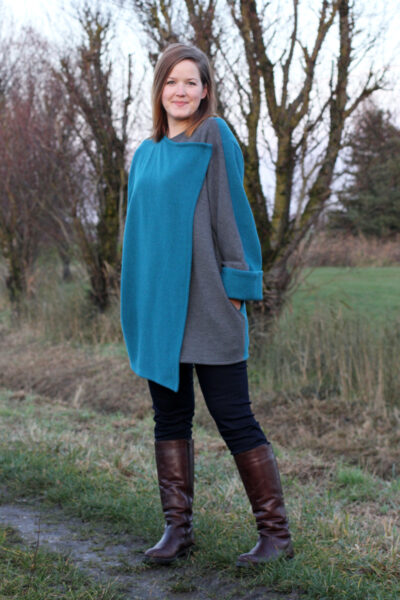
The Burdastyle pattern 09/2015 #117A is such a rewarding little project. Not much effort but making a big impact. View B is belted and slightly shorter than View A. The pattern is pretty brilliant as long as you use the right fabric. They’re asking for double-sided wool because it comes without lining. Therefore, it’s a really quick, simple sew. No interfacing, no lining, no bindings. It’s pretty much just three pattern pieces: front, back and back sleeve (plus pockets). The sleeves are two pieces. The front one is cut as a kimono sleeve and part of the front bodice pattern. I got many compliments on this coat and people can’t believe I made it myself. You can check out my version here. No-sweat coat making with this little number!

My tip: Find a show-stopper fabric in a bold colour. Make sure your fabric is double-sided!

Slow & Steady:

The Ellsworth Coat by Christine Haynes is a fully lined classic 1960’s-inspired double breasted overcoat. You can go topstitching galore on this one! There’s a collar, lots of buttons and buttonholes, pockets, lining… basically everything you want and more when your sewing mojo is top-notch and you have the whole weekend in front of you. Add a season of Game of Thrones or Homeland to the mix and you’re good to go!

My Tip: If you’re planning on using a patterned fabric, buy a little extra and take your time before you cut to get the pattern matching right.

Skirts: Ultimate Pencil Skirt vs. Hepburn Skirt

Ultimate Pencil Skirt by Thisblogisnotforyou.com
The Hepburn Skirt by thisblogisnotforyou.com

Skirts are generally easygoing and quick projects. It depends on pleating, button plackets, zips or pockets how much time you’ll need.

Speedy:

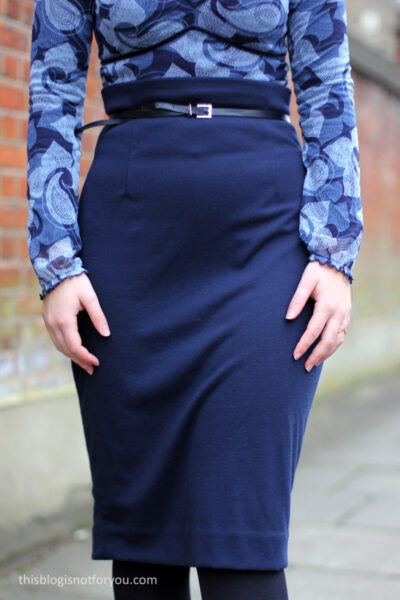
The Ultimate Pencil Skirt by Sew Over It is one of my all-time favourite patterns. It’s very elegant but simple, works also as a mini skirt and can be made in woven or knitted fabrics (I tested this!). The trickiest part of this skirt is at most the concealed side zip. I made a version with a exposed front zip which also worked brilliantly. I’ve made many versions and hacks of this skirt, it’s the perfect base once you got the fit right. I made a faux-wrap hack with belt-and-all. I even based the design of my wedding dress on this pattern! It’s so very versatile, it’s definitely worth buying.

My Tip: Find a fabric with a little stretch and focus on getting a perfect fit. It’s a great base for many future skirt projects.

Slow & Steady:

My very own Hepburn Skirt PDF pattern is another great option for a high-waisted pencil skirt. The vertical and horizontal seam lines are perfect for colour-blocking and give you some options for experimenting with style lines and colours. Cutting, sewing, pressing and finishing seams takes a little bit longer, although the skirt is fairly easy to sew. It’s certainly a project for a confident beginner to tackle.

My Tip: Depending on the type of fabric you choose, you might want to take the time to add a lining, as well. Thus, you prevent the skirt from riding up when you walk. 

* * *

Did you find this helpful? Would you like to see more content like this? And what are your evening vs. weekend pattern recommendations? Please don’t be shy and let me know in the comments!

Next time we’ll have a look at blazers, cardigans, trousers and dresses!

xx

Charlie


Happy sewing!

facebook/bloglovin/pinterest
twitter/instagram

Stay in touch!

Tips on sewing your wedding dress

DIY wedding dress by thisblogisnotforyou.com
Making my own wedding dress

This time two years ago I was frantically working on my wedding dress. It was such a joyful but equally stressful process. As much as I am proud of the dress that came out of it, I’m glad I won’t have to do it again.

As spring/summer weddings are coming up and some of you lucky soon-to-be brides are making their own dresses, I thought I’d share some (hopefully) helpful advice.

As helpful as some couture sewing books might proof to be, they do not give much insight into the whole shebang of planning and scheduling and of course, the emotional stress that interferes with every single step on the way.

I had just under a year to prepare our wedding and create the dress. I spend the first half planning and organising before getting down to the nitty-gritty of actually making things. All romance aside, it’s quite a tedious, sometimes boring, sometimes frustrating process.

DIY wedding dress by thisblogisnotforyou.comDIY wedding dress by thisblogisnotforyou.com

DIY wedding dress by thisblogisnotforyou.com

DIY wedding dress by thisblogisnotforyou.com

Here’s a quick overview of my rough “schedule” to illustrate this:

10 months left.
Deciding on making my own dress.
Getting inspired (Pinterest helps!)
Narrowing down the designs I liked.

9 months left.
Deciding on silhouette & colour.
Deciding on a pattern to base the dress on & sketching a rough draft.

8 month left.
Going fabric-shopping (probably the hardest part, constant panic).
Actually deciding on making my own dress as I had spend so much money on fabric already.

***Long panicky break of procrastinating with wedding decor projects ***

5 months left.
Drafting, draping, making a pattern. Spending a couple of weeks on making a corset I swapped for a cheap stick-on bra in the end.

4 months left.
Fitting to perfection.

3 months left.
The actual construction of a dress starts.

8 weeks left.
Adding embroidery details.
(Dress finished 3 weeks before the wedding. Phew.)

As you can see, the actual “fun” of sewing together the dress was not happening until 3 months before the big day. My nerves! Imagine not having seen yourself in a dress and it’s already 8 weeks before the wedding. I probably could’ve finished much earlier had I not procrastinated all these months, but don’t forget there’s life that gets in between.

So should you find yourself in a similar position, here’s some advice you might find helpful.

DIY wedding dress by thisblogisnotforyou.comWedding dress embroidery by thisblogisnotforyou.comWedding Dress design by thisblogisnotforyou.com

Advice on sewing your own wedding dress:

  1.  Give yourself enough time. Plan for unexpected breaks or getting stuck somewhere in the process or extra trips to the fabric shop, just to name a few!
  2. Decide on a design early on and try not to change your mind (unless you have huge amounts of extra time, fabric, money and motivation). There will be times of doubt, but they go away again, too.
  3. Really think about and be reasonable about shapes and textures. Certain silhouettes require certain types of fabrics. Find out as much as you can before you start spending money.
  4. Stop comparing your dress to others once you start on your project. This is unhelpful, believe me.
  5. Buy plenty of fabric and then get some extra. This not only helps if things go wrong, but keeps the suspension of cutting into the fabric low.
  6. Muslin till you drop. Get the fit perfect before cutting into expensive fabric. This saves a lot of time and money.
  7. Don’t ask others for their opinion (unless you are willing to change your design constantly or you’re able to live with someone saying they don’t like it even before it’s finished). This is important. Trust your style and gut-feeling. You will wear this dress, so first and foremost you are the person that needs to like it.
  8. Take the time to practice sewing techniques. You will feel much more confident once you start constructing!
  9. Before you start constructing the dress, make a rough step-by-step plan – especially if you’re not following a pattern with instructions. Structure prevents panic.
  10. Sew as much by hand as possible. It just looks so much better and gives yourself more control (especially when working with difficult fabrics!)
  11. Keep your hands and floor clean at all times. No chocolate, no coffee nor red wine anywhere near your fabrics or working surfaces. RULE.
  12. You can skip pre-washing if you’re working with delicate fabrics you do not feel too confident about (and if you’re planning on wearing your dress only once).
  13. Find the perfect iron setting using small fabric scraps and mark the setting with a sharpie. Don’t use water/steam when working with silk (= water stains) and make sure the iron is clean (=limestone stains etc).
  14. Put some fabric scraps in your bag or wallet so you have them with you when shopping for matching shoes, accessories, ties, make-up etc. Take scraps of the lining, too an layer the pieces on top of each other, just as they will be when your dress is done. Adding lining and layers might change the appearance of the colour.
  15. Do not put pressure on yourself by telling everyone that you’re making your own dress. Do not eliminate the option of buying a dress, should you start to feel uncomfortable with making one. That’s fine, too. But you have to allow yourself to keep that option in mind. Just because you like to sew, doesn’t mean you have to make your dress yourself!

DIY wedding dress by thisblogisnotforyou.com

I hope you find this helpful! Is there some really important advice that I missed? Let me know in the comments. Also, I’d love to hear about your process of making a wedding dress.

If you want to read more about my dress and all the work that went into our DIY wedding, check out the DIY Wedding category on the right sidebar. There you’ll find a blog series about my wedding dress process.

xx

Charlie


Happy sewing!

facebook/bloglovin/pinterest
twitter/instagram

Stay in touch!

The 11 Most Useful Sewing Tools (And why you don’t need to own every tool out there to improve your sewing)

The 11 Most Useful Sewing Tools by thisblogisnotforyou.com
I’m a perfectionist.

Well, the kind of perfectionist who doesn’t do things perfectly but is constantly dissatisfied with the result. For example, I’m often unhappy with my sewing and want to do something about it. Instead of the obvious ‘taking more time with my projects and practising techniques’, I tried to take short cuts. I kept buying more and more tools and books and supplies that promised to make a more professional seamstress out of me.

Now, after five years of sewing almost every free minute, I sit on a massive pile of sewing tools and books which I hardly use. I don’t regret the money spent, because it was spent on something I love. What I do regret is the time spent looking for and buying unnecessary stuff instead of using the things I already had and taking time to learn how to use them properly.

This last year I really started learning how to do things properly. I actually read the sewing and couture books I bought ages ago and started to adopt certain techniques and generally tried to be more patient with myself and my sewing. This brought my sewing to a whole new level. Not only do my garments look much more polished now, I noticed that I use fewer tools. I now have my go-to tools I use all the time which are absolutely sufficient to make a professional-looking garment.

We are a consumer society and we are constantly told what we need to buy to be happier and more successful. This includes the market of sewing goods. Investing in your hobby is  fun and if your goal is to collect all the sewing books out here, please do so! But for those that constantly feel under pressure to accumulate more stuff to ‘become more professional’ and might not be willing to spend so much money, this can be frustrating as hell. So let me tell you: You don’t have to have all the tools, just a few right ones. In the end, it comes down to your manual skills and not the amount of tools you are using.

If you’re a beginner confused by the vast variety of sewing supplies, maybe this helps to get an idea what you really need to spend your money on. Quality is better than quantity!

The 11 Most Useful Sewing Tools by thisblogisnotforyou.com

11 MOST USEFUL SEWING TOOLS

1. Measuring tape

That’s an obvious one, I know. But it’s one of the most used tools I have, so I had to include it in this list. I have different measuring tapes, but I use one the most: It’s metric on one side and imperial on the other, which makes it easier to work with US patterns. It’s pretty old and therefore really soft now and I only use other ones when I cannot find this one because it’s buried somewhere in my creative mess.

2. Spend money on sharp, high quality fabric & embroidery scissors

Money spent on sharp, good quality fabric scissors is money well-spent. My first pair of fabric scissors was pretty cheap and bought off the internet. Oh, how I hated cutting fabric back then. After cutting heavyweight fabrics I had blisters on my fingers and my wrist hurt for two days. I tried a rotary cutter (+ cutting board), which was much less painful, but the board wasn’t big enough to cut out large pattern pieces without having to move the board around under the fabric. Also, it’s hard to cut small curves and corners with a rotary cutter. If you’re a quilter, go get one, but if you mainly sew clothes, scissors work much better in the end. When I finally got proper scissors (I was gifted lovely Prym scissors from John Lewis at our Sewing Bee), they felt like cutting through butter with a knife.

Next to large scissors for cutting out pattern pieces, I use small, equally sharp embroidery scissors which are always within reach while I sew. I mostly use them to cut thread ends. They’re also great for marking notches and clipping curved seam allowances. Since they’re much smaller the risk of accidentally cutting too deep into your fabric isn’t as high.

The 11 Most Useful Sewing Tools by thisblogisnotforyou.com

3. Handsewing needles & bees wax

You won’t get by without a little or a lot of handsewing here and there. Have a set of handsewing needles in different strengths and lengths within reach. I only very recently started using bees wax on my handsewing thread and it’s wonderful! Goodbye, constantly knotted threads!

4. Iron & pressing board

Never underestimate the power of a good iron. I tried to ignore this for a long time, but eventually had to admit that pressing is a major part of the sewing process. Get a good steady board, the larger the better.

5. Tailor’s chalk

There are thousands of different marking tools on the market. Fabric pens, chalk pens, tracing paper etc. I’ve tried the powdery chalk tools and they don’t work well on some fabrics and they’re also a bit more expensive. The most effective tool for me is a simple square piece of tailor’s chalk. It draws clean lines easily on any fabric and is quickly removed with a bit of rubbing. You can get it in different colours. I only use the white one. When the edges get blunt, I use a knife to sharpen them. I’m still using two of a set of three I bought when I started sewing five years ago.

6. Seam ripper

I can’t live without my seam ripper. No matter how good a sewer you are, you’ll always mess up at some point, so having a seam ripper near for a quick fix is essential. Some people use embroidery or nail scissors instead which I wouldn’t recommend as you can accidentally cut into the fabric very quickly. When your seam ripper starts to get blunt, go get a new one!

7. Tracing wheel

For me this is the most effective tool for copying patterns. I trace all my patterns and never cut into the original pattern sheet. Tracing paper is too expensive for my taste. This little tracing wheel punches little holes into your pattern paper which are easy enough to see and trace with a pen afterwards. For marking on fabric I use tailor’s chalk.

The 11 Most Useful Sewing Tools by thisblogisnotforyou.com

8. Four main sewing machine feet

I have two boxes with two different sets of sewing machine feet (probably around 20 different ones). While some sewing machine feet are great helpers (edgestitch feet, invisible zip feet, blind hem feet, overlock feet, the list goes on…), you don’t have to spend your money on getting them all. I found that these four, which are also the most basic, are absolutely enough if you learn how to use them right.

Zigzag foot: The most basic, standard foot of all sewing machines. You can use it for pretty much all of your machine settings. This is the one you will use most.

Straight stitch foot: Although you can use the zigzag foot for straight stitches, too, this little fellow is great to have when sewing with very delicate, lightweight fabrics. We all hate it when our sewing machine eats our chiffon or silk fabrics, this machine foot really helps to prevent that.

Zipper foot: When dealing with zippers, a normal zigzag foot won’t do. The standard zip foot is for exposed zips. There are different ones for concealed zips, although I still haven’t found one that works perfectly. That’s why I often use my normal zip foot for concealed zips, too. And it works ok.

Buttonhole foot: This one will probably come with your machine, unless you bought it secondhand. If your machine has a four-step buttonhole setting, you’ll need this one. And it works brilliantly once you get used to working with it.

9. A Dressmaker’s Square or Hip Curve

I’ve tried all sorts of different rulers and dressmaker’s curves over the years, that I don’t really use any more since I got the dressmaker’s square. It’s a rectangular ruler with an integrated hip curve, lines to mark 1cm and 1.5cm seam allowances and it’s much longer than the average ruler. Since it has so many different functions all-in-one, it’s a very useful tool to have.

10. High quality (glass head) pins

Don’t try and save money when you buy pins. They’re not expensive anyway. Get good quality pins. A pack of 100-200 will last ages. You can get super cheap ones that are of a horrible quality and will leave holes or rip threads in your fabric while pinning. If you buy them from a sewing brand, such as Prym, you should be ok.

Furthermore, I really love using glasshead pins. They’re a tiny bit more expensive, but the glass heads won’t melt if you accidentally press them with a hot iron!

11. Stock up on different sewing machine needles

Always keep some extra needles. This is something you can really stock up on. Needles break or become blunt after a while and it’s the most annoying thing to be forced into breaktime and having to buy or order new needles. Also, different fabrics require different needles. This applies especially when working with knits or very heavy or lightweight fabrics. Your standard needles are fine and will work with most mediumweight, woven qualities. But once you start working with stretch or knit fabrics you might get problems with skipped or untidy stitches. Have some ballpoint/Jersey, stretch, leather or denim as well as extra fine needles ready when you’re working with these fabrics. Change your needle regularly!

The 11 Most Useful Sewing Tools by thisblogisnotforyou.com

Are there tools that you think are essential, which aren’t included in this list? Or have I listed something that you find unnecessary? Please leave a comment and let me know! I’d love to hear other sewists’ thoughts on this!

xx

Charlie


Happy sewing!

facebook/bloglovin/pinterest
twitter/instagram

Stay in touch!