I enjoyed reading all these resolution lists last week, and since one of my sewing/blogging resolutions is “Make Lists & Plan Projects ahead”, I thought it would be a good start to begin the year with my own list of “re-sewlutions”.
Make Lists & Plan Projects Ahead
Organise Patterns & Fabrics
Take Part In The Stash Diet (instead of buying and hoarding!)
Draft More Patterns (at least one every two months!)
Publish A Pattern On The Blog
Sew A Winter Coat
Sew A Chanel-style Jacket
Sew Menswear
Learn & Improve New Skills: Practise fitting & grading patterns & making alterations
Learn more about couture sewing techniques
Actually Read All The Sewing Books You Bought
Take The Time & Dedication For A Better Outcome
My overall goal is to never stop progressing. I think one can always do better. I try this by challenging myself with every project, trying more complicated patterns and not being afraid of working with difficult fabrics. I almost never sew something twice.
The hard part really is to stop being impatient and dissatisfied with your own progress and to keep going even if you fail.
Well, let’s hope I can tick off most of these things on the list in 12 months! I’ve met up with Daniela from Ela Sews and Doesn’t Sleep last weekend and she showed me how to fit a pattern with tissue pattern. So I sort of started working on that list!
Let me know your thoughts and your own New Year’s re-sewlutions!
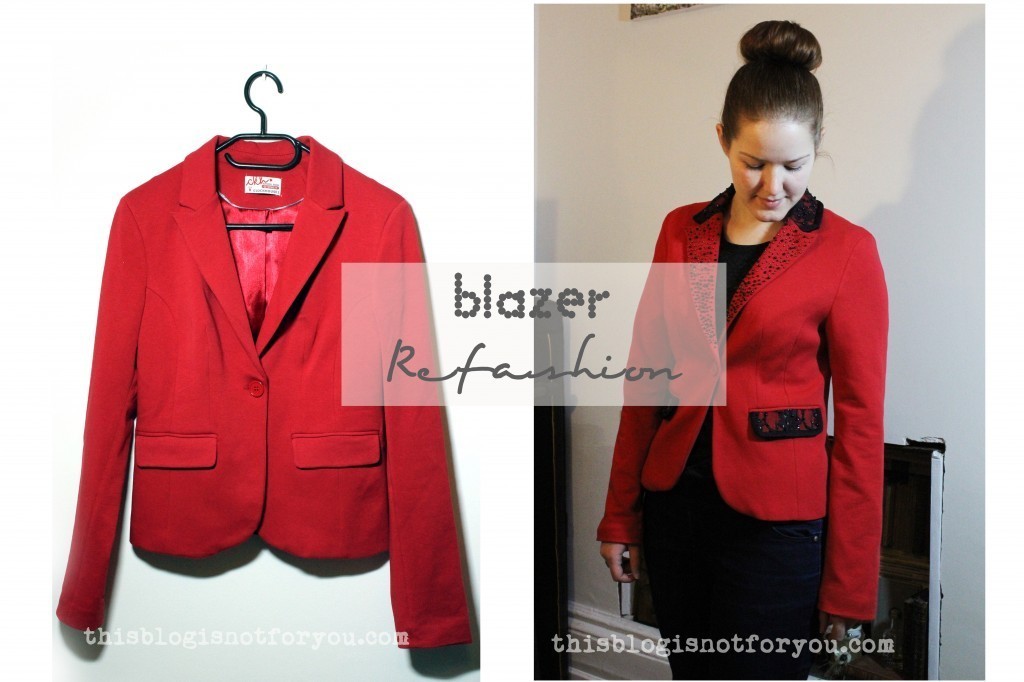
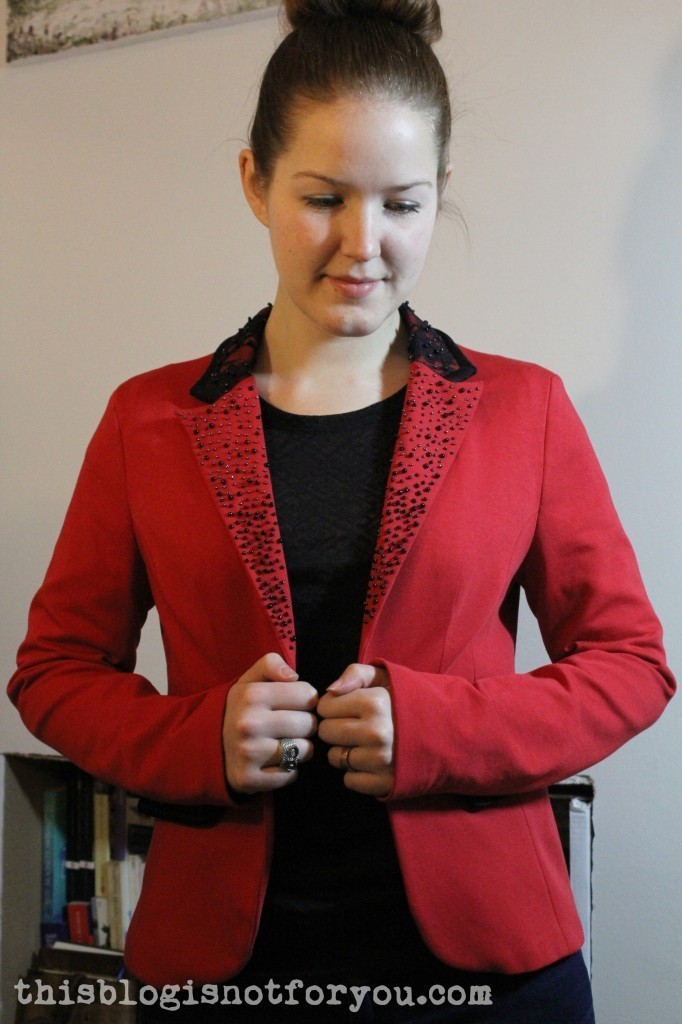
I love blazers. I love red. Bright red blazers can look really cool, but this one was a weird mixture of too bold and too boring.
I love that it’s a jersey blazer, which kind of makes it more casual (since I don’t go to fancy events too often). But I thought that some contrasting colour was missing. It was just too red.
Look at all the red. RED.
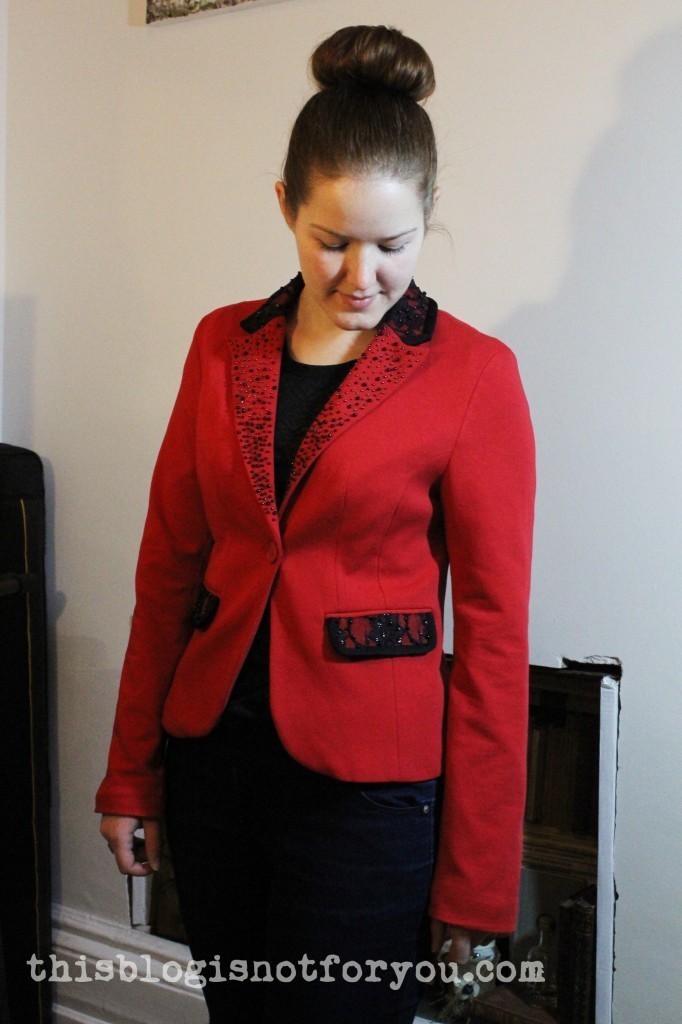
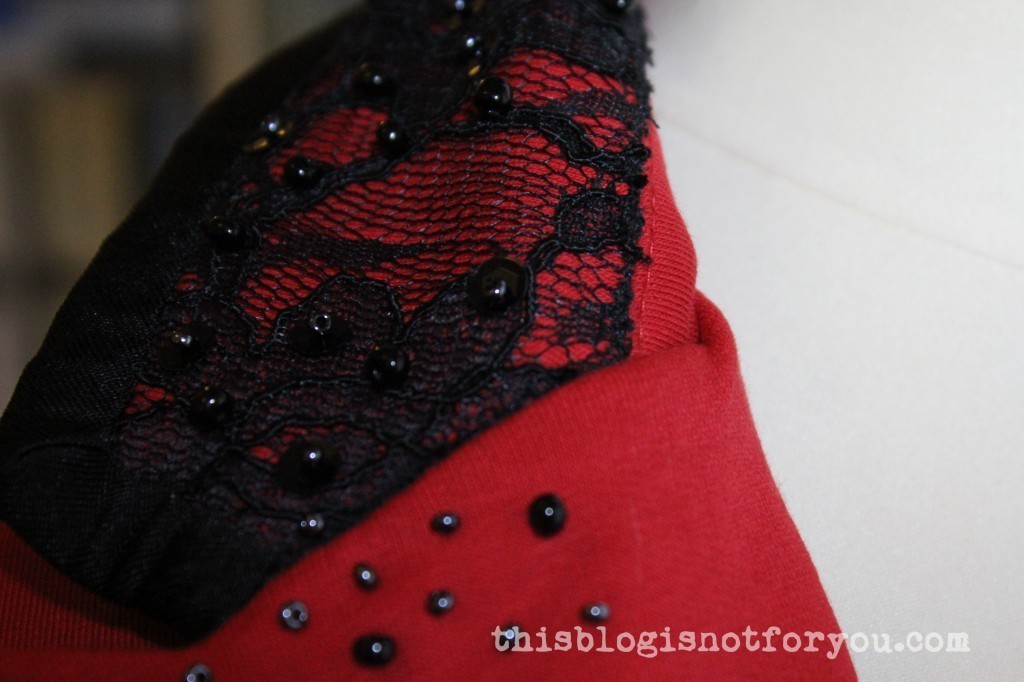
I love to combine red and black and found that beautiful black lace in my fabric stash that has been waiting its turn for quite some time.
I also love to embroider fabrics with beads and sequins, I have no idea why. It takes so much time and hurts your eyes, but I guess the process is just really relaxing and meditative, like knitting for example.
After a huge amount of coffee, Star Wars Episodes IV & V and some Game of Thrones in between, I finally finished the blazer today. I only used simple handsewing techniques. (Even for the bias binding I used backstitching. The jersey fabric would’ve been too heavy for the machine and the jersey bias binding too stretchy.)
So if you don’t have access to a sewing machine, this could be a perfect project for you. You don’t need too many materials, no complicated sewing techniques, just a handful of beads, a few strips of lace and bias binding and A LOT of time and patience.
Instructions for making your own embellished blazer
If you do not have so much time, omit the beads and use some lace trim instead for the collar.
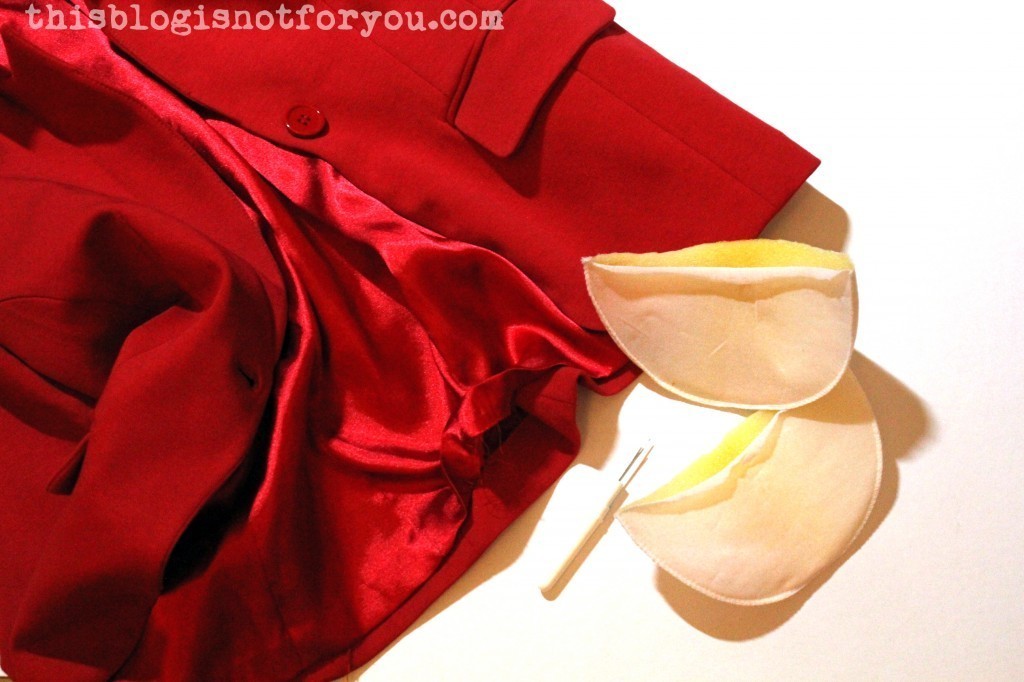
First of all, I took out these two bad guys (by opening the lining at the hem).
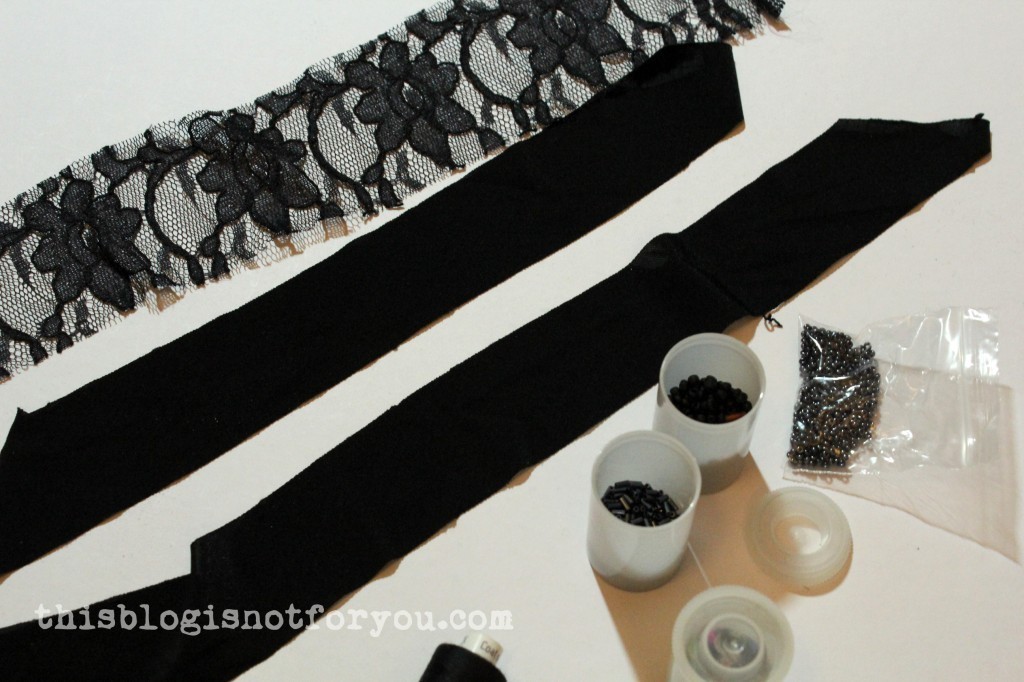
What you’ll need:
black thread
beads (different sizes and colours)
black sequins
black bias binding
lace
scissors, sewing needle
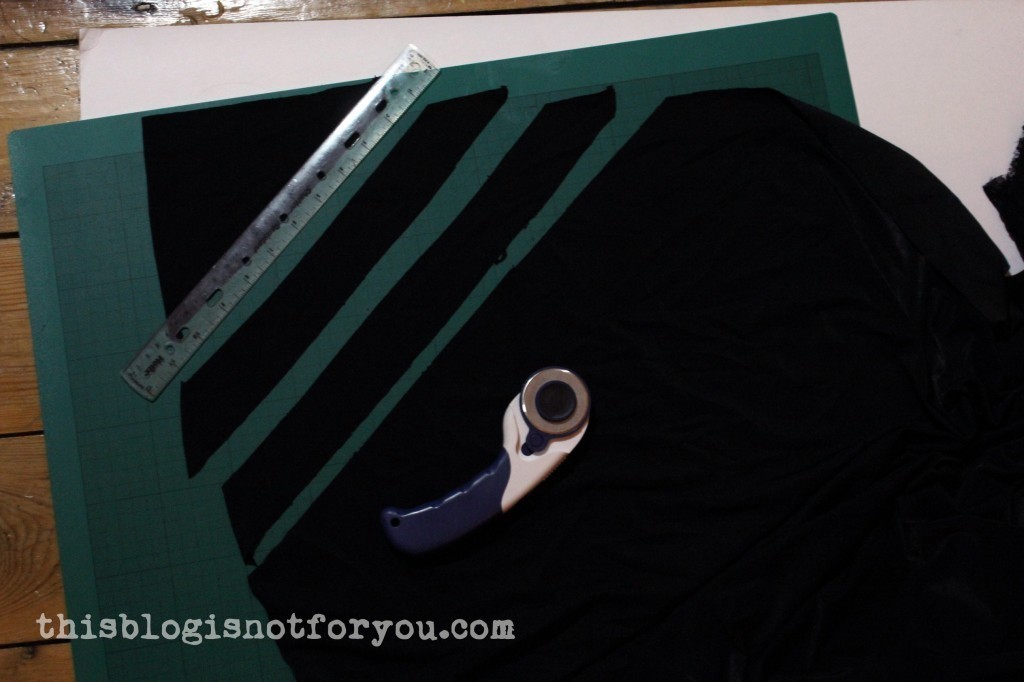
I made the bias binding from a black jersey (I guess there’s some Lycra in it, too).
Cut out some strips of fabric (approx. 4cm wide) on the bias, enough to cover the edges of collar and pockets.
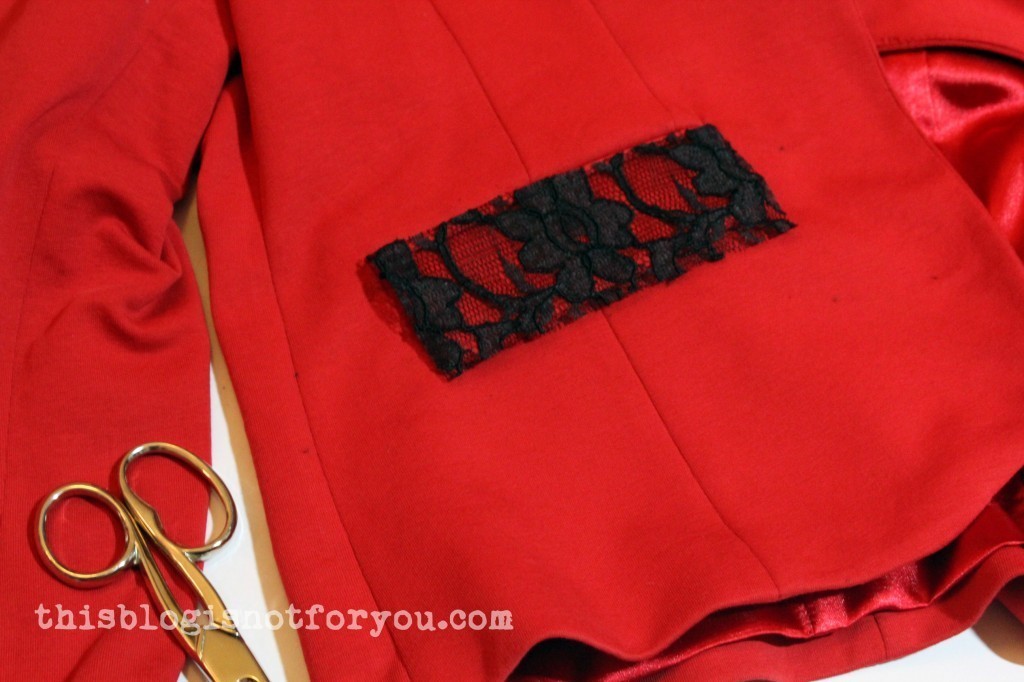
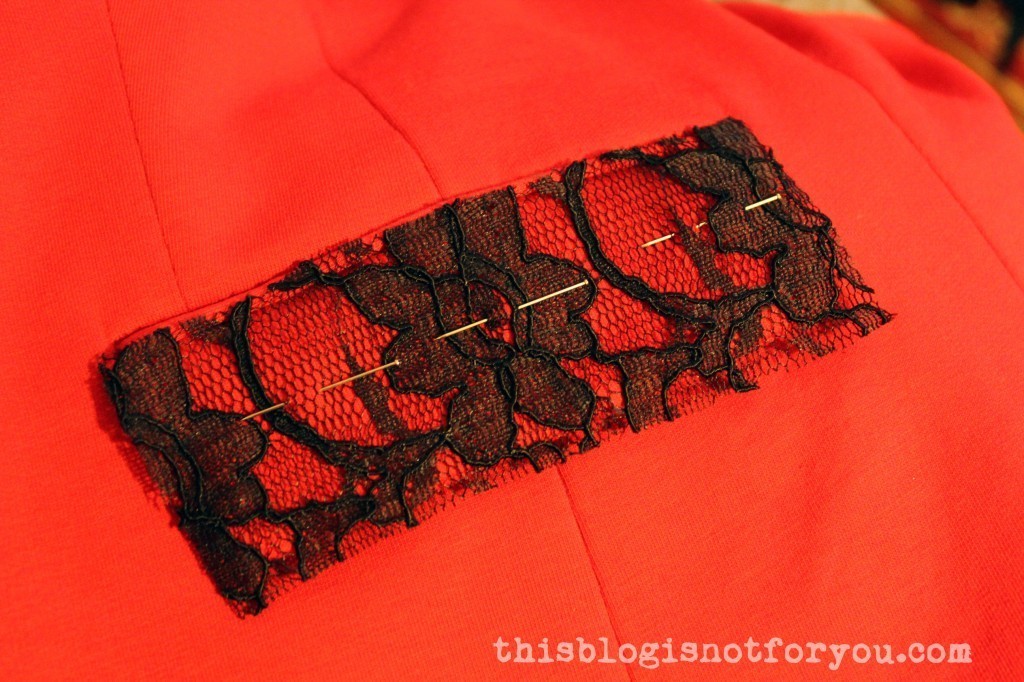
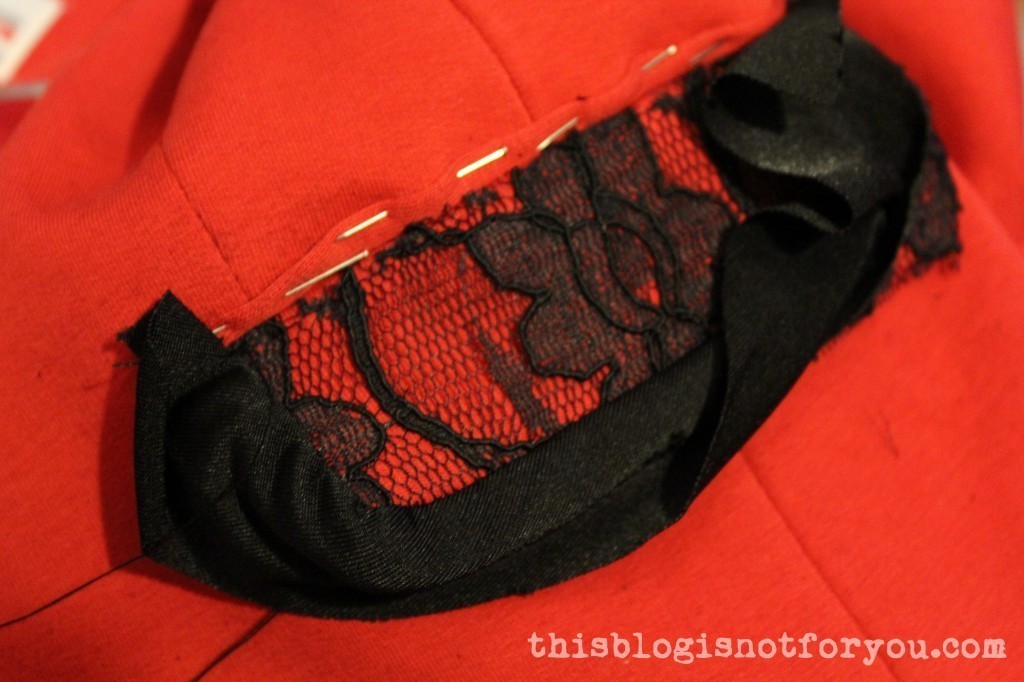
Cut out the lace, a little larger than the pocket. Pin it.
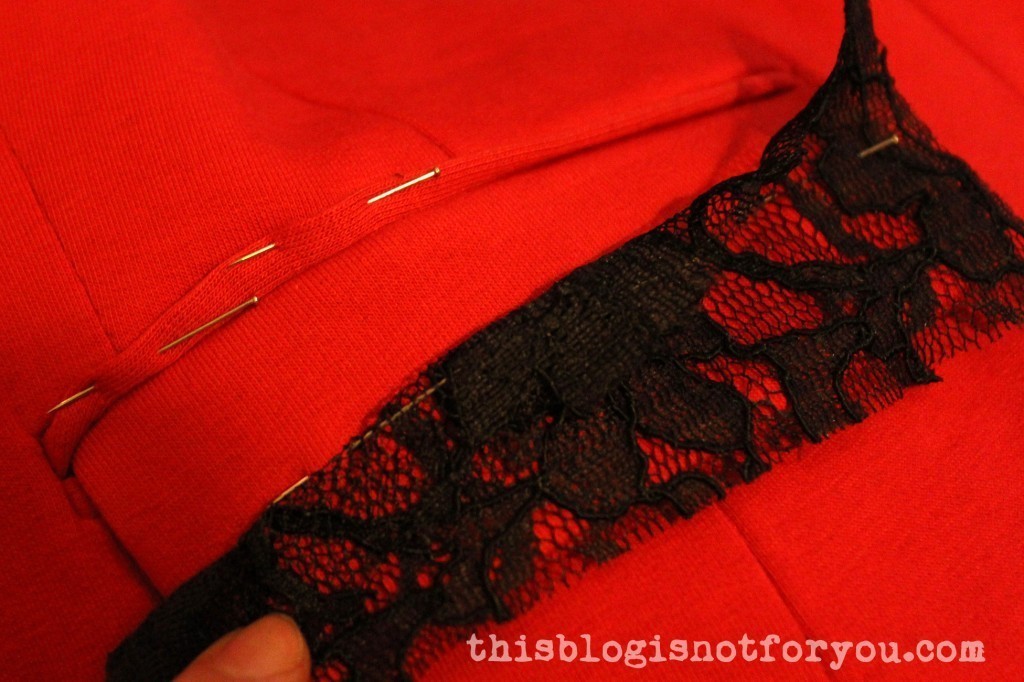
… then pin up the piping (if there’s some), so you can easily hide the lace under it.
After sewing the lace on with a basting stitch all the way around (approx. 0.5-1cm from the edge), start attaching the bias binding:
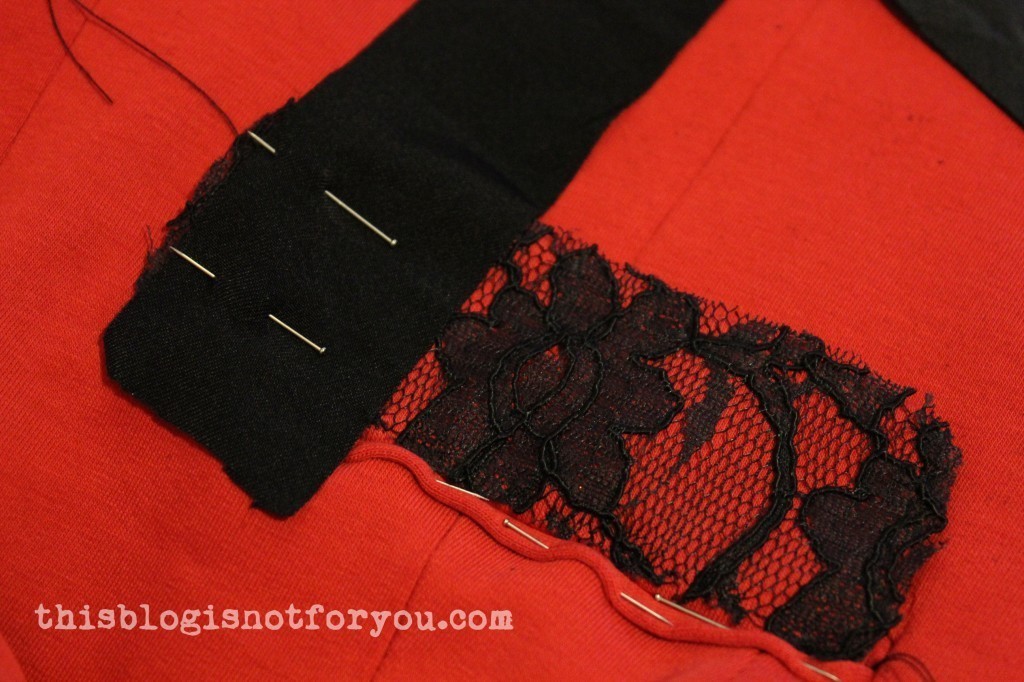
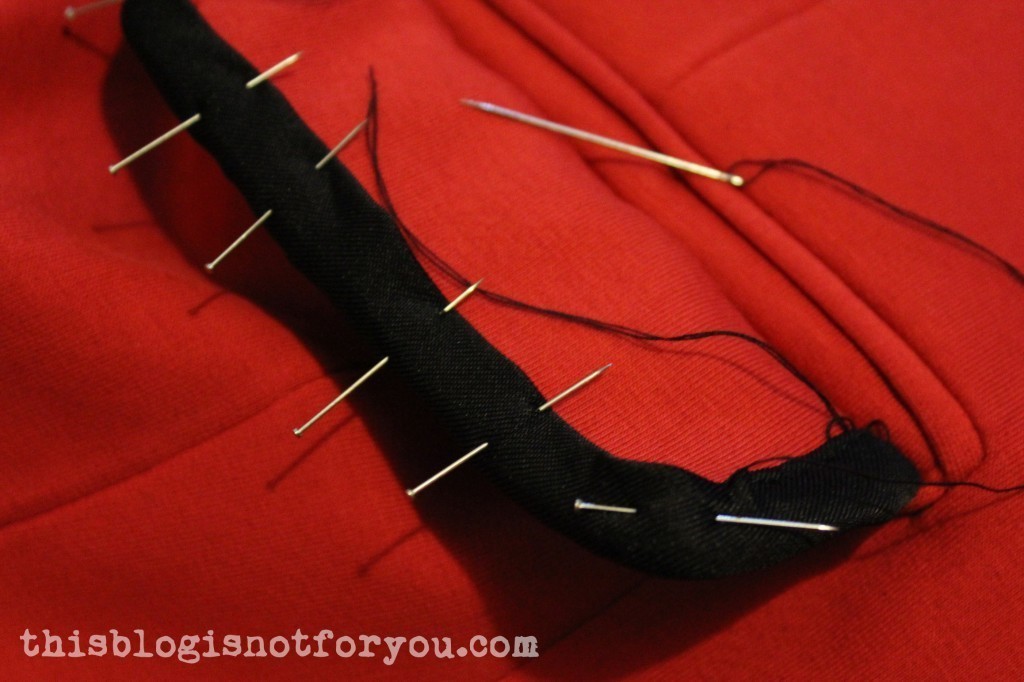
Start with the side facing up. Place the bias binding on the lace, right sides together. Handstitch approx. 1cm from the edge.
Tightly pull the binding over the edge.
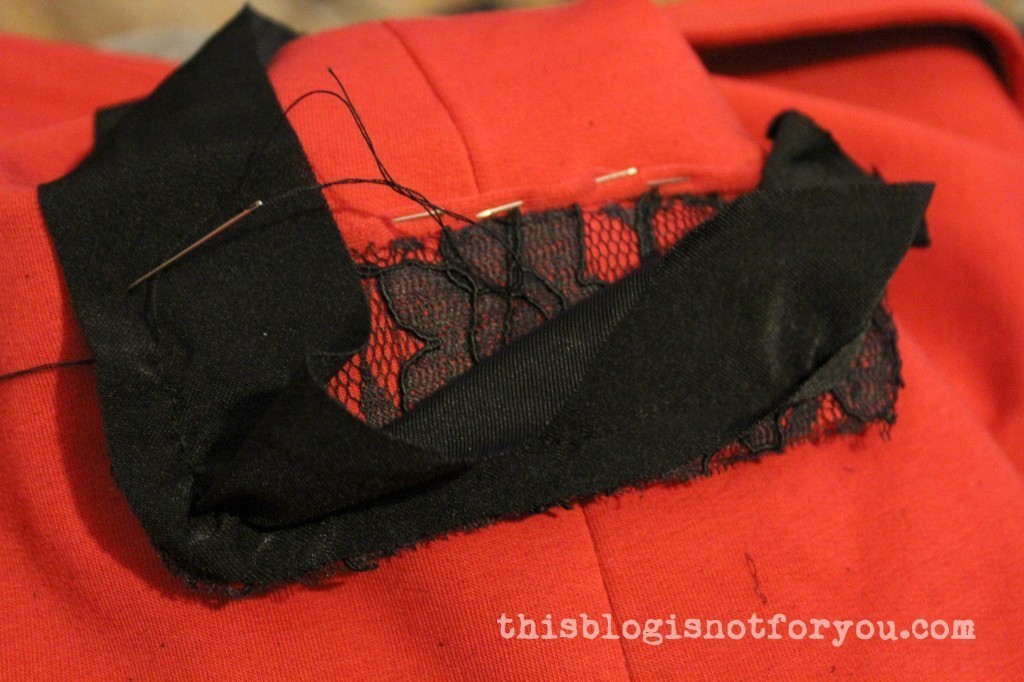
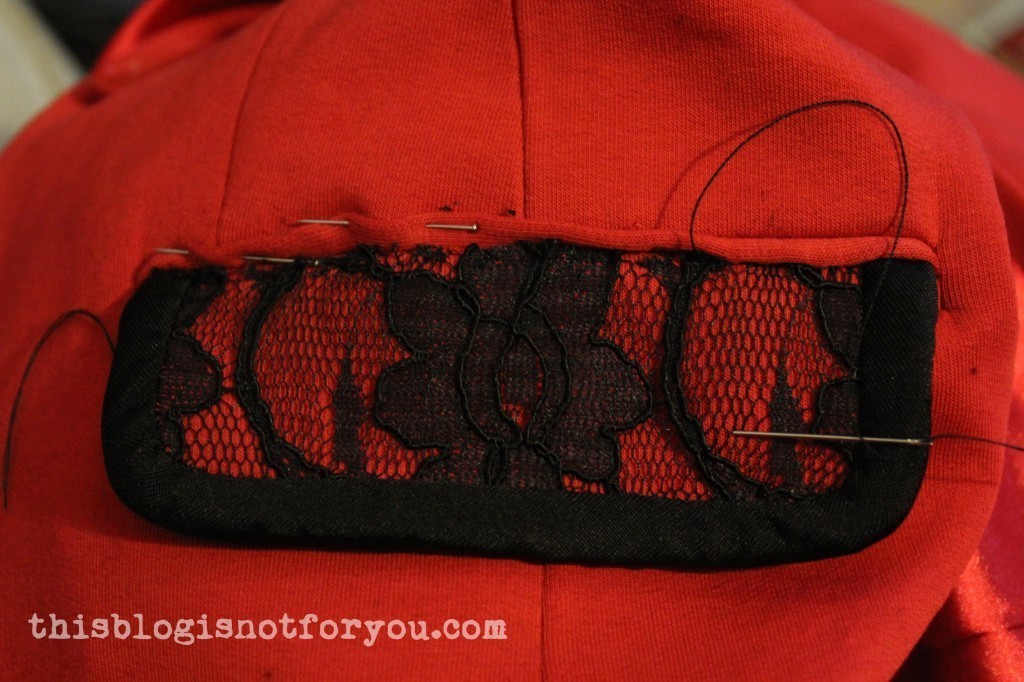
Pin the raw edge under and stitch (I used a backstitch).
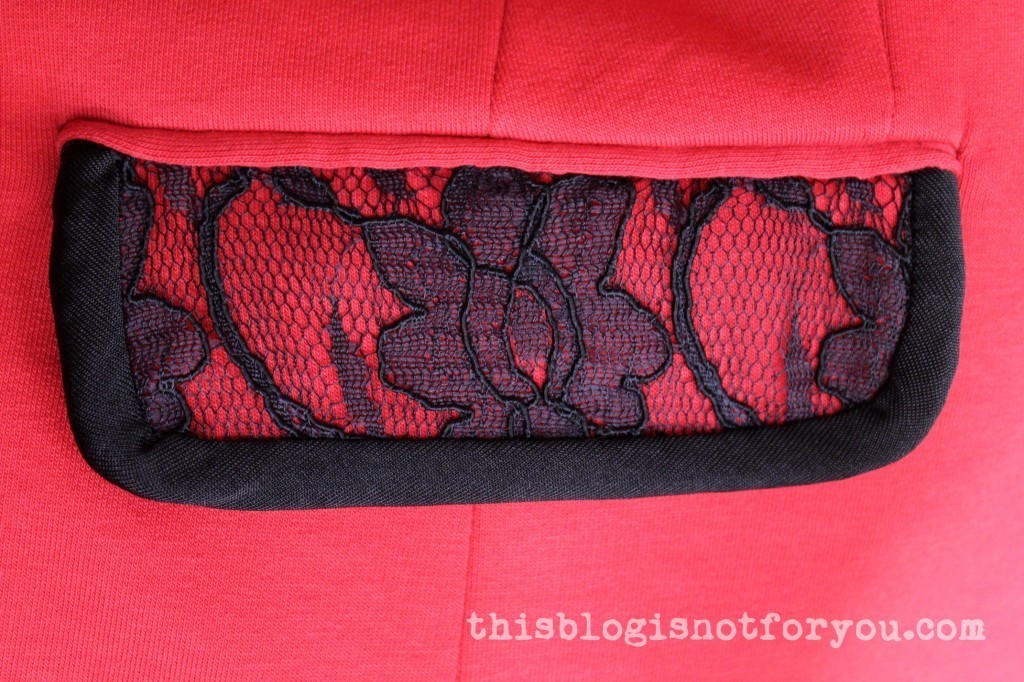
To hide the raw edge of the lace, I sewed the piping onto the flap using a slipstitch.
Now it’s time to add some sparkle!
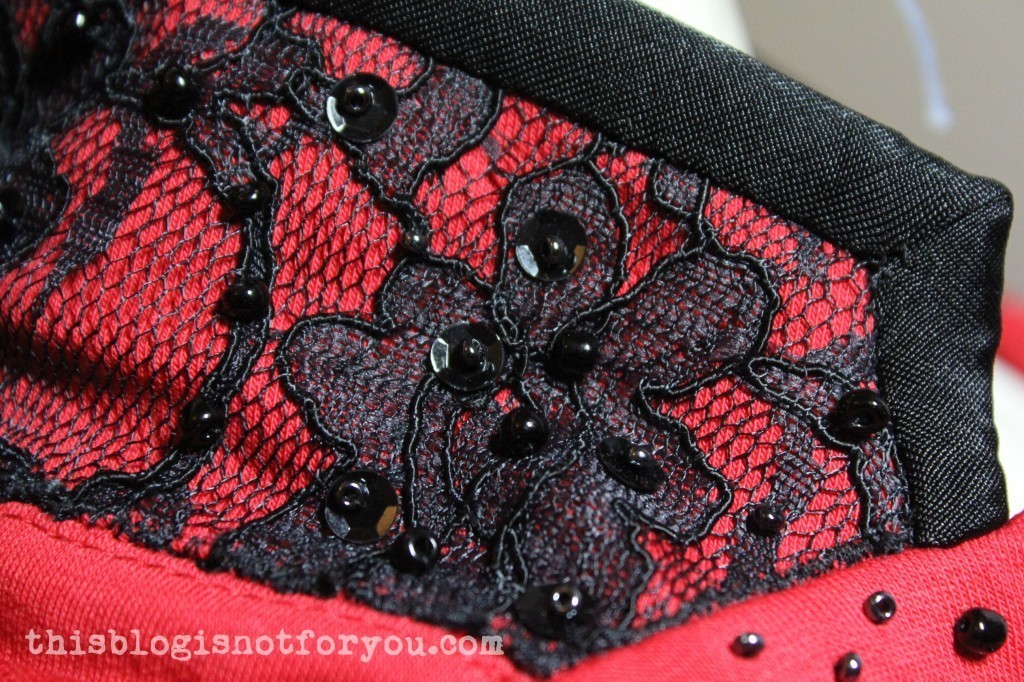
I embroidered the flap with black beads, silver-blue rocailles and black sequins.
I embroidered the collar sewing on black beads in two different sizes, starting at the bottom. Half-way up the collar I added silver-blue rocailles.
Since the collar did not have piping where I could hide the raw edge of the lace, I used a satin stitch all the way along the lower edge where I couldn’t add bias binding. This took almost as long as watching the whole Episode IV. So may the force be with you!
But it was totally worth it!
Here’s a close-up of the embroidered collar. I placed black sequins under the silver-blue rocailles. The beading also keeps the lace nicely in place.
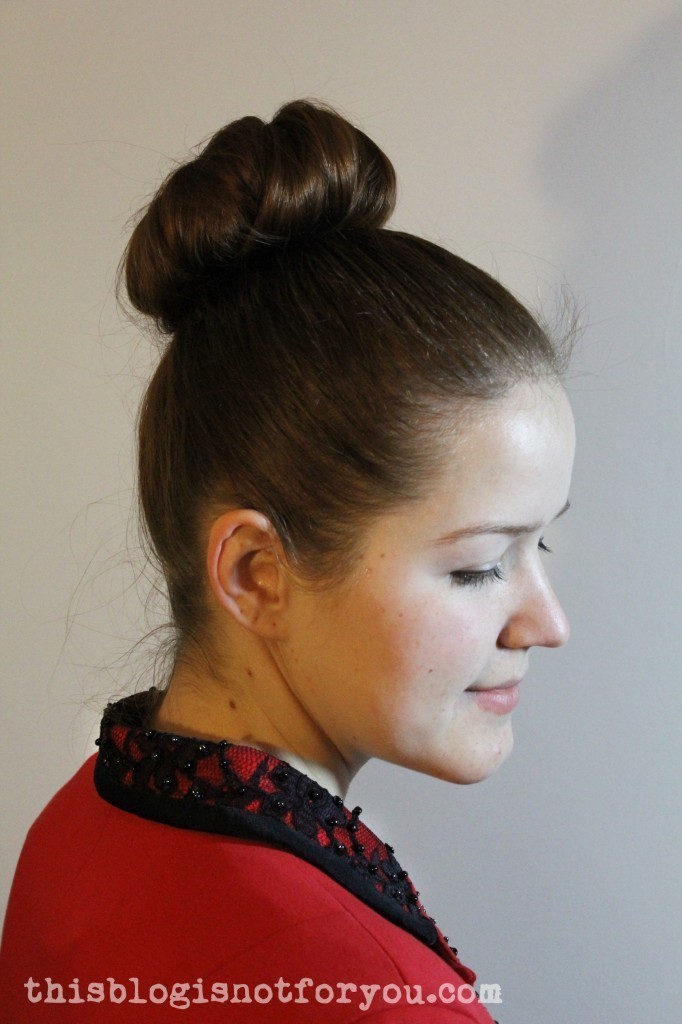
I love my old new blazer (thanks mum for clearing out your wardrobe 🙂 ). I don’t like so much that the blazer lost a bit of its casualness. It looks really good with jeans and t-shirt, but I still feel a bit overdressed wearing it at work or when having coffee with a friend.
What do you think? How would you style it? Do you also enjoy time-consuming sewing-techniques (haha)?
I used the last days of my Christmas break for some quick refashion projects. I have a huge pile of old or thrifted clothes I keep for refashion projects and recently, a friend gave me a bunch of cute dresses and sweaters that doesn’t fit her anymore.
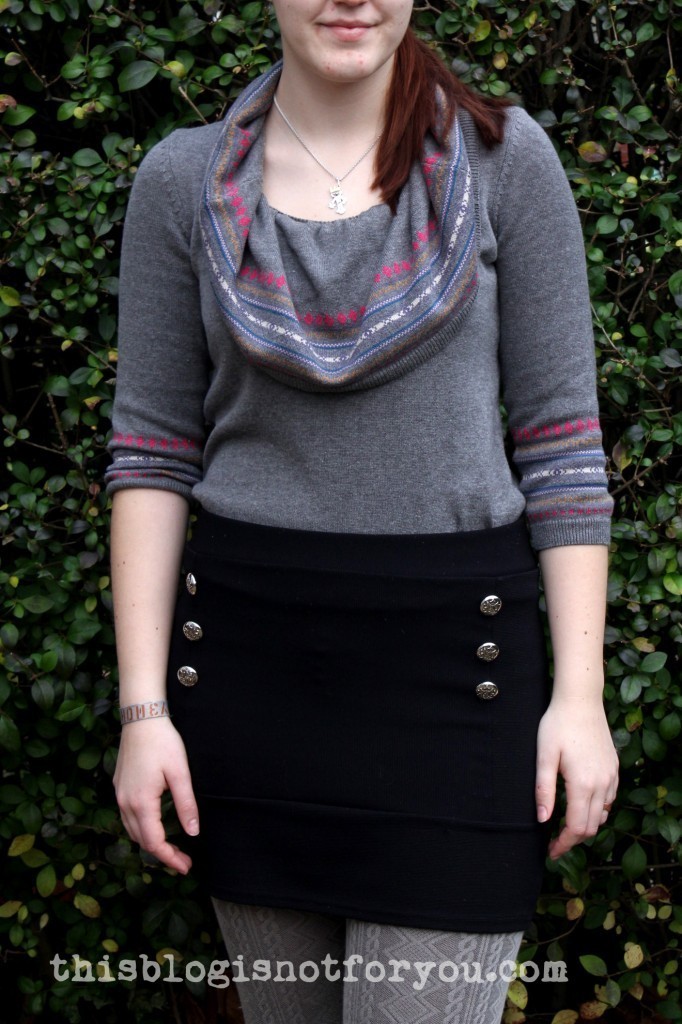
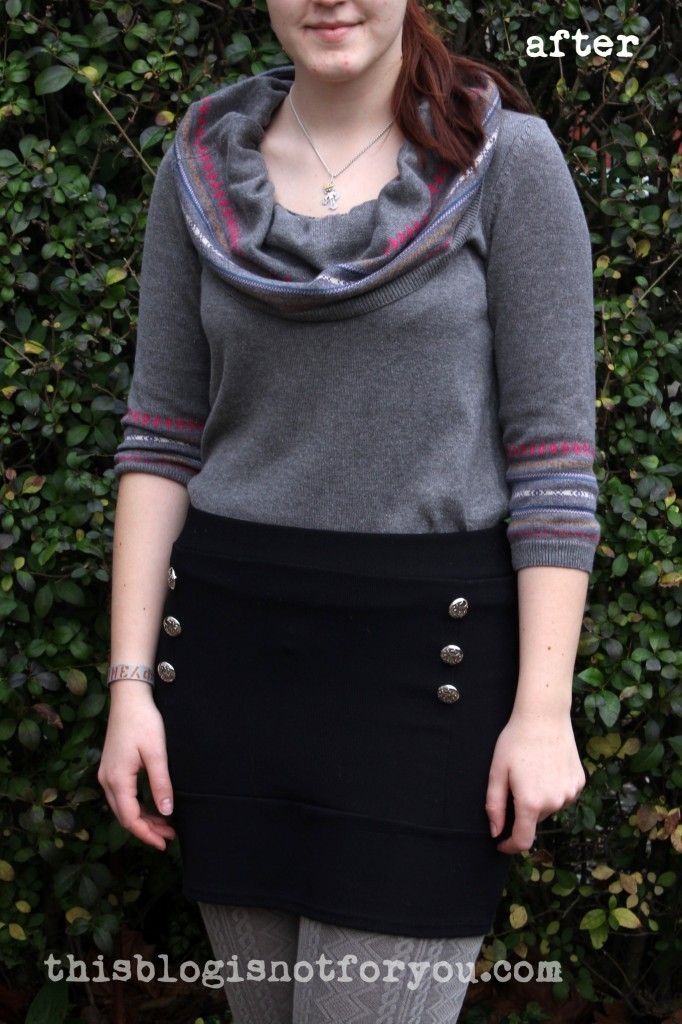
One of these was this cute grey sweater dress which was not very flattering and a bit too short for my liking. I decided to make it into a sweater and use the excess fabric for a cosy cowl neck.
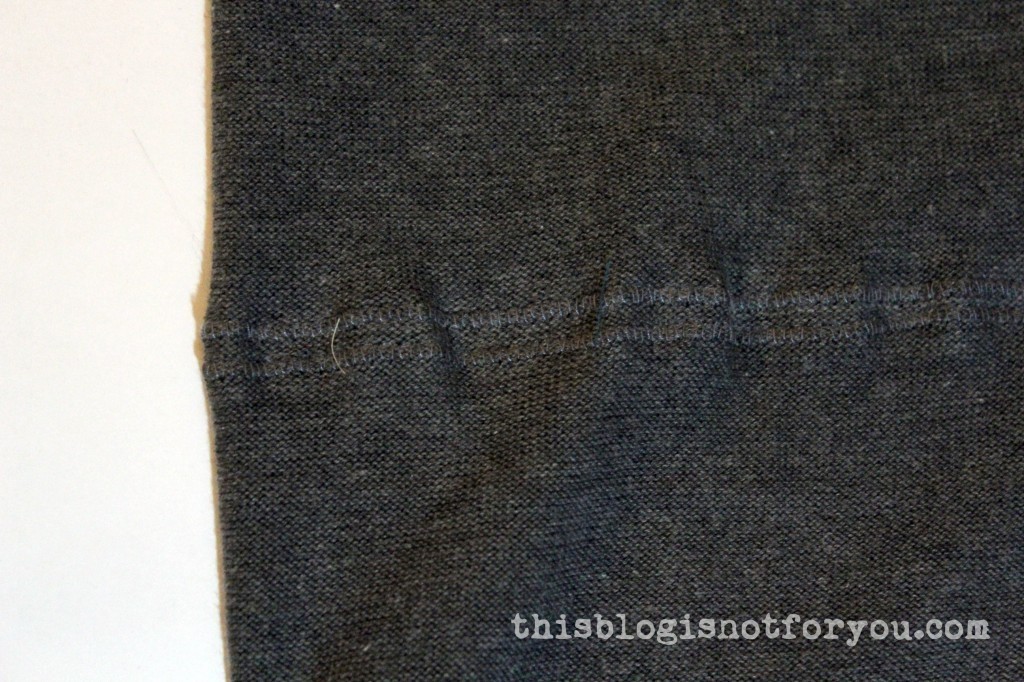
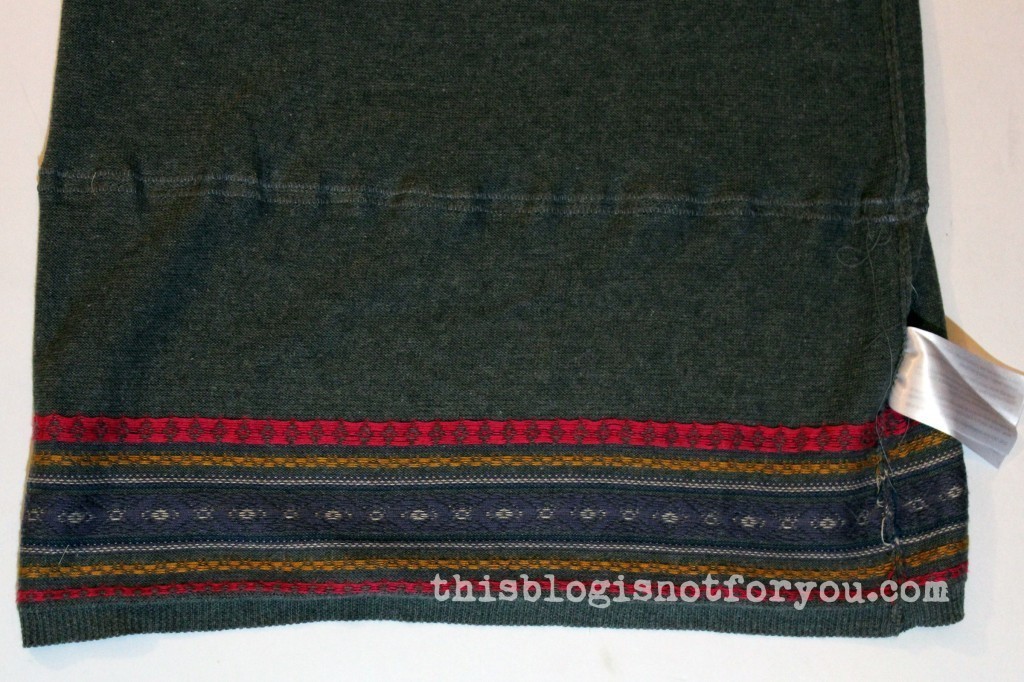
This was my first time sewing with knits – not as bad as I had imagined. I had some troubles with the hem of the sweater as is kept curling up, but I’m thinking about using some leftover black jersey to combine with the sweater and make a more flattering sweater dress in the future. As soon as I get my overlocker, these problems will be over, hopefully. For the time being I’ll just hide away the hem 🙂
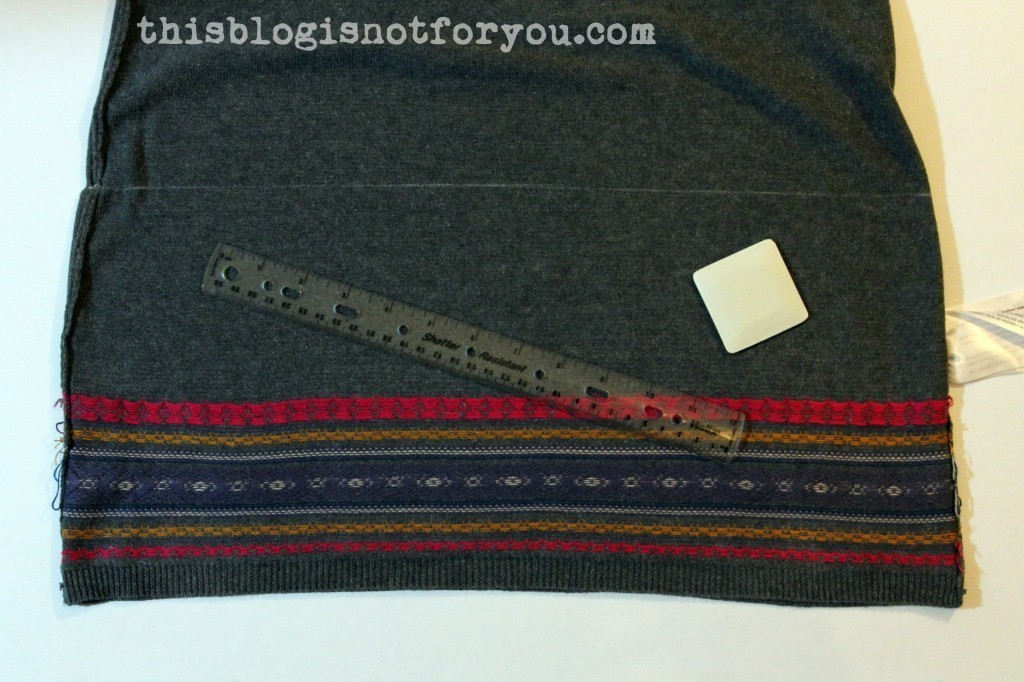
I tried the dress on and marked the new hemline with a safety pin. Using tailor’s chalk I marked the line for cutting the fabric (left side of fabric).
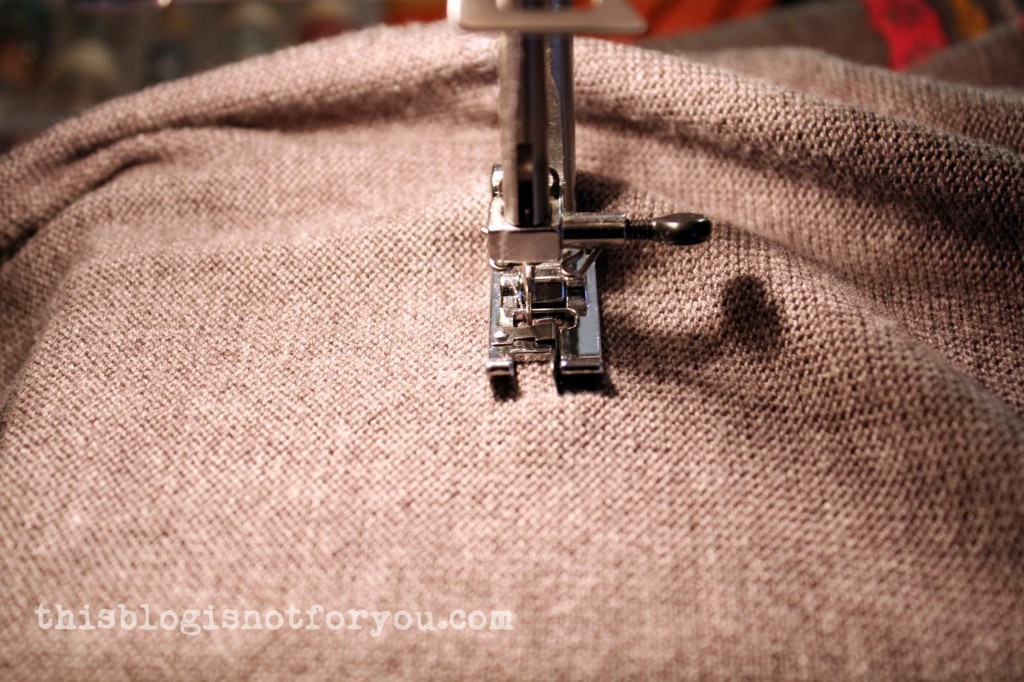
With my overlocker foot I carefully sewed two seams on either side of the marked line using a stretch stitch setting for finishing raw edges.
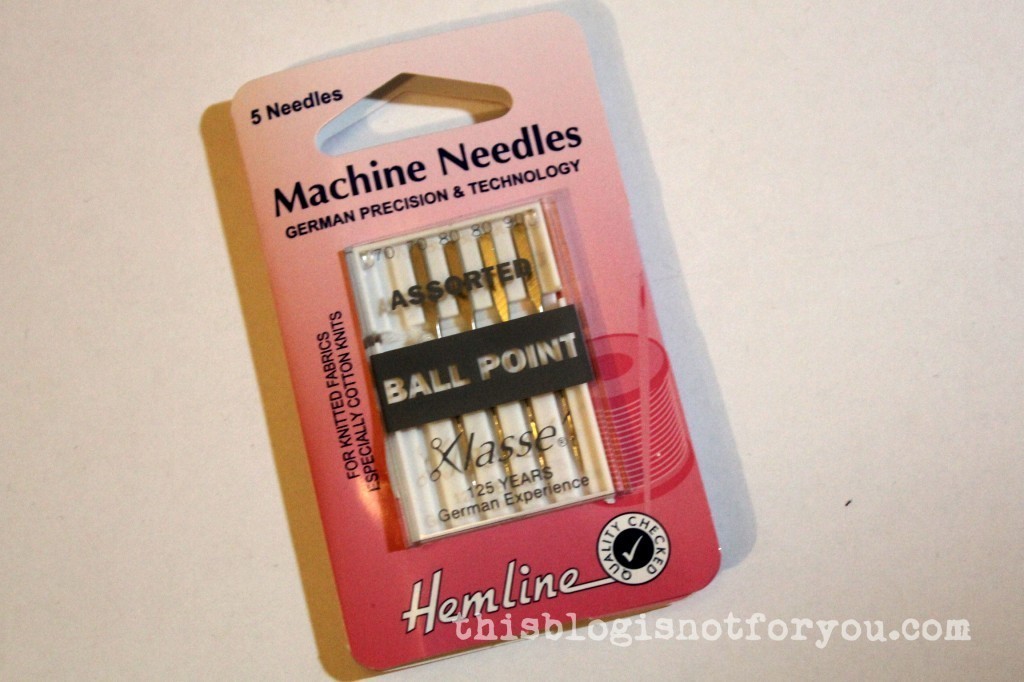
For sewing knitted fabrics, I recommend using ballpoint needles. They’re not too expensive (these were 3 pounds) and they have teeny tiny balls at the tip of the needle which prevent the yarn from breaking when sewing over it.
After sewing two rows on each side of the marked line, use your fabric scissors and carefully cut the two pieces apart. The seams will prevent the knitted fabric from fraying. Be careful not to pull the seams as this will stretch the fabric and it will start to fray.Finish the hem of the sweater. Then sew the cut-off part onto the neckline (left side up, so the right side is showing when turning the cowl neck inside out). I’m quite happy with how it turned out, although I this this technique probably would work even better with a sweater that has a slightly higher neckline (for a more snug fit).
This little refashion can be done in less than an hour and is a perfect project for starting to sew with knits.
You could also use two sweaters in different colours to make a colour-blocked cowl neck sweater.
Please note: You might not want to use an ancient sweater that has been in the laundry every week since you bought it – the knitted fabric might be strained and tear easily when sewing over it.
As promised, here are more pictures of my self-drafted bridesmaid dress and a brief tutorial on drafting flared half-circle sleeves.
If you think you’ve seen enough of that dress already, feel free to skip this post – there will be a massive amount of pics 🙂
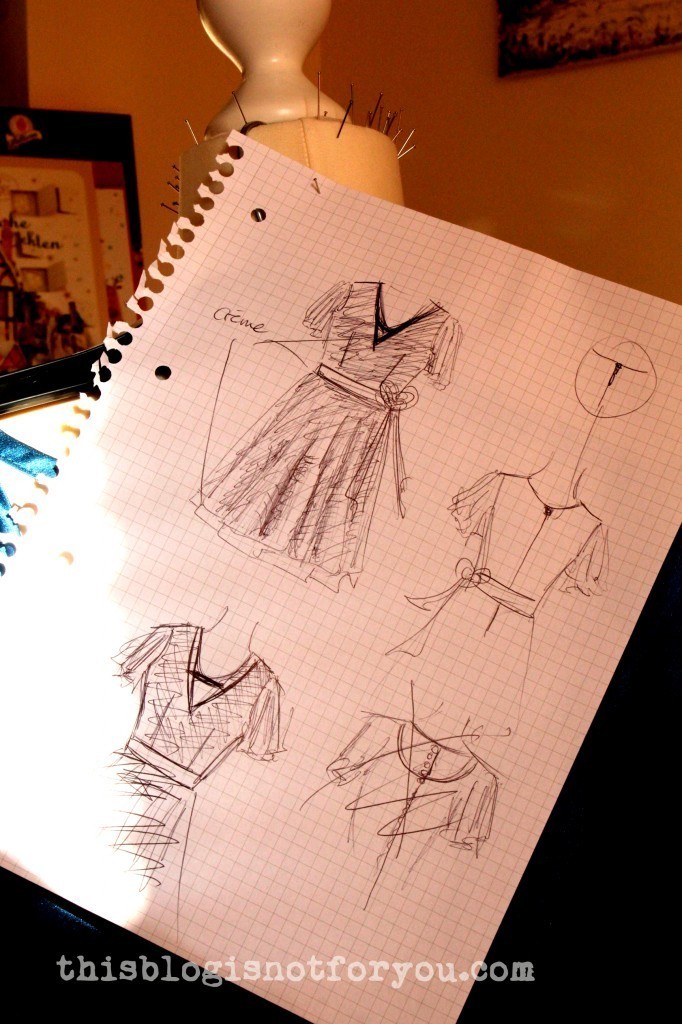
Btw, this is the original sketch of the dress. I was thinking about adding some fabric-covered buttons in the back, but discarded that idea pretty soon after starting to draft the pattern. It just didn’t fit in and would’ve been even more time consuming.
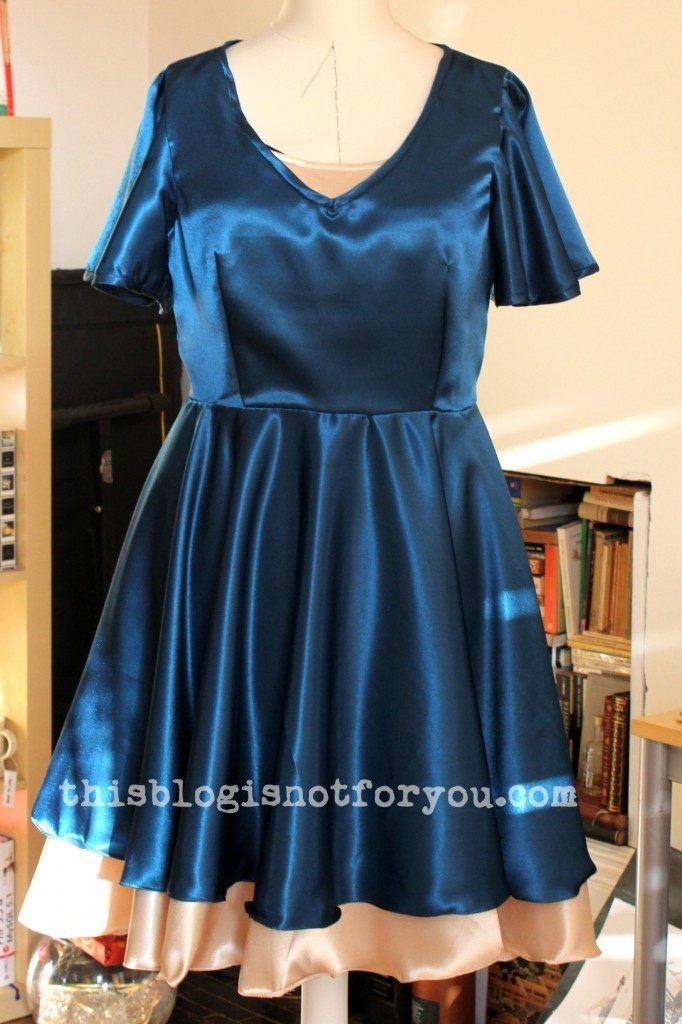
As you can see in the above pics, the colour of this dress is absolutely ‘unphotographable’. Neither of the two colours is quite right, it’s probably something in between.
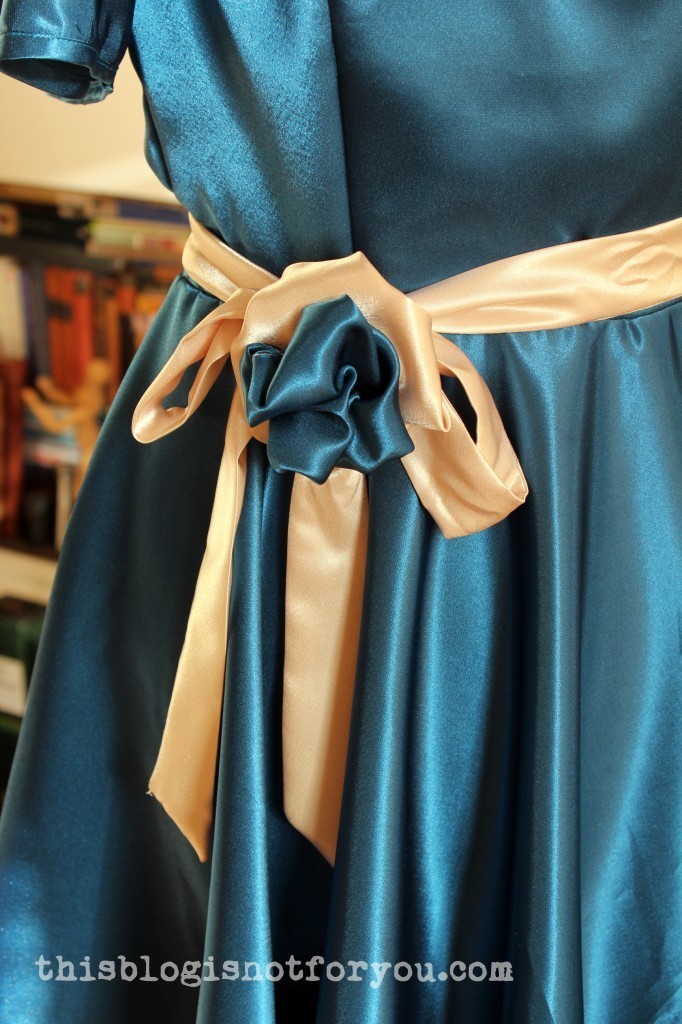
That’s what the dress looks like without the belt. Not bad, but I personally prefer the contrast of the creme coloured belt.
The bow can be worn the classic way, in the back, or, with the flower on top, in the front.
The flower is made from two cut-out circle. A bigger one cut out fo the creme fabric and a slightly smaller one in blue. Both hemmed with a narrow hem foot, sewn together in the middle and then gathered rather randomly, creating the flower shape.
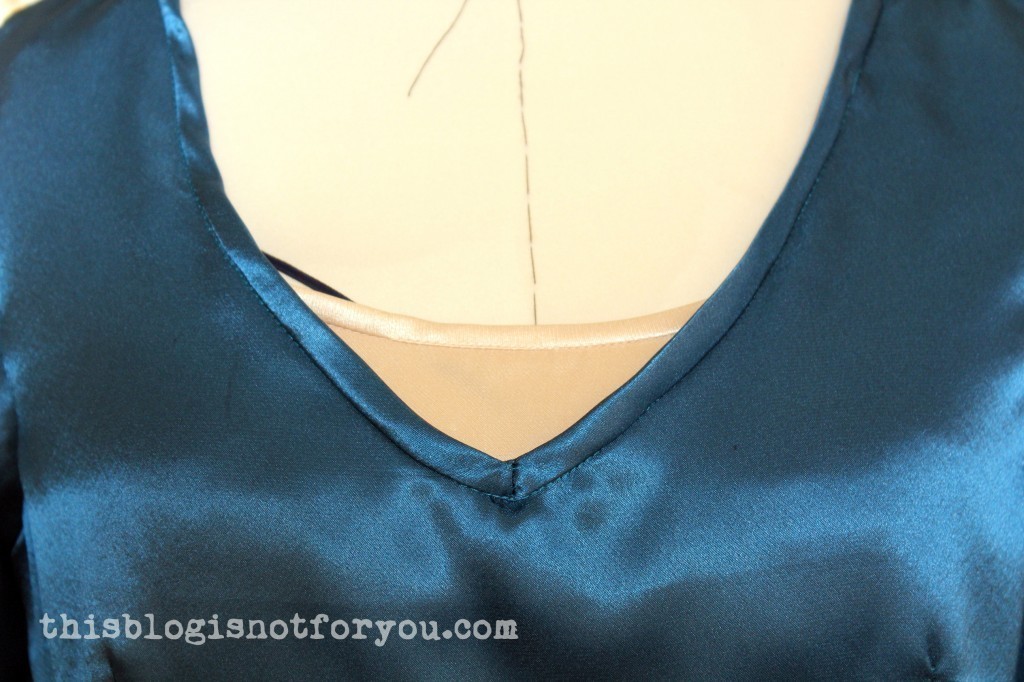
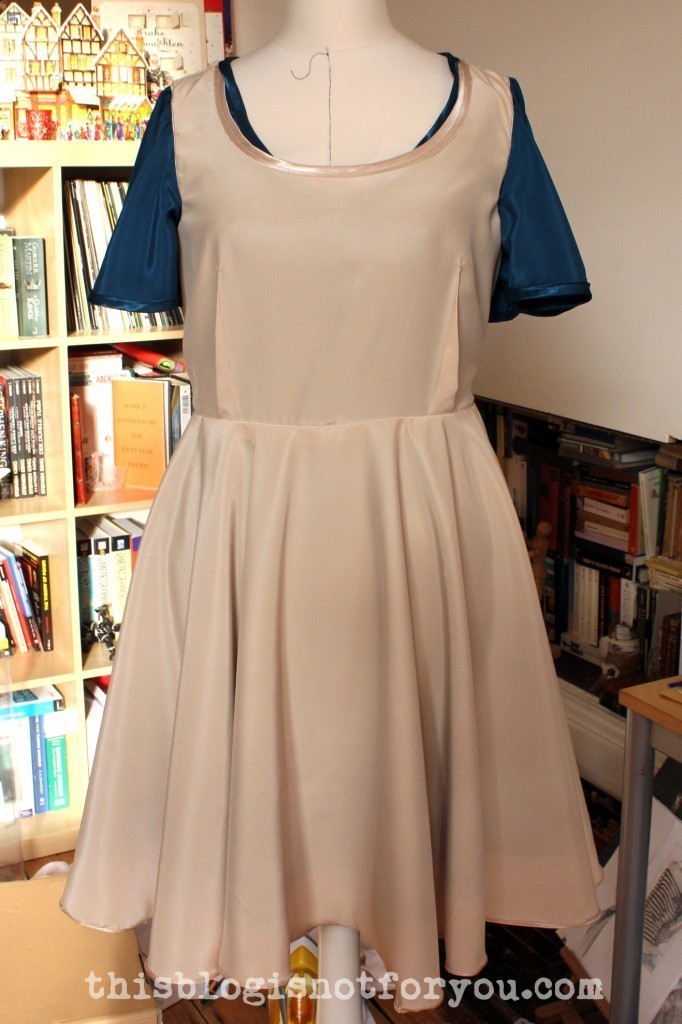
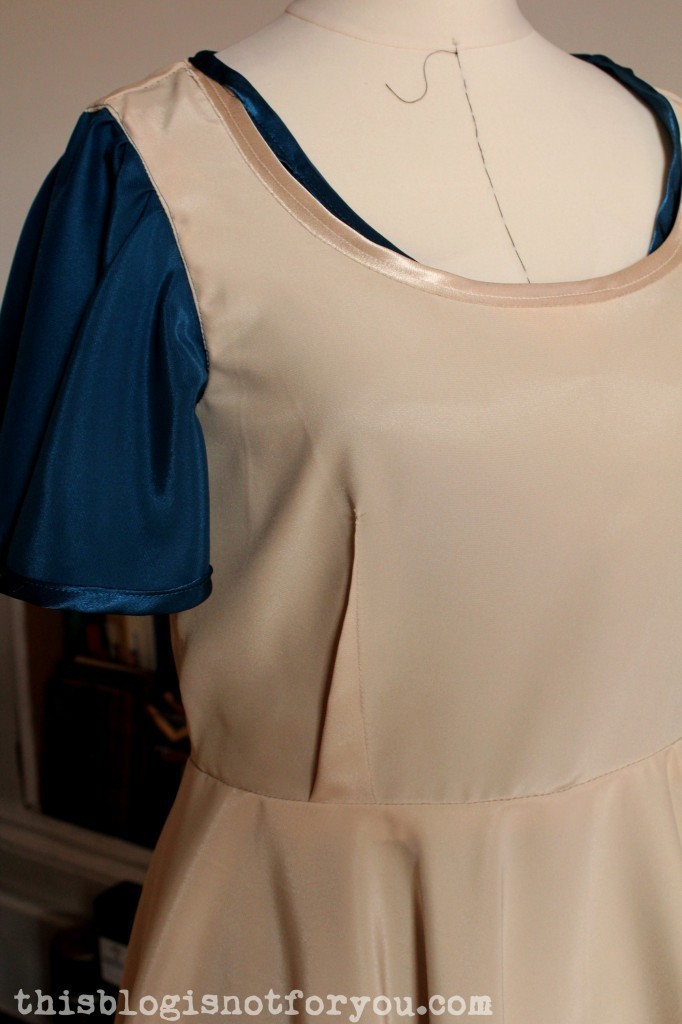
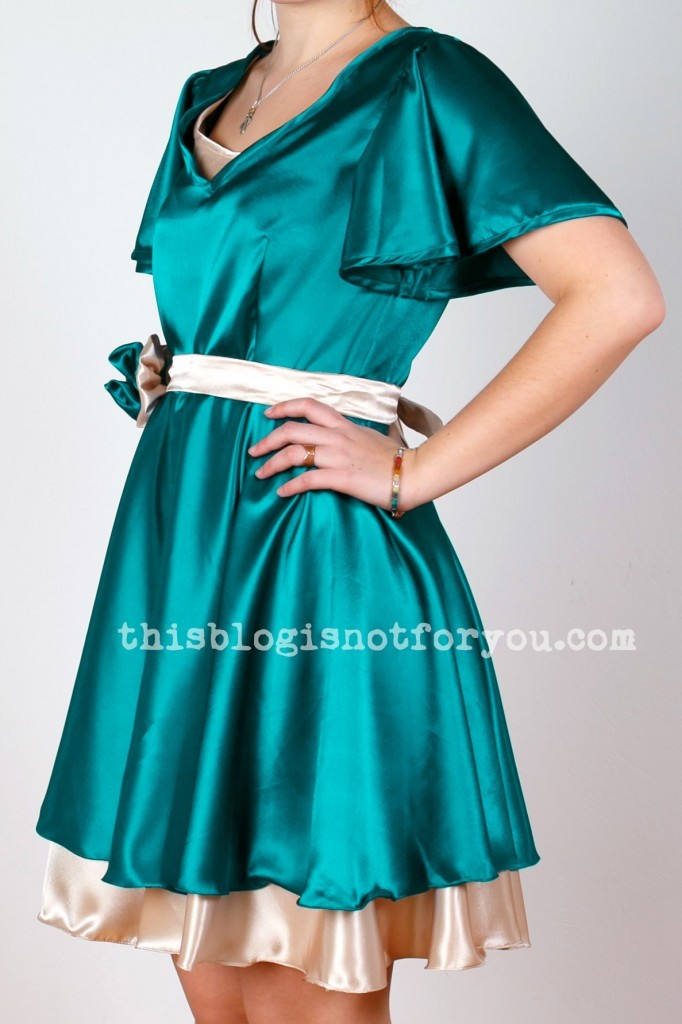
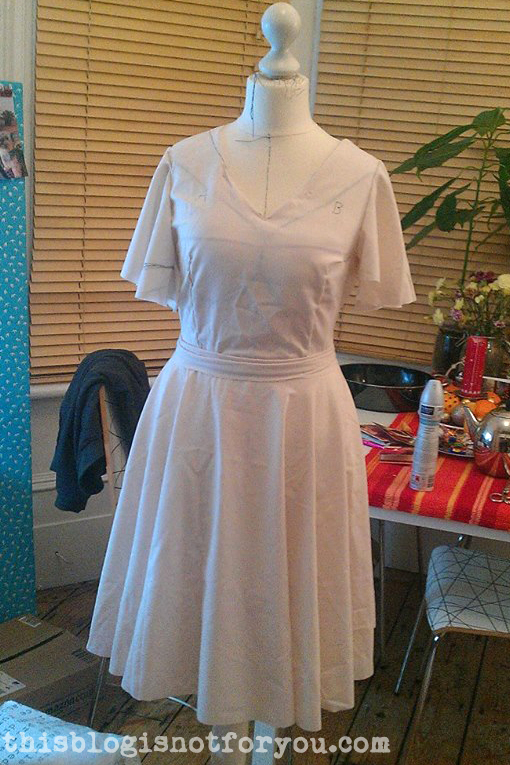
The dress is fully lined. The lining (same fabric in a contrasting colour) is right side up. Both layers, dress and lining, are made from the same pattern, same darts etc. The only difference is, the lining has a slightly different (higher and rounder) neckline, so it shows under the v-neckline and the circle skirt is about 4”/10cm longer. The sleeves are not lined.
Both layers are handsewn together at the shoulder seams and waist seams and machine stitched around the armskye.
I inserted the invisible zip with my sewing machine, the lining around the zip is handsewn with a slip stitch. When attaching the lining to the zip, be careful to leave some space between the folded edge of the lining an the zip. Otherwise the constant opening and closing of the zipper will tear all your handstitching over time.
How to Draft Half-Circle Sleeves
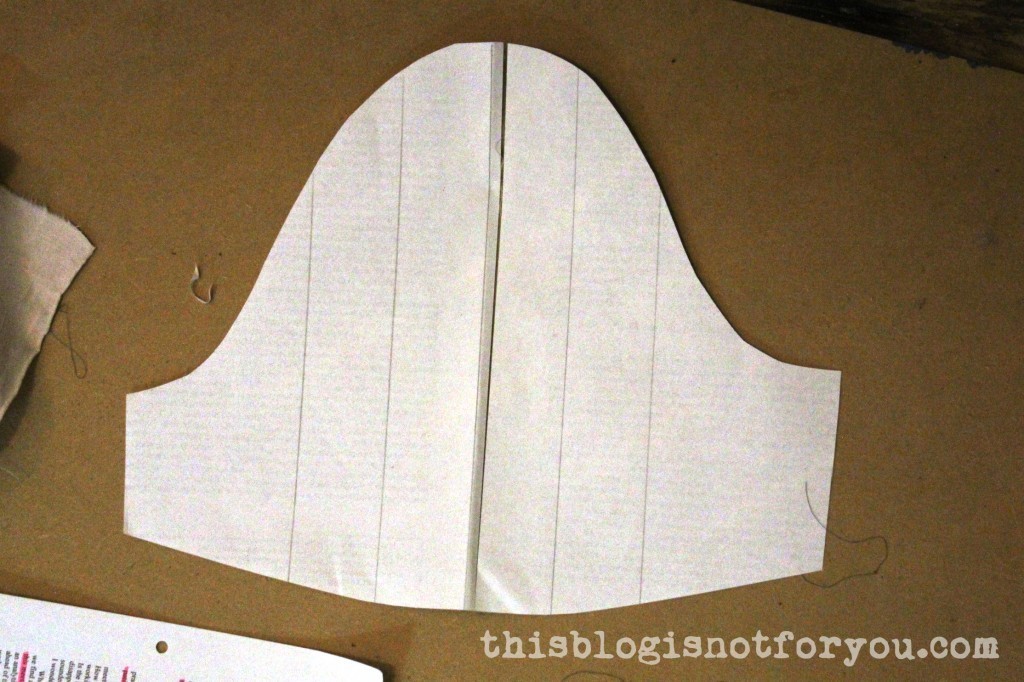
To get the right amount of flare for the sleeves, I tried out different styles, but decided to make half-circle sleeves in the end. For drafting these, you basically begin with a simple sleeve pattern. If your bodice pattern does not have sleeves, you will have to draft one according to the bodice pattern and your own measurements and liking.
After cutting out the sleeve pattern, you divide the pattern into six pieces (or more if you like) by putting five folds in the sleeve foundation or marking the lines with a ruler.
Before cutting up the folds, measure the lentgh of the sleeve curve, so you can check the measurements of the sleeve cap with the armhole later.
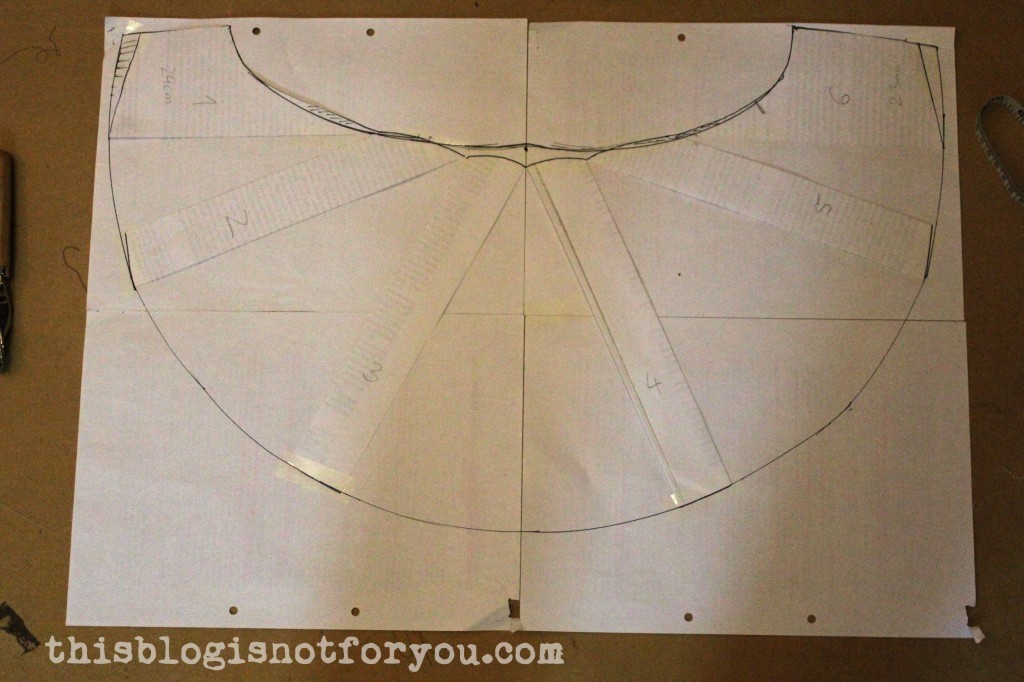
Now cut up the folds and spread into a half circle, making sure to keep the strips together at the cap end (to make this easier you can tape them together).
Tape the strips evenly spaced onto your new pattern paper. Check the measurements of the sleeve cap with the armhole and adjust if needed. Raise 1cm at the sleeve cap. Shape sleeve cap smoothly with a flowing line.
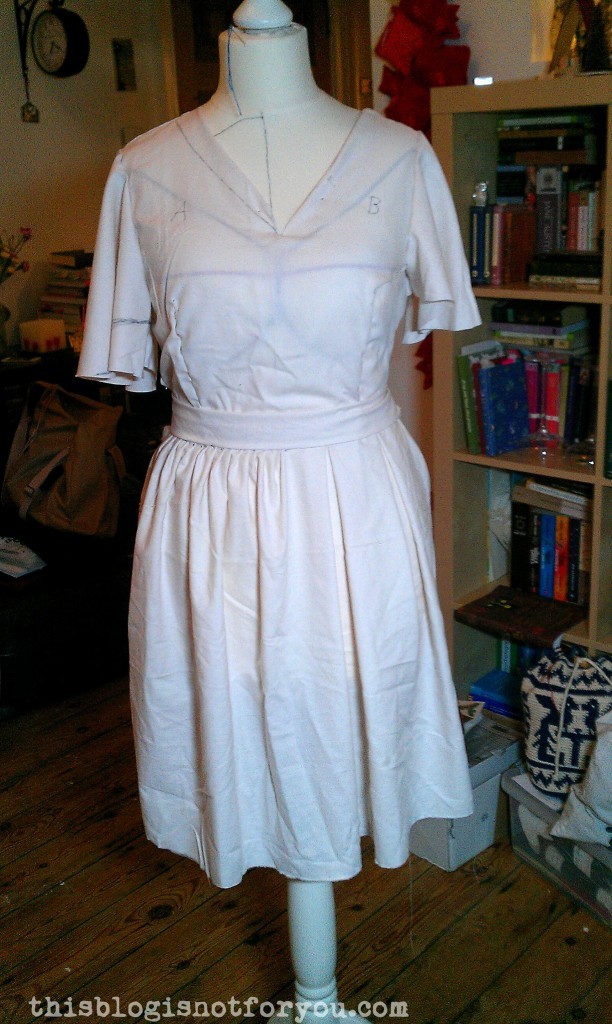
Make a muslin and see if the sleeve has the right length for you, adjust the pattern if needed.
I played around with different lengths and shapes.
You can always adjust the amount of flare and fullness by reducing or increasing the spread of the pattern pieces.
Please note:
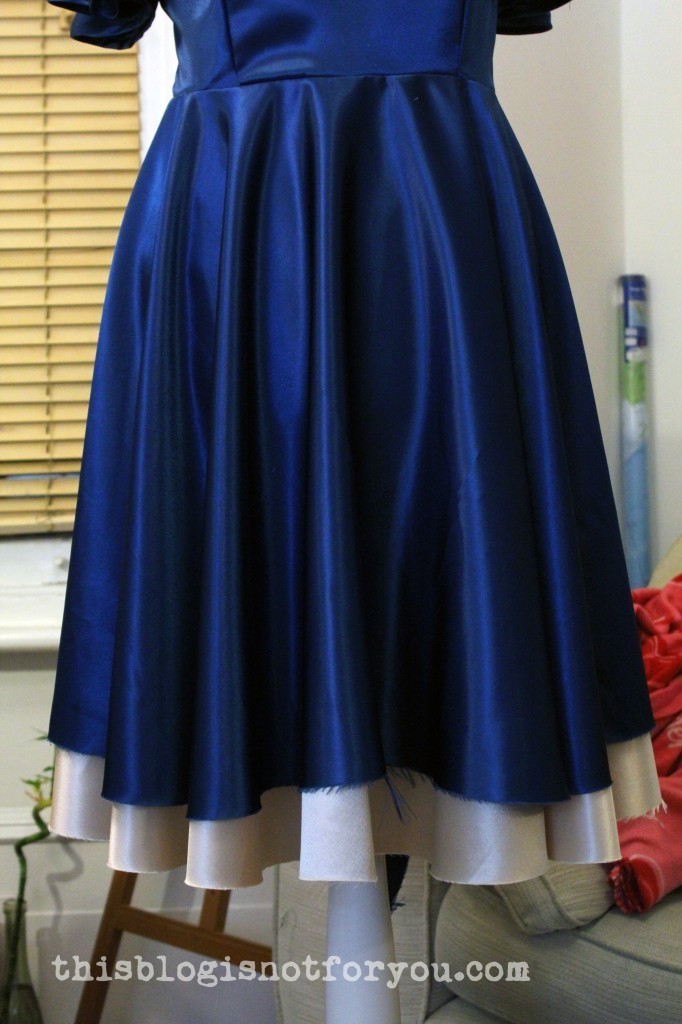
Before hemming your half-circle sleeves or circle skirts, adding binding etc. – Always leave the cut-out fabric hanging for at least one day/over night (works best with on a dress form if you have one)!!
The parts that are cut on the bias (something that is inevitable when cutting out circles or half-circles) will probably stretch after hanging for a while.
As you can see in this pic, the hem is slightly uneven after hanging on the dressform for two days. Carefully even out the skirt and sleeve hem by cutting off the excess fabric before hemming or adding binding to the edges. I recommend finishing the sleeves’ raw edges with a narrow hem, or binding off with bias binding made from the same fabric or in a contrasting colour.
Before wishing you all a happy weekend full of sewing, let me share this gem with you 🙂
Hi my lovely readers!
I hope you all had a wonderful Christmas!
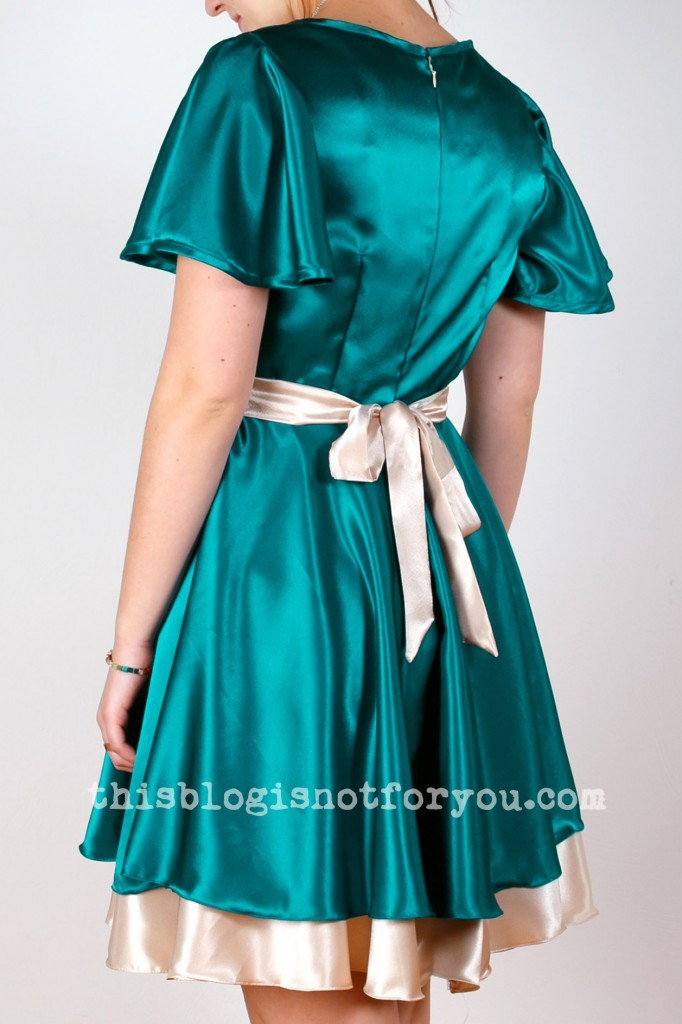
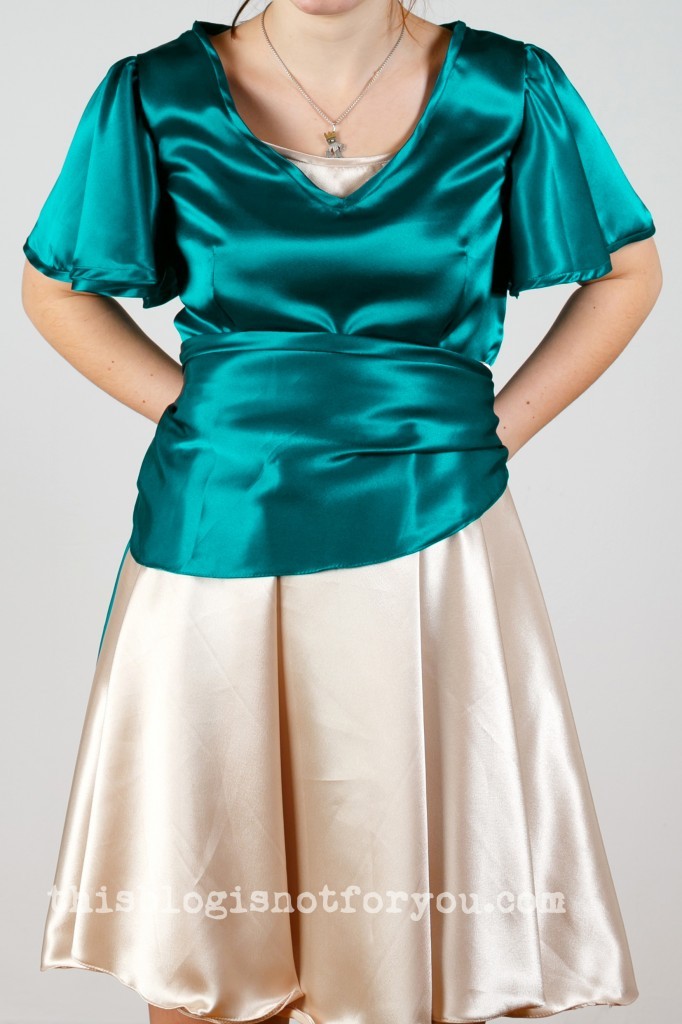
Now that the holidays are over, I can finally post some pictures of the bridesmaid dress I made for my best friend whose sister is getting married. It was a Christmas gift and she wanted the dress to be a surprise, that’s why I had to keep the pictures secret.
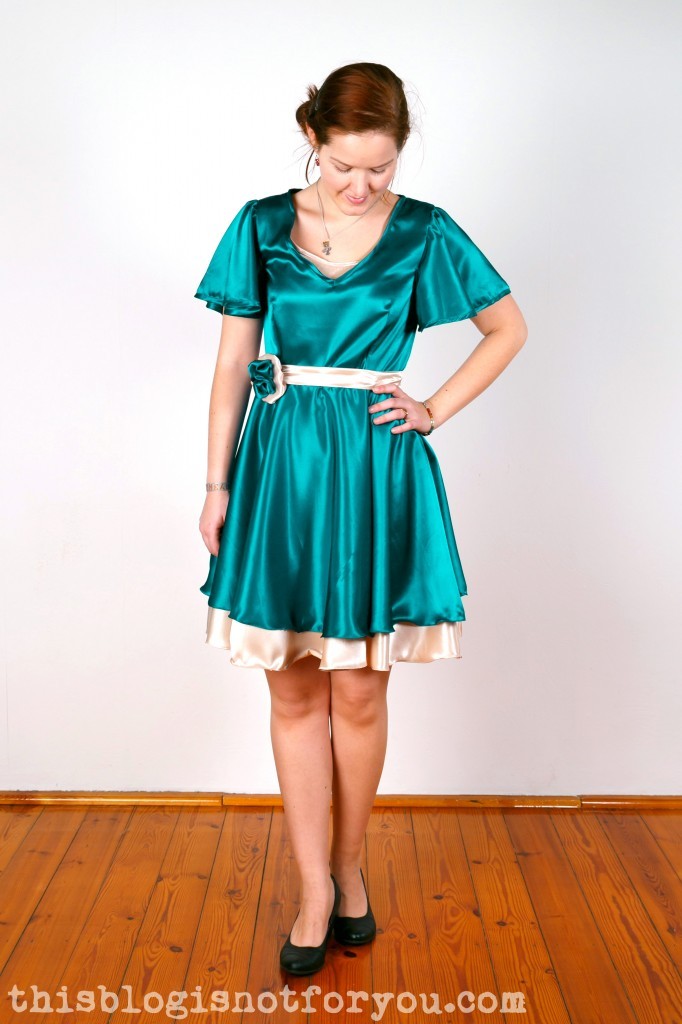
I used a simple Burda bodice pattern to get some orientation, but had to move all the darts and the waist and shoulder lines to match my friend’s measurements. The circle skirt and sleeves are completely self-drafted.
I tried different options for the skirt (e.g. gathered or box pleats), but in the end the full circle skirt looked so much better with the half-circle sleeves.
I used a turquoise-blue silk satin and the same fabric in creme-white for the lining, belt and underskirt. The dress has got a creme-white invisible zipper in the back and an additional hook and eye closure. I made a little flower for the belt which can be removed or used as hair accessory.
The belt is detachable as well and the bow can be also worn in the front, e.g. with the flower on top.
Hemming this rather heavy fabric was horrible, especially since I never hemmed a circle skirt before. In the end I used the narrow hem foot as nothing else seemed to work. The hem either puckered or rolled up. I tried to handsew a invisible hem, but the cirlce skirt was giving me a hard time and I had to get out the seamripper after two hours of swearing.
The narrow hem still rolls up a bit, but I kind of like it better now, as it gives the hem and skirt a rose petal-like shape which goes well with the sleeves, I think.
If anyone has any tips for hemming heavy satin-like fabric, pleaaaaase let me know how you deal with this!!!
The dress fits my friend perfectly and I (and my bestie, as well) are super happy with the result. (Btw, this dress is #17 of my 27 Dresses Challenge!)
I have more pictures of the sewing process, but my internet connection is really bad as I’m still on holiday. I will probably upload a second part in the next few days for those of you who are interested in the making of!
I have thousands and thousands of sewing projects planned (I probably won’t be able to finish in a million years) and I hope to bring my 27 Dresses Challenge to an end (and finally buy an overlocker)!

 I enjoyed reading all these resolution lists last week, and since one of my sewing/blogging resolutions is “Make Lists & Plan Projects ahead”, I thought it would be a good start to begin the year with my own list of “re-sewlutions”.
 I love blazers. I love red. Bright red blazers can look really cool, but this one was a weird mixture of too bold and too boring.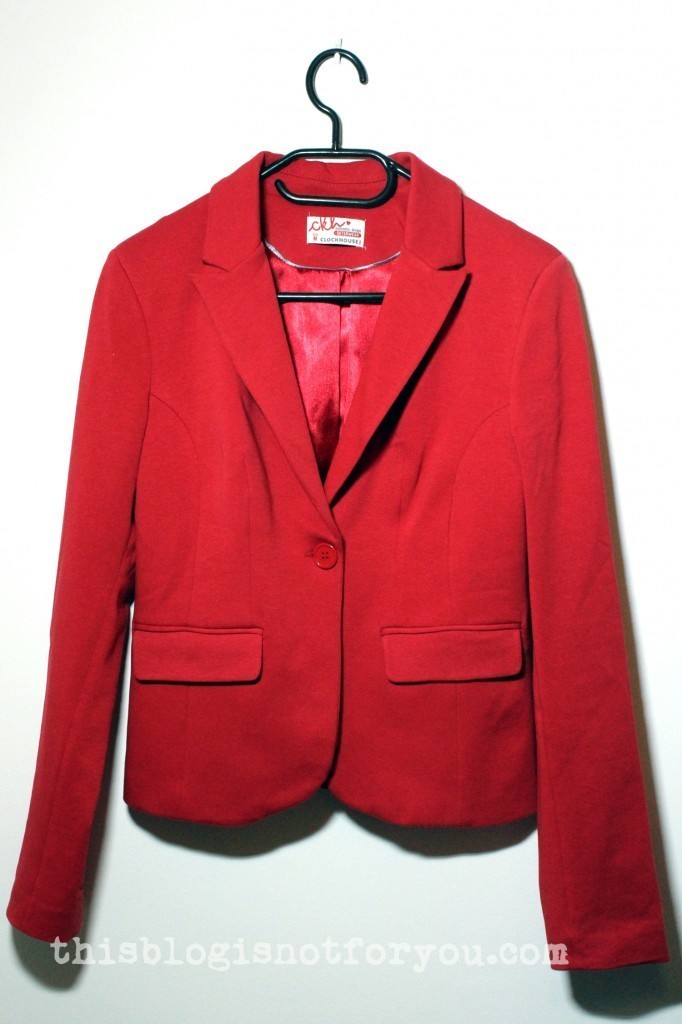



 I used the last days of my Christmas break for some quick refashion projects. I have a huge pile of old or thrifted clothes I keep for refashion projects and recently, a friend gave me a bunch of cute dresses and sweaters that doesn’t fit her anymore.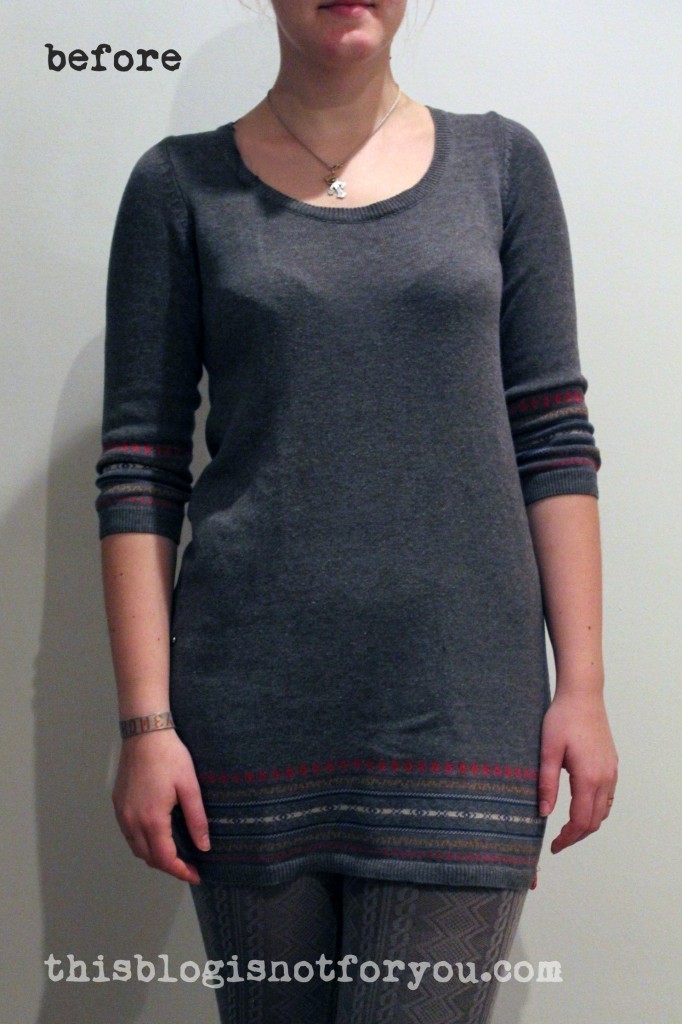
 After sewing two rows on each side of the marked line, use your fabric scissors and carefully cut the two pieces apart. The seams will prevent the knitted fabric from fraying. Be careful not to pull the seams as this will stretch the fabric and it will start to fray.
 Finish the hem of the sweater. Then sew the cut-off part onto the neckline (left side up, so the right side is showing when turning the cowl neck inside out).
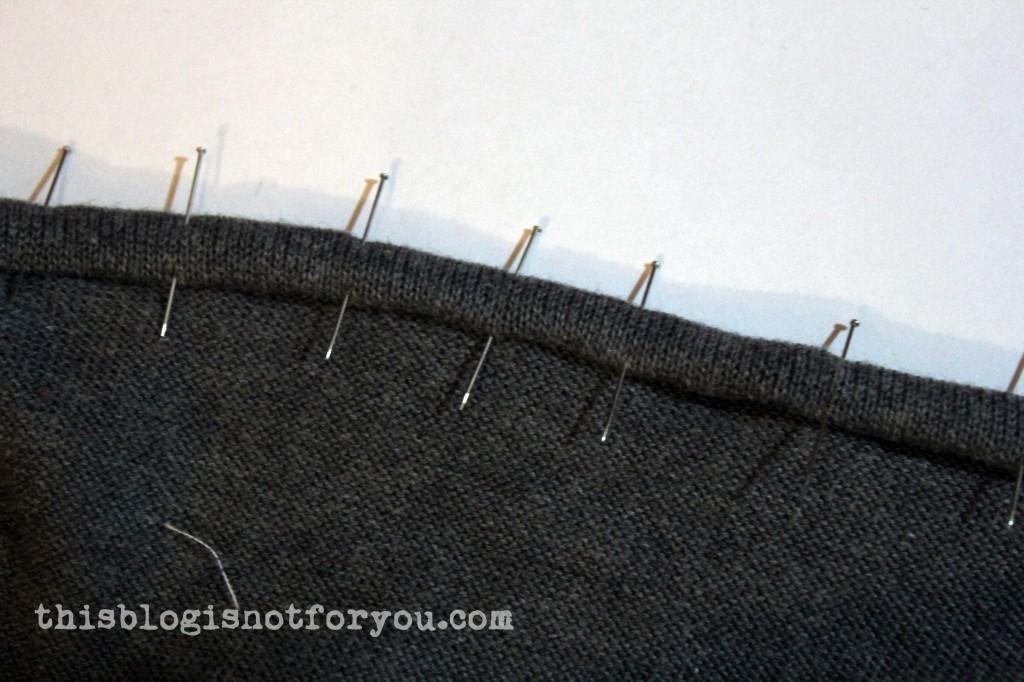 I’m quite happy with how it turned out, although I this this technique probably would work even better with a sweater that has a slightly higher neckline (for a more snug fit).






 Hi my lovely readers!
 I used a simple Burda bodice pattern to get some orientation, but had to move all the darts and the waist and shoulder lines to match my friend’s measurements. The circle skirt and sleeves are completely self-drafted.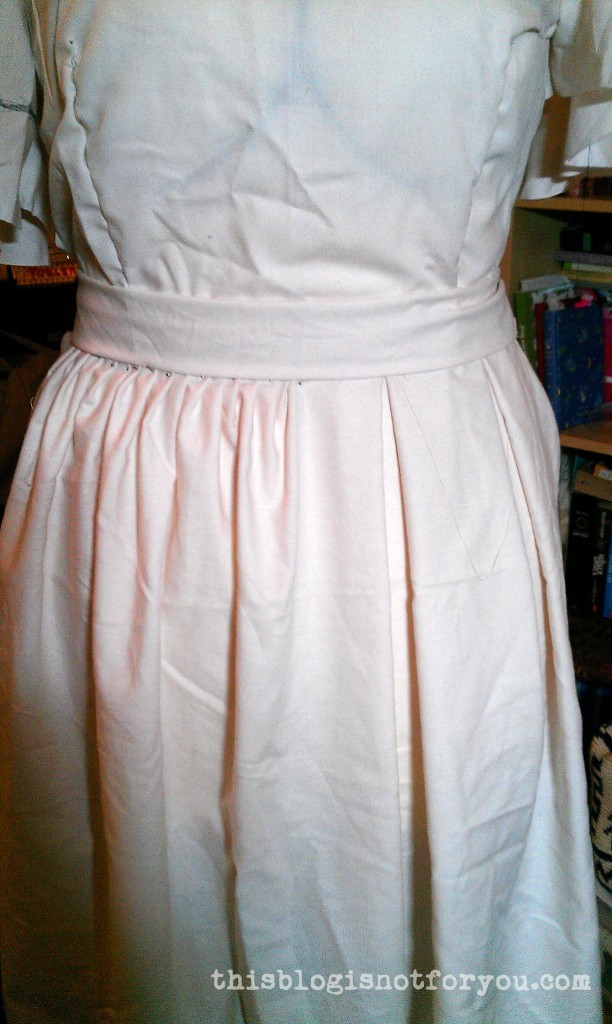
 The dress has got a creme-white invisible zipper in the back and an additional hook and eye closure.
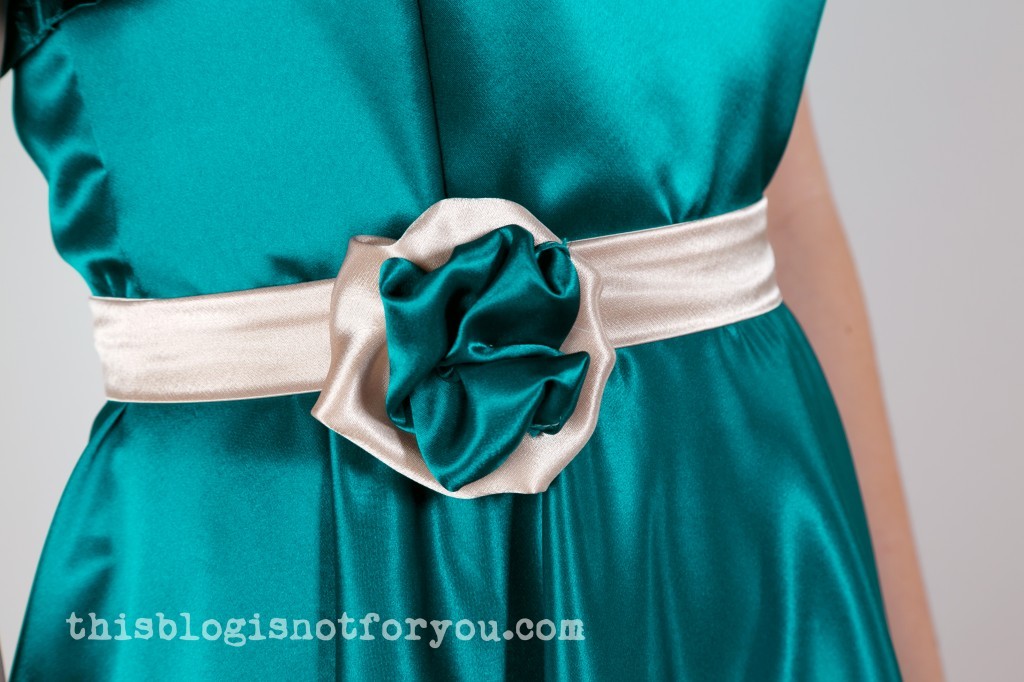 I made a little flower for the belt which can be removed or used as hair accessory.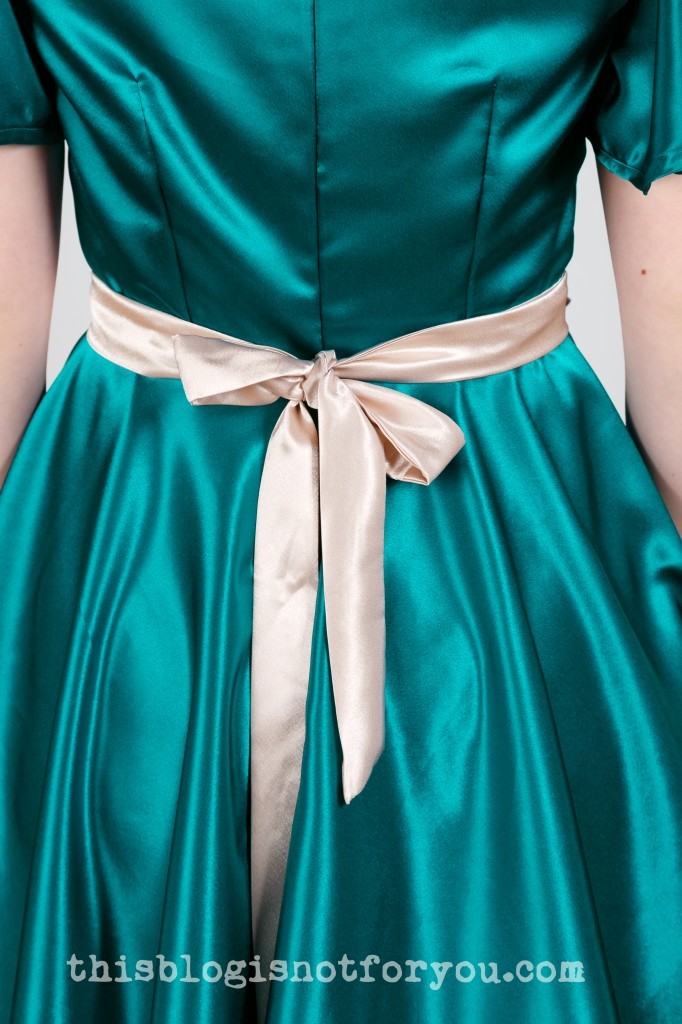
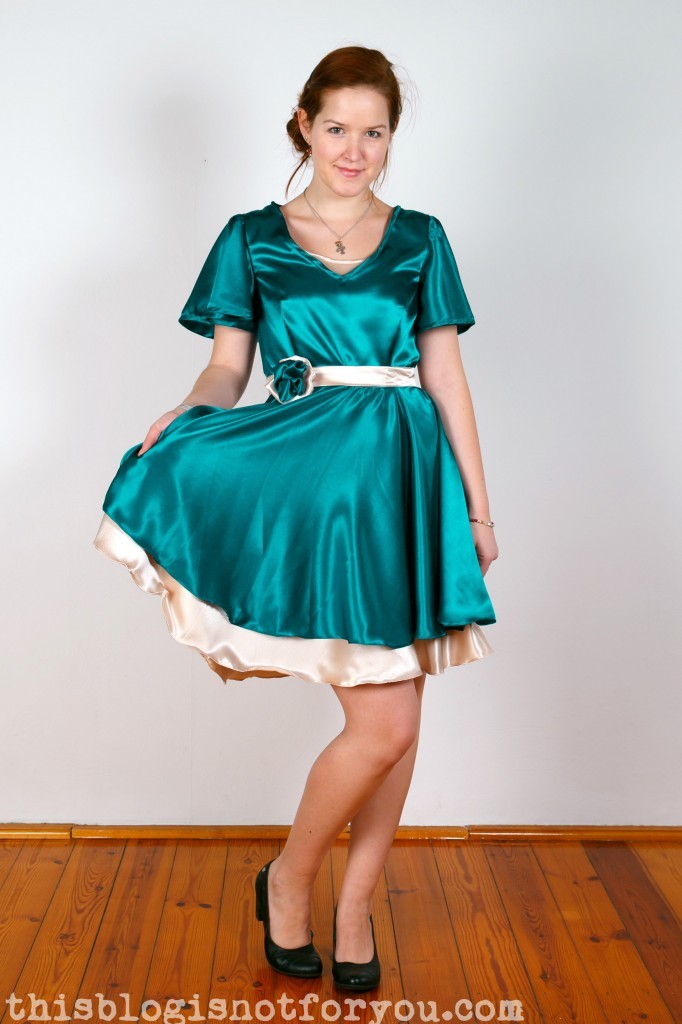 The dress fits my friend perfectly and I (and my bestie, as well) are super happy with the result. (Btw, this dress is #17 of my