Refashion It! Adding Uniqueness to Your Clothes with Buttons

adding buttons to simple clothes by thisblogisnotforyou.com

We are starting this week with buttons! Why? – Because everyone love buttons! (If you don’t, please leave a comment saying why!)

I will share some more crafty button ideas later on, but let’s start with refashioning some clothes (because that’s what we love as well!).

What we don’t like at all? Spending loads of money shopping just to see her with the same shirt or dress a day later.

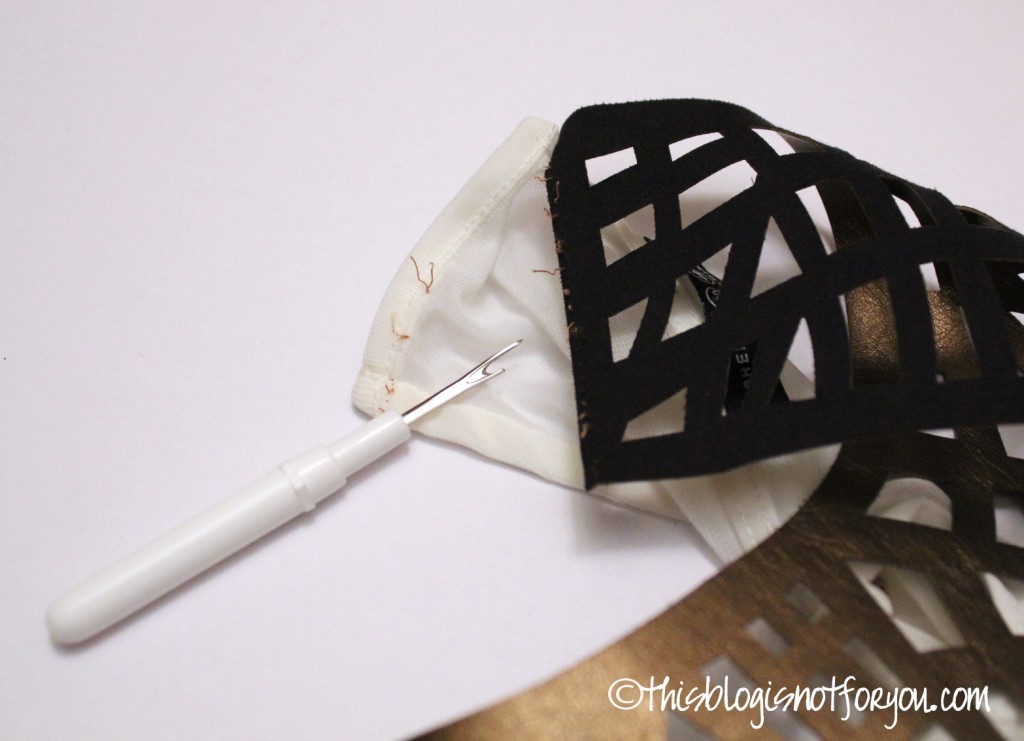
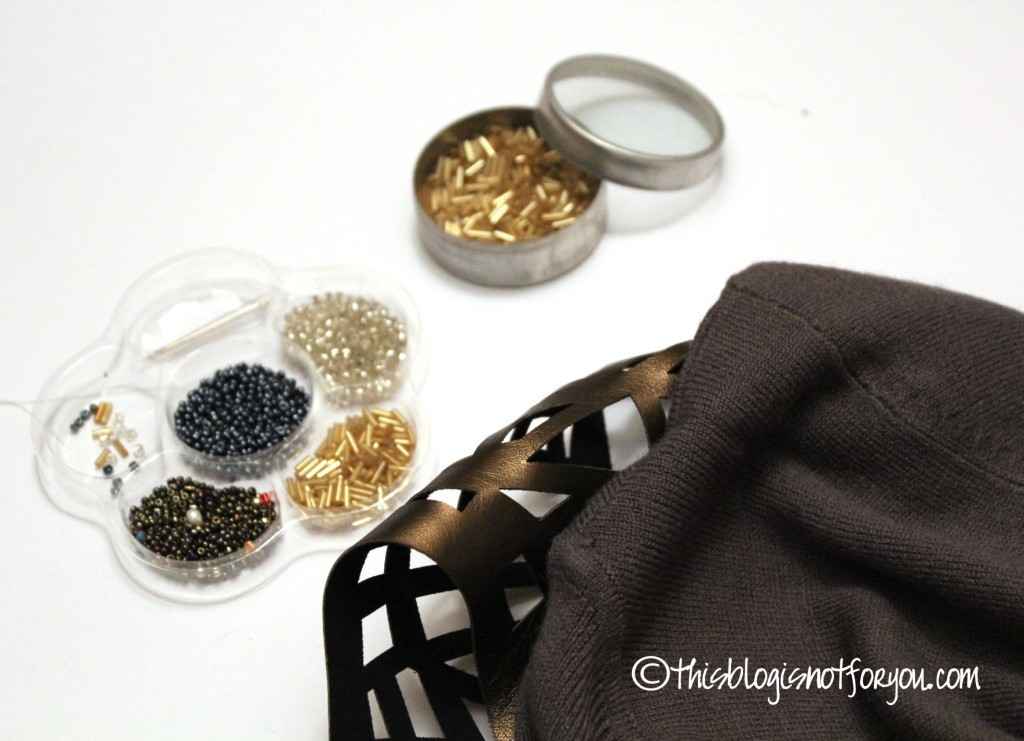
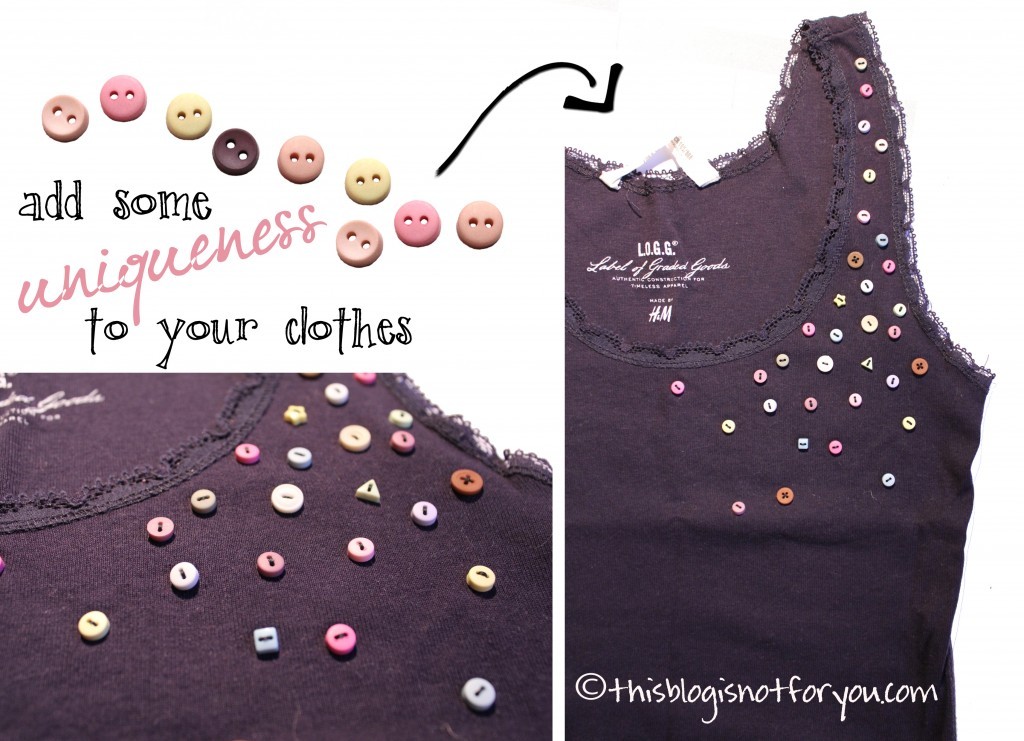
Adding some –  fun – cute – nifty – buttons to your clothes makes them unique in only a few minutes. And you don’t need to be a seamstress to add some spice to your style. Just needle and thread – and buttons.

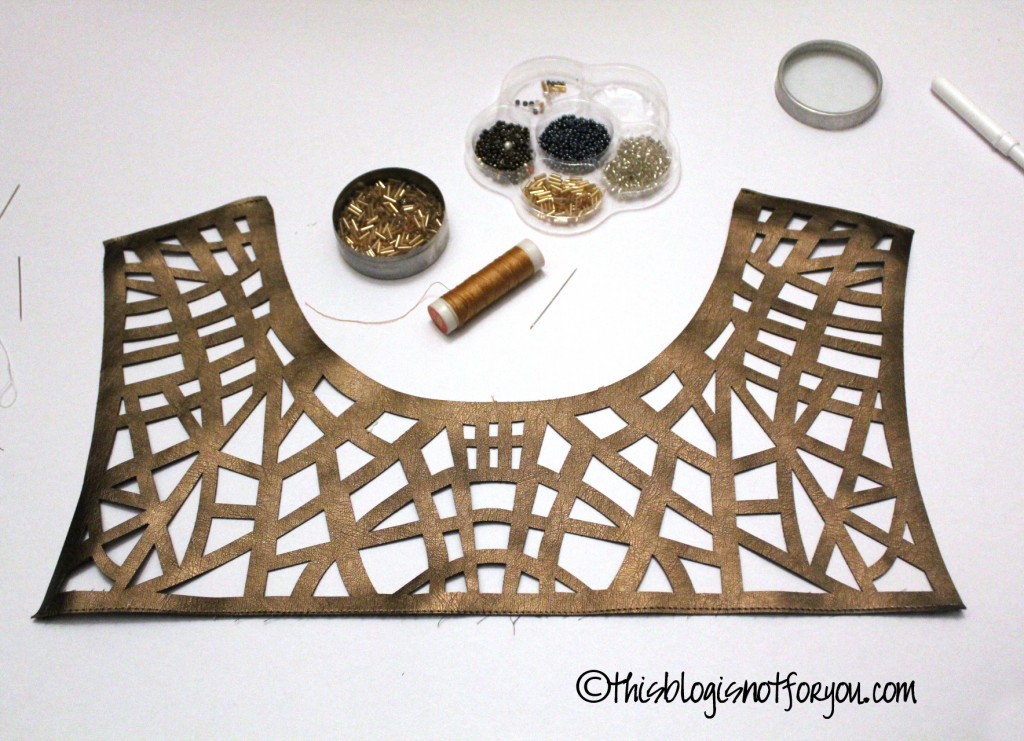
Especially skirts and shirts are great to refashion with a handful of pretty buttons. Here are some of my button-ideas:

adding buttons to simple clothes by thisblogisnotforyou.com

This simple tank top got sprinkled with super cute mini buttons I bought during one of my trips to Oslo. (This city has the best craft shop ever!)

adding buttons to simple clothes by thisblogisnotforyou.com


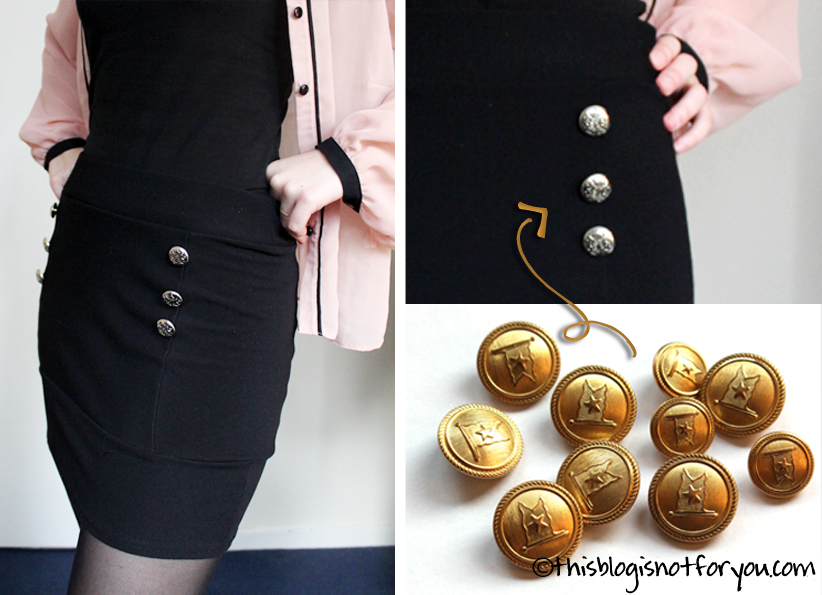
This sexy black mini skirt seemed rather plain after a while, especially because I already have a similar one. So it got some posh golden buttons. Six buttons make a lot of difference, don’t you think?

adding buttons to simple clothes by thisblogisnotforyou.com

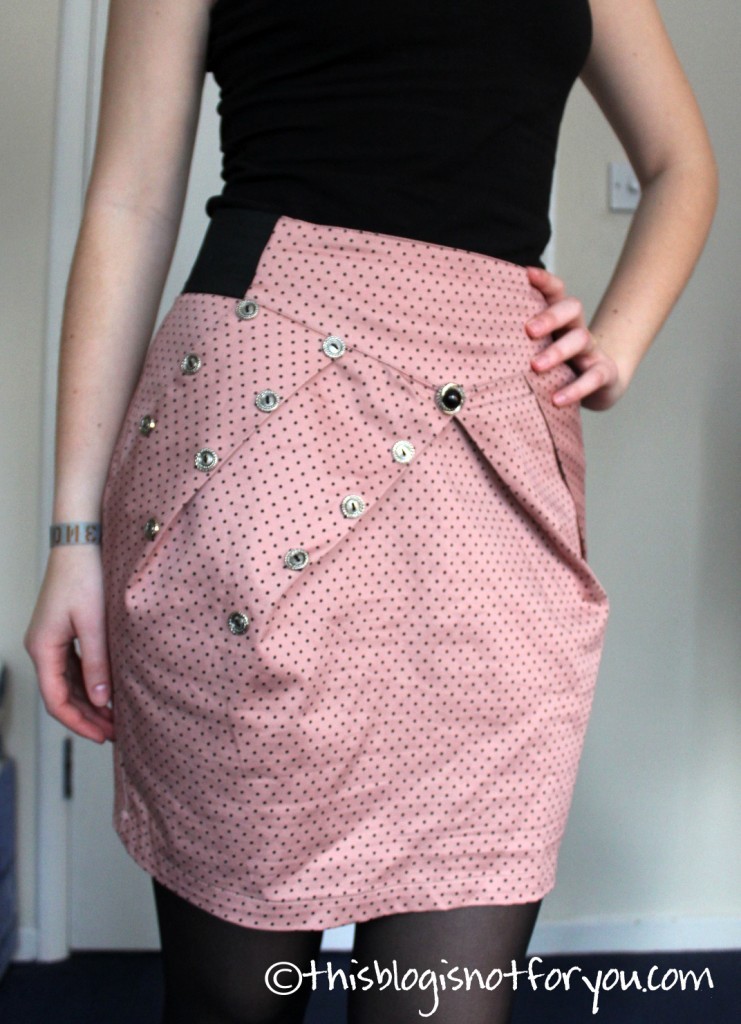
This skirt was already pretty cute, but I (of course!) saw someone wearing it only a few days after I bought it. Which made me do what? – Add some buttons.adding buttons to simple clothes by thisblogisnotforyou.com

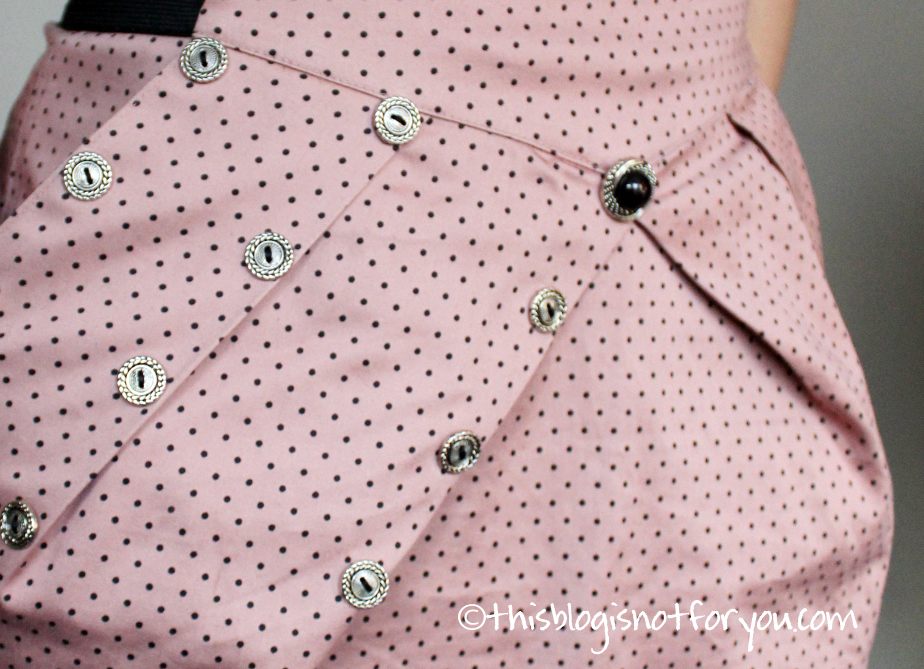
Two handful of silver buttons. Looks a bit more rock star now.

adding buttons to simple clothes by thisblogisnotforyou.com

This cute skirt had done nothing wrong. It got some buttons anyway. I picked buttons in different sizes and in the same colours as the hearts/keys/locks. (To add more cuteness to the cuteness)

More button ideas coming up soon!


 this post was featured:A Jennuine Life Thrifty to Nifty Thursdays Feature

Refasion It! The Embellished Sweater {DIY appliqué}

Last week I went bargain hunting for some easy weekend upcycling projects. (I wrote about it in my “When a Crafter goes Shopping” post and explained my “method” of selecting the clothes.)

Now it’s time to share my first finished project with you: the embellished sweater.
embellished sweater

embellished sweater


When I saw Trash to Couture’s post a few weeks ago, I wanted to try a knock-off project.
Unfortunately I didn’t have any nice appliqués, so I postponed the project.

But when I went shopping last week, lucky me found a nice top with a faux leather insert. When I saw it I immediately had to think of the Trash to Couture DIY sweater, so I bought it. I also found a matching anthracite-coloured sweater that was even cheaper than the top.

embellished sweater

embellished sweater

The faux leather insert wasn’t embroidered, which wasn’t that bad since I had the beads and everything to do it myself at home.

I have to admit, as easy as it was, you need to have patience. A. Lot. Of. Patience.
I am normally not very much blessed with patience, but after weeks of essay writing and other assignments it was a welcome change.

embellished sweater

I started with simply removing the faux leather from the rest of the top. The white fabric will be used for one of the next projects.

embellished sweater

After trying different combinations, I decided to use some dark blue, brown and champagne-coloured beads that matched the sweater as well as the gold-brown faux leather.

appliqué DIY

Appliqué DIYappliqué DIY

To explain the embroidering part: A picture is worth a thousand words. This is a copy of a page of Burda Magazine. I know, it’s German, but the pictures are pretty self-explanatory.burda embroidering instructions

I used the mannequin for pinning and basting the appliqué to the sweater.embellished sweater

embellished sweater

After basting I handstitched the appliqué onto the sweater. Then I cut the remainder of the sweater on the inside, leaving a small seam allowance, and finished the seam to keep the knitted fabric from fraying.embellished sweater

embellished sweater

I love how the sweater matches the petticoat I made a few months ago. Fortunately I still have some of the butterfly fabric left and will definitely make a pleated skirt out of it in the future.
embellished sweater

embellished sweater


Refashion It! Upcycling a Lamp with Handmade Paper

I upcycled this old lamp from my parents today. Quick, inexpensive and pretty, such a fun thing to do! It took no longer than 30 minutes and all I used was a sheet of handmade paper bought in a stationary store and double-sided adhesive tape.

The paper was beautiful and not expensive at all.

Finding the right size for the pattern was a little tricky. Make sure your sheet of paper is big enough!


This post was featured:

Refashion It! [Upcycling a stained shirt Tutorial]

So I bought a white shirt. And spilled something on it. Of course, that’s what white shirts are for. Luckily the stain was on one of the sleeves, so I thought about cutting them off. I read a lot of blogs about upcycling clothes lately and discovered a whole bunch of knock offs of this jcrew shirt:

My craft alarms set off and I decided to do this myself. Since I wasn’t sure how this would turn out, I tried it on a second, even older and more worn-out shirt before. Just in case. It turned out pretty well and now I have two – goody!

For doing it I found Suzannah’s tutorial most helpful. She blogs at Adventures in Dressmaking – a totally awesome blog you should check out if you’re into sewing and crafting.
Ok, now: Here’s my version of how to do it:

Mark the line where you want to cut off the sleves. To find out what’s the perfect length for you, put on the shirt, measure from the end of the left shoulder to the point where you want your sleeve to end. Add the seam allowance and mark the line at a right angle.

Cut off the serged seam allowance and the hem.

Trim the pieces of fabric to two even rectangles.

Cut one of the sleeves into evenly sized strips of about 1,5 inch/4cm.
Cut the other one into larger strips (2inch/5-6cm).

Hem the shortened sleeves of your tee.

Sew all 1,5 inch strips together into a longer single strip. Do the same with the 2 inch strips.

Now, for the ruffles:
Sew along one side on both of your strips with straight stitches. Use large stitches and a tight tension, it makes it easier to pull the top thread to gather the fabric.

Gather the first strip piece (1,5 inch) until it reaches the circumference of the neckline of your tee and pin it in place (see picture below), pointing up.

Sew along the seam of the ruffles.
Now do the same with the wider strip piece, pin it starting at the shoulder seam, pointing down. Cut it shortly before reaching the middle of the front neckline/ just above the V, if you’re using a V-neck tee. Sew down.

Use the cut-off rest and sew it on the top of the second strip. Start a few inches behind the shoulder seam and cut the strip off a few inches after the second strip. This way you’ll get a smooth transition between the pieces.

Trim the second and third strip into a nice round shape at the end. And you’re done!

For the white one I added a lace layer instead of the second strip.

Because just trimming the lace at the end makes it look rather ragged, I pinned it in place in a round shape, as you can see in the picture below. This way I wont need trimming.

Before adding the third strip:

I also added some lace to the hem of the sleeves.

Now I’m glad I didn’t throw it away. Two “new” shirts – yay!

Refashion It! The Old Mirror [sort of tutorial]

I’m a girl. And I adore jewelry. Of course.

I love buying it, wearing it and making it myself. The only thing that annoyed me for years was not knowing how to store it.

I have a really nice jewelry stand for necklaces, but nothing for earrings – one of the reasons why I often wear the same earrings for weeks, because I don’t think of all the others stored in little boxes somewhere.

I found some really nice earing holders in a cute shop in Covent Garden, but too expensive for my taste. Nevertheless, they did inspire me to make my own.

Since I love how everything’s reflecting in the mirrors in jewelry shops and therefore looks so much nicer, I came up with the idea of upcycling an old mirror that has been waiting in a corner for months. (So old that it has an “made in GDR” stamp on the back cover).

It was rather easy to do, but it took some time and creativity to decorate it.

If you got an unneeded mirror and an old wooden frame, some wire and some bells and whistles for decorating, it’s easy to copy.

Here are some pictures of the crafting process:

The mirror’s original colour was red. Before painting it and adding wire and decoration, I removed the back cover and the glass panel.

First I sandpapered then painted the frame. (I did not only use plain white paint, but also light browns, ivory and grey to make it look more vintage). I used some old florist’s wire and shaped it with help of a pencil. I attached it to the frame by wrapping the ends around  small nails (1”) .

Decorating is definitely the best part, but it takes a lot of time to find things that go well together and I tried a lot of different ideas until I came up with this:

I printed pictures on book pages and cloth, wrapped satin ribbon around the wire and found some pretty postcards to glue on the mirror.

Finally, all my little treasures have their own display.


We haven’t found a way to nail stuff onto the wall yet, since we don’t have wallpaper in our new flat (the plastering starts crumbling immediately 🙁 ). But it doesn’t look too bad sitting on the dresser.