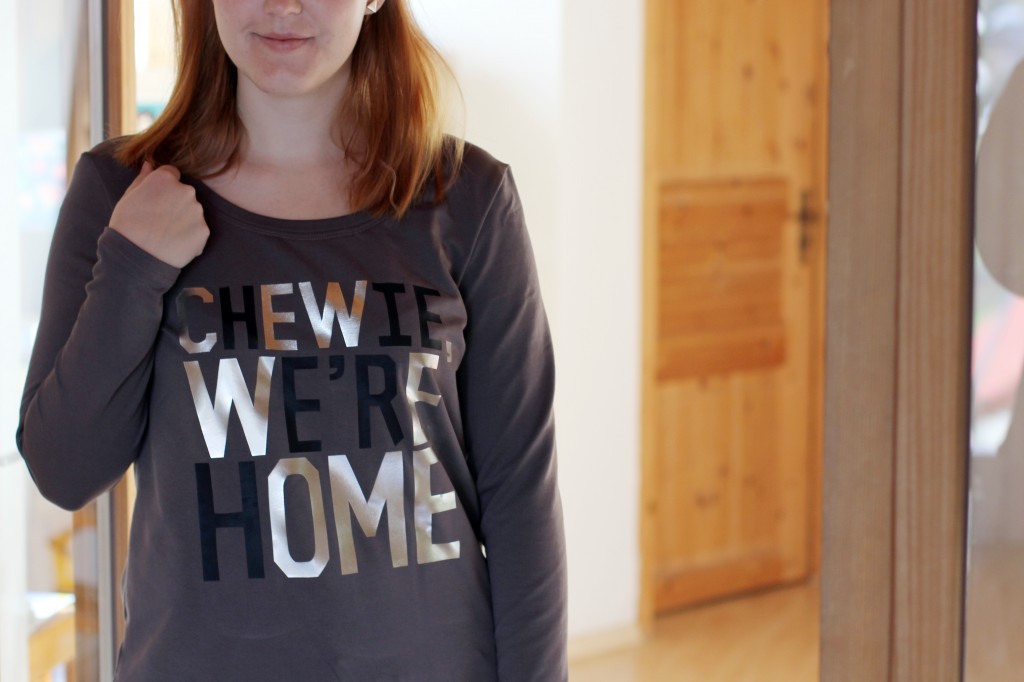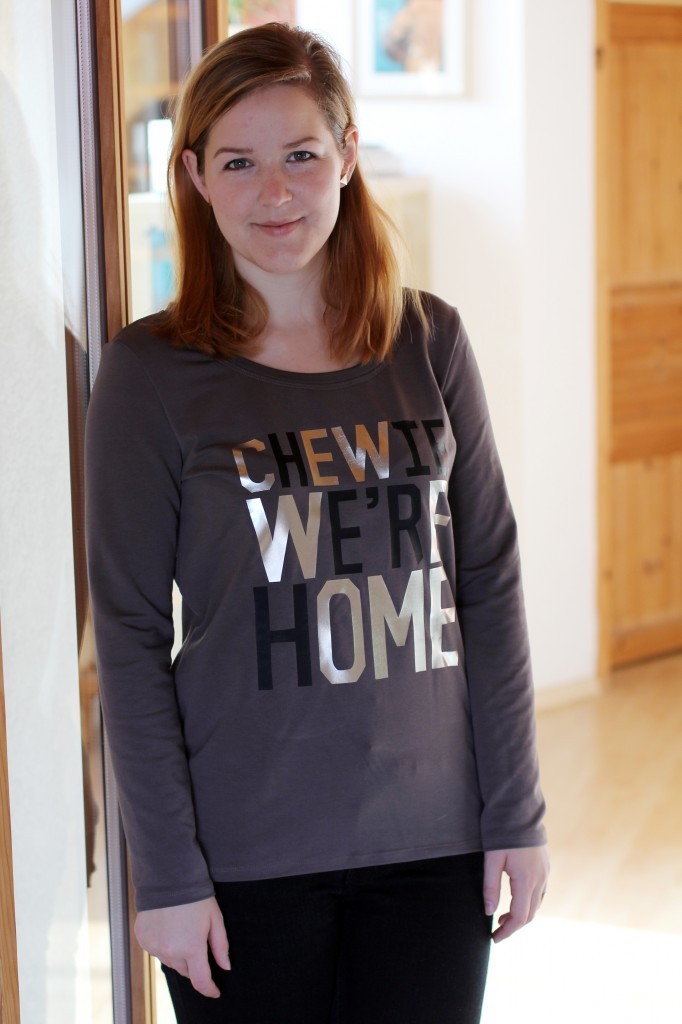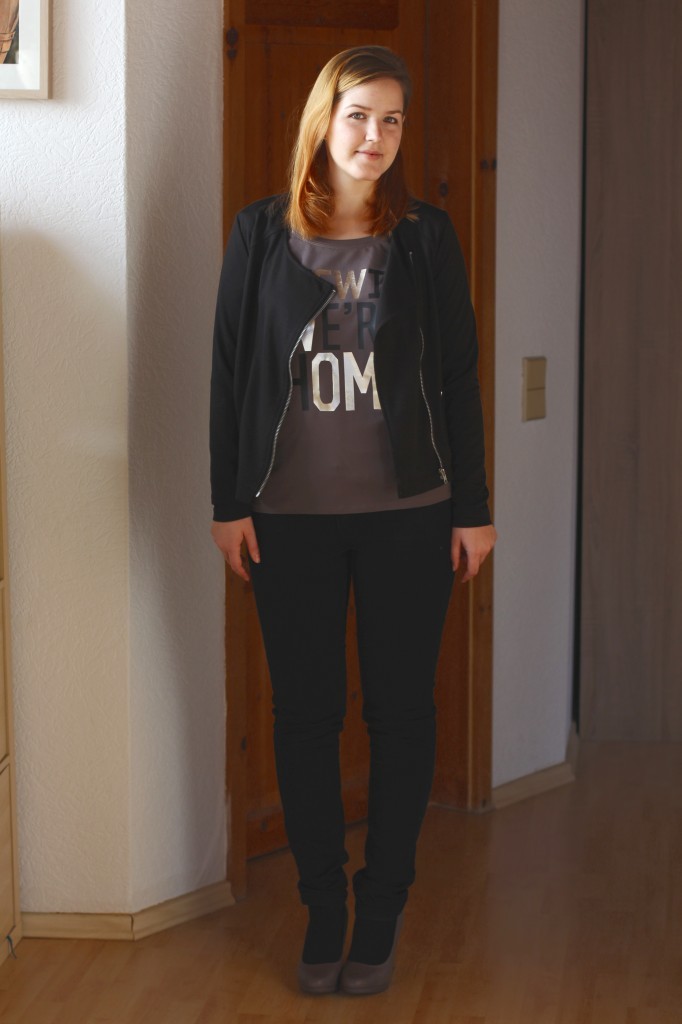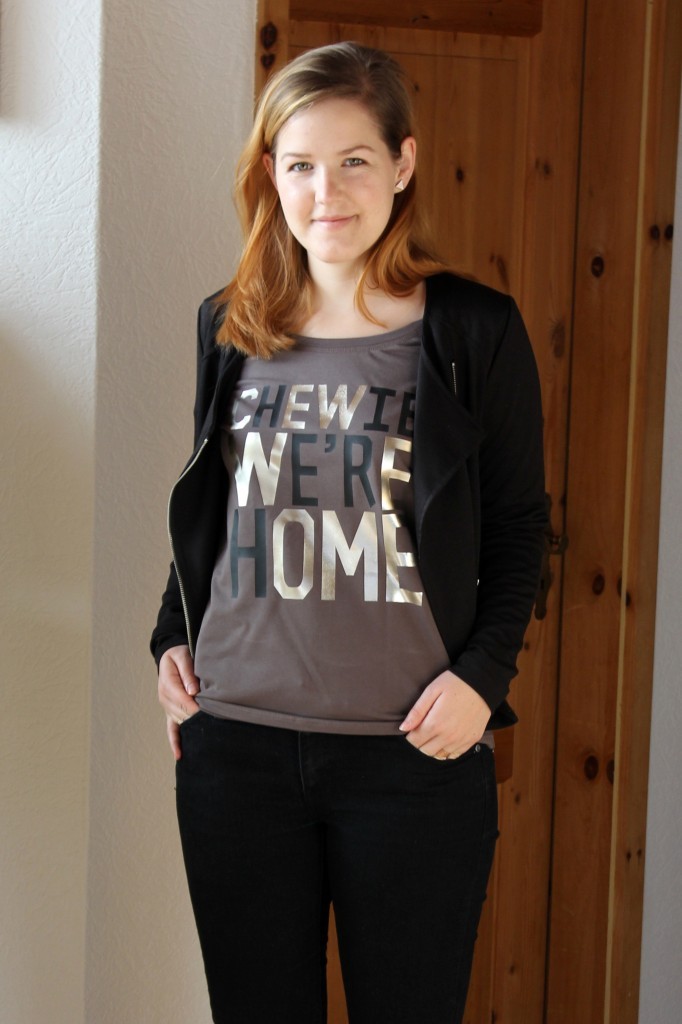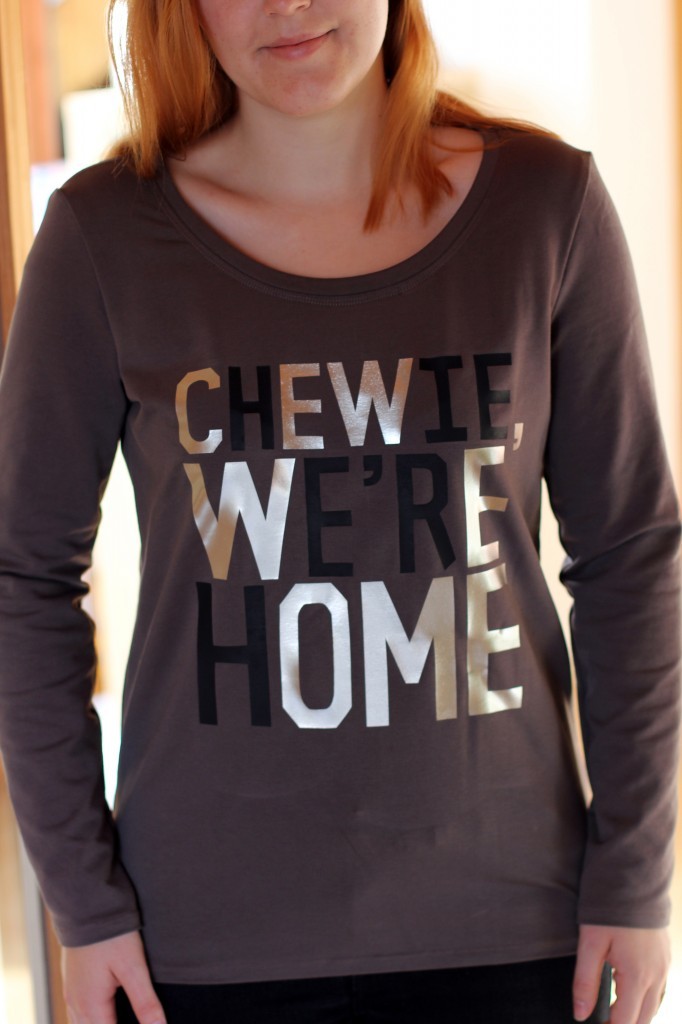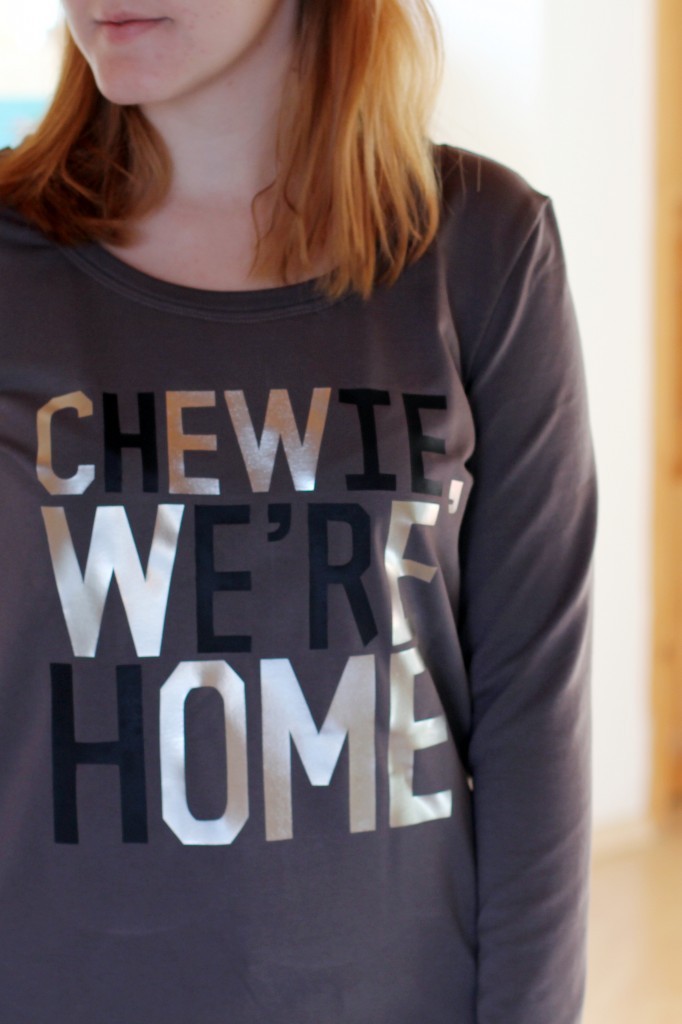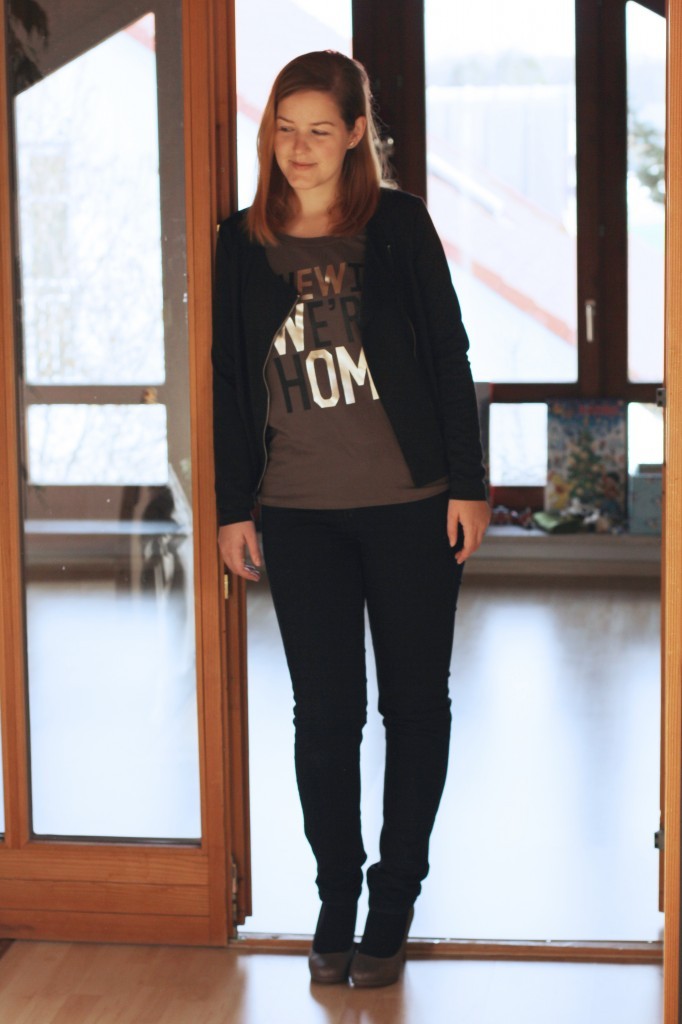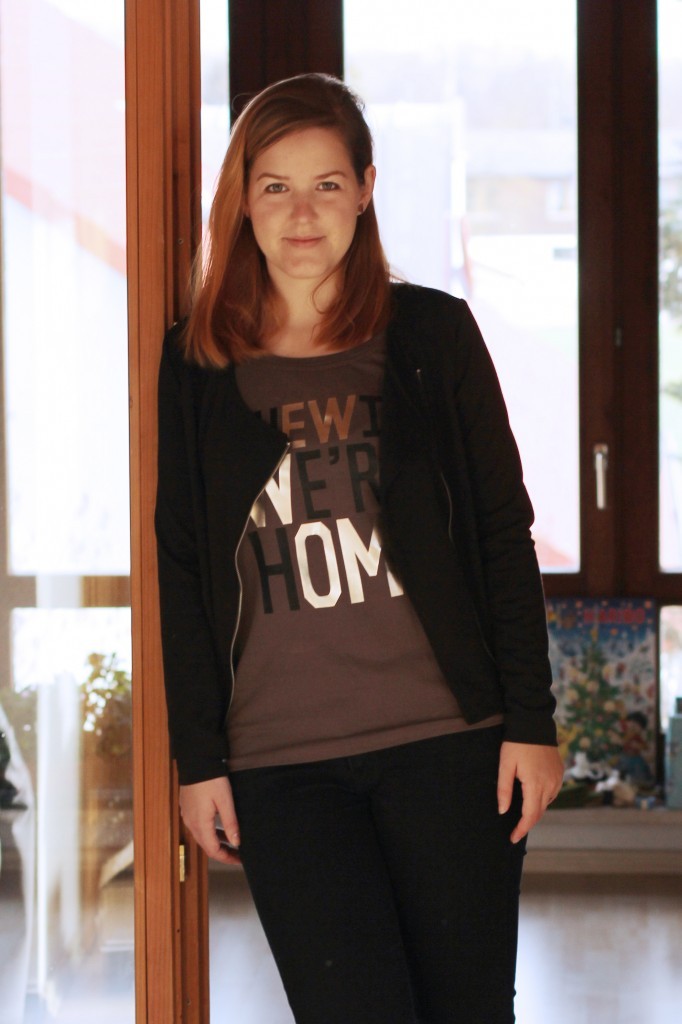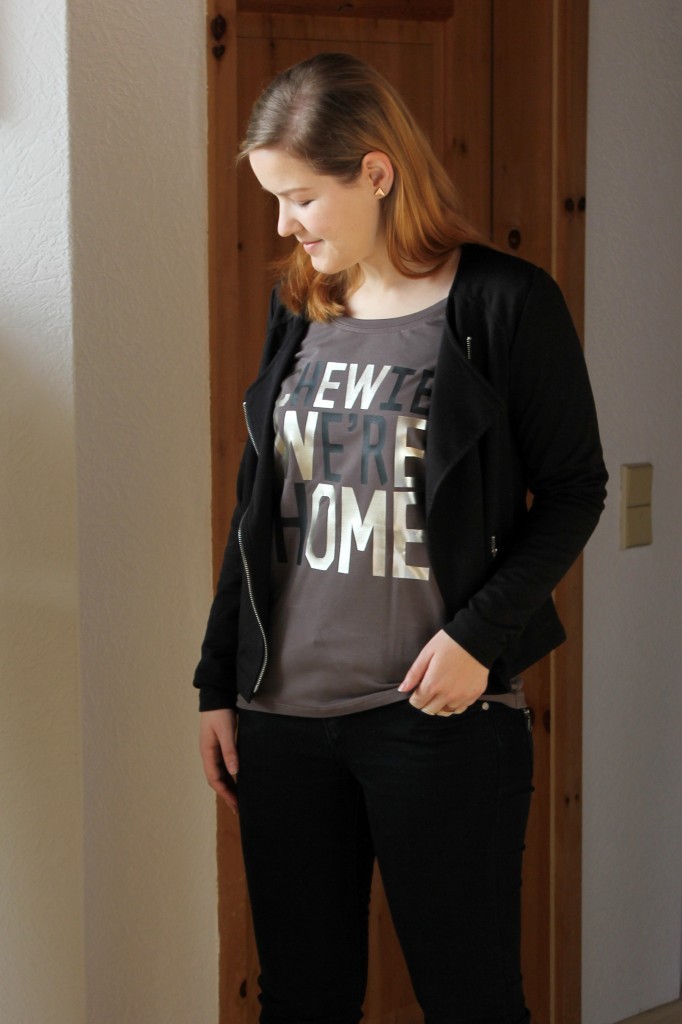
DIY Star Wars: The Force Awakens Christmas Sweater!

DIY Star Wars Tshirt by thisblogisnotforyou.comDIY Star Wars Tshirt by thisblogisnotforyou.comHappy Holidays everyone!

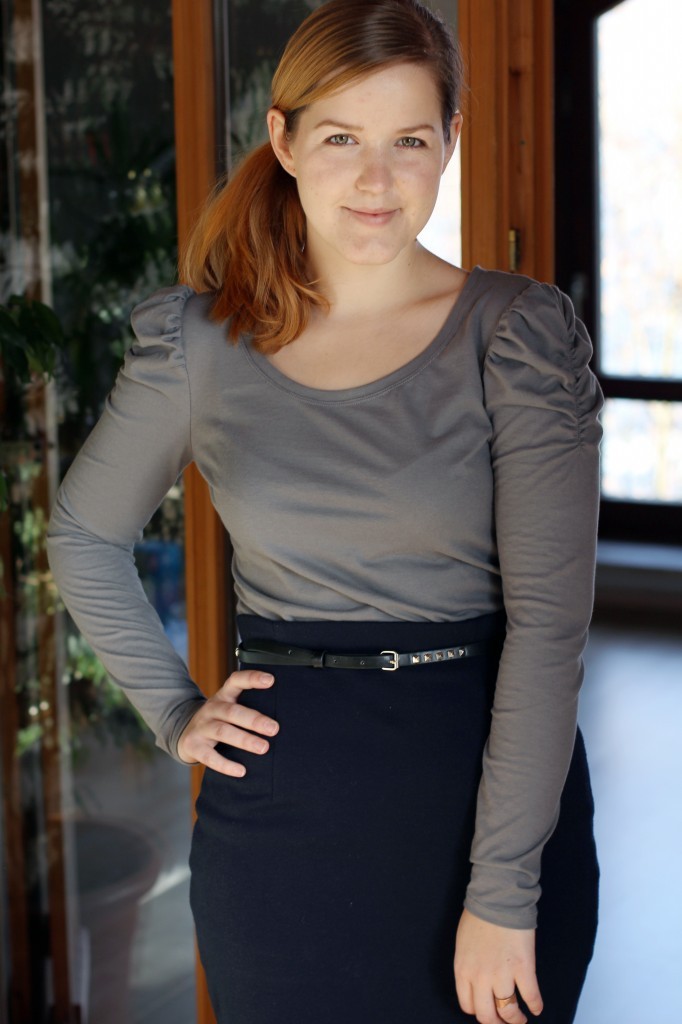
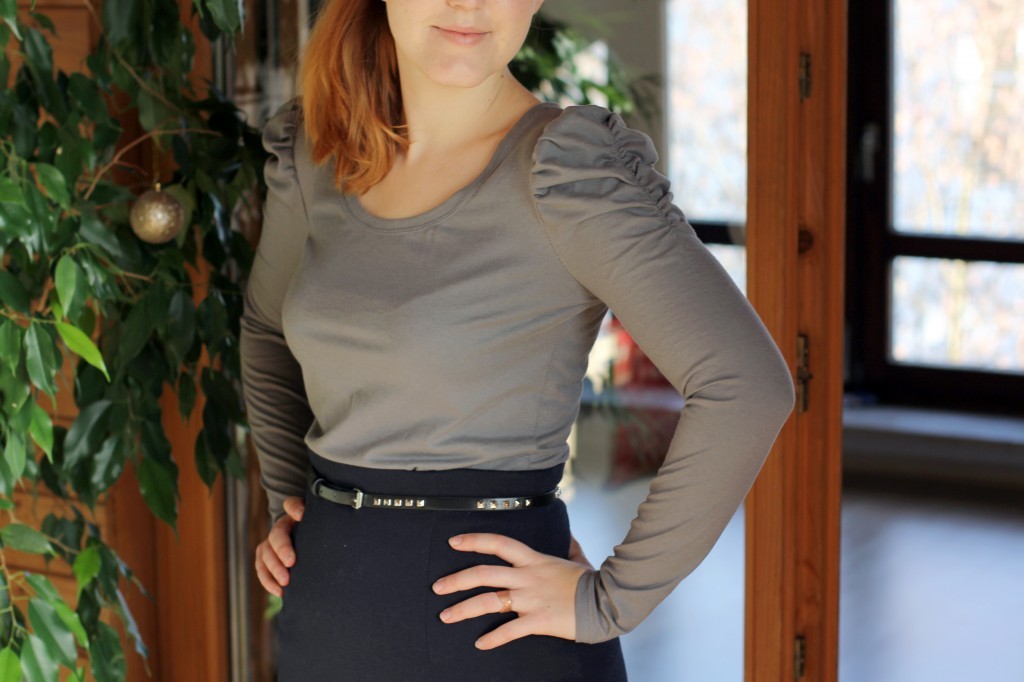
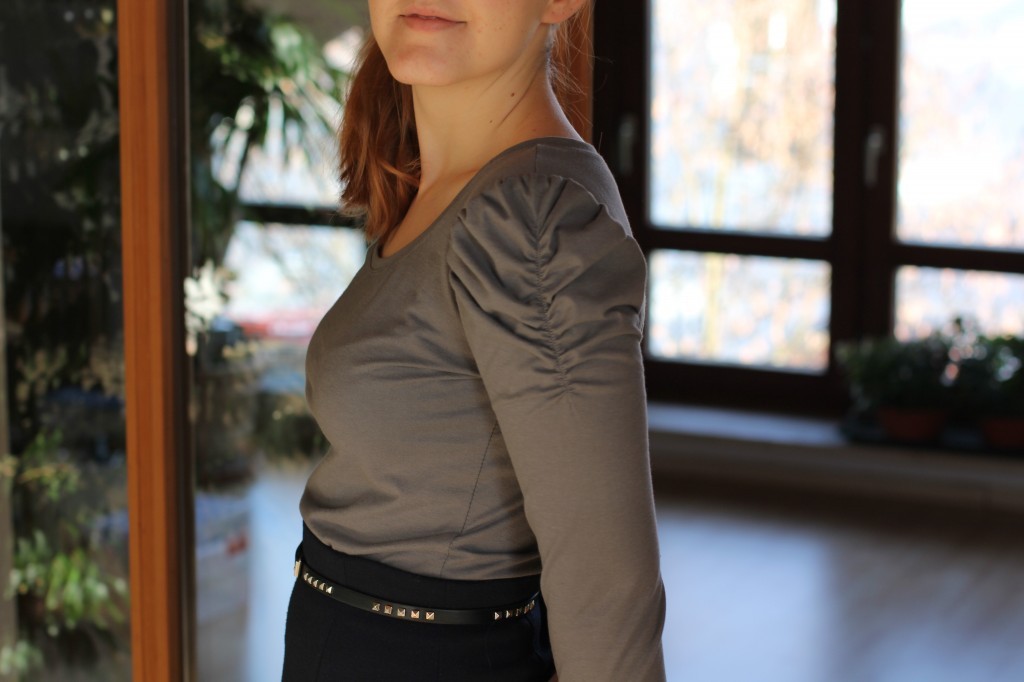
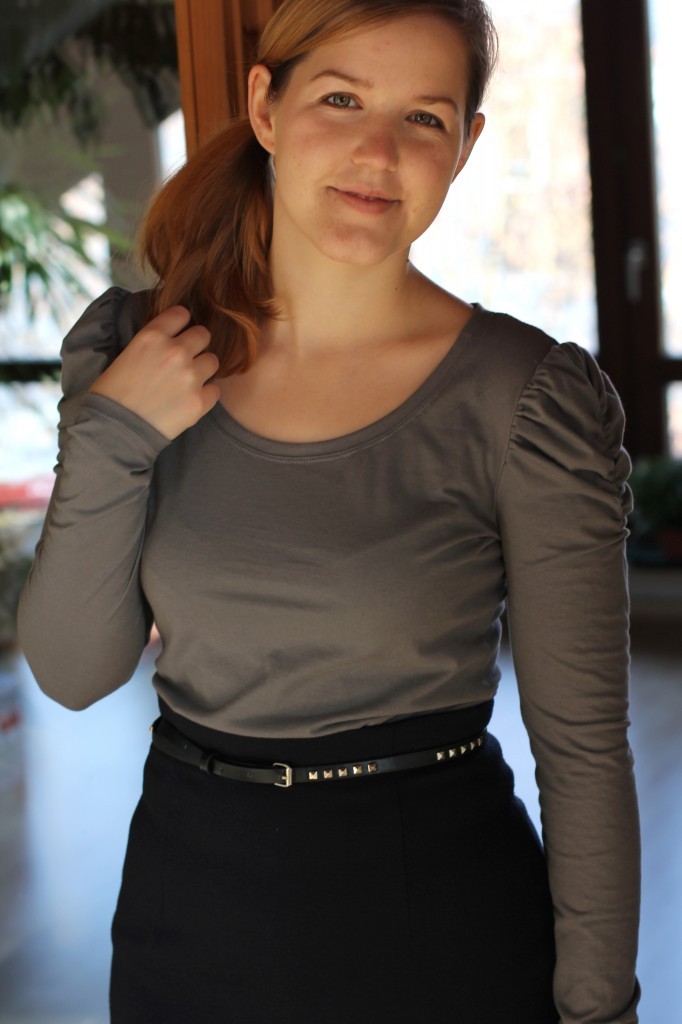
A quick word about the sweater I used for this project. It’s, what a surprise, handmade! This is the reason why I got the Agnes pattern in the first place! I wanted to have a simple shirt pattern that could easily be turned into a sweater.

I added about 2cm to the sleeve and bodice pattern pieces and also squared down the bodice for a looser fit. The close fit of the original pattern would’ve been unsuitable for the lettering. I always find it somewhat weird to have bold lettering right across the bust if the shirt’s a tad too tight. I used a slightly heavier jersey knit fabric in taupe which I bought in a little sewing café in Germany last winter.DIY Star Wars Tshirt by thisblogisnotforyou.comDIY Star Wars Tshirt by thisblogisnotforyou.comDIY Star Wars Tshirt by thisblogisnotforyou.com

PERSONALISE A SHIRT USING IRON-ON FOIL

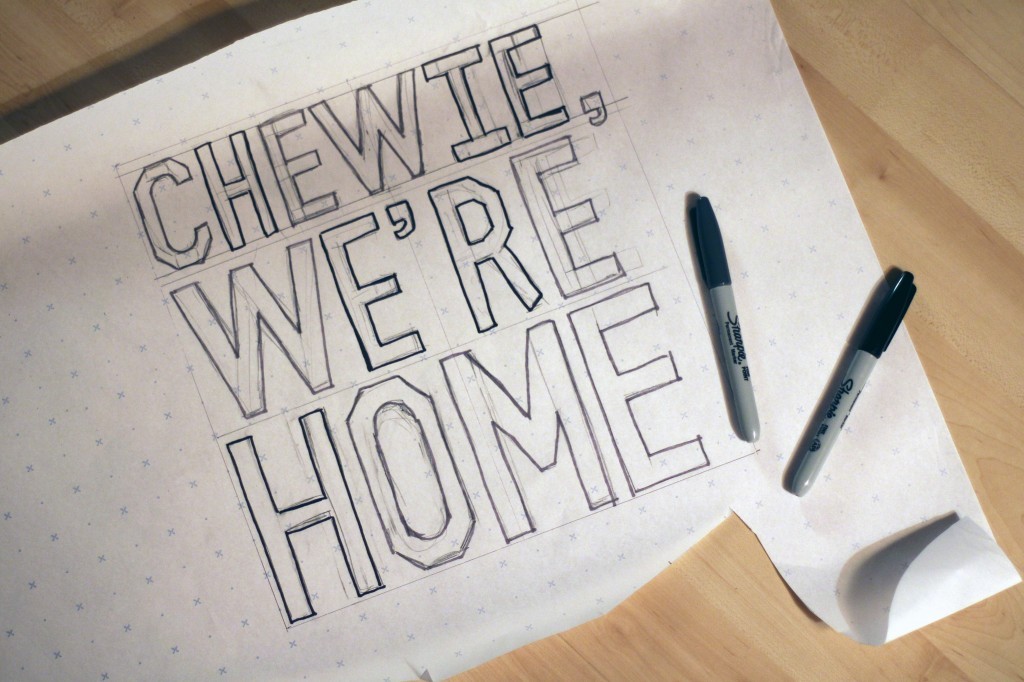
This is a super easy way to personalise or embellish any kind of garment. If you have templates for letters or shapes, it’s even easier. (It took me a while to draw all those letters and get them in perfect shape).

All you need is a shirt and some iron-on foil that you can order online.
DIY Star Wars Tshirt by thisblogisnotforyou.com

Some tips:

– Use a shirt with a smooth surface (jersey or cotton works best)
– You need to be able to iron your garment on a very hot temperature setting (I wouldn’t recommend using silk or polyester!)
– Read the instructions that comes with the iron-on foil carefully
– Keep in mind that all shapes and letters have to be mirrored!

I ordered silver and matt black foil online which came in different sizes. The A4 size had the best cost-benefit ratio and also I wasn’t sure how much I needed. In the end, I used less than half of a sheet of each colour. I have plenty left for other projects.

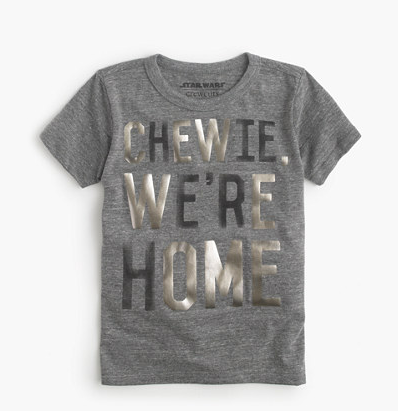
For this project I was inspired by this jcrew kids tshirt which unfortunately doesn’t come in adult size!

source: jcrew.com
source: jcrew.com

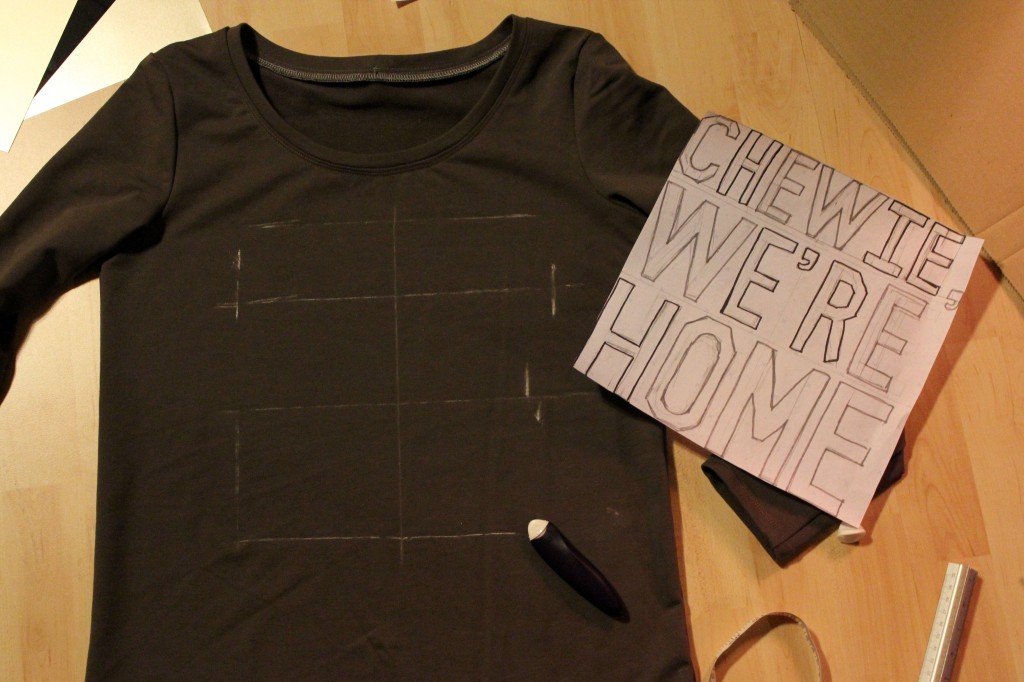
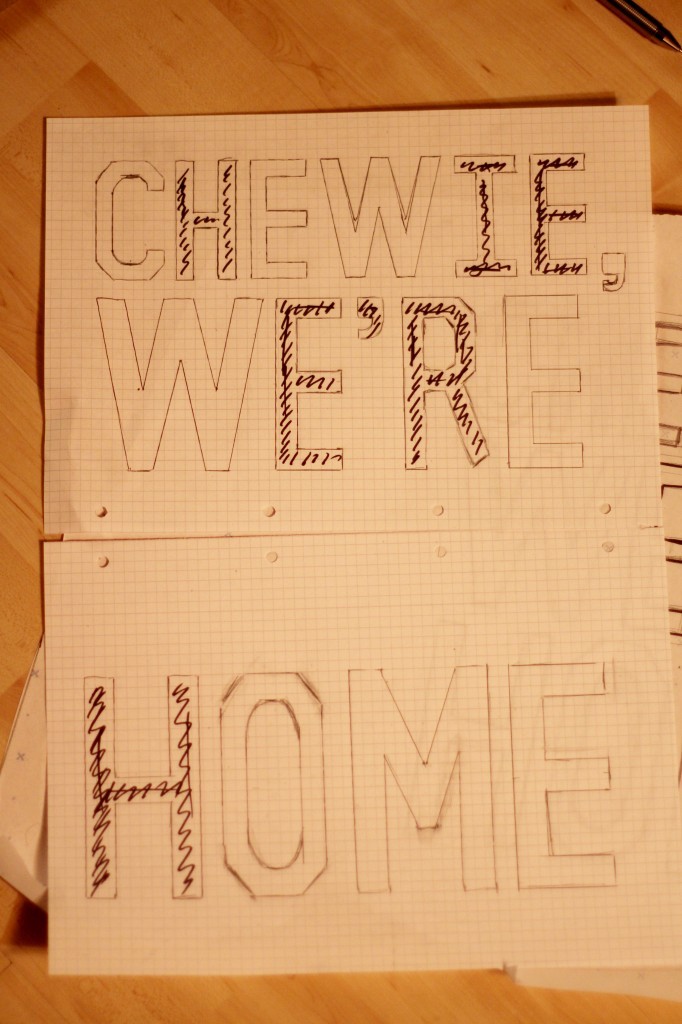
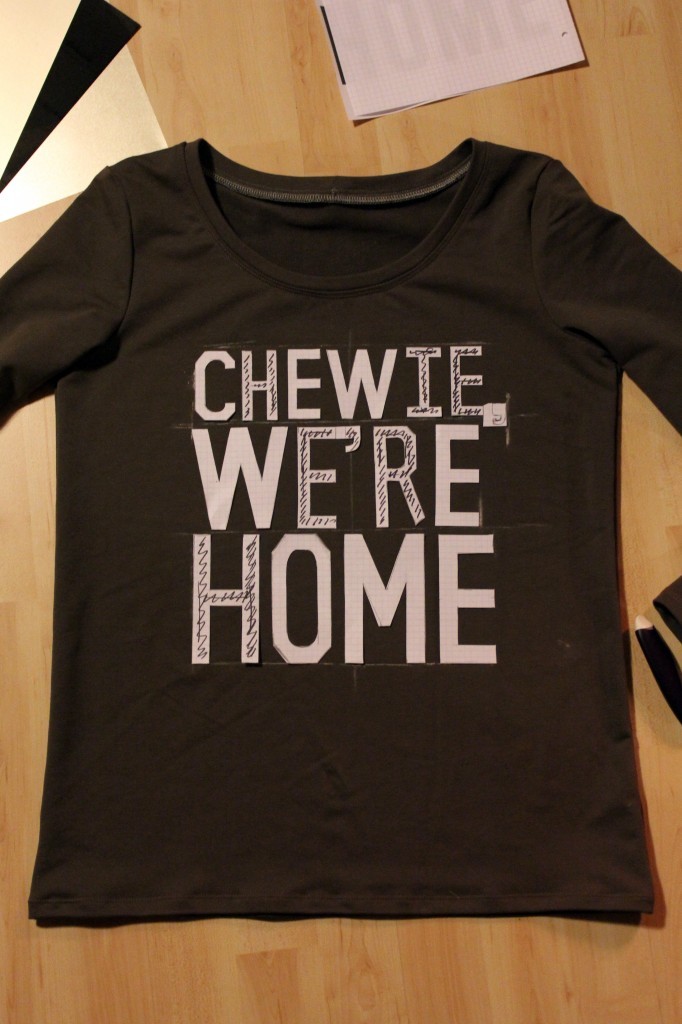
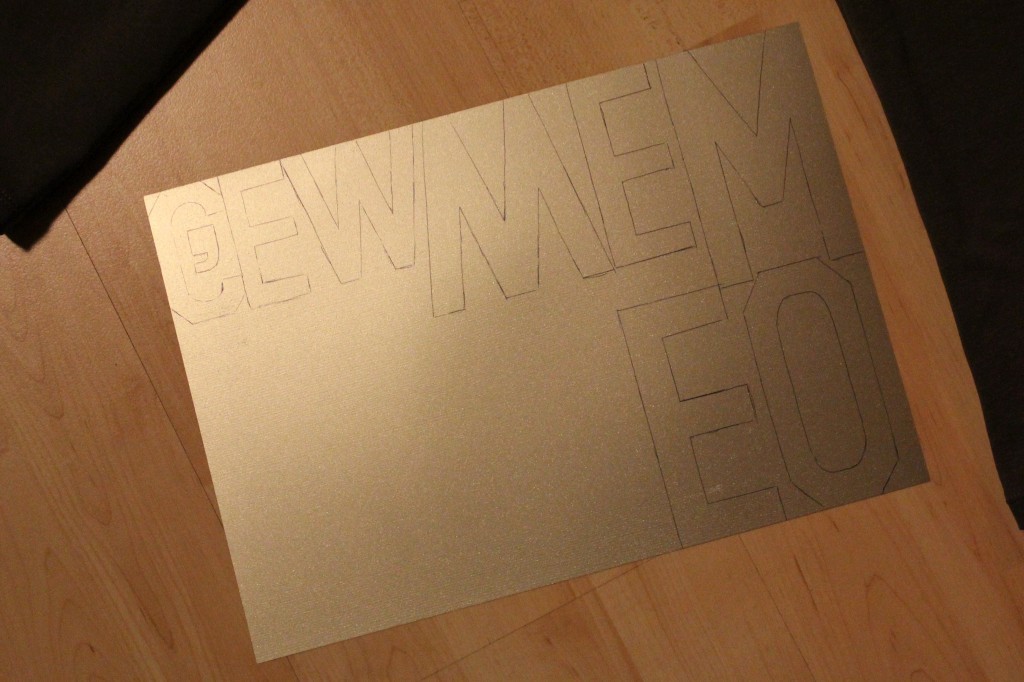
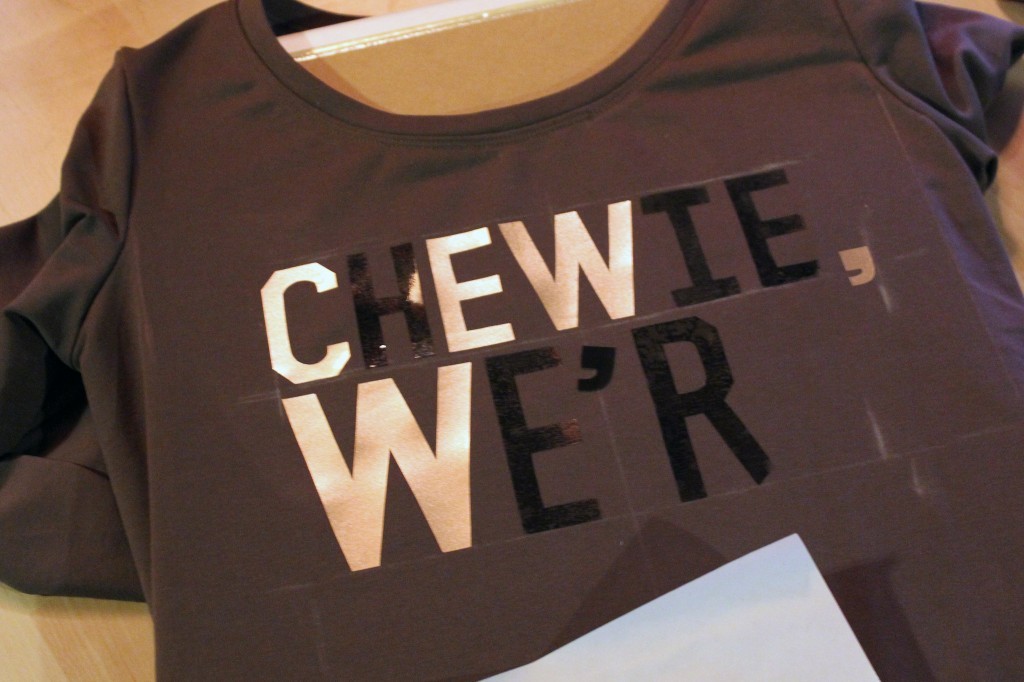
DIY Star Wars Tshirt by thisblogisnotforyou.comStart of by sketching out the shape or letters you want to create. Alternatively, you can use Word or Photoshop to create a layout you can print off and cut out.DIY Star Wars Tshirt by thisblogisnotforyou.comI used the sketch to check if the size was right and to mark the position on the shirt.DIY Star Wars Tshirt by thisblogisnotforyou.comBecause I couldn’t find a good font and sketched my own, I copied them onto squared paper to make sure they were even and all the exact same size. I positioned them on the shirt and used chalk for markings.DIY Star Wars Tshirt by thisblogisnotforyou.comWhen transferring the template onto the foil, make sure everything is mirrored. Draw the shape onto the matt side of the foil, you can use pen or pencil. If you don’t want to mirror your letters, you can try to draw them onto the “right” side, but since it has a protective film it might be a bit tricky and the ink of your pen might come off and ruin your iron.DIY Star Wars Tshirt by thisblogisnotforyou.comCut out the letters, place the onto your shirt and press the iron onto them one by one to prevent them from slipping out of positon. Don’t remove the protective film until all the letters are firmly applied and have cooled off. DIY Star Wars Tshirt by thisblogisnotforyou.comDIY Star Wars Tshirt by thisblogisnotforyou.comYou can now remove the plastic film and use the extra sheet of protective paper that comes with the foil to set the glue a second time. Never iron without the paper after that otherwise the foils sticks to your iron and the whole this is ruined. You can wash the shirt at 60° and iron it from the wrong side if necessary. DIY Star Wars Tshirt by thisblogisnotforyou.comDIY Star Wars Tshirt by thisblogisnotforyou.comDIY Star Wars Tshirt by thisblogisnotforyou.comDIY Star Wars Tshirt by thisblogisnotforyou.comDIY Star Wars Tshirt by thisblogisnotforyou.com

Will I make it again? Yessss! I love this shirt, especially because it’s not so obviously Star Wars themed as many of the Christmas sweaters you can buy online. It’s actually quite glamourous and someone not familiar with the Star Wars franchise might not even notice. The foil was super easy to use and I love the result. You can use it to transform an old shirt or jumper or to personalise presents.

Merry Christmas and may the force be with you in the New Year!

xx

Charlie


Happy sewing!

facebook/bloglovin/pinterest
twitter/instagram

Stay in touch!

T&TB Agnes Dress in John Kaldor Jersey

Tilly & the Buttons Agnes Dress by thisblogisnotforyou.com

HACKING AGNES INTO A DRESS

Hello again!

After reviewing the pattern and showing you my wearable muslin, it’s time to get out the actual project I was working on.

The pattern and fabric used for this project are courtesy of WeaverDee.com. They very kindly offered me to pick some fabric along with a pattern for me to try. (As usual, all opinions are my own.)

I wrote about the pattern, the Agnes Top by TILLY AND THE BUTTONS,  after I made the puff sleeve version as a muslin.

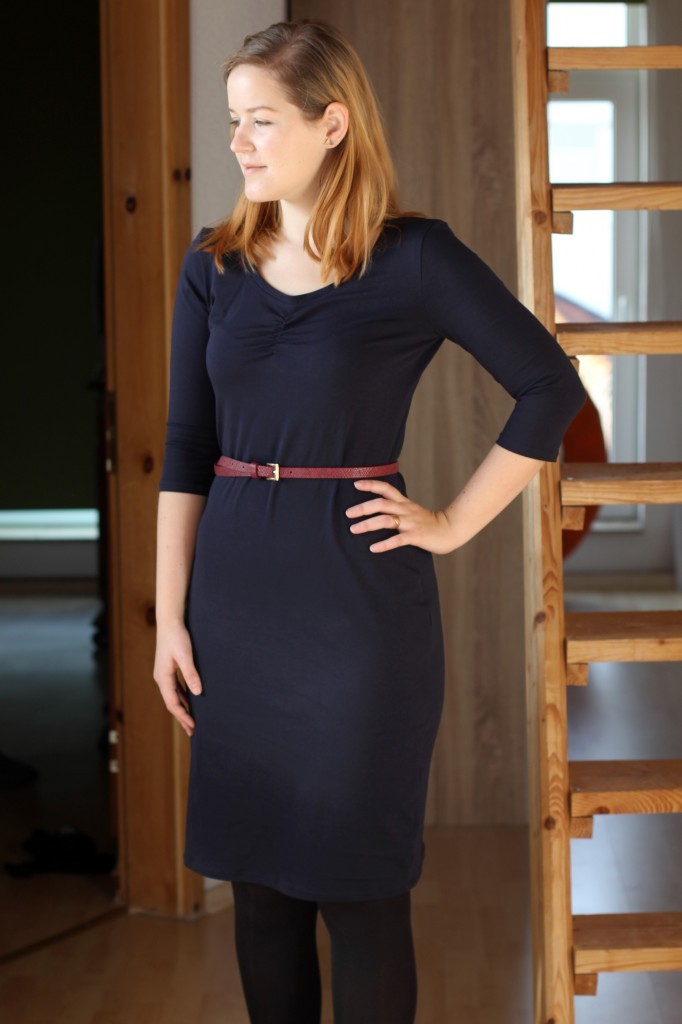
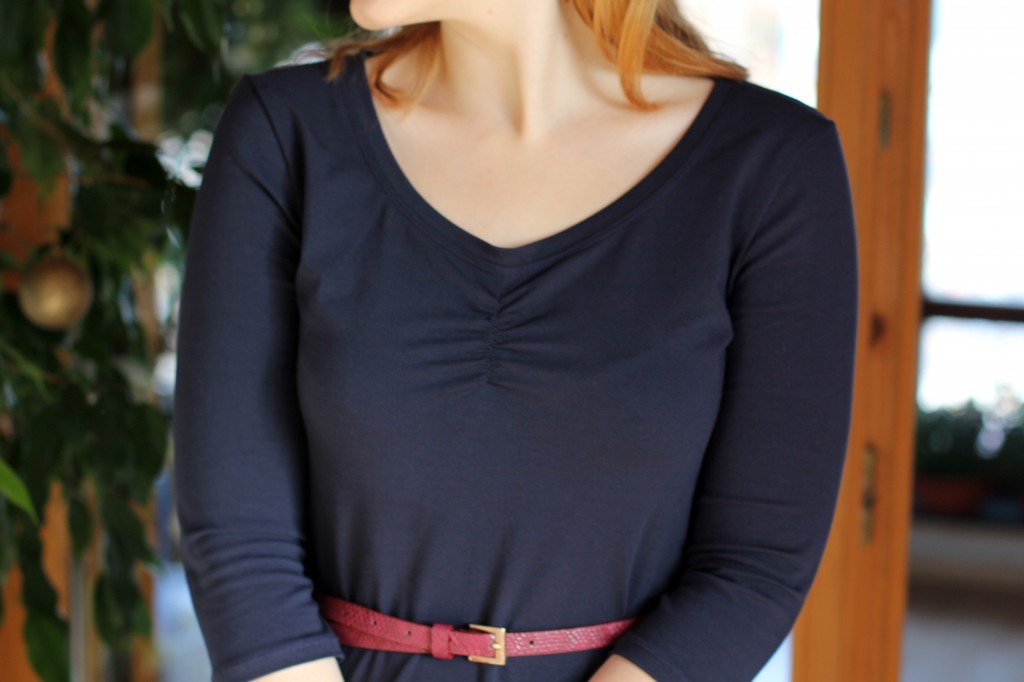
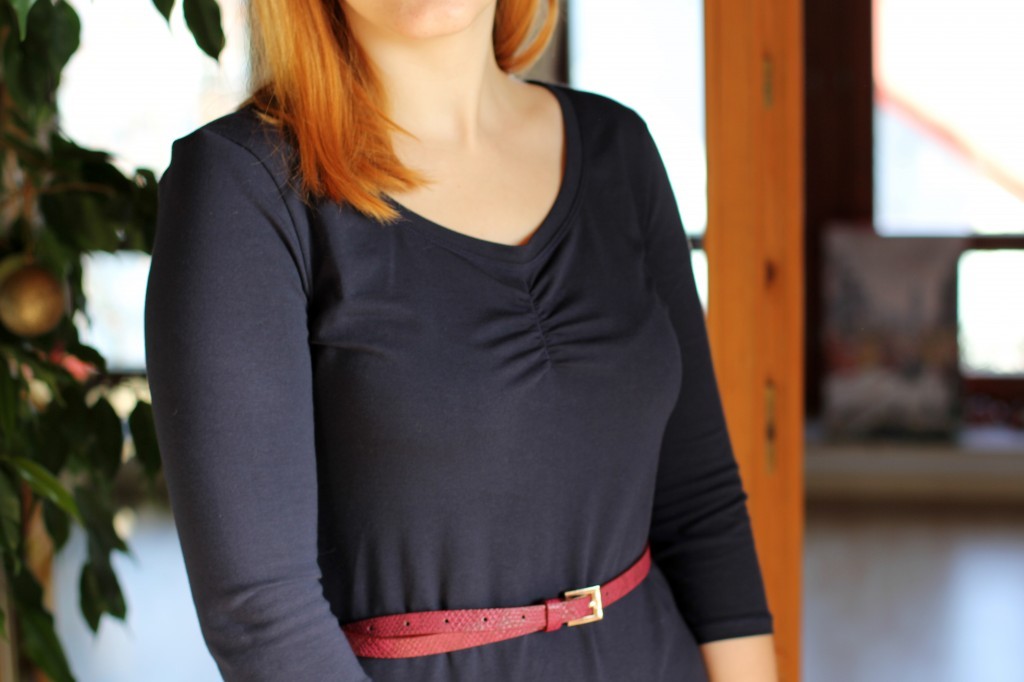
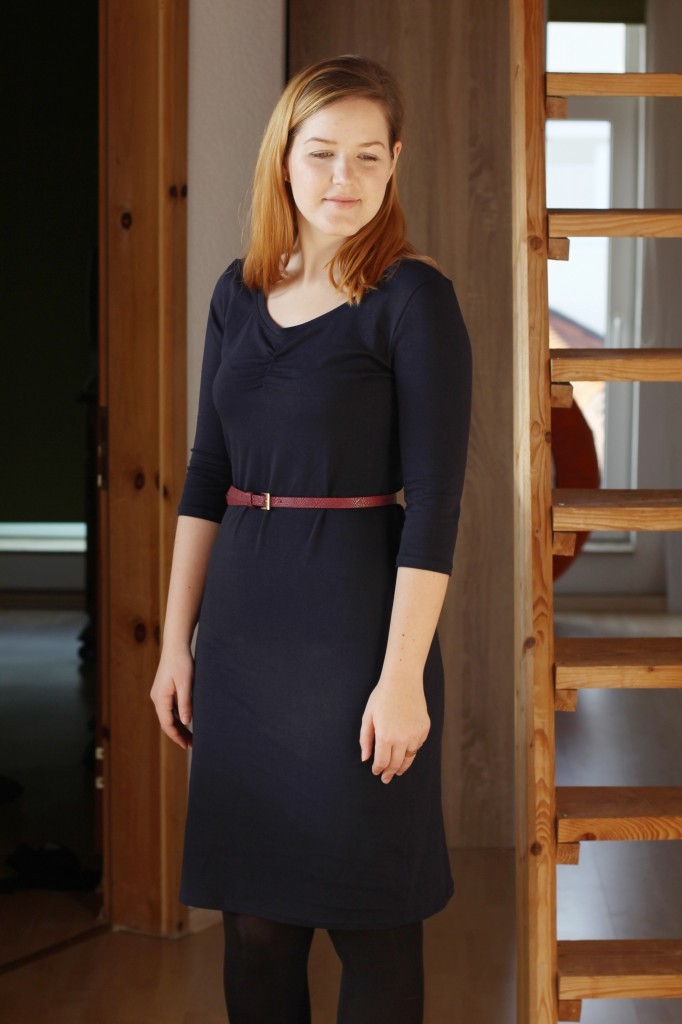
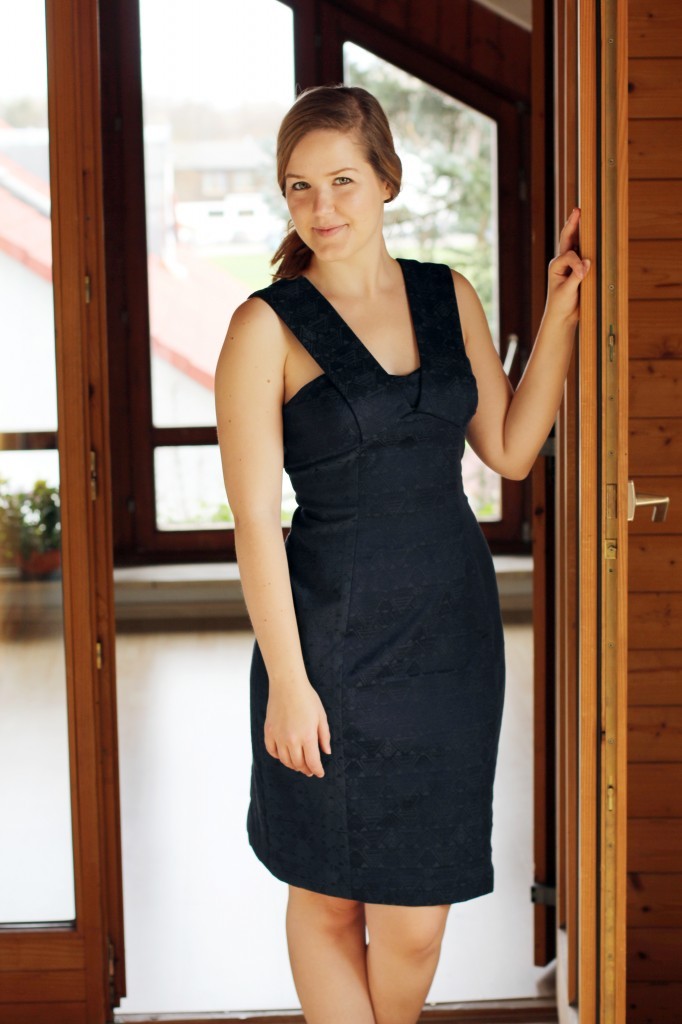
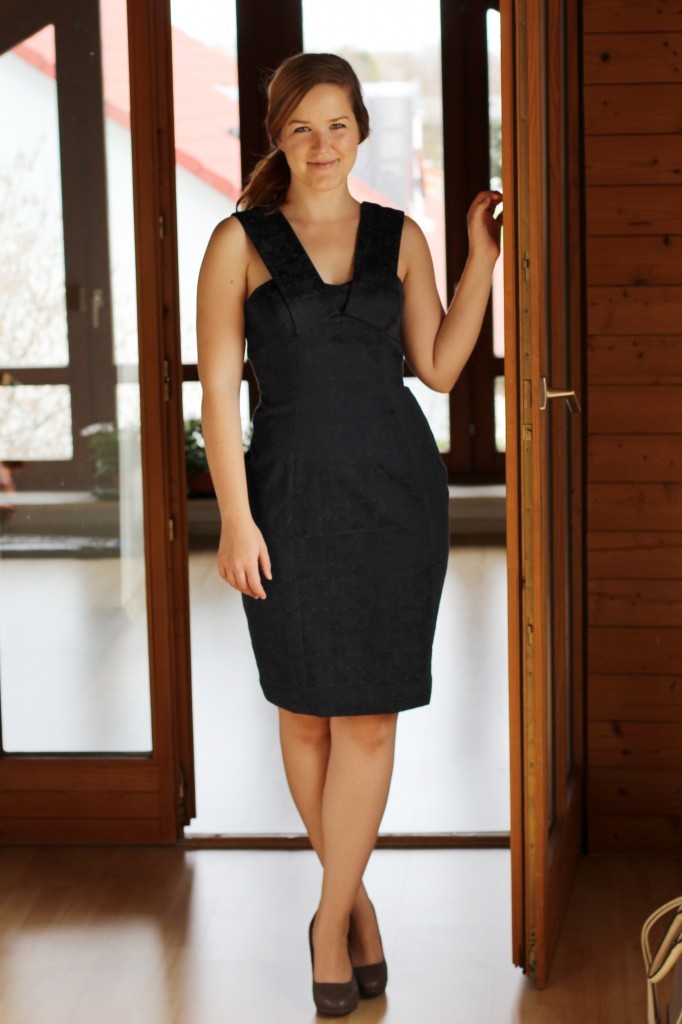
For hacking the pattern into a close-fitting dress, I picked a gorgeous navy blue John Kaldor jersey (92% cotton, 8% elastane). The fabric is very smooth with quite a cool, luxurious feel to it. It didn’t give off any fluff after washing and the colour didn’t fade. It’s quite a dark rich colour, but it was a bit hard to photograph which is why it looks a bit greyish in some pictures. WeaverDee.com also has other beautiful John Kaldor jerseys, the fuchsia and kingfisher ones look soo tempting!

The fabric sewed and pressed really well. When pressing dark jersey fabric you always have to be careful to only press from the left side of the fabric, other wise the bulk of the seam allowance might leave marks on the right side.

Tilly & the Buttons Agnes Dress by thisblogisnotforyou.com

Tilly & the Buttons Agnes Dress by thisblogisnotforyou.com

PATTERN ADJUSTMENTS & FIT

To make the top into a dress I used my hip measurements and lengthened the top all the way to knee-length shaping in below the hip. I’ve done this to a couple of stretch patterns, so I keep using an older hacked pattern as reference. You can merge any pattern by lining up the bodice and skirt pieces at the waistline. This is the reason why I try to copy all marks when I trace a pattern. You never know when you might need it.

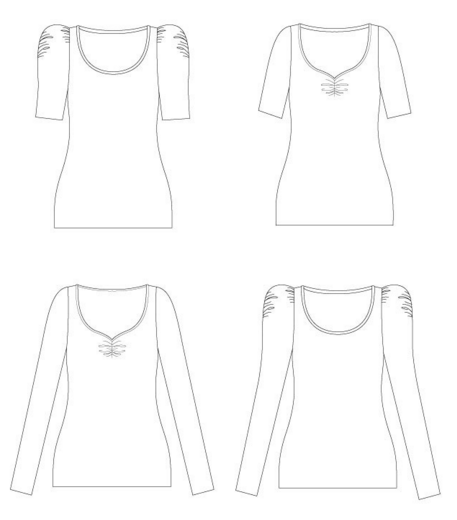
source: http://shop.tillyandthebuttons.com/

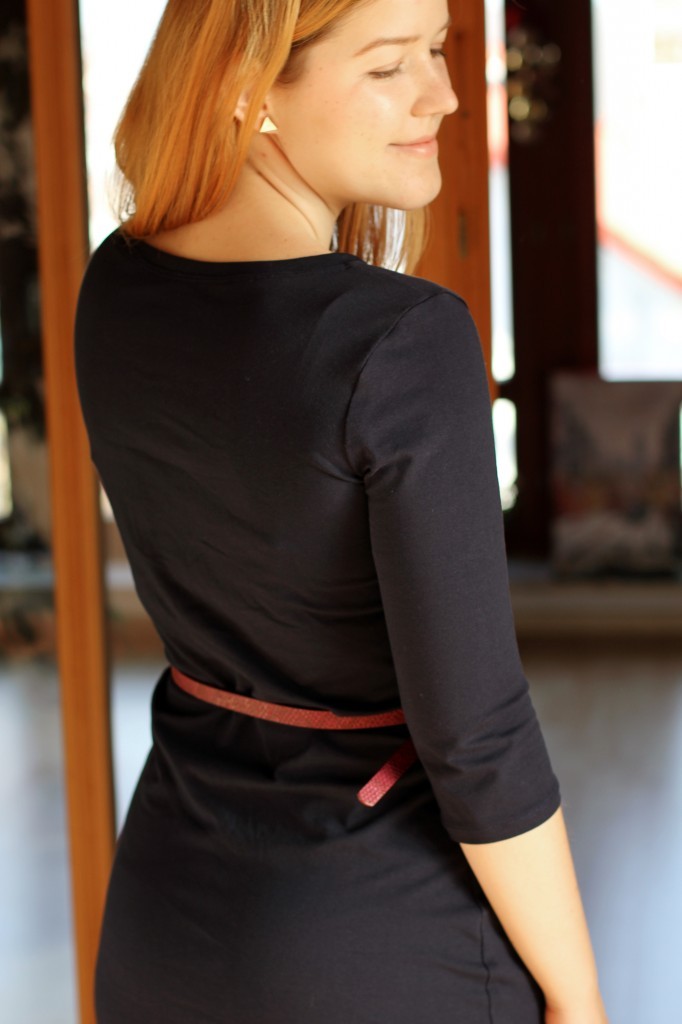
I made the view with the ruched neckline detail and short sleeves. The original length of the sleeves was a bit short for my taste, so I lengthened them by about 10cm.  I love 3/4 sleeves or sleeves that at least cover the elbow. They are easier to wear in colder and warmer seasons alike and look just so much classier.Tilly & the Buttons Agnes Dress by thisblogisnotforyou.comTilly & the Buttons Agnes Dress by thisblogisnotforyou.comTilly & the Buttons Agnes Dress by thisblogisnotforyou.comThe dress is super comfy and looks great with tights and is also great for layering with a cardi or jumper. That is something you might want to keep in mind if you are planning to make the puff sleeves. They do look quite bulky once you wear a cardigan on top.

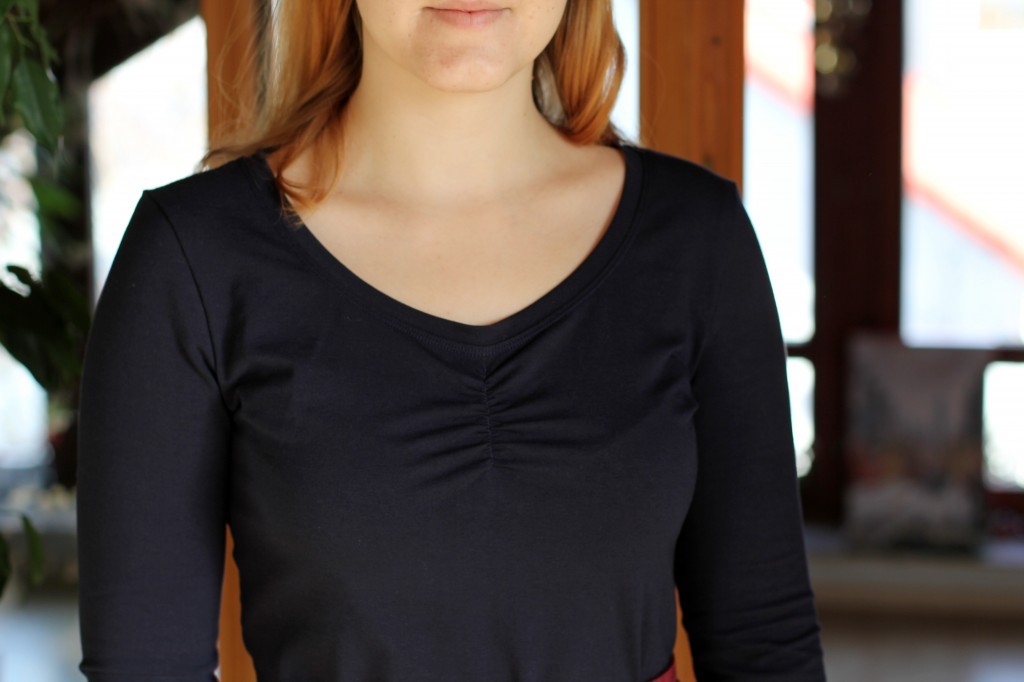
The simple silhouette makes this dress a perfect basic for different outfit combinations. The ruched detail is a pretty feature and also adds a really good shape to the bust area. I really like how the neckband is pulled slightly into a v-shape. It makes it look a bit less sporty. It’s not quite the heart-shape as shown on the pattern envelope because the neckband is a bit too bulky to be pulled down that far. But I like this look better anyway.Tilly & the Buttons Agnes Dress by thisblogisnotforyou.comTilly & the Buttons Agnes Dress by thisblogisnotforyou.comTilly & the Buttons Agnes Dress by thisblogisnotforyou.com

Will I make it again? I am really happy with this make. It came together in no time (2 hours tops) and is such a great wardrobe staple. I rediscovered jersey dresses this autumn and keep wearing them all the time until they’re all in the wash. I have to say I like the dress best of the all the Agnes’ I made so far (I made four different tops), but that’s just because I am not a jeans and t-shirt kind of type. Jersey is one of the fabrics that gets damaged through use and washing quite quickly, let’s see how this one holds up.  I definitely see myself making tons more (just in case)! 

xx

Charlie


Happy sewing!

facebook/bloglovin/pinterest
twitter/instagram

Stay in touch!

T&TB Agnes Top with Puff Sleeves

Tilly & the Button Agnes Top by thisblogisnotforyou.comTilly & the Button Agnes Top by thisblogisnotforyou.com

MERRY SEWING EVERYONE!

Hello sewing-friends! Hope you’re having a great festive season!
My mum-in-law gave me a handmade (!) sewing (!) advent calender, which is absolutely awesome! Every day I get a new suprise sewing supply, notions or fat quarters of beautiful fabrics. It’s the best gift ever! Too bad it ends on the 24th – it really could go on for ever. It never was so easy to get out of bed in the morning!

But that’s not the only reason why December rocks. Not only do I love getting together with my family so very soon, I am starting a new job in January and until then I’ve got a couple more weeks off. And you know what that means. I am in a total sewing frenzy. I am almost done with finishing handmade Christmas presents, so the selfish sewing IS ON!

This sounds really bad, but it makes me very happy.

I’ve made more garments than I can blog. Maybe I can get around to posting them during the holidays, but I also might be very distracted by Plätzchen and mulled wine and will probably completely forget about it.

Aaaanyway, back to the actual reason why you’re reading this post: I finally gave in and jumped on the Agnes-train, just like all of the other sewing bloggers out there. I don’t know why I hesitated so long. I guess, because the pattern is so very basic and therefore quite expensive. But I don’t mind supporting independent pattern businesses and by now I’ve made 5 different Agnes’ – so the pattern is definitely worth buying!

I often underestimate basic patterns, but when I finally buy them, they often are mind-blowingly good! Basic patterns are easy to sew, to adapt and very time-efficient. Best example is Agnes (or Ultimate Pencil Skirt, Coco, Lottie Blouse etc.): I’ve made five different versions and not two are the same.

Tilly & the Button Agnes Top by thisblogisnotforyou.comTilly & the Button Agnes Top by thisblogisnotforyou.com

THE PATTERN & FIT

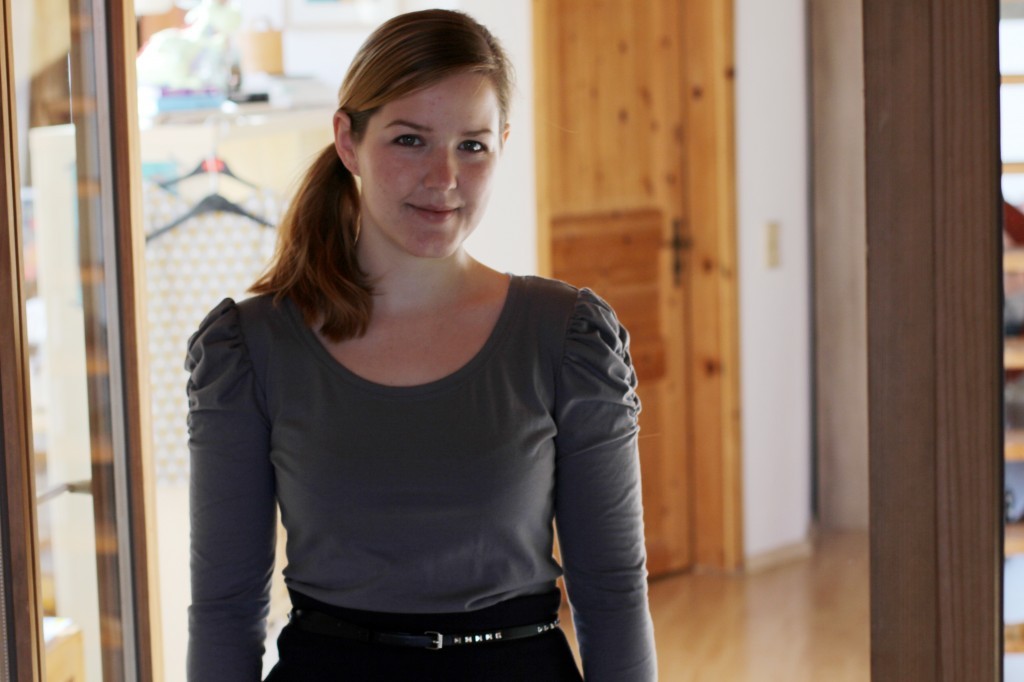
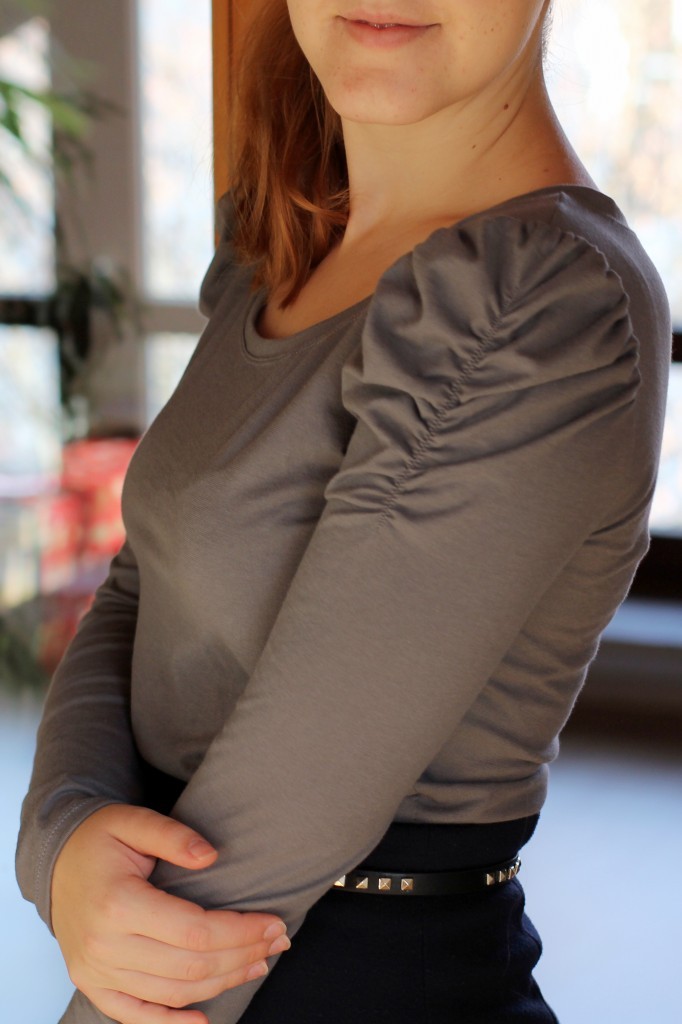
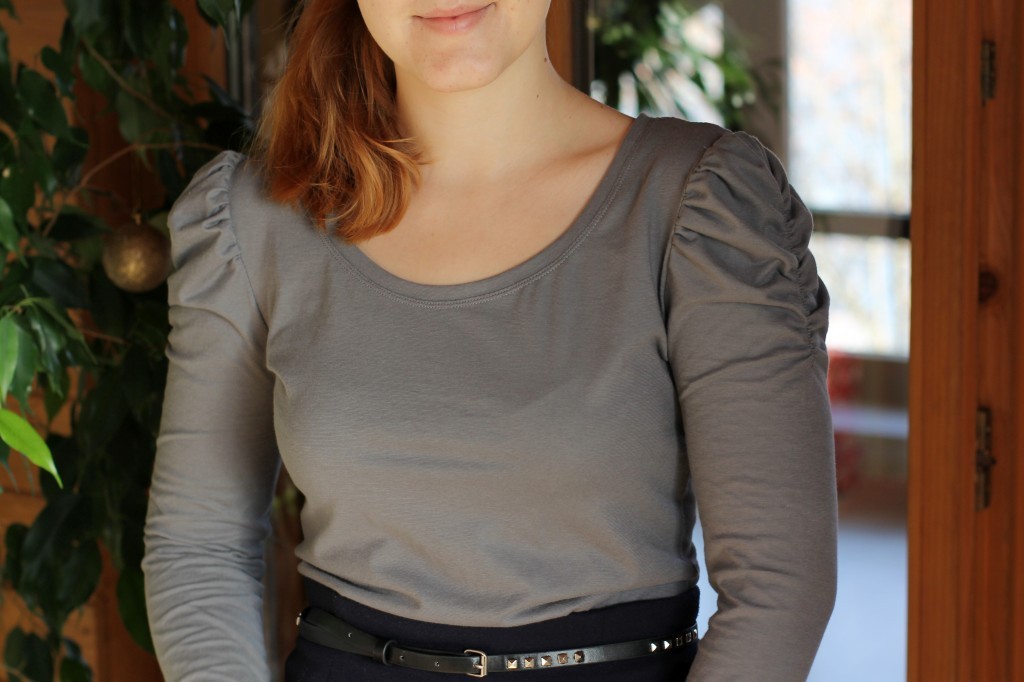
The pattern is the Agnes Top by TILLY AND THE BUTTONS (courtesy of WeaverDee.com). I made the long-sleeved version with a ruching detail on the puff sleeves.

This is the very first one I made, more or less a muslin, but a very wearable one. I had some fitting issues with Tilly’s patterns in the past, so I decided to make one from inexpensive fabric remnants before cutting into the good fabric. I think I used less than 1 metre of fabric.

I knew from reading other blogs, that the pattern runs quite small. According to the envelope it has quite a bit of negative wearing ease. I didn’t want it to be too tight, so I went with a larger size where the finished garment measurements are the same as my measurements. I cut out a size 4, which astonishingly fits me really well. (According to the pattern I am a size 3: 34in at the bust. Size 4 is 36in at the bust, but the finished garment measurement is 34in. Keep that in mind when deciding about how tight you want your top to fit.) Apart from making the sleeves a tiny bit wider, I did not have to change anything else in the following Agnes’ I made.Tilly & the Button Agnes Top by thisblogisnotforyou.comTilly & the Button Agnes Top by thisblogisnotforyou.com

CONSTRUCTION

The top is super easy to assemble, no major sewing challenges really. If you are new to sewing, the neckband might be the trickiest bit. For me that was my biggest worry, but it turned out quite well on the first try. For the later versions I shortened the neckband pattern by 5mm (so 1cm over the whole length) and now it sits perfectly flat. After making 5 Agnes’ I now consider myself a neckband pro. I never felt so good!

The sleeves are constructed in flat, which is my favourite technique for knit fabrics. It’s just so much faster than a set-in sleeve. The sleeves are ruched by a small piece of elastic, which is stretched while you sew.

I like a puff or ruched sleeve, but both in one are a bit too much for my taste. It makes my shoulders look quite massive, not quite the romantic look I was aiming for. Unless you consider football romantic. It wil probably look really lovely on a petite figure (someone like Tilly herself) but I will stay away from this look, I think.

It looks alright with a simple, close-fitting skirt, so it will definitely get some wear now and them. I scrapped the ruched sleeves for all the other versions and I am super happy with those.
Tilly & the Button Agnes Top by thisblogisnotforyou.com

Will I make it again? Well I know that I already have! And there sure as hell will be more. Although I love more challenging projects, this pattern is pure instant-gratification! It’s very versatile as well and it doesn’t use up much fabric – perfect stash buster pattern. Overall grade: 9/10.

xx

Charlie


Happy sewing!

facebook/bloglovin/pinterest
twitter/instagram

Stay in touch!

By Hand London Georgia Dress

ByHandLondon Georgia Dress by thisblogisnotforyou.comByHandLondon Georgia Dress by thisblogisnotforyou.com

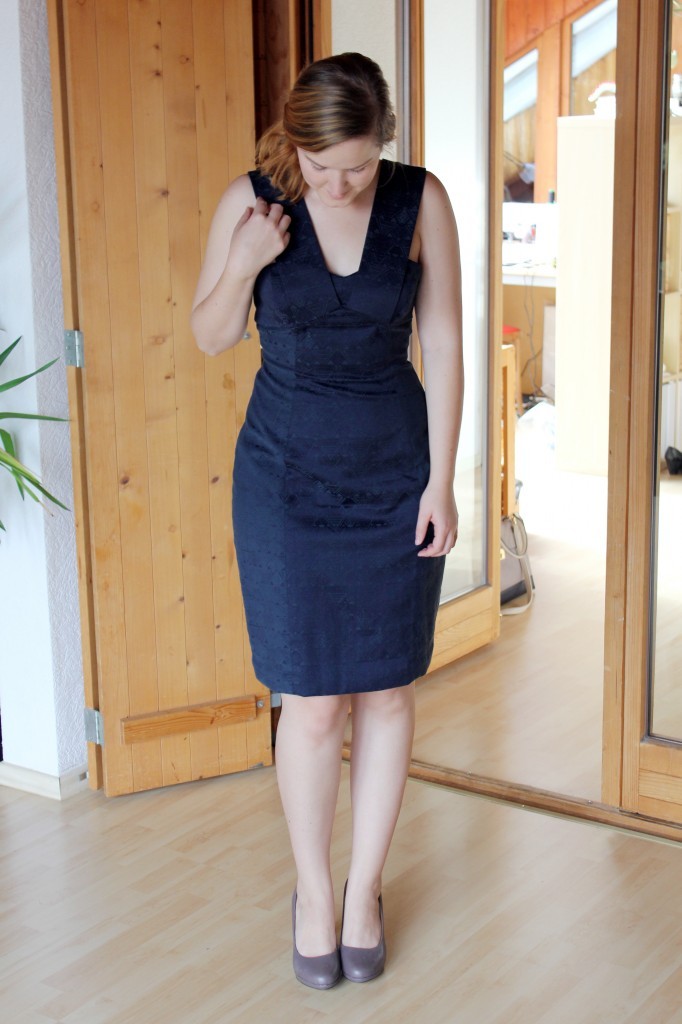
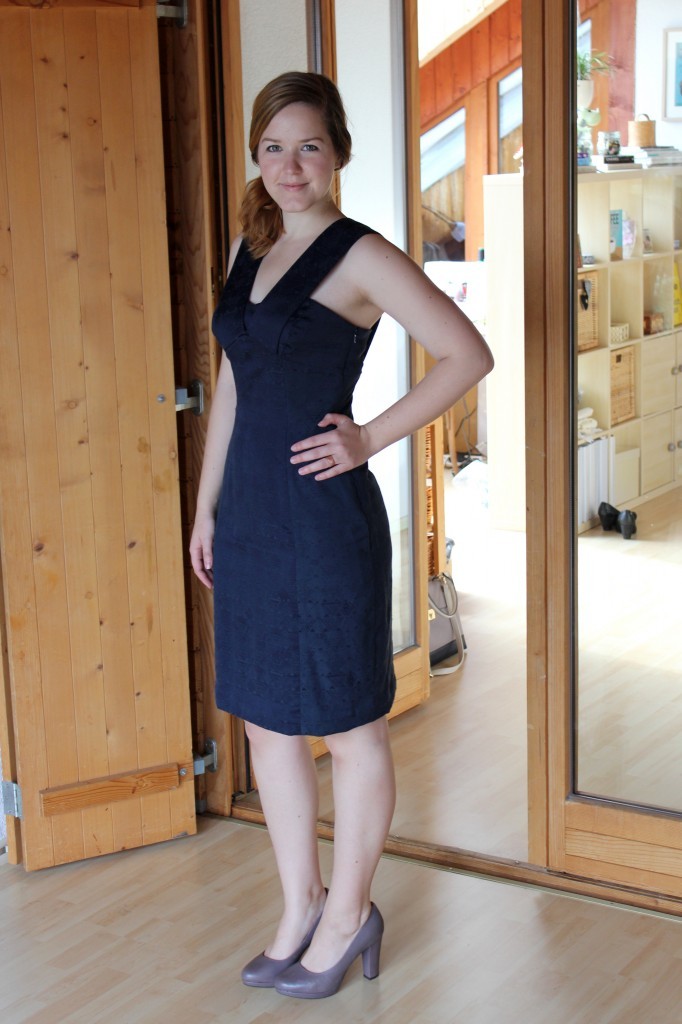
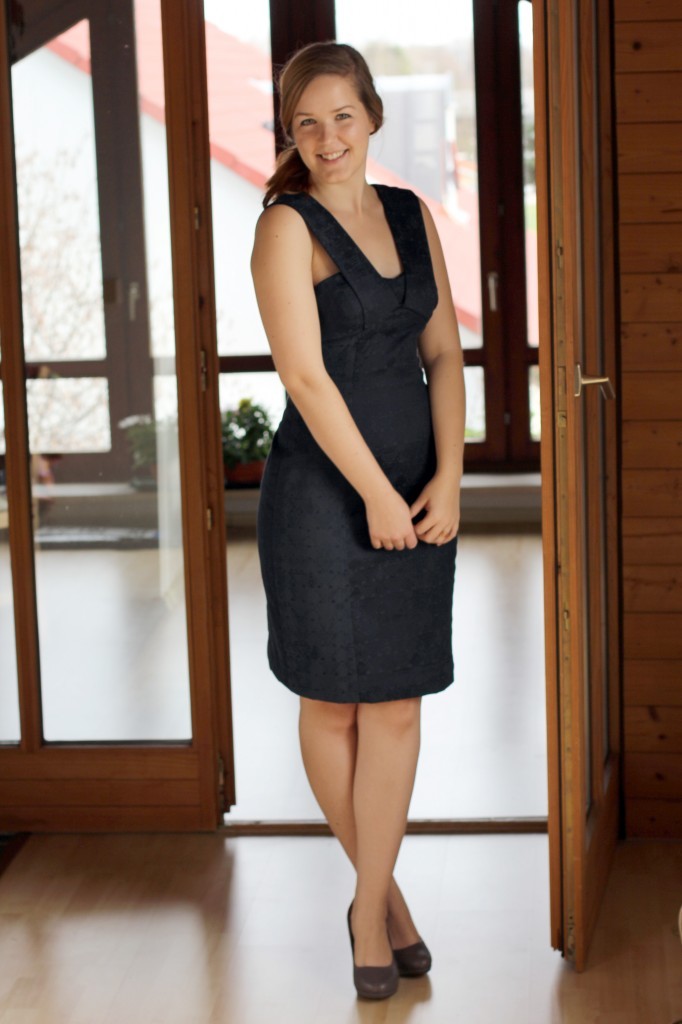
This post is long overdue! I made this dress in August this year. I whipped it up in just a couple of days, which is normally more than enough considering I sometimes make a dress in a day. But it was the first time sewing the By Hand London Georgia, so I had to trace the pattern, adjust the fit etc. Also, I tried out some construction techniques from my new Couture Sewing book which is probably the main reason why this kept me busy for a couple of days.

I made this dress a bit short notice, to have something nice to wear to the Mr.’s graduation ceremony at UCL. It came together without any problems and the fitting wasn’t too difficult. As it was a cold and rainy weekend I wore it with a bordeaux red blazer and felt very pretty! All in all, I’m really happy with this dress!

ByHandLondon Georgia Dress by thisblogisnotforyou.com

THE FABRIC

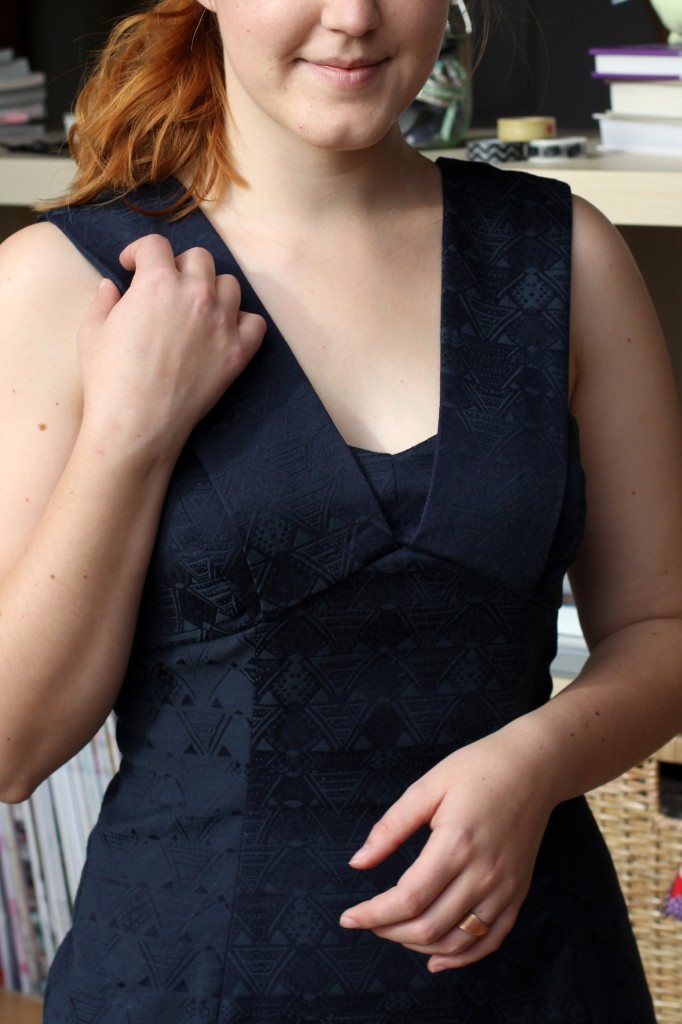
I bought this stretchy jaquard polyester/cotton blend at a bargain price at Karstadt, a large German department store. They always have quite good fabrics in their remnant corner. I found this at a sale price for 4€/m which is as cheap as you can get at Karstadt. Fabrics of this quality are usually much, much more there. I bought three metres and already hat the Georgia Dress in mind.

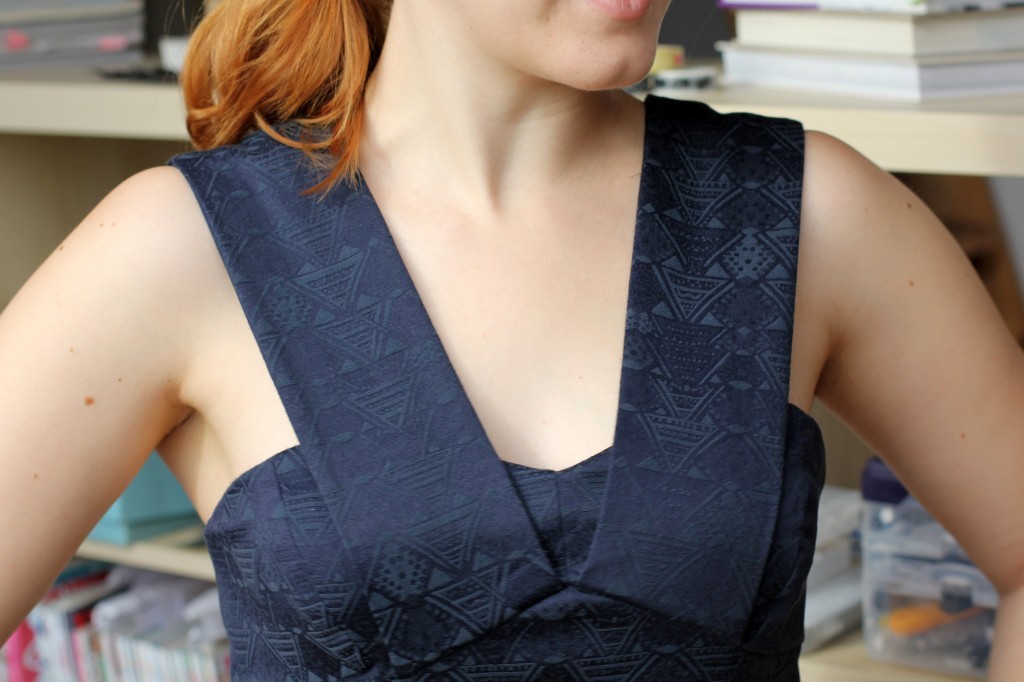
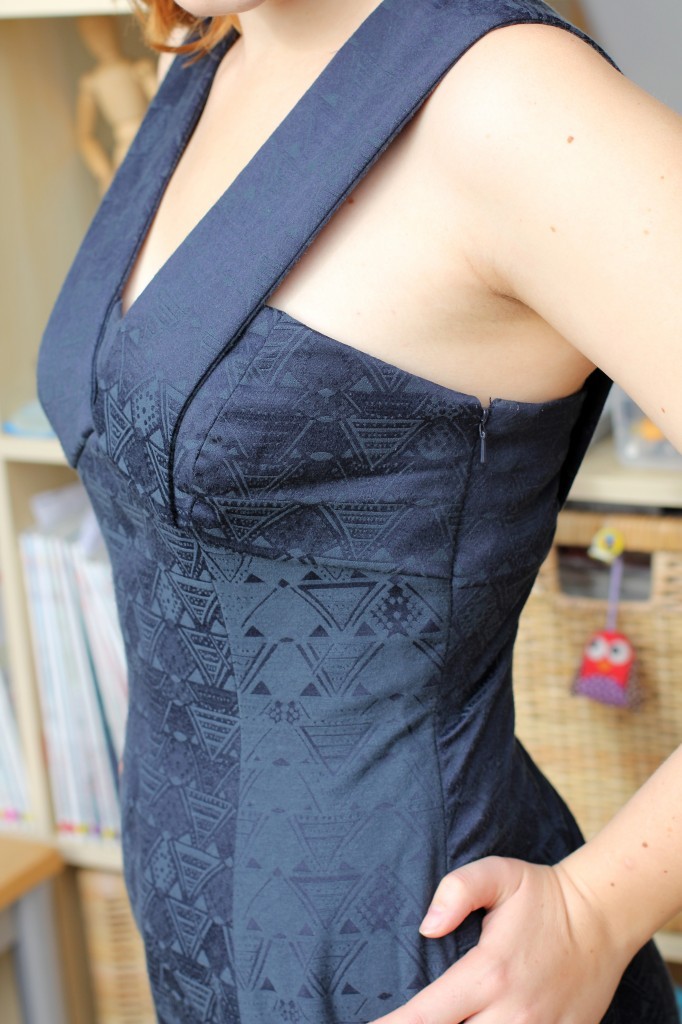
As this is jaquard, this fabric is sort of doublesided. Probably not meant to be, but the left side looked really interesting and was slightly brighter than the right side of the fabric. I decided to incorporate this detail into the dress and thought that the skirt panels would be perfect for that. On garments with princess seams I like to work with contrasting fabrics, when possible, to create a slightly more slimming silhouette. It worked beautifully with the two different sides of the jaquard, but it’s really hard to photograph. Below is the only picture where you can see the contrast a little bit.ByHandLondon Georgia Dress by thisblogisnotforyou.com

PATTERN & FIT

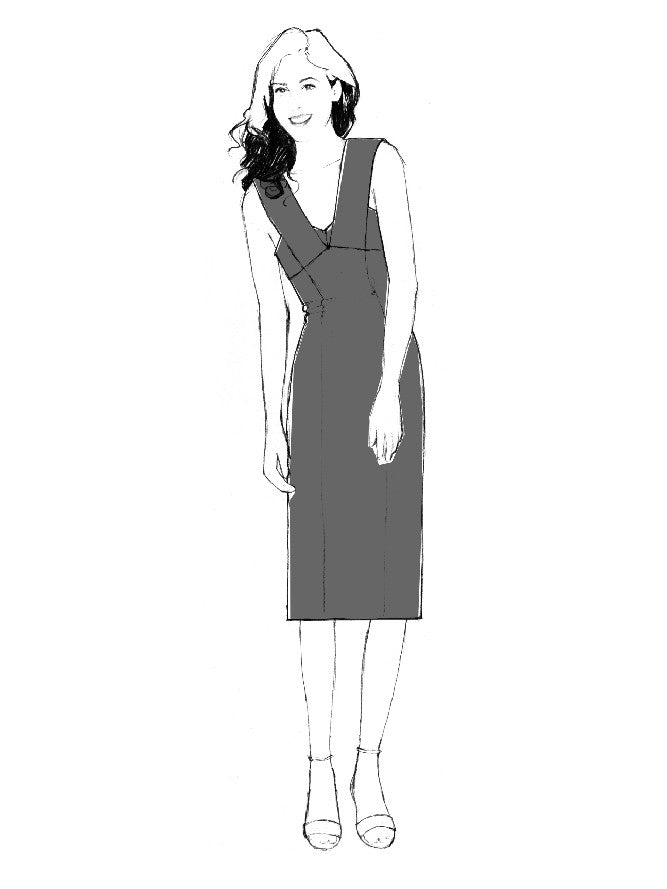
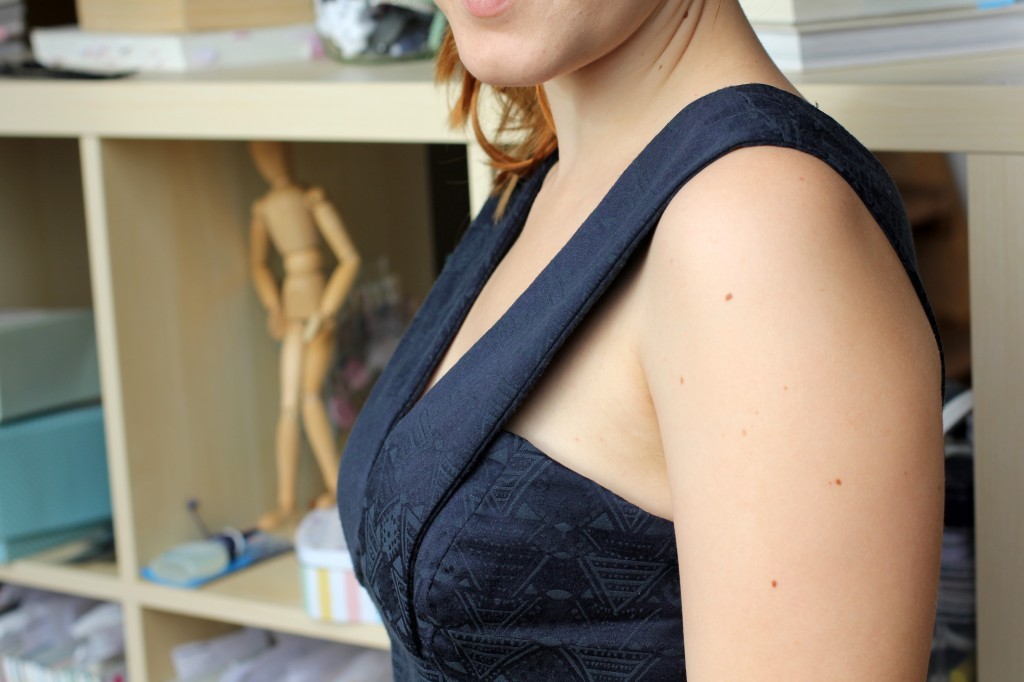
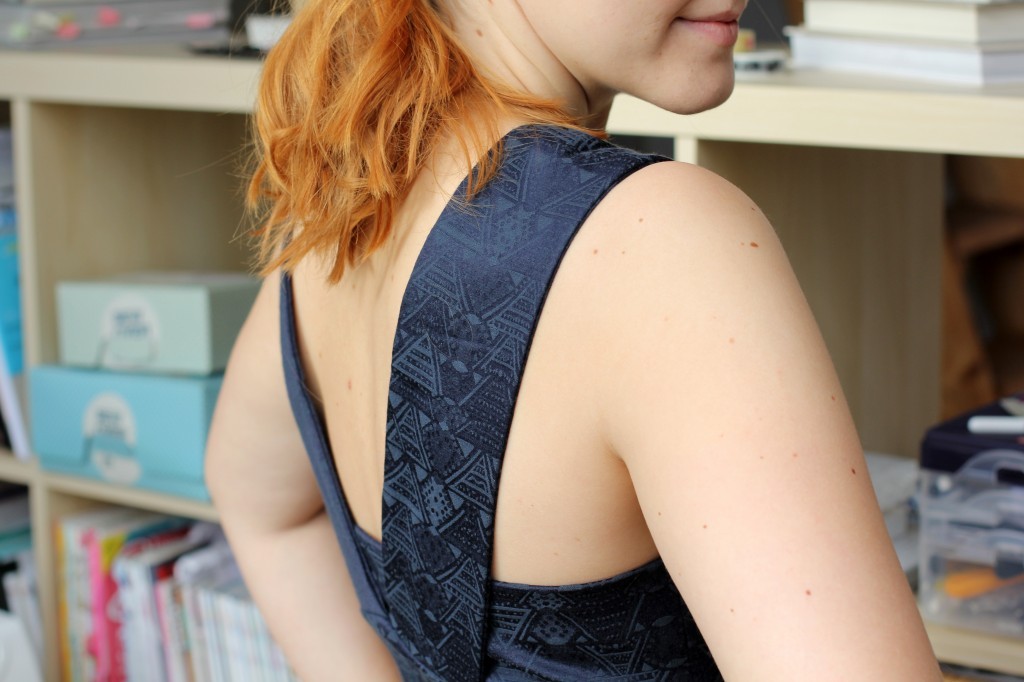
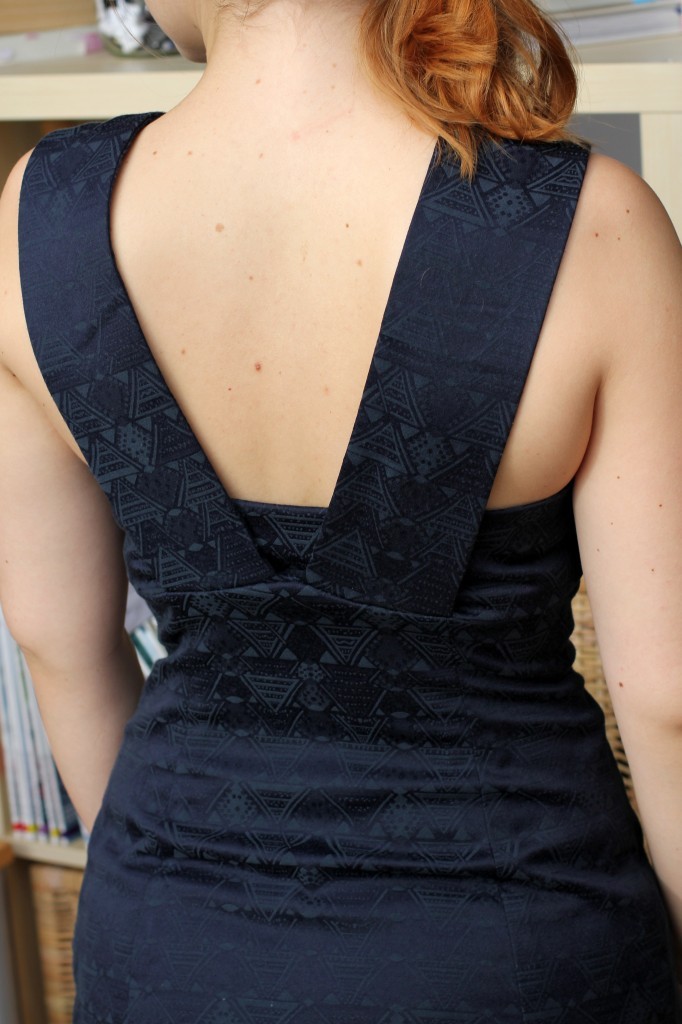
The pattern is the Georgia Dress by By Hand London. It’s a lovely, versatile dress. I’m not a big fan of strapless dresses or the view with the narrow straps, so the wide straps definitely sold the pattern for me! I love how they go across the top of the dress, a detail I haven’t really seen anywhere else.

source: http://byhandlondon.com/

The pattern is great and came together easily. I really like the illustrated instructions, which are pretty failproof. I graded the skirt up to a larger size and the first fitting went quite well. I took the dress is here and there. The only part hard to fit was the top, as the cups consist of several pattern pieces and are lined as well. Although my measurements were the same as on the pattern for the bust, the top was quite a bit too large and gapey. I took it in at the side seams. It sort of fits ok, especially with the wide sleeves giving some more structure, but it’s still a bit too wide and will need some more fitting should I sew it again.

The waist and hip areas were easy to fit because of the different panels of the skirt that go right up to the bust line. No darts! Yay! It really fits like a glove!

ByHandLondon Georgia Dress by thisblogisnotforyou.comByHandLondon Georgia Dress by thisblogisnotforyou.com

CONSTRUCTION

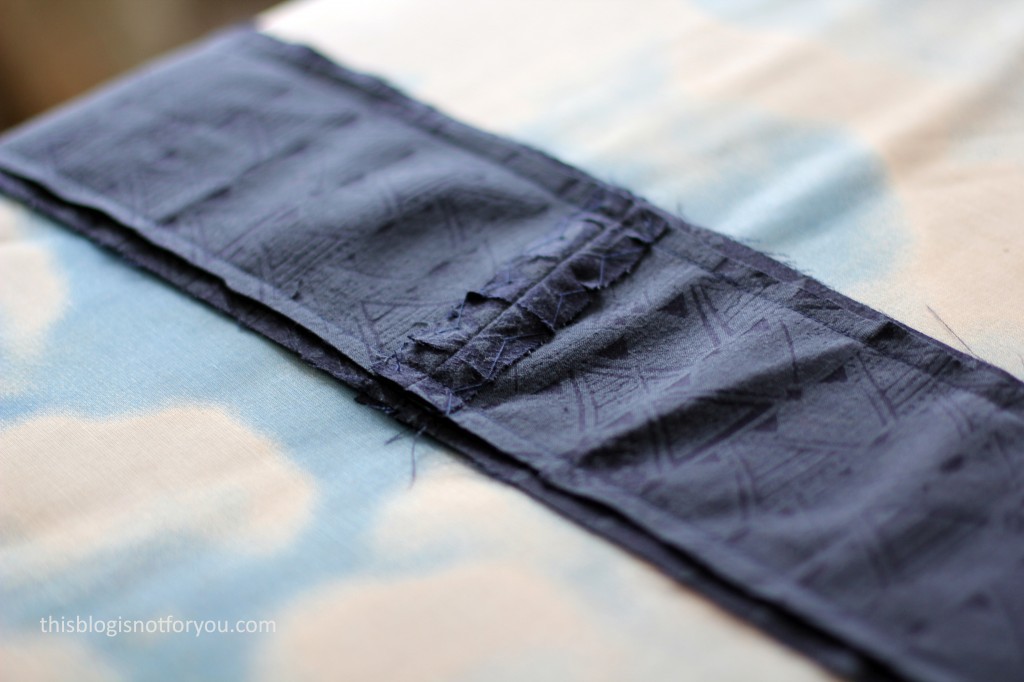
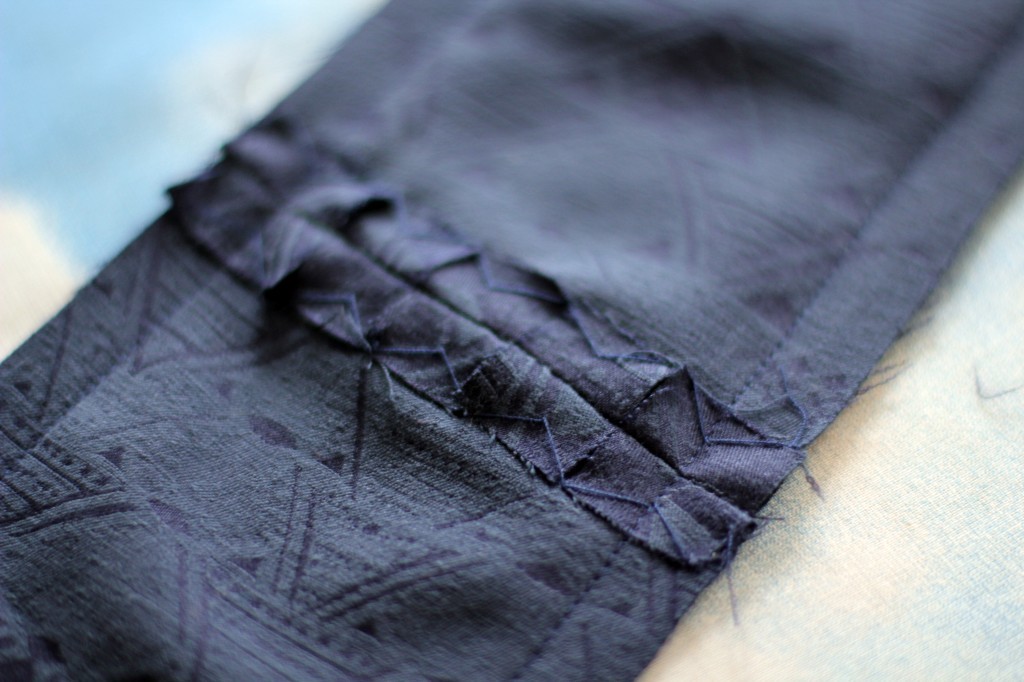
While sewing this dress I tried out different couture sewing techniques from the Roberta Carr book: Couture: The Art of Fine Sewing. This is probably the main reason why sewing this dress took so long. I mainly focussed on reducing bulk at the seams, clipping and catchstitching curved seams (the dress has a lot of those!) and pressing techniques. I absolutely love the book and will have to read it over and over again to memorise all these helpful tips and tricks. I won’t lie, couture techniques take ages and will slow down your sewing process, which is what couture is about. I will definitely try to use more of these techniques in my sewing.

ByHandLondon Georgia Dress by thisblogisnotforyou.comByHandLondon Georgia Dress by thisblogisnotforyou.com

Apart from the curved seams (especially at the bust cups), there were no particularly tricky bit in constructing this dress. It’s a dress a beginner could definitely tackle, yet it’s still interesting enough for an advanced sewer.ByHandLondon Georgia Dress by thisblogisnotforyou.comByHandLondon Georgia Dress by thisblogisnotforyou.comByHandLondon Georgia Dress by thisblogisnotforyou.comI had to get out a strapless bra for this dress, otherwise the wide straps on this dress wouldn’t look half as good. They are at an angle, so bra straps would probably show, especially at the back.ByHandLondon Georgia Dress by thisblogisnotforyou.comByHandLondon Georgia Dress by thisblogisnotforyou.com

Will I make it again? I really like this dress and feel very confident wearing it. I will most likely make another one, but not this year. The straps make it hard to pull off a layered look, so it’s more of a summer dress for me.

xx

Charlie


Happy sewing!

facebook/bloglovin/pinterest
twitter/instagram

Stay in touch!

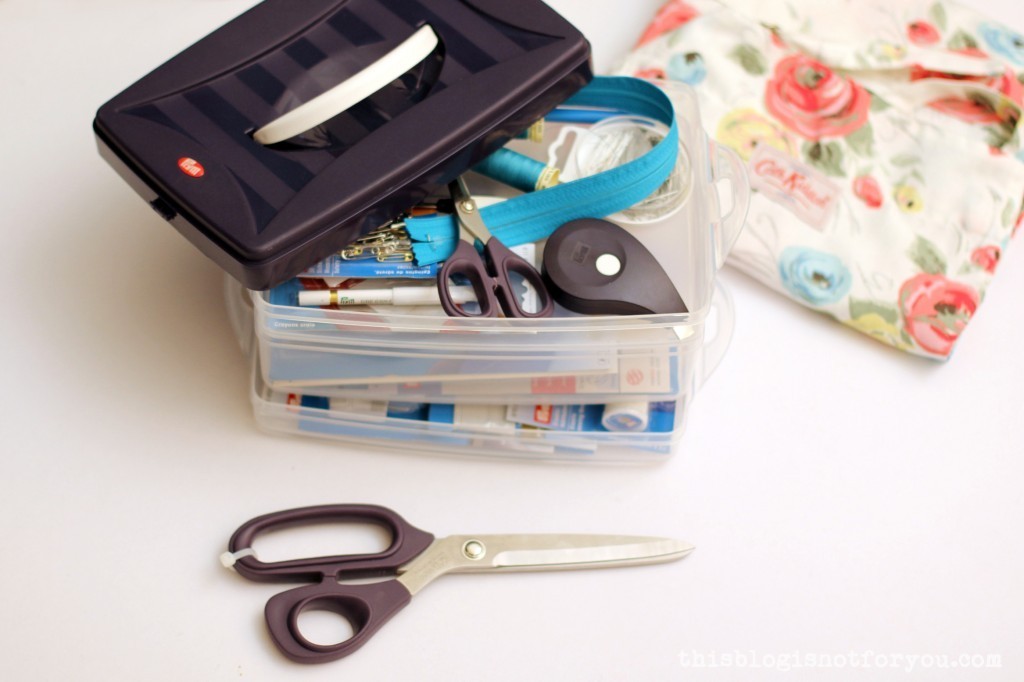
The 11 Most Useful Sewing Tools (And why you don’t need to own every tool out there to improve your sewing)

The 11 Most Useful Sewing Tools by thisblogisnotforyou.com
I’m a perfectionist.

Well, the kind of perfectionist who doesn’t do things perfectly but is constantly dissatisfied with the result. For example, I’m often unhappy with my sewing and want to do something about it. Instead of the obvious ‘taking more time with my projects and practising techniques’, I tried to take short cuts. I kept buying more and more tools and books and supplies that promised to make a more professional seamstress out of me.

Now, after five years of sewing almost every free minute, I sit on a massive pile of sewing tools and books which I hardly use. I don’t regret the money spent, because it was spent on something I love. What I do regret is the time spent looking for and buying unnecessary stuff instead of using the things I already had and taking time to learn how to use them properly.

This last year I really started learning how to do things properly. I actually read the sewing and couture books I bought ages ago and started to adopt certain techniques and generally tried to be more patient with myself and my sewing. This brought my sewing to a whole new level. Not only do my garments look much more polished now, I noticed that I use fewer tools. I now have my go-to tools I use all the time which are absolutely sufficient to make a professional-looking garment.

We are a consumer society and we are constantly told what we need to buy to be happier and more successful. This includes the market of sewing goods. Investing in your hobby is  fun and if your goal is to collect all the sewing books out here, please do so! But for those that constantly feel under pressure to accumulate more stuff to ‘become more professional’ and might not be willing to spend so much money, this can be frustrating as hell. So let me tell you: You don’t have to have all the tools, just a few right ones. In the end, it comes down to your manual skills and not the amount of tools you are using.

If you’re a beginner confused by the vast variety of sewing supplies, maybe this helps to get an idea what you really need to spend your money on. Quality is better than quantity!
The 11 Most Useful Sewing Tools by thisblogisnotforyou.com

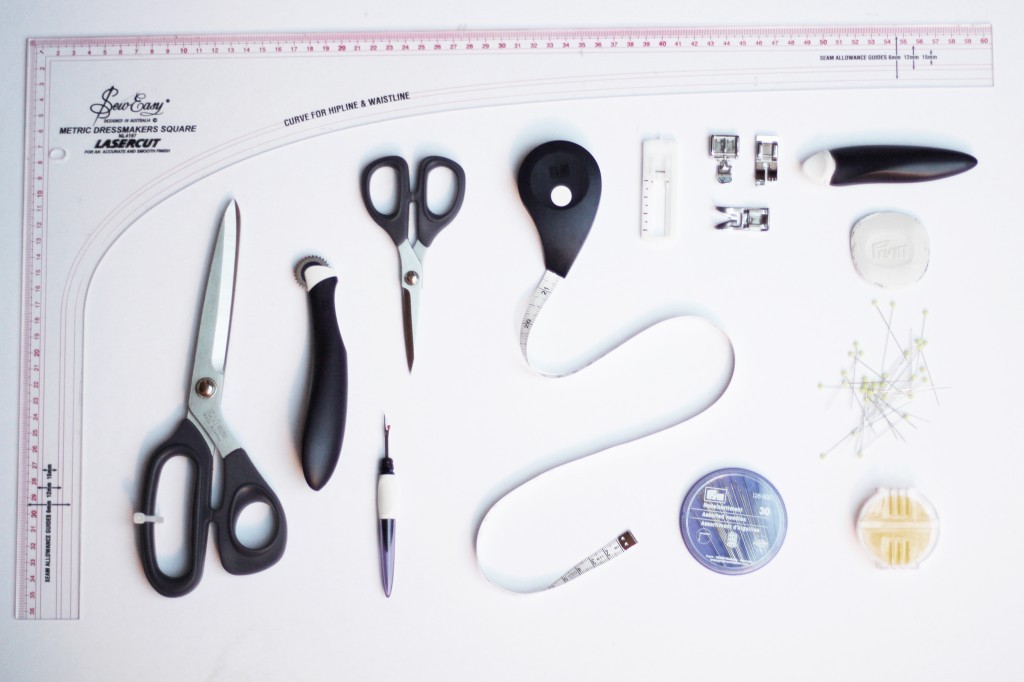
11 MOST USEFUL SEWING TOOLS

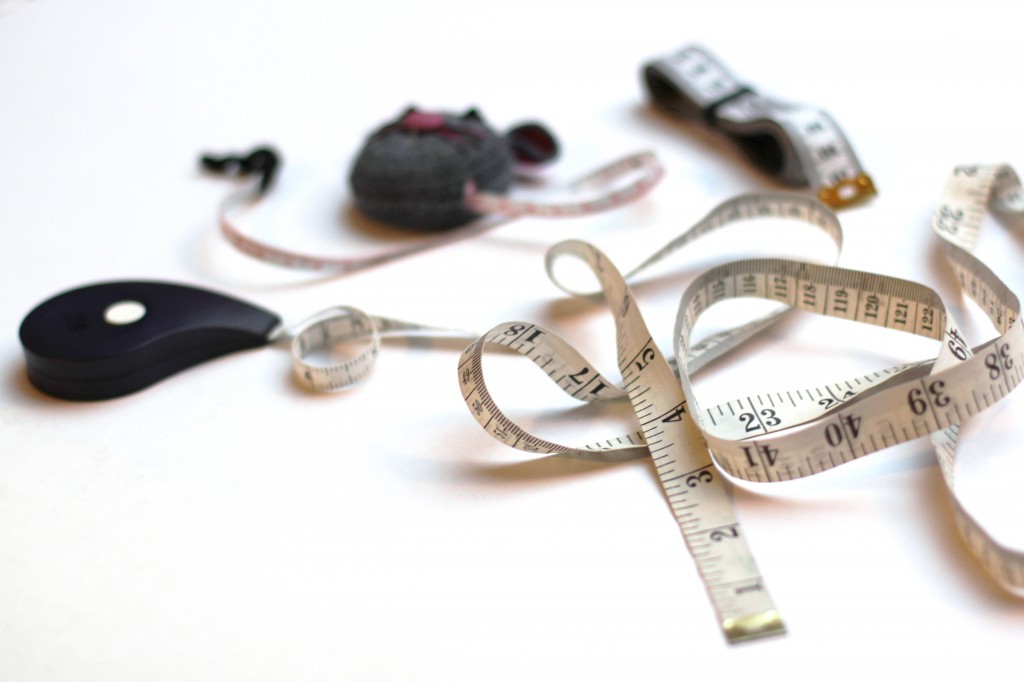
1. Measuring tape

That’s an obvious one, I know. But it’s one of the most used tools I have, so I had to include it in this list. I have different measuring tapes, but I use one the most: It’s metric on one side and imperial on the other, which makes it easier to work with US patterns. It’s pretty old and therefore really soft now and I only use other ones when I cannot find this one because it’s buried somewhere in my creative mess.

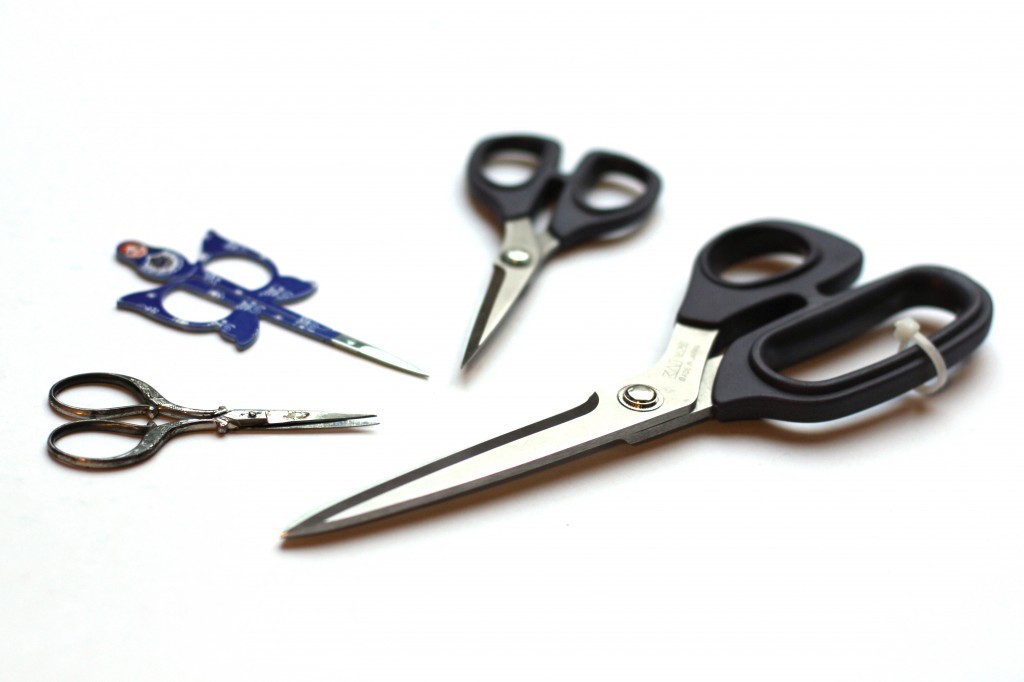
2. Spend money on sharp, high quality fabric & embroidery scissors

Money spent on sharp, good quality fabric scissors is money well-spent. My first pair of fabric scissors was pretty cheap and bought off the internet. Oh, how I hated cutting fabric back then. After cutting heavyweight fabrics I had blisters on my fingers and my wrist hurt for two days. I tried a rotary cutter (+ cutting board), which was much less painful, but the board wasn’t big enough to cut out large pattern pieces without having to move the board around under the fabric. Also, it’s hard to cut small curves and corners with a rotary cutter. If you’re a quilter, go get one, but if you mainly sew clothes, scissors work much better in the end. When I finally got proper scissors (I was gifted lovely Prym scissors from John Lewis at our Sewing Bee), they felt like cutting through butter with a knife.

Next to large scissors for cutting out pattern pieces, I use small, equally sharp embroidery scissors which are always within reach while I sew. I mostly use them to cut thread ends. They’re also great for marking notches and clipping curved seam allowances. Since they’re much smaller the risk of accidentally cutting too deep into your fabric isn’t as high.
The 11 Most Useful Sewing Tools by thisblogisnotforyou.com

3. Handsewing needles & bees wax

You won’t get by without a little or a lot of handsewing here and there. Have a set of handsewing needles in different strengths and lengths within reach. I only very recently started using bees wax on my handsewing thread and it’s wonderful! Goodbye, constantly knotted threads!

4. Iron & pressing board

Never underestimate the power of a good iron. I tried to ignore this for a long time, but eventually had to admit that pressing is a major part of the sewing process. Get a good steady board, the larger the better.

5. Tailor’s chalk

There are thousands of different marking tools on the market. Fabric pens, chalk pens, tracing paper etc. I’ve tried the powdery chalk tools and they don’t work well on some fabrics and they’re also a bit more expensive. The most effective tool for me is a simple square piece of tailor’s chalk. It draws clean lines easily on any fabric and is quickly removed with a bit of rubbing. You can get it in different colours. I only use the white one. When the edges get blunt, I use a knife to sharpen them. I’m still using two of a set of three I bought when I started sewing five years ago.

6. Seam ripper

I can’t live without my seam ripper. No matter how good a sewer you are, you’ll always mess up at some point, so having a seam ripper near for a quick fix is essential. Some people use embroidery or nail scissors instead which I wouldn’t recommend as you can accidentally cut into the fabric very quickly. When your seam ripper starts to get blunt, go get a new one!

7. Tracing wheel

For me this is the most effective tool for copying patterns. I trace all my patterns and never cut into the original pattern sheet. Tracing paper is too expensive for my taste. This little tracing wheel punches little holes into your pattern paper which are easy enough to see and trace with a pen afterwards. For marking on fabric I use tailor’s chalk.
The 11 Most Useful Sewing Tools by thisblogisnotforyou.com

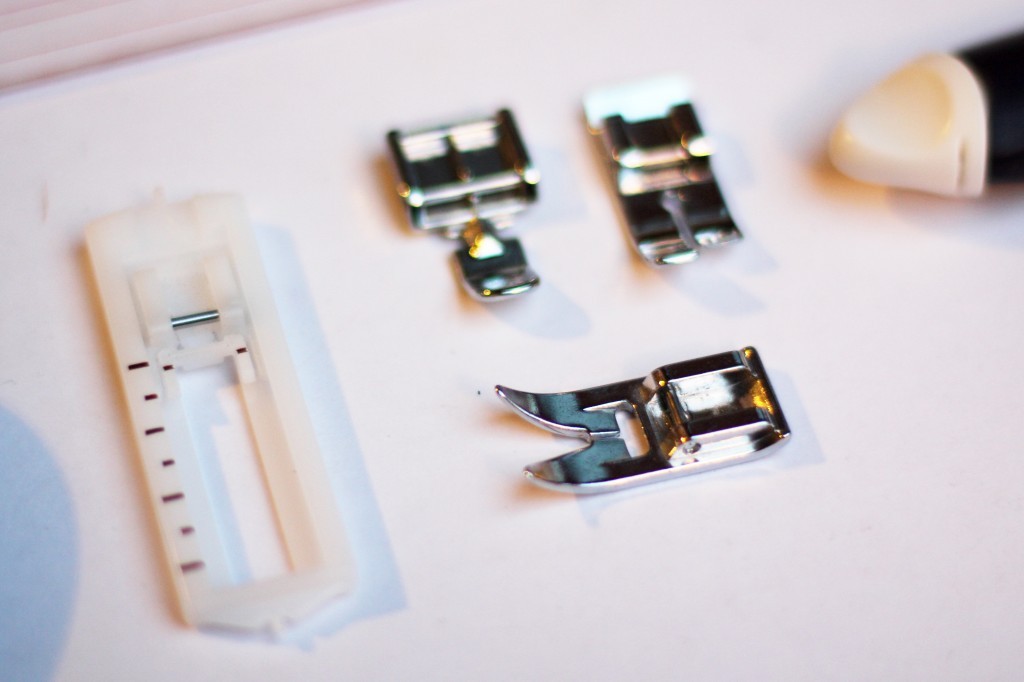
8. Four main sewing machine feet

I have two boxes with two different sets of sewing machine feet (probably around 20 different ones). While some sewing machine feet are great helpers (edgestitch feet, invisible zip feet, blind hem feet, overlock feet, the list goes on…), you don’t have to spend your money on getting them all. I found that these four, which are also the most basic, are absolutely enough if you learn how to use them right.

Zigzag foot: The most basic, standard foot of all sewing machines. You can use it for pretty much all of your machine settings. This is the one you will use most.

Straight stitch foot: Although you can use the zigzag foot for straight stitches, too, this little fellow is great to have when sewing with very delicate, lightweight fabrics. We all hate it when our sewing machine eats our chiffon or silk fabrics, this machine foot really helps to prevent that.

Zipper foot: When dealing with zippers, a normal zigzag foot won’t do. The standard zip foot is for exposed zips. There are different ones for concealed zips, although I still haven’t found one that works perfectly. That’s why I often use my normal zip foot for concealed zips, too. And it works ok.

Buttonhole foot: This one will probably come with your machine, unless you bought it secondhand. If your machine has a four-step buttonhole setting, you’ll need this one. And it works brilliantly once you get used to working with it.

9. A Dressmaker’s Square or Hip Curve

I’ve tried all sorts of different rulers and dressmaker’s curves over the years, that I don’t really use any more since I got the dressmaker’s square. It’s a rectangular ruler with an integrated hip curve, lines to mark 1cm and 1.5cm seam allowances and it’s much longer than the average ruler. Since it has so many different functions all-in-one, it’s a very useful tool to have.

10. High quality (glass head) pins

Don’t try and save money when you buy pins. They’re not expensive anyway. Get good quality pins. A pack of 100-200 will last ages. You can get super cheap ones that are of a horrible quality and will leave holes or rip threads in your fabric while pinning. If you buy them from a sewing brand, such as Prym, you should be ok.

Furthermore, I really love using glasshead pins. They’re a tiny bit more expensive, but the glass heads won’t melt if you accidentally press them with a hot iron!

11. Stock up on different sewing machine needles

Always keep some extra needles. This is something you can really stock up on. Needles break or become blunt after a while and it’s the most annoying thing to be forced into breaktime and having to buy or order new needles. Also, different fabrics require different needles. This applies especially when working with knits or very heavy or lightweight fabrics. Your standard needles are fine and will work with most mediumweight, woven qualities. But once you start working with stretch or knit fabrics you might get problems with skipped or untidy stitches. Have some ballpoint/Jersey, stretch, leather or denim as well as extra fine needles ready when you’re working with these fabrics. Change your needle regularly!
The 11 Most Useful Sewing Tools by thisblogisnotforyou.com

Are there tools that you think are essential, which aren’t included in this list? Or have I listed something that you find unnecessary? Please leave a comment and let me know! I’d love to hear other sewists’ thoughts on this!

xx

Charlie


Happy sewing!

facebook/bloglovin/pinterest
twitter/instagram

Stay in touch!