Hello there! Finally! A sewing-related post :) It’s been a while!
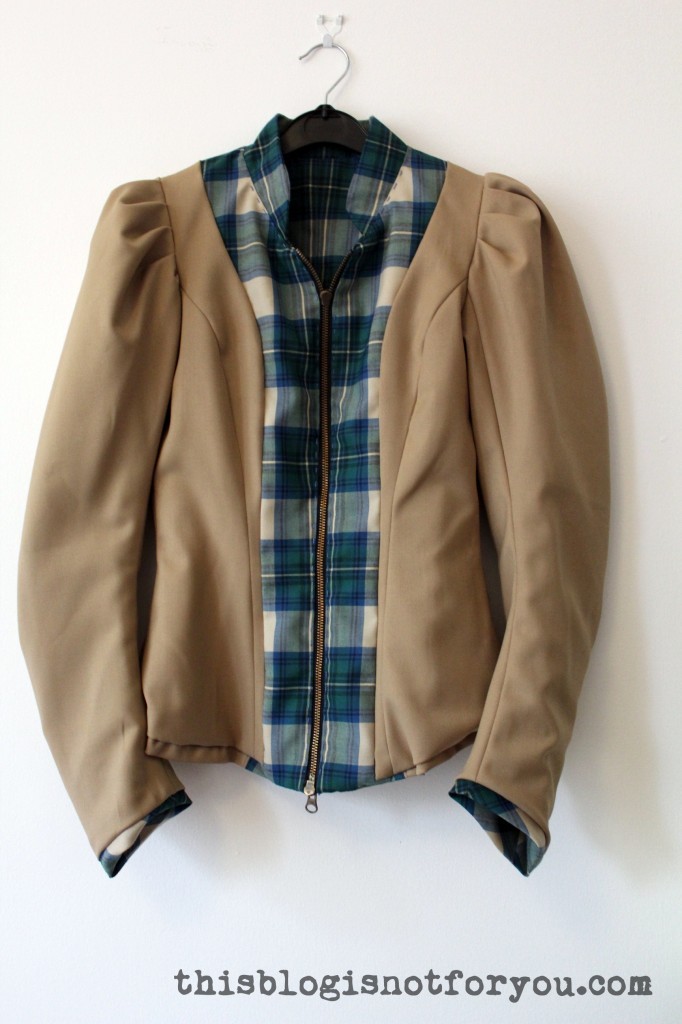
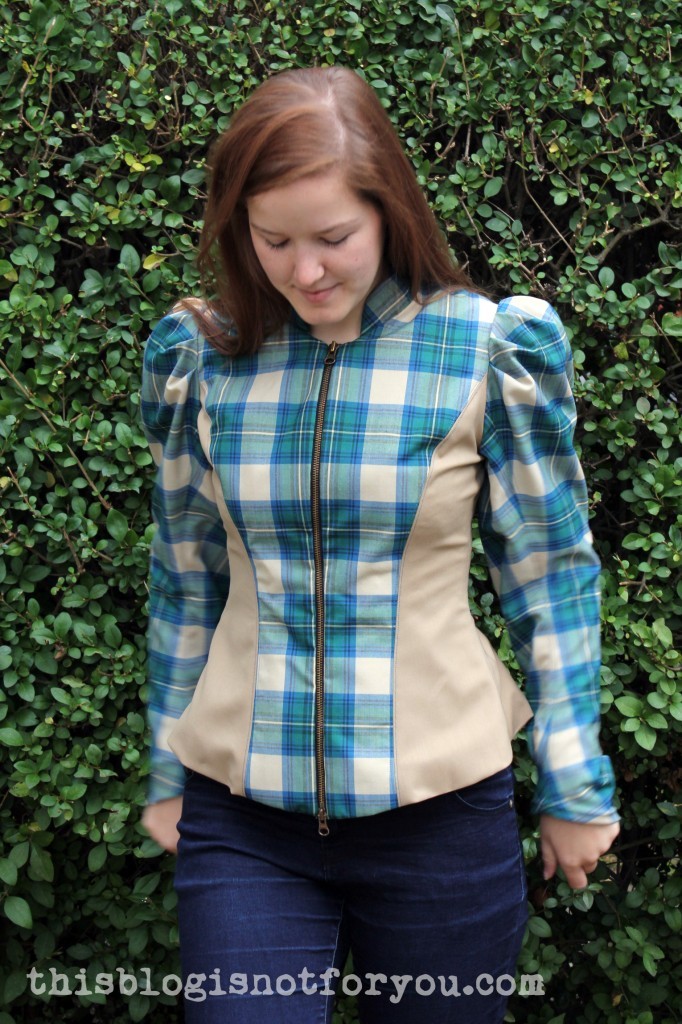
I’m happy to annouce that I finally finished sewing up my first jacket. (#15 of my 27 Dresses Challenge, btw!)
I scored 3 metres of a pretty greenish/blueish cotton plaid at the last fabric swap in Goldhawk Road and went through my pile of Burda magazine looking for a jacket or blazer pattern.
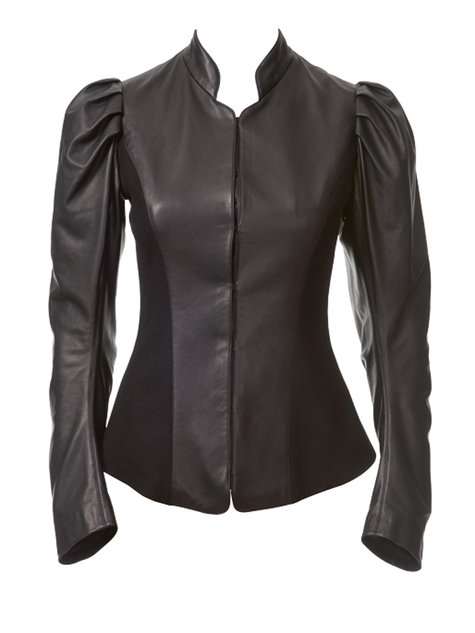
I came across this leather puff sleeve jacket which I really loved and thought I’d give it a try. It’s from Burdastyle 8/2013, #113.
As the pattern is supposed to be used with leather I absolutely didn’t know if it would affect the fit of the jacket if I used it with my cotton/linen fabric. No risk, no fun!
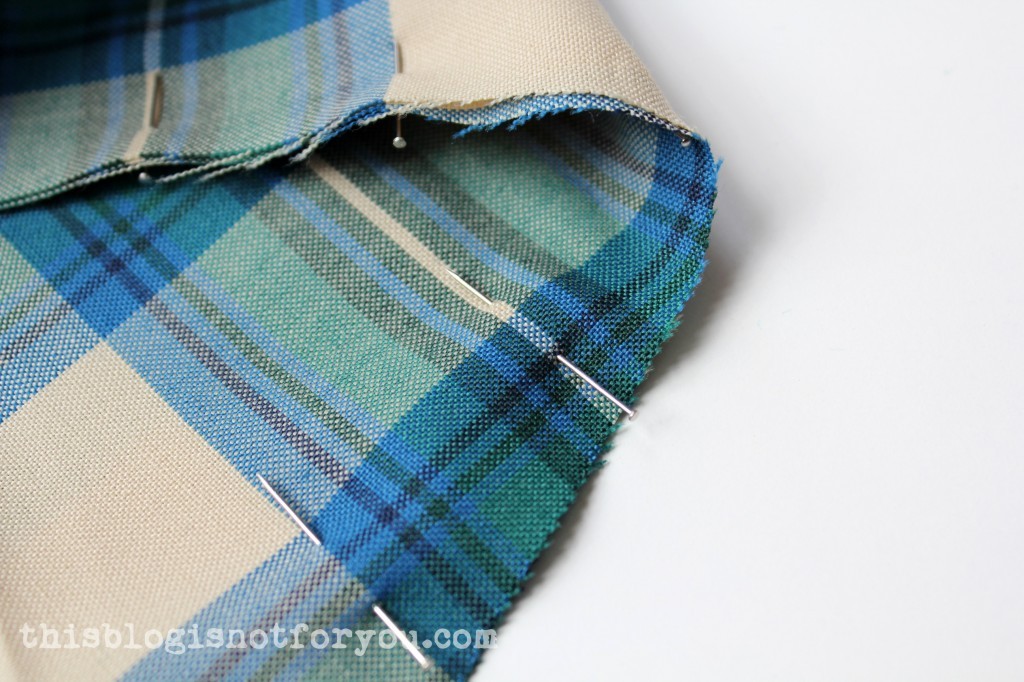
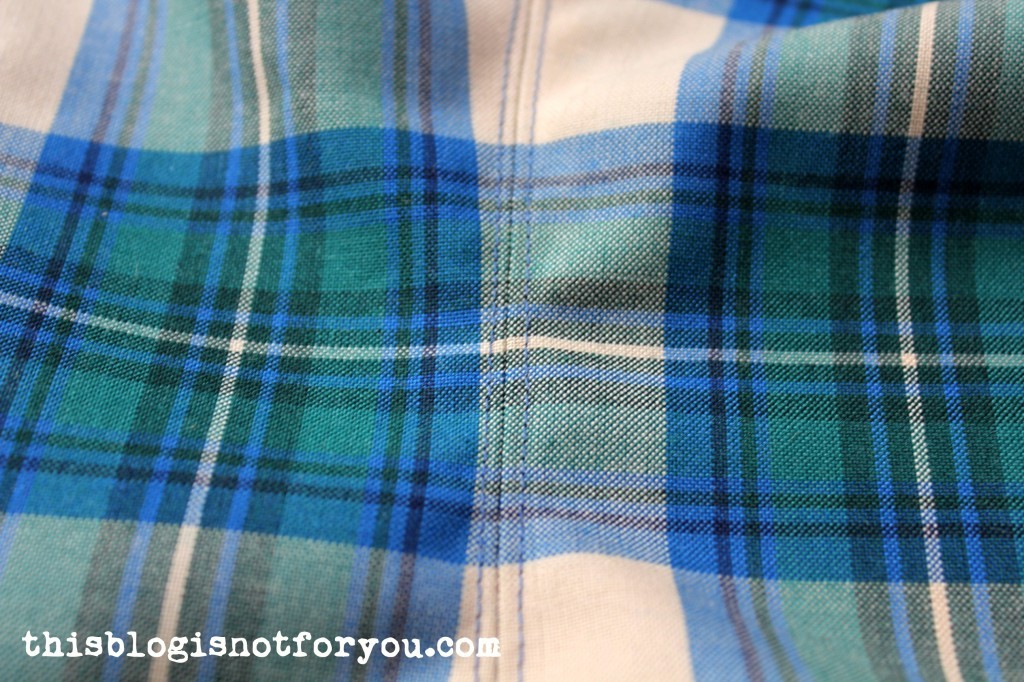
Well, as soon as I started cutting out the fabric, I learnt that working with plaid is annoying as f***. You have to be so so soo careful if you want the pattern of the fabric to match up at all seams in the end.
After six hours (!) of cutting I took a break and didn’t start sewing until a few days later. Sewing the pieces together was not as easy as I thought, as you have to match up the pattern at the seamline, not the edge of the cut out pieces (otherwise the lines will be off by almost 1/4 inch or more).
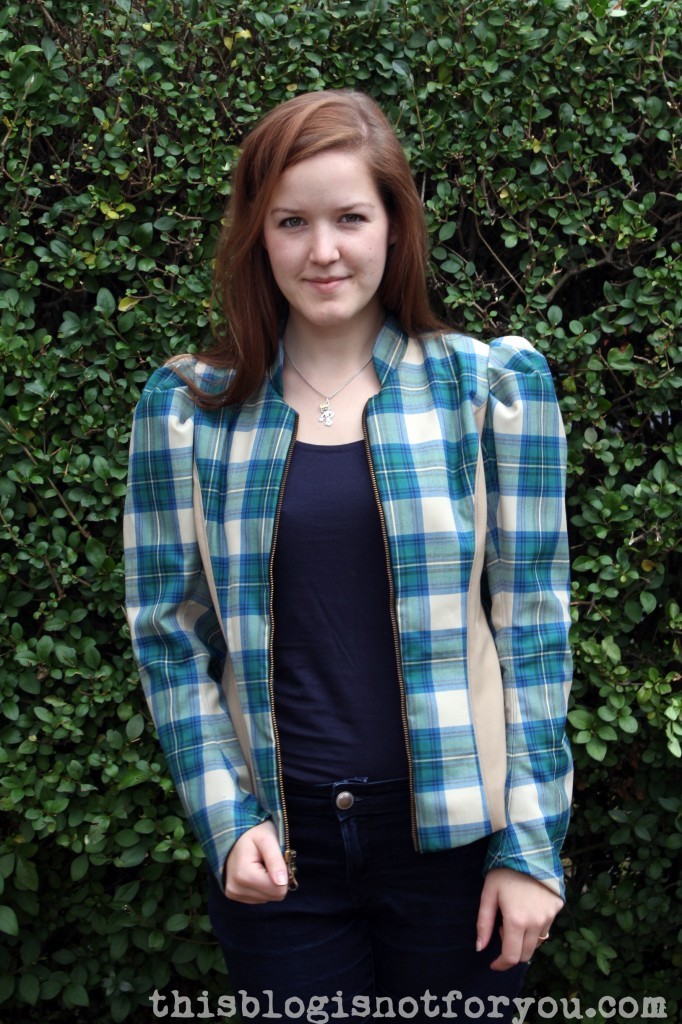
Look! I made it! Phew. Sewing with plaid is nerve-wracking! I struggled a bit with the zipper because the left front panel was a bit off after sewing it in and I had to take out my BFF Mr Seamripper.
After two attempts, I finally succeeded and now it looks like this, still off by a millimetre:
By the way, as the zipper was from an old cardigan of Mr Thisblogisnotforyou and the fabric was from the fabric swap, this jacket basically didn’t cost a penny!
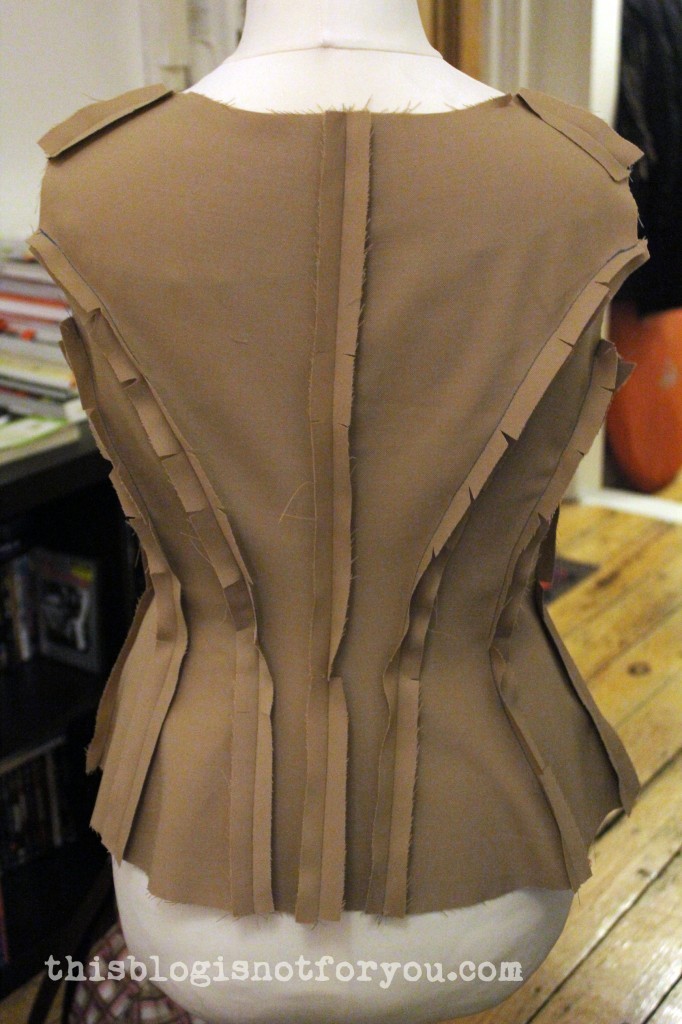
Here a few pics of the work in progress:
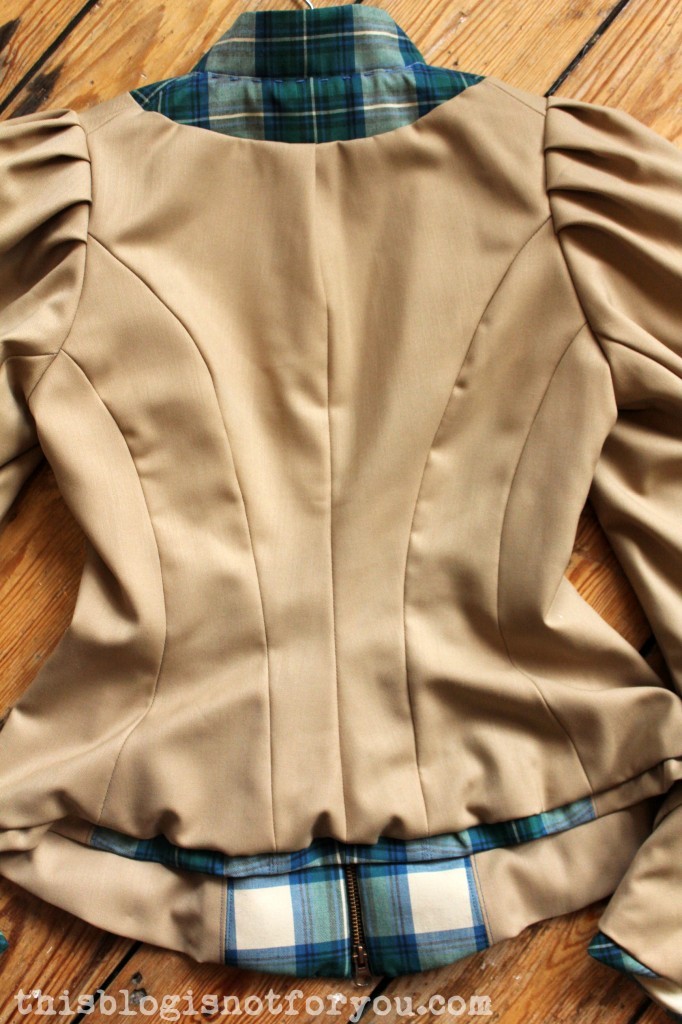
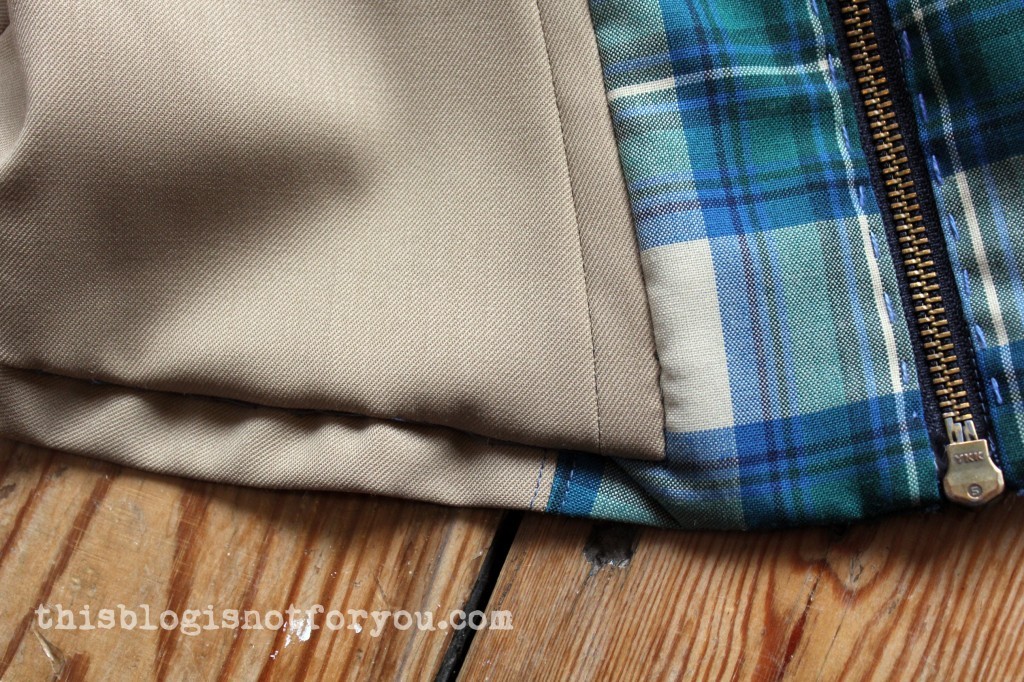
The lining:
Finished!
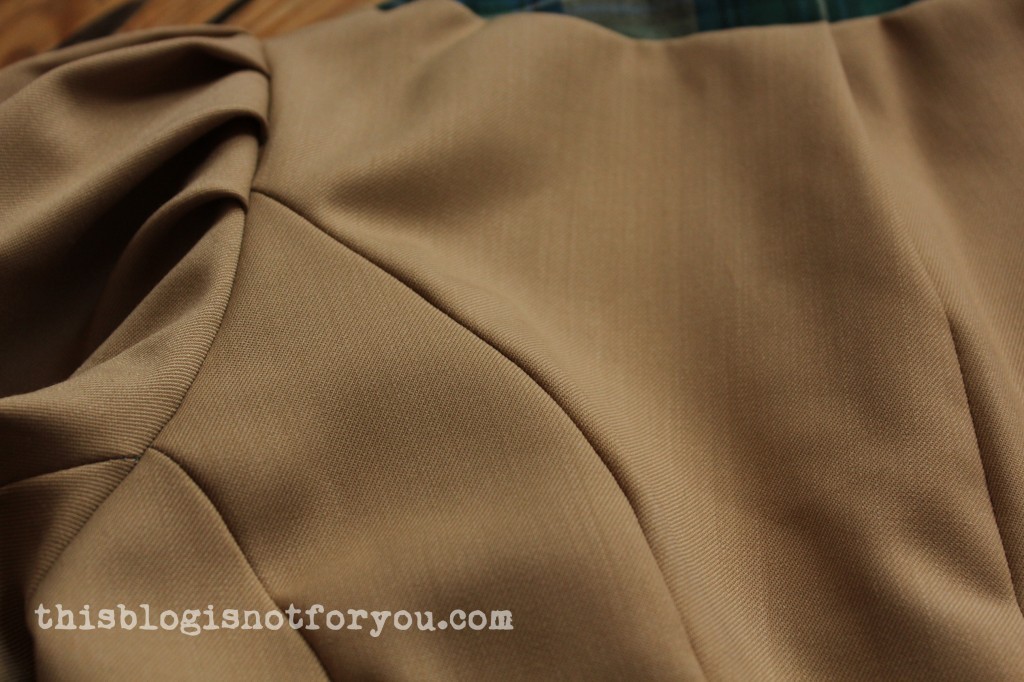
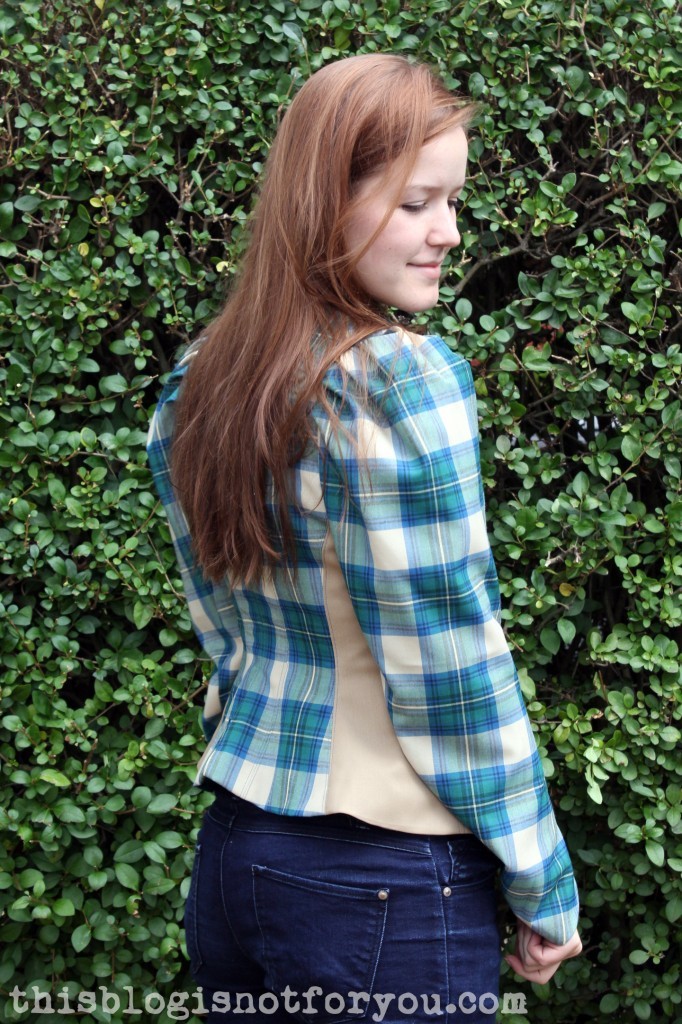
The jacket turned out pretty well, but I started hating the sleeves that I loved to much in the beginning as soon as I tried it on. The puff sleeves are ginormous! I don’t know what the Burda pattern people thought or if it’s a typical leather jacket thing, but these sleeves are huuuuge! I look like an American football player. Or as Mr Thisblogisnotforyou put it:
Elizabeth, queen of Puff Sleeve
Well, I’m still proud of the jacket. It’s the first time I sewed in a full lining and I doesn’t look too bad.
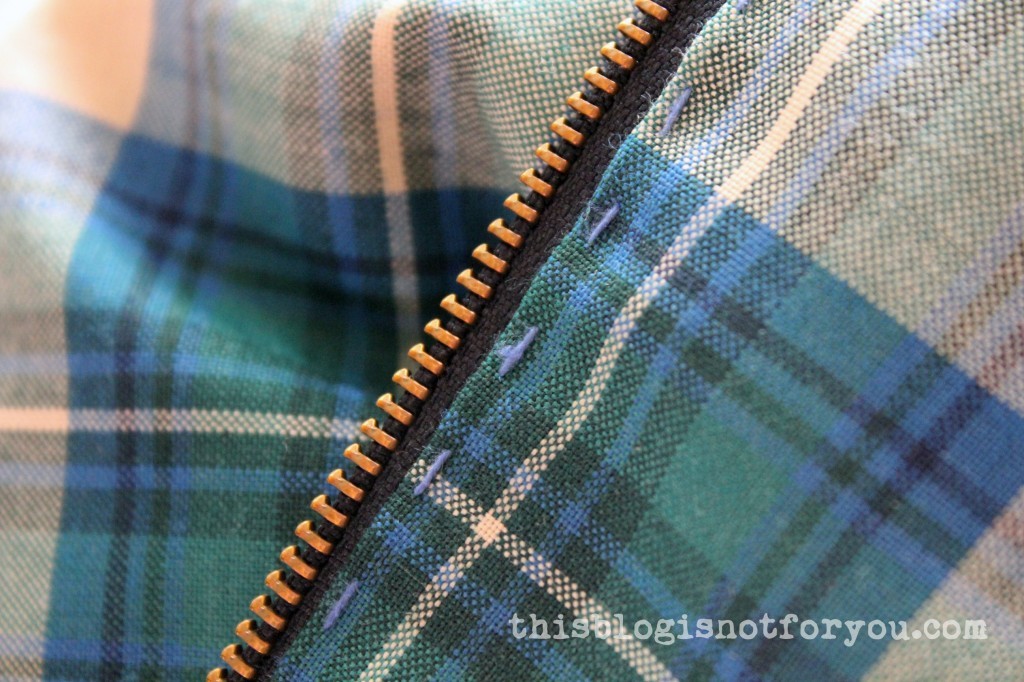
I embellished the facing with blue embroidery thred instead of edge-stitching it to the seam allowance.
Well, at least I now have an excuse to (finally!) get ticket to the Globe theatre to see some of Shakepeare’s finest.
Yes, I’m still alive. And yes, I’m still busy and need to figure out my new work schedule, sewing and blogging balance. To prove to you that I’m still working hard on my 27 Dresses Challenge, I even took some pics of my Work In Progress *spoiler alert*!
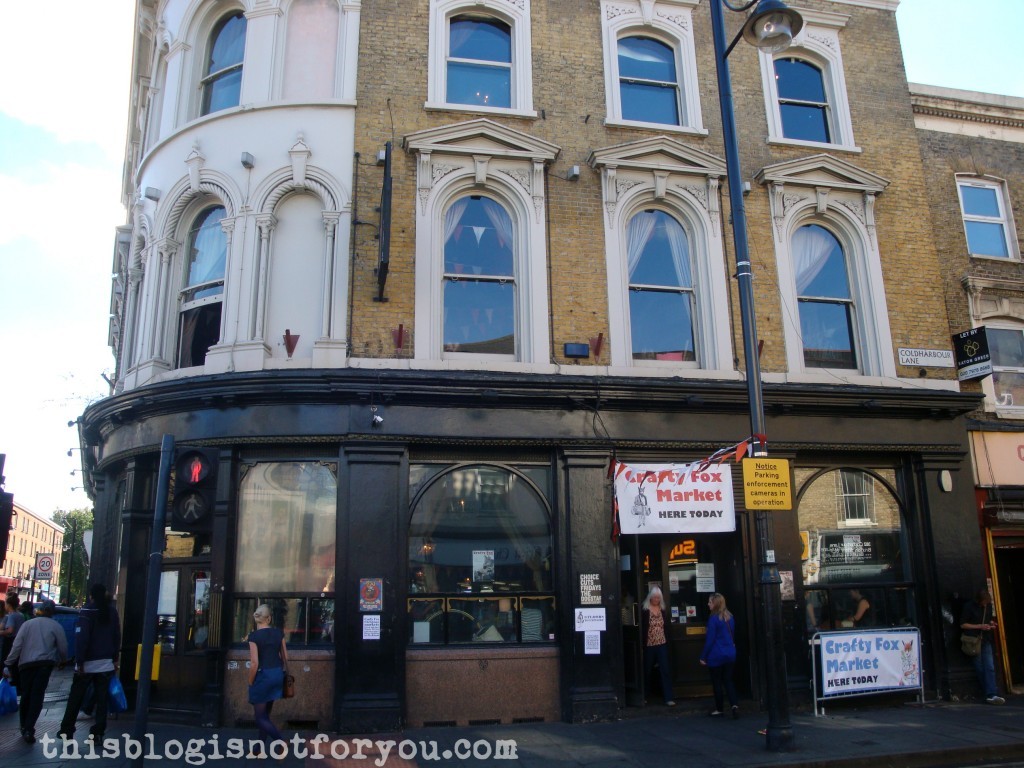
But first of all I wanted to share some of the stuff I admired (and bought) at the Crafty Fox Market in Brixton last Sunday. Daniela from Ela Sews And Doesn’t Sleep invited me to come with her, which was super sweet and if she hadn’t asked me I wouldn’t have known about the Crafty Fox Market in the first place. The location was absolutely wonderful, but I forgot to take pictures.
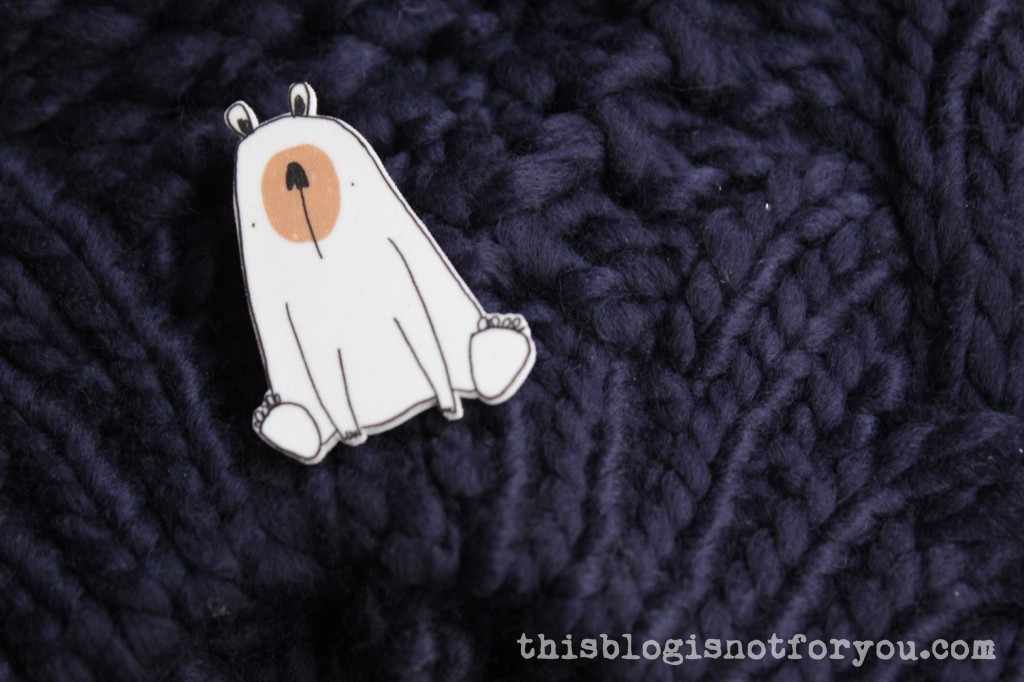
One of my absolute favourite traders was Kayleigh O’Mara, who sold (next to other things) super cute shrink plastic brooches. After standing in front of the brooches for almost 15 minutes I HAD to buy some. I picked a super cute polar bear and a badger (see pic above).
The polar bear now found its place on my new beanie and I love it!
And yes! You guessed right – my order of shrink plastic arrived this morning! Let’s make some fun jewelry this autumn.
*Blurry Pic Alarm*
One of the other traders, Forgotten Stitches, sold beautiful vintage-looking dolls. Aww! Unfortunately way out of my budget, but you can check them out here.
By the way, the Crafty Fox Autumn market exhibitors have been selected by guest curators, one of them being Tilly Walnes (you know her from Tilly and the Buttons).
Other traders I absolutely loved (actually I loved all of them, but these are the very best):
Jimbo Art had super cute and fun designs – plates, cups and art prints.
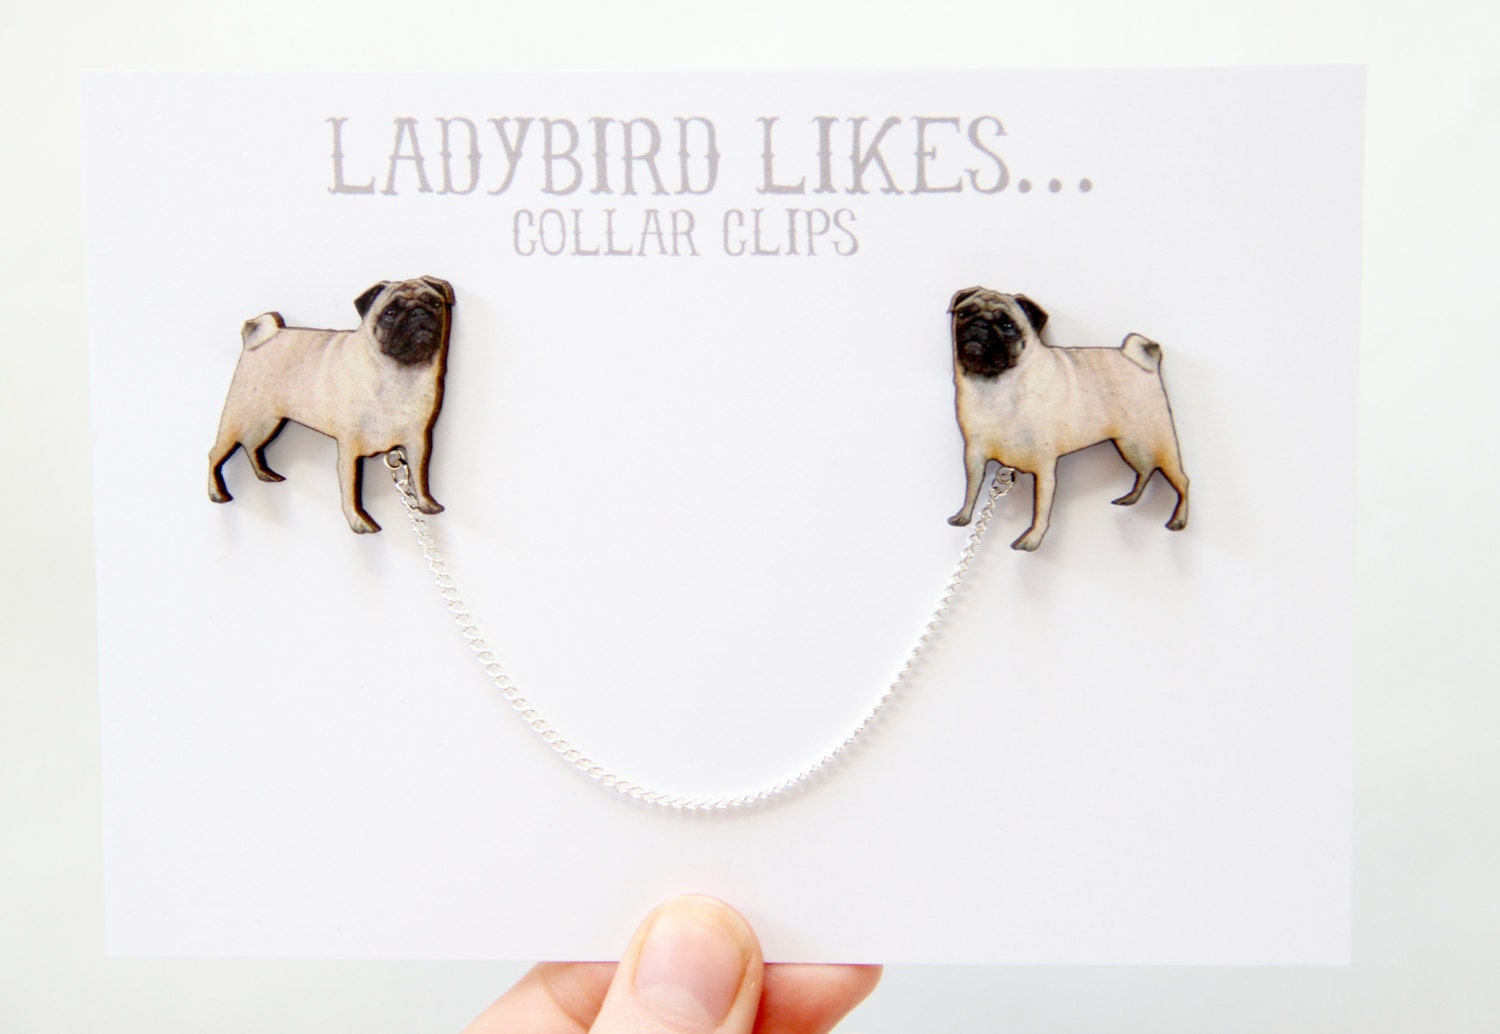
Ladybird Likes sold these cute pug and owl collar clips (amongst other things).
For a list of all traders, check out the Crafty Fox website. It’s absolutely worth it! Most of them have web or etsy shops, your chance to get your share of handmade froufrou if you missed the market last weekend!
Now, to prove to you that I’m not just hanging around being lazy and taking a break from blogging, here’s the chance to sneak a peek at my WIPs!
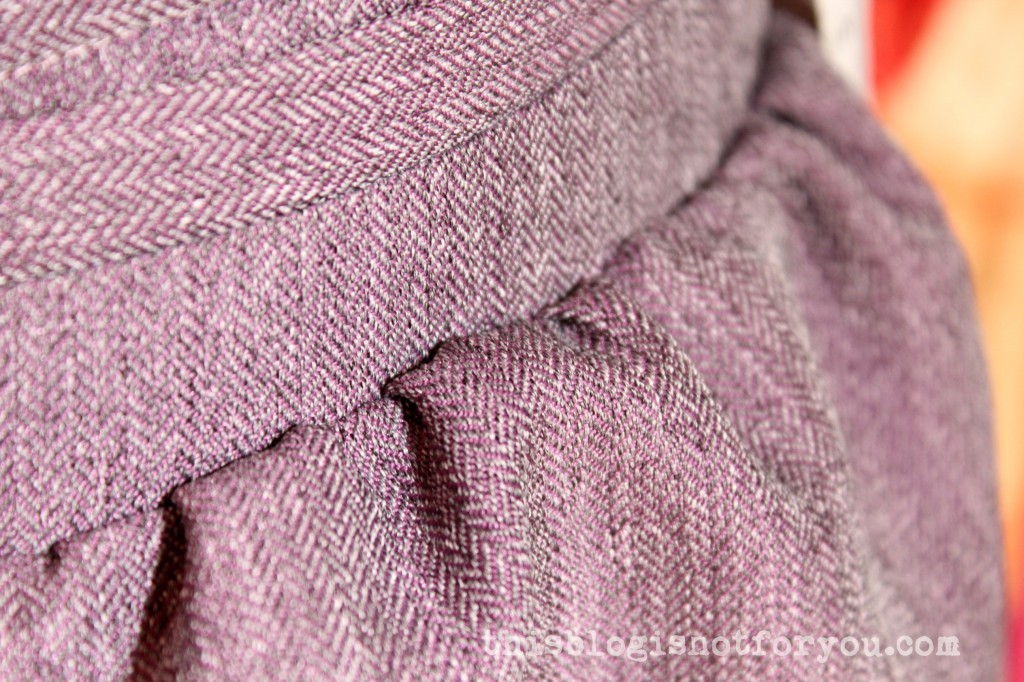
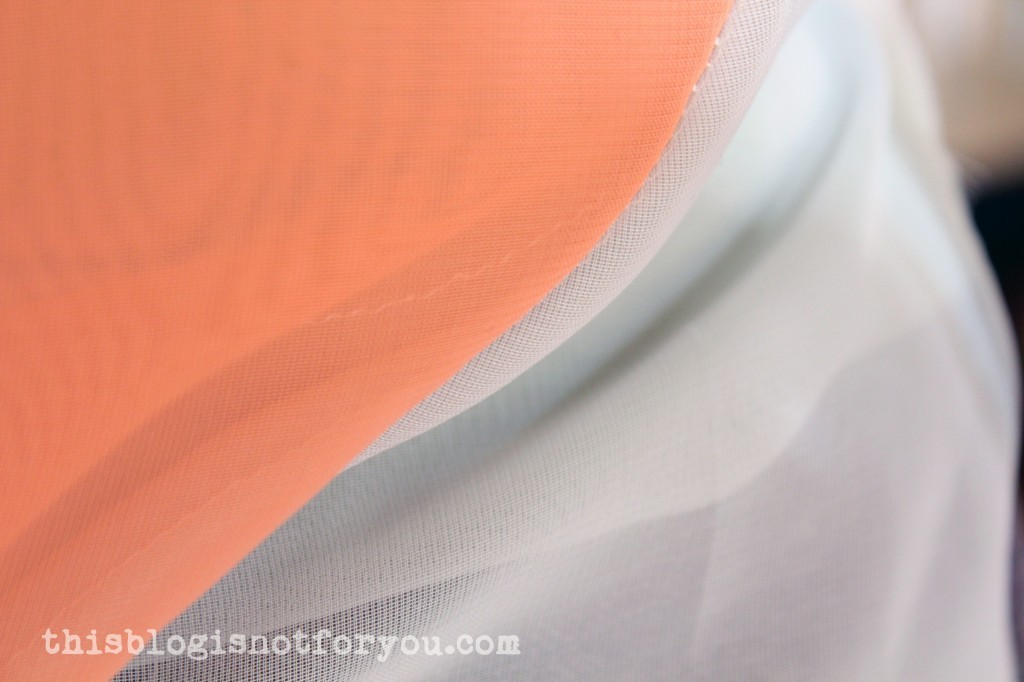
Currently I’m finishing a jacket, working on a dress and refashioning a skirt. Oh, and I started knitting a scarf. You can try and guess what is what in the pictures above. 🙂
Here is the promised tutorial for those of you who are interested in how I made my maxi dress. Warning! This post got way too long. I recommend reading through first, before starting to cut your fabric 🙂
As I mentioned in my last post, I always wanted to make a maxi dress. I’m not a big big fan of the slightly shapeless jersey versions you see everywhere, although I bet these are super comfy. I wanted to make something easy, yet a bit elegant and thought of something like this:
source: img.alibaba.com
What do you need to make it?
Some lightweight fabric, matching thread, stretch satin or jersey for an underdress and some bias binding for the straps (you can make this from the fabric you use for your underdress by cutting strips at a 45 degree angle). Make sure the underdress has a bit of stretch, so that you can skip the zipper.
I used a chiffon (150x2m/60inx80in) and a stretch satin slip dress.
Of course you can make a fitted underdress/slip dress yourself, if you want to go all the way. Here are some pattern suggestions:
Burdastyle.com Cami Dress 09/2013 #114BBurdastyle.com Slip 07/2013 #116
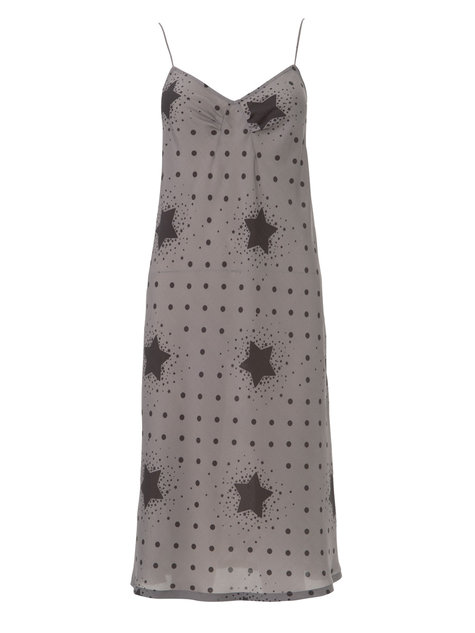
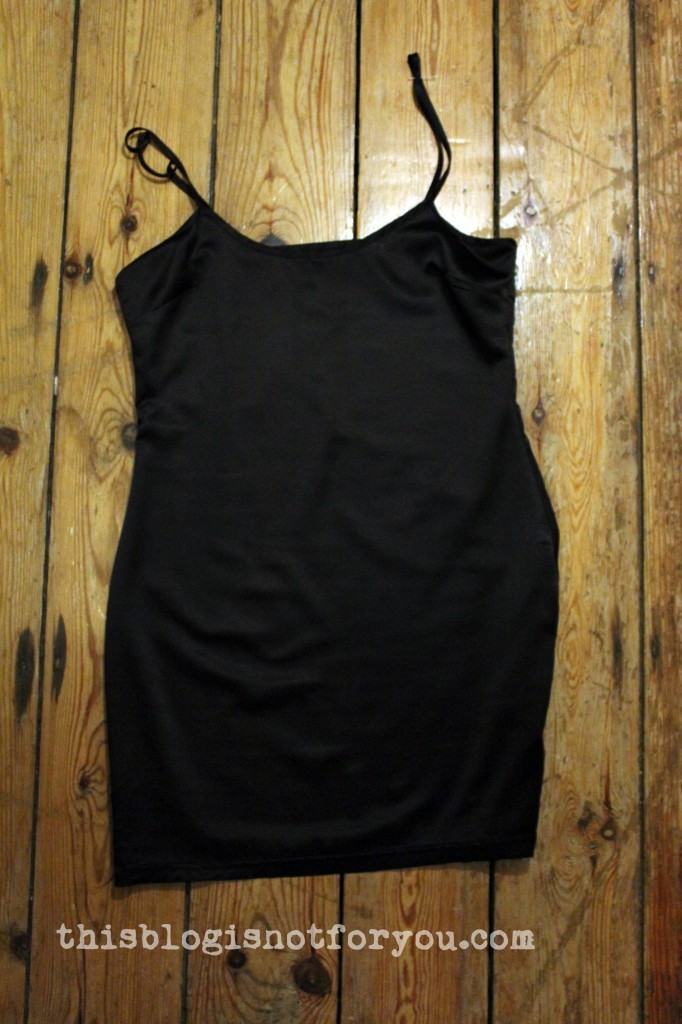
I was super lazy and used a stretch satin slip dress from a Zara lace dress I bought years ago. Who would do that to a lovely Zara dress?? Well, me. In a minute you will know why!
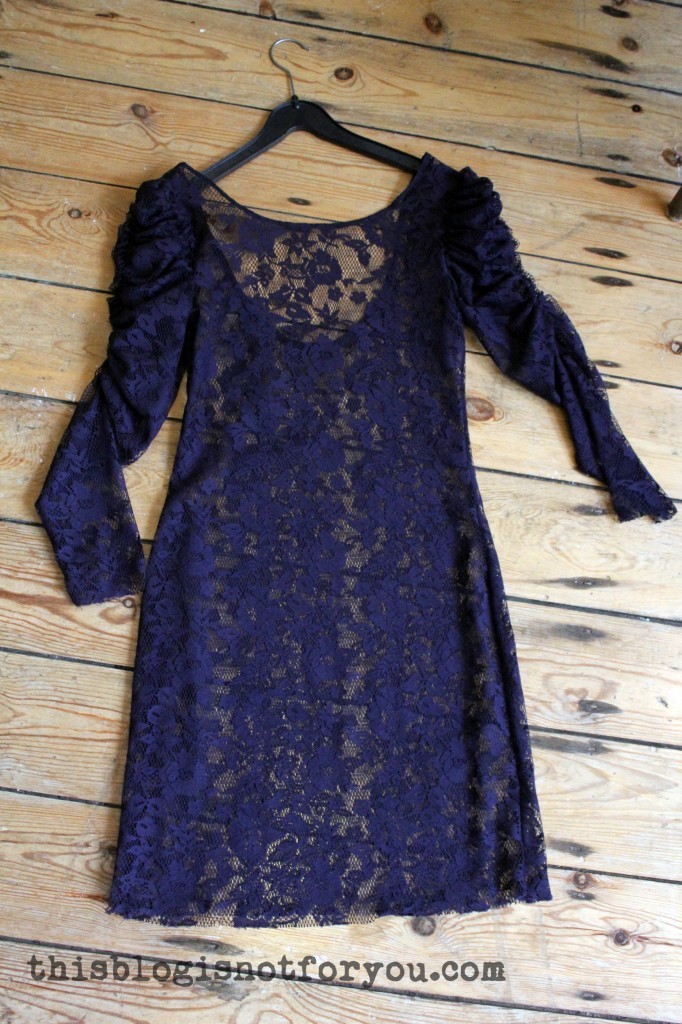
This is the dress without the underdress. Looks lovely, eh? It wasn’t.
So I bought this lovely lace dress during a Zara sale for just 6 Euro. I must have worn sunglasses when trying it on, because it turned out that the dress is super duper ill-fitting. I actually bought this to have something chic to wear for special occaisons, but um, no. Ill-fitting, wayyy too short and I really couldn’t tell what was the front and what was the back.
I wore this little number only once. This is a picture of that evening:
Where were we? Ah, making a maxi dress!
no, it’s not super wide. it’s just super short.
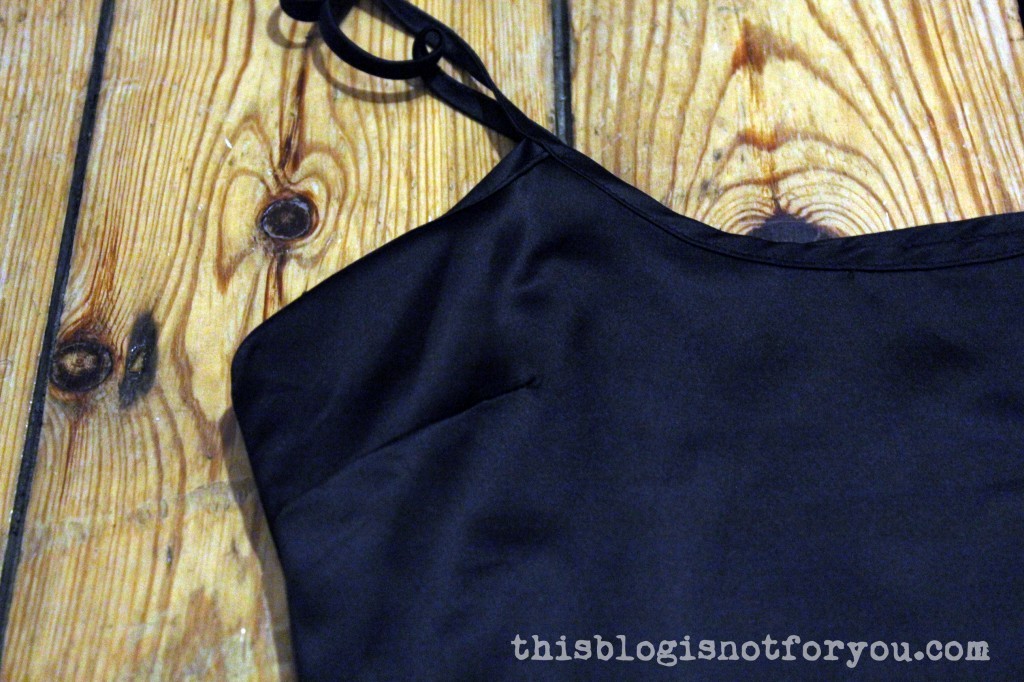
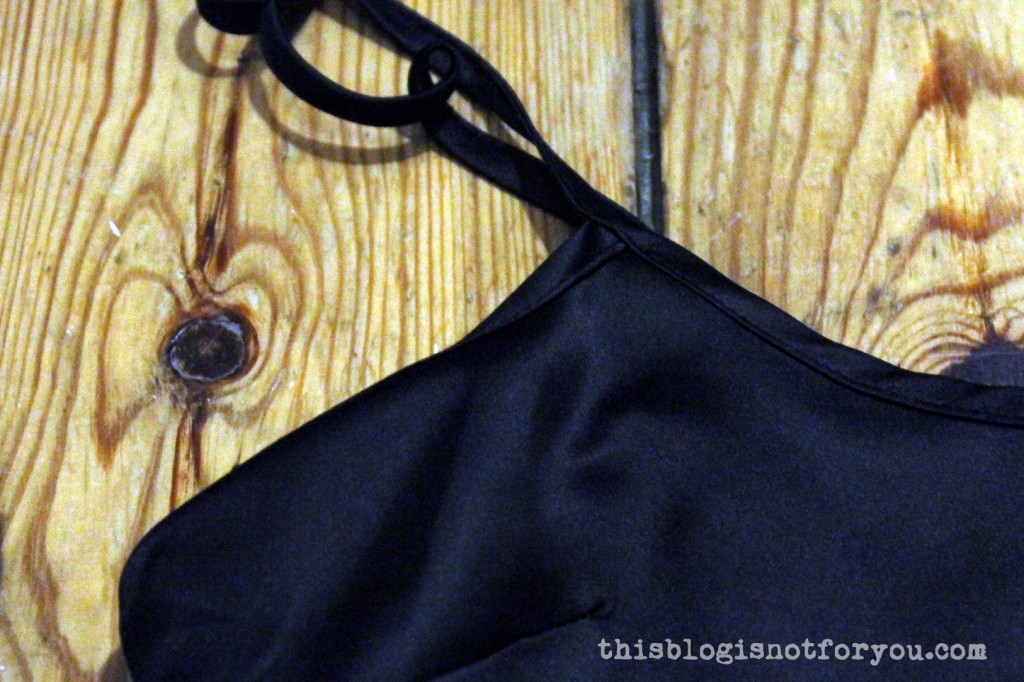
So this is the slip dress. It has only two side seams and two darts at the bust. You could easily make this dress using your bust, waist and hip measurements, creating two hourglass shaped panels. If you want to do that, please use stretch fabric. Otherwise it might not fit.
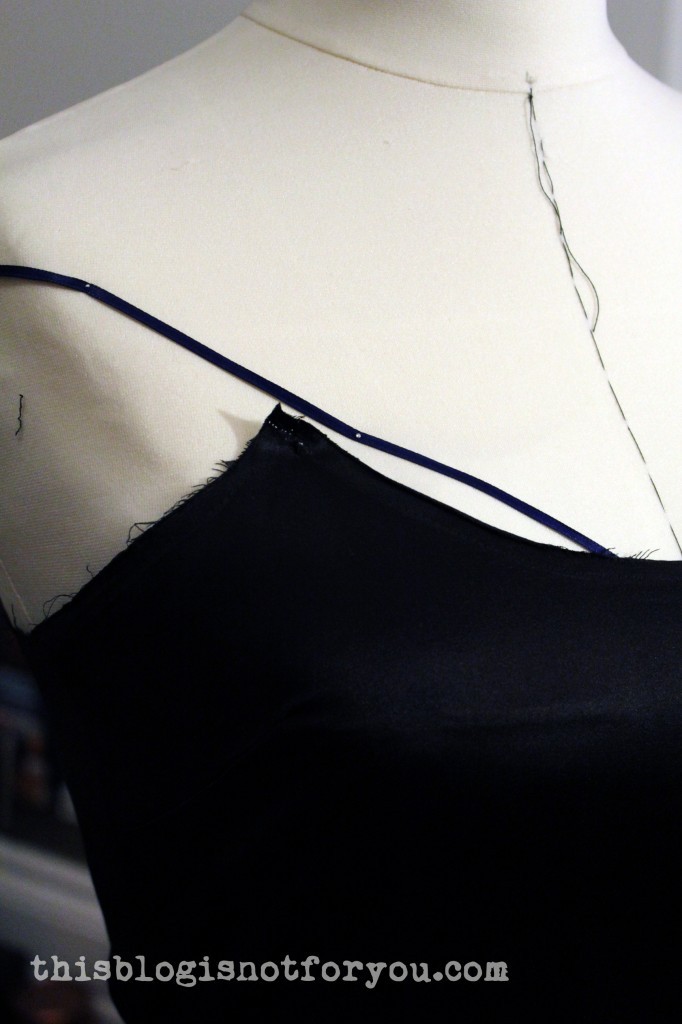
The bias binding/straps were made with the same stretch satin fabric. I decided to re-use them for my maxi dress.
Time to dig out my seam ripper!
If you’re making your own slip dress – just skip the bias binding and strap part!
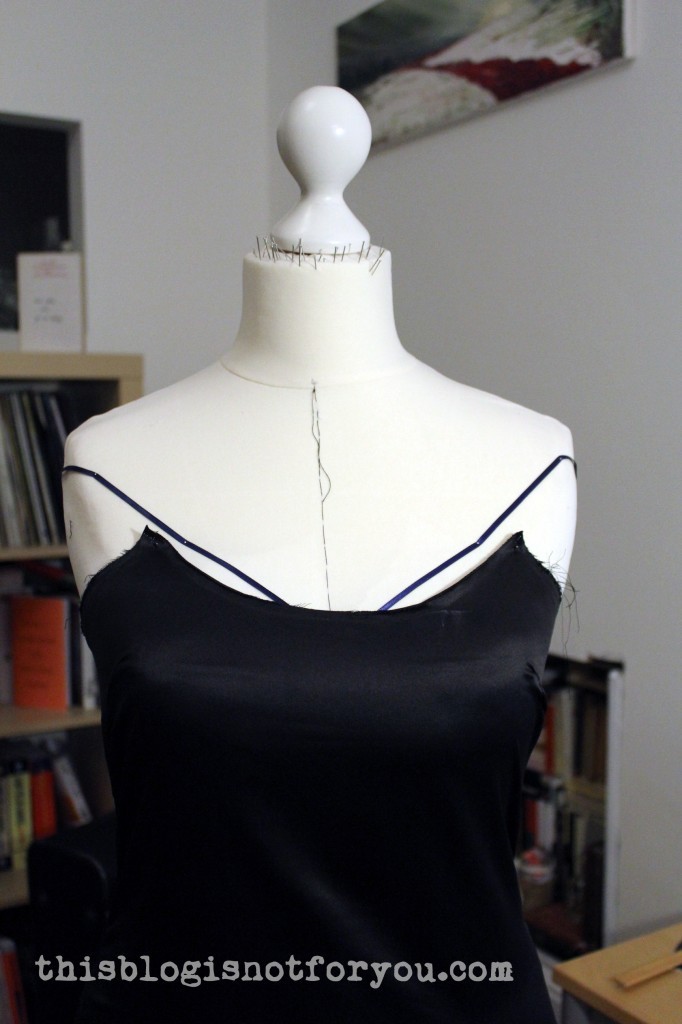
Before continuing with the next step – make sure to turn the slip inside out.
If you do not have a dress form, that’s fine. I think it’s much easier to have one when draping and pinning, but this dress you can definitely make without one.
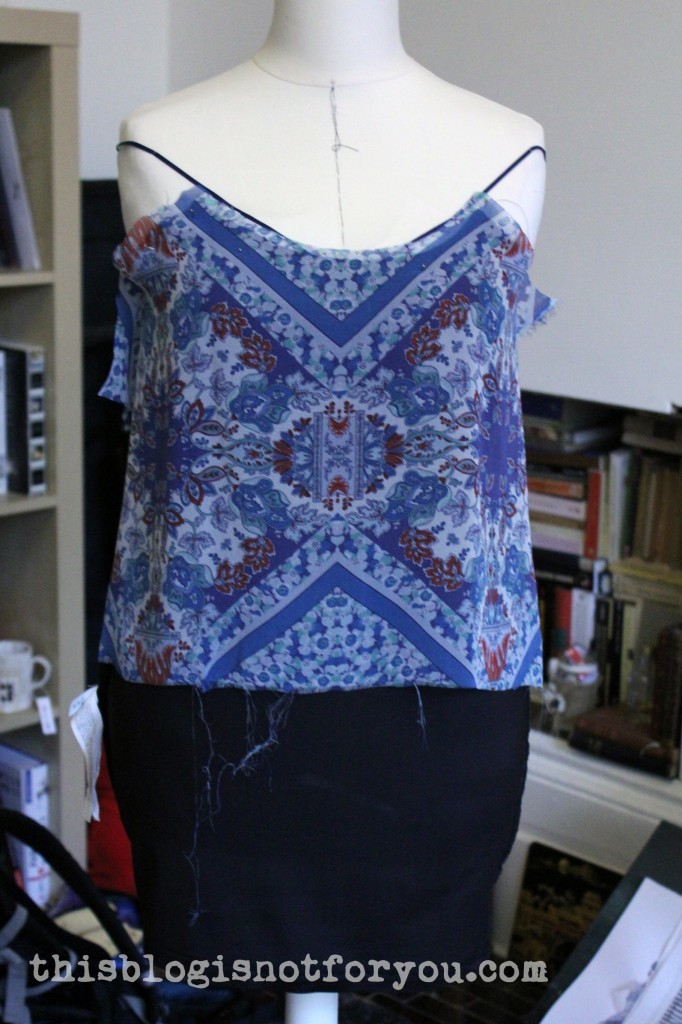
I loosely pinned the fabric (left side facing me) onto the dress form to see where the print would look best.
In the picture above you can see that I started pinning the fabric starting with the selvedge (see right side) pinned a few inches behind where the side seam would be. You just want to make sure to have enough seam allowance in the end. I just pinned the fabric flat onto the dress form, leaving enough seam allowance. I cut the fabric a few inches behind the left side seam.
I decided to make the waist fitted and the bodice part a bit longer, so that it would cover the shirred waist and would loosely hang, looking almost like a separate part.
To get the perfect length I just used my hand to push up some of the fabric at the waist, adjusting until the fabric part that fell over it was was long enough to cover a waistband of about 10cm/4in length. (see picture above. Hope I don’t confuse you too much.)
Mark the fabric length were the waistband would start, e.g. in the picture above this would be were my fingertips are. Don’t cut the fabric in the loosely hanging fold, since you want to create that “overhanging” part.
If you’re competely confused by now – just add about 15-20cm length at your bodice piece’s waistline.
Chop, chop! I acutally prefer clipping and then tearing – makes a much straighter edge!
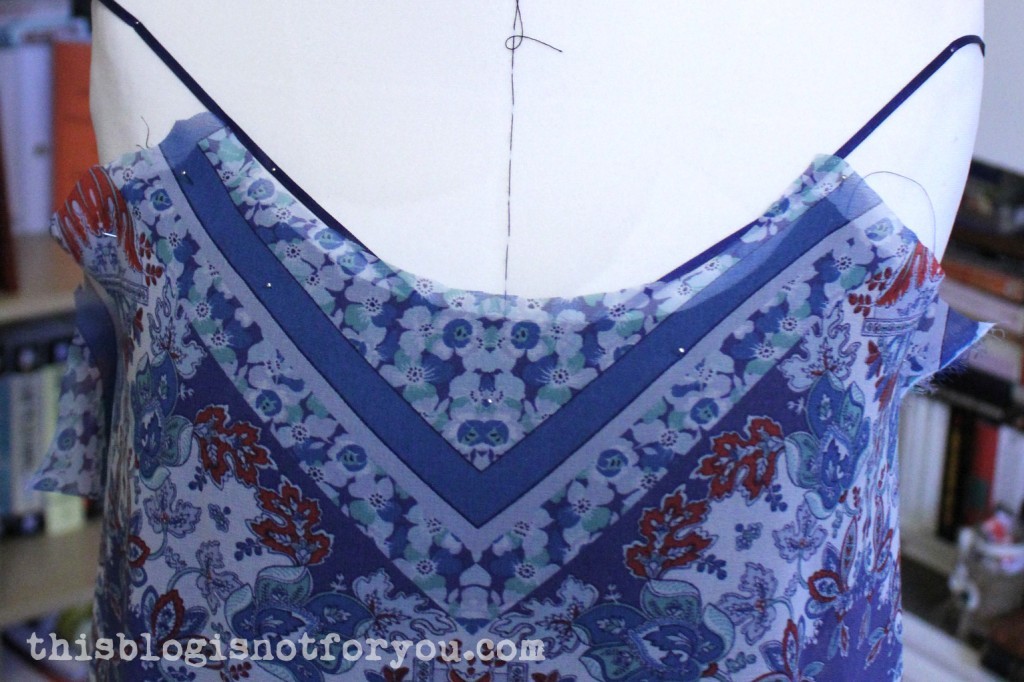
Now cut around the shapeof the neckline of your slip dress, leaving enough seam allowance.
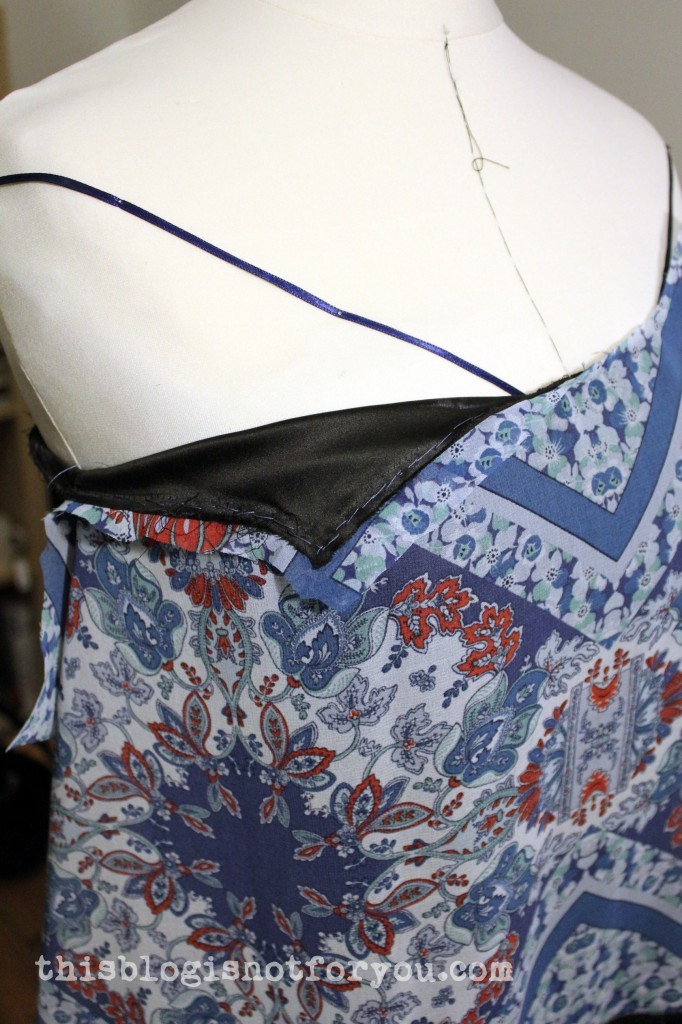
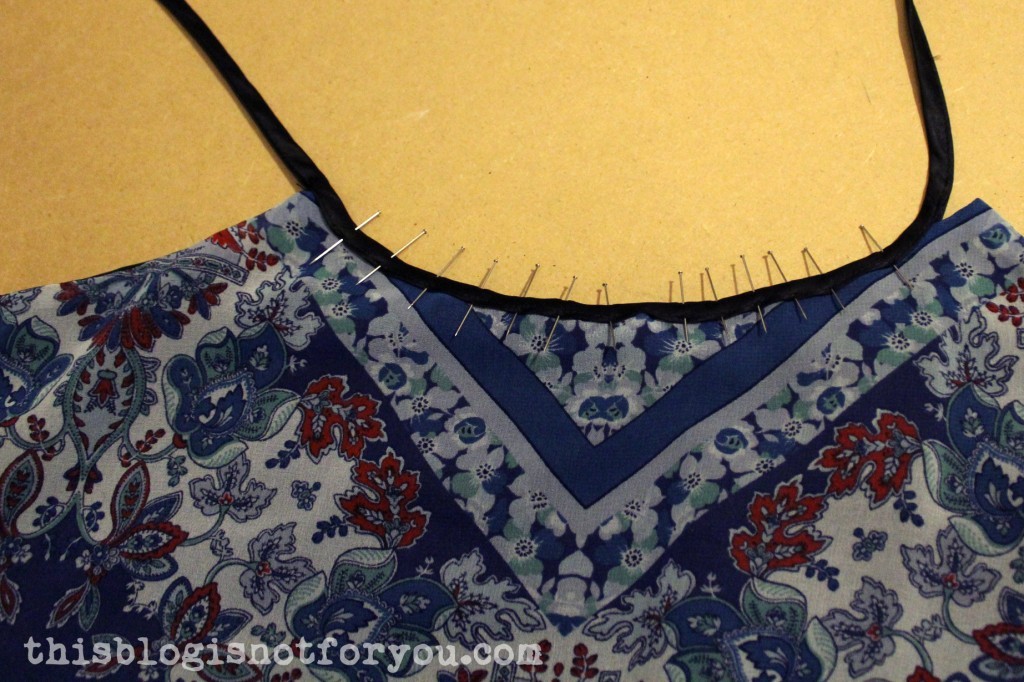
Since I couldn’t really pin the chiffon (the pins would keep falling out), I hand-basted the fabric to the slip dress neckline. I’d recommend doing that anyway, to make sure everything stays in place.
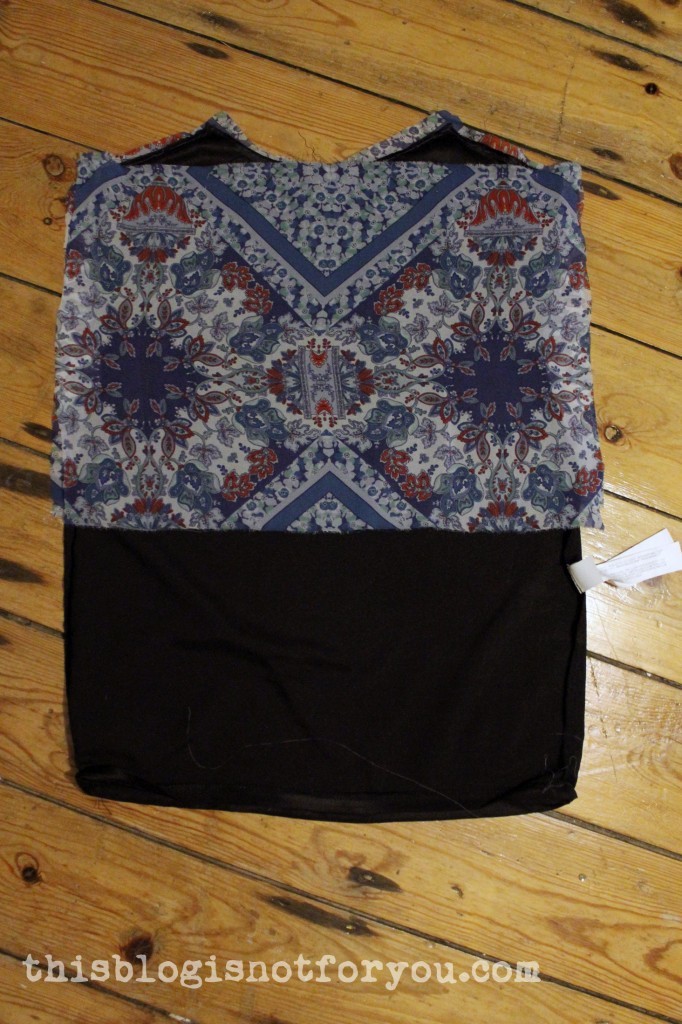
I laid everything flat on the ground to make the side seam allowance more even. I made them straight (as compared to the fitted slip) so everything would fall a bit more loosely.
If your fabric does not have any stretch (like mine) I’d strongly recommend cutting the side seams straight anyway. Otherwise you will have problem getting the dress over your unmentionables.
Creating the back panel is super easy. Just line up a piece of fabric, leaving enough seam allowance at the top and using the egdes of your front panel at the side and bottom as a template for the back panel.
If you are using a print like I did, make sure everything is symmetrical. (You can easily forget that when you are super concentrated watching Project Runway, ask me how I know this)
I forgot to make pictures of the next steps, naughty me.
1. Sew the side seams first. Since I was working with chiffon, I used my favourite baby seams technique.
2. Stitch the fabric onto the slip dress neckline. I only had 0.5cm/0.2inch seam allowance on the slip dress, since I had removed the bias binding before. If you’re making your own slip, you can use more seam allowance.
3. Turn everything inside out and try it on. Make a happy dance.
I pressed the turned dress (now right side facing you) and pinned the bias binding back onto the neckline. You need two strips of bias binding. One that goes all the way around the back and ends at the pointed corners at the bust, and one that goes along the neckline and the ends are used as straps.
Sew the one around the back and sides first, so you can cover the end with the one you use for the straps.
The straps are creating by simply stitching the binding together at the open side.
The ends of the straps are sewn onto the left side of the binding in the back. You can orientate yourself at your bra straps.
Now the skirt panels:
The length is really up to you. I made 3 tiers, each about 40 cm long since I wanted to gather the pieces like a petticoat. I didn’t do that in the end and now have two weird-looking seams that were absolutely unnecessary. If you just want to have a straight skirt, measure the length from waistband to your feet.
(Make sure to make the panels wide enough, so you can walk properly. Everything less than 150cm in cirumference might be problematic and you’ll walk like a geisha. My panels are 70cm each, that’s just about fine, but I’m thinking about altering that. I can’t run in this dress!)
Now comes the fun part. We want the skirt panels to be shirred at the waist. (Alternatively, you can insert a wide elastic band, if you want to avoid the shirring)
To determine the width of the skirt panels, measure your waist. Shirring will make the fabric shrink in width so you need to add some extra width. As a rule of thumb you need to multiply your measurements with 1,5/2. The more lightweight the fabric is, the more width you need to add (because it will shir easier). I used chiffon and multiplied by 2.
Cut the fabric in half, so you have a front and back panel.
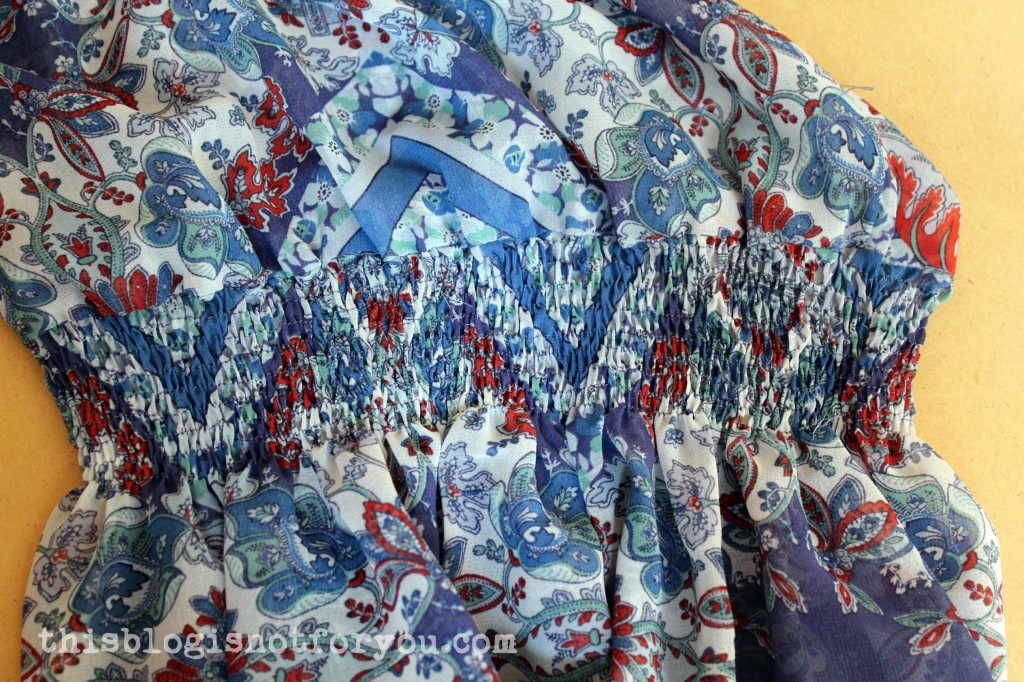
I left some seam allowance and then sewed 9 rows of elastic shirring, each about 0.7cm/0.3inch apart (orienting myself by the edge of my straight stitch presser foot).
Here’s a quick tutorial on shirring, if you don’t know how to do it. Try! It’s not hard at all. There are millions of other tutorials on shirring out there. Google it and make yourself familiar with the technique before you start.
For sewing the 9 rows I used 2 complete bobbins of elastic thread.
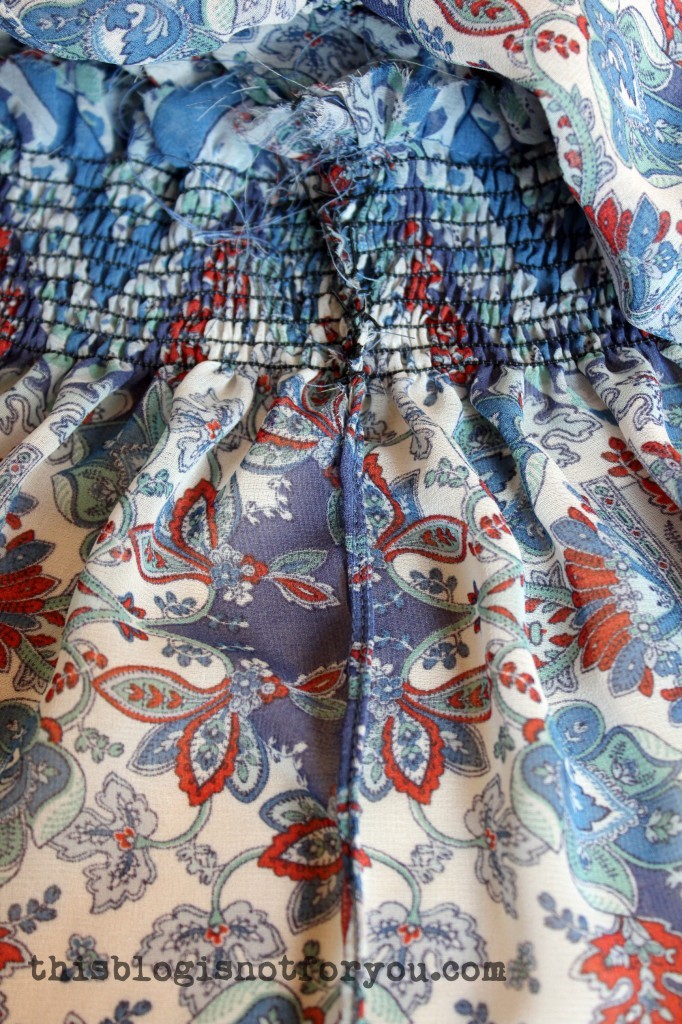
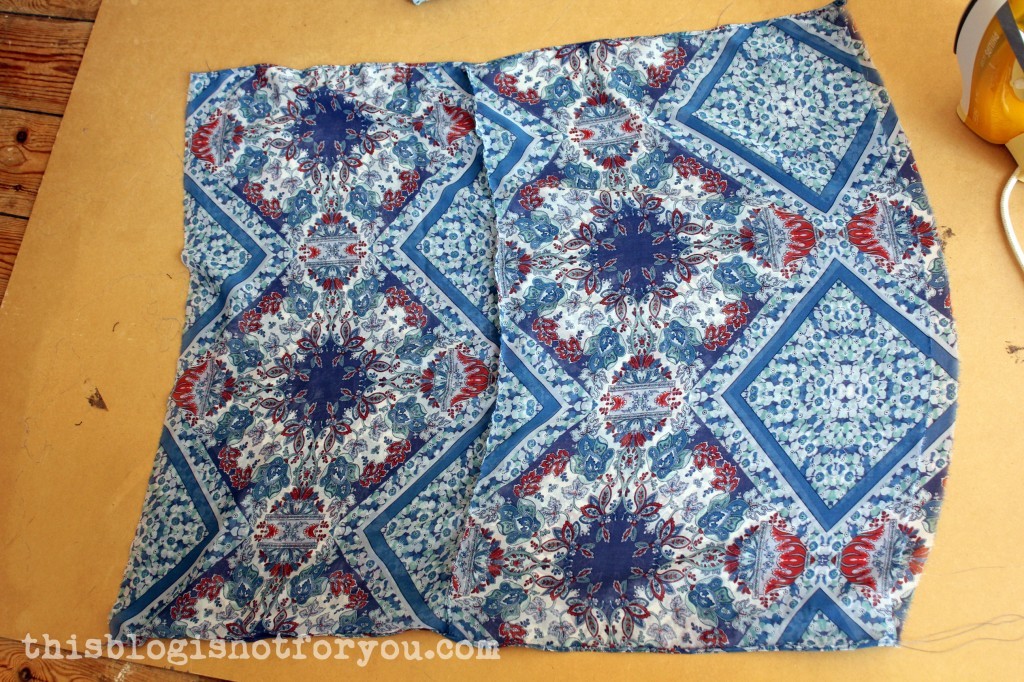
Sew the shirred panels together at the sides. In the pic above you can see the baby seams. The shirred part I simply stitch together and finished with a zig zag stitch.
Sew the shirred skirt onto your bodice piece, right sides together. You will need to carefully pin everything in place first. With both pieces pinned together, you will need to gently stretch the shirred part as you are sewing so that it is the same length as the bodice fabric.
By pressing the shirred fabric, the shirring will pull in nice and tight. Don’t pull the fabric, just press the iron down lightly.
Looking good!
If you made one long skirt panel, you can skip the next part.
If you made tiers (I recommend gathering them to create more width on the bottom), sew the tiers together. Then sew the side seams.
Pin the tiered part onto the bottom of the shirred panel and sew together.
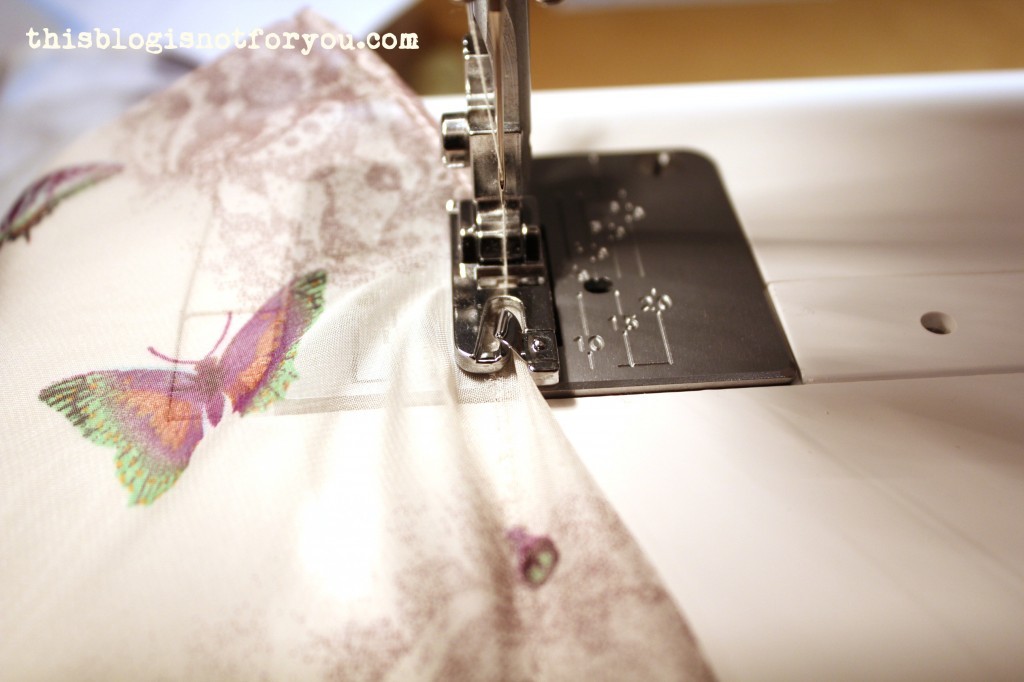
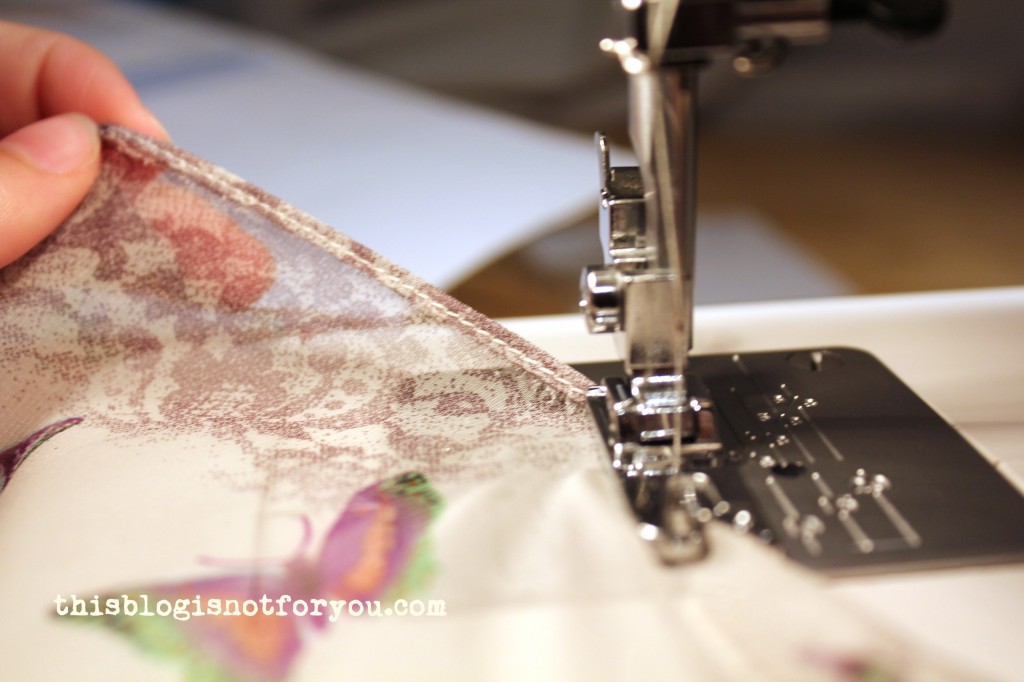
I hemmed the dress using my narrow hem presser foot. It’s the perfect way to finish a chiffon hemline:
Phew! Are we done? I think so!
If this was way too confusing, don’t hesitate to ask questions in the comments.
When you’re done, please share our creation in the comments. I’d love to see it!
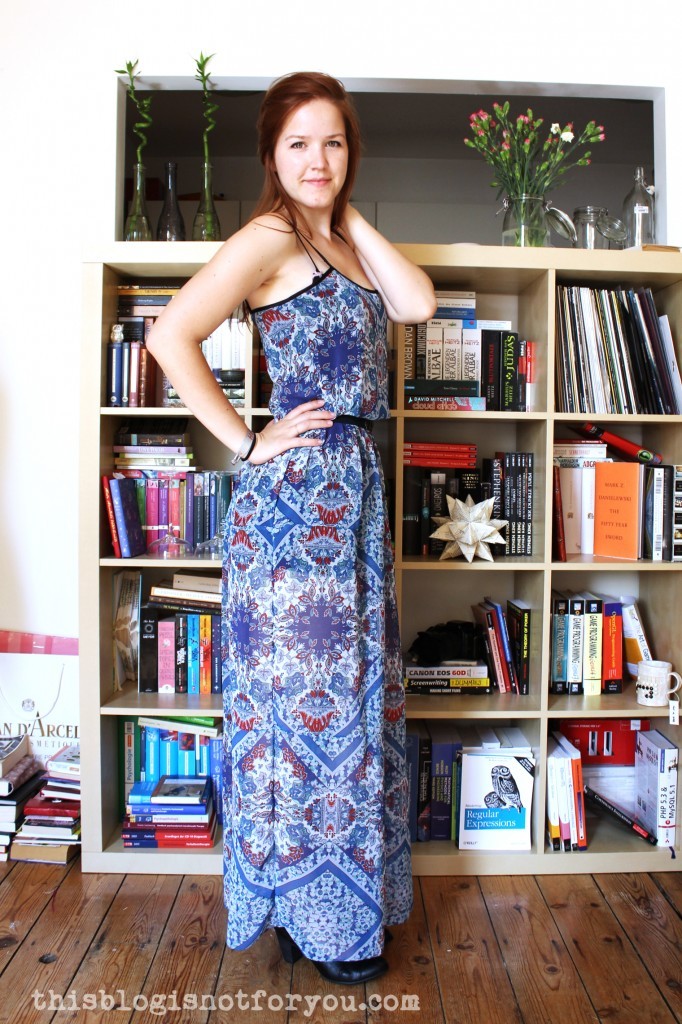
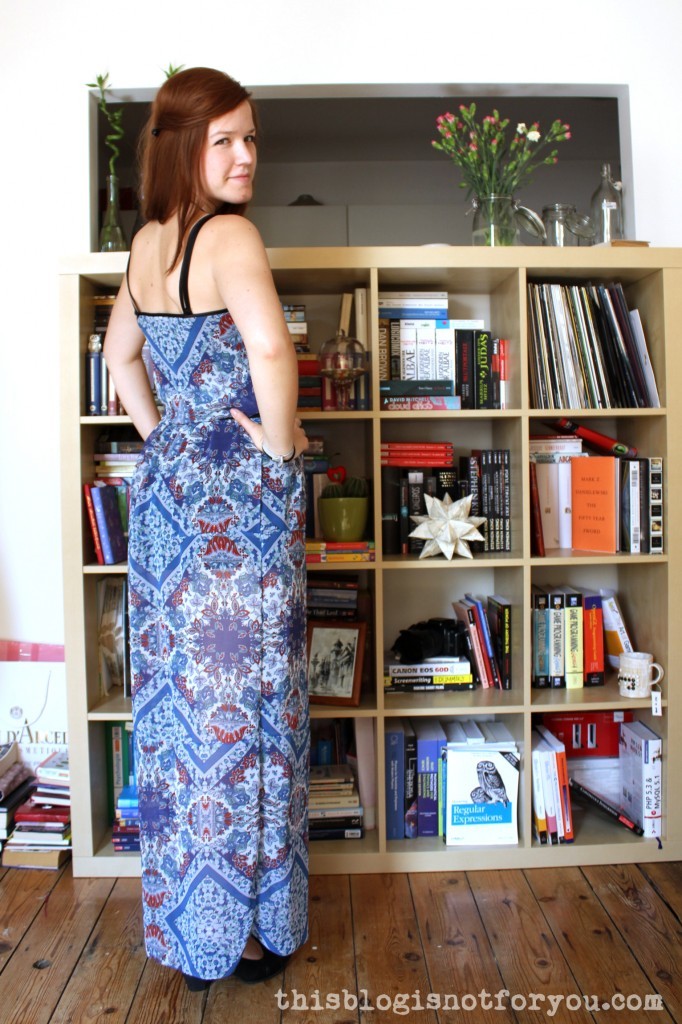
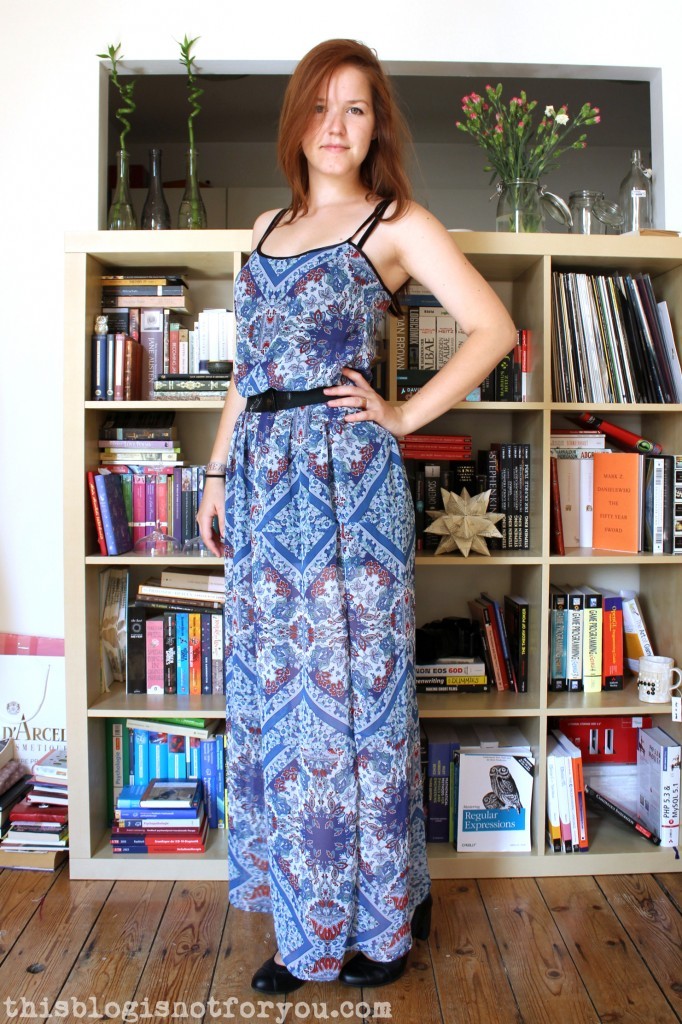
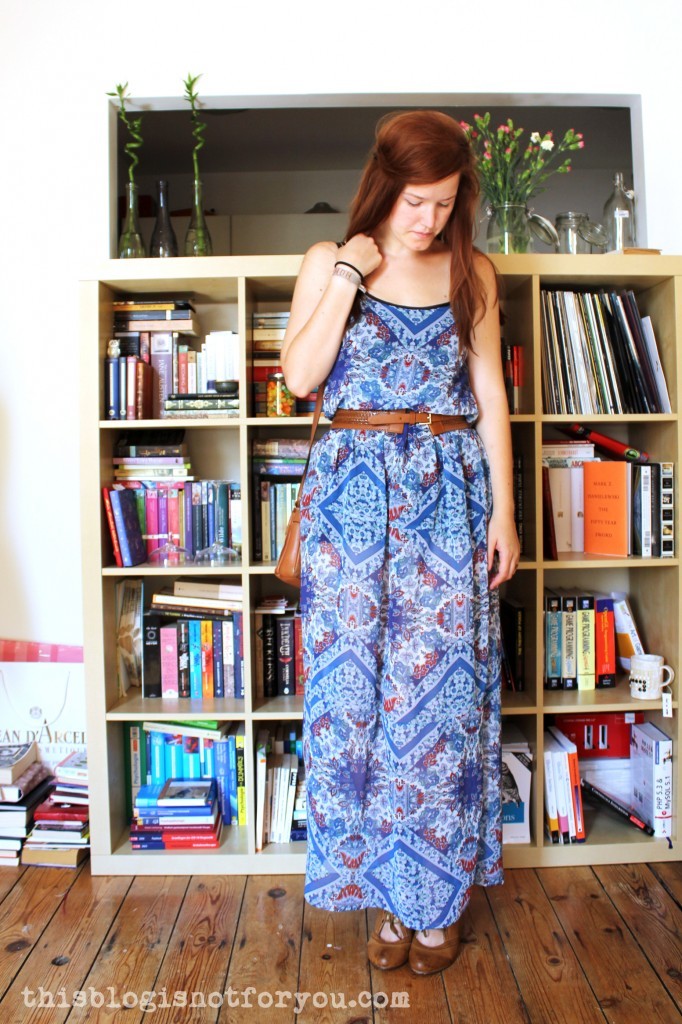
Believe it or not, I finally managed to sew a maxi dress! I never had one and always wanted to make one (just buying one is way too easy and boring!). I already had bought fabric for at least 3-4 different ones, everything already planned out in my head. But – oops – summer is almost over. Bummer.
It was a super busy summer and for some reason I worked on so many things, but forgot my maxi dress plans.
Well, I finally got around to making one but not even using the fabrics I bought. I used a pretty blue-ish chiffon I got for my birthday from Mr Thisblogisnotforyou’s sweet grandma, who also had bought matching thread and sewing machine needles (thank youuuu!). Isn’t that sweet?
I made this dress without a pattern. How I did that? I’ll explain this in an extra post as this time, I took millions of pictures during the process and maybe not everyone is interested in this, I figured. If you’re not – you can just skip the next post 🙂
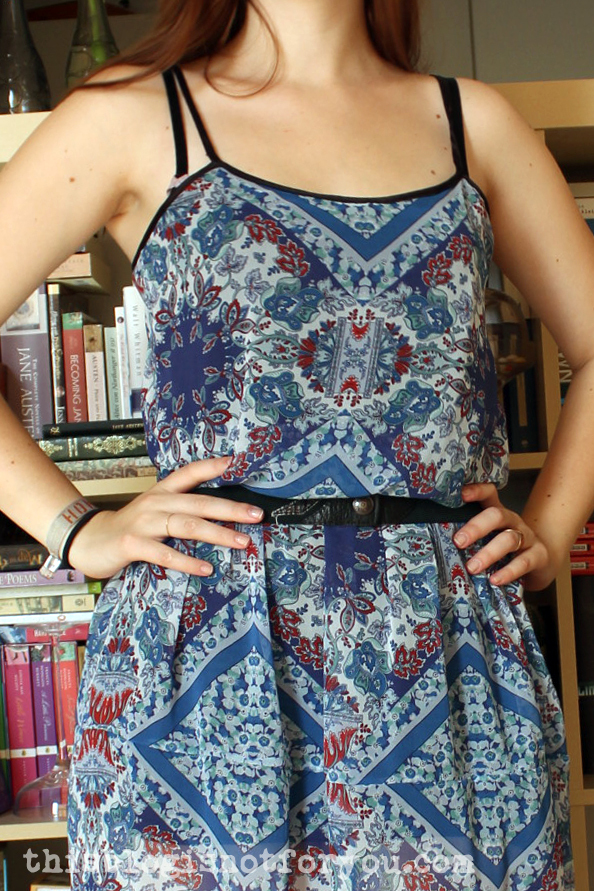
I used elastic shirring at the waist, which actually was a really clever idea, I have to admit – with the shirring I can alter the length of the dress by raising or lowering the shirred waistband. This is really helpful – now I can wear high heels or flats with the dress without it being too long or too short.Flats!Heels!My favourite black vintage leather belt. I love this look the most.Brown belt with my new thrifted shoes 🙂 ( I forgot to adjust the length of the dress in this pics, ooops! Well, this way I can show off these shoeeees!)
Knotted at the hip 🙂
The “I’m so fabulous” pic. No, seriously, I hate taking pictures with selftimer. I always feel so stupid and then make funny faces. As soon as Mr Thisblogisnotforyou is back, that’s his job again (the picture taking, I’ll still be the one making funny faces).
Anyway, if you like to know how to make this dress – stay tuned! Another “sort-of” tutorial is on its way. And you’ll hear the story of the dubious underdress 😉
Hello everyone!
I wanted to write this post days ago, but I was busy writing applications and going to job interviews. Fun times!
***Warning! This post contains very bad blurry selfies!***
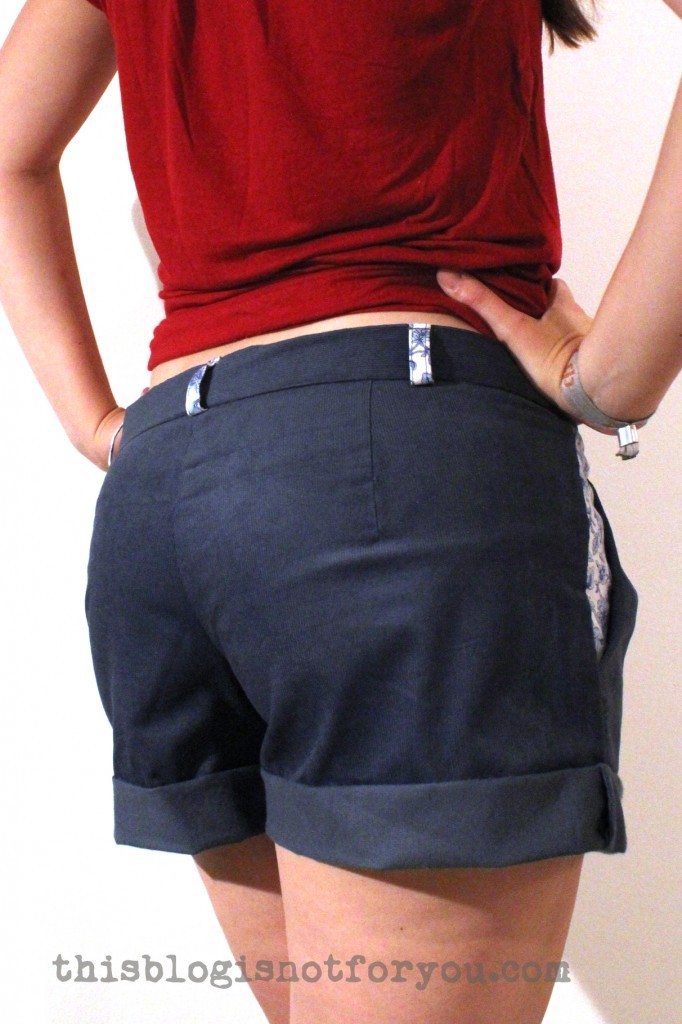
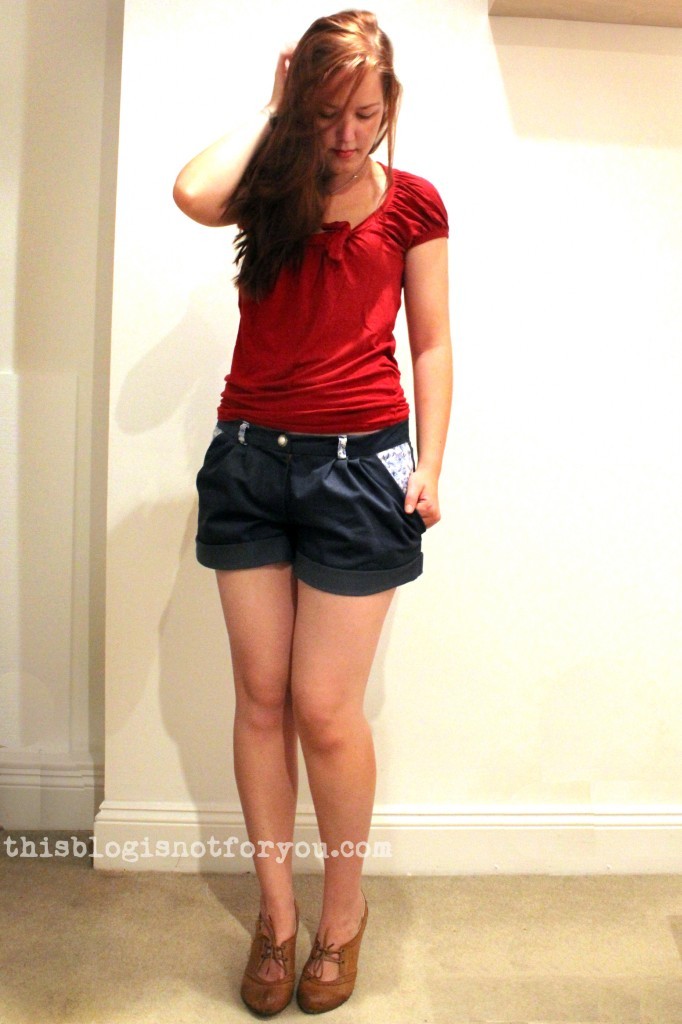
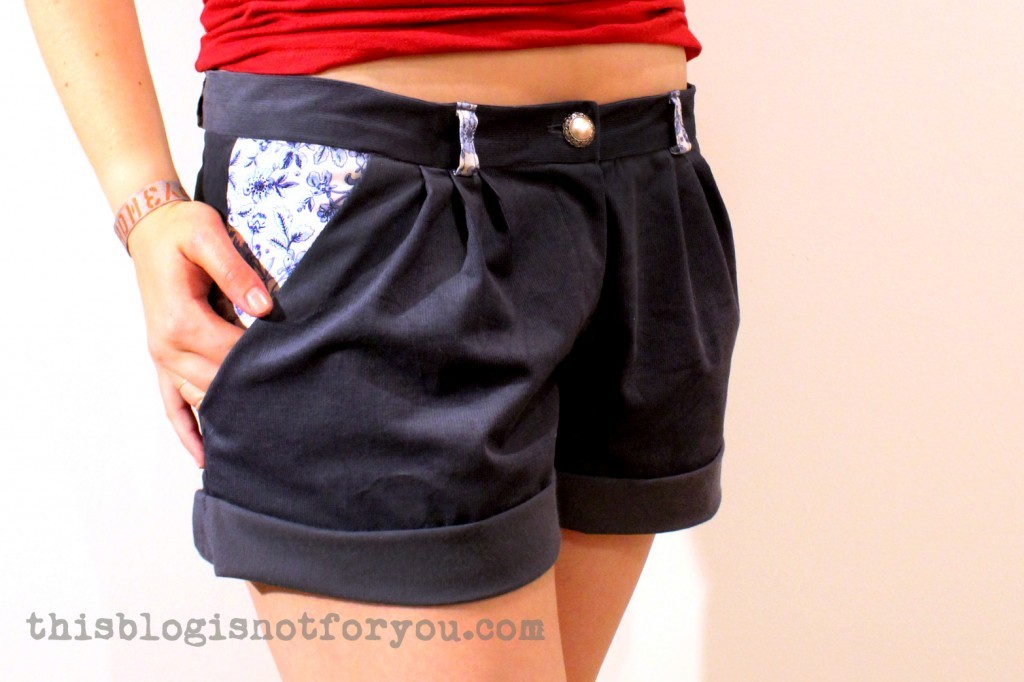
In between all this post graduate madness I managed to whip up these cute corduroy shorts, which I call “end of summer shorts” as they are short enough for the last sunny days, but due to the corduroy can also be worn with thick tights when it gets colder. Genius, eh?
By the way, it’s number 13 of my 27 Dresses Challenge. For those of you who just happened to stumble across my blog: Yes, I do could shorts as dresses. Please don’t ask me why.
Again, I used a Burda pattern (I see everyone rolling their eyes…). It’s the Pleated Shorts 07/2013 #105A pattern. No idea why there is an A, B and C version, as they are all exactly the same pattern, just in a different colour.
source: burdastyle.com
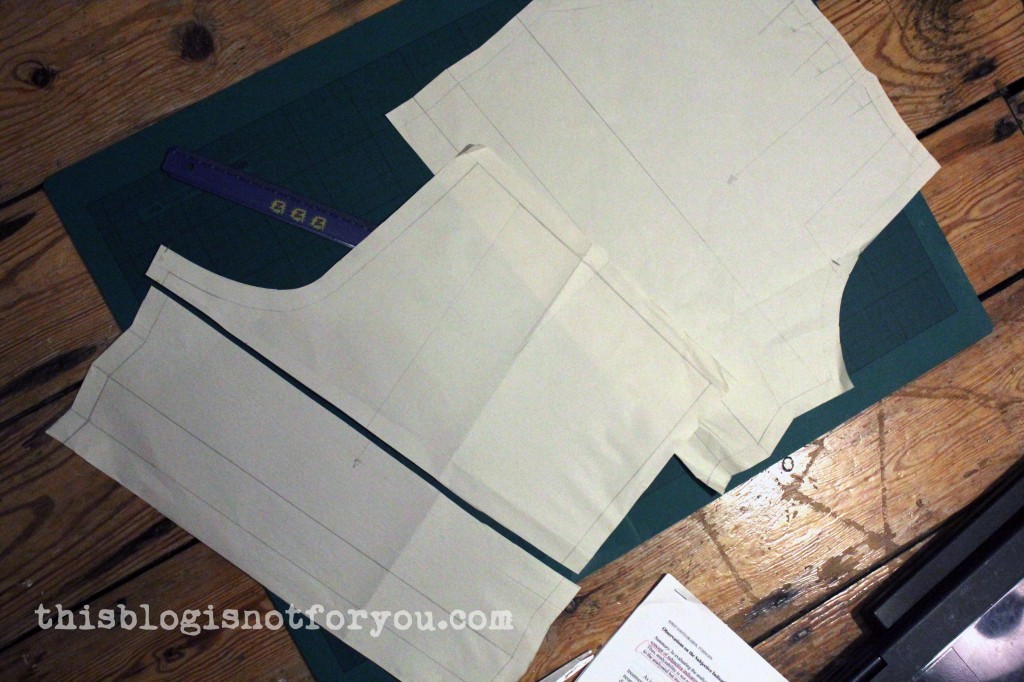
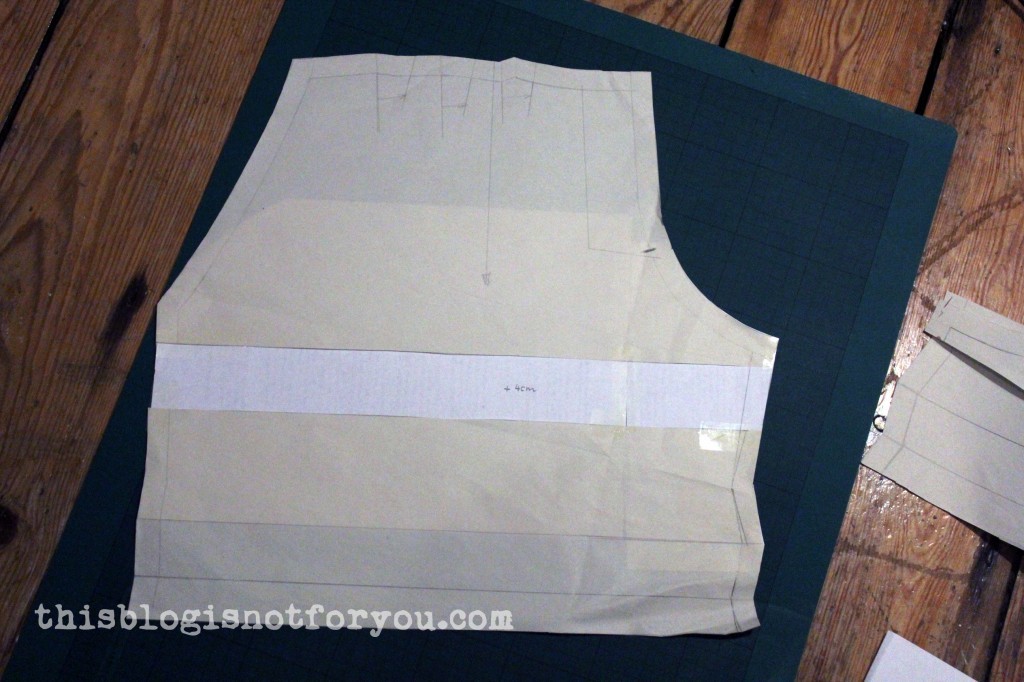
As my legs don’t even remotely look like the ones in the picture above and I recently made the acquaintance of way too short shorts ( I won’t go into detail, I promise) I thought it was clever to lengthen the pattern before making a muslin. (I don’t always make muslins, but with trousers and shorts I always do, as – what can I say – my butt is not easy to work with.)
Lengthening the pattern:
(Yes, parts of my dissertation drafts photobombed this picture and I don’t know why.)
I drew a horizontal line and cut the pattern pieces in two.
I moved them apart by 4cm/~1,5inch and glued them onto a piece of paper (ah, now I know why the disso was lying there!)I then cut out the muslin and sewed everything together, just to notice that the shorts looked really bad and way too long. Due to the pleats they just made my butt look huuuge. I didn’t take pictures of the muslin, and trust me, you really don’t want to see this.
I ended up removing the extra paper and glueing the pattern pieces back together. Now the shorts have the original length and I’m pretty much fine with that. At least I could show you how to lengthen a pattern. Yay 🙂
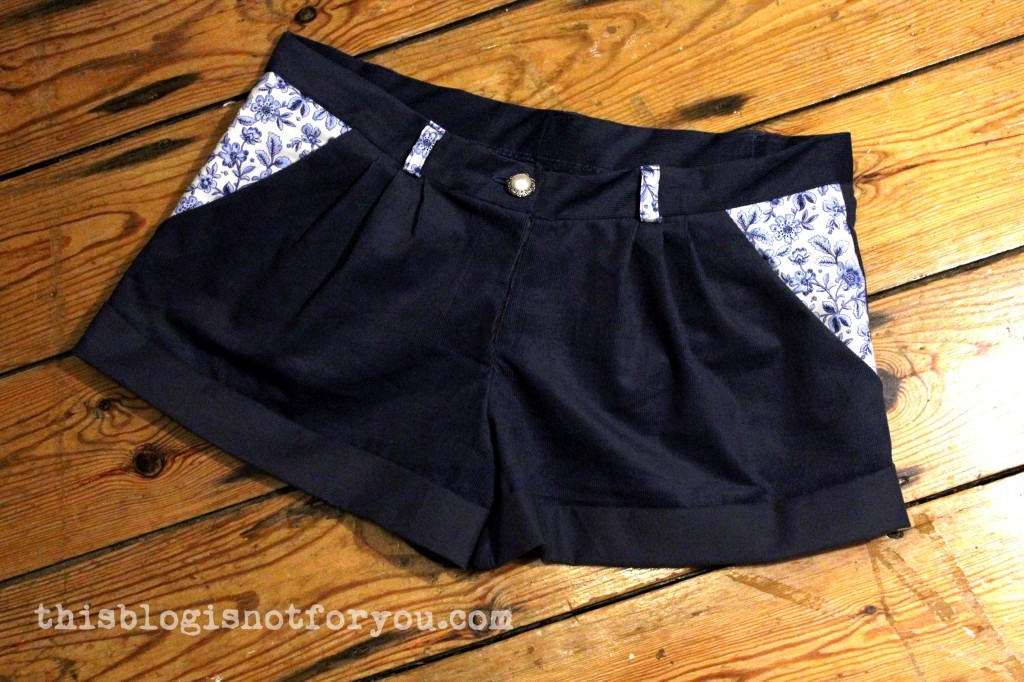
Here they are in all their glory:
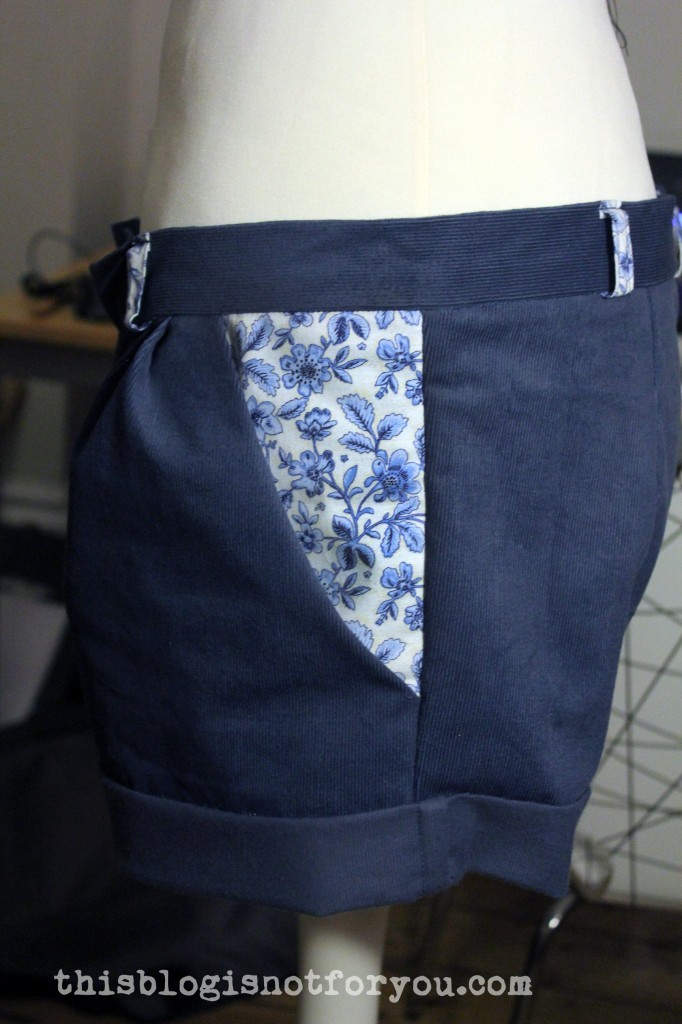
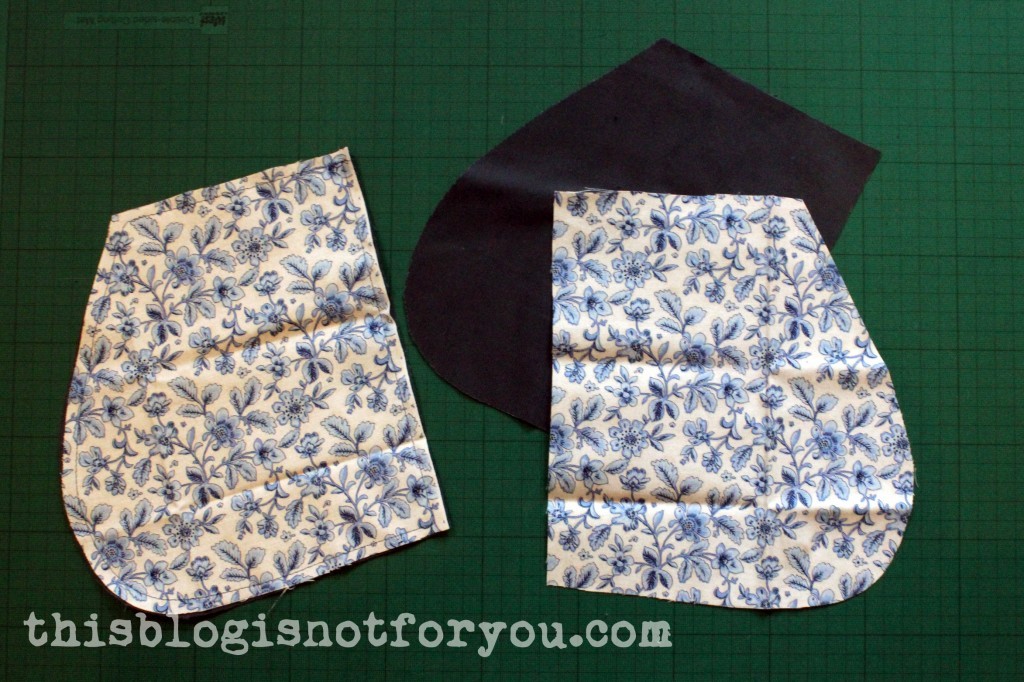
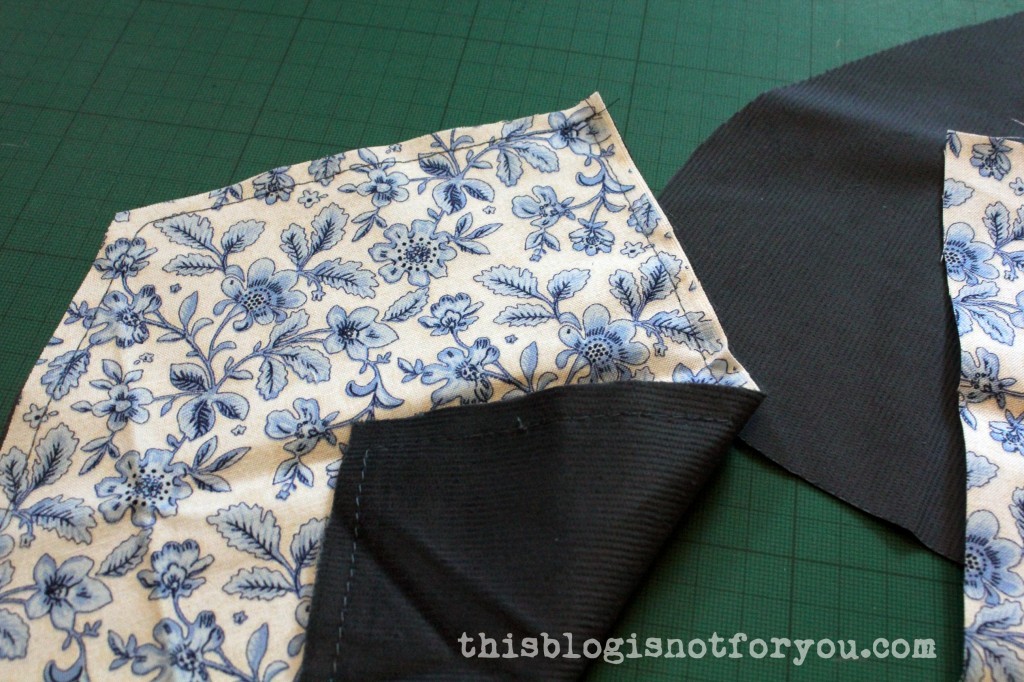
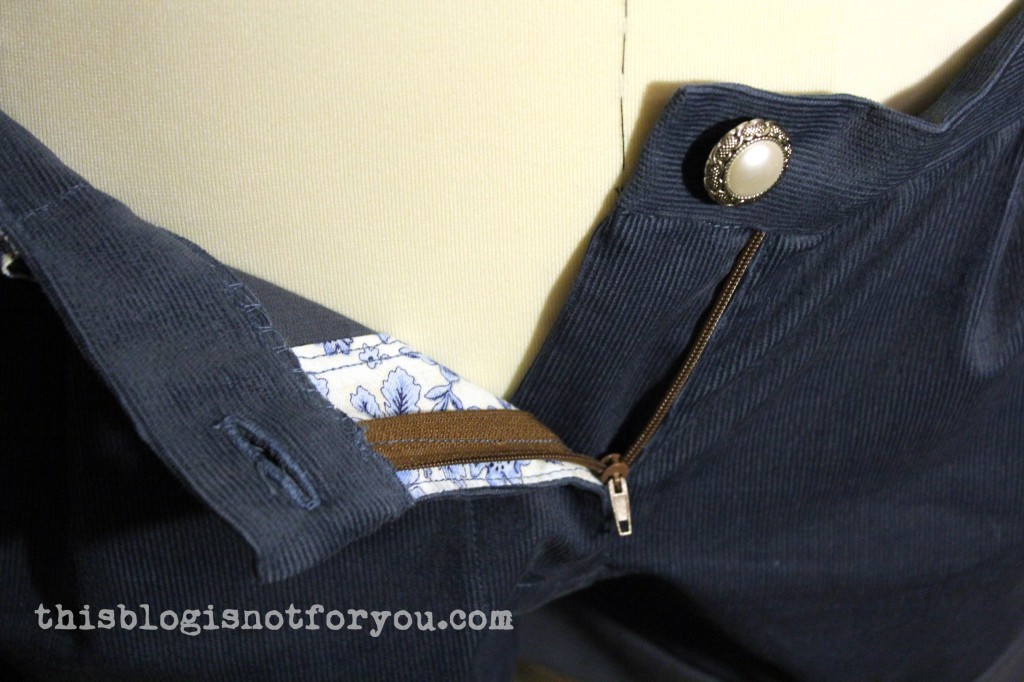
I decided to make them a bit more fun by adding this flowery cotton fabric. I used it for the pockets, belt loops, and parts of the fly.
Since the cotton fabric was not as heavy as the corduroy, I cut out the pocket in corduroy and cotton and basted the two layers together before sewing.
I used a very narrow seam allowance, so the basting stitches are hidden in the final seam allowance.
After basting the layers together, you proceed like normally.
I wanted to have the cotton fabric on the left side, but ended up cutting it out wrong and did not have enough fabric to do it again…
I found this cute button in my button collection and thought it would look great on the corduroy fabric. What do you think?
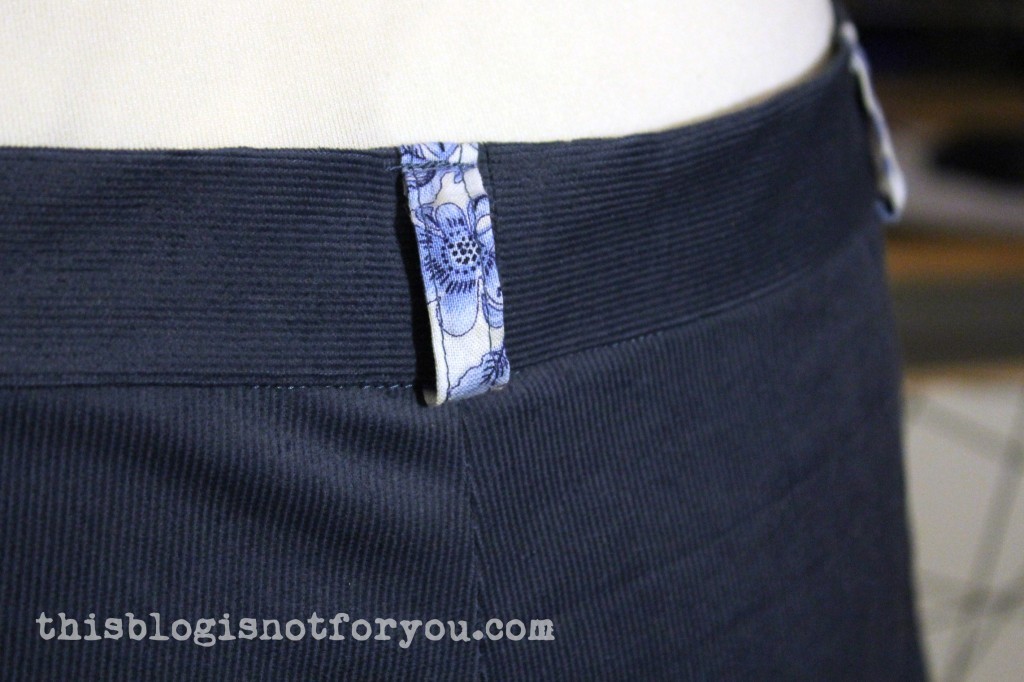
First time I made belt loops!
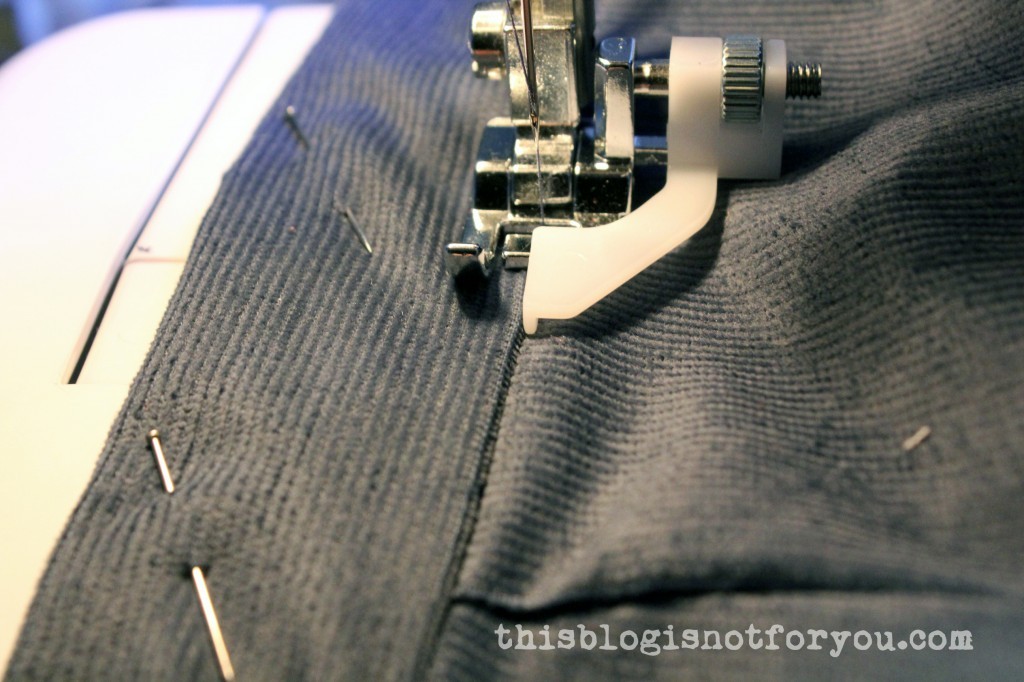
I got 15 different sewing machine feet for my birthday (from my lovely little sister) and decided to go pro and use them all as often as possible, haha.
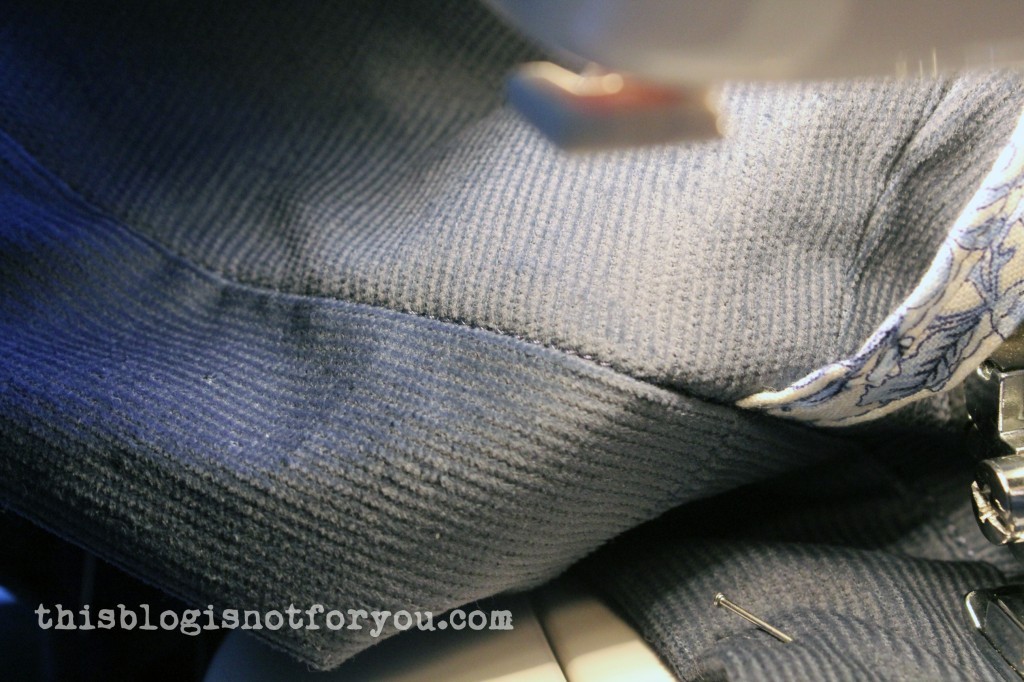
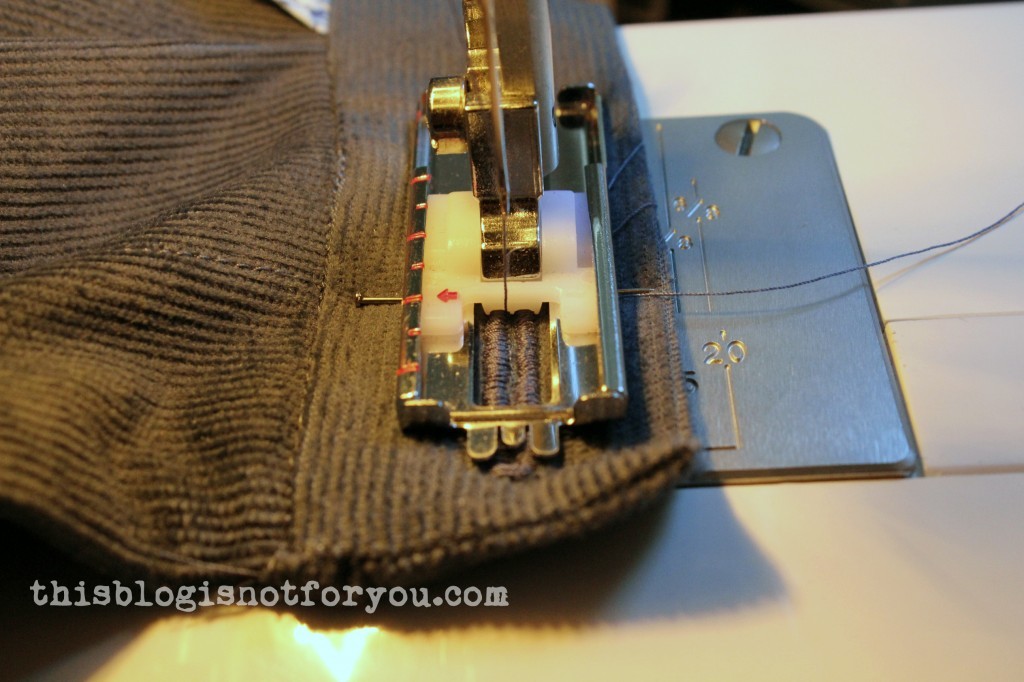
But actually I noticed it made my sewing so much better! Look at this! Perfect stitching in the ditch. I never really managed to do this properly (so it doesn’t show in the end) and had to sew on my bias binding or waistband by hand. But now that I have an edgestitch foot I can do magic.
I had this buttonhole foot before and use it whenever I have to make buttonholes. Just wanted to show it off:
It’s really easy to use and if you don’t have one – get one! They are inexpensive and absolutely worth it, if you’re sewing machine does have a buttonhole setting.
Quick tip:
When opening buttonholes with a seam ripper, I always put a pin at the end of the button hole to keep the seam ripper from going through the threads and the end of the buttonhole. Works like a charm and nothing is more annoying than screwing up a perfectly sewn buttonhole, believe me!
I think these shorts might actually be the first garment that I sewed from scratch without any major catastrophes happening on the way. The only flaw: I cut out the waistband against the straight grain and it’s really wobbly now, even after pressing it. (As you can see in the picture below).
I stitched a few straight vertical lines that are hidden by the belt loops to keep the waistband as straight and flat as possible.
Done!
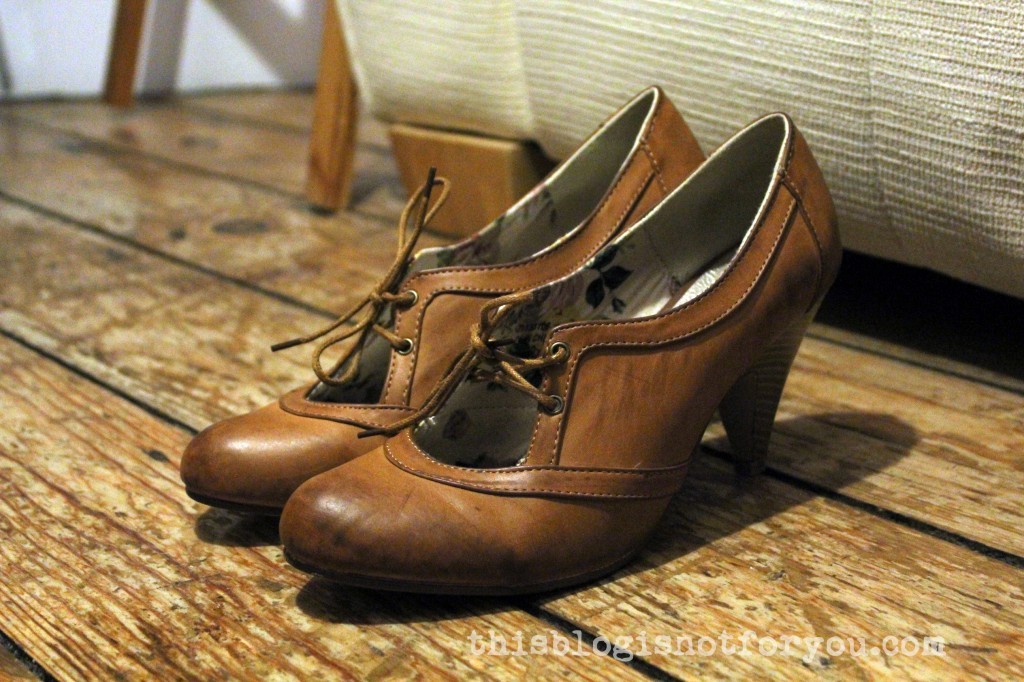
By the way, I found these awesome shoes in a thrift store last week (completely new for 4 pounds only. Sigh) I love thrifting! It’s inexpensive, you don’t feel bad refashioning and cutting apart things you just bought and you do something for the planet by re-using things instead of buying new stuff all the time.
I wish it weren’t END of summer shorts, though. I really don’t want the summer to end. There are so many maxi dresses I want to sew and already bought the fabric.
Did you make any autumn-inspired things lately?

 Hello there! Finally! A sewing-related post :) It’s been a while!



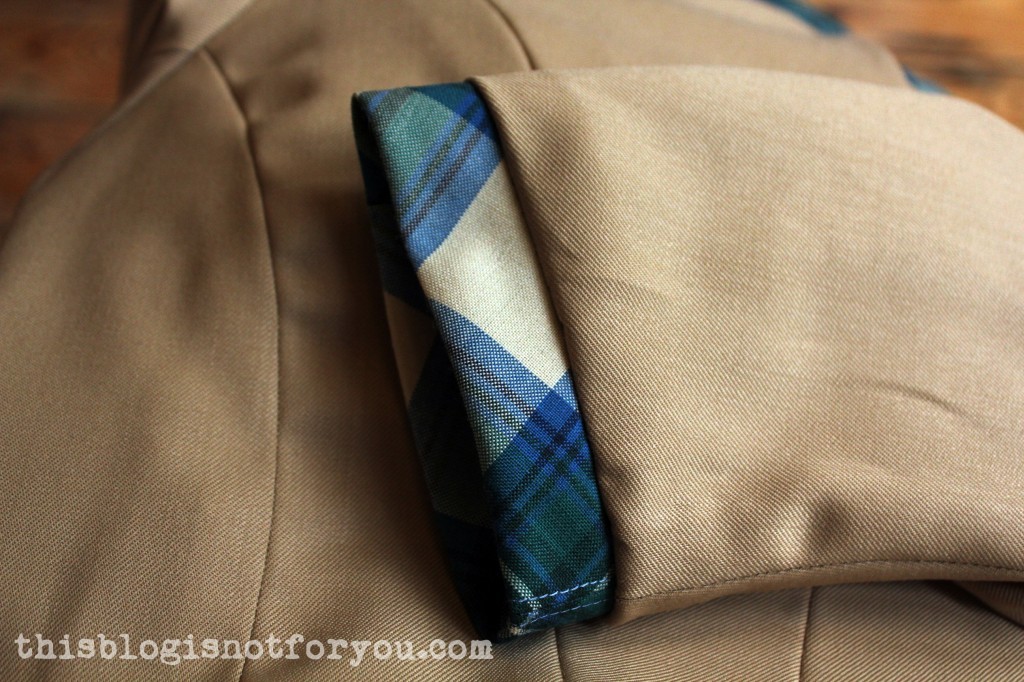

 I embellished the facing with blue embroidery thred instead of edge-stitching it to the seam allowance.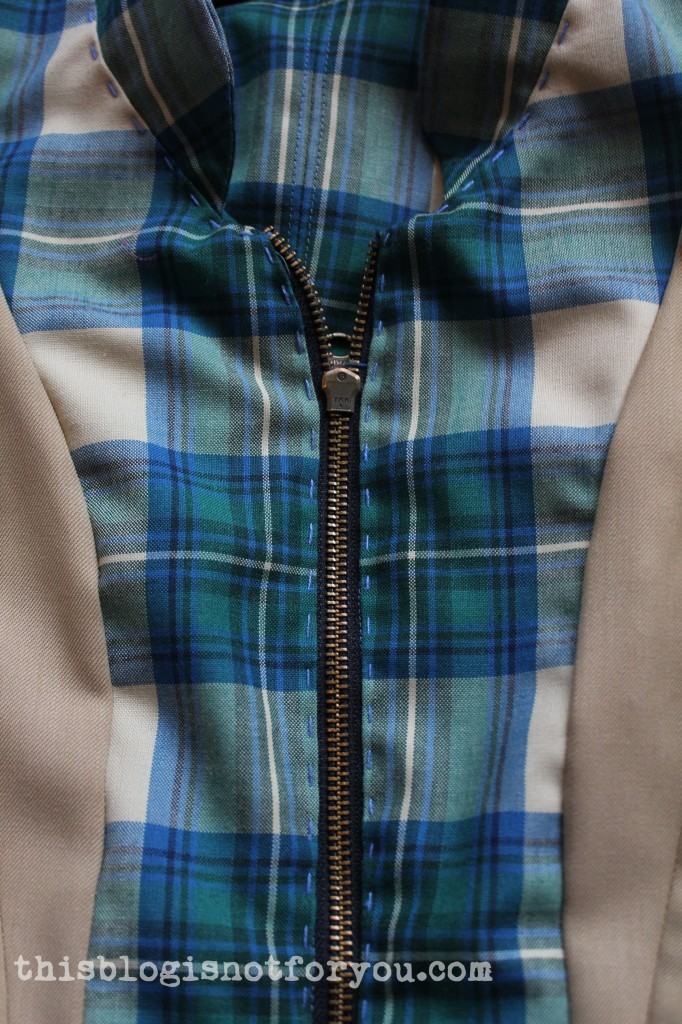

 *Blurry Pic Alarm*




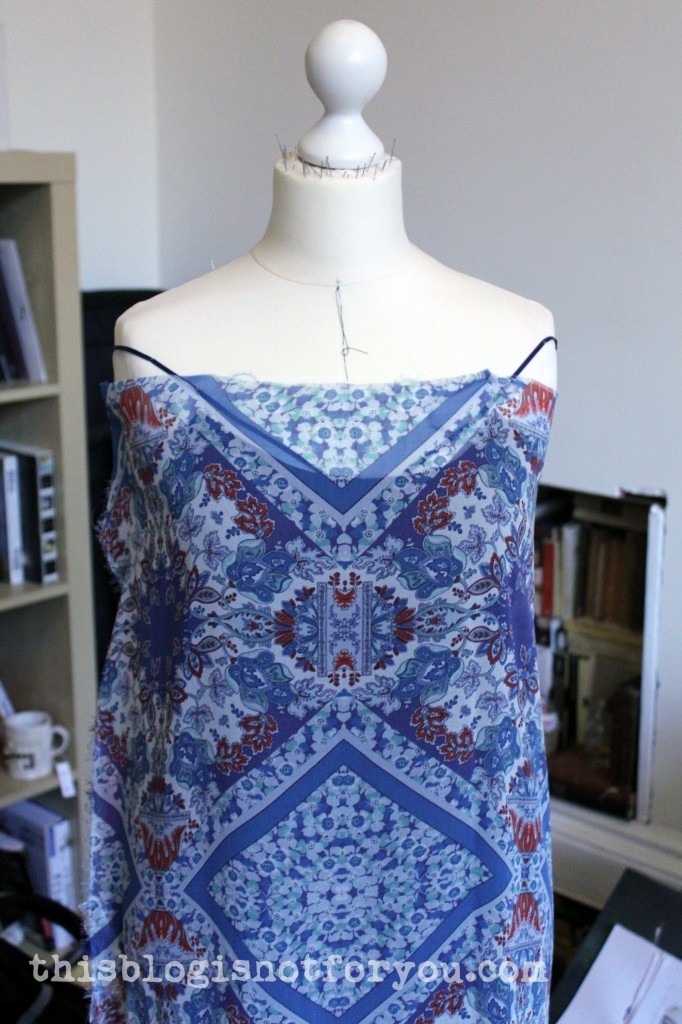 I loosely pinned the fabric (left side facing me) onto the dress form to see where the print would look best.
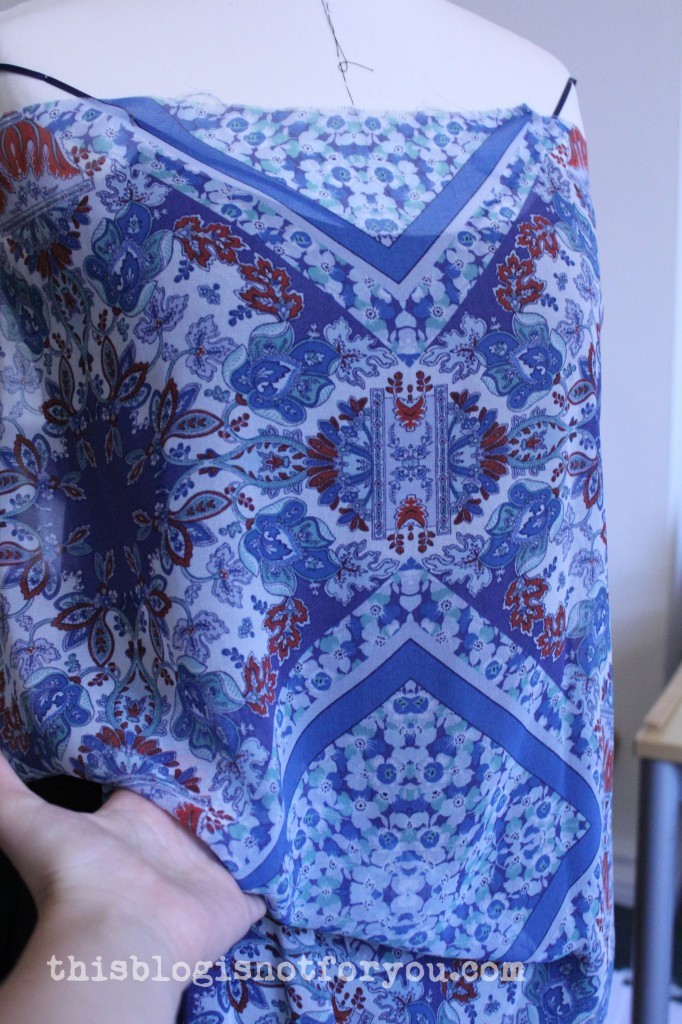 I decided to make the waist fitted and the bodice part a bit longer, so that it would cover the shirred waist and would loosely hang, looking almost like a separate part.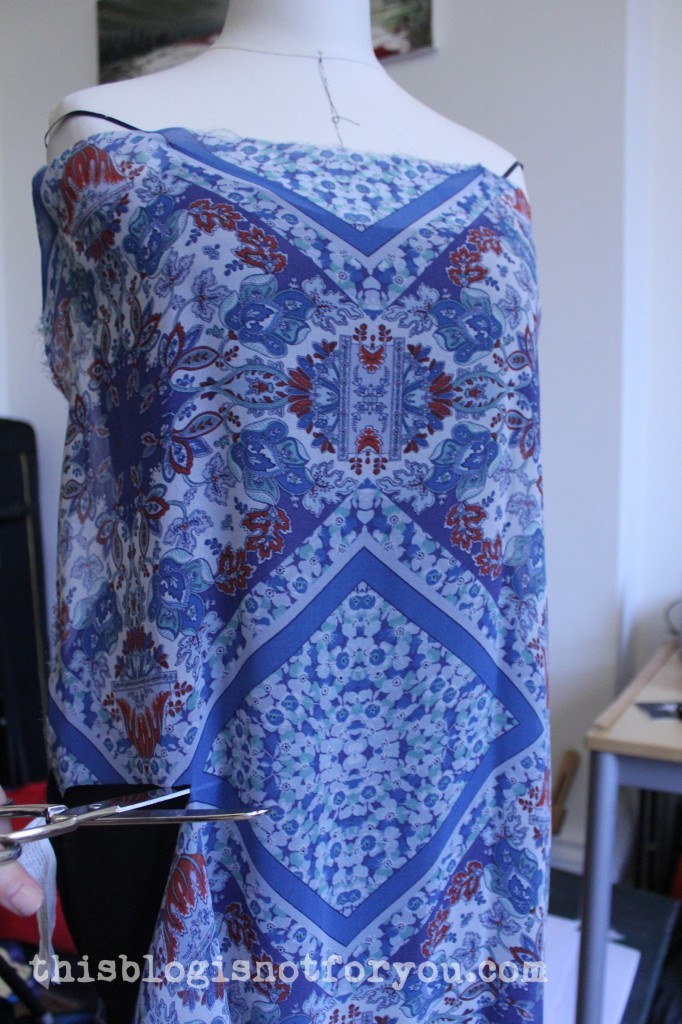



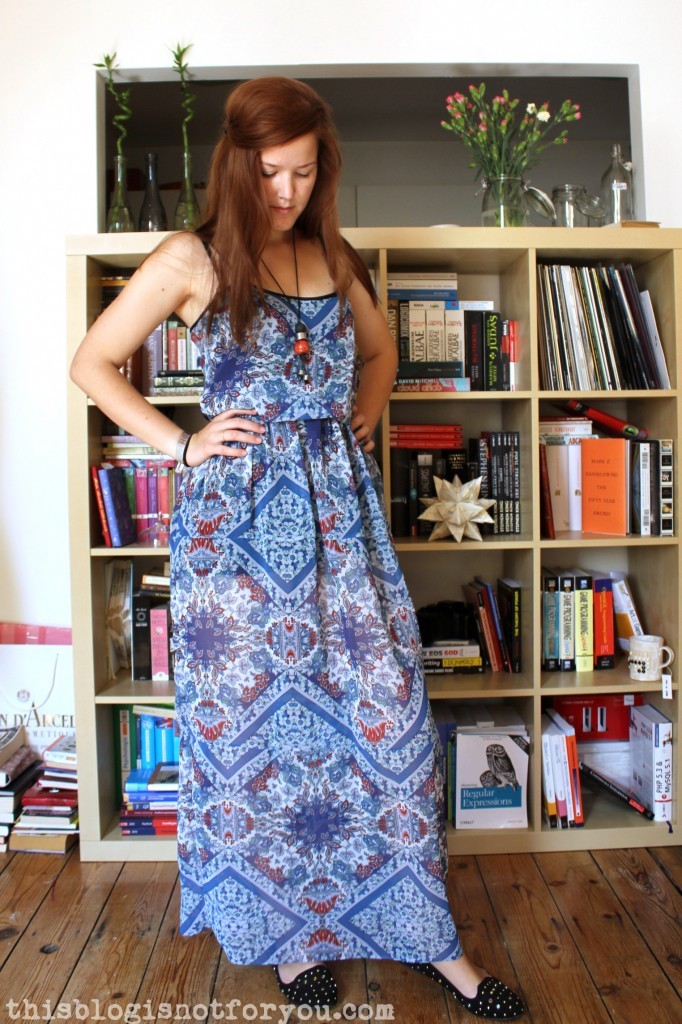 Flats!
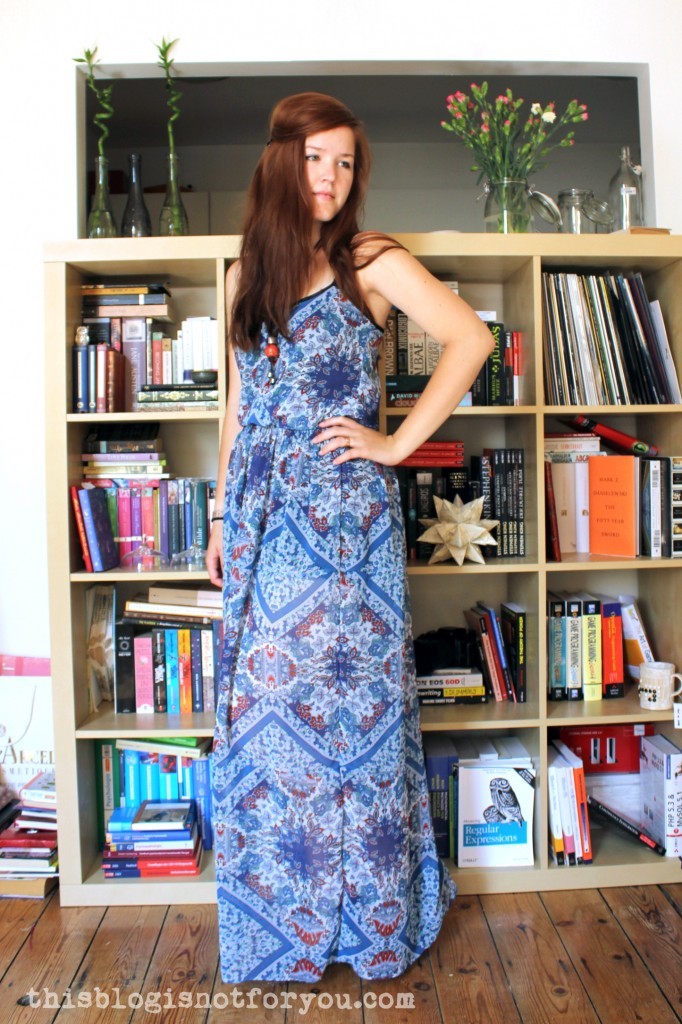 Heels!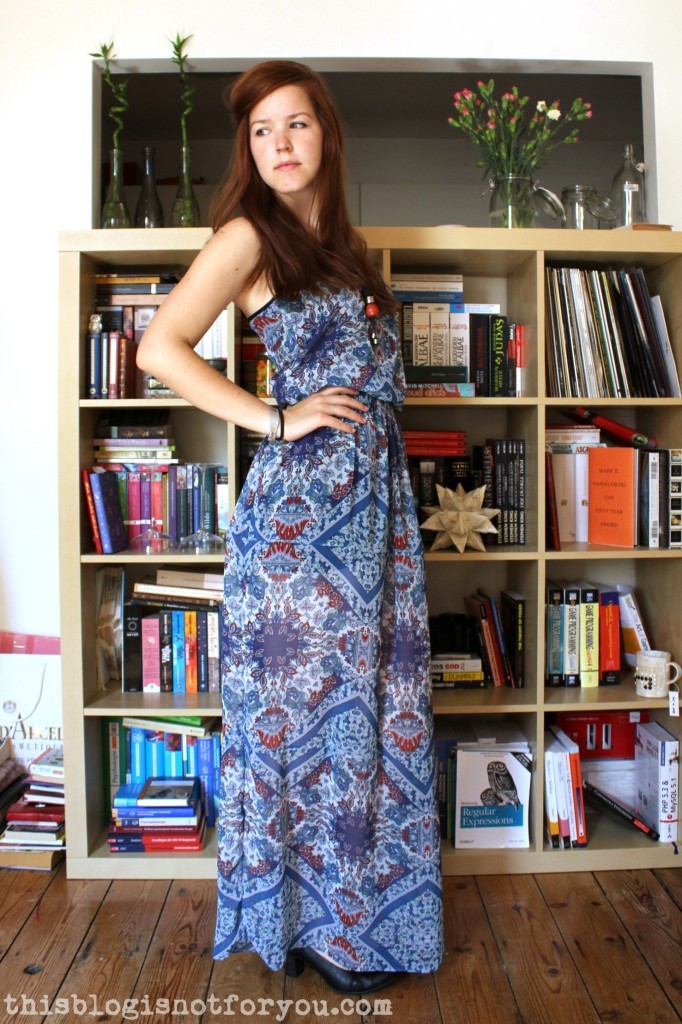
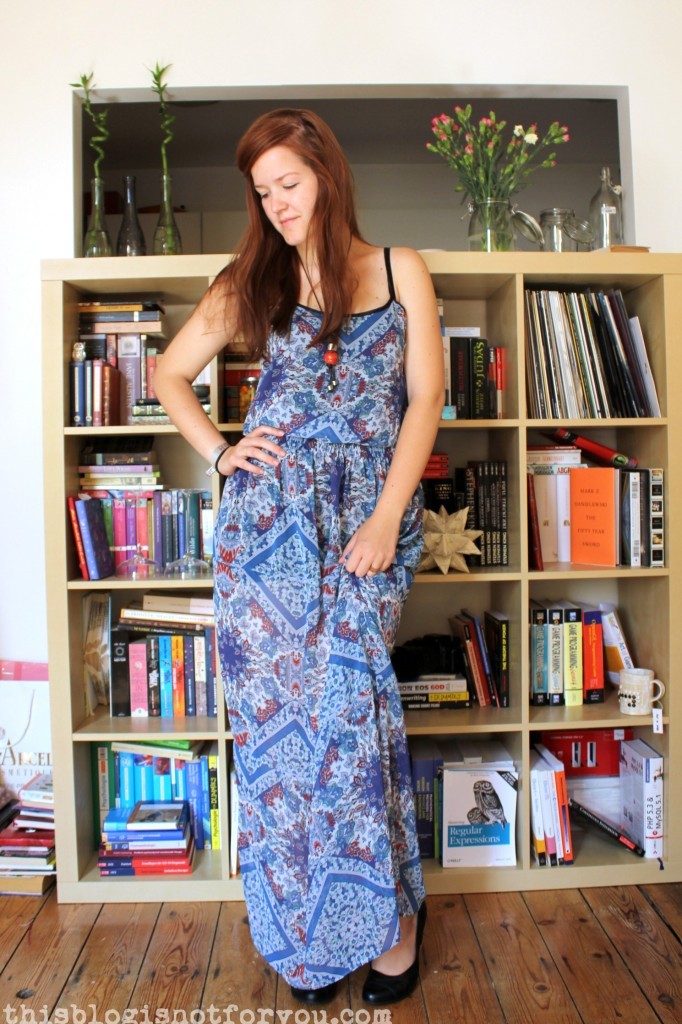
 Brown belt with my new thrifted shoes 🙂 ( I forgot to adjust the length of the dress in this pics, ooops! Well, this way I can show off these shoeeees!)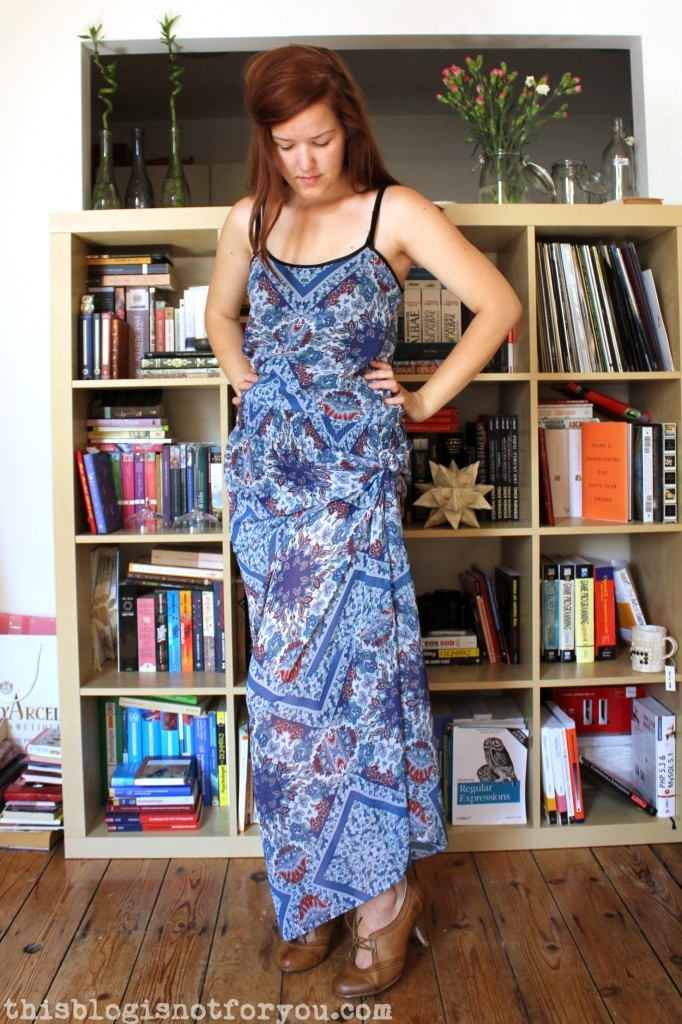

 Hello everyone!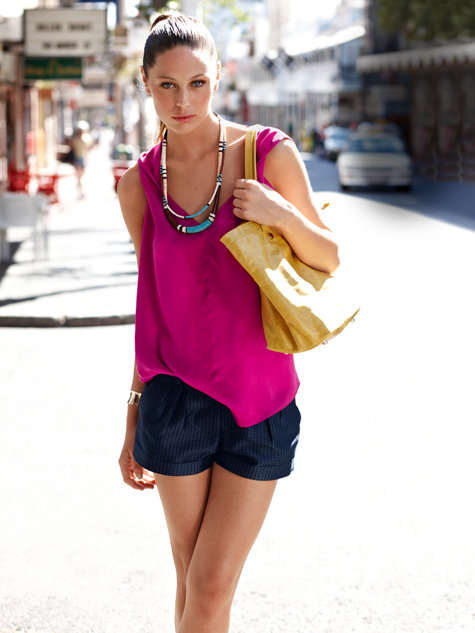

 I then cut out the muslin and sewed everything together, just to notice that the shorts looked really bad and way too long. Due to the pleats they just made my butt look huuuge. I didn’t take pictures of the muslin, and trust me, you really don’t want to see this.