When a Crafter goes Shopping

Over the whole last week I was planning to do something crafty this weekend. Last night I sat down with a bunch of Burda magazines and a cardboard box full of fabric, determined to find the perfect weekend sewing project. Well, things always end up differently than you think. In the end, no fabric and no pattern was good enough and the only thing that I really liked would have been another massive project. This morning I decided to try something quick and easy – quick success can be really motivating!

I went shopping.

This sounds easy indeed (it wasn’t that quick though).
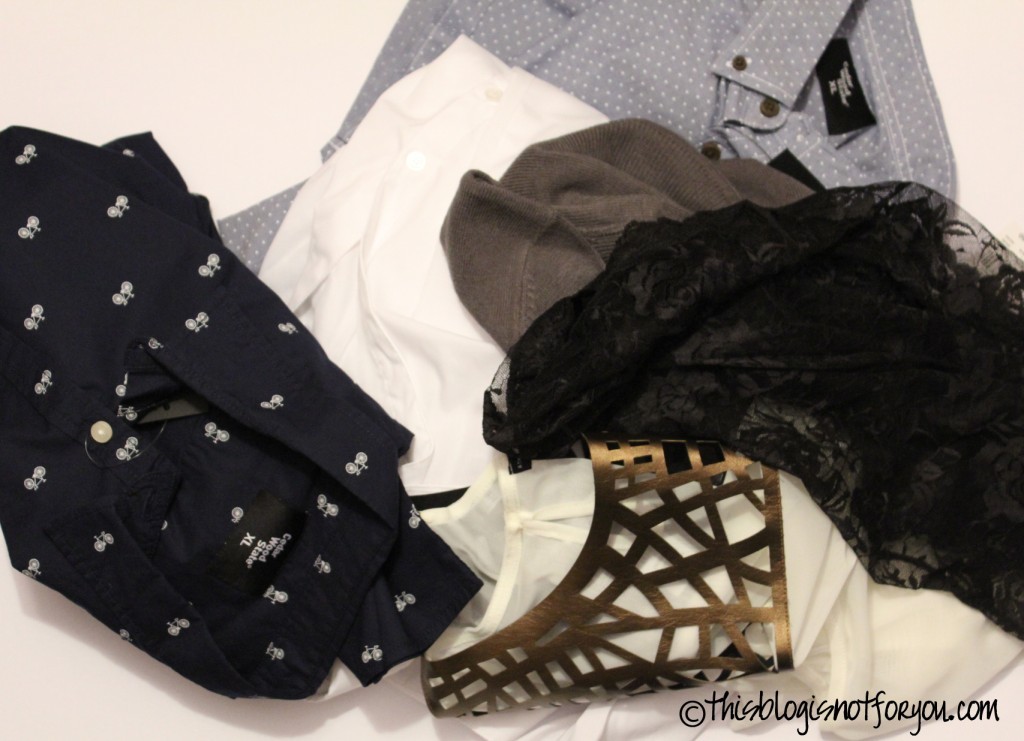
I must have looked a little weird wandering through the store, touching this garment, touching that garment, trying on nothing and in the end buying oversized clothes from the men’s department. If someone had asked me what I wanted to do with those I would have said “Cut them to pieces.”

upcycling cheap clothes 1

And this is what I will do this weekend. Making pretty garments out of cheap, too big and poorly-made clothes. This is also why I tried to buy them as large as possible – more fabric, more options.

Why I bought men’s clothes? Well, for some projects I have on my mind, I’ll need shirting fabric and it’s really hard to find other than white one in the women’s department. And, guess what, men’s XL is bigger than a women’s XL. Plus, there are a lot of great fabric stores in London, but fabric’s rather expensive there.

I also came up with a new resolution for this year: Not to buy clothes from cheap and popular department store chains without completely altering them from scratch. For when I went shopping the last time and was really satisfied with my finding, I ended up wearing the same thing as two other people from my class. What a bummer!

Here are the “rough diamonds” I found:

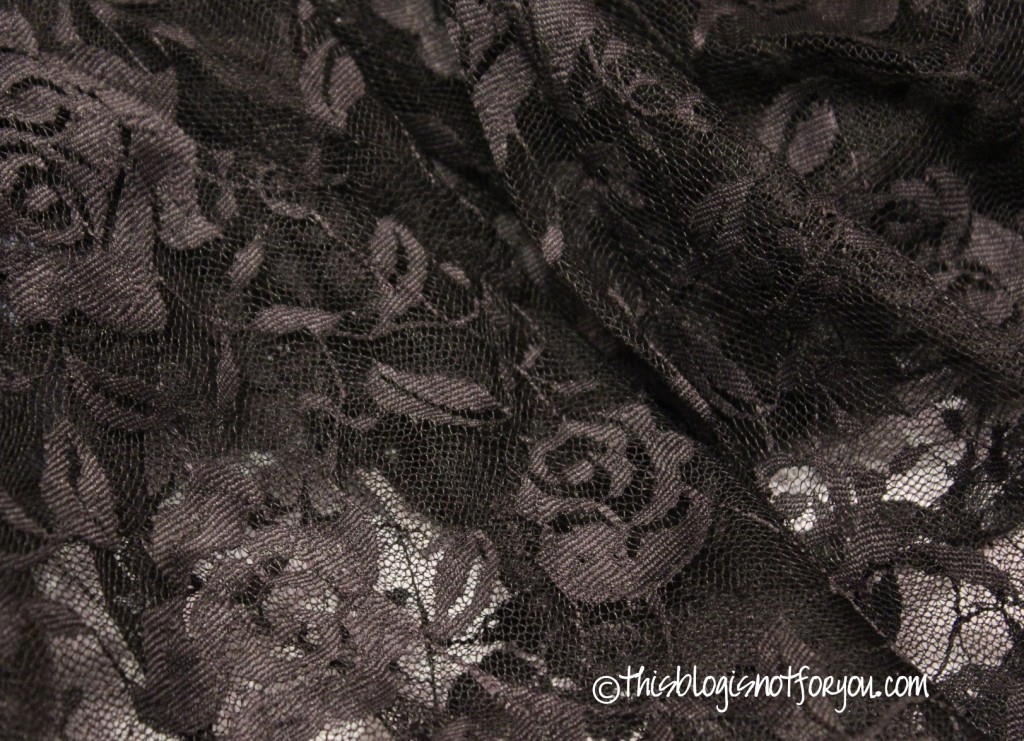
black lace

Beautiful black lace that was supposed to be some kind of ill-fitting dress.

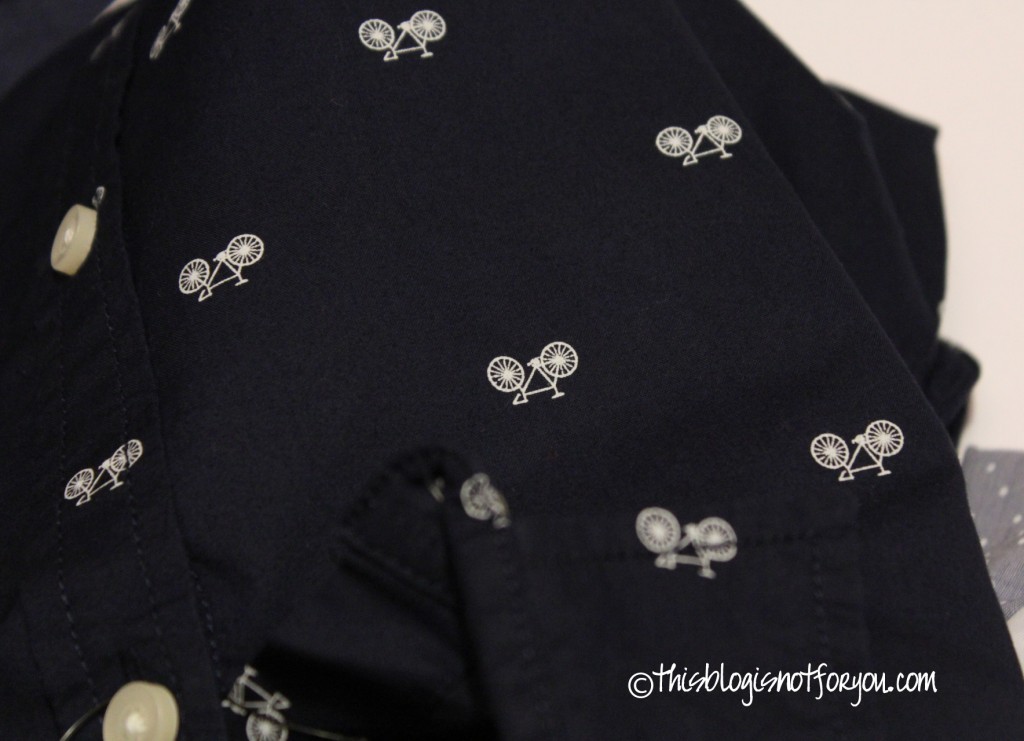
shirt fabric white bicycles

 A navy blue men’s shirt with cute little bicycles on it.

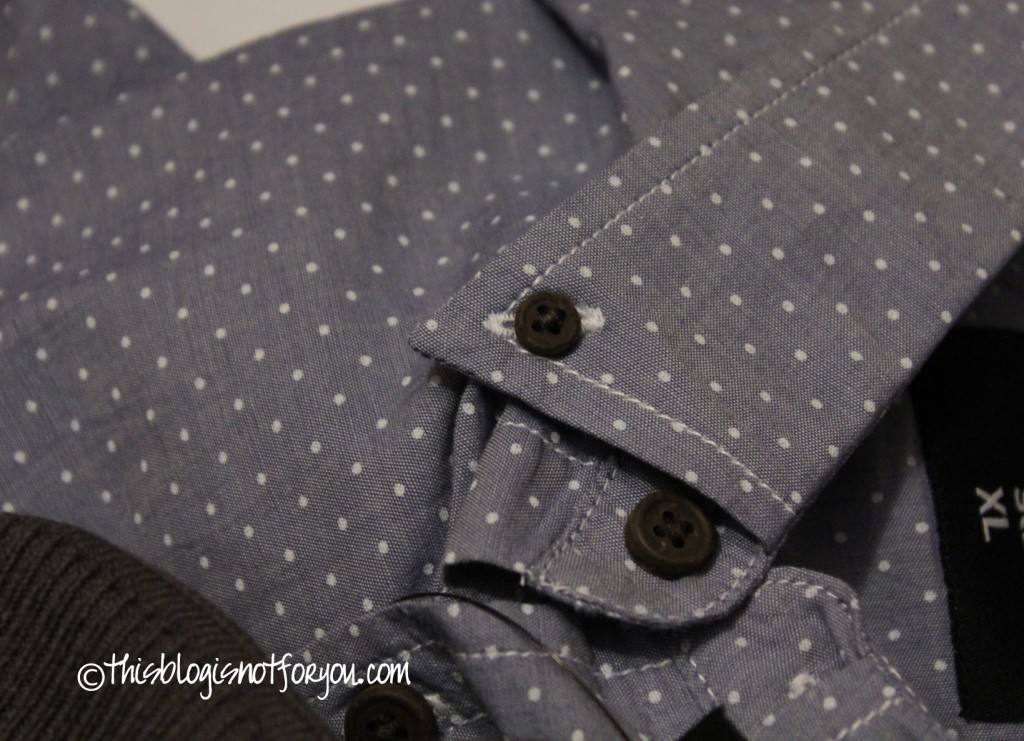
shirt fabric white dotsThis shirt is so big, it’ll make a cute little summer dress!

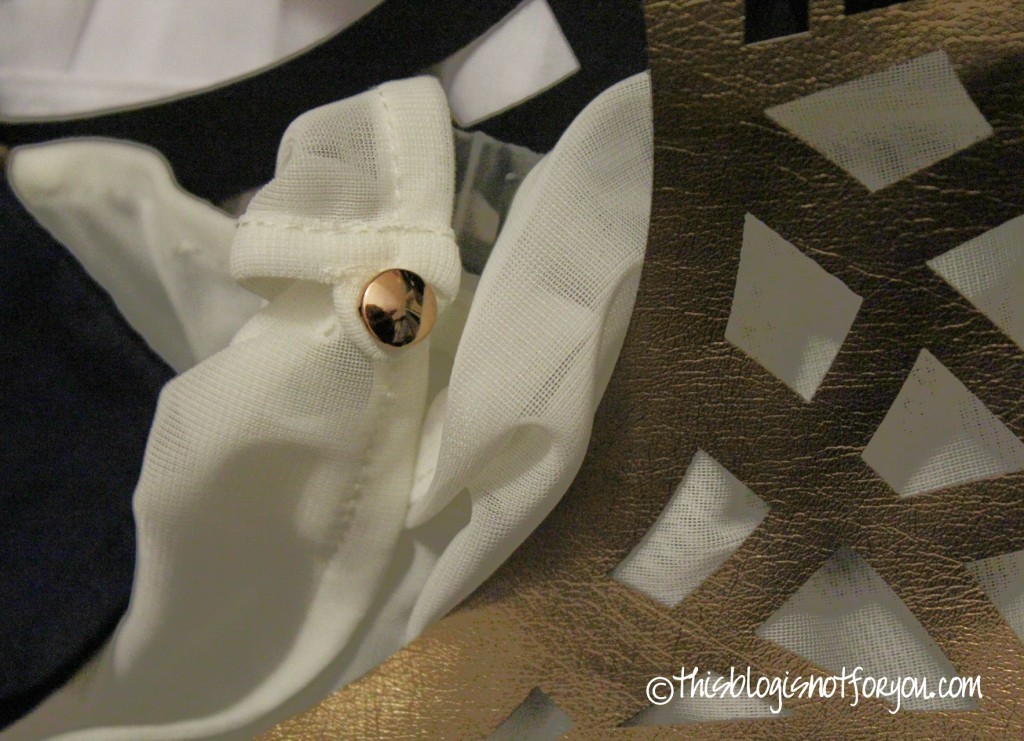
 upcycling cheap clothes

This one is my favorite! It’s exactly what I needed for a DIY project knock-off I’ve been itching to do for weeks! Be ready for suprises! I’ll keep you posted.

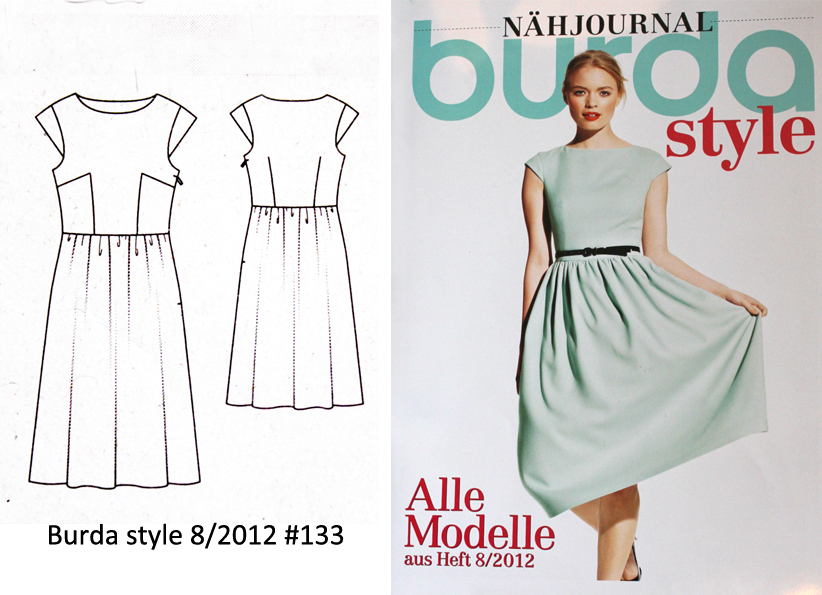
Allow me to introduce… {Burda 8/12 #133} – my Christmas dress!

Burda 8-2012 133

I did it!

Despite all the pre-Christmas stress and end-of-term exams, I managed to finish my Christmas dress in time. Not as easy as it sounds – I really had to hurry, since I went home for Christmas and had to leave my sewing machine in London.

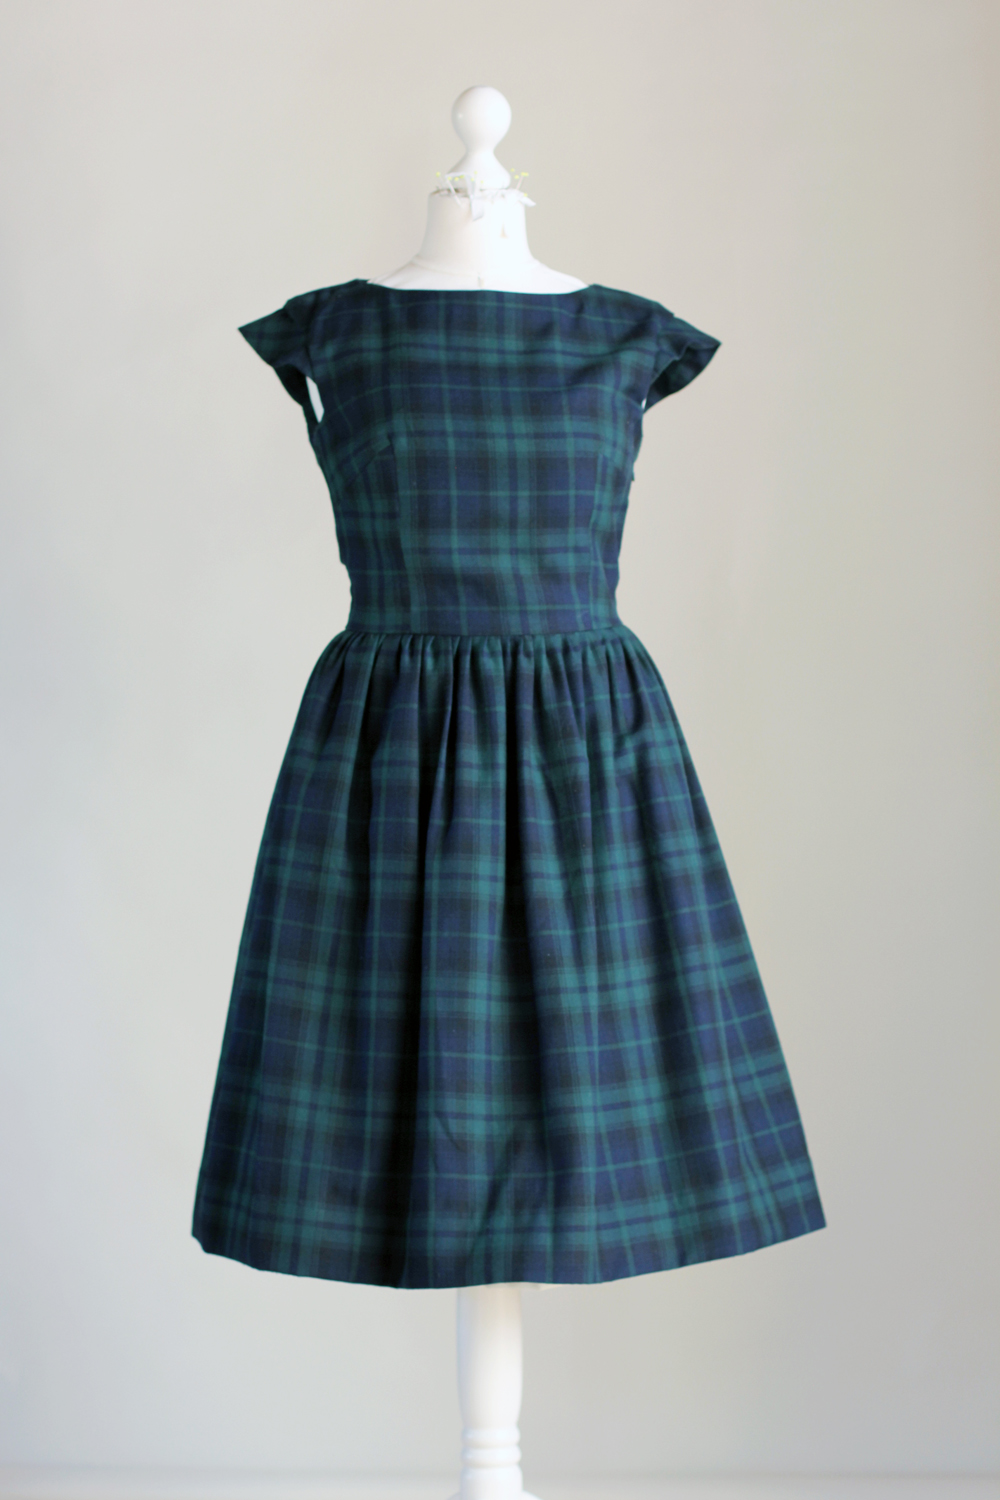
I made the dress with a beautiful 50’s style pattern which had been in Burda Magazine 8/2012.

burda

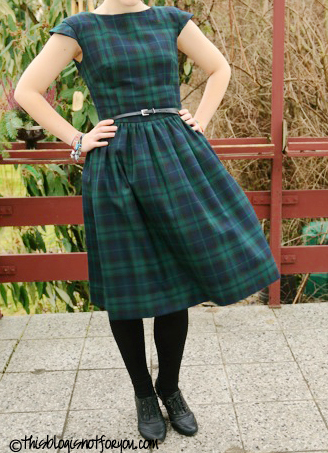
The fabric was really easy to work with. I used a green-blue checked wool fabric, I got for Christmas a year ago.

Burda 8-2012 133-1


As you can see, I shortened the skirt a little. Otherwise it would have looked a little too old-fashioned for my taste. By the way, the weather was crazy! The picture was taken Dec 25 and it was so warm and sunny I didn’t even need a jacket.

I wore the dress together with a slim leather belt which, I think, went really well with the shoes.

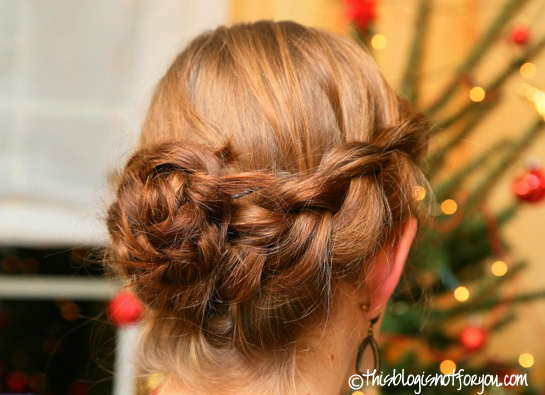
Since the whole look was rather vintage inspired I chose a braided hairdo. In case you’re interested, here’s what it looked like:

Christmas hairstyle

How to make a mobile phone case {the sewing}

After making the pattern – here comes the fun part: the sewing.

If you haven’t done the pattern yet, here’s a link to the pattern making tutorial:
 #1 transfer the pattern onto the fabric

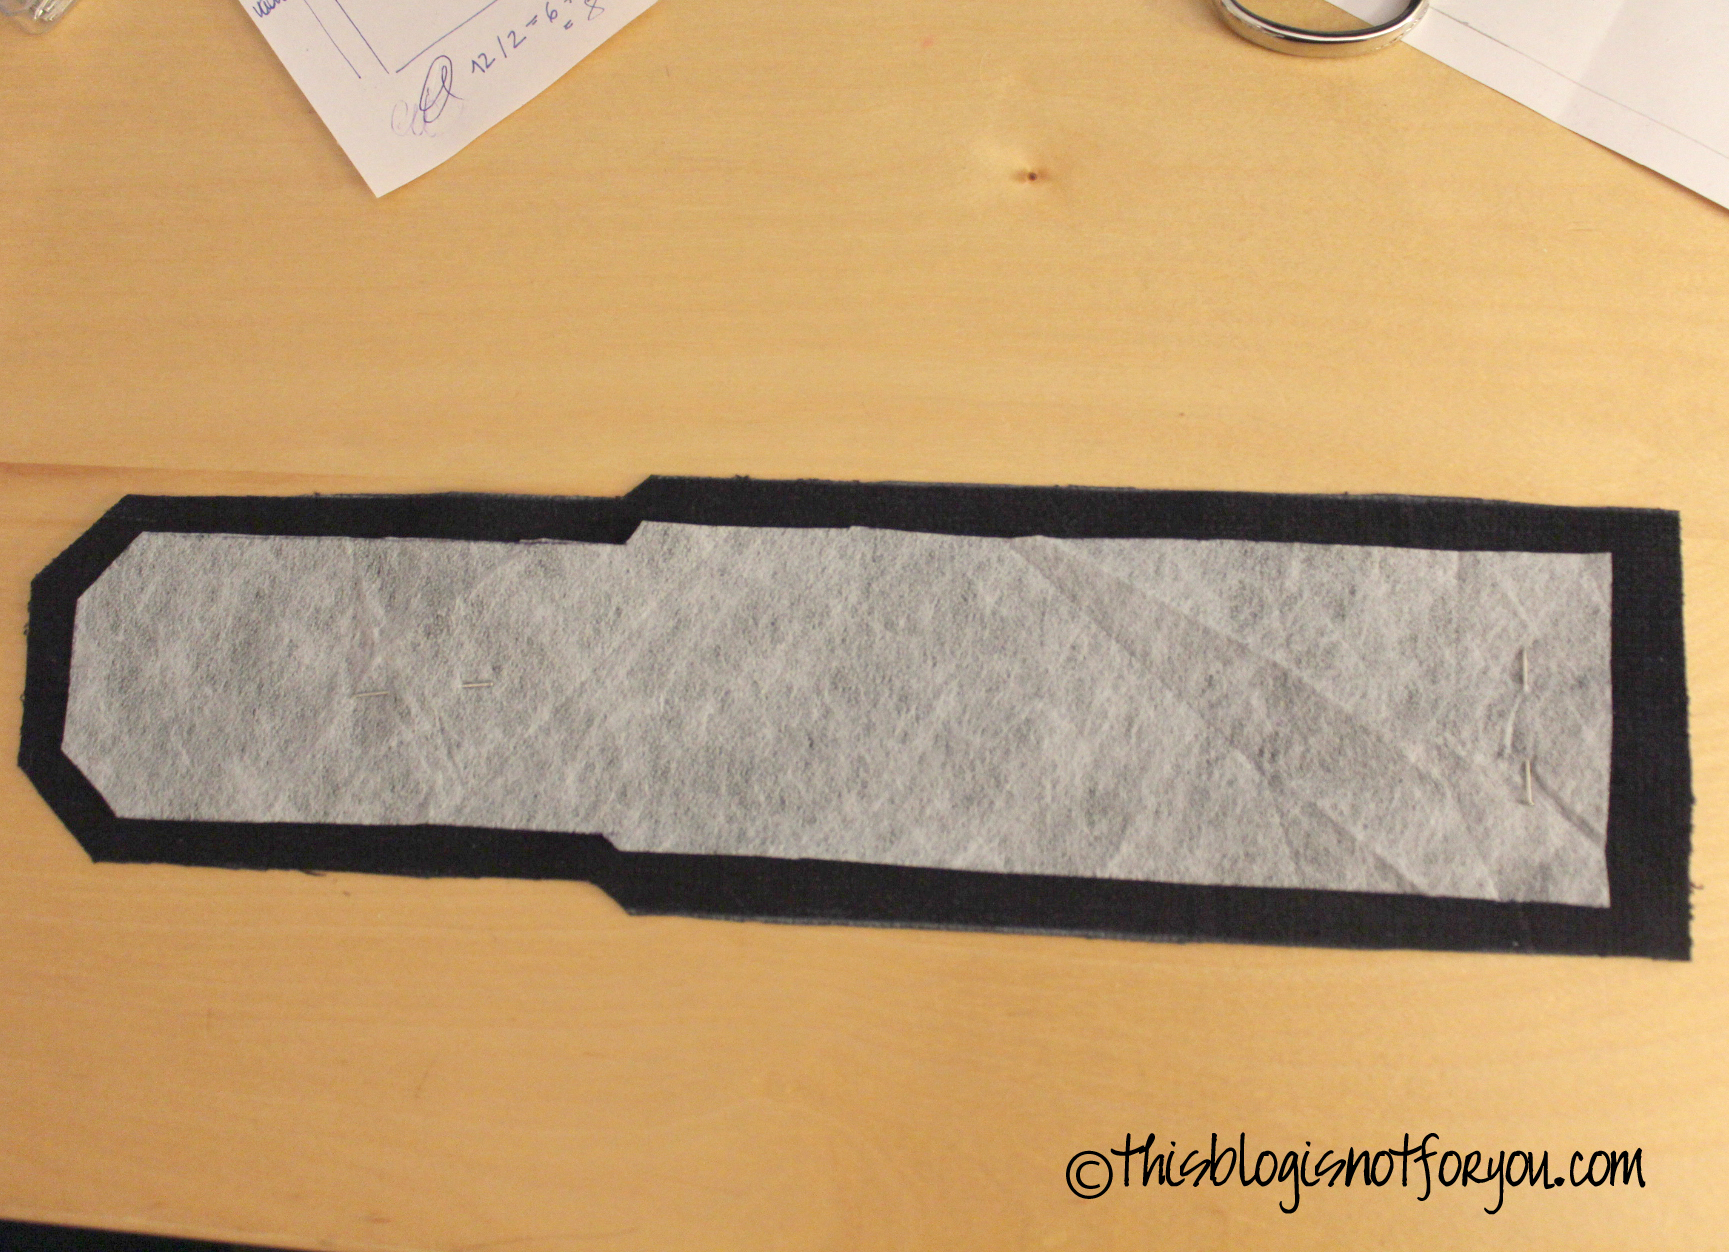
Note that you won’t need to add seam allowance any more. You will need two pieces for the outer and the inner fabric and one piece of fusible interfacing.

#2 transfer the pattern onto the interfacing

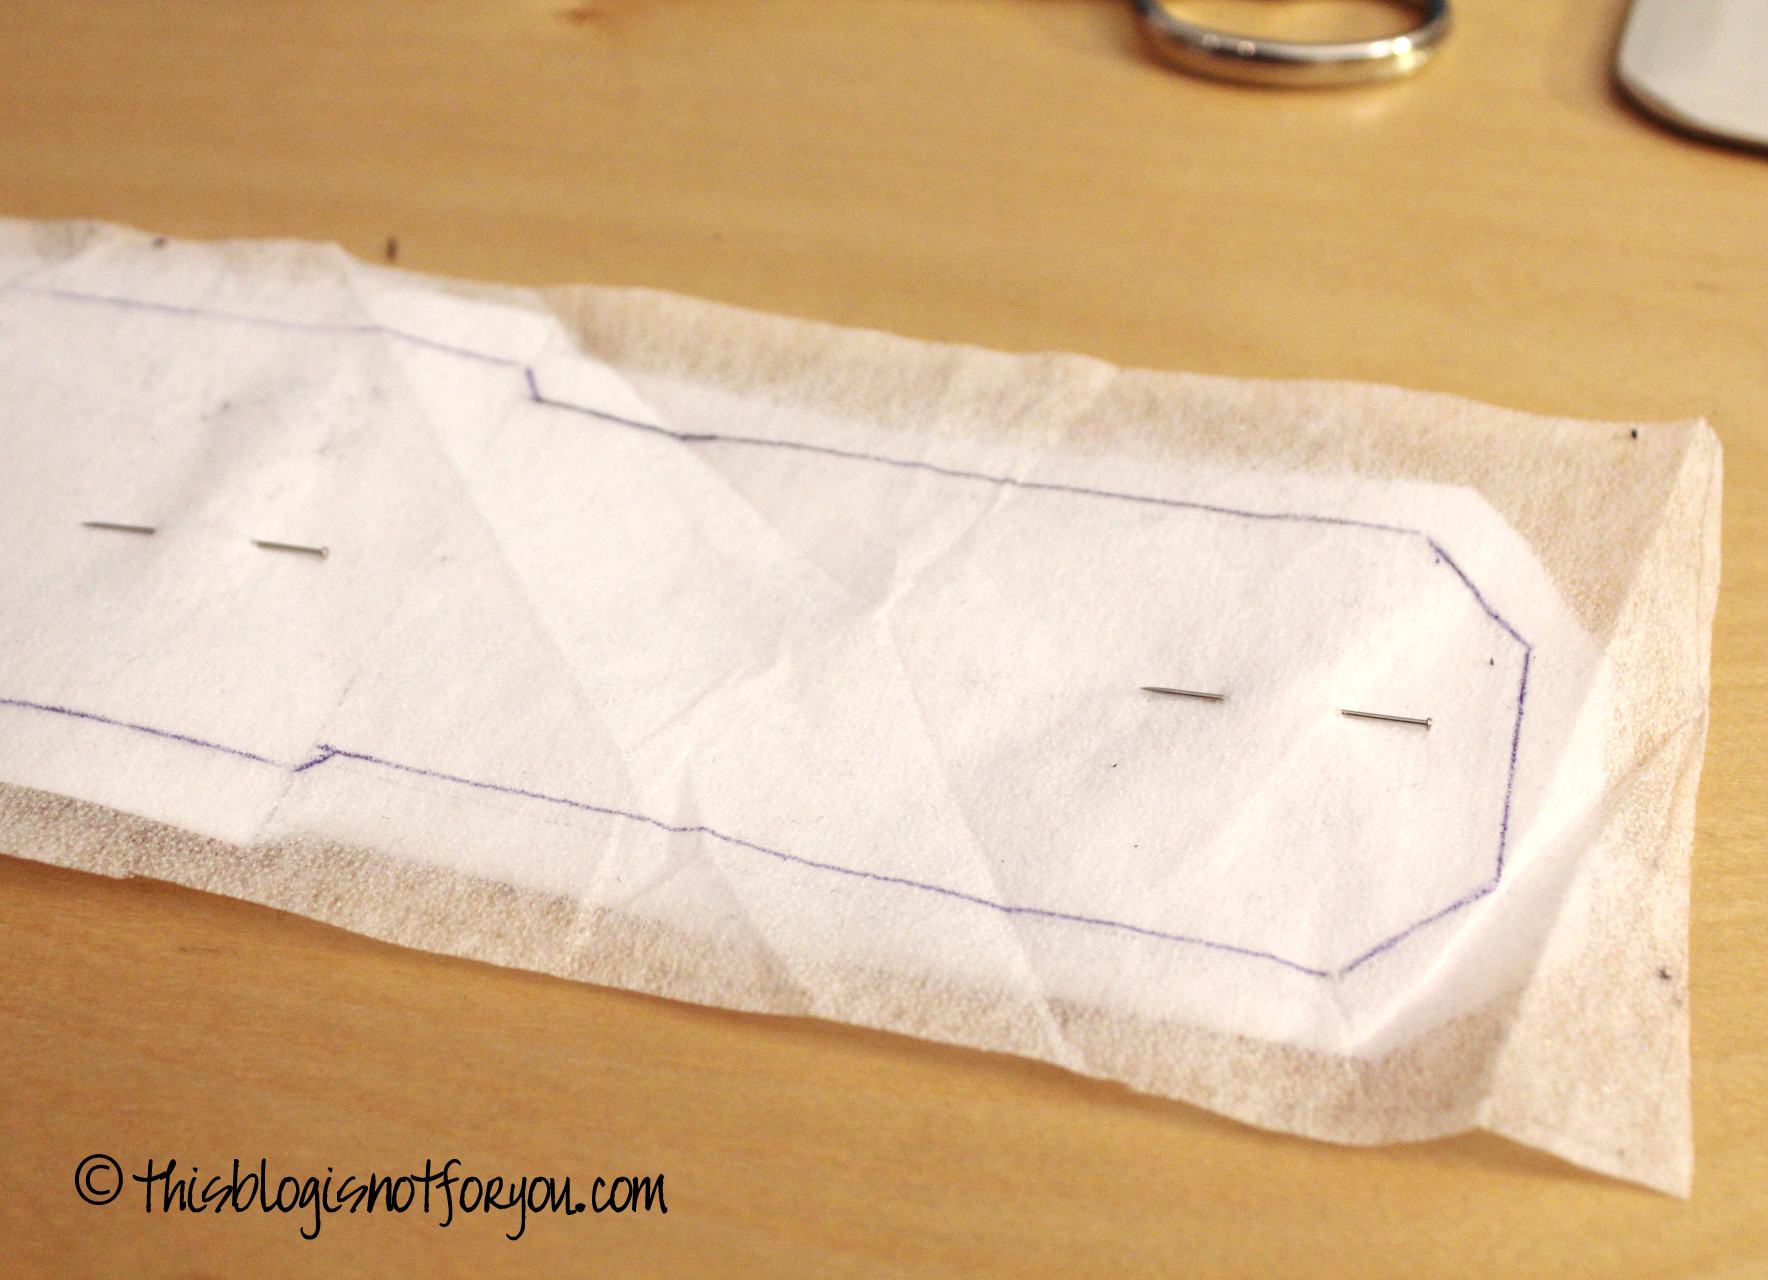
…by placing the pattern under the fusible interfacing and tracing/cutting along the markings of the seam allowance. Iron it onto the backside of the outer fabric. (You can skip this step if you don’t want to use interfacing. It just helps your phone case to keep its form.)

#3 apply the fastening

Before sewing outer and inner fabric together, don’t forget to apply the fastening. Find the right spot for Velcro, buttons, snap buttons by using your phone. Put the cut-outs on top of each other and wrap them around the phone, mark the spot for the fastening on flap (inner fabric) and pocket (outer fabric). Sew the fastening on both inner and outer fabric.

For the phone case with the little owls on it I used velcro tape. For the one in the tutorial I had to find something else, since I made it for someone else’s phone and didn’t have the phone to adjust the fastening.
My workaround: Applying a loop for the flap. This way the fastening is flexible, and the exact height of the phone doesn’t matter.

#3 the sewing-everything-together

Fold and press the seam allowance on the bottom edge and prepare the “pocket” by folding over and pinning it (see pictures below) on both pieces of fabric.

Try making the inner fabric pocket a little shorter than the outer one (see picture above). By putting it into the outer pocket later on it will otherwise stick out by a few millimeters and we don’t want that to happen. For the same reason make the outer fabric’s pocket a tiny bit bigger as well by using less seam allowance (see picture below).

Now sew together the side seams of the pockets separately.

Place both pieces on top of each other, right sides together. Before pinning, make sure the edge of the outer pocket protrudes by a few millimeters.

Sew together the two flaps.

#4 boxing the corners

To give your phone case a bit more depth, you can box the corners.
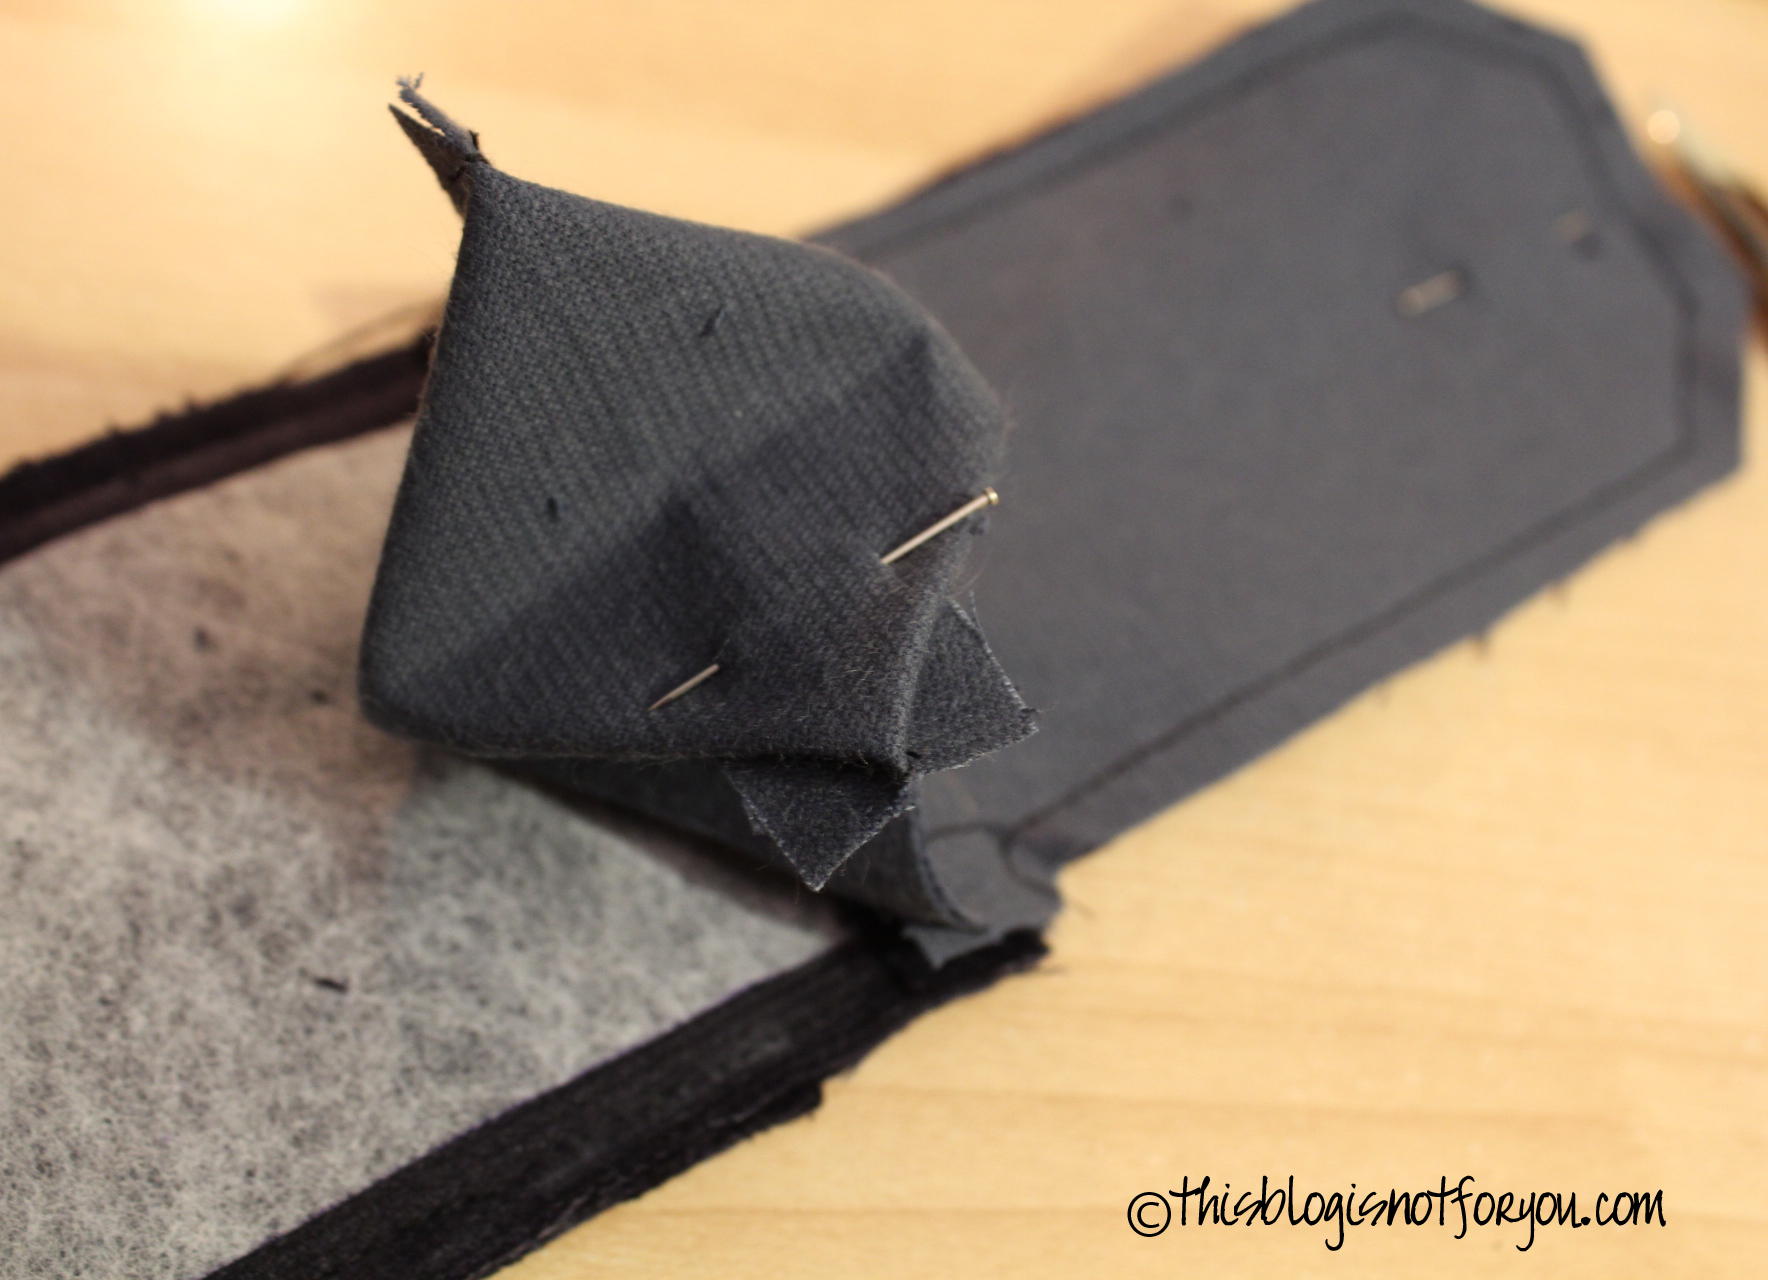
Flatten a corner so the side seam is in line with the bottom seam; the point where they meet is at the point of your fold. Determine the amount of depth you want which should be the same as the depth of your phone. In this case it was 1cm.

Mark and sew across the corner, perpendicular to the seams, as shown in the picture below. Normally you would fold this tuck down against the bottom seam, and hand-stitch it to the seam allowance, but in this case the pocket are quite small, so you can just cut it off.

Do this with both pockets.

Turn the outer pocket and flap inside out again and tuck the inner pocket into the outer pocket. It should look like this:

Sew the inner pocket onto the outer pocket, use hand-stitching if your phone case is quite small.

If you want, you can also stitch around the seams of the flap to give it a better shape. I didn’t do it in this case since the fabric was quite thick, but with the other one I did (see the first picture where I used the owl fabric).

And then you’re done! If you have any questions or my instructions don’t seem clear at some points, please leave me a comment and I will answer as soon as possible!

Have loads of fun sewing!

facebook/bloglovin/pinterest
Stay in touch!


How to make a mobile phone case {the custom pattern}


Maybe you still need an idea for a last minute Christmas gift? Or you have a mobile phone yourself that just doesn’t seem to fit in any case? Or maybe you simply want to customise a phone case for fun.

Well anyway, this is part 1 of How to Make a Mobile Phone Case where I show how to make a custom-made pattern. And it’s fairly quick and easy. Pattern-making and sewing together takes about an hour. But if you’re figuring it out for the first time it might take a little longer.

I had the idea of doing this after looking for an iphone case pattern. I found a German youtube video on how to make an iphone case and figured you can basically make this with mobile phones of any size. The phone case with the owl fabric was made for an iphone, the one in this tutorial is for an old nokia phone.

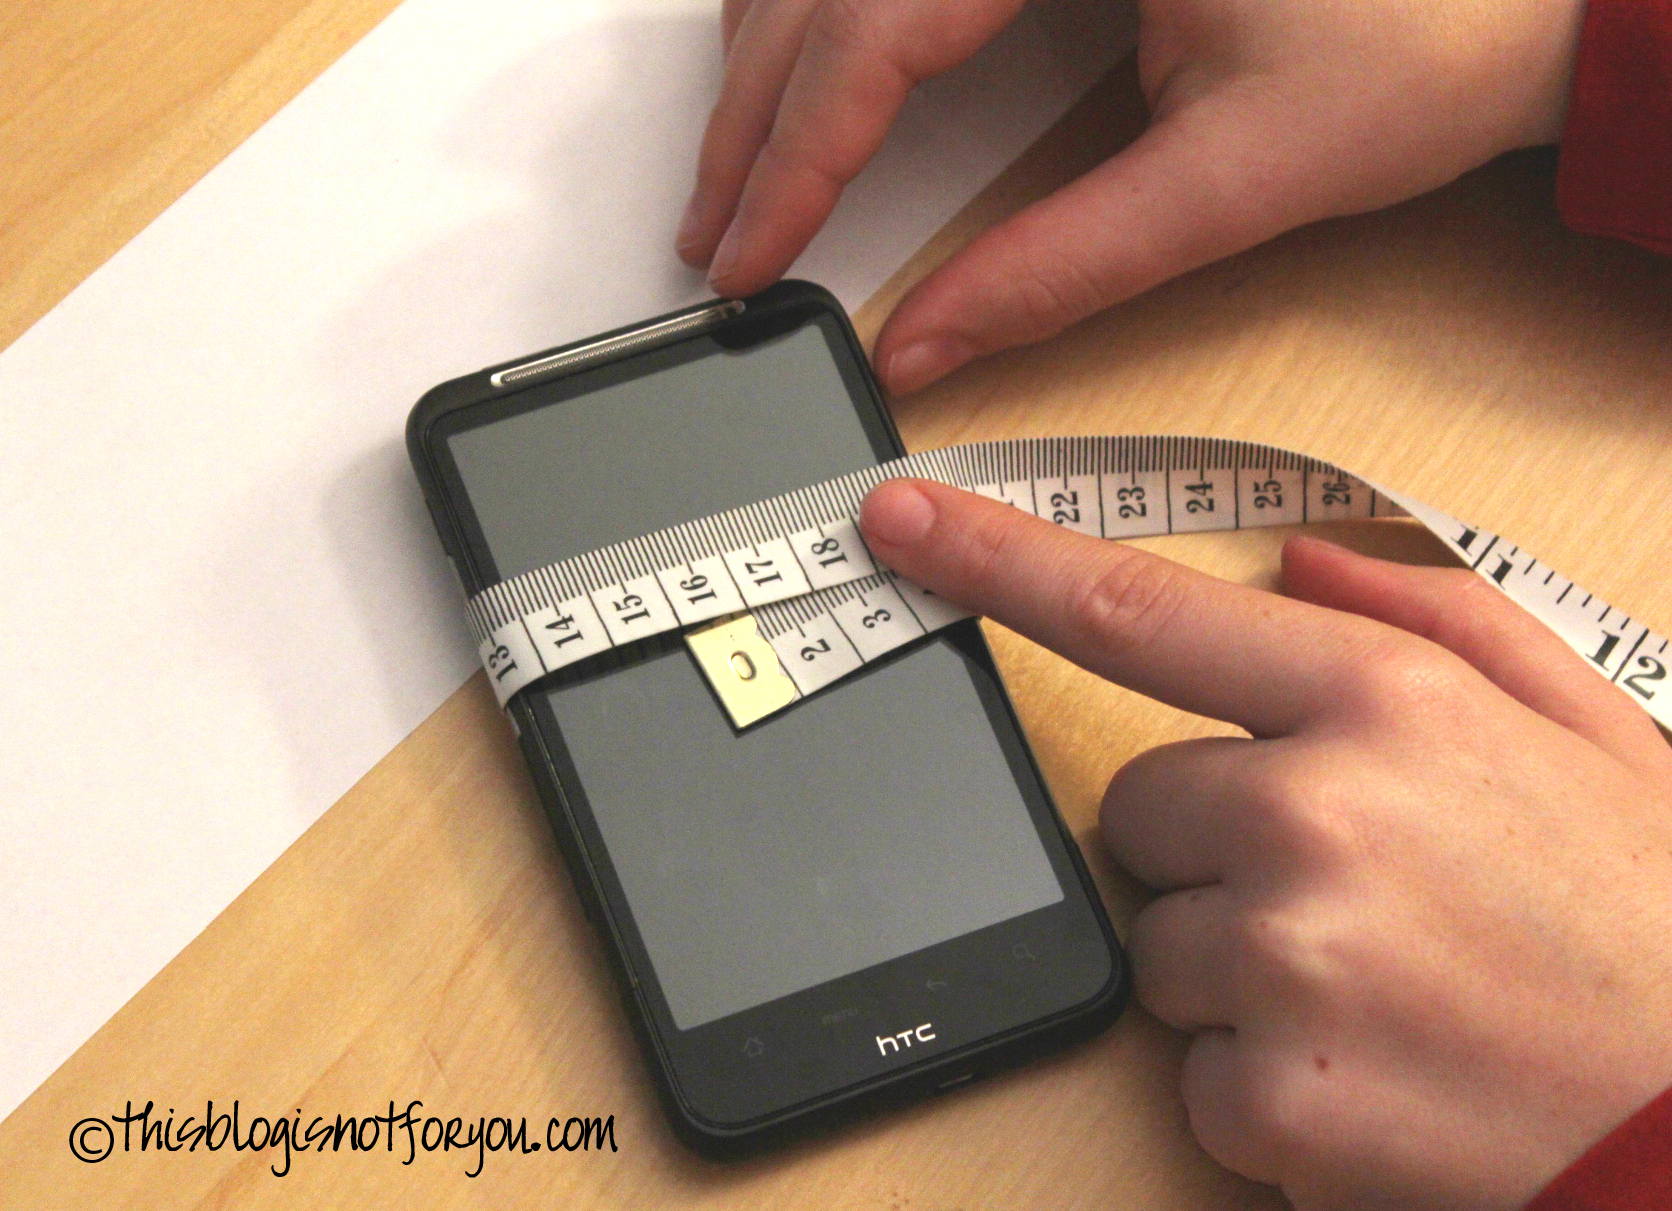
#1 take measure of your phone

Measure width, length, height and diameter.

#2 Prepare a sheet of paper for your pattern

Now you need a long, narrow sheet of paper. You can glue together two sheets of paper and then cut off a strip that’s as wide as half your phone’s diameter + seam allowance.

The phone I made the case for was 12cm in diameter. Seam allowance on both sides was 1cm. So I made the strip 8cm wide.

In this tutorial I made the phone case out of curdoroy. Therefore I made the strip 8,5cm since the fabric is quite thick and I was afraid that the phone might not fit it. Now it fits perfectly.

In case you’re not sure if the phone case fits, make the pattern wider rather than narrower. Otherwise you won’t be able to make adjustments if it’s too small!

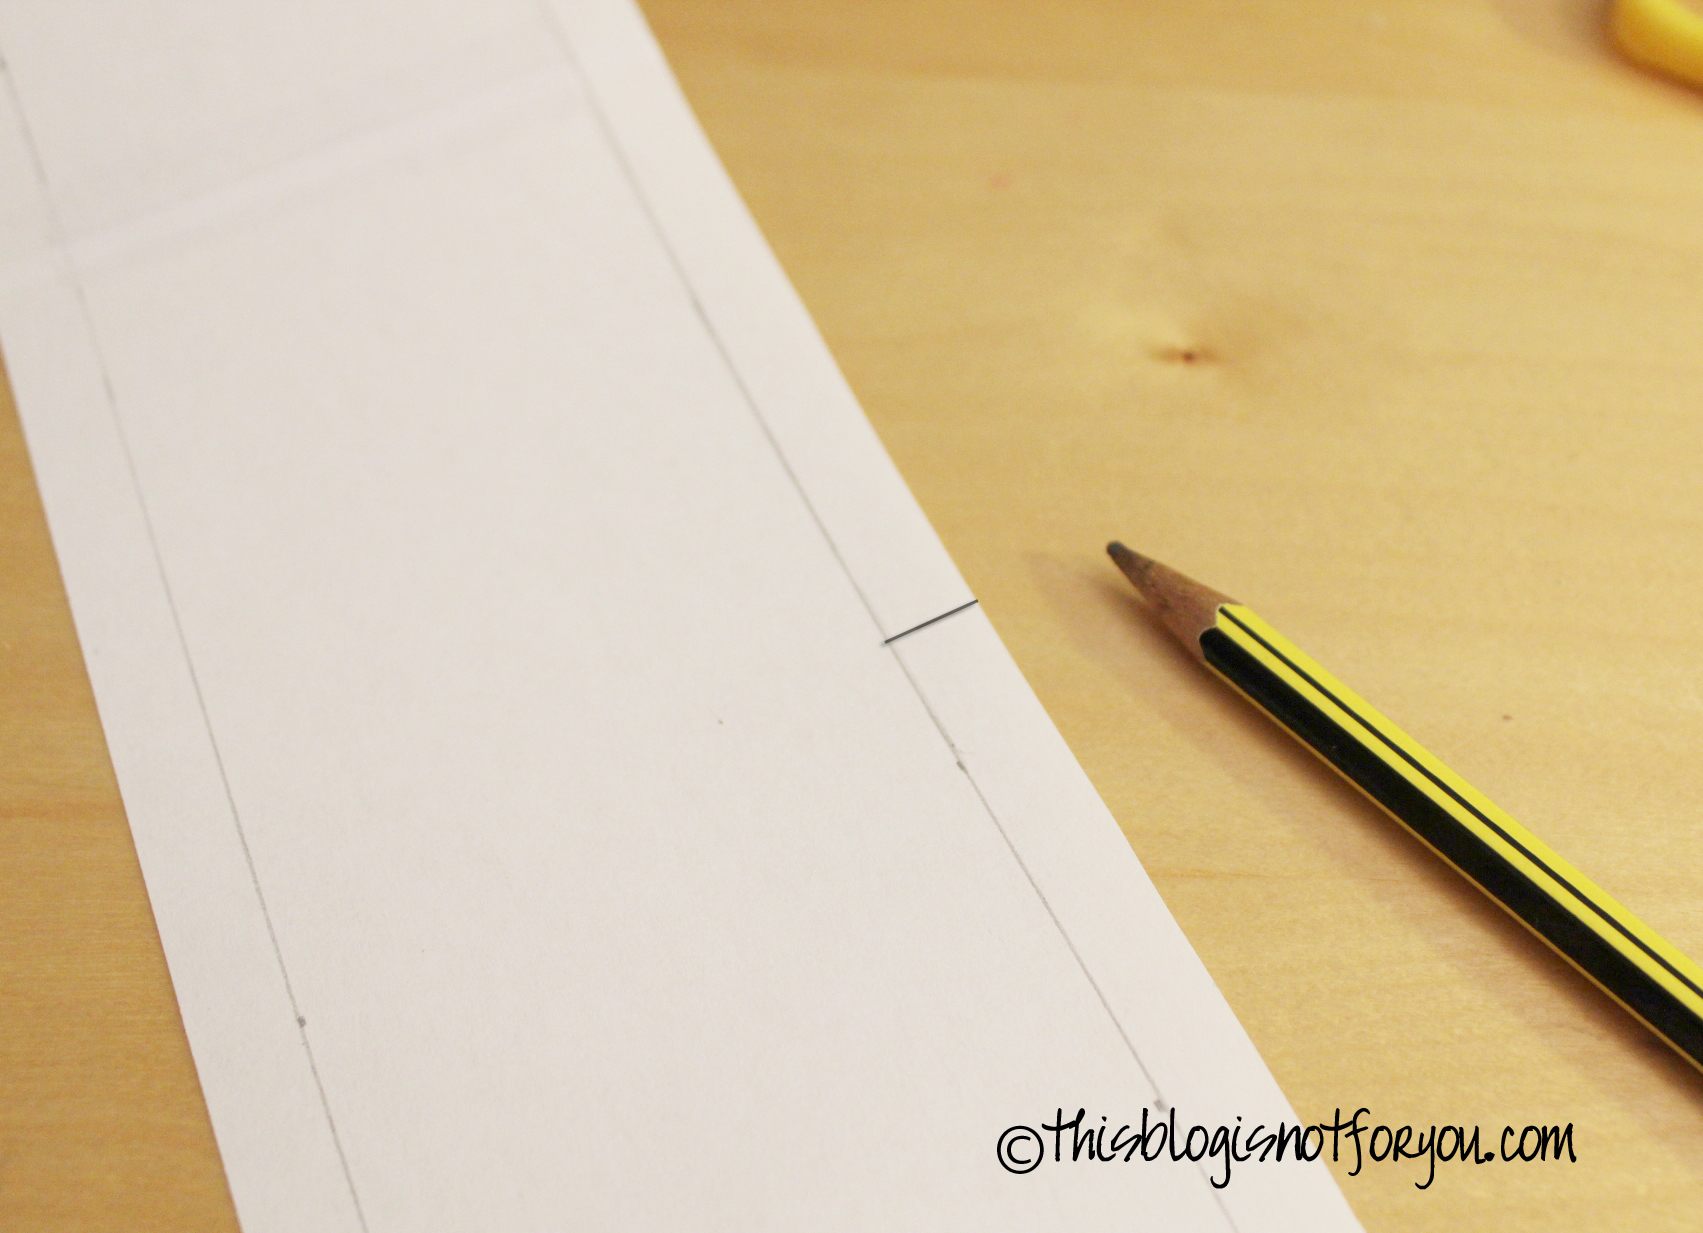
Here you see the marked seam allowance. Use 1,5cm for the bottom edge and fold it over.

Now fold the bottom edge over your phone to find the correct height for the pocket. Take into account that the phone should protrude a little so you’re able to pull it out quickly without having to fumble for minutes.

Mark the height, measure the length from mark to bottom edge and mark on the other side as well.

Then connect the markings of the outer edge using a ruler.

Now do the same with finding the lentgh of the flap.

Mark and don’t forget the seam allowance (1cm) before you cut the rest of the paper off.

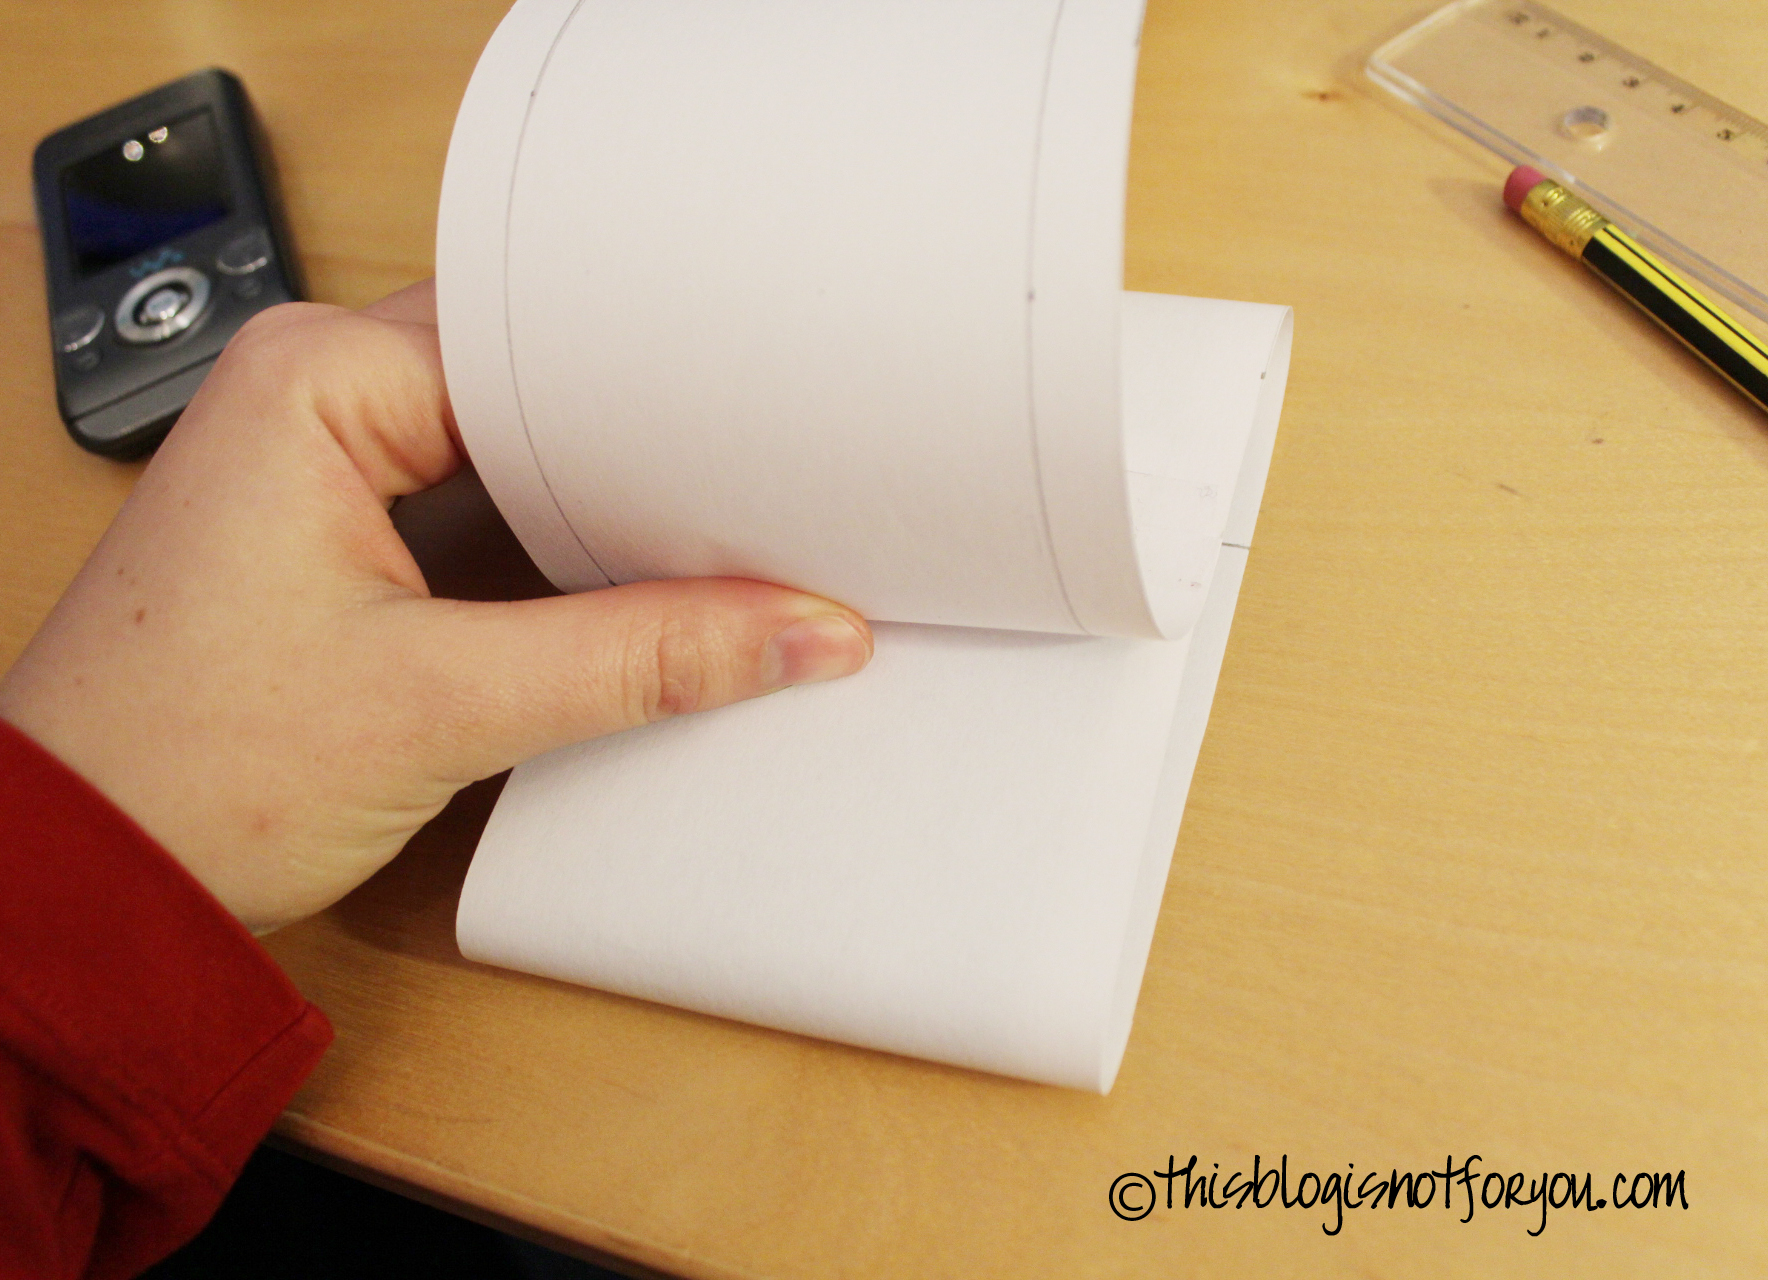
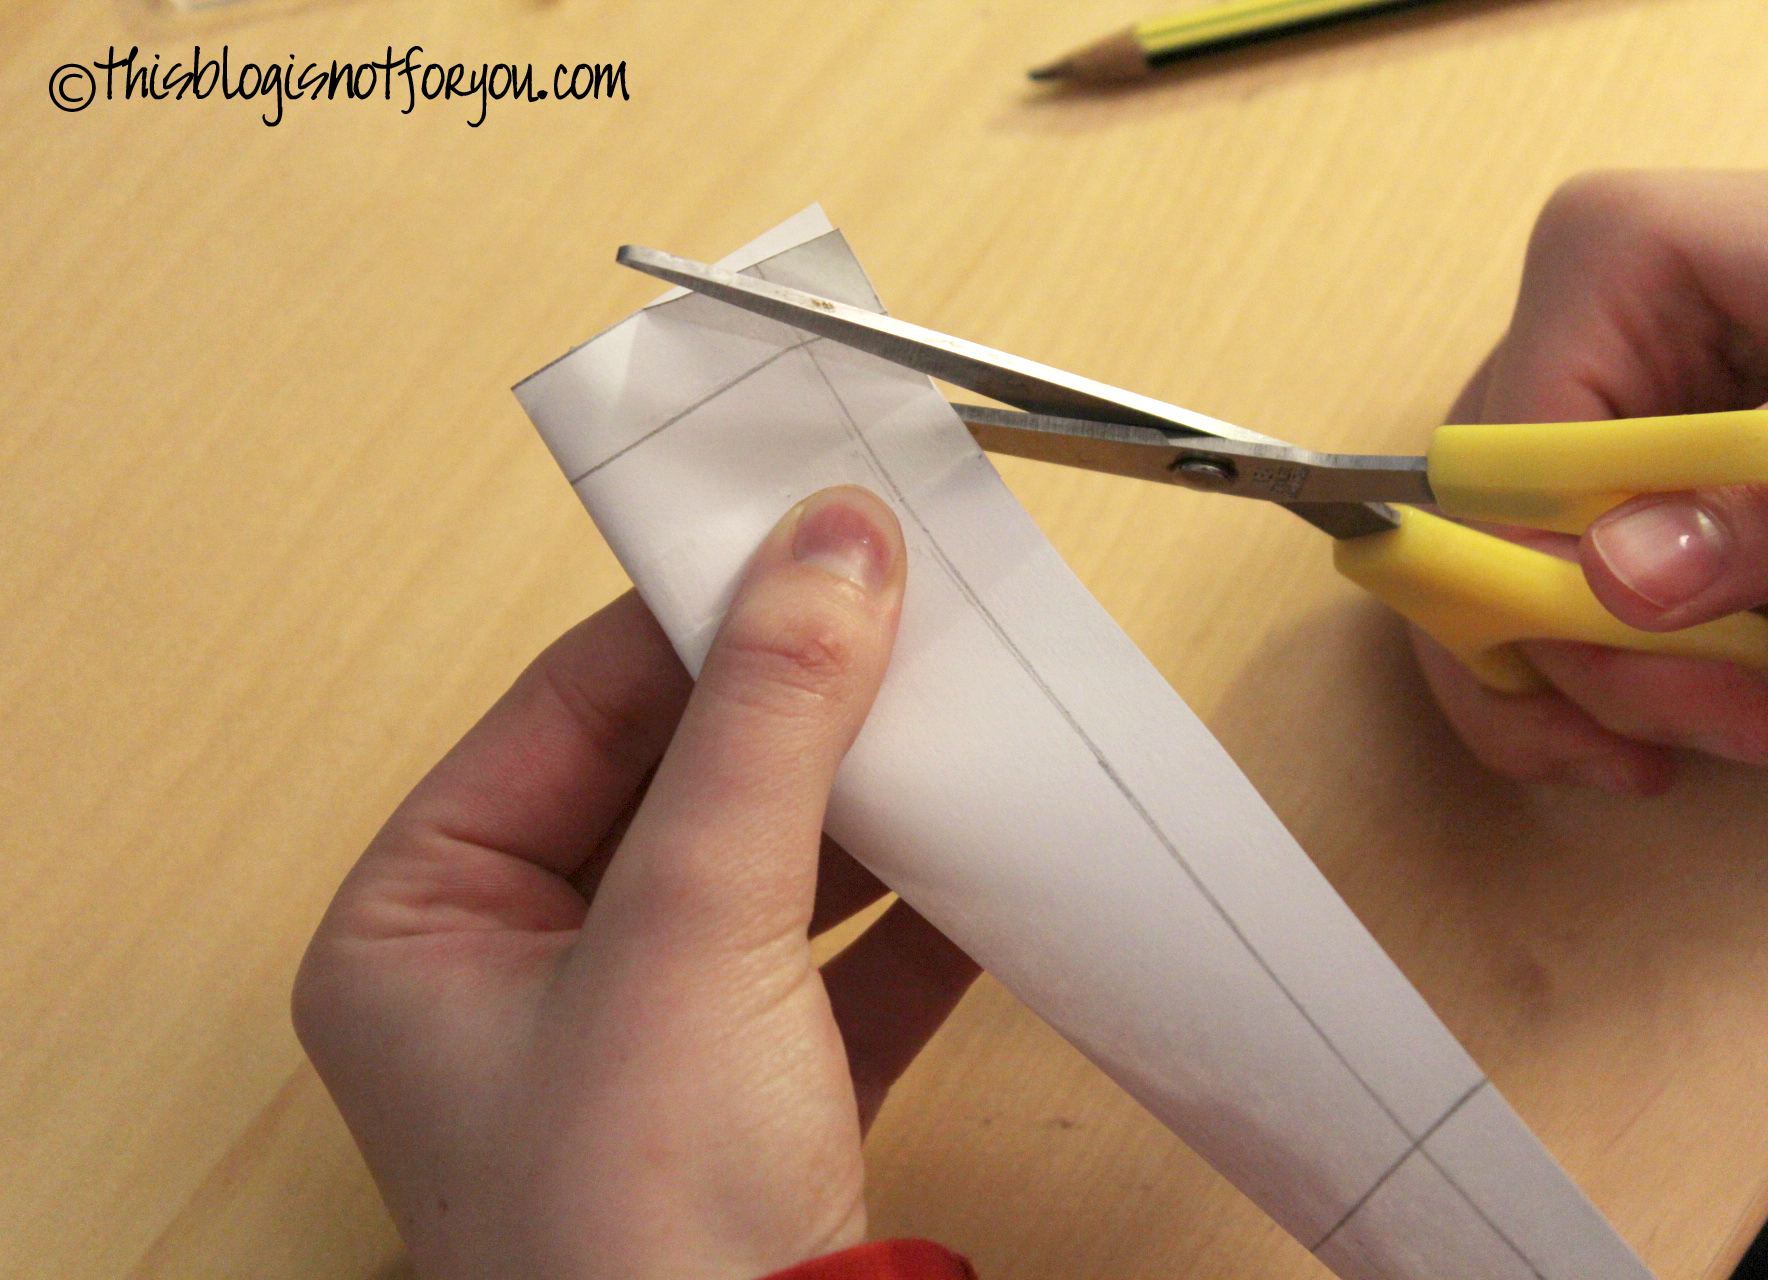
For shaping the flap you can simply cut off the corners or round them. To do that mark the edge by folding the corner, unfold, fold both sides together (see picture below) and cut off.

Now the edges of the flap are nicely uniform.

Ok, almost done.

The part for the flap needs to be a little narrower than the rest of the pattern. The part of the pocket will become narrower when you put your phone in (since we already included the width we don’t need for the flap) and you don’t want the flap to be wider than the rest.

You can do that anyway, it makes the pattern a lot easier, but it may look a little awkward. Just saying.

For narrowing the flap pattern mark and cut off about the half of you seam allowance (0.5-0.7cm) as you can see in the picture above and below.

Adjust the new seam allowance for the flap part of the pocket (make it 1cm again).

Your pattern should now look like this.

If it doesn’t: Don’t panic, just look at the pictures at of every step again. You probably just skipped a step somewhere by accident.

If it does: Well done! You can go on to part 2 of  How to Make a Mobile Phone Case. You will find a link at the end of this post.

Follow the link to Part 2 here:


How to make your own Petticoat

Petticoat tutorial by Thisblogisnotforyou.com

Finals are over! Hard to believe –  I finally have my life back. Well, for a few days/weeks at least. Anyway, one of the first things I did after finishing all the handmade Christmas gifts was gathering loads and loads of tulle again and sewing together the second Petticoat. This time I didn’t forget to take pictures and could make a detailed tutorial.Petticoat tutorial by Thisblogisnotforyou.com
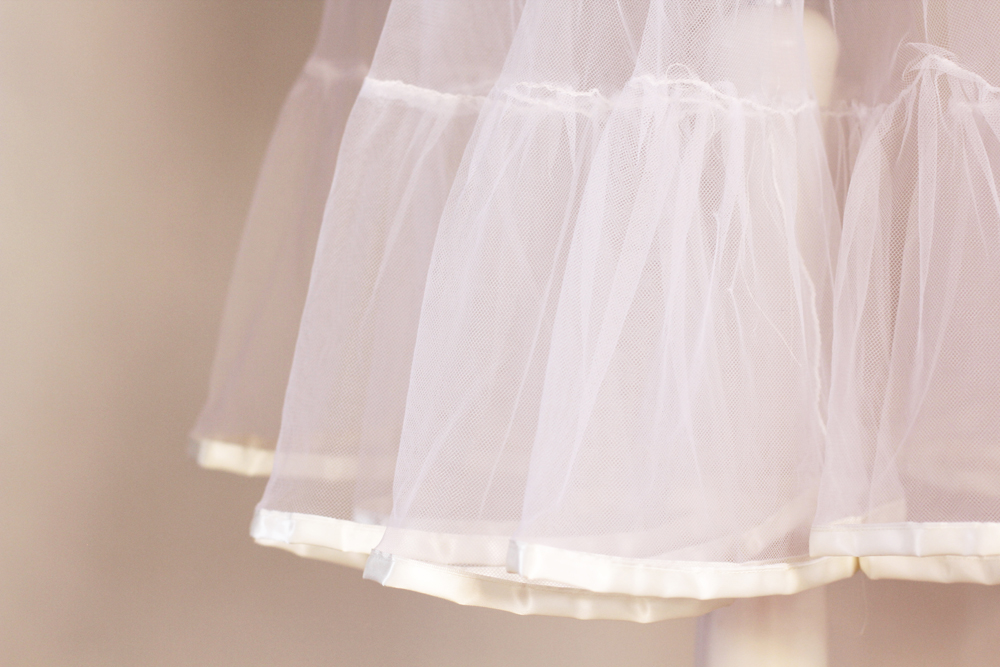
Here we go:

THE MATHS (not as bad as it sounds)

First of all, you have to decide about the length and number of layers of your Petticoat.
For the length it’s best you measure the skirt/dress you want to wear your Petticoat with from waist to hemline. The Petticoat should be about 1 inch shorter than the dress.

Depending on how many layers you want your Petticoat to have, you need to buy about 4yrd of tulle.(I used 3,5m and got 3 layers ĂĄ 56cm out of it). You can use other fabric, but tulle is quite stiff and helps your Petticoat to become more puffy. Tulle is also quite itchy, if you want to make a Petticoat for a dress you don’t want to wear tights with, you might consider sewing a little underskirt or make the first layer out of a softer fabric.
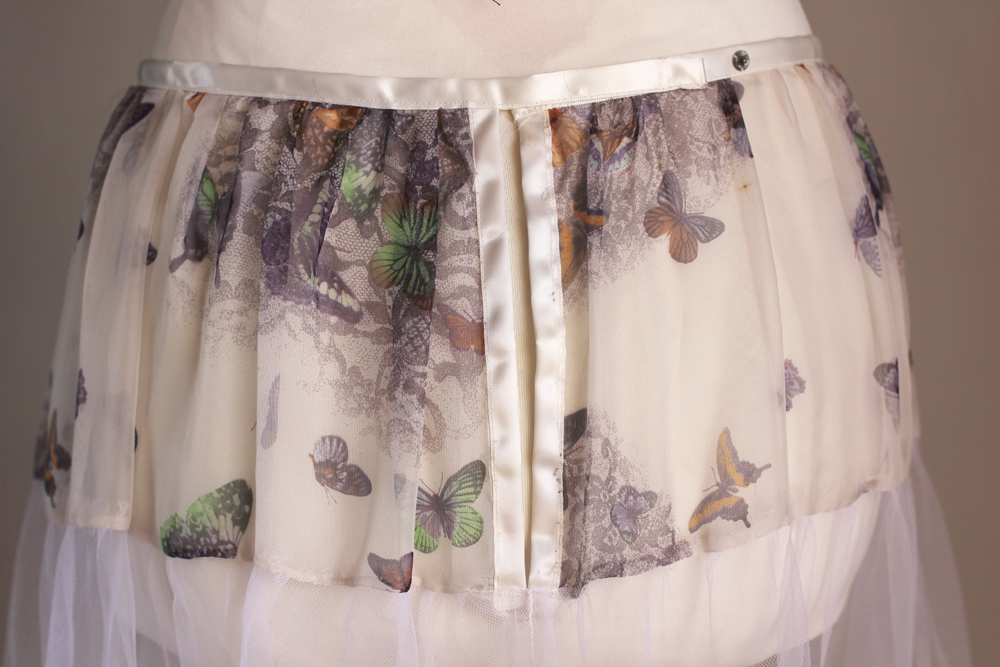
I just replaced the tulle of the first tier of all layers for a chiffon fabric. It’s more comfy, makes the Petticoat look really nice and does not look too bulky under the dress.

As soon as you have decided about the length and layers, you have to do a little math to know how much tulle you’ll need.
The Petticoat I made consists out of 3 tiers and a waistband. So if the skirt of your dress is 25 inch, you want your Petticoat to be about 24 inch long, so 3 tiers ĂĄ 8 inch.

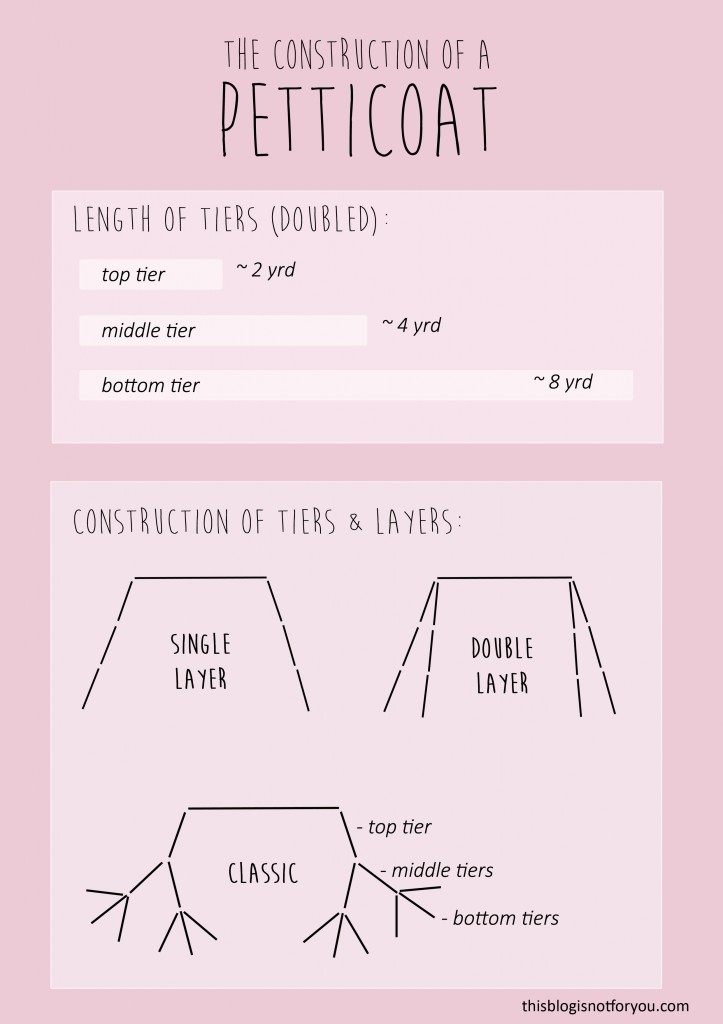
When you figured out how wide the single tiers are, you also want to know how long. As you can see on the scheme below, the length of the tiers doubles from tier to tier.
The top tier is about twice your waist circumference/ lentgh of waistband (about 2 yrd will do). So if you want your Petticoat to have 3 tiers, the bottom one will be about 8 yrd long. (Yeah that’s a lot of cutting and gathering, I know!)

Also, consider the seam allowance before cutting the tulle. For tulle you generally won’t need much seam allowance – a simple zigzag stitch on the fabric edge will do. With other fabric it might be about 0,5 inch/ 1-1,5 cm.  The bottom tier only needs seam allowance on one side if you’re hemming it with ribbon.

For the waistband I just used the ribbon I used for the hem.

So here’s a little scheme, which should also help with the general construction if you want to have more than one layer. My two layered Petticoat (picture at the end of this tutorial) differs a little from the two-layered Petticoat scheme (more on that later).Petticoat construction by Thisblogisnotforyou.com (Click through for full tutorial)Petticoat tutorial by Thisblogisnotforyou.com
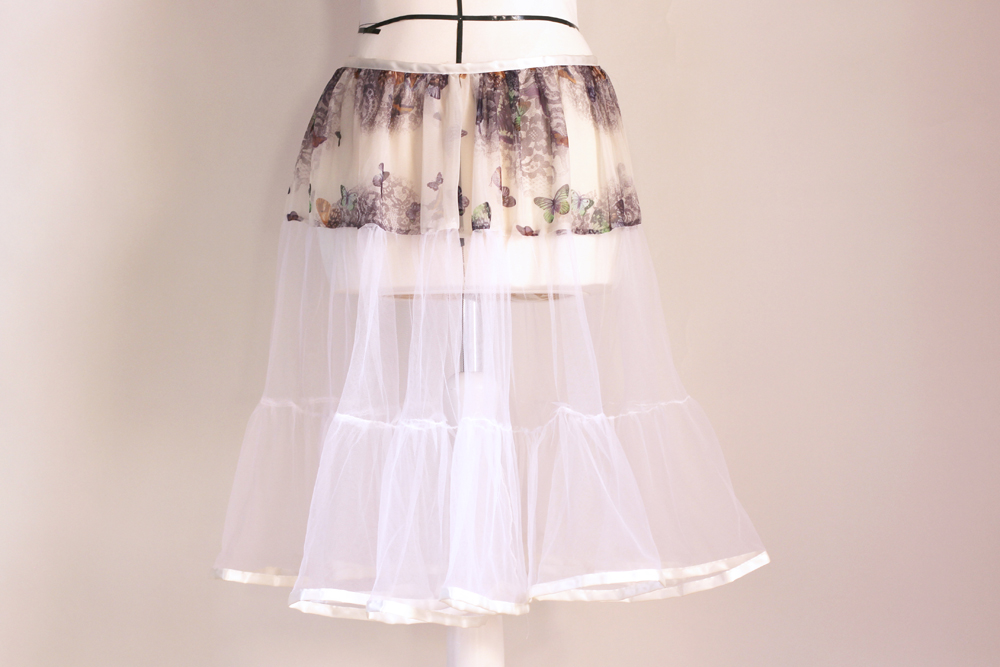
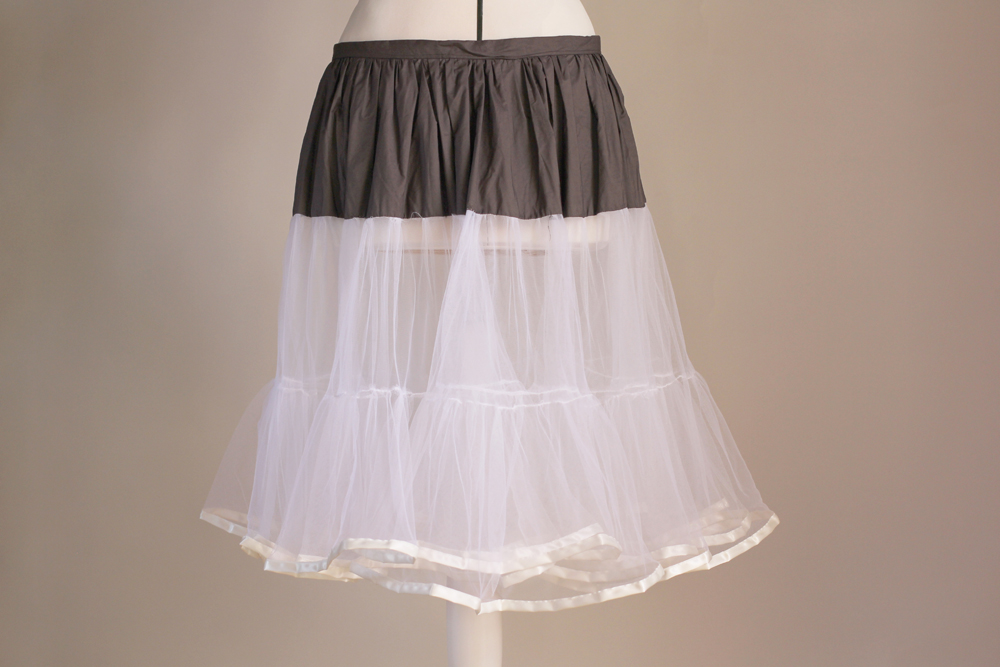
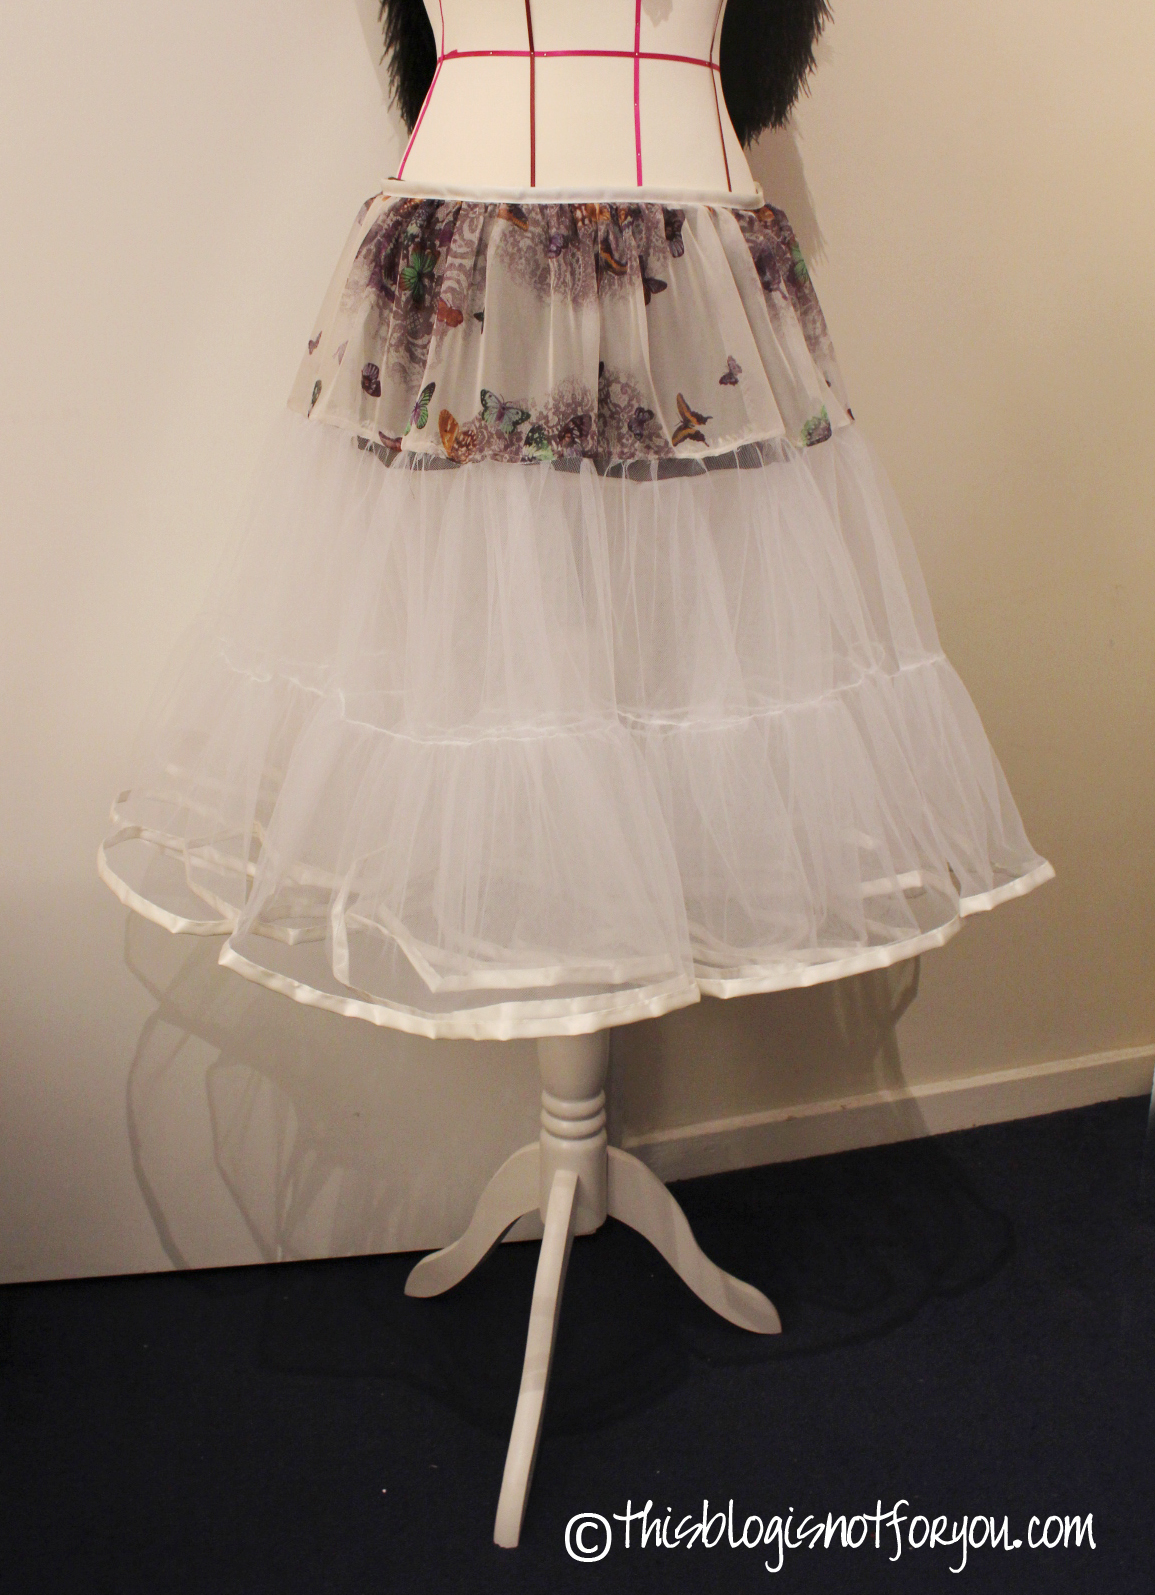
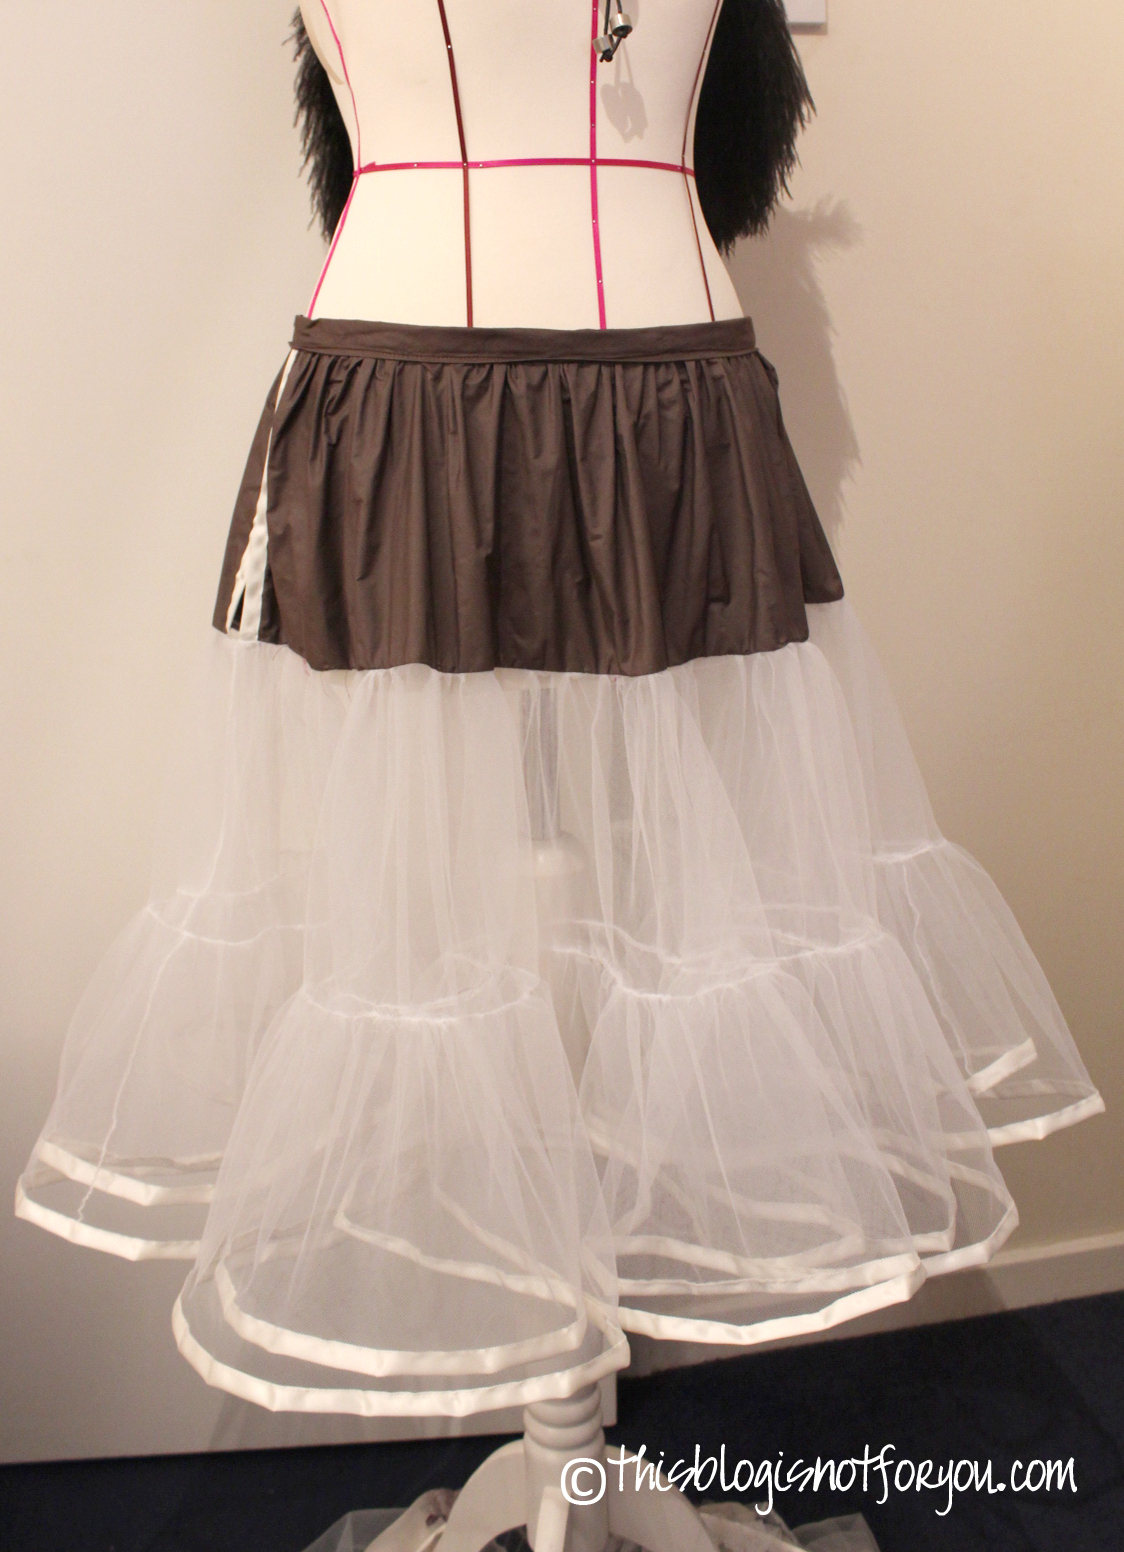
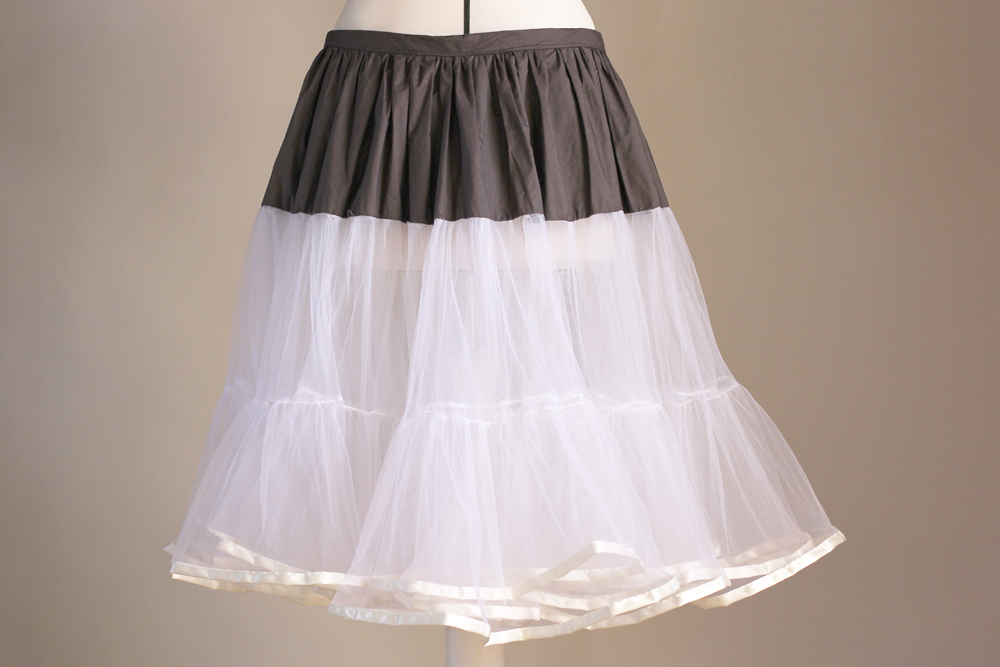
This is what my single layer Petticoat looks like. I wanted one that’s not too puffy. Whenever I want to add more volume, I wear the  double-layered Petticoat under this one. The more layers, the puffier – makes sense, eh?

SEWING THE THING TOGETHER 

First of all, for sewing a Petticoat one starts from bottom to top. That is sewing together the pieces for the single tiers, hemming and gathering the bottom tier.
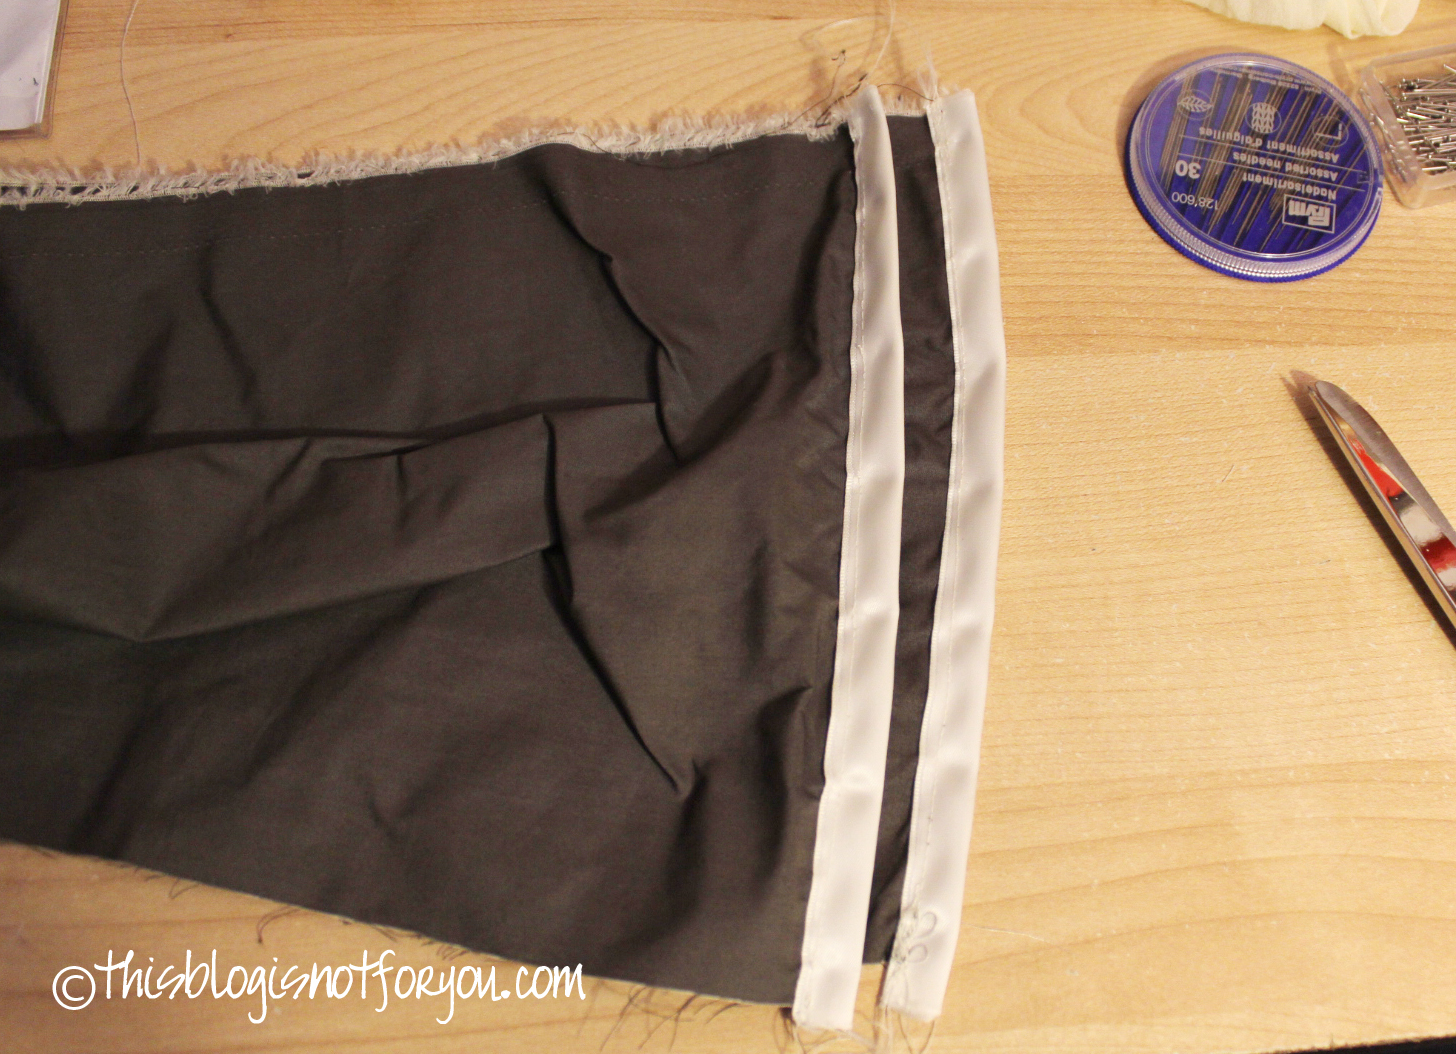
To sew together the ends of the top tier. You’ll need to add ribbon later on for the fastening.
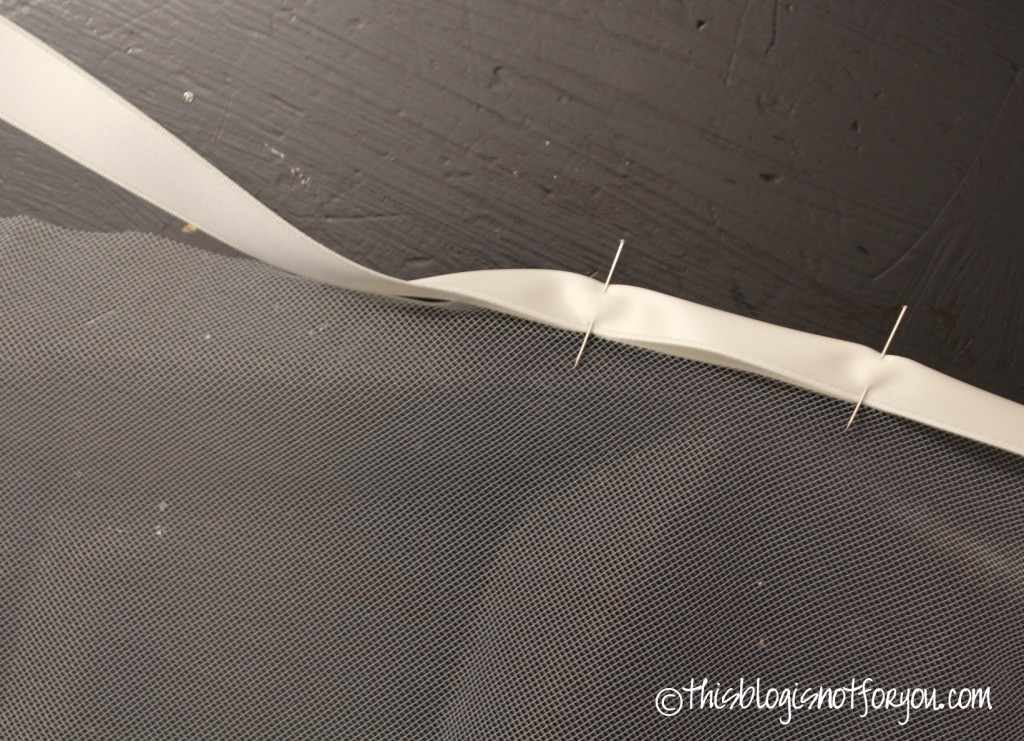
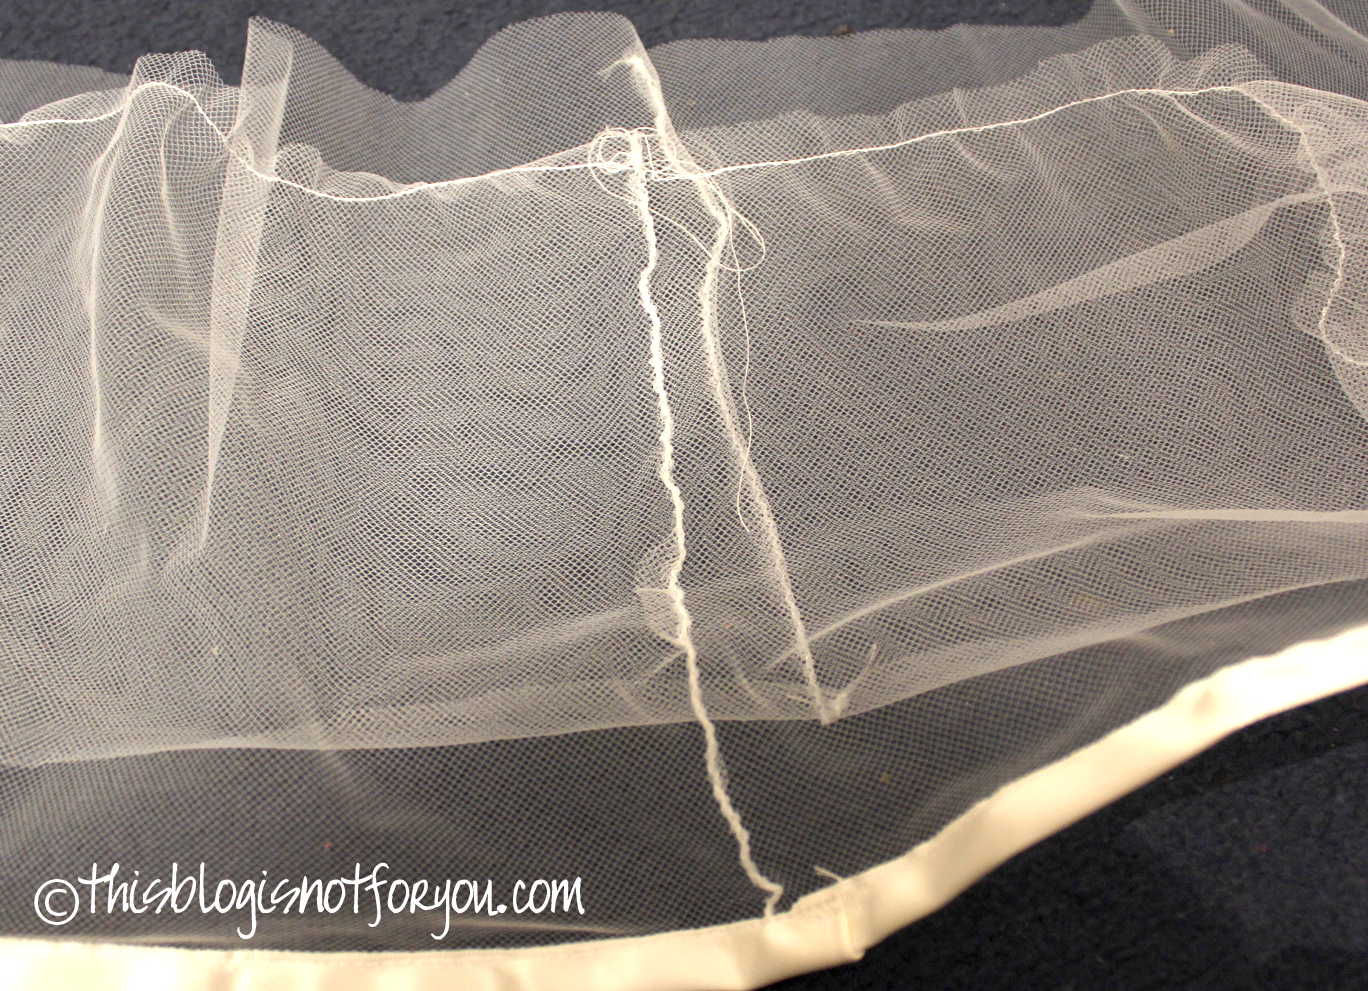
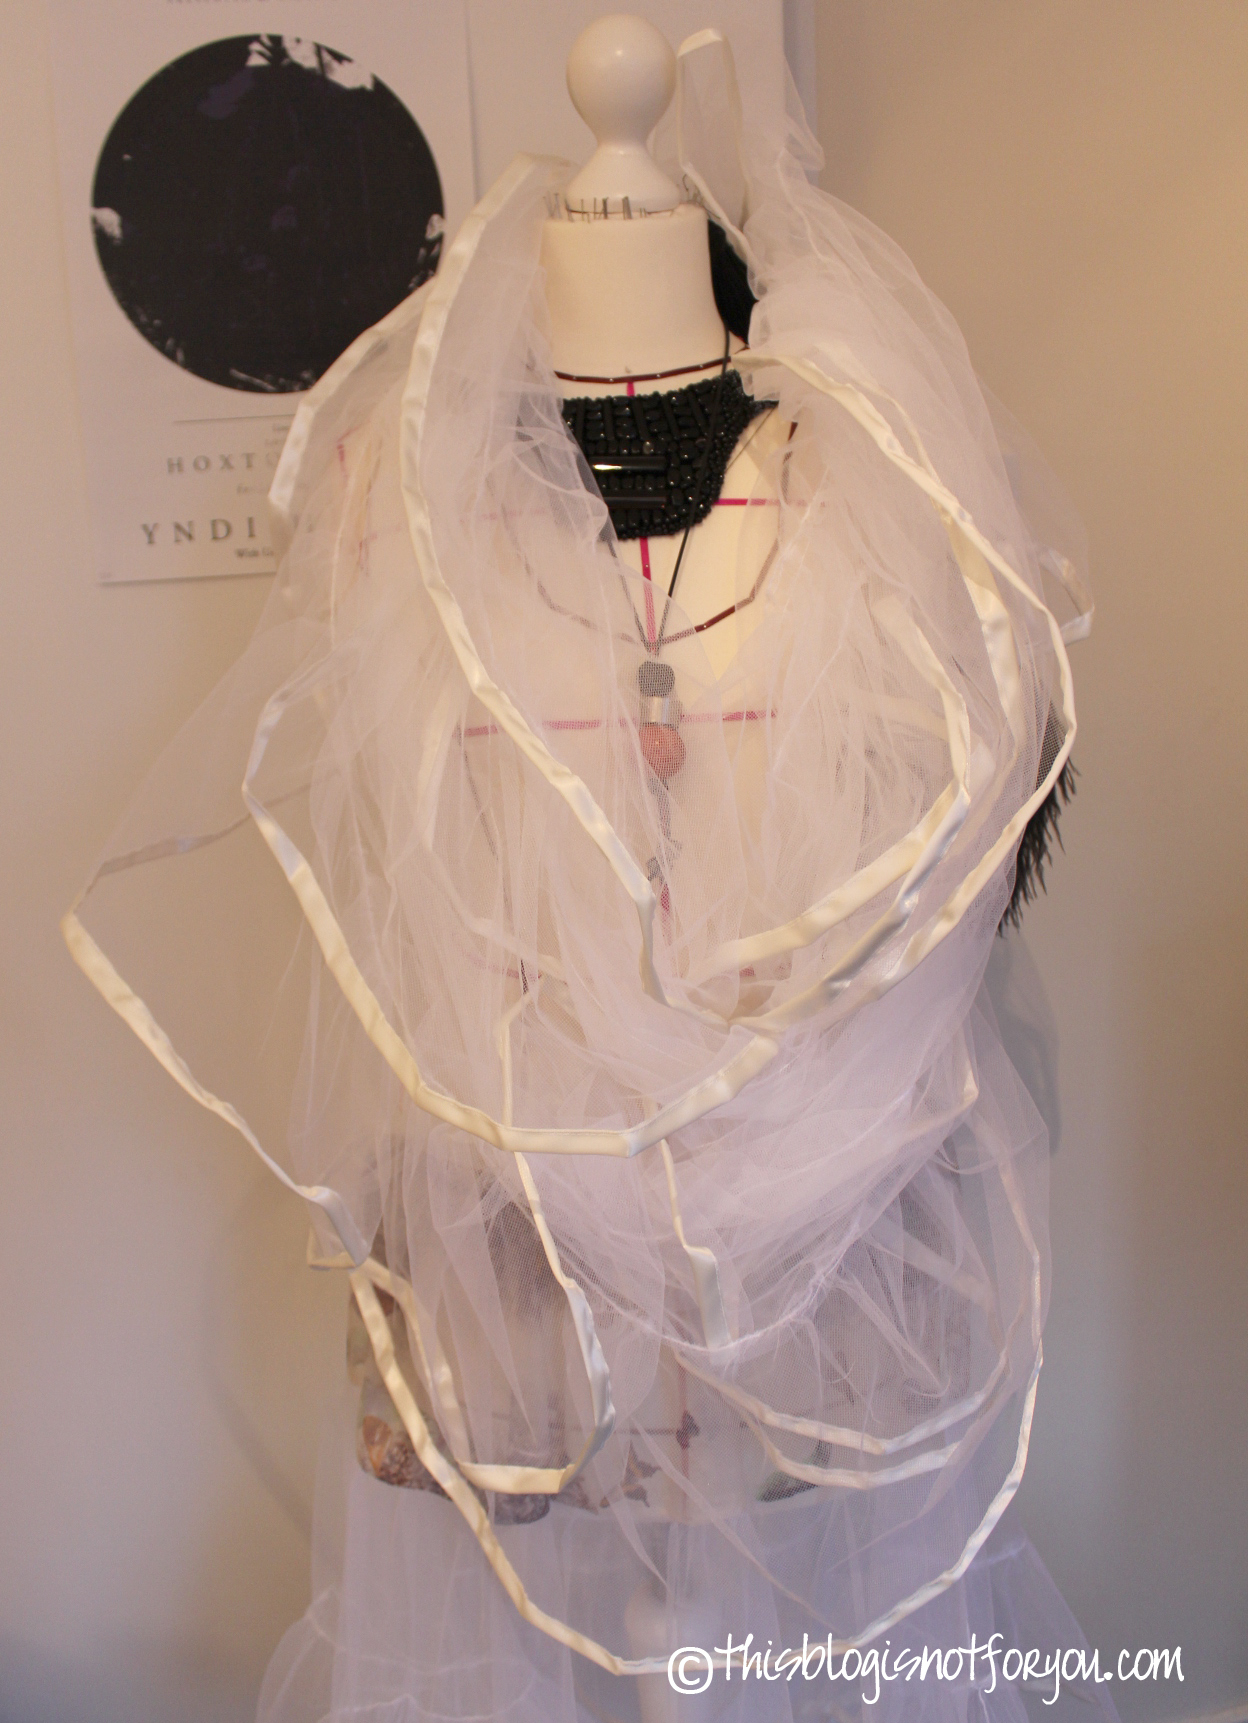
After planning and cutting, start pinning the ribbon to the bottom tier. I used 1inch-wide creme-coloured satin ribbon. It’s fairly inexpensive and looks nice.
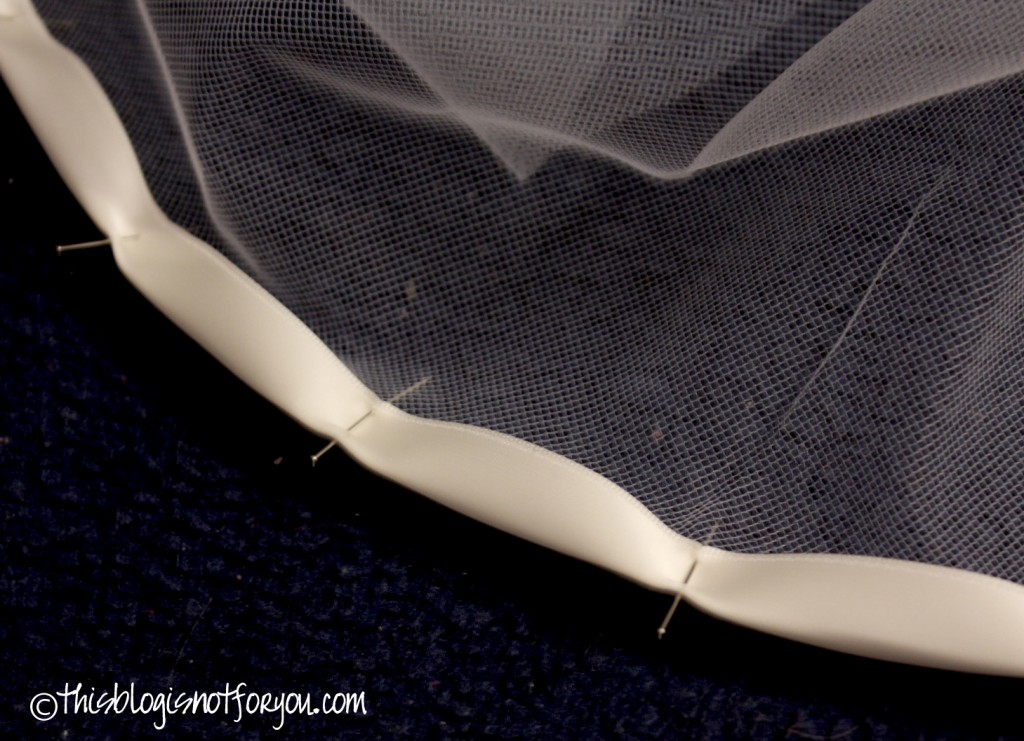
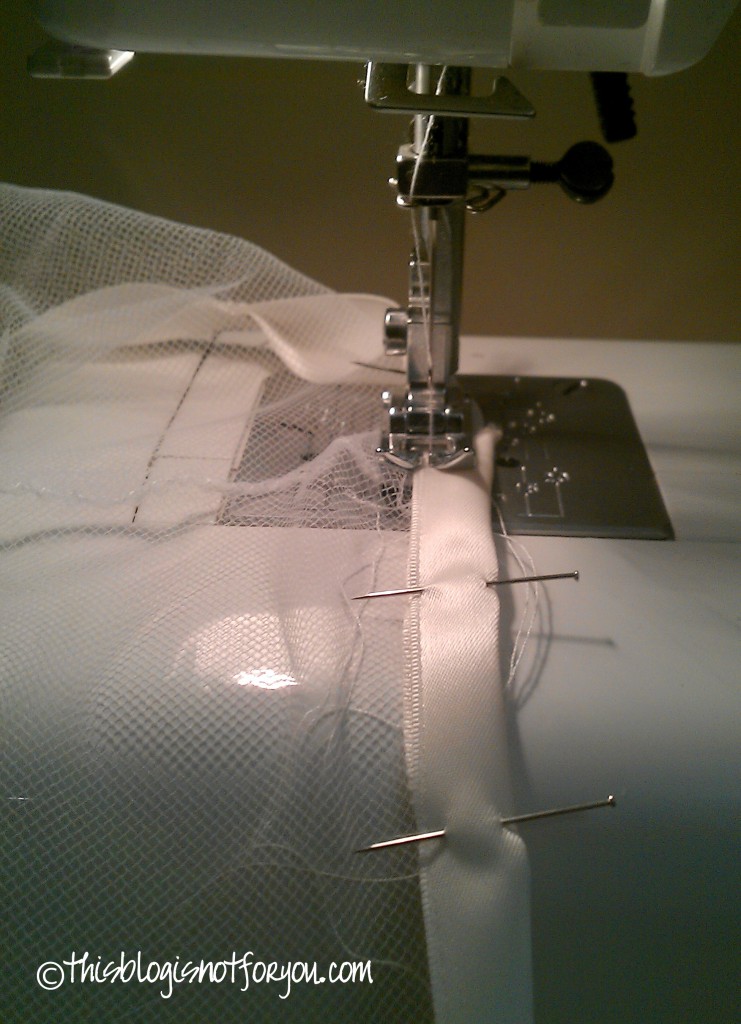
After pinning, stitch it down.

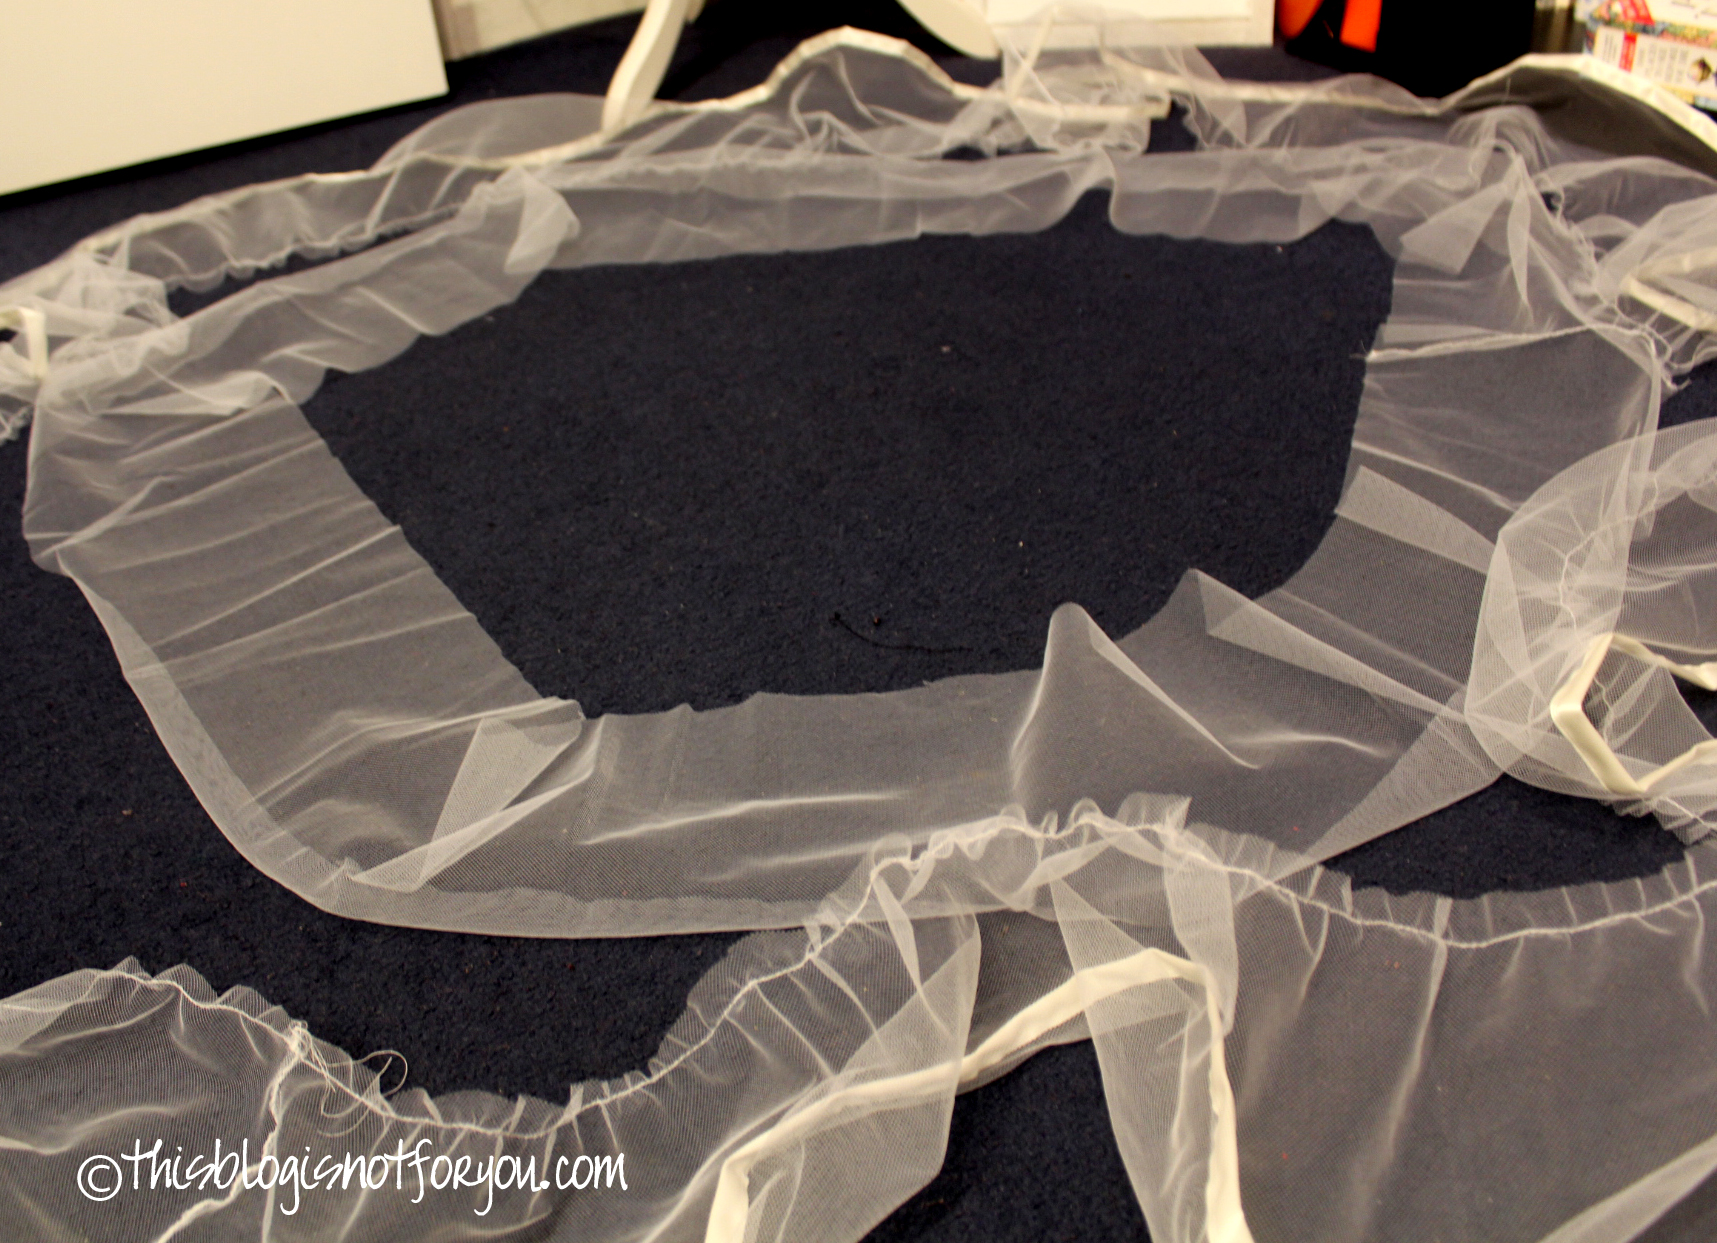
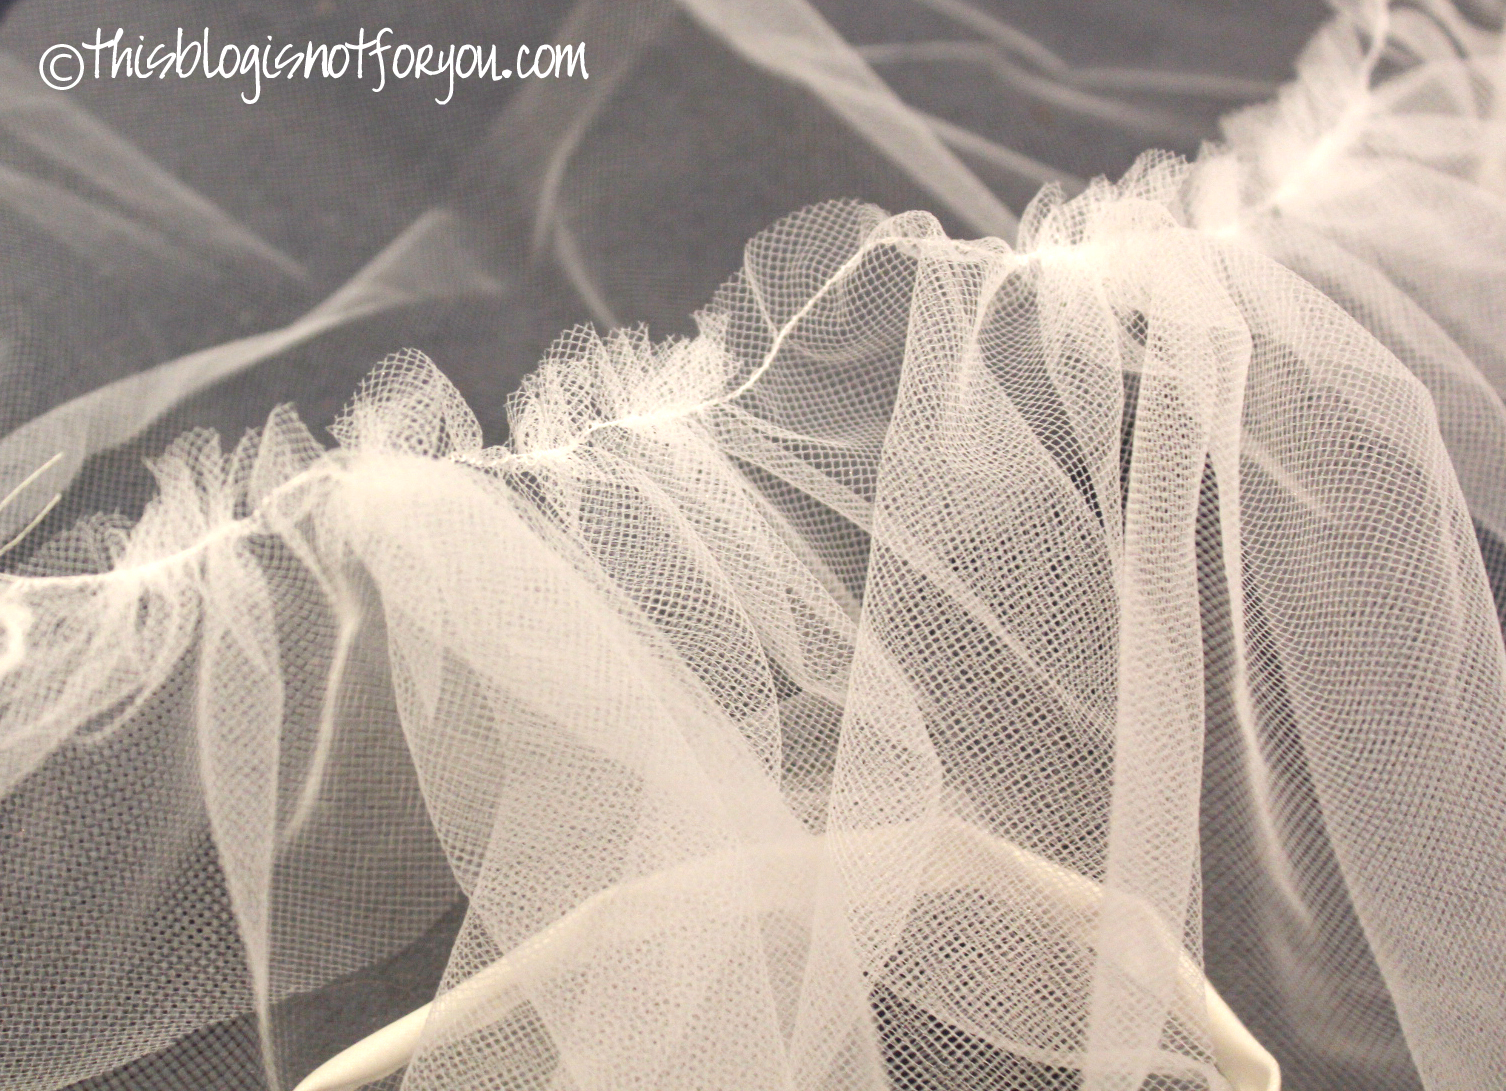
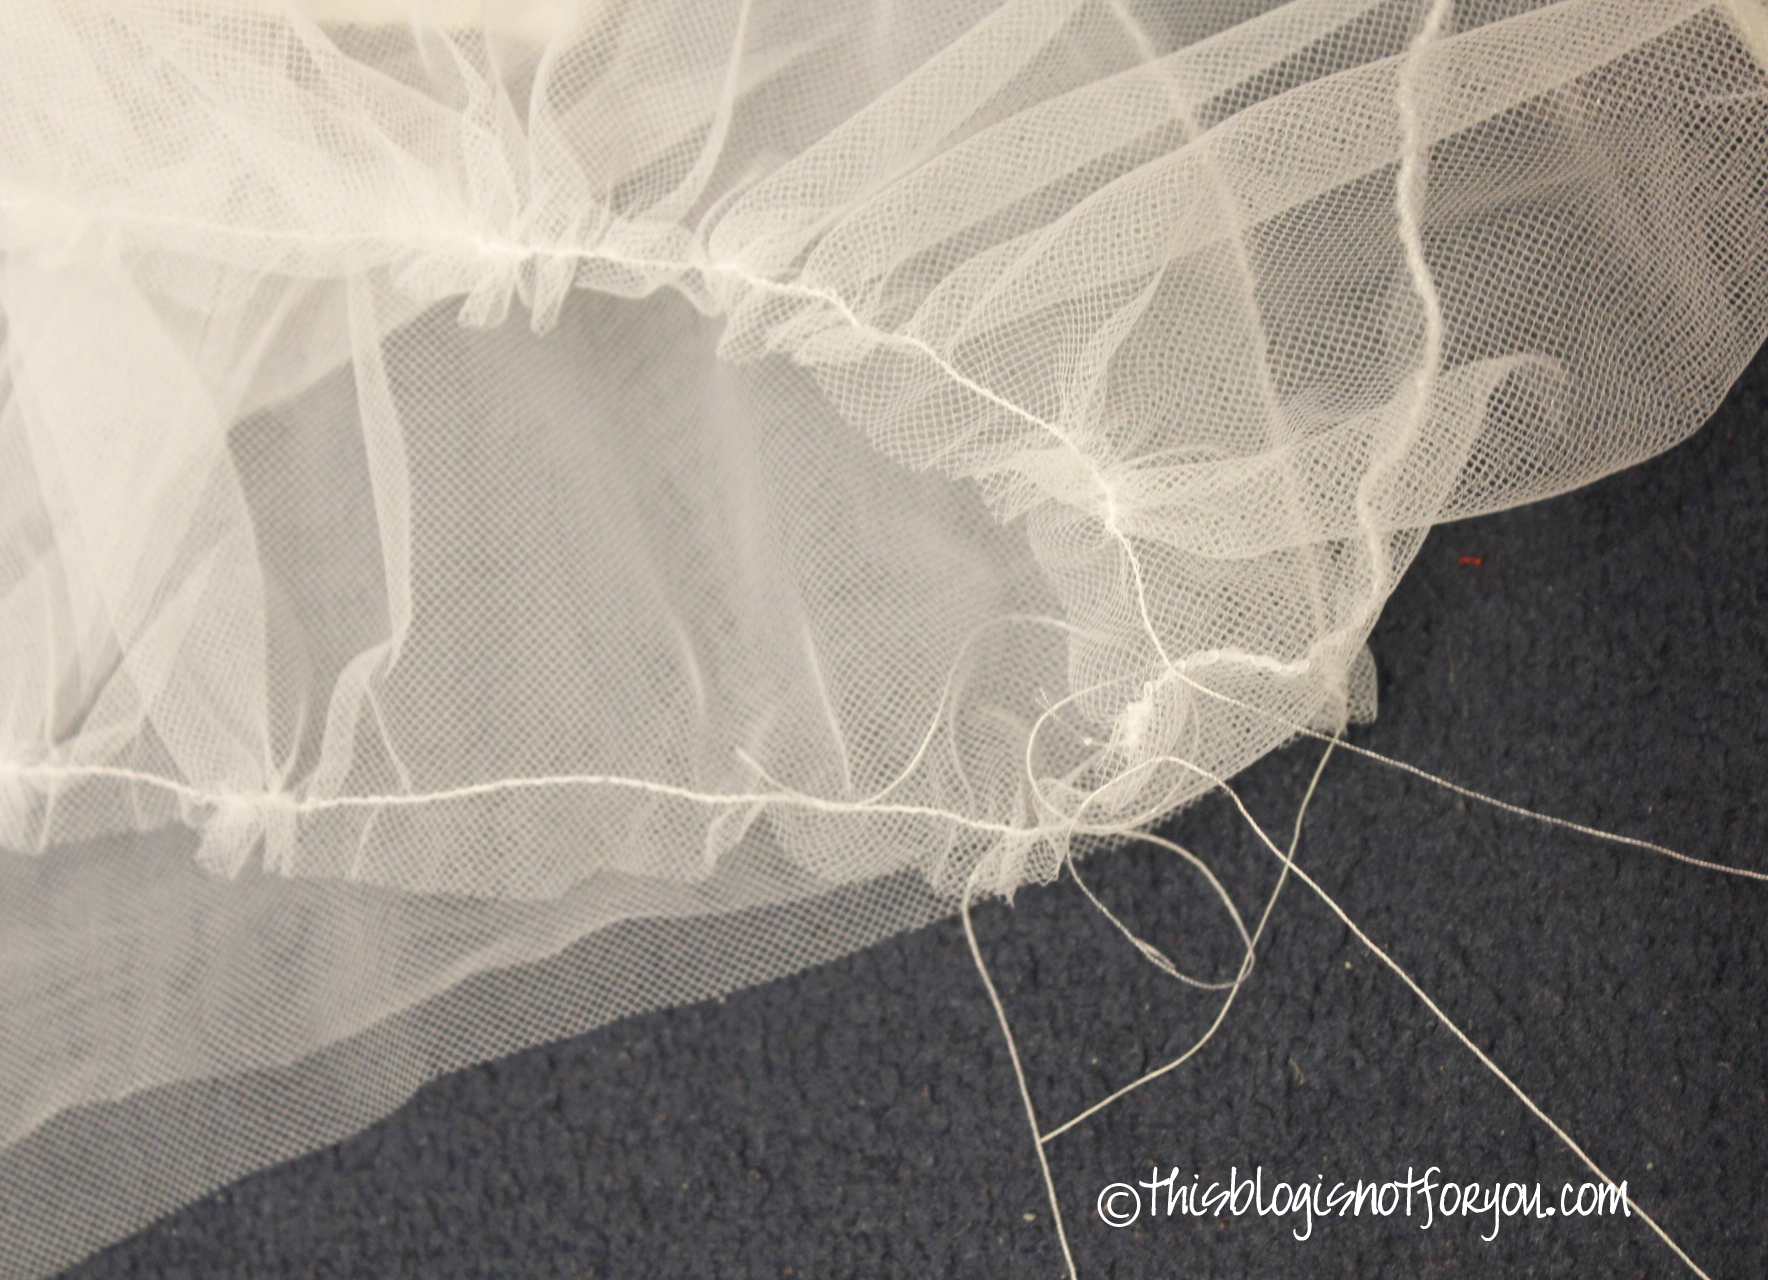
For the gathering, sew along the side of the bottom tier with straight stitches. Use large stitches and a tight tension, it makes it easier to pull the top thread to gather the fabric.

Lay the bottom tier around the middle tier. Makes it easier to gather the bottom tier to the lentgh of the circumference of the middle tier.
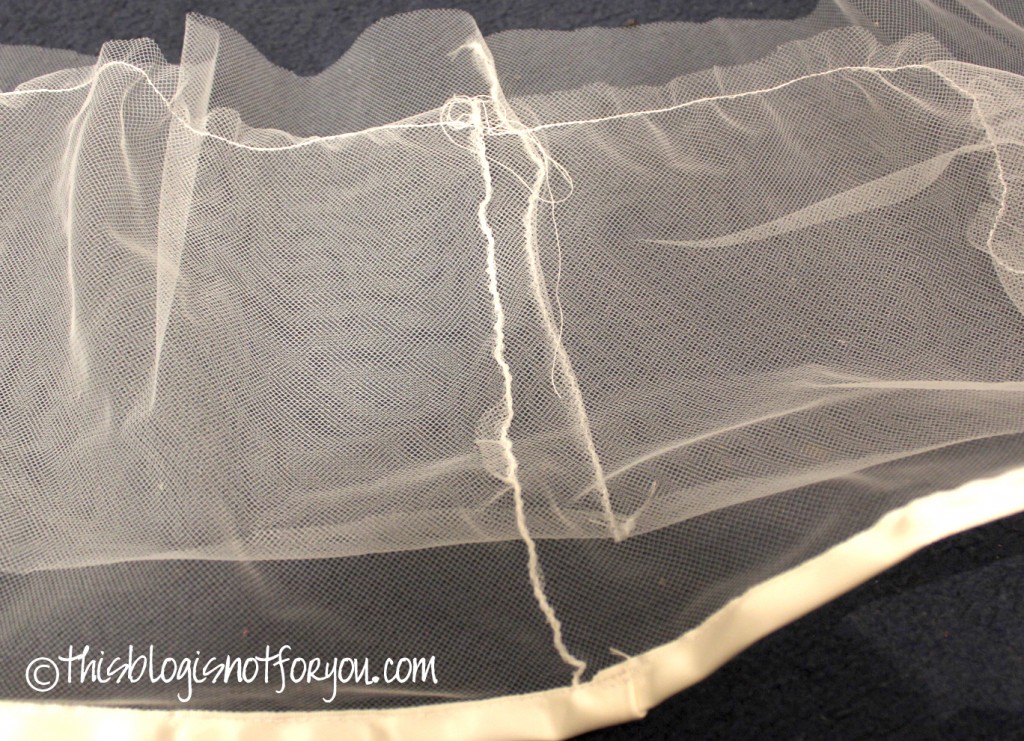
Makes sure you have the tulle right side to right side before pinning.

With pulling the upper thread start gathering the bottom tier until it has the same circumference as the middle tier.
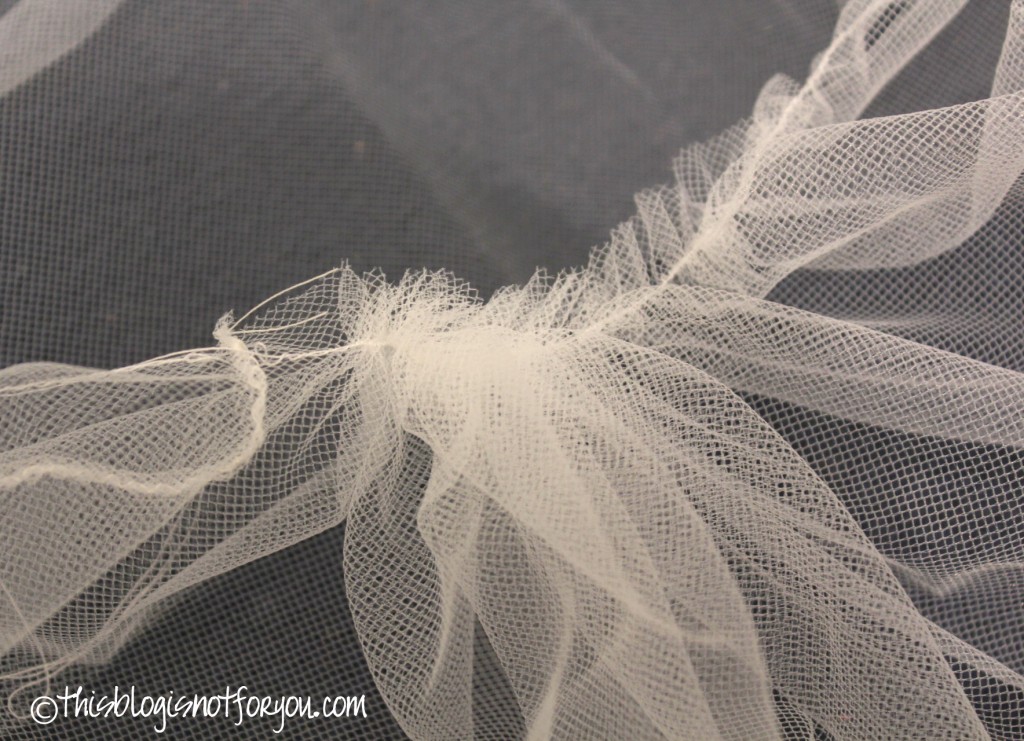
If you don’t have enough room for spreading the fabric out in a circle, you can also fold both tiers in half and thus gather the bottom tier to the right length.

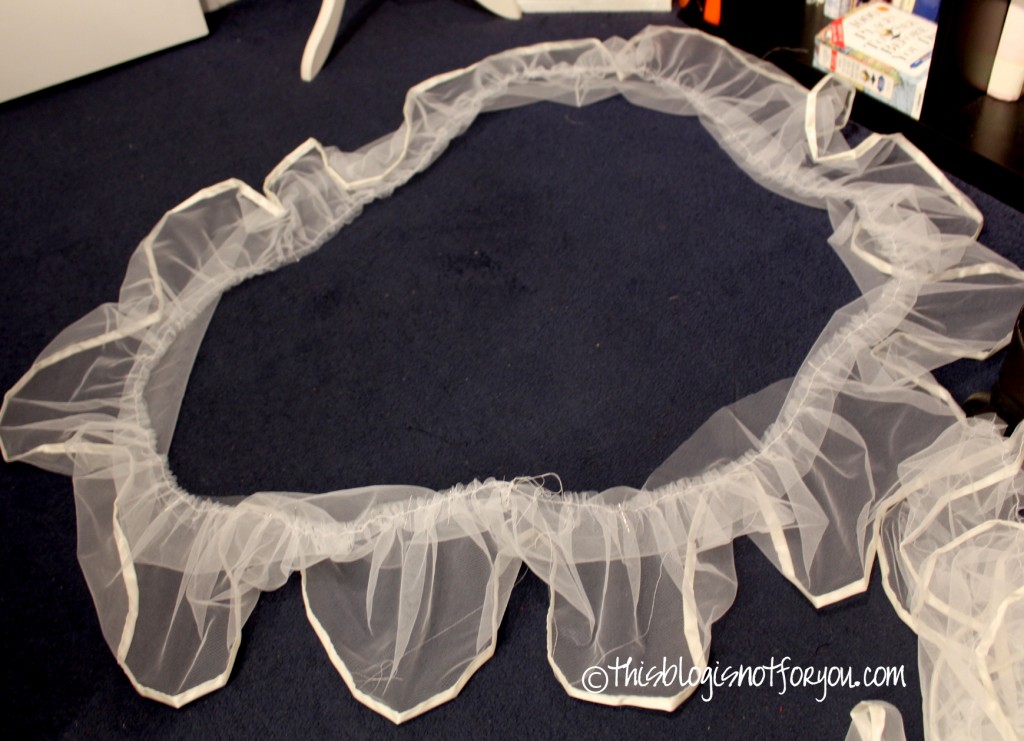
Pin everything into place and sew the tiers together. Before doing the same thing with the middle and the top tier, you need to hem the ends of the top tier.

As mentioned, for the waistband I used the same ribbon I used for the hem. For the fastening I used a simple hook closure. I made this with three hooks, so I can adjust the Petticoat to the length of the dress I am wearing lowering it down when I widen the waistband.
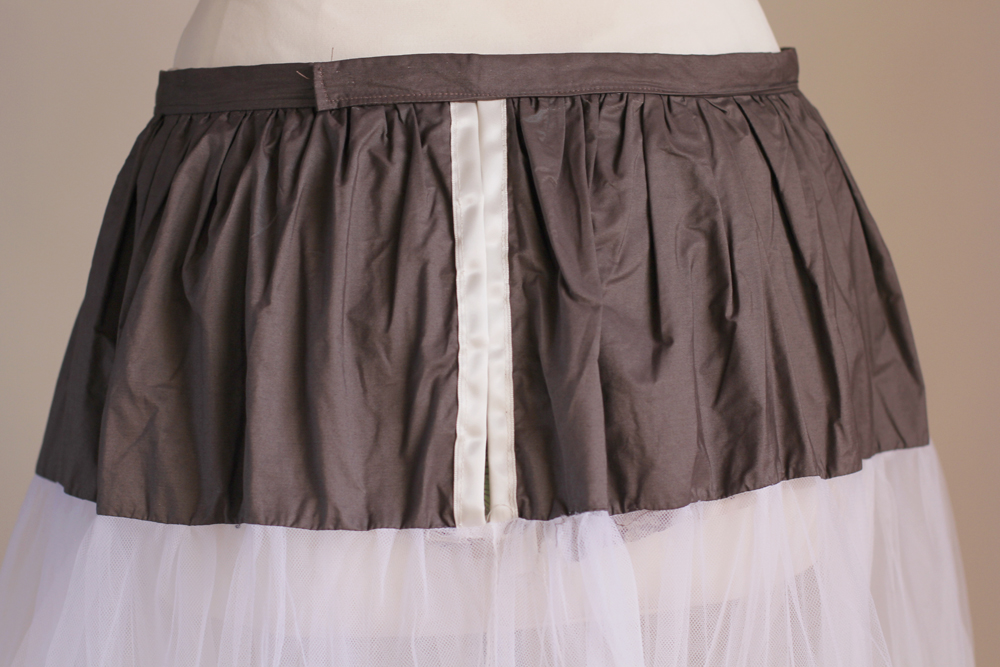
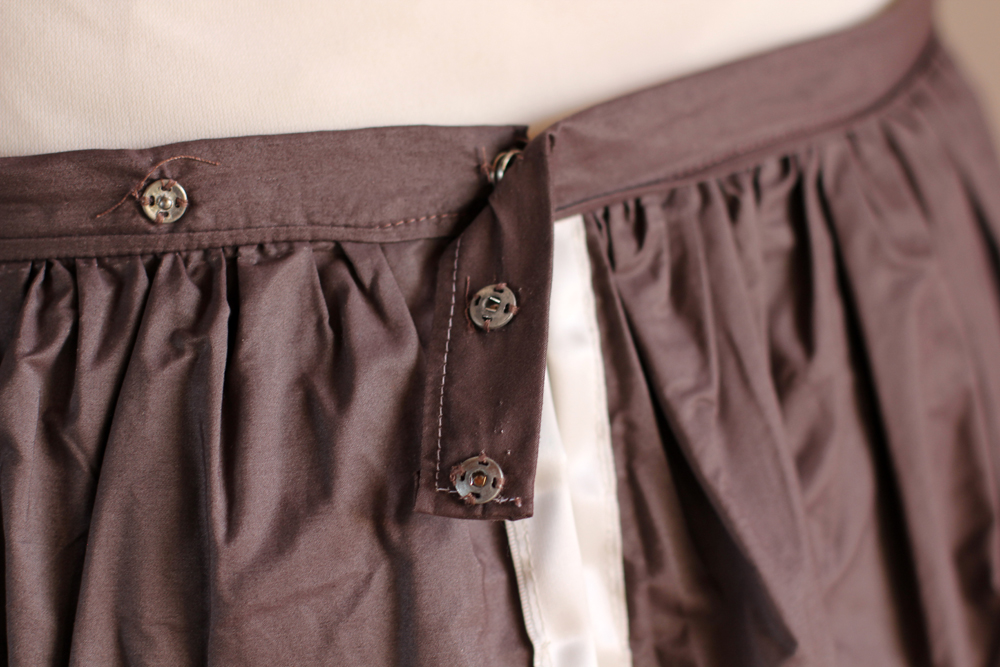
Petticoat tutorial by Thisblogisnotforyou.comPetticoat tutorial by Thisblogisnotforyou.comPetticoat tutorial by Thisblogisnotforyou.com

This last pic is of the single layer Petticoat. Last week I finished the second one. Two layers – even more tulle. Sooo much fun, haha.

Petticoat tutorial by Thisblogisnotforyou.com

For the second, double-layered Petticoat I came up with this scheme, since I didn’t have enough tulle left:

For max volume I can wear the first Petticoat on top of the other one. This way I don’t have just a single three layered one, which isn’t really suitable for daily use 🙂 This is how the two together look like:Petticoat tutorial by Thisblogisnotforyou.comPetticoat tutorial by Thisblogisnotforyou.com
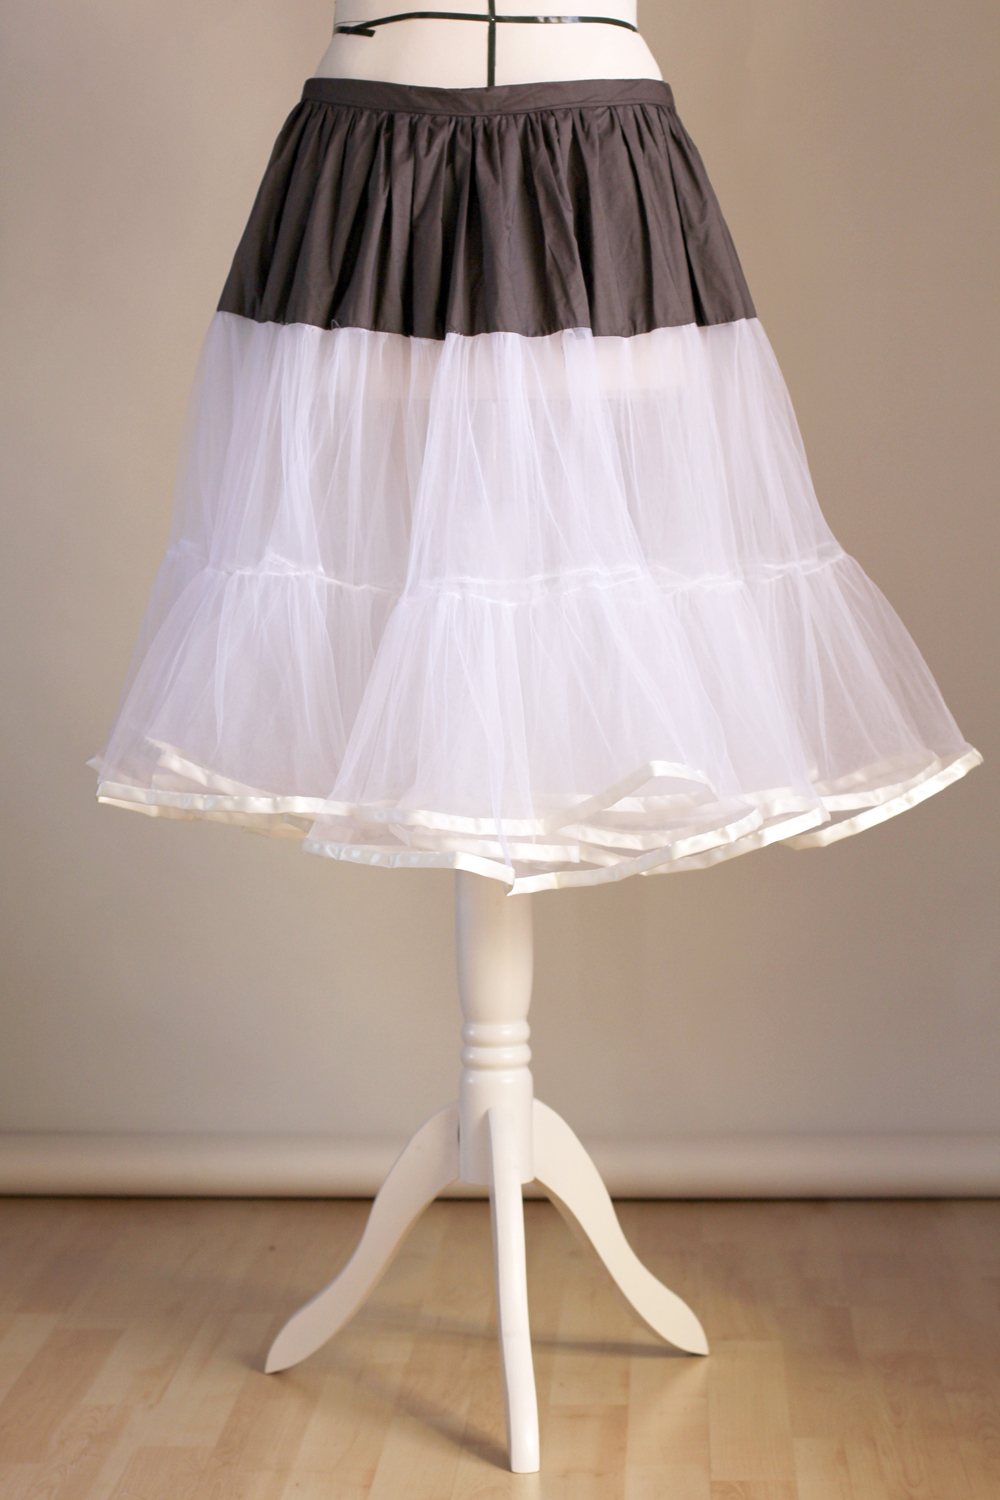
Petticoat tutorial by Thisblogisnotforyou.com

To see the effect of wearing a petticoat underneath a dress or skirt, here’s the same dress with and without a petticoat:Petticoat tutorial by Thisblogisnotforyou.com
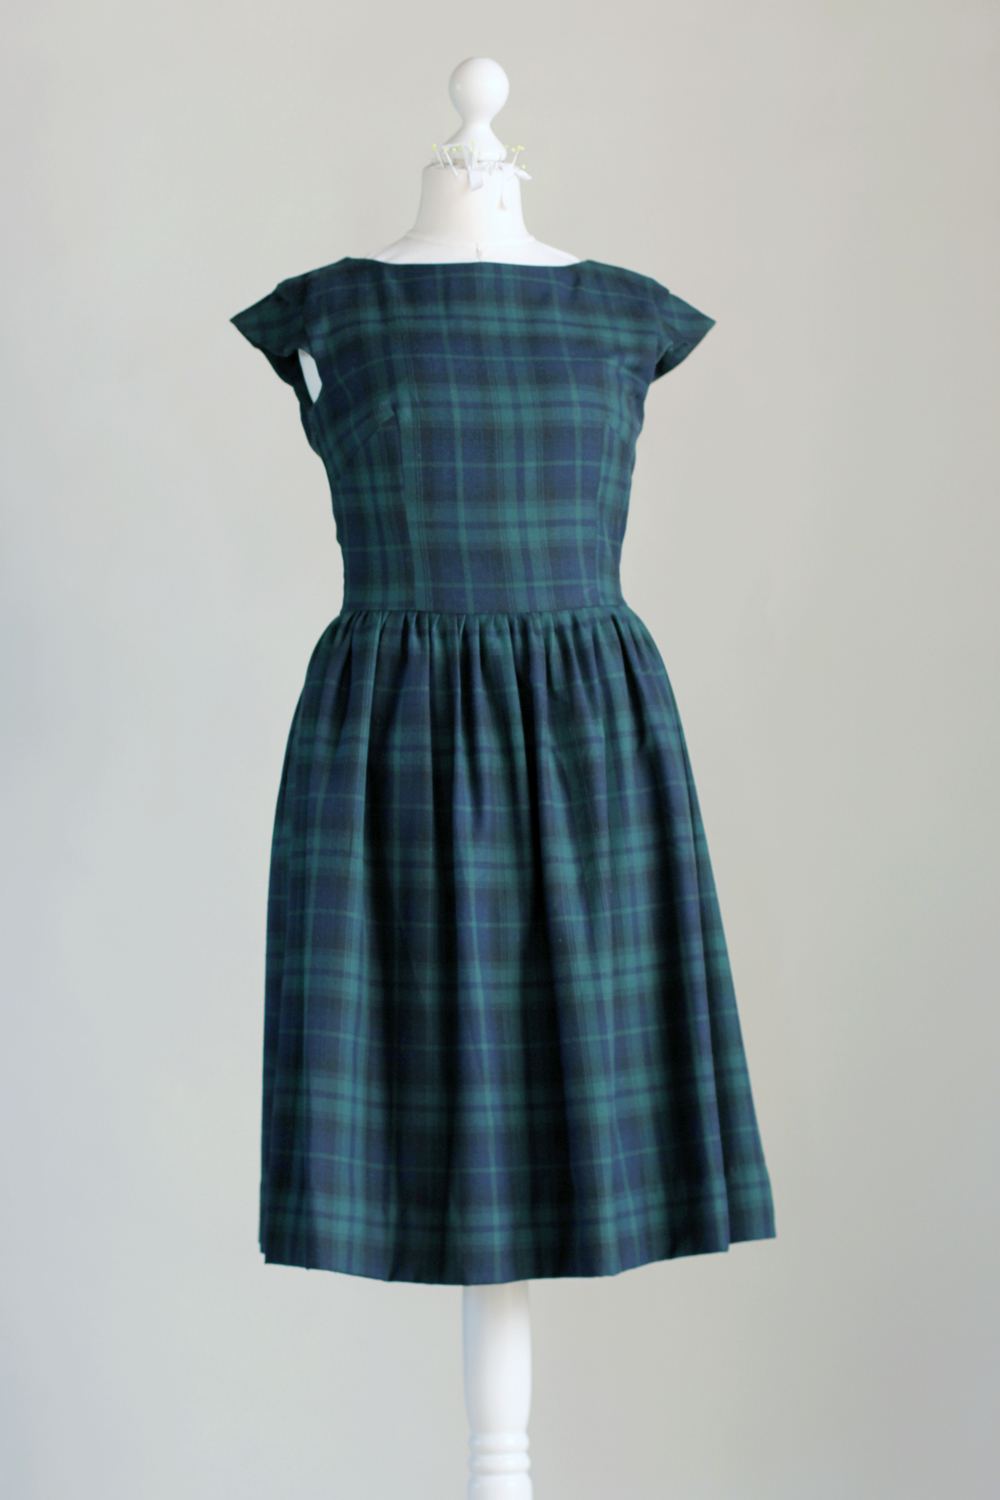
Petticoat tutorial by Thisblogisnotforyou.com

Petticoat tutorial by Thisblogisnotforyou.com

VoilĂĄ! It’s really simple and so so soo much cheaper than buying one. Have fun sewing your own Petticoat! May patience be with you! haha. (As mentioned before, Sinatra and red wine helps. Please just don’t spill it!)

If you have any questions, leave them  in the comments and I’ll promise to answer them asap.

xx

Charlie


Happy sewing!
♄

facebook/bloglovin/pinterest
twitter/instagram

Stay in touch!