SEW OVER IT Ella Blouse & Burda Culottes
SOI Ella Blouse and Burda Culottes by thisblogisnotforyou.com

SOI Ella Blouse and Burda Culottes by thisblogisnotforyou.com

SOI Ella Blouse and Burda Culottes by thisblogisnotforyou.com

SOI Ella Blouse and Burda Culottes by thisblogisnotforyou.com

Hi there! It’s been a while. We’re back from our summer vacation and the weather is finally cooling down enough for me to be able to use my sewing room again. (The drawbacks of having a very light space…) I did get some sewing done, though!

Today I’m sharing one of my most recent makes plus one make that was finished two years ago but never got any blog time.

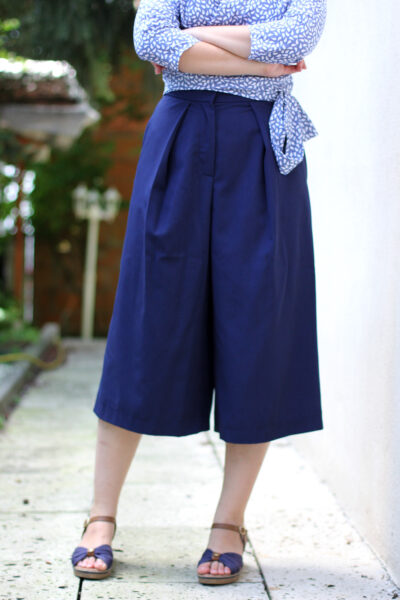
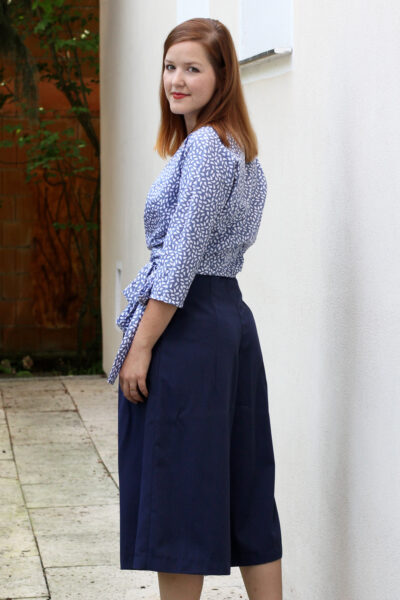
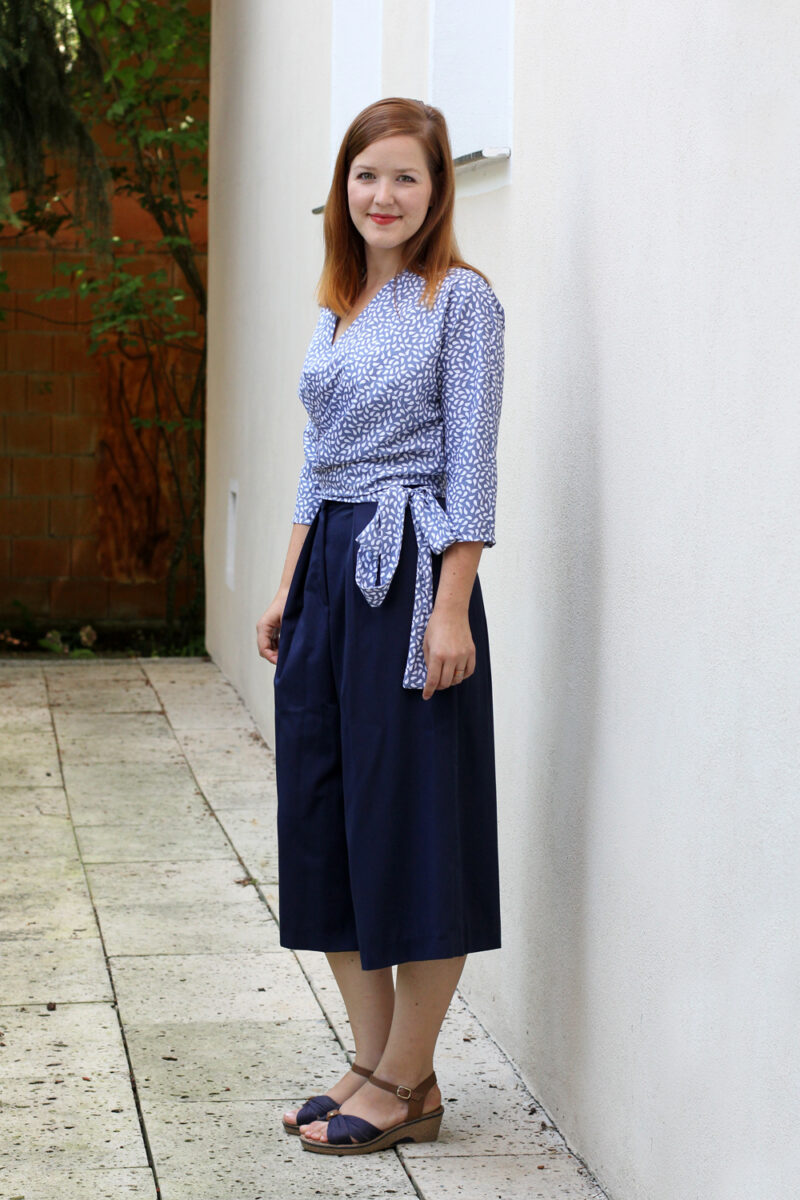
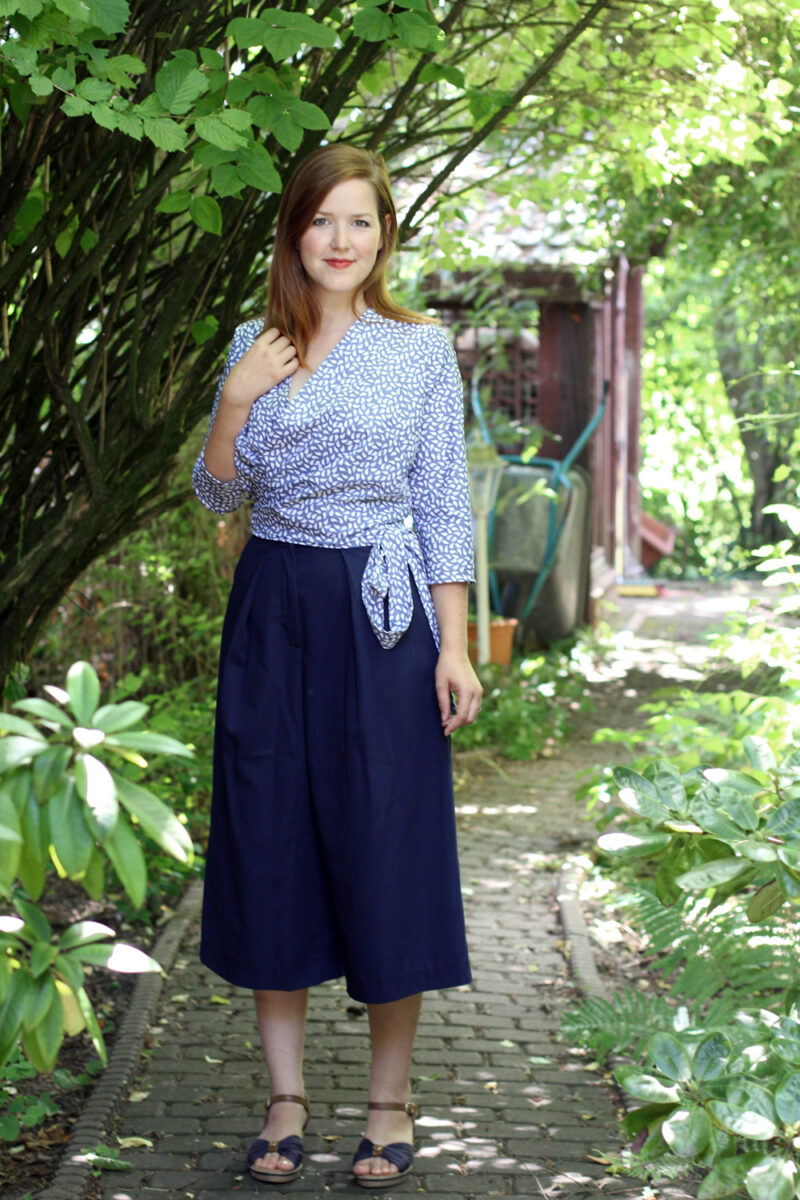
I made these fabulous Burdastyle culottes a while ago. They turned out really neat, but were way too tight at the waist, although I had made a muslin before I started. So I had these really neat culottes that I couldn’t wear. Two years later they fit me well enough to be put on and photographed, but the fit is far from perfect. I won’t be wearing them any time soon.

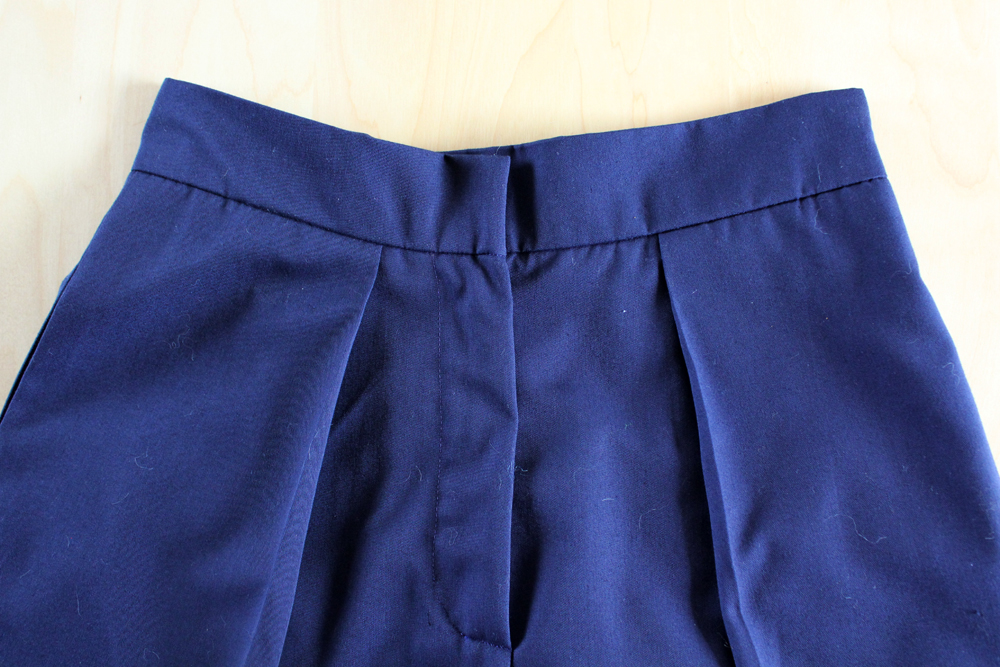
The pattern is Burda Style Midi Culottes 04/2015 #113A.  If you’re interested in a more detailed review of the pattern, check out the wearable muslin I made. I used a medium-weight midnight-blue cotton, that was a breeze to sew with. I overlocked all the raw edges and used some purple satin bias binding to encase the edge of the seam at the waistband.
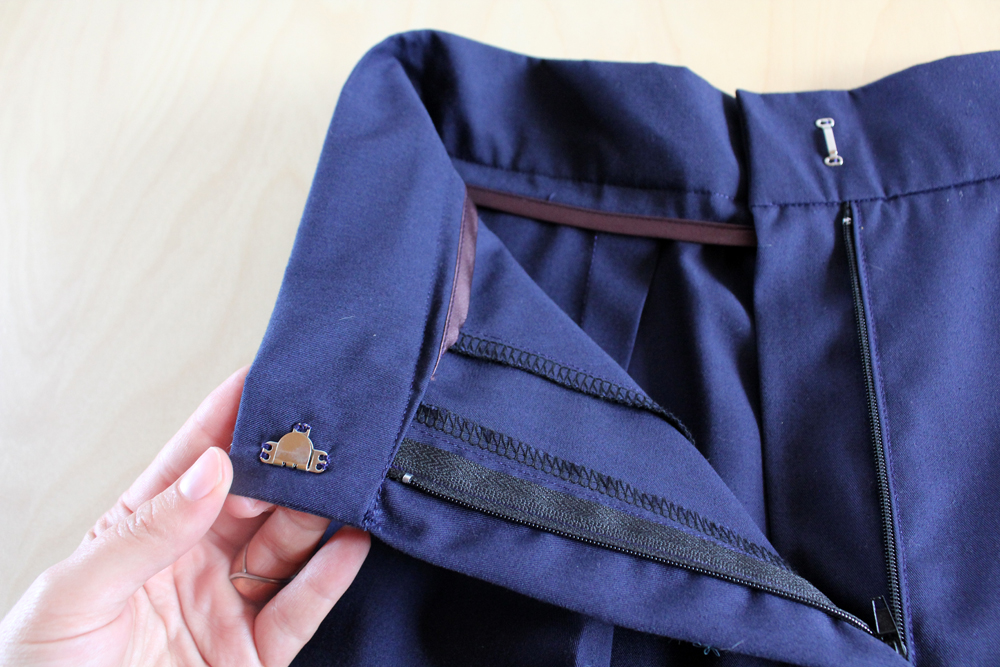
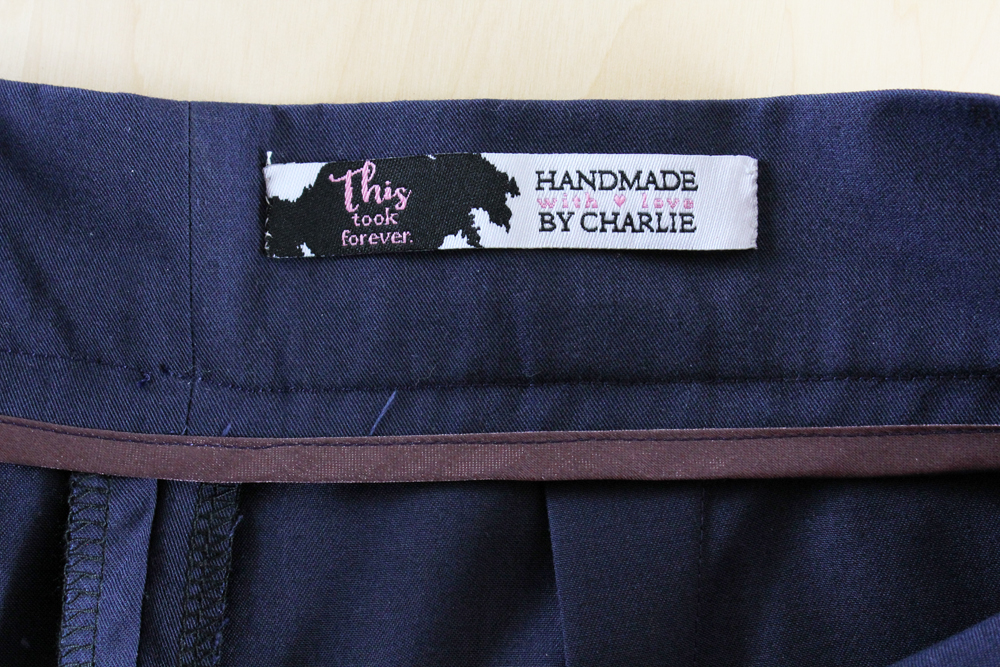
SOI Ella Blouse and Burda Culottes by thisblogisnotforyou.comSOI Ella Blouse and Burda Culottes by thisblogisnotforyou.comSOI Ella Blouse and Burda Culottes by thisblogisnotforyou.comOh, and check out my new amazing labels! (Courtesy of The Dutch Label Shop – there’ll be another post giving more details soon!) I had them match my blog layout, which I’m super happy about. I’ve got so many of them, I seriously need to up my sewing game now! But winter’s coming, so there’ll be plenty of time spent in doors way too soon!

But now on to the blouse!
SOI Ella Blouse and Burda Culottes by thisblogisnotforyou.com

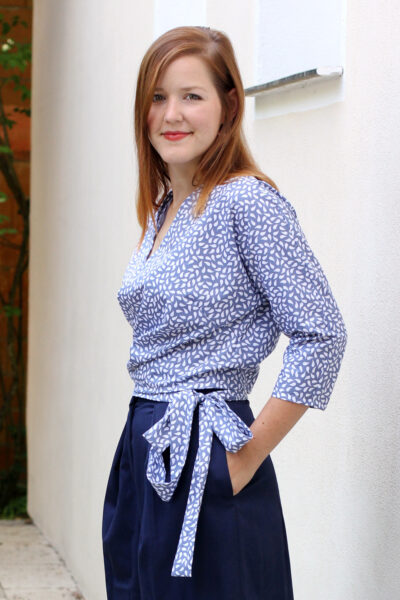
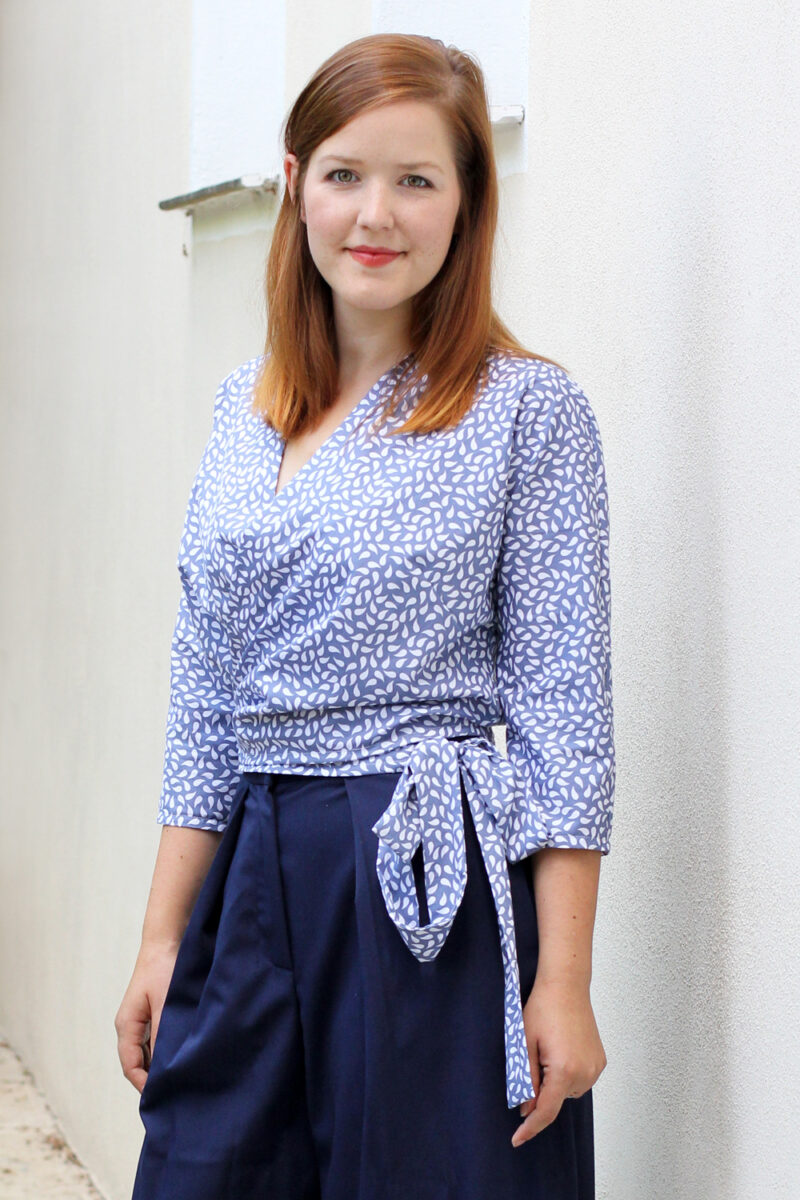
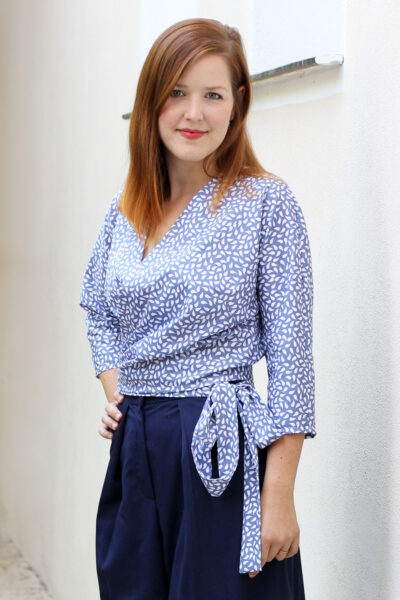
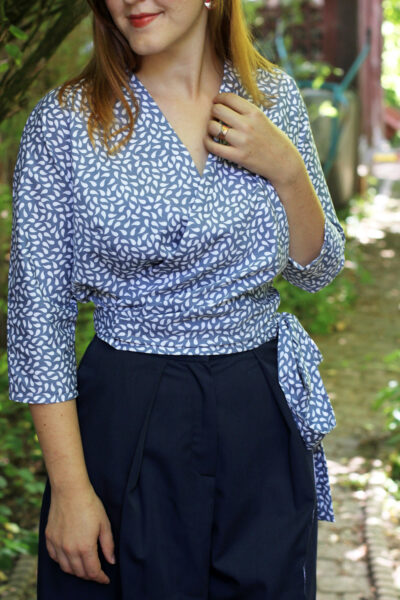
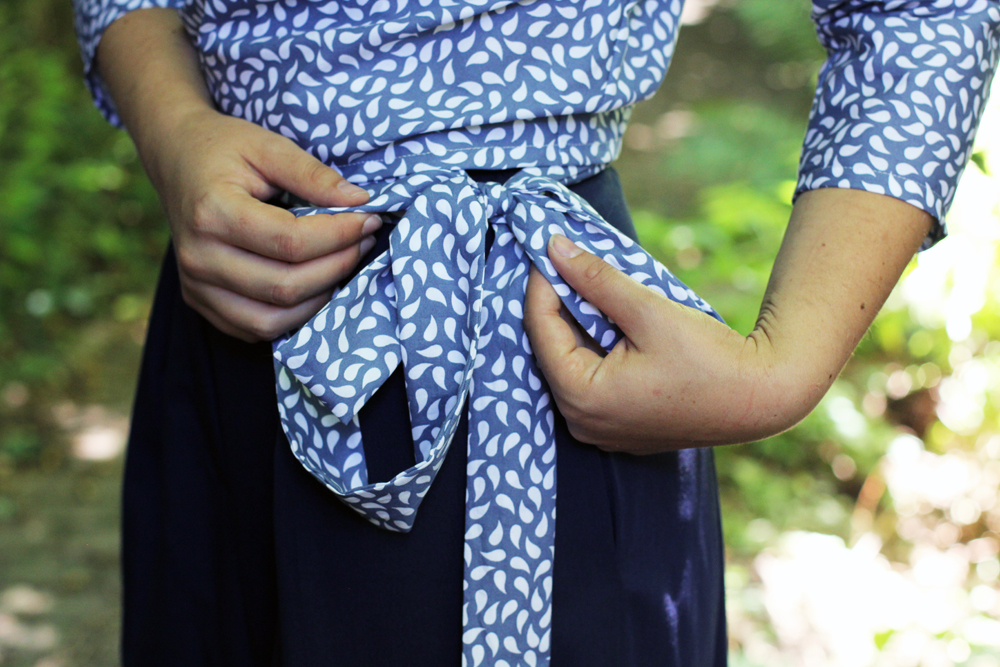
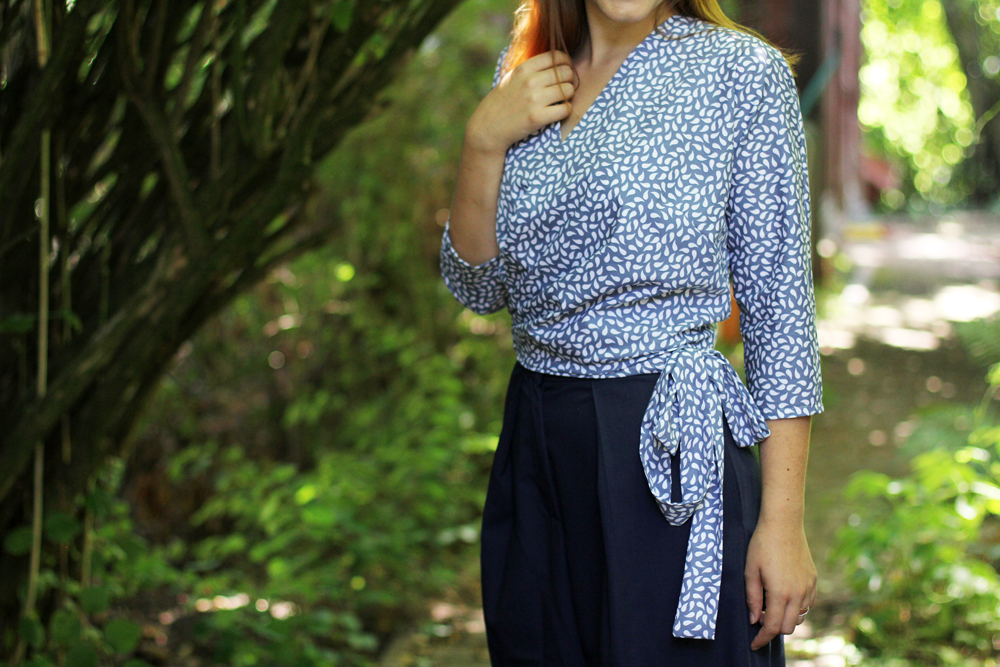
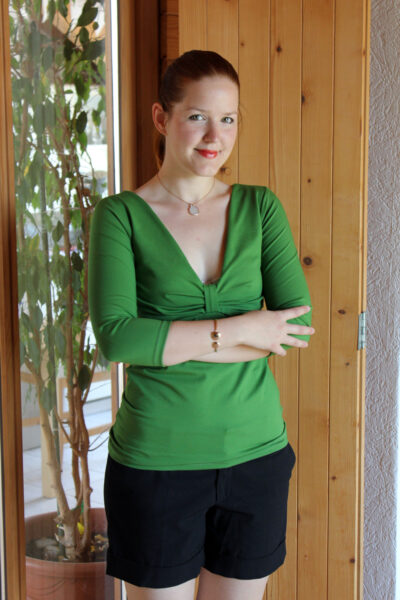
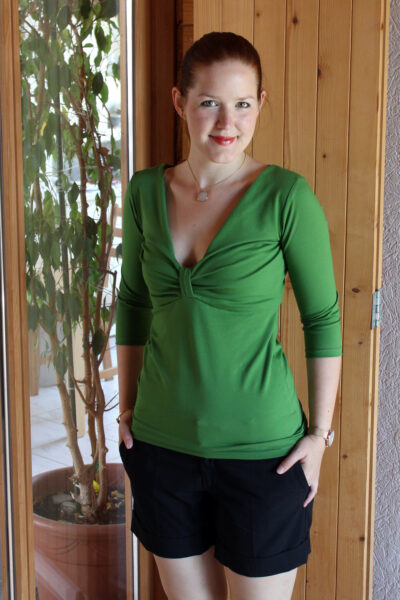
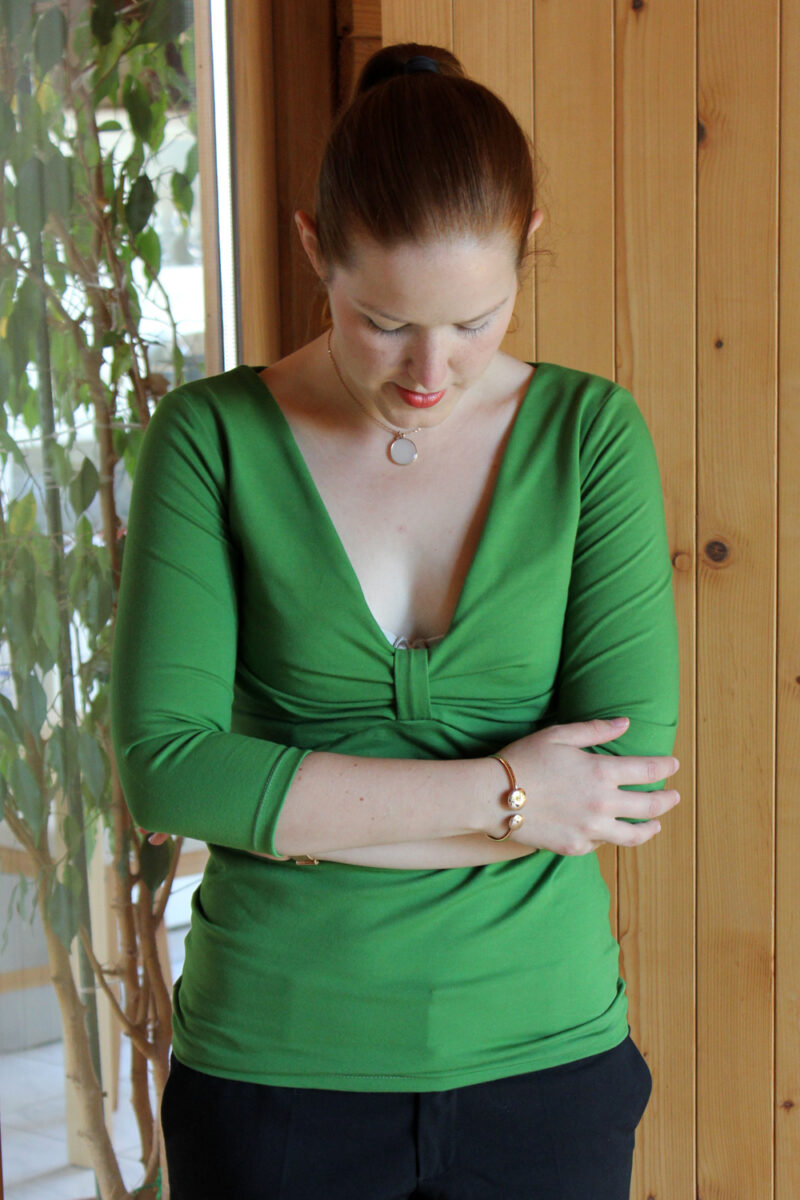
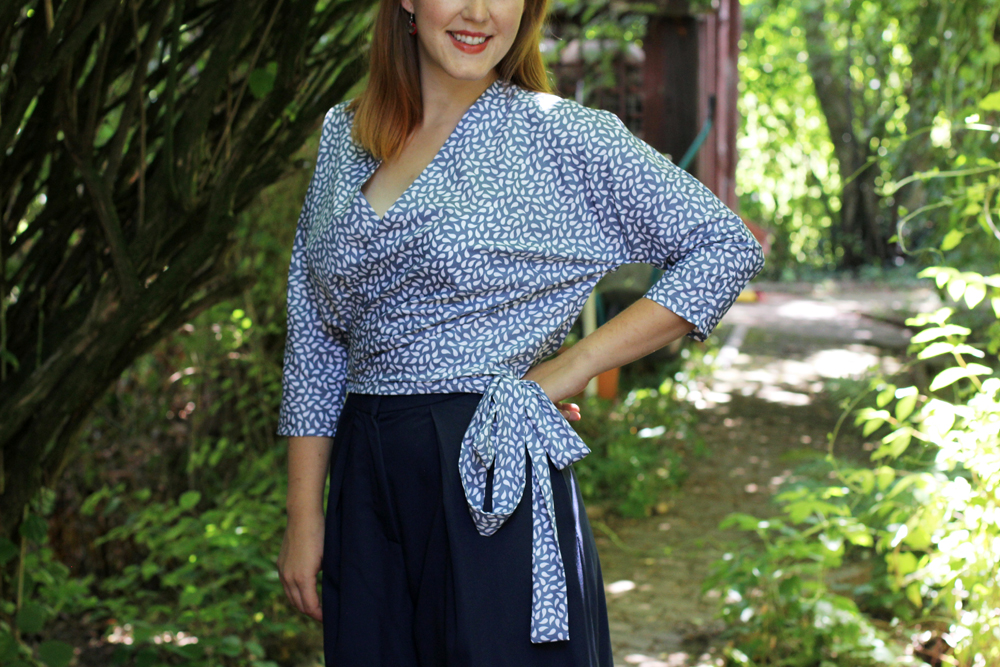
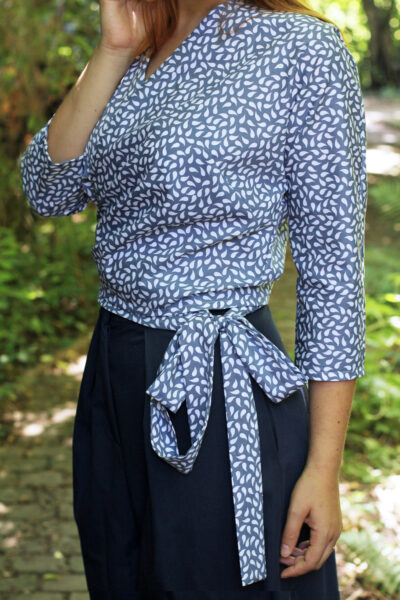
That second little pattern is the wonderful Ella Blouse by Sew Over It. It’s a pattern they’ve released quite recently. It’s a fairly simple and super quick little project I cannot recommend enough.  It doesn’t use up much fabric and a nice cotton or rayon fabric will do the job just fine. Another plus, no inserted sleeves, no zips or buttonholes! Which makes this project extra quick and pretty much fail proof.

I’m really happy with the fit. I was a bit concerned about gaping in the front, but there’s been no nipplegate yet. The only drawback I find is that you need some super high-waisted trousers or skirts to match with it, otherwise it’s not appropriate for work. Unfortunately, most of my high-waisted skirts are patterned, so I will have to make more plain skirts or more plain Ella blouses. I guess, I’ll end up making both!
SOI Ella Blouse and Burda Culottes by thisblogisnotforyou.com

SOI Ella Blouse and Burda Culottes by thisblogisnotforyou.com

SOI Ella Blouse and Burda Culottes by thisblogisnotforyou.comSOI Ella Blouse and Burda Culottes by thisblogisnotforyou.com

So…what’s next on my sewing list?
I’ll certainly make a few more Ella blouses, just because they are so easy to make, but as I said, I need more matching skirts! Also, there’s a Sew Over It Juliette Blouse already cut out waiting to be sewn and a few more Silk Camis planned. So quite a few SOI patterns! When I’m done with those, I have some really great autumn patterns lined most which are mostly going to be from Burdastyle magazine. (And there’s knitting to be done!) I definitely won’t be bored!

What are you sewing at the moment?


xx

Charlie


Happy sewing!

facebook/bloglovin/pinterest
twitter/instagram

Stay in touch!

A second, fitted Alice Top!

Sew Over It Alice Top by thisblgoisnotforyou,com

Sew Over It Alice Top by thisblgoisnotforyou,com

Sew Over It Alice Top by thisblgoisnotforyou,com

Hello there!

As mentioned in the previous post, here’s another version of the Alice Top from SEW OVER IT’s new online class.

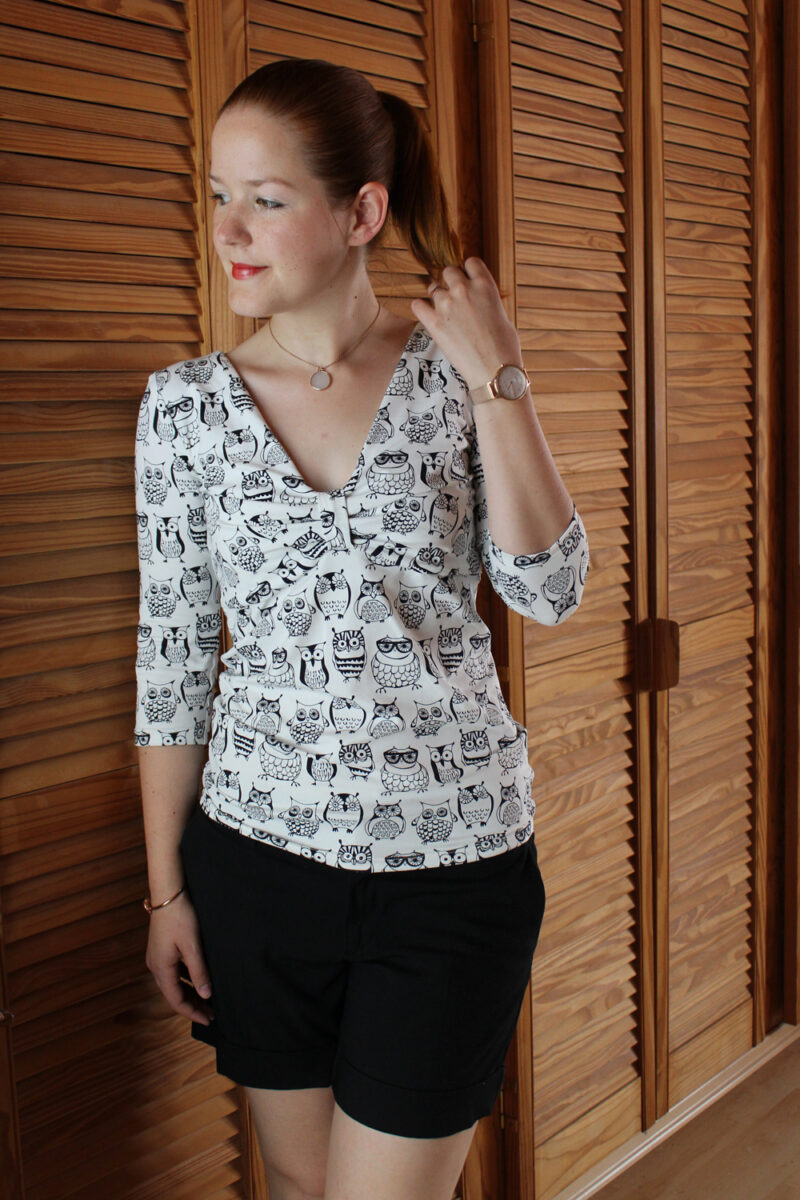
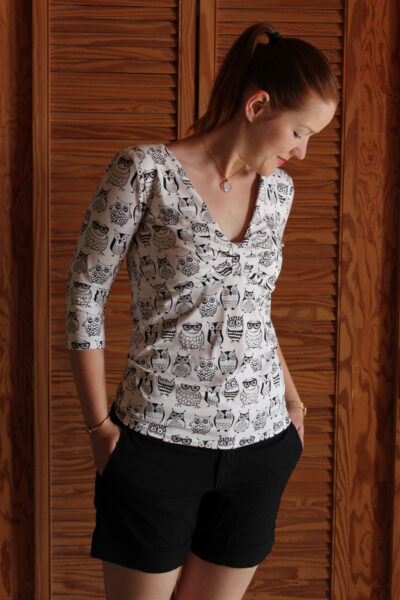
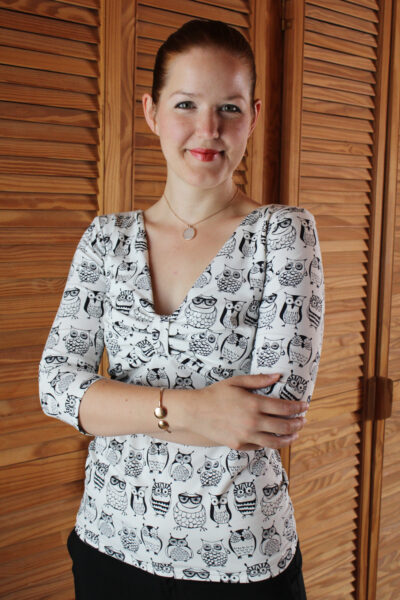
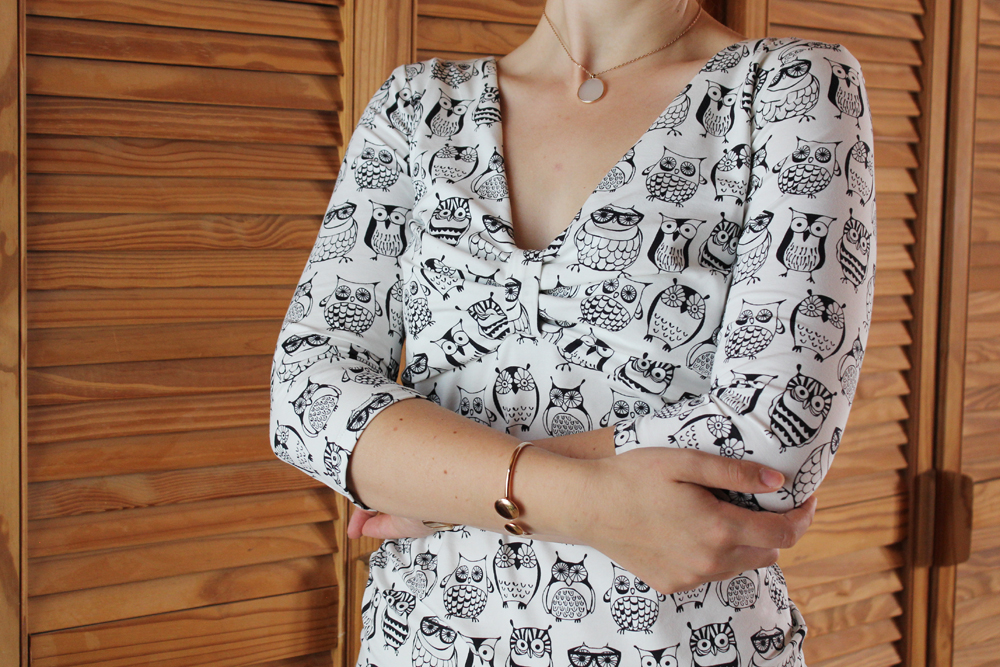
This time I used a lightweight jersey with a black and white owl print. Adorable, right? I’ve talked a bit about the online class and the construction of the pattern in the previous post. So if you want to know more about the pattern and the class, you can read about it here.

These are all the adjustments I made:

  • The front neckline was gaping ever so slightly. I took out 2 cm on length from the front neckline at the shoulders.
  • The sleeves were rather tight. I added 1 cm width at the sleeve seams.
  • The fit at the waist was quite loose. I took out about 2 cm of width on each side an around the waist and about 1 cm around the bust.

The fit is much better now and the top more comfortable to wear, although the changes are probably hardly noticeable. I’m really pleased with this top and can’t wait to wear it more often! We’re having a heat wave at the moment, so anything with sleeves is out of the question.

Wanna hear a fun story?

I wore this top when I went out to a restaurant with my family. When I wanted to put it in the wash a few days later, I only then noticed that there were still pins in there! The little bust tab at the front was only secured by two pins on the inside. This was one of the times I was glad I’m quite flat-chested. Otherwise, eating out might’ve become quite uncomfortable…
Sew Over It Alice Top by thisblgoisnotforyou,com

Have you left the house pins still sticking in your clothes?

xx

Charlie


Happy sewing!

facebook/bloglovin/pinterest
twitter/instagram

Stay in touch!
Green Jersey Alice Top (SEW OVER IT online class)

Sew Over It Alice Top by thisblgoisnotforyou,comSew Over It Alice Top by thisblgoisnotforyou,com

Sew Over It Alice Top by thisblgoisnotforyou,com

Hi everyone!

A few weeks ago, I got to try out the new SEW OVER IT online class ‘Intro to Sewing with Knit Fabrics’. (As always, all opinions are my own!) I’ve never really made use of online courses before. I bought a couple on Craftsy ages ago but never actually made anything from it.

When the lovely ladies over at SEW OVER IT approached me, I immediately wanted to try after getting a glimpse at the patterns included in the class. I love their work and most of my favourite patterns are from SEW OVER IT. The Alice Top, with a faux bow front, was incredibly tempting! (There’s another pattern included, the Emma dress, which looks lovely, but I haven’t tried it yet.)

About the class:

It was pure joy to follow this online course. It’s always great to see lovely Lisa in action and she perfectly explains all the steps involved in making this cute top. The construction is not too tricky, but a bit unconventional and seeing it being put together on camera helps a lot. There’s a lot of useful information about sewing with knits included. As a more experienced sewer, I really enjoyed this class, none-the-less. It’s delightfully relaxing, as you really get immersed in the project.

My first Alice Top:

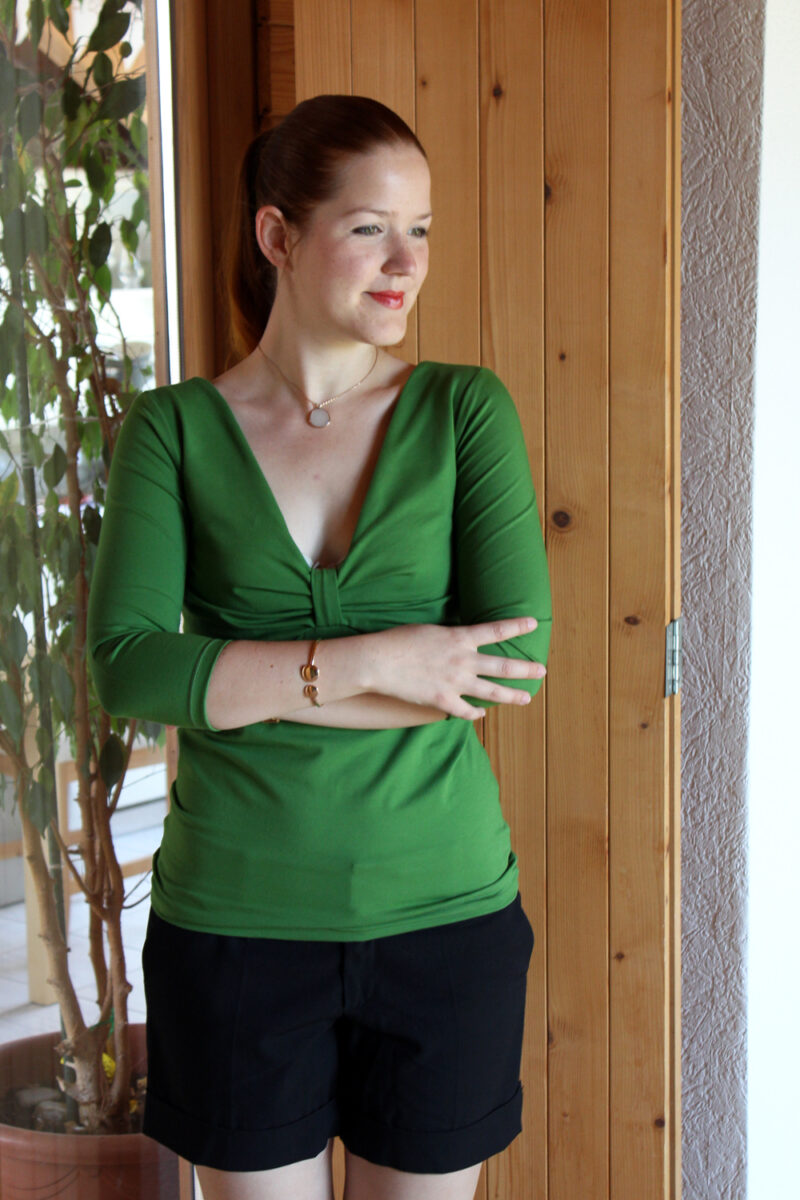
I used a green lightweight jersey, as was recommended in the class. (The fabric was gifted to me by my mother-in-law, so I’m afraid I cannot tell you where to buy it!)

For this first version of the Alice Top I went through the class step-by-step, pretty much cutting a straight size 10 without making any fit adjustments. It turned out really well! There were a couple of minor fit issues, I could easily fix before cutting another version of this pattern:
(Remember, these have nothing to do with the pattern itself, but are specific to my body measurements and posture)

  • The front neckline is gaping ever so slightly
  • The sleeve were rather tight
  • The fit at the waist was quite loose

The only thing I adjusted on the green top was taking in the waist by approximately 2 cm on each side. I’ll show you the fitted version of this top in the next post!

But perfect fit or not, this trial round went really well, don’t you think? The top is perfectly wearable and I’m really happy with it.

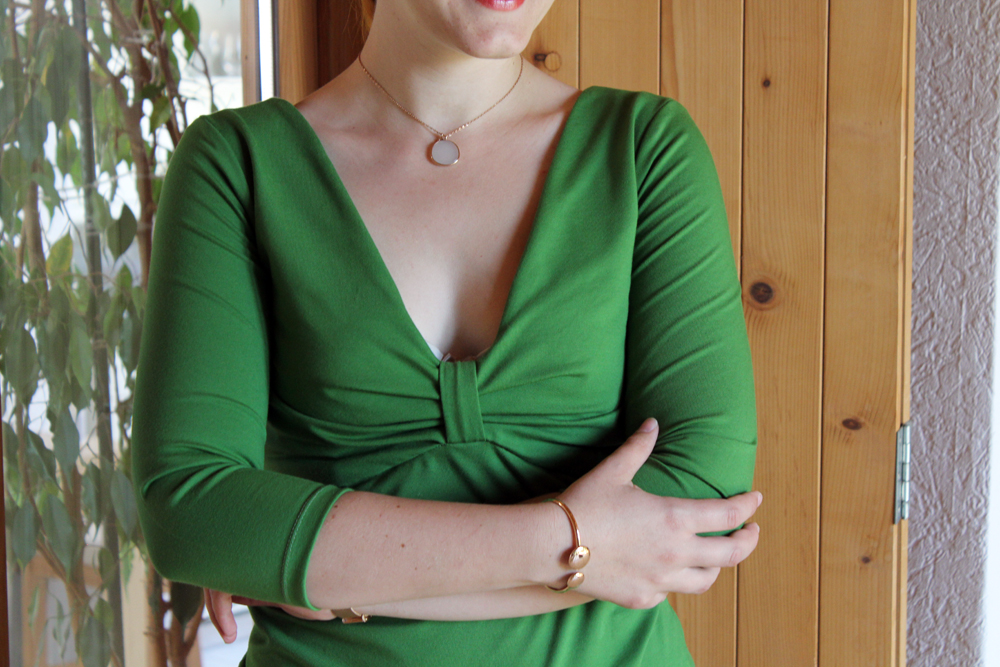
A few words about the construction: The Alice Top is fully faced, front and back, to create a perfect, close-fitting V-neckline and stabilise the gathers at the front. With the very detailed video instructions, this rather unconventional pattern isn’t very hard to construct. Once I finished the first top, I hardly had to revisit the course to make the second one.
The construction takes a bit longer than the average jersey top, as you have to stabilise the neckline and sew a couple more seams because of the facing. But the finishes look incredibly neat and professional.

No overlocker needed!

For this first top, I only used my sewing machine. So if you do not have access to an overlocker, this is the perfect project for you. Because of the specific construction techniques used in this course, you’ll get very neat finishes without having to use any professional equipment.

Sew Over It Alice Top by thisblgoisnotforyou,com

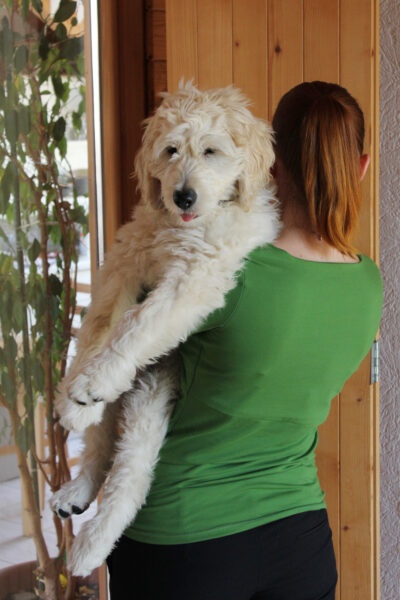
This was also the first project Aslan very helpfully assisted with modelling. I didn’t realise he might be a bit too big to use as accessory until after seeing these photos! Man, he’s grown so much in the past two months!

As I don’t want to post too many sewing-unrelated pics on my blog’s social media accounts, Aslan now has got his very own…For those of you, who want to see more of this cute little face, you can FOLLOW ON INSTAGRAM to watch him grow up!

Sew Over It Alice Top by thisblgoisnotforyou,com

What are your thoughts about online classes? Are you a fan?

xx

Charlie


Happy sewing!

facebook/bloglovin/pinterest
twitter/instagram

Stay in touch!
 

Having Fun Sewing for Toddlers Pt.1

Toddler Kitten Dress by thisblogisnotforyou.comToddler Kitten Dress by thisblogisnotforyou.com

  MEOW, MEOW!

I don’t enjoy sewing for others. That’s a fact.

I don’t really know why, and I’d love to be able to rejoice in it. But I don’t. Sewing for others makes me feel frustrated and in that case it becomes more chore than pleasure. There’s one exception, though: Sewing for my toddler nieces.

Again, I’m not sure why. I guess it’s because you can go wild with ideas and also fitting isn’t as big an issue as with adults. Toddlers aren’t that hard to please when it comes to new dresses. They can be as crazy, loud and colourful as you like and they’ll love it! It’s also a great way to use up larger fabric scraps and try out combinations you wouldn’t be able to pull off yourself.

Last year I made a bunch of dresses, jumpers and a jacket for my oldest niece, who is 2.5 years old. I completely forgot to post these, as I mostly blog about things I make for myself. But I’m quite proud of them and they are too cute not to be shared.

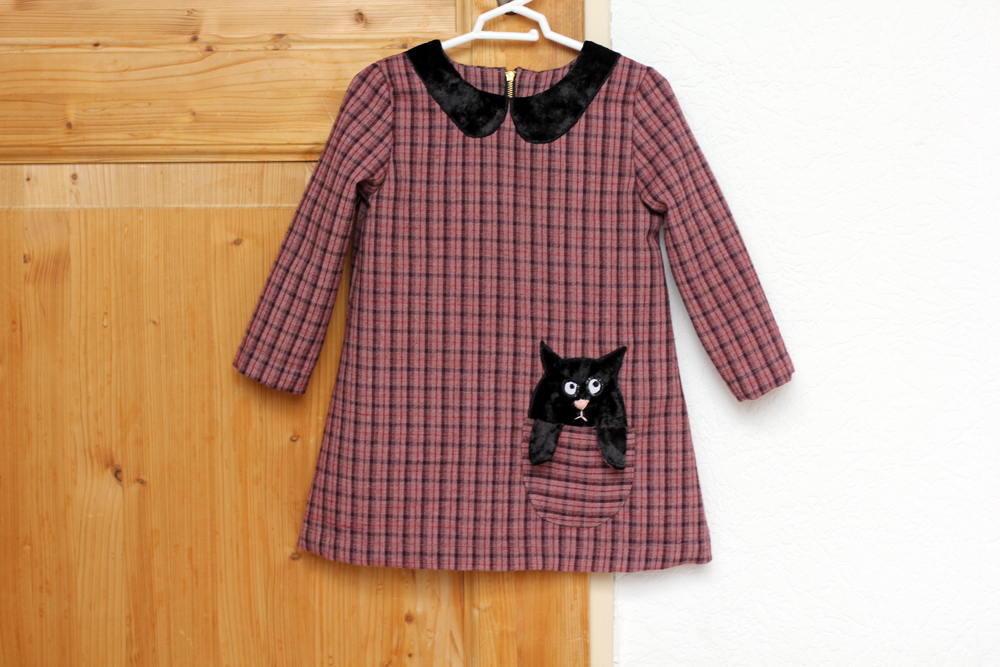
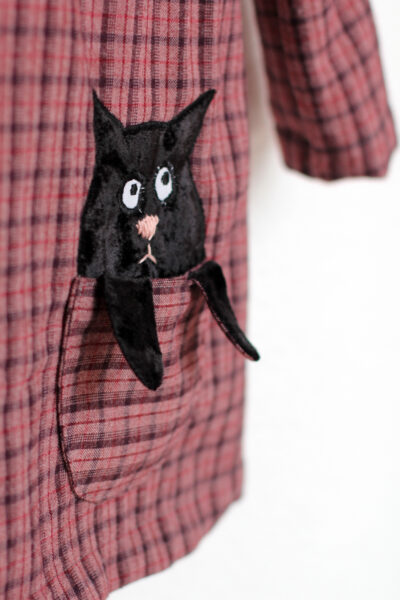
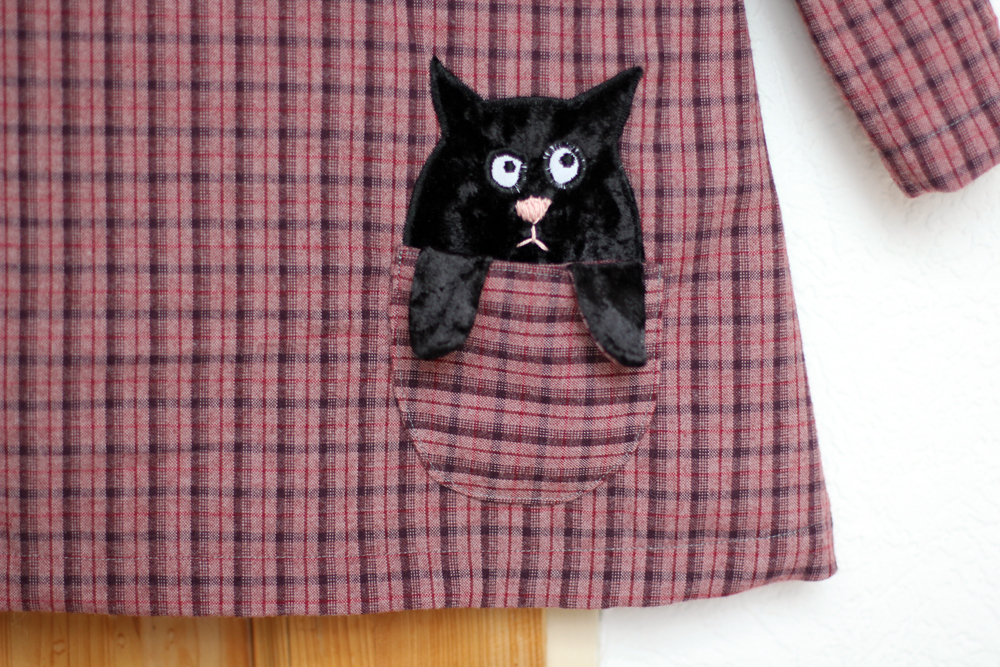
So here’s the first one: A boiled-wool tartan and velvet dress with a fake Peter Pan collar and a grumpy kitten pocket.

Toddler Kitten Dress by thisblogisnotforyou.com

Toddler Kitten Dress by thisblogisnotforyou.com

Toddler Kitten Dress by thisblogisnotforyou.com

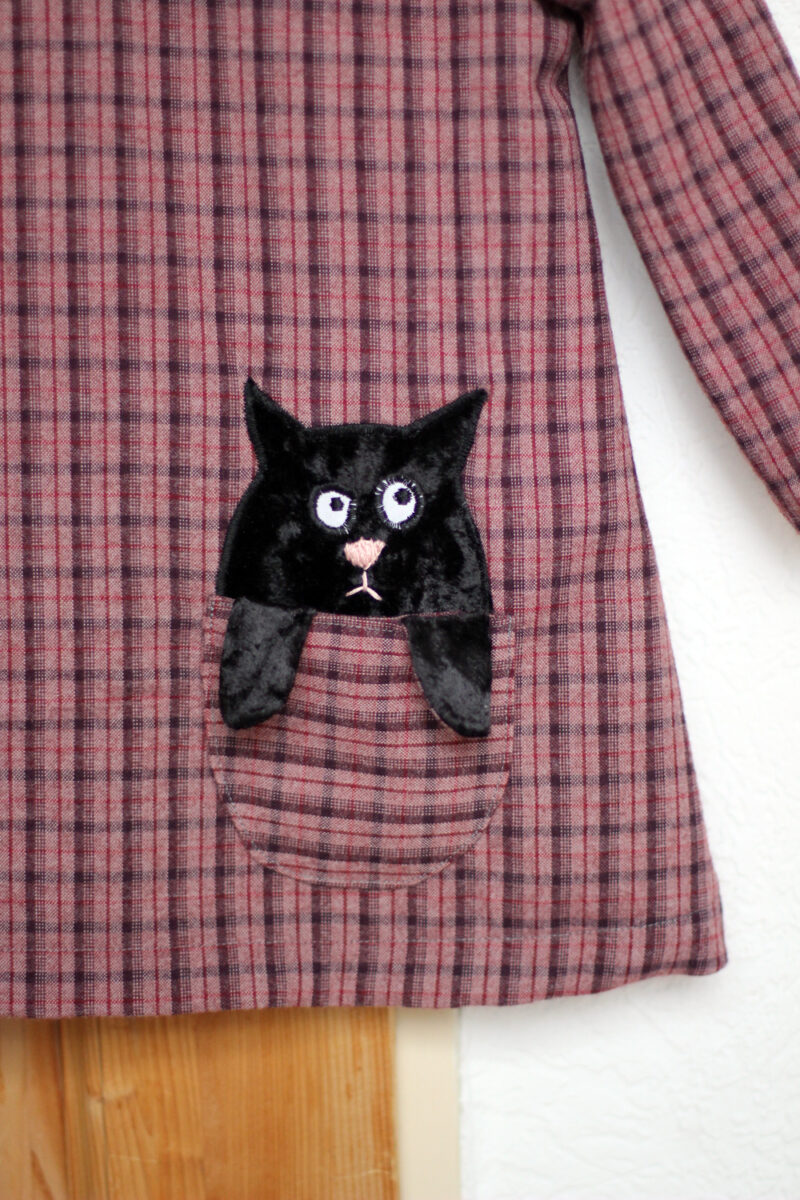
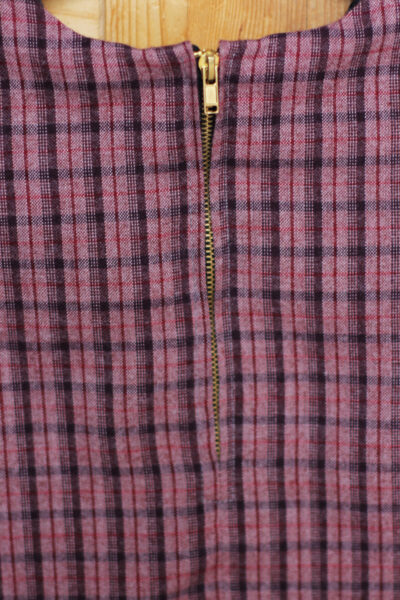
Such a great little project to try my hand at appliqué (using the satin stitch setting and fusible interfacing) and simple hand-embroidery for the nose and mouth. I also tried a different technique for inserting an exposed zip.

And, of course, the pocket is fully functional. Toddlers need pockets!

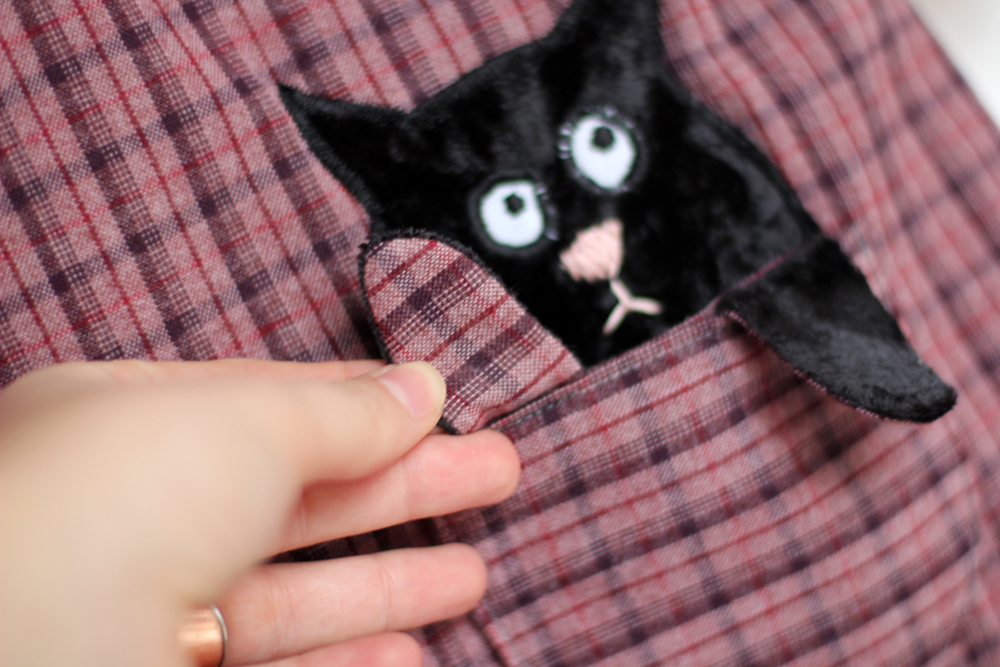
How did I make the kitten appliqué? I made a little drawing and created a paper pattern from that. I cut out the velvet (recycling an old velvet top) and interfaced it. I sewed on the eyes by machine and the pink nose and mouth by hand, using embroidery thread. I appliqued the kitten to the front of the dress using the same satin stitch I used for the eyes. The bottom of the cat which you can’t see fills out the whole of the pocket, so you can’t see “where the cat ends” when you peek into the pocket.

To create the paws, I cut two pocket pieces and pinned the paws in between before stitching them together, as you can see in the picture above. The paws are lined with wool, as the velvet alone would’ve stretched out of shape. After assembling the pocket, I topstitched it onto the dress, covering the bottom of the weirdly egg-shaped cat!Toddler Kitten Dress by thisblogisnotforyou.comToddler Kitten Dress by thisblogisnotforyou.com

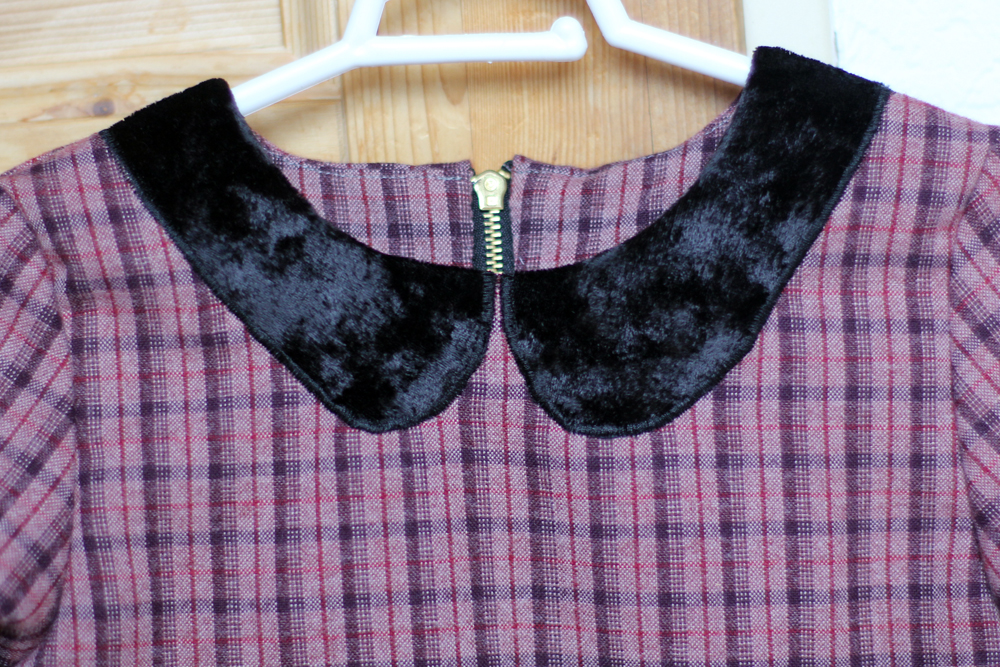
The collar was made pretty similarly. I appliqued the velvet collar to the front of the dress, before assembling the dress. This way I could simply finish the raw edge at the neckline by facing it. The pattern is a toddler dress pattern from LA MAISON VICTOR, that I adapted quite a bit. I’ve made another dress using the unchanged, original pattern which I’ll review on the blog soon.

I love how this little dress turned out. I feel the combination of pink tartan, black velvet and the golden zip give it quite a cool, grungy look. I’d love to have one in my size!

How do you feel about sewing for others? Do you enjoy making kids clothes?

xx

Charlie


Happy sewing!

facebook/bloglovin/pinterest
twitter/instagram

Stay in touch!
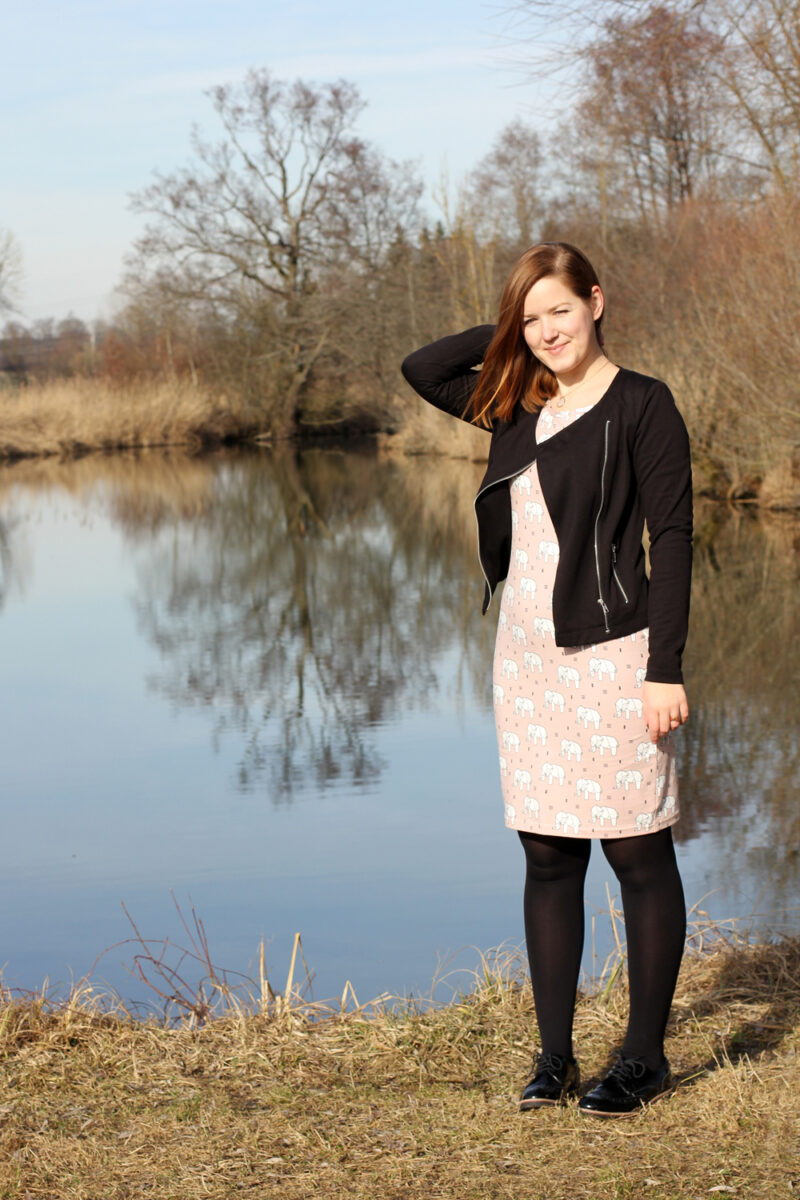
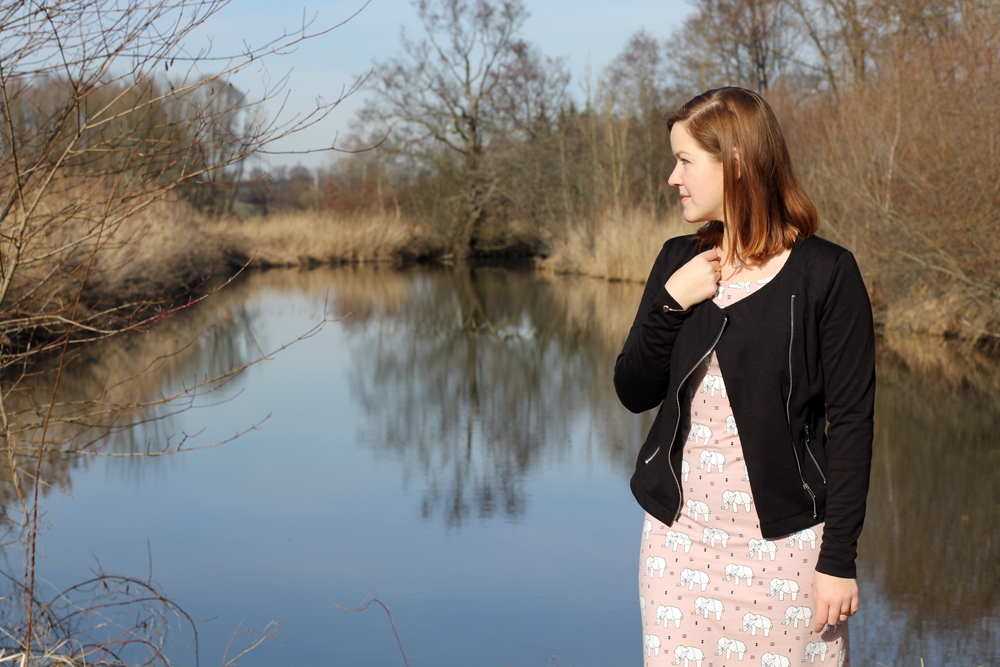
Elephant Print Agnes Dress

Agnes Dress by thisblogisnotforyou.comAgnes Dress by thisblogisnotforyou.comAgnes Dress by thisblogisnotforyou.com

Agnes Dress by thisblogisnotforyou.com

Agnes Dress by thisblogisnotforyou.comAgnes Dress by thisblogisnotforyou.com

Agnes Dress by thisblogisnotforyou.com


Hey guys, hope you’re all having a fantastic Sunday!

After spending the last couple of weeks mostly sewing for friends and family, I finally could squeeze in a sewing project for myself. I really have to be more selfish with my sewing if I want to keep wearing handmade clothes! I find it really hard to say no to requests and then also I often find myself offering my help. Sounds familiar, anyone? For some reason I can find little joy in sewing for others, especially if there’s no opportunity for a fitting. Putting a lot of work into something not knowing whether it will fit is just not enjoyable to me. (The exception is my nieces, really. Sewing for babies is always fun as fitting is easy and you can just go wild with your fabric choices and use up all your fabric scraps.)

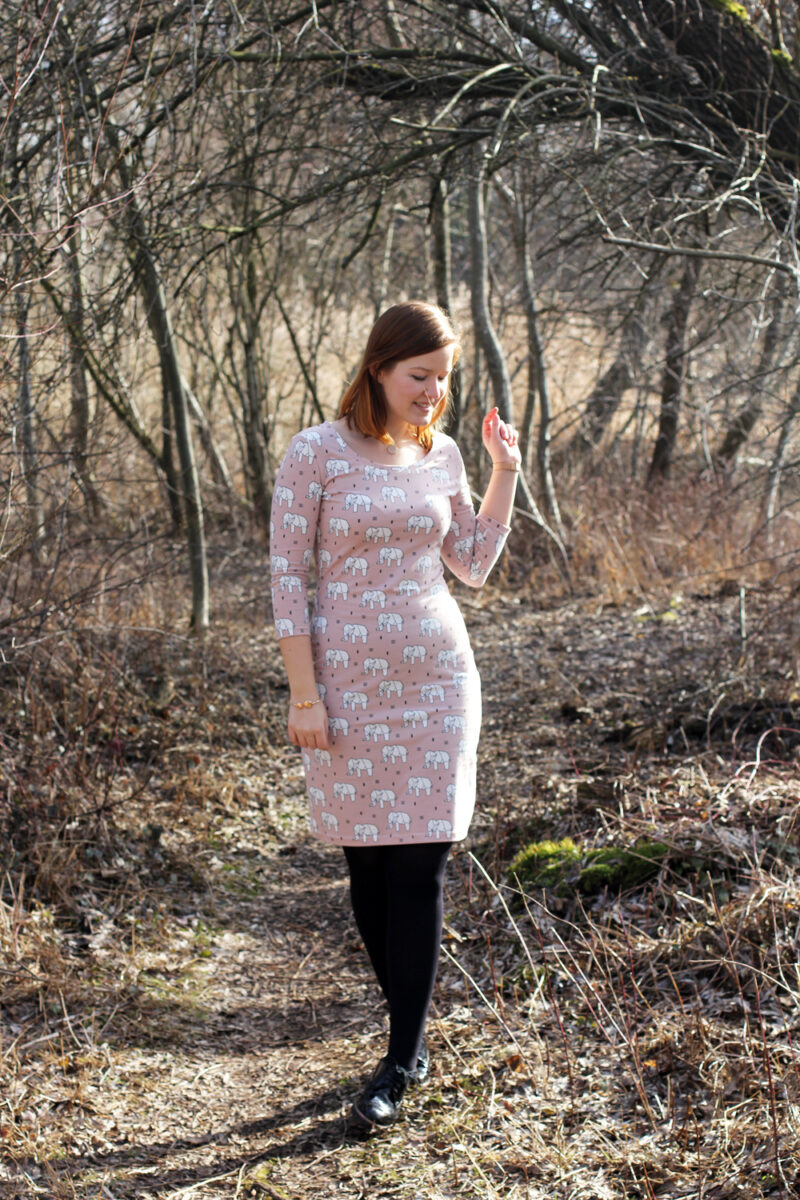
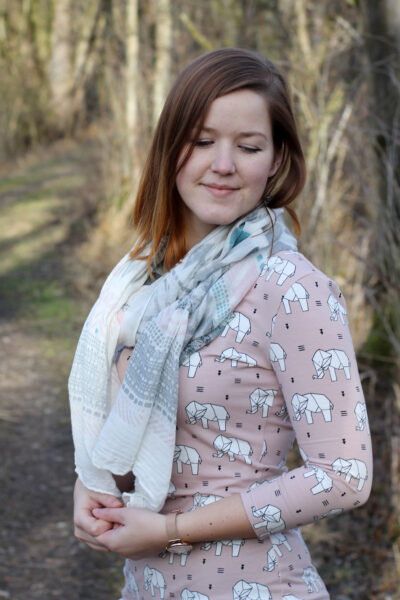
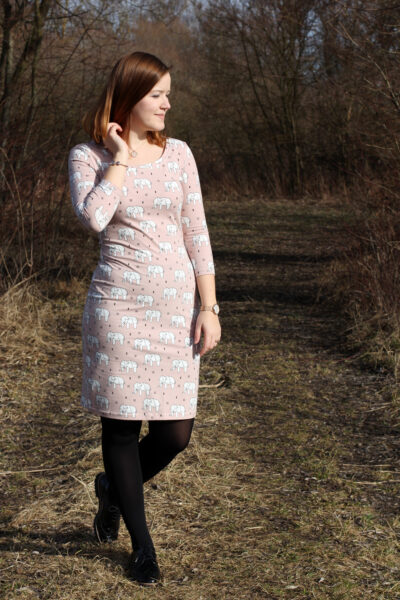
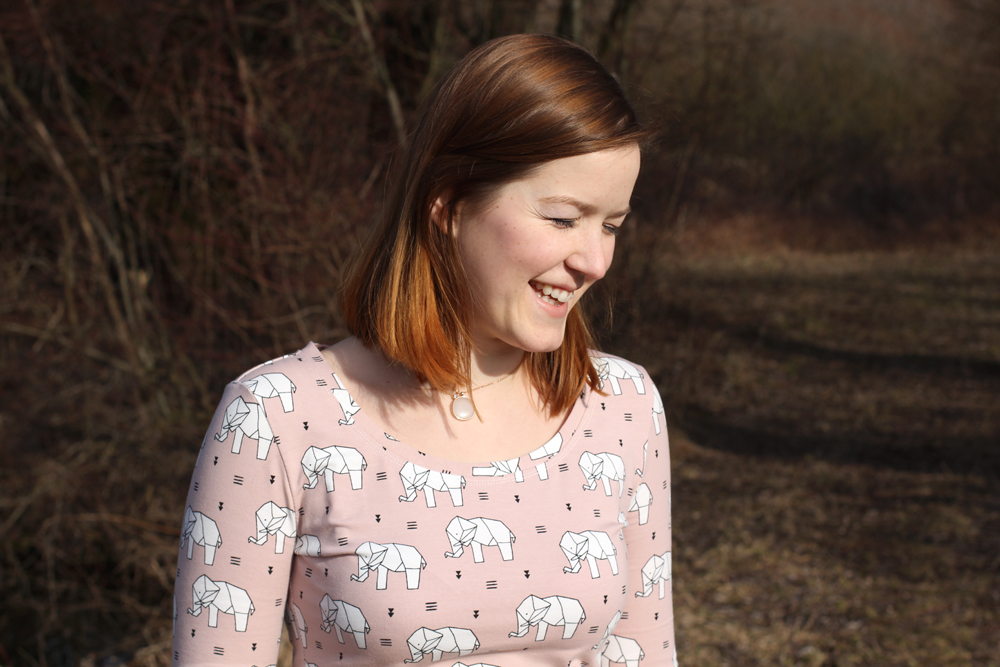
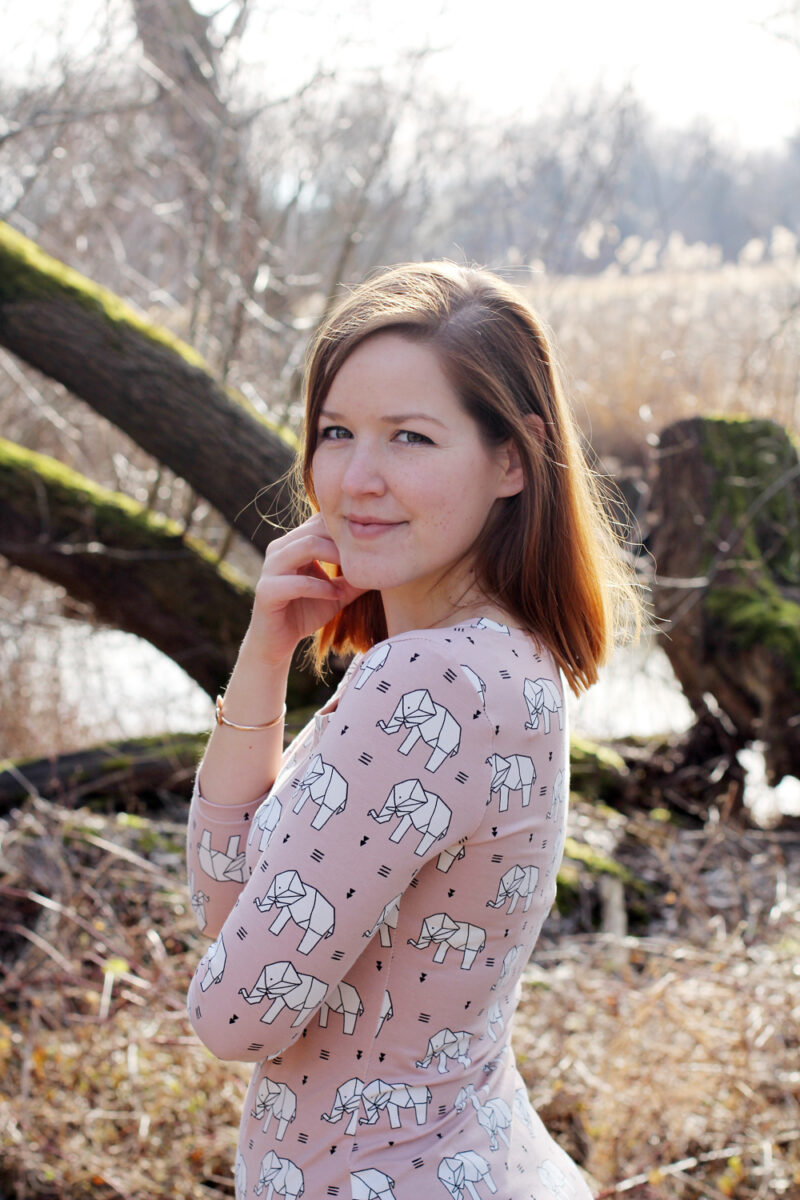
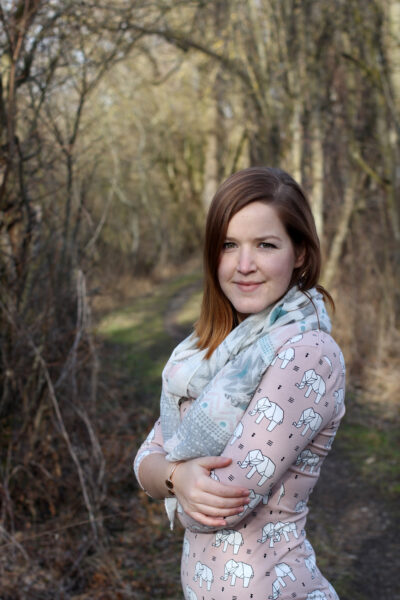
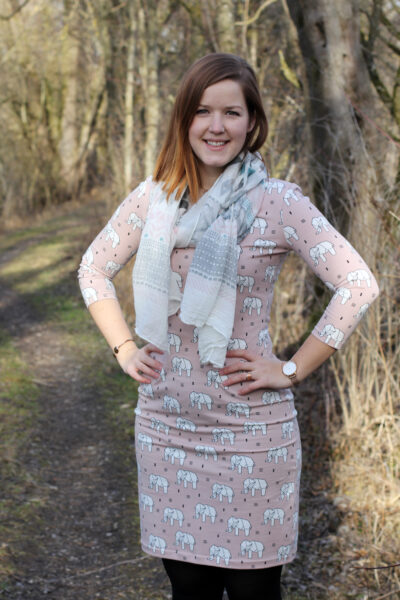
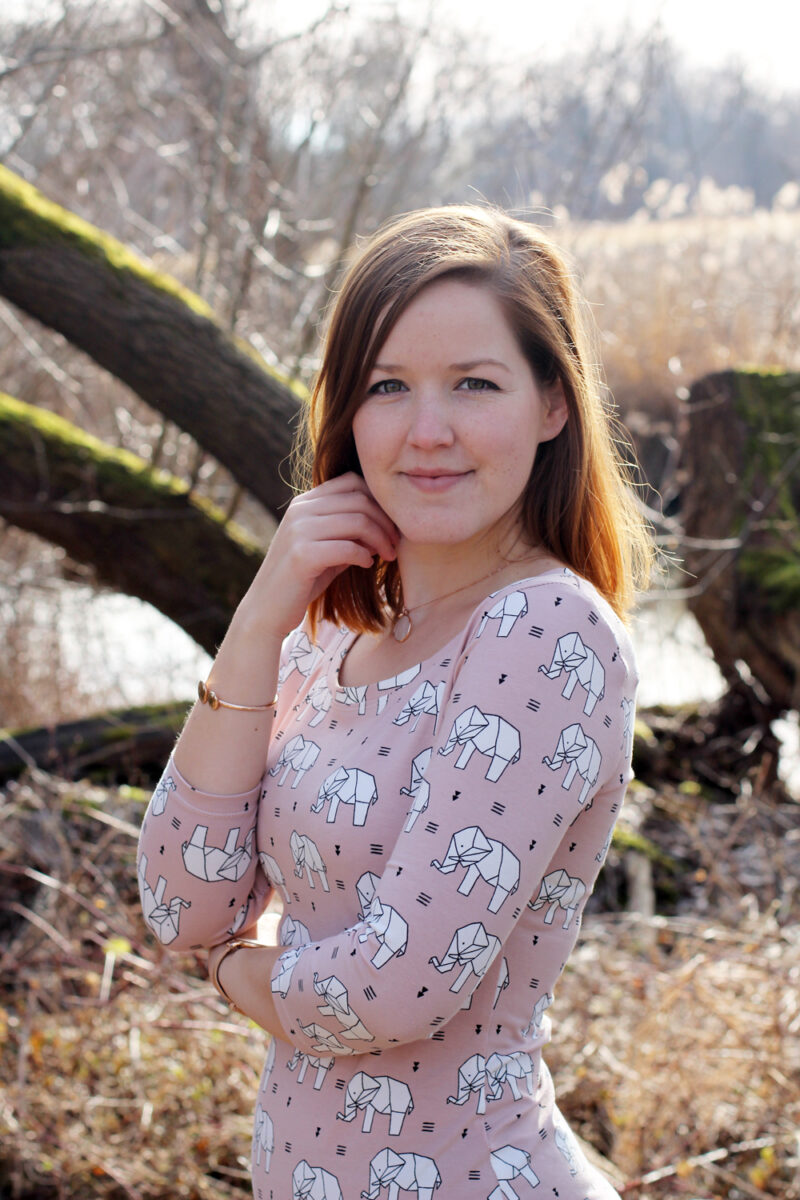
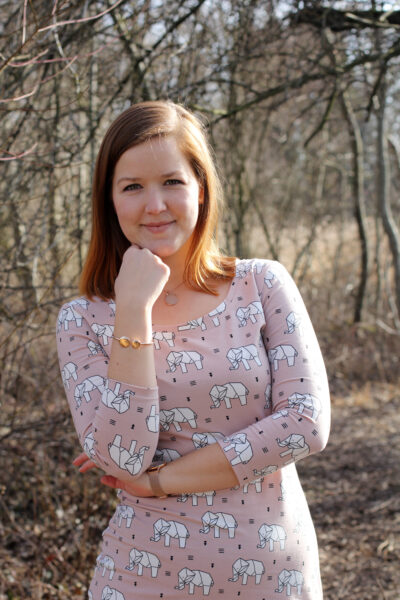
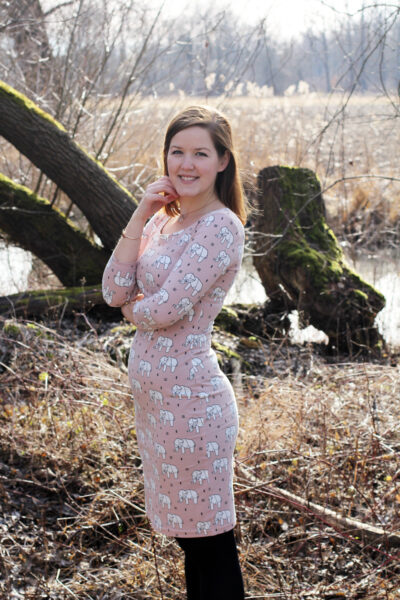
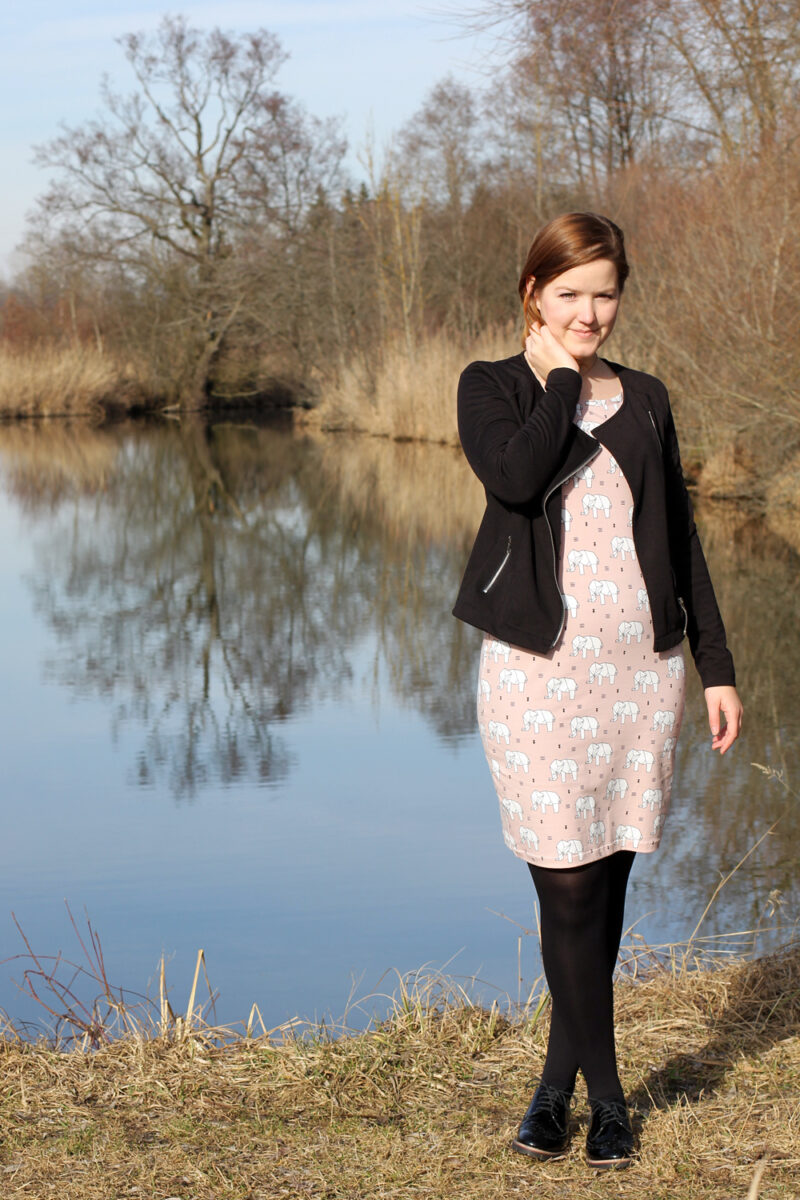
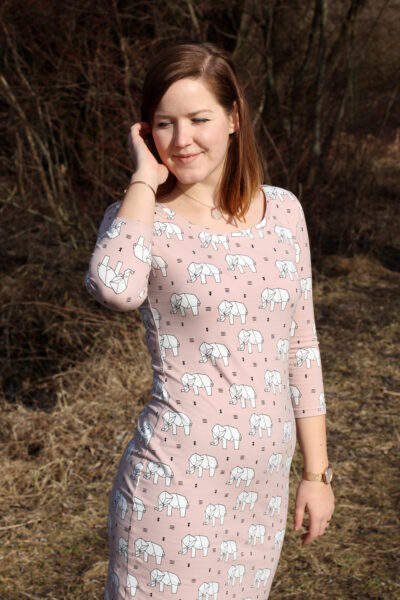
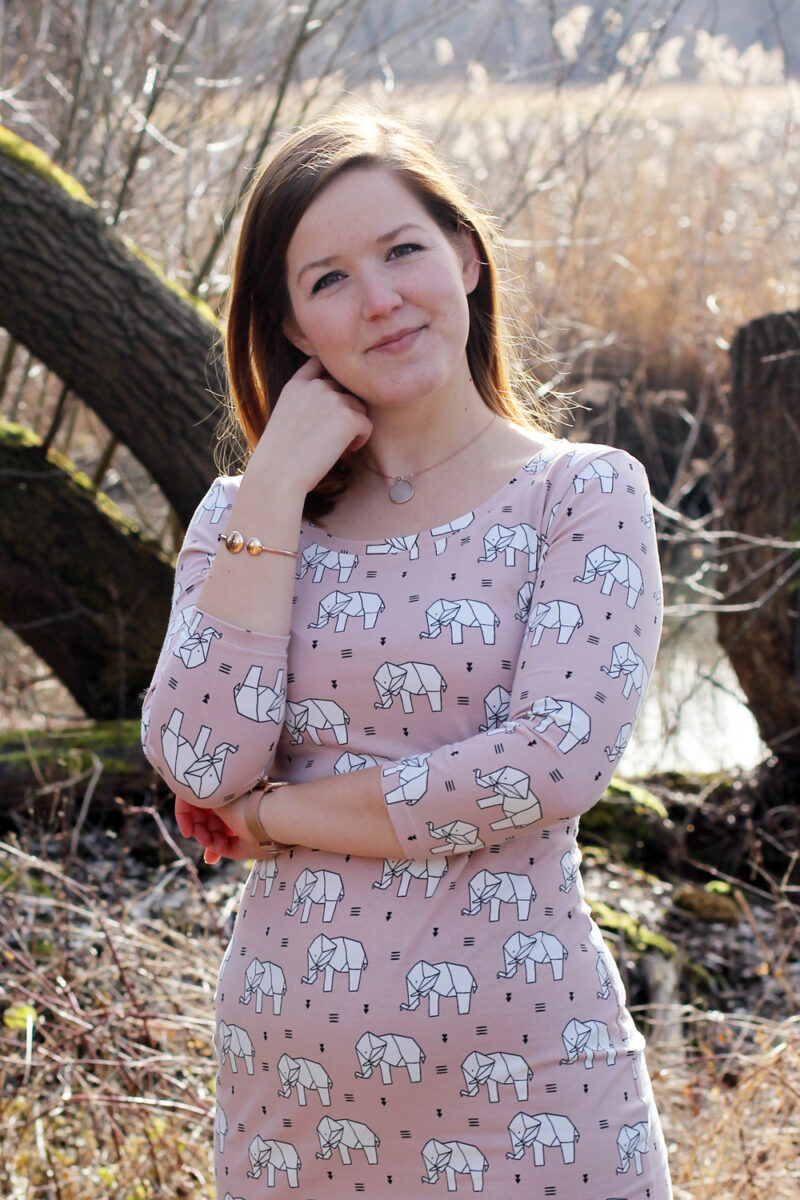
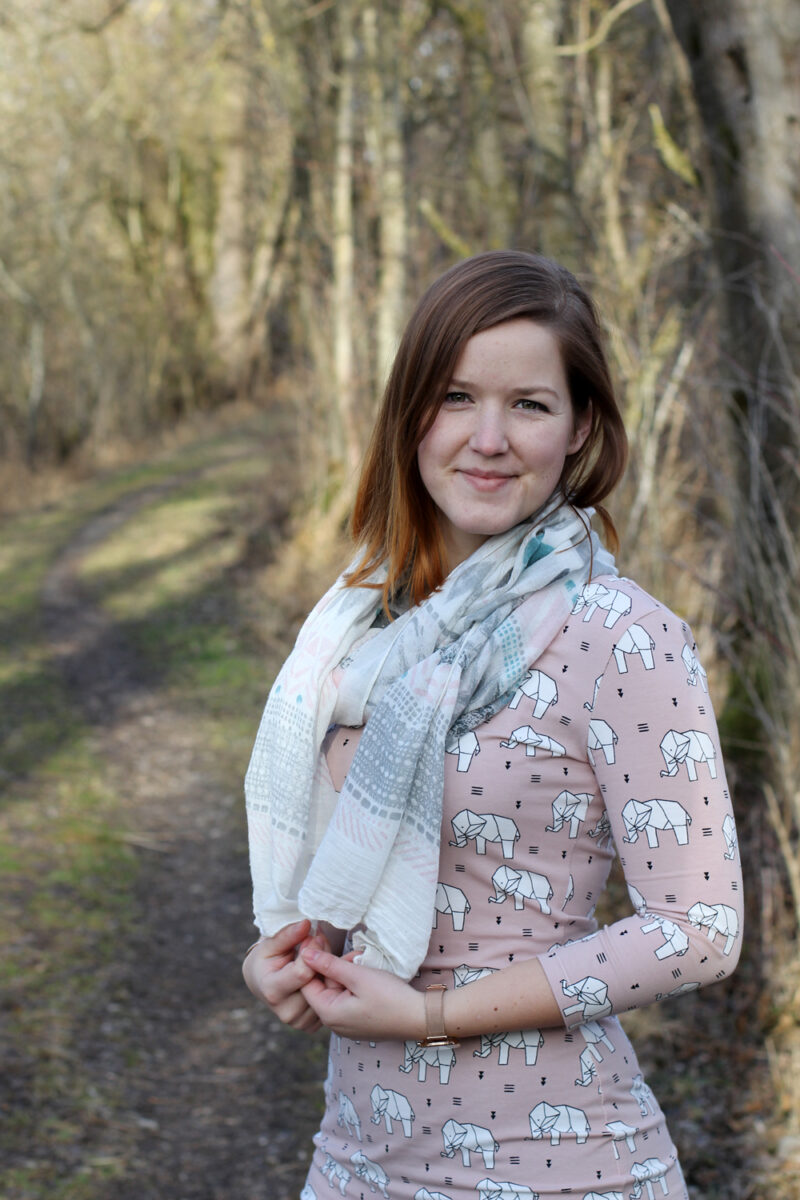
I bought this amazing elephant print jersey on Stoffe.de (myfabrics.co.uk in the UK). I loved the print right away. I wanted to make an Agnes top at first, but had enough fabric left for the dress hack. The last Agnes dress I made has become such a wardrobe staple for me, which can easily be dressed up or down for the occasion, that I had to make another one. It was my husband’s birthday that weekend, and a dress would be much cuter for the party than jeans + top.

As mentioned before, I used the Tilly & The Buttons Agnes Top pattern, which I have sewn and hacked many times before. (Check out my project gallery for all the different versions!) Hacking the top into a dress is really, really simple. I also added 3/4 sleeves and went for the simple scoop neckline, as the print was busy enough.
Agnes Dress by thisblogisnotforyou.com

Agnes Dress by thisblogisnotforyou.com


As always, the fit of the Agnes pattern is amazing. As the fabric wasn’t as stretchy as I had hoped, it was a little bit tight at first, but stretched out after the first wear. The Agnes pattern is super versatile and so quick to cut out and sew. I wasn’t really lucky with the first bunch of Tilly patterns (especially from her Love At First Stitch book), as I just couldn’t get them to fit right no matter what I tried. But Agnes really makes up for it!

The pattern is perfect for busy prints like my elephant fabric. Although I used this pattern quite a few times before, all the clothes I made with it look so different, that you can’t really tell it’s the same pattern.

Will there be more Agnes’ in the future? Hell, yeah!Agnes Dress by thisblogisnotforyou.com

Agnes Dress by thisblogisnotforyou.com

Agnes Dress by thisblogisnotforyou.comAgnes Dress by thisblogisnotforyou.comAgnes Dress by thisblogisnotforyou.com

I’m so happy that spring’s back! The sun is luring me out of the house. Luckily there are enough rainy weekends still, to get some sewing done for the warmer season…

Do you have any recommendations for wardrobe staple patterns? And what are your spring sewing plans?

xx

Charlie


Happy sewing!

facebook/bloglovin/pinterest
twitter/instagram

Stay in touch!