
Hello fellow sewing enthusiasts!
My lovely mum recently sent me a dress to make alterations and I decided to make a pattern from it first before cutting it apart. It’s a super easy and super quick sew and I thought I’d share it with you. 
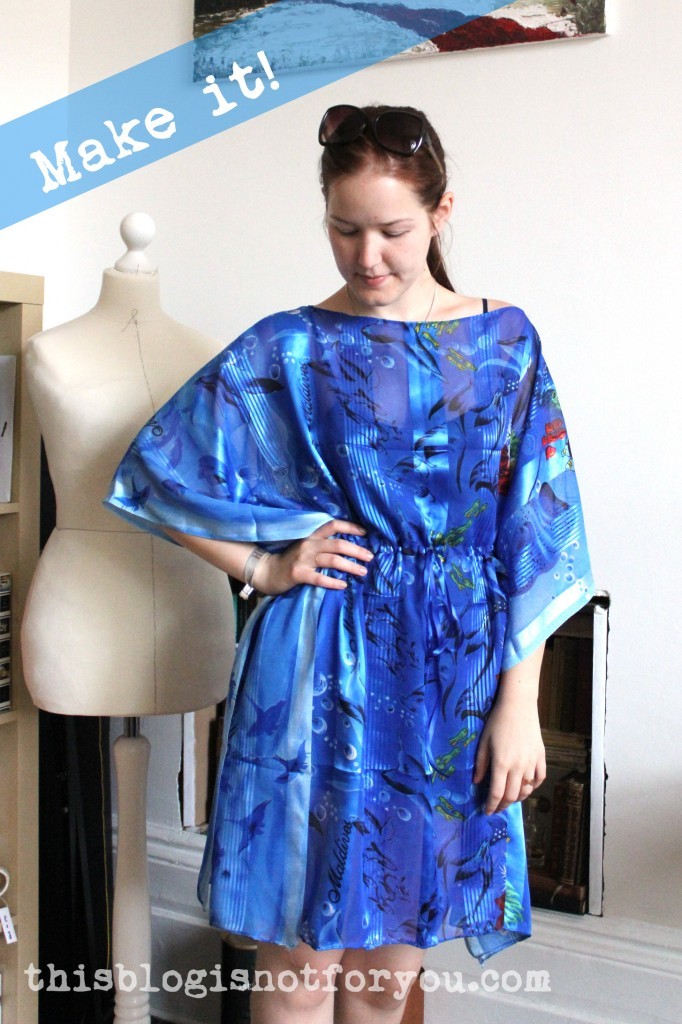
This is the dress I will refashion (taking off the sleeves). The blue one is the version I made yesterday.
In this post I’ll share the pattern and instructions on how to sew everything together. It’s one size fits all!
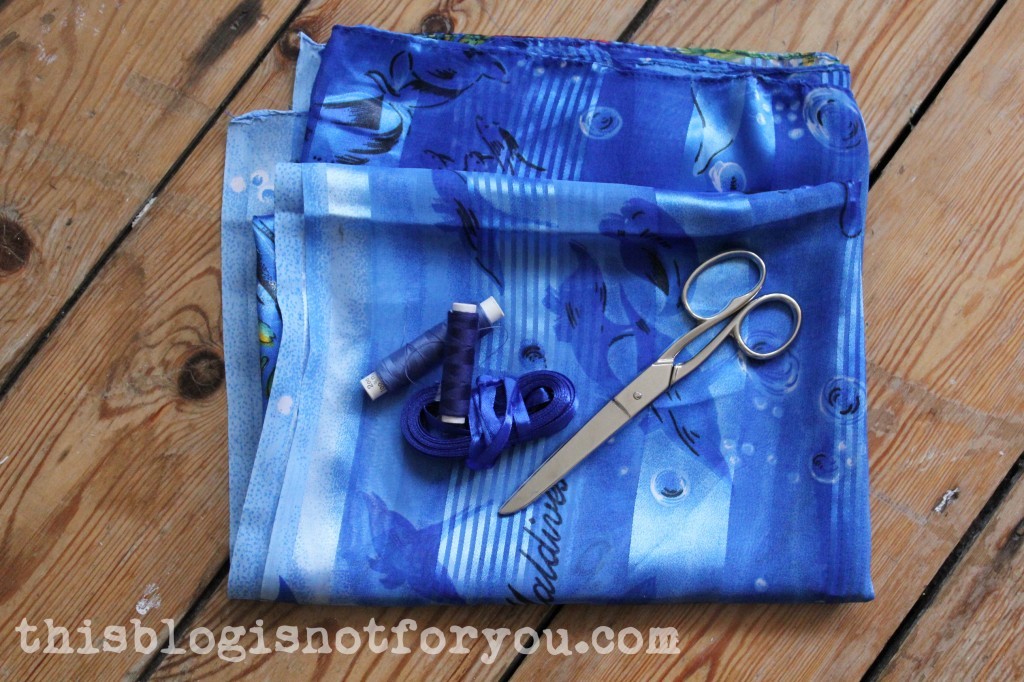
All you need
– a 90x180cm or 37×71” piece of fabric
– scissors, pins, matching thread
– matching ribbon or bias binding
Here’s the pattern!
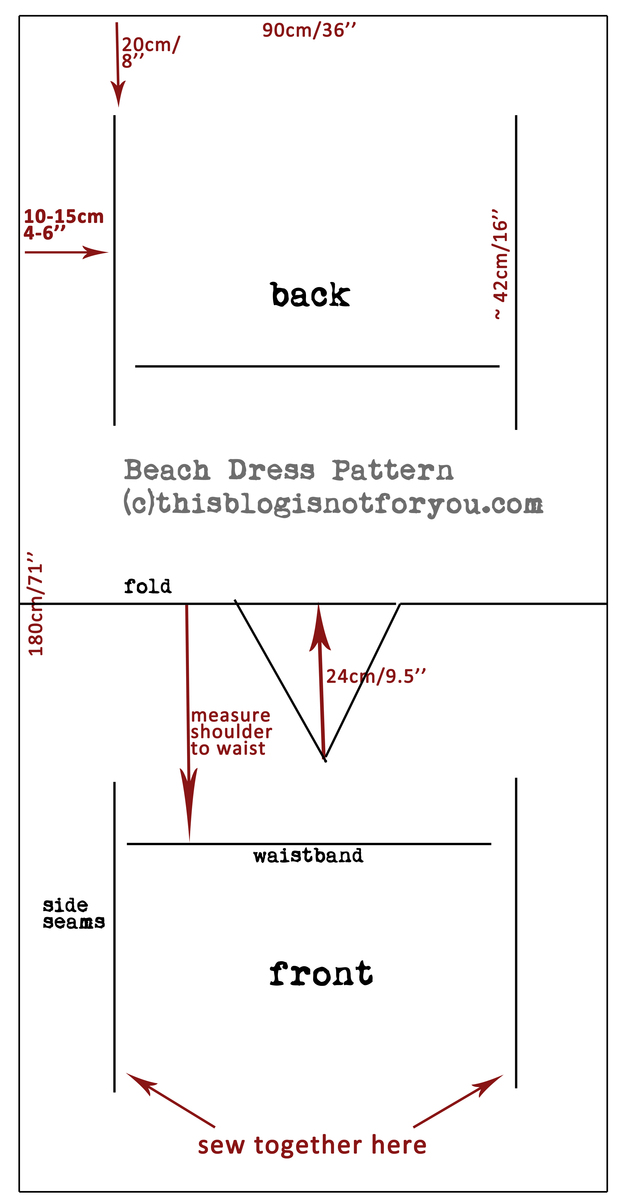
As you can see, it’s super easy. It’s basically a rectangular piece of fabric you sew together on two sides and then add a waistband.
I used a 90x180cm scarf which was already hemmed on all sides. If your fabric has raw edges, hem it before you start. If you’re using lightweight fabric (which I recommend!) you can use a narrow hem foot. They work great!
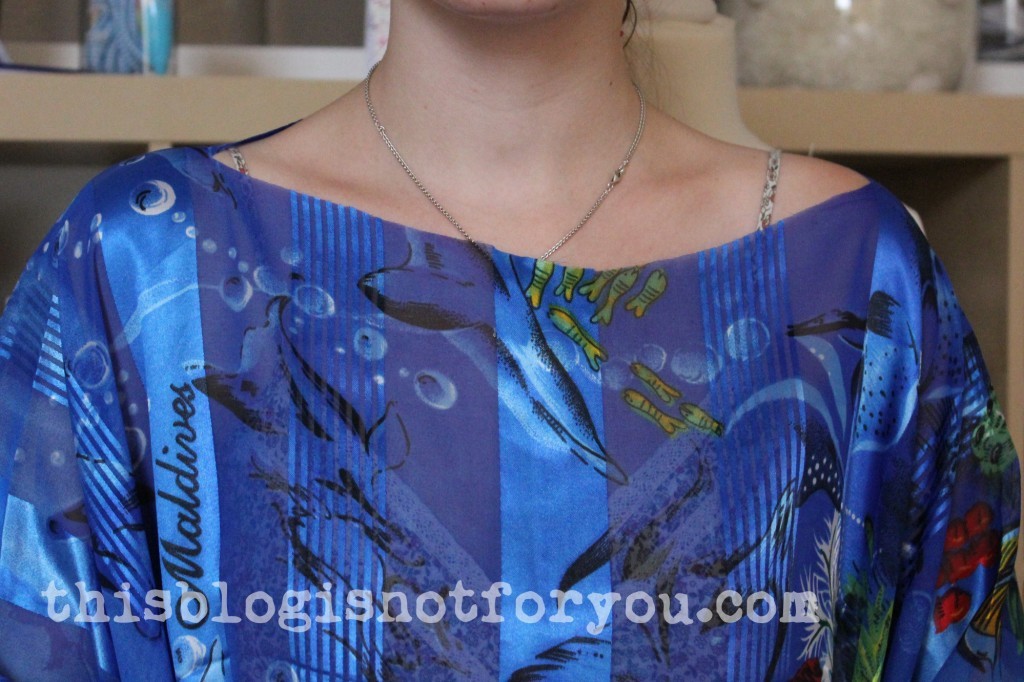
You start with the neckline. You can either make it a V-neckline like in the pattern above or do something totally different. The V in the red dress starts 24cm/9.5” below the center fold. I decided to make a boat neckline which is even easier to do.
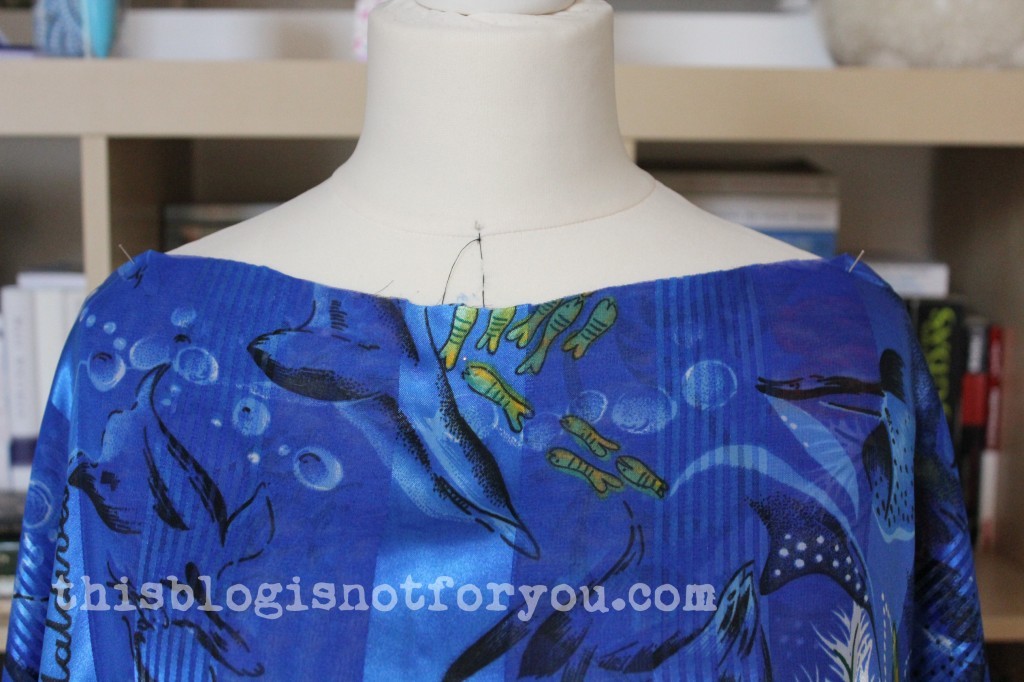
To get the boat neckline, I pinned the fabric to the dressform and cut off fabric until it had the shape I wanted. Try it on and see if you need to make changes!
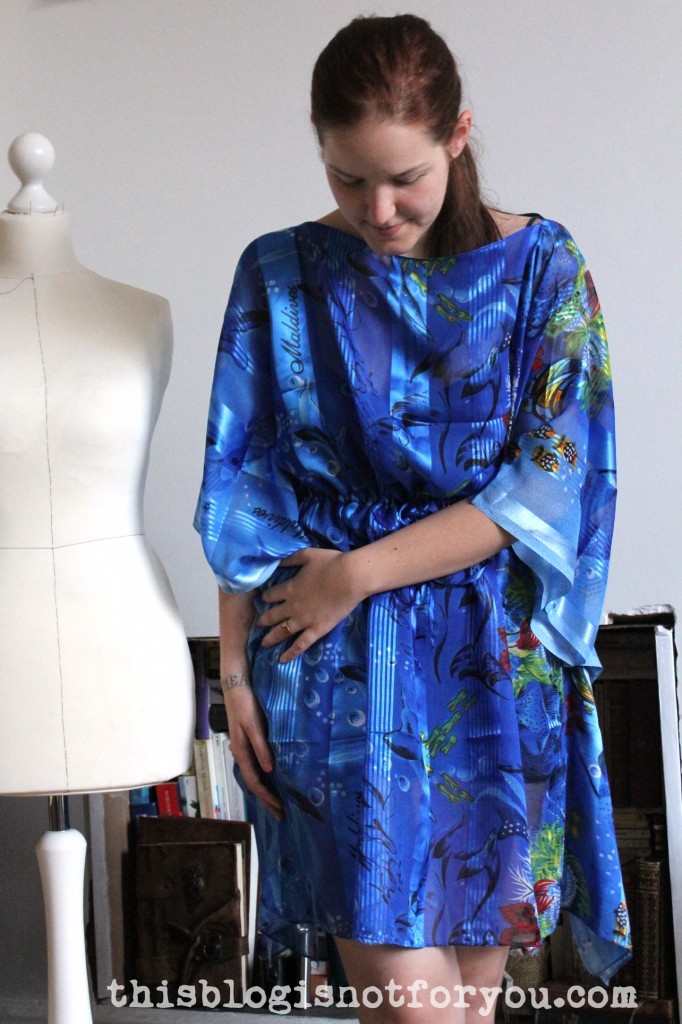
I liked it the way it was and left it like that.
To finish the raw edges I used 7mm ribbon. Bias binding would be even easier. If you have neither at home but a bit of fabric left, you can make the bias binding yourself by cutting out strips at a 45 degree angle.
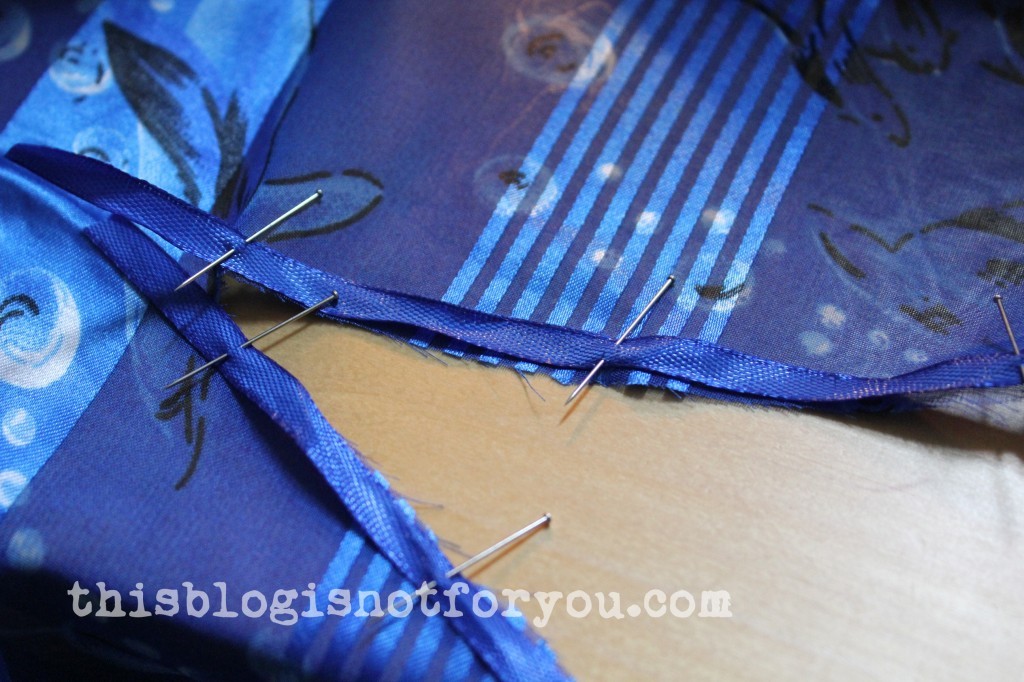
Pin the ribbon to the neckline, right sides together. Edgestitch about 2-3mm from the edges.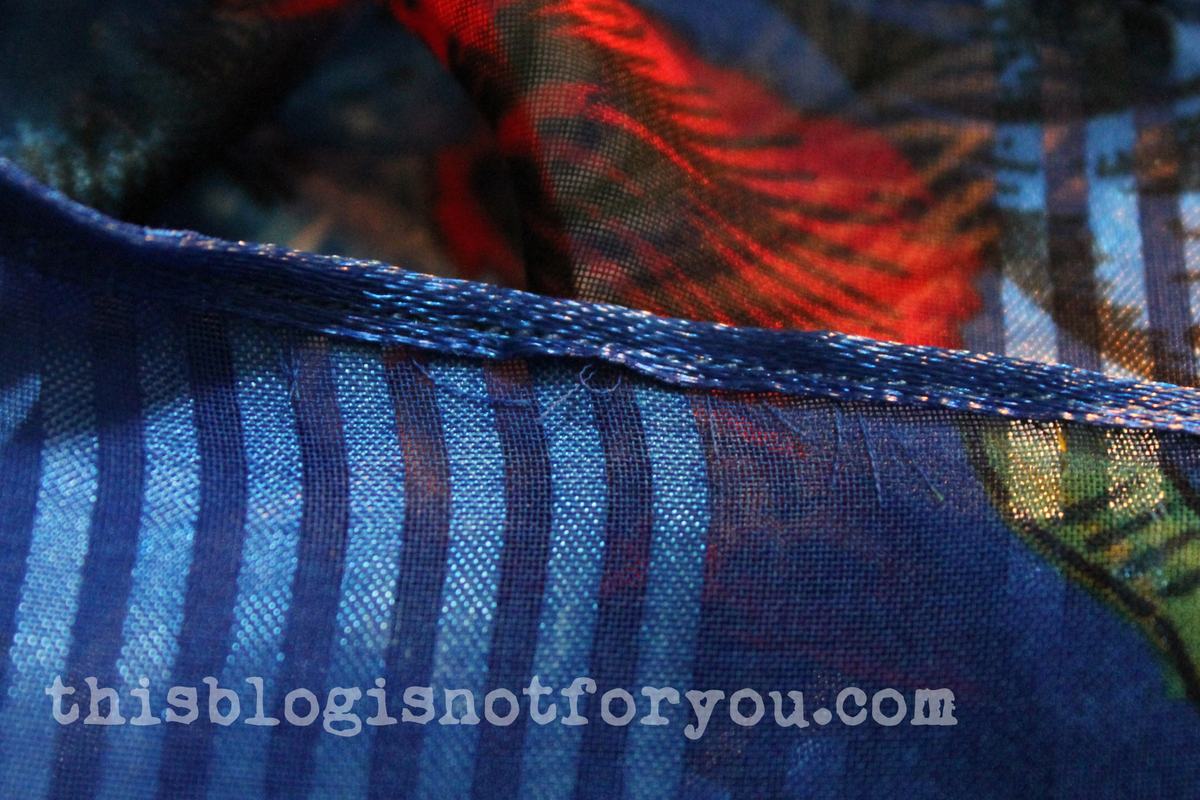
Fold the ribbon over and topstitch it on 2-3mm from the edge.
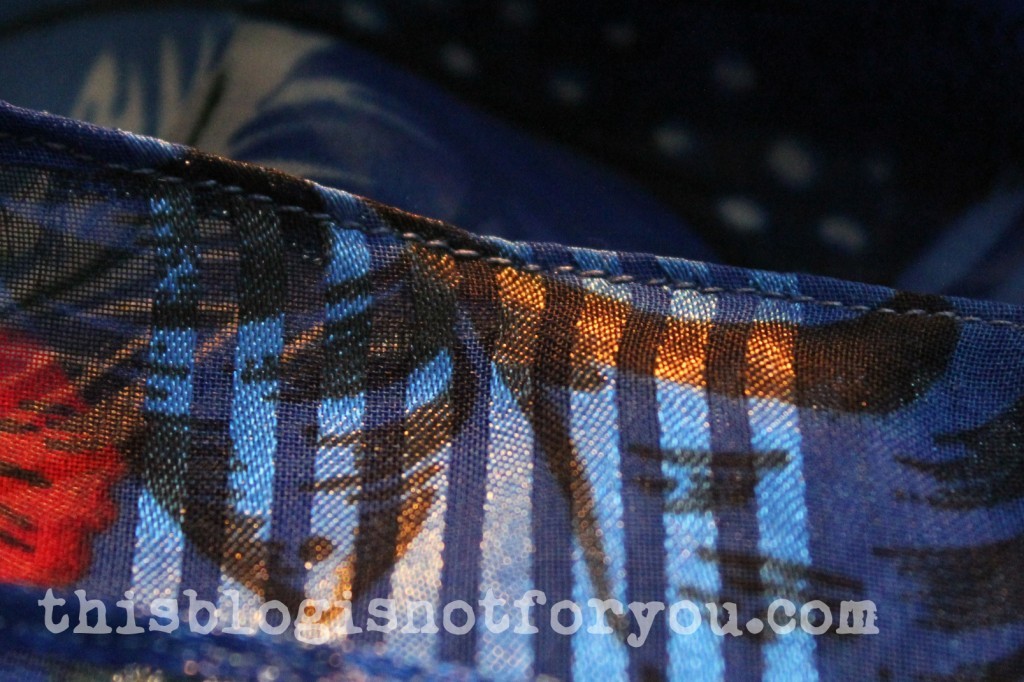
It should look like this on the right side of the fabric. All raw edges perfectly enclosed!
For the side seams, fold the fabric on the center line, left sides together. Sew the back and front together as shown in the pattern. Starting 20cm/8” from the bottom edge and 10-15cm/4-6” from the sides. The stitched line should be approximately 42cm/16” long.
To be on the safe side, you can pin the sides together first before you start sewing and see how it looks on you.
Now you need to add the casing for the drawstring/waistband. I used 2cm wide bias binding. You can also use ribbon or a strip of remnant fabric.
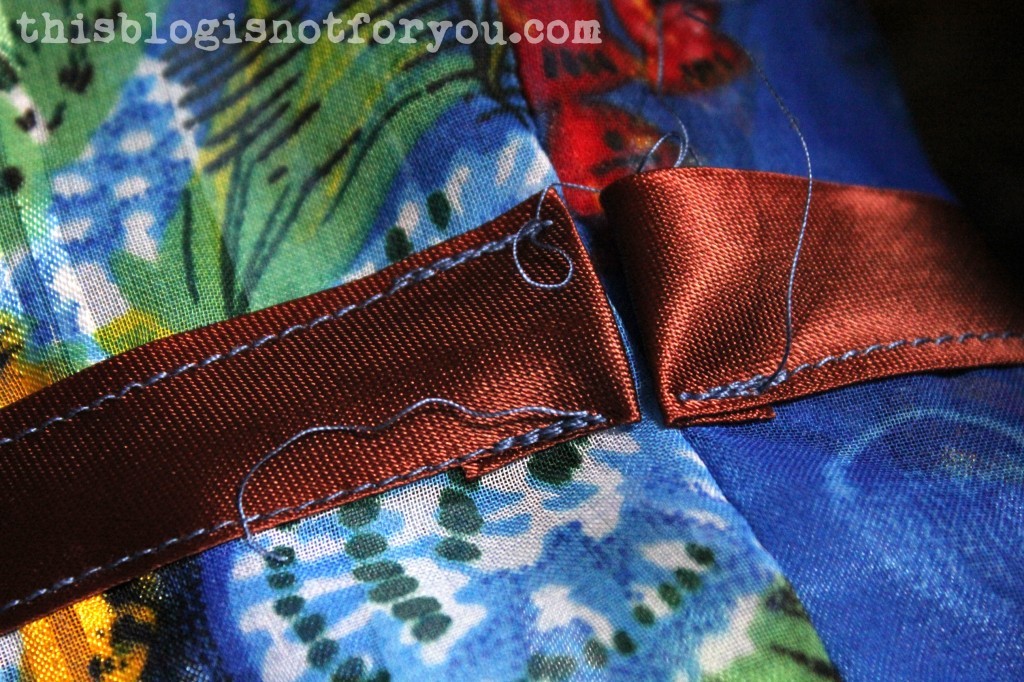
Stitch the casing//ribbon on in the front and back (left side of the fabric!) as shown above leaving the casing open at the side seams to form a tube for the drawstring.
In the front, sew on the casing only on one side as you need to make a little button hole first!
Now that you’ve secured the casing, mark the center of the waistband in the front and make a little buttonhole wide enough for your drawstring. Make sure it doesn’t get larger than the casing/ribbon is wide! I used the buttonhole setting on my sewing machine. You can also sew a buttonhole by hand, but I’m lazy lazy!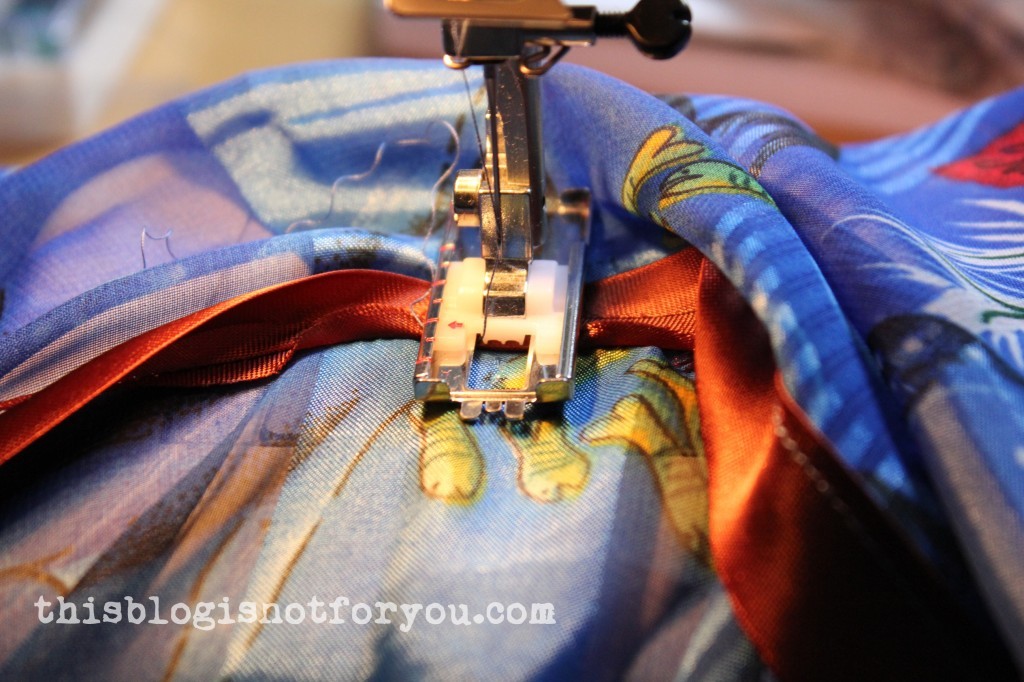
Now stitch on the rest of the front drawstring casing.
To get the drawstring through the narrow tube use a safety pin. (Start on the right side of the fabric)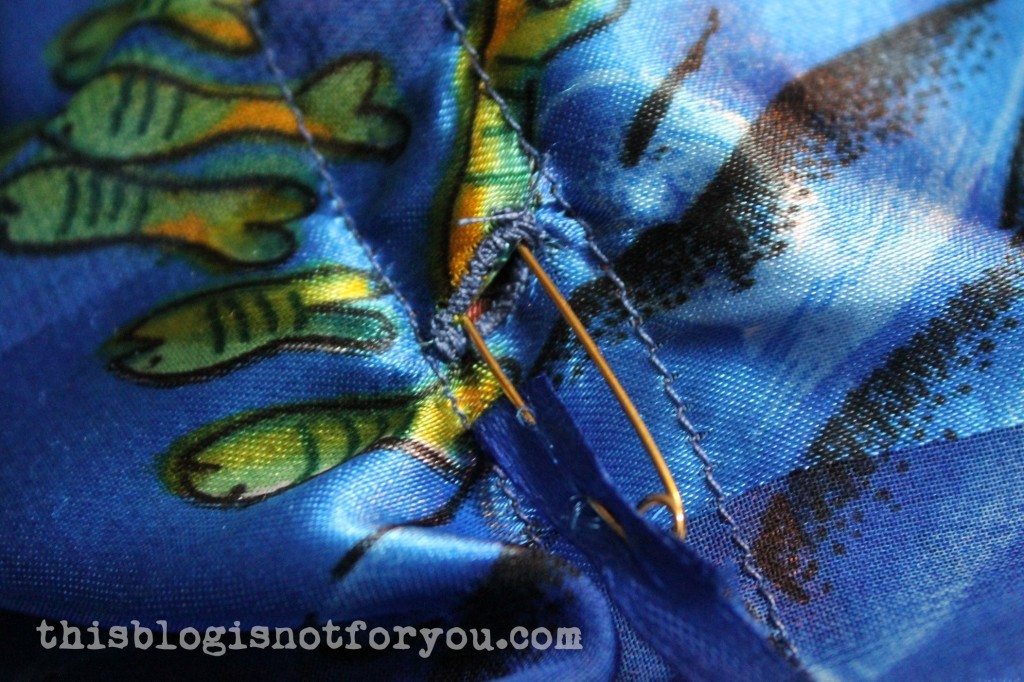
Make a few knots or add some beads to the ends of the drawstring to keep it from slipping back into the casing.
And you’re done!

Now I feel a bit silly wearing blue dolphins here in London city, but I’ll be in Germany over the weekend, so hopefully I can take this dress on a little trip to one of our bathing lakes (and look slightly overdressed. Certainly no dolphins there either haha).
As always, if you have any questions just pop me a comment! I also LOVE seeing and featuring your makes! If you’re making this dress, sent me a picture of it. Contact details on my about page!
Happy Sewing! xxx
facebook/bloglovin/pinterest
Stay in touch!
That’s an amazing tutorial for such a nice beach dress! I wish I could have beach holidays this year, swoon. But I might make this dress at some point so that I can wear it on the weekend when having brunch at home 🙂 Great idea by the way to use a scarf!
Thanks Daniela! No beach holidays for me either, I’m afraid, but I’ll wear it when we go to the lakes back home in good ol’ S-A 😉
This is a great tut! You should go to CraftGossip and submit this post for review under sewing. They would definitely publish it!
Wow! this is a fabulous dress and a great tuorial! Thanks so much for sharing!
Have a nice week!
Hugs from Portugal,
Ana Love Craft
http://www.lovecraft2012.blogspot.com
Haha, dolphins at the Bergwitzsee… It’s gonna be legen.. wait for it…
😛
That looks chic! More than a beach dress, I say 🙂
Thank you for this tutorial! I actually have 2 pieces of fabric I was planning to use to do a “kaftan” or beach cover-up. Now I have no excuses to get busy on it- looks simple and easy to do and I love the way it looks. Pretty!