There’s a tree branch in our living room. Let’s hang it on the wall.

tree branch wall decor by thisblogisnotforyou.comThere’s a tree branch hanging on our wall. At first I was afraid this thing could attack me by falling down, but I didn’t (so far) and I love it. Here’s a selfie of our shabby couch with our new (not so new anymore) roommate.tree branch wall decor by thisblogisnotforyou.comI found this nice little guy when I went running after a day of stormy weather. Out of pity I picked it up and carried it home. I thought Londoners would be used to so much weird stuff that they’d ignore this, but they stared anyway.  (The branch is about 1.5m long, our couch is just so big, that it makes it look tinier than it is)
tree branch wall decor by thisblogisnotforyou.com
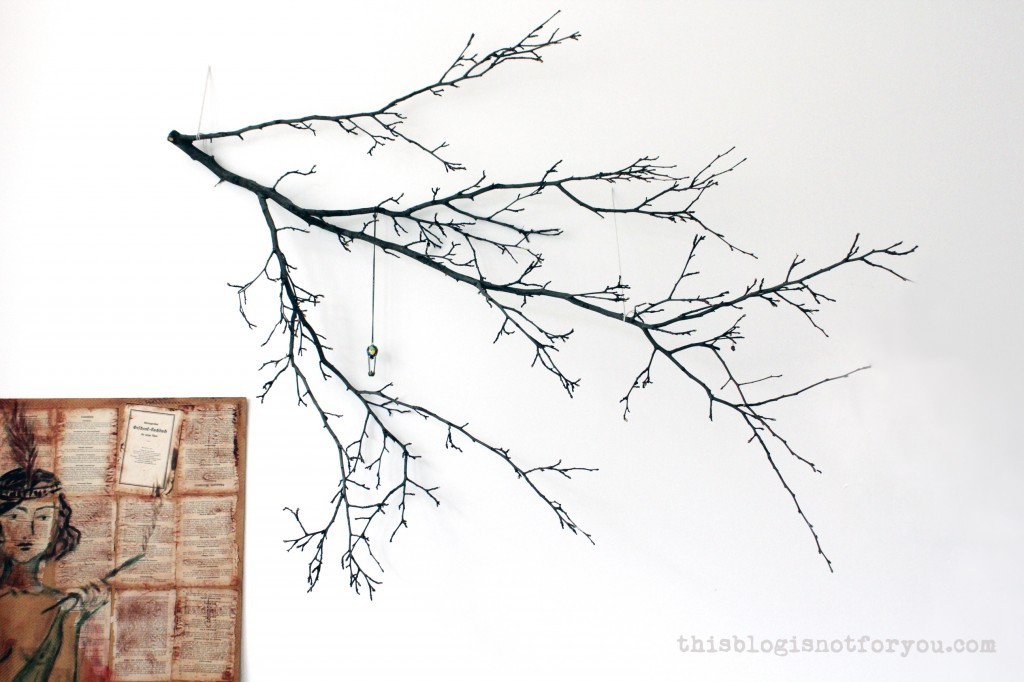
Mr Thisblogisnotforyou was a bit surprised but was willing to help me find a place for it. We hung it on the wall with two small nails and a few bits of string. tree branch wall decor by thisblogisnotforyou.com
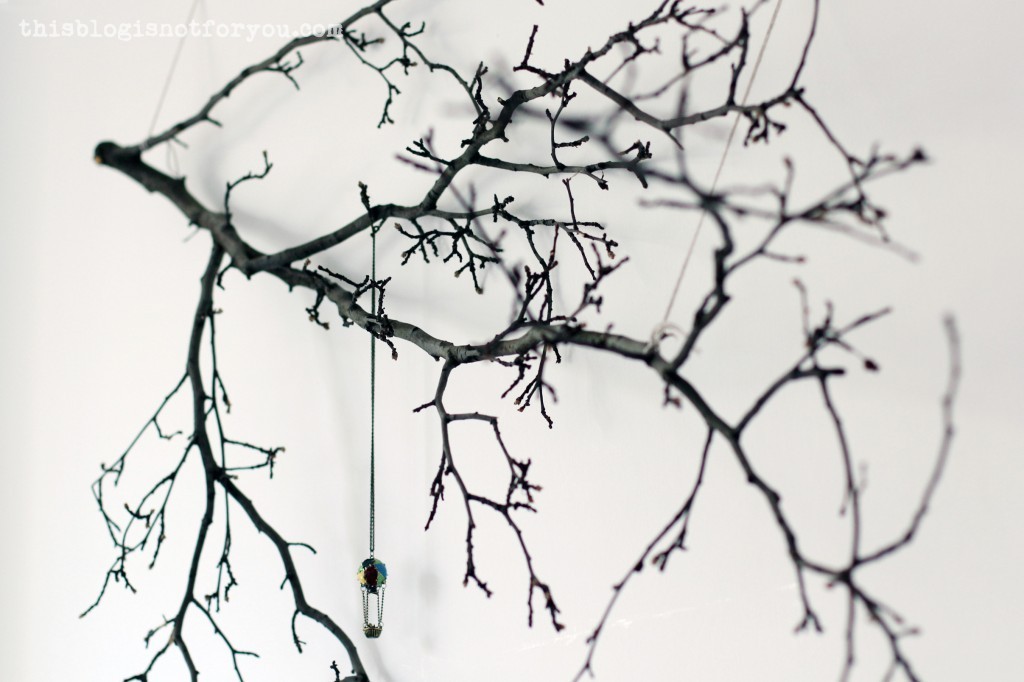
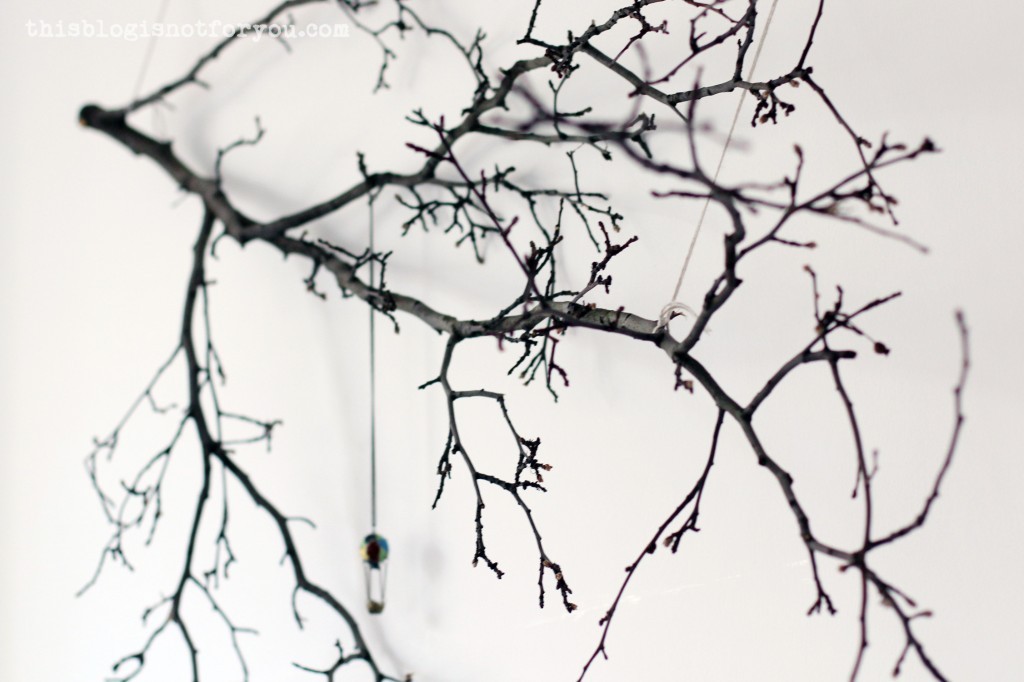
I was planning on decorating it with white mini origami cranes and just hung this necklace there for the time being. But we liked this so much, we kept it like that. tree branch wall decor by thisblogisnotforyou.com
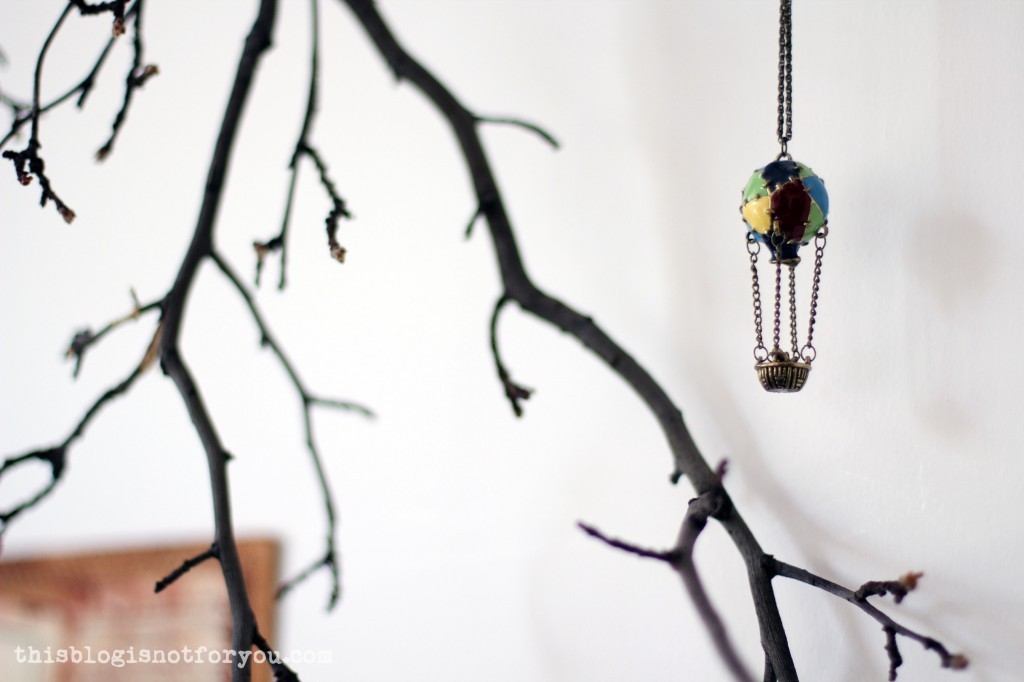
It has a great effect and it’s such an easy and really simple DIY decor project. I love tree branches because I love wood. That’s probably why I chose to live in a place with this:
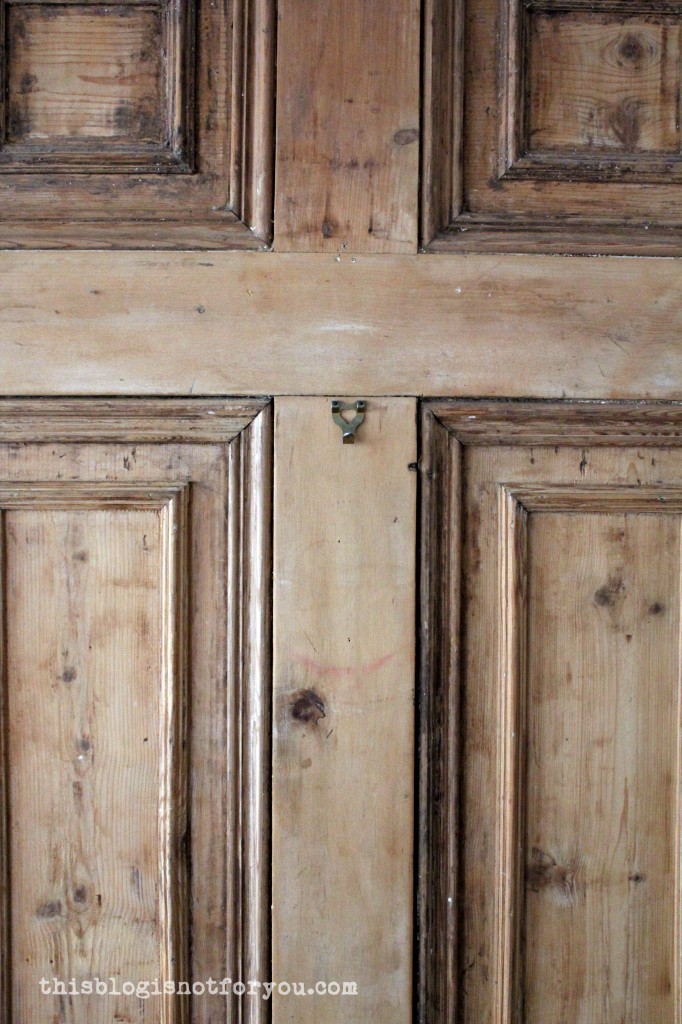
tree branch wall decor by thisblogisnotforyou.comAnd…this:tree branch wall decor by thisblogisnotforyou.comThis hole in the floor has eaten so many pins that I stopped counting. And a battery. But it hasn’t stolen any of my chocolates yet, so I can live with it.tree branch wall decor by thisblogisnotforyou.com

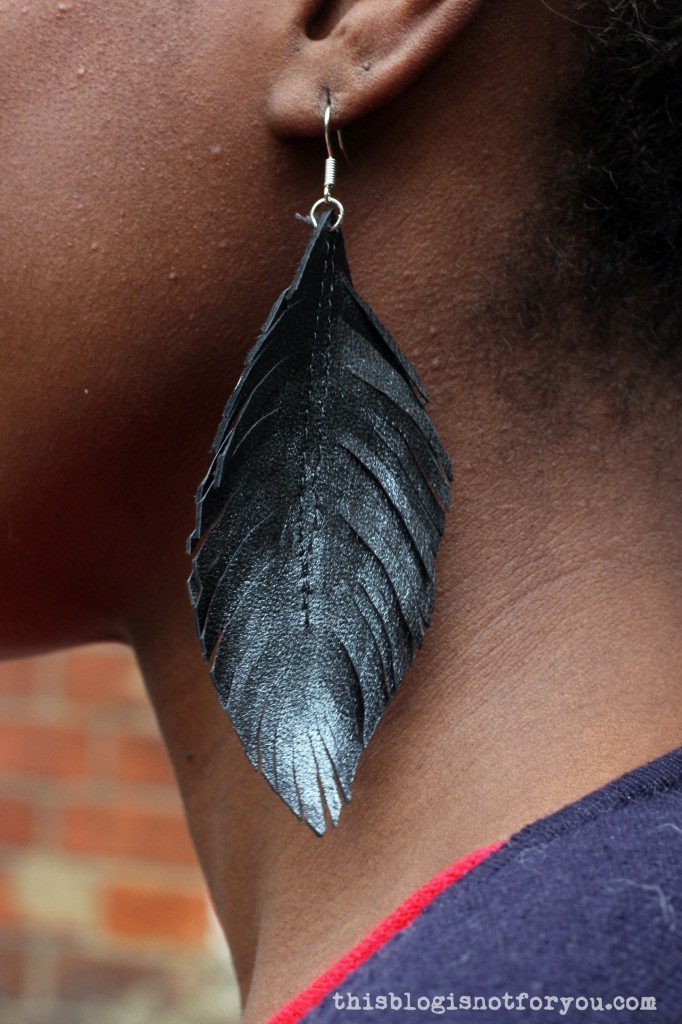
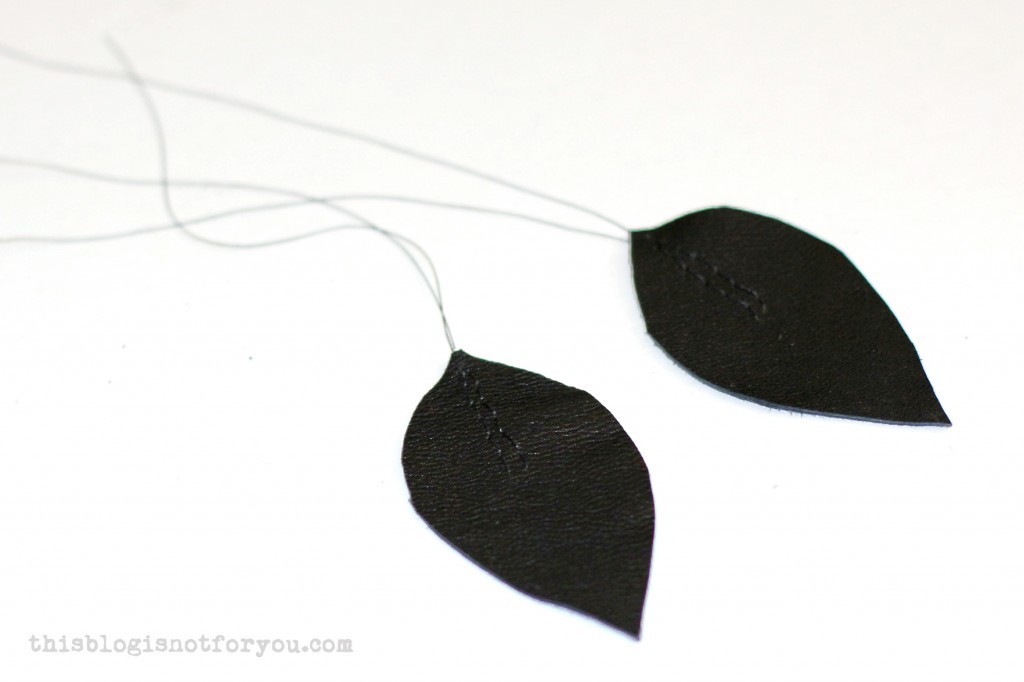
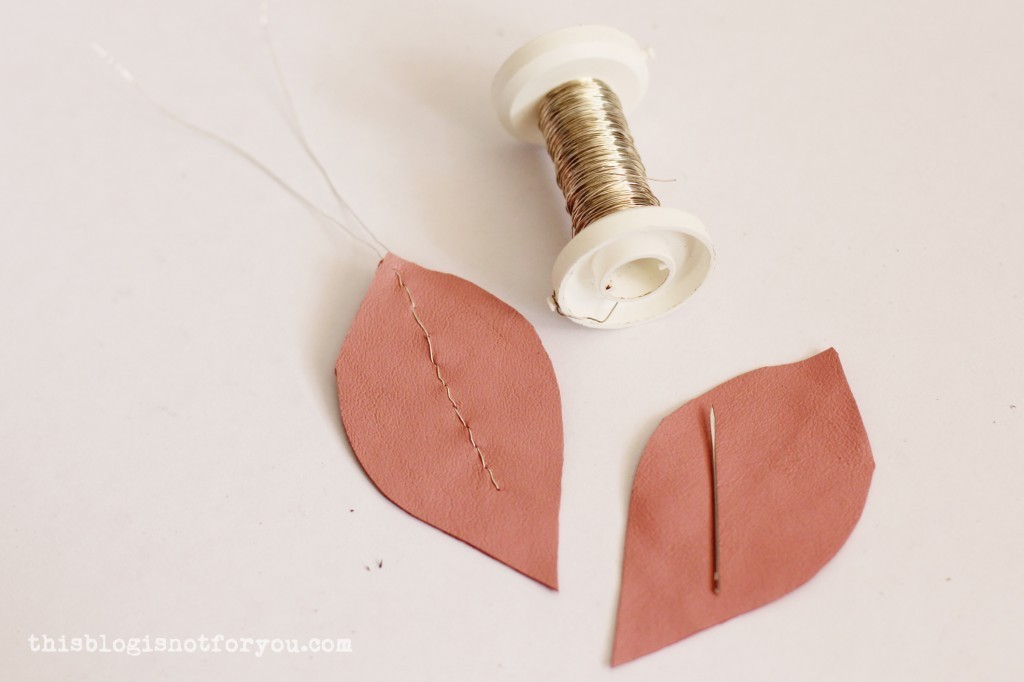
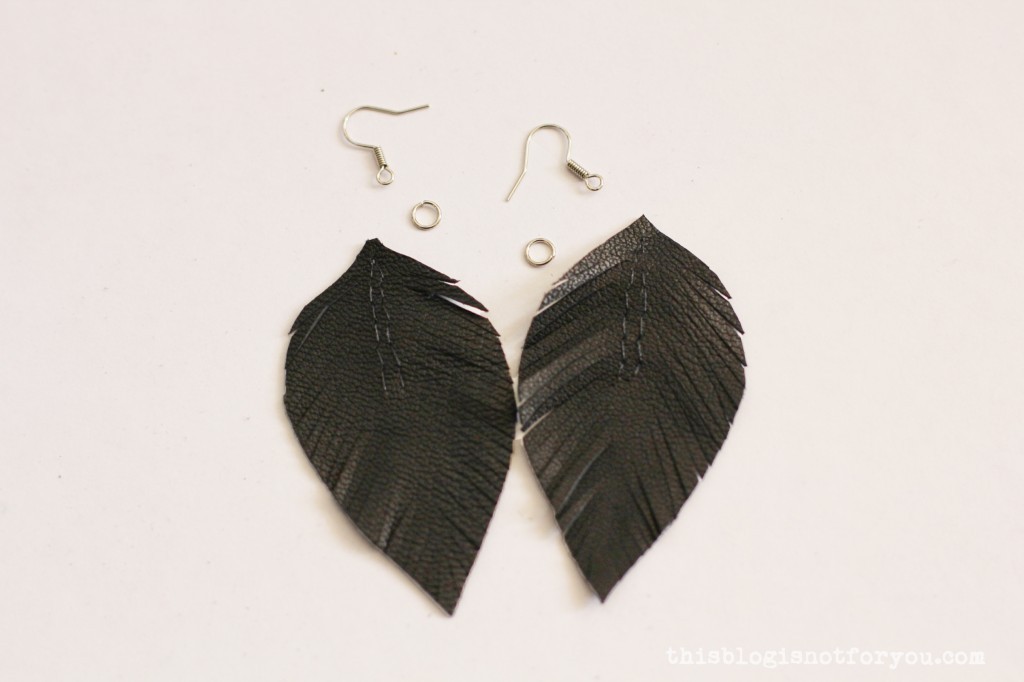
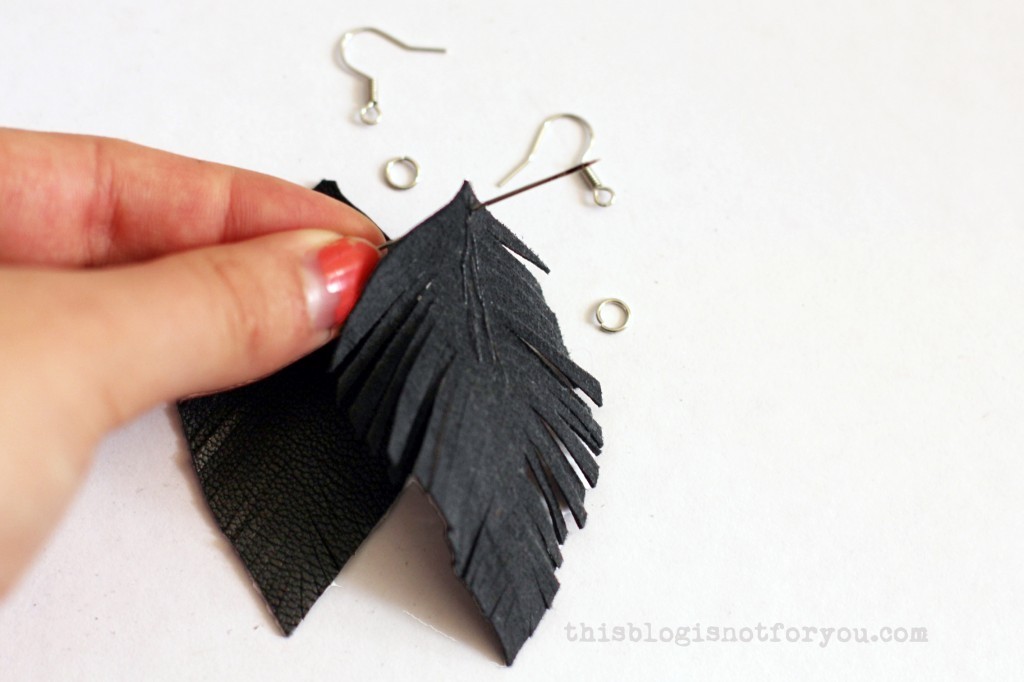
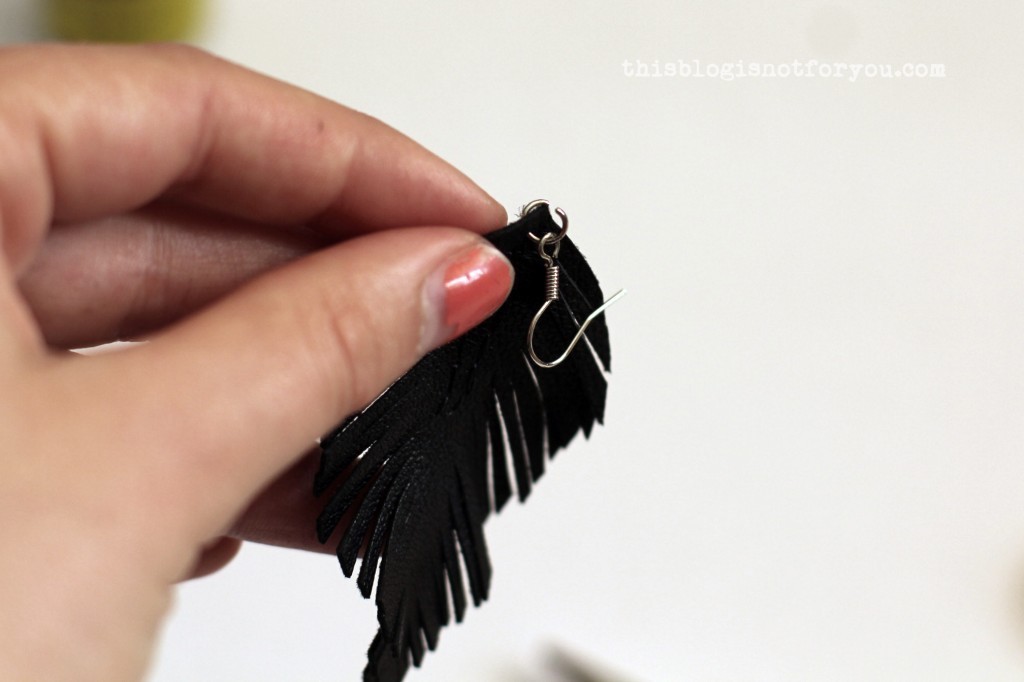
Hope you all had a great weekend and lovely mother’s day. I sent my mum a pair of leather feather earrings and she loved it. She even sent me a pic with both her and my sis wearing the earrings on the same day. Aww! 🙂

There will be more sewing-related posts later this week (including the start of the cape sewalong!), but the weather has been so horrible that I couldn’t take any pictures for the blog.

Anyone attending the London Blogger Meet Up on Saturday? I’ll be there!

Over and out. ♥

Inspiration Wall DIY by thisblogisnotforyou.com
other wall decor projects by me

Happy sewing!

facebook/bloglovin/pinterest
Stay in touch!

DIY Leather Feather Earrings

DIY leather feather earrings by thisblogisnotforyou.com

Hellooo everyone! After some server errors (sorry about that!), I’m back. Upgrading plug-ins can be annoying if they decide to break your website!

Hope you had a great week so far! London couldn’t decide between pouring rain and bright sunlight, so luckily my conscience didn’t make me feel guilty about playing stay-at-home in order to prepare this tutorial and update my FAQ page.

A little while back I recycled two leather coats into a bag for my little sister. From this project I had tons of leather scraps left and made a pair of black and silver feather earrings. I gave them to my sister (who loved them) after which my mum also wanted her own pair.

I made three more pairs and will share a little tutorial for making these DIY cuties. Mother’s Day is this weekend and these adorable earrings make a lovely last-minute handmade gift! DIY leather feather earrings by thisblogisnotforyou.comDIY leather feather earrings by thisblogisnotforyou.com

DIY leather feather earrings by thisblogisnotforyou.com

These are the earrings I made for my sister, here modelled by a friend of mine:
DIY leather feather earrings by thisblogisnotforyou.com

Ok, let’s get cracking! Here’s how to make your own pair of DIY leather feather earrings:

DIY leather feather earrings by thisblogisnotforyou.com

OPTIONAL: Silver jewelry wire, tape, tailor’s chalk.

DIY leather feather earrings by thisblogisnotforyou.com

1. Cut out two symmetrical feather shaped pieces from the leather scraps. You can mark the shapes with chalk on the left side of the leather if you you’re not sure about freehand-cutting.

DIY leather feather earrings by thisblogisnotforyou.com

2. Stitch down the middle of your leather pieces (about 2/3 down), either with machine or by hand. This will stabilise the shape of the feather and look like the shaft. Alternatively, you can use jewelry wire instead of thread:DIY leather feather earrings by thisblogisnotforyou.comDIY leather feather earrings by thisblogisnotforyou.com

Puncture the leather with a needle, making it easier to thread the wire through it.
DIY leather feather earrings by thisblogisnotforyou.com
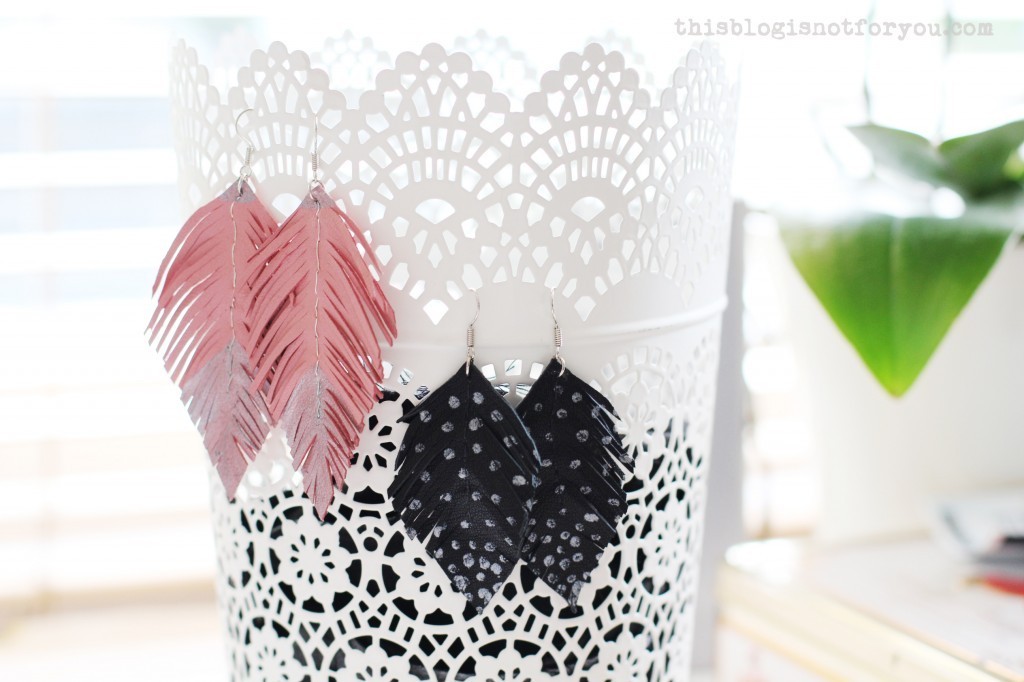
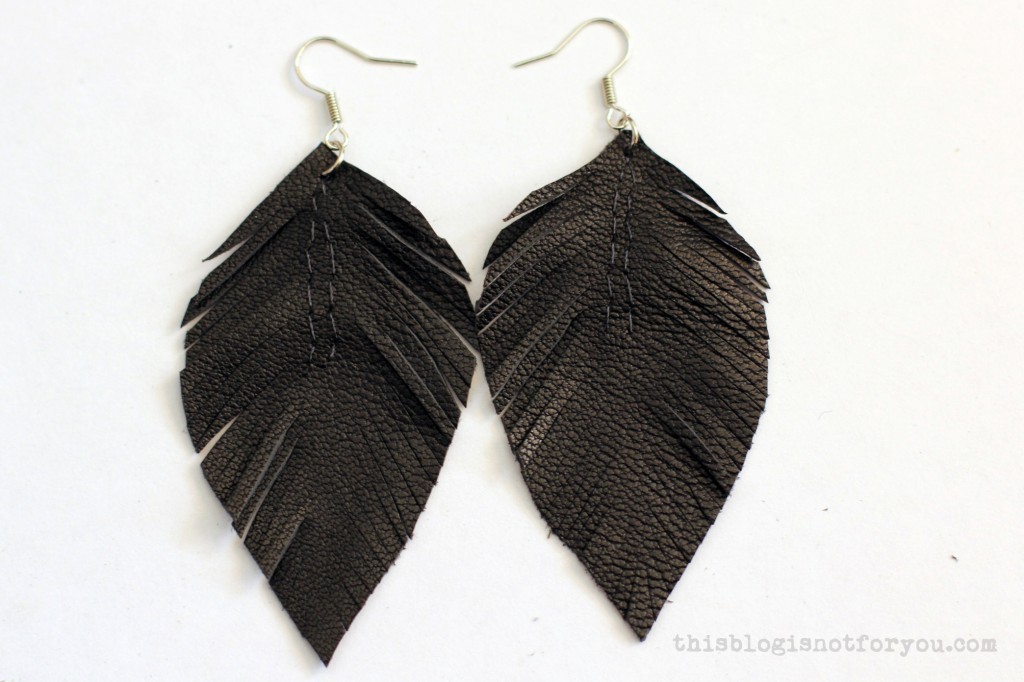
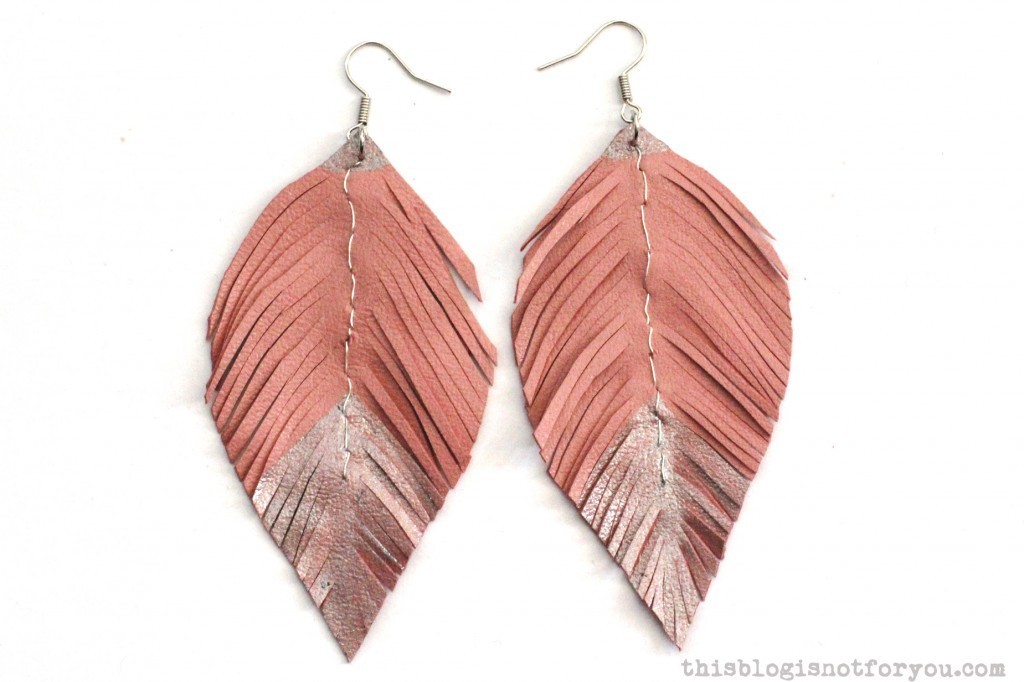
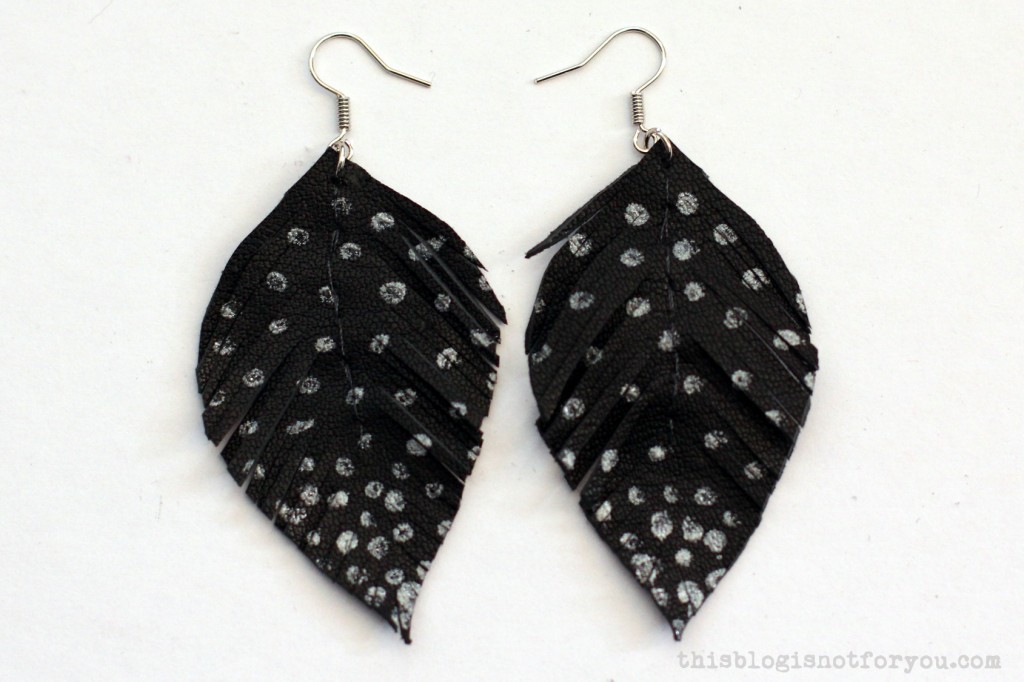
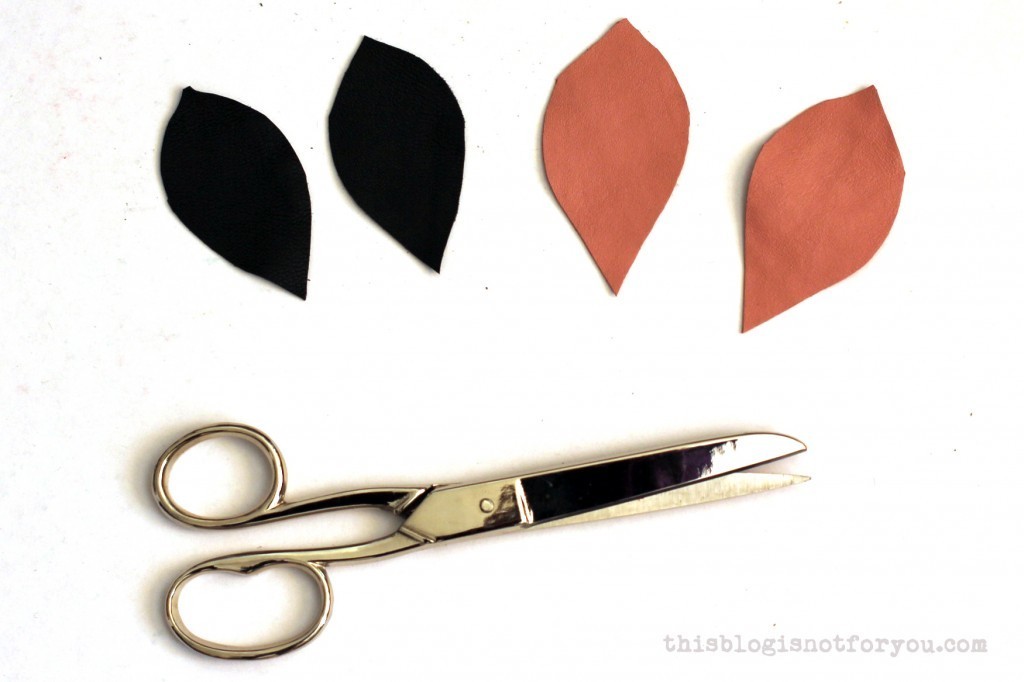
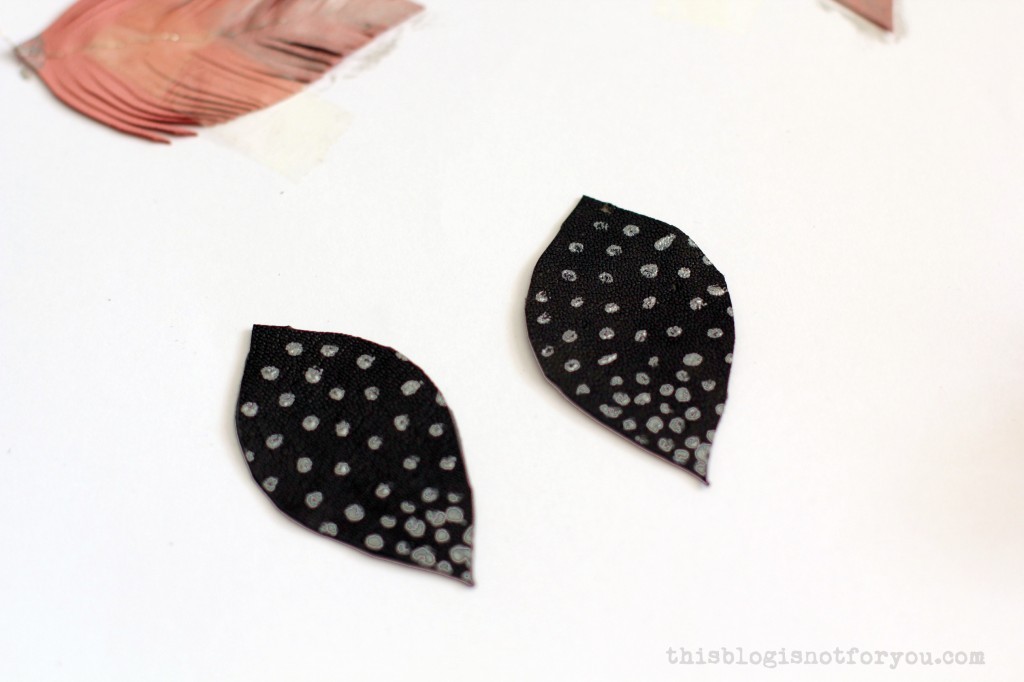
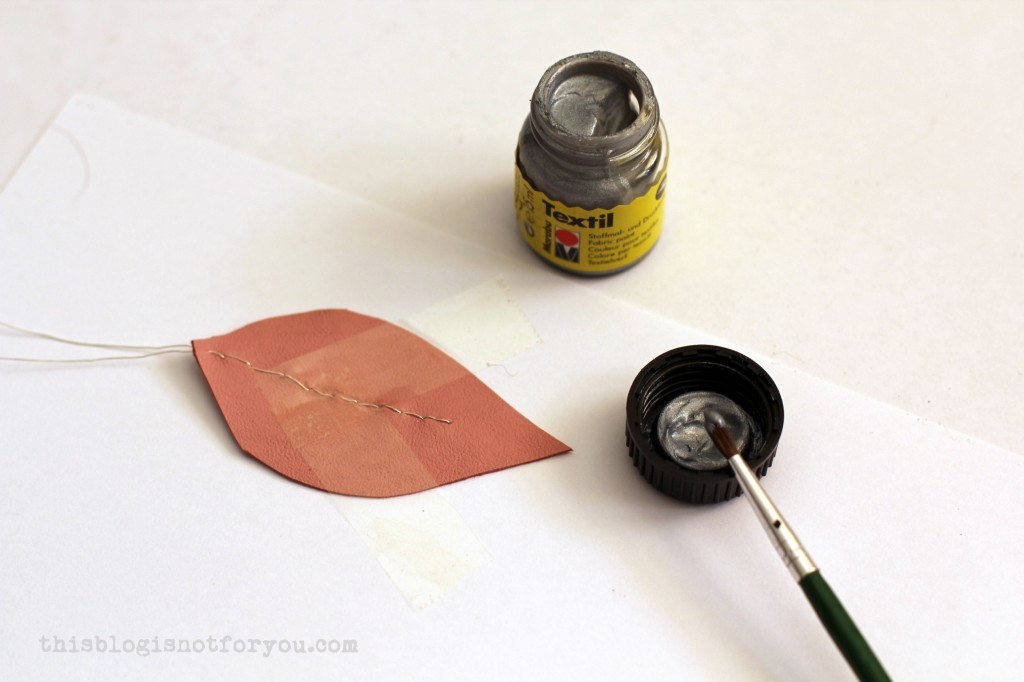
3.  Now it’s time to apply any textil paint. To create chevrons or other shapes with clear lines, you can mask the leather with tape. Wait until the paint is completely dry before you remove the paint.
DIY leather feather earrings by thisblogisnotforyou.com

4. Cut into the leather diagonally. Be careful not to cut into the thread/wire.DIY leather feather earrings by thisblogisnotforyou.comDIY leather feather earrings by thisblogisnotforyou.com

This pair I decoreated with dots to look like guinea fowl feathers.
DIY leather feather earrings by thisblogisnotforyou.com

5. In the next and last step you will apply the jump rings and earrings hooks. Having pliers helps, but if you’re very careful, scissors will do the job, too.DIY leather feather earrings by thisblogisnotforyou.com

Use a larger needle to punch a little hole into the top of your earring. Bend the jump ring up and push it through. This is a bit fiddly. Holding the ring with a pair of pliers helps!DIY leather feather earrings by thisblogisnotforyou.com

Slide on the earring hook and use your pliers or scissors to squeeze the ends of the jump ring together again.DIY leather feather earrings by thisblogisnotforyou.com

Make sure you mirror the earring hooks. Using this technique, the earrings will hang sideways (see picture above). If you don’t like that, you can either use two jump rings or omit them altogether.

Well, and that’s it!

It’s a really fun and quick project which also makes a great handmade gift!

DIY leather feather earrings by thisblogisnotforyou.com

Have fun making your own feather earrings! xx


Happy weekend!

facebook/bloglovin/pinterest
Stay in touch!

Hollywood-Sewalong: The Notebook – Part 3

The Notebook Playsuit by thisblogisnotforyou.com
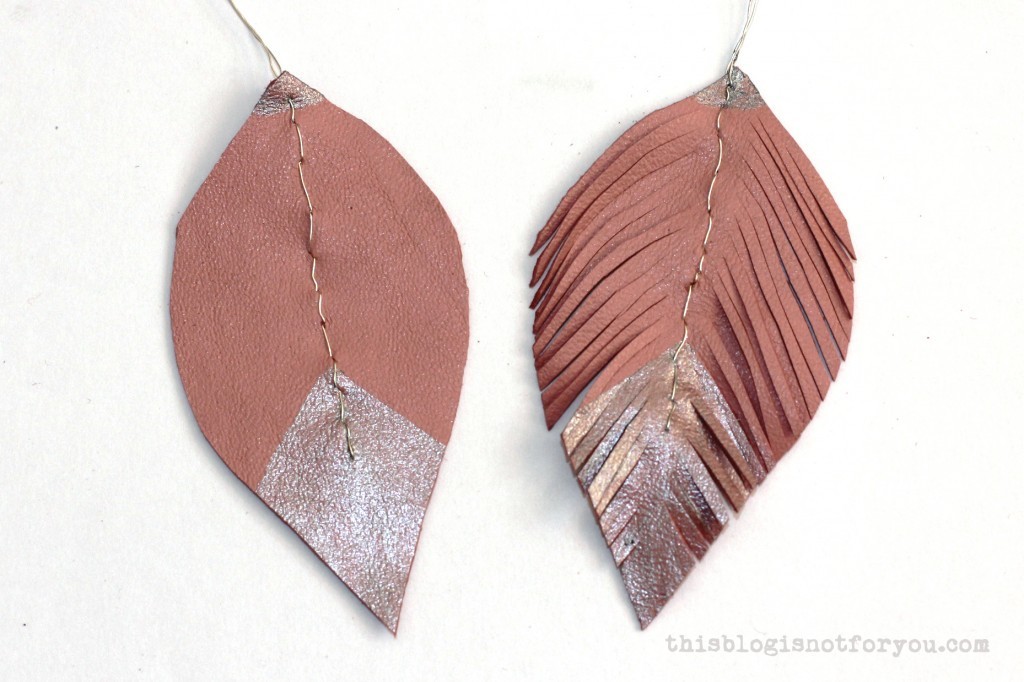
Hurray! It’s time to reveal our final garment for the “The Notebook”-themed Hollywood-Sewalong!

Hollywood Sewalong: The Notebook by thisblogisnotforyou.com

Make sure to check out the other girls’ posts, too:

Courtney from Makesphere

Amy from Sews N Bows

Hannah from Made with Hugs and Kisses

Freya from The Dressmaking Diaries

Nina from Inchworming

Jennie from Jagged Rose

If you joined the sewalong, leave me a link to your post in the comments, so I can add you to the list!

First of all, let me throw a bunch of pictures at you! Here we go:

The Notebook Playsuit by thisblogisnotforyou.comThe Notebook Playsuit by thisblogisnotforyou.comThe Notebook Playsuit by thisblogisnotforyou.com

Just a quick recap (you can read the full blog post on my inspiration here): My garment was inspired by Allie’s cute red playsuit (which she only wears in a very short scene in the movie).Hollywood Sewalong: The Notebook by thisblogisnotforyou.com

I kept a similar neckline, just without the lapel. The shape of the white front panels inspired my topstitching in the front (which also has the function of holding the facing in place):

The Notebook Playsuit by thisblogisnotforyou.comThe Notebook Playsuit by thisblogisnotforyou.com

I also loved the blue button-front dress and it definitely inspired the fabric-covered buttons and the matching narrow belt I made using the same fabric.
Hollywood Sewalong: The Notebook by thisblogisnotforyou.comHollywood Sewalong: The Notebook by thisblogisnotforyou.com
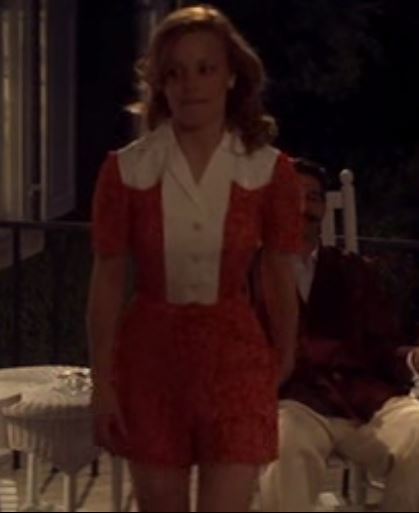
I drafted the pattern for this playsuit myself. I based the bodice on a shirt dress and changed the skirt part to shorts. After trying on my first muslin, I had to add some extra length in the waist (I wasn’t able to sit down before, haha!). This was really the only chang I had to make to my pattern. The second muslin magically fitted perfectly and I could start cutting into my fabric.

Remember the striped lightweight cotton fabric I wanted to use for this project? Headache!

Hollywood Sewalong: The Notebook by thisblogisnotforyou.comCutting out the pattern pieces was just so unbearable that I thought I had to scrap the whole thing and start all over again. Well, that was a week ago and I was in no mood of going fabric shopping.

I then had the glorious idea of using the left side of the fabric. After Mr Thisblogisnotforyou gave me his thumbs up, I was crazy happy about the idea and started sewing full of motivation again. Best idea ever! So, what you see here, is actually the left side of the stripey headache-y fabric!The Notebook Playsuit by thisblogisnotforyou.com

I thrifted this cute Laura Ashley cardigan a month ago. When I saw it in the store I thought it was just perfect for this 1940’s themed project! The Notebook Playsuit by thisblogisnotforyou.comThe Notebook Playsuit by thisblogisnotforyou.com

When I presented the finished playsuit to Mr Thisblogisnotforyou (making a little happy dance), he remarked that I looked like a retro girl from a harbour town. (I still don’t know what to think of this!)

Although looking very retro is perfect for this challenge, I was afraid that I might not wear this make “in public”. I then combined the playsuit with my favourite belt, which makes it look a bit more modern (ever so slightly). It will also look great with a pair of oversized shades and a messy bun!The Notebook Playsuit by thisblogisnotforyou.comThe Notebook Playsuit by thisblogisnotforyou.com


Happy Sewing!

facebook/bloglovin/pinterest
Stay in touch!

May the force!

It’s Star Wars day! Yay! (It’s not the reason why I’m writing this post, though)

There are a few annoucements I wanted to make which I’m super excited about!

First of all, if today is the 4th May, tomorrow will be the 5th! Which means tomorrow is the big reveal of our Hollywood-Sewalong makes which were inspired my the movie “The Notebook”. I’m very excited to share my final garment, which I even was able to finish wayyyy before the deadline (two days ago!). That definitely is a first.

Hollywood Sewalong: The Notebook by thisblogisnotforyou.com
I’m also very excited to see the other girls’ makes! They shared their fantastic inspirations a month ago. Did anyone of you join in? Don’t forget to share your make tomorrow!

Second annoucement: The Sew-Along for the Fairy Tale Cape variations will be starting very soon! I will be sharing detailed step-by-step instructions for

  • adding buttonholes
  • adding armslits
  • putting in a full lining
  • drafting and adding a Peter Pan collar instead of the hood.

So go and get your copy of the pattern and some lovely fabric! For a summer cape I’d recommend a lightweight linen (plus a lightweight cotton lining) or jersey fabric.

Button

Last but not least: Thisblogisnotforyou is now officially a business (a super duper small one)! Although this practically won’t change anything, it’s a big step for me. It allows me to share more sewing patterns in the future! There are loads of patterns already planned in my head and I hope that I will be able to publish the next one this summer. So keep your eyes peeled for more! xx


Happy sewing!

facebook/bloglovin/pinterest
Stay in touch!

Refashion it! The Porcelain Dress

‘But I don’t want to go among mad people,’
‘Oh, you can’t help that, we’re all mad here. I’m mad. You’re mad.’

The Porcelain Dress by thisblogisnotforyou.com
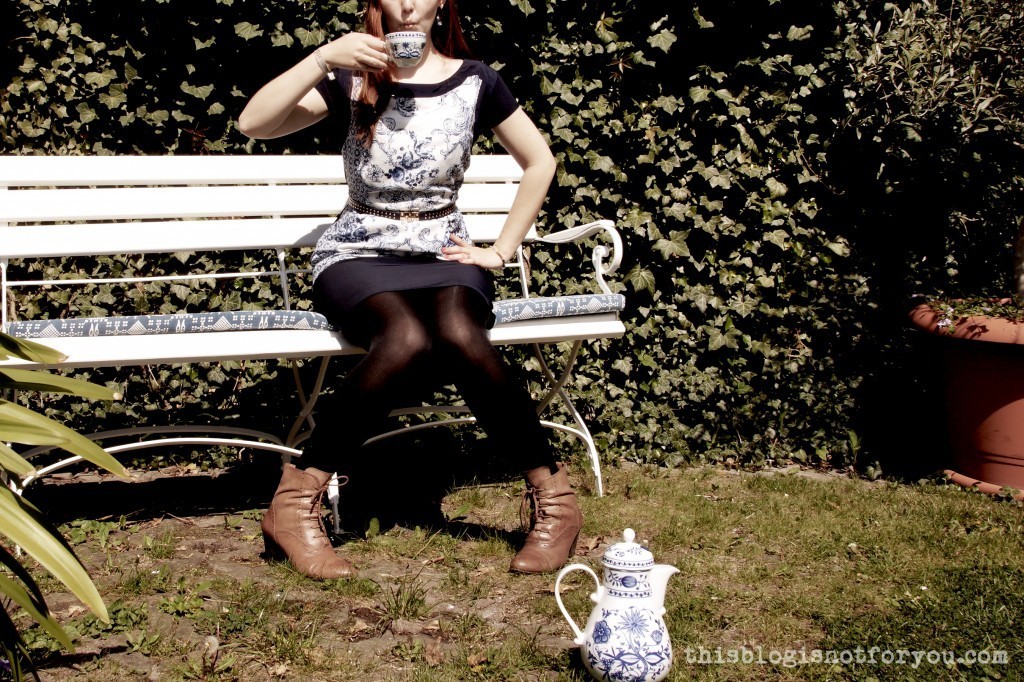
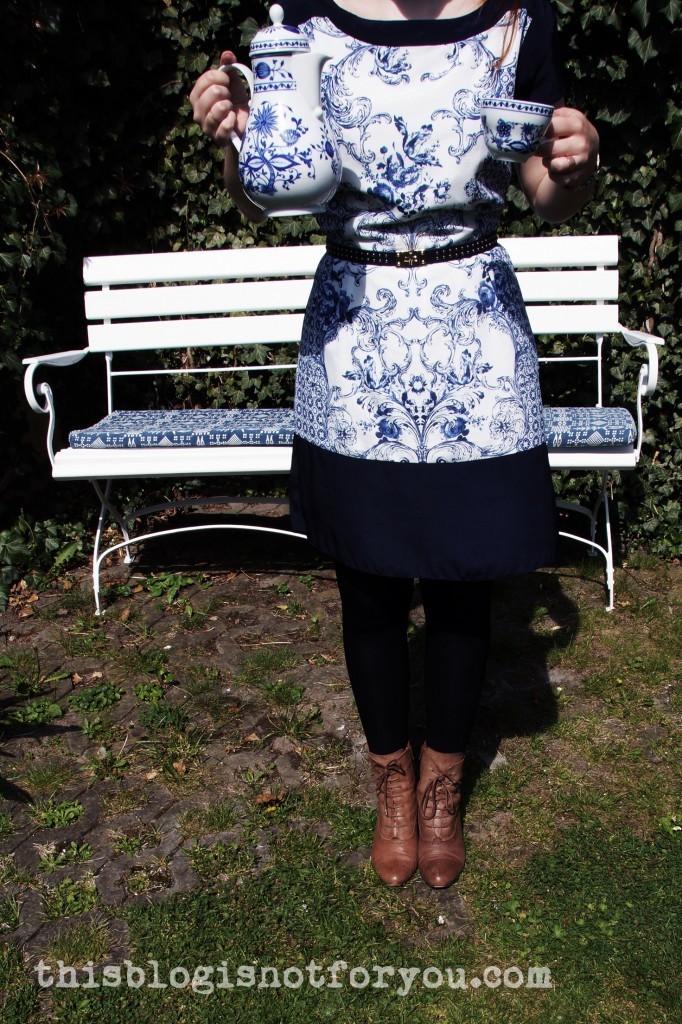
I’m all ready for the tea party, just couldn’t find the rabbit-hole yet. In the meantime I had many cups of pretend-tea while my sister was snapping pictures of me and my newly refashioned porcelain dress.The Porcelain Dress by thisblogisnotforyou.comThe Porcelain Dress by thisblogisnotforyou.com

I refashioned this dress the night before I flew back home over the Easter holidays so I had something to wear for our big Easter sunday family brunch (because there was nothing in my closet. Seriously.)

The Porcelain Dress by thisblogisnotforyou.comThe Porcelain Dress by thisblogisnotforyou.com

Here’s a before pic of the dress. I bought it at TRAID, my favourite charity thrift store, for just a few pounds.

The Porcelain Dress by thisblogisnotforyou.com
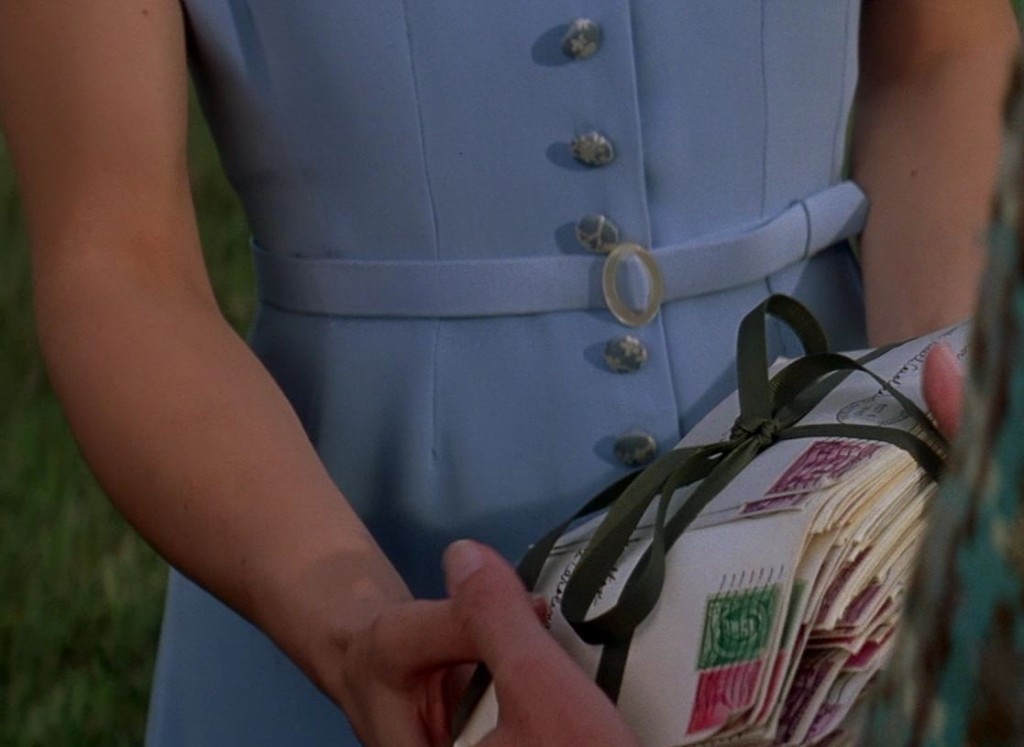
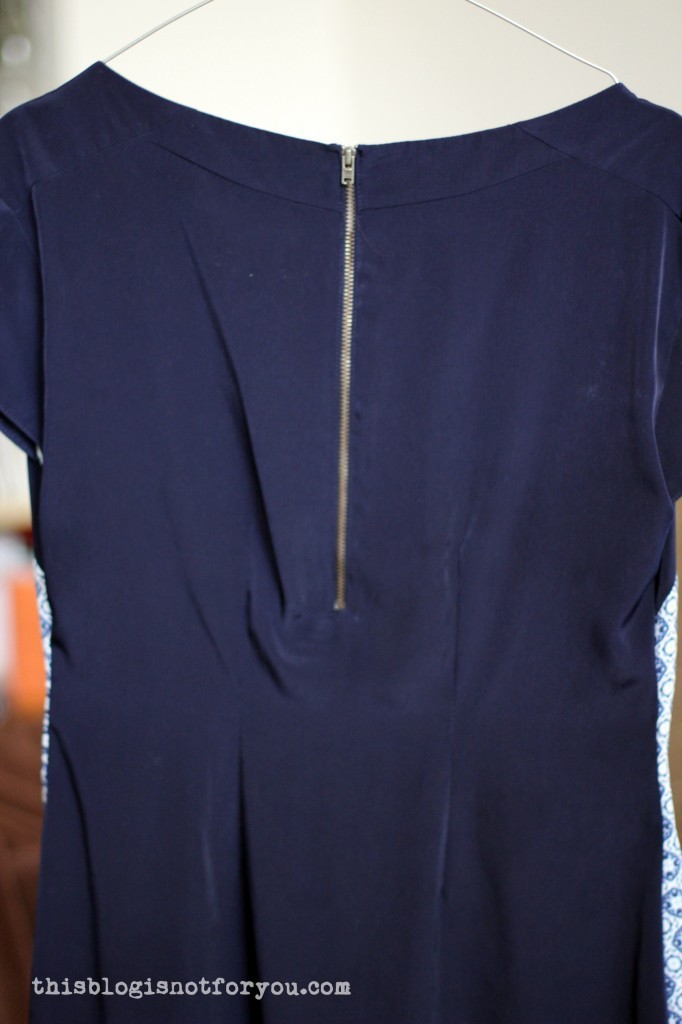
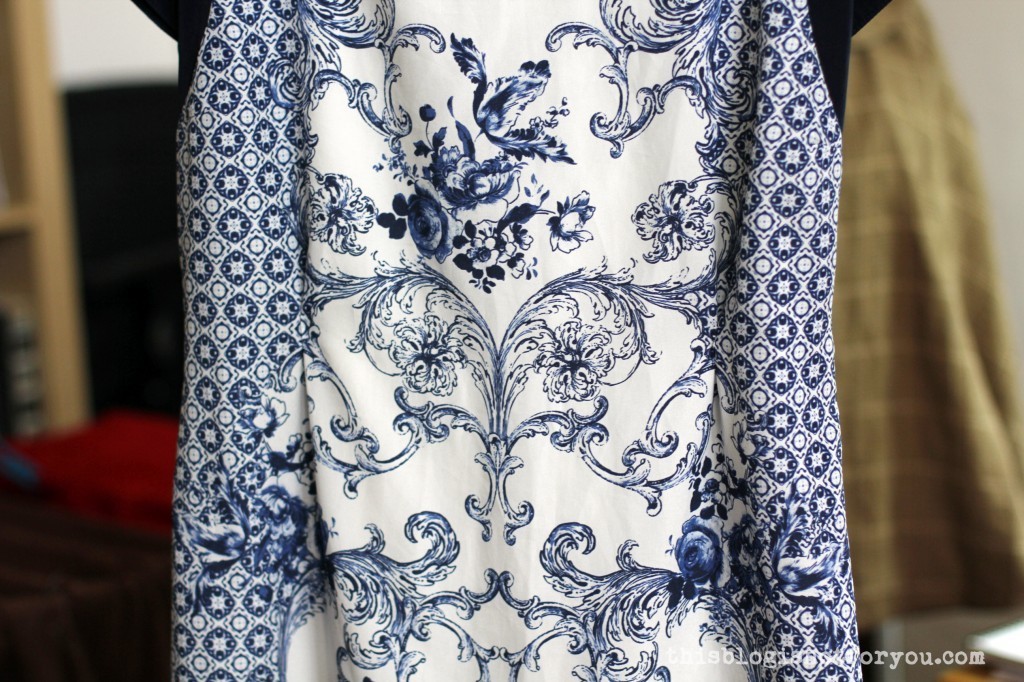
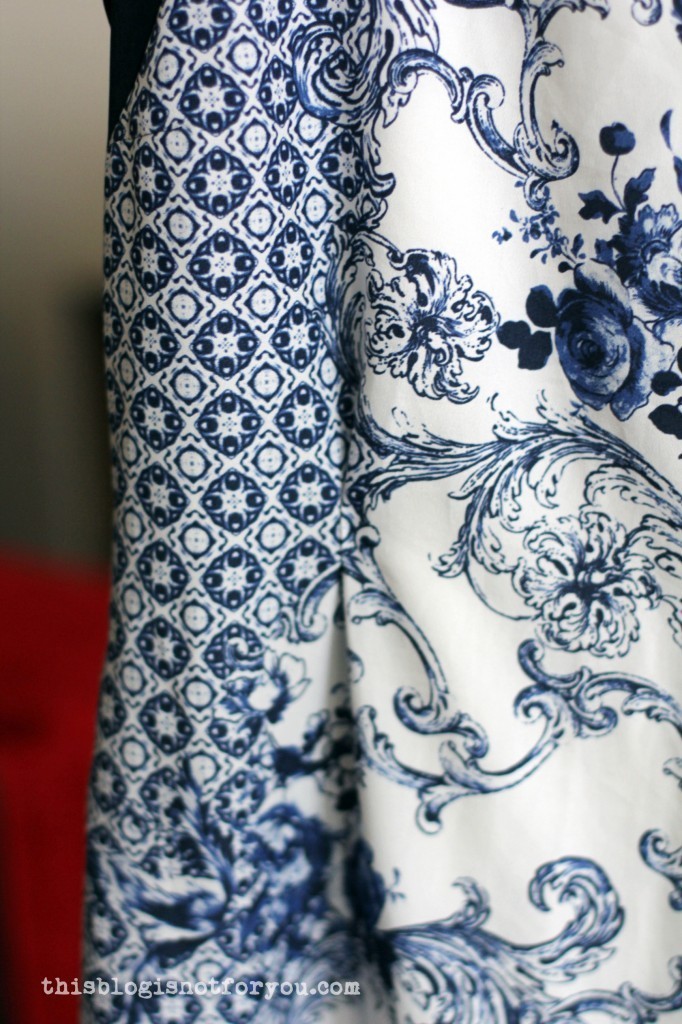
It was a size 20 Dorothy Perkins dress I absolutely fell in love with because of the fabric. Although it’s polyester is has a very soft and silky feel to it and the print is just fabulous. I don’t know if you guys know onion pattern porcelain, this is basically what I grew up with.

source: www.private-prague-guide.com

It’s the sort of china my grandparents had (and still use) and if I remember correctly my parents also have similar china at home. I just love the pattern and this fabric reminded me so much of it (and happy lunches at my grandparent’s place).

The Porcelain Dress by thisblogisnotforyou.com
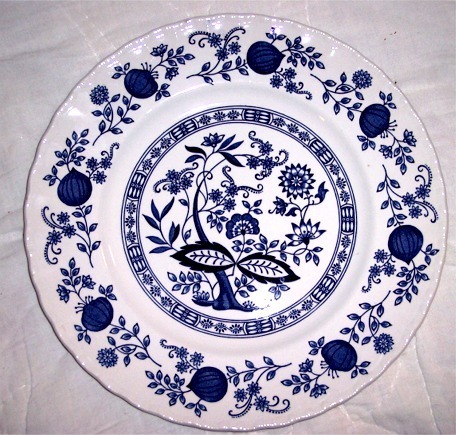
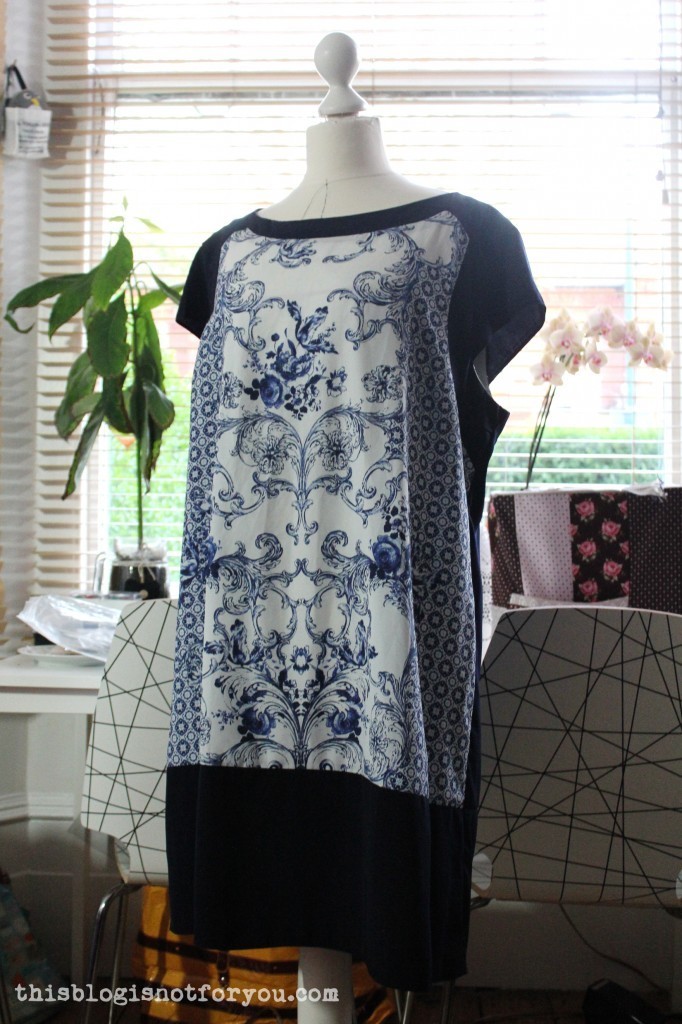
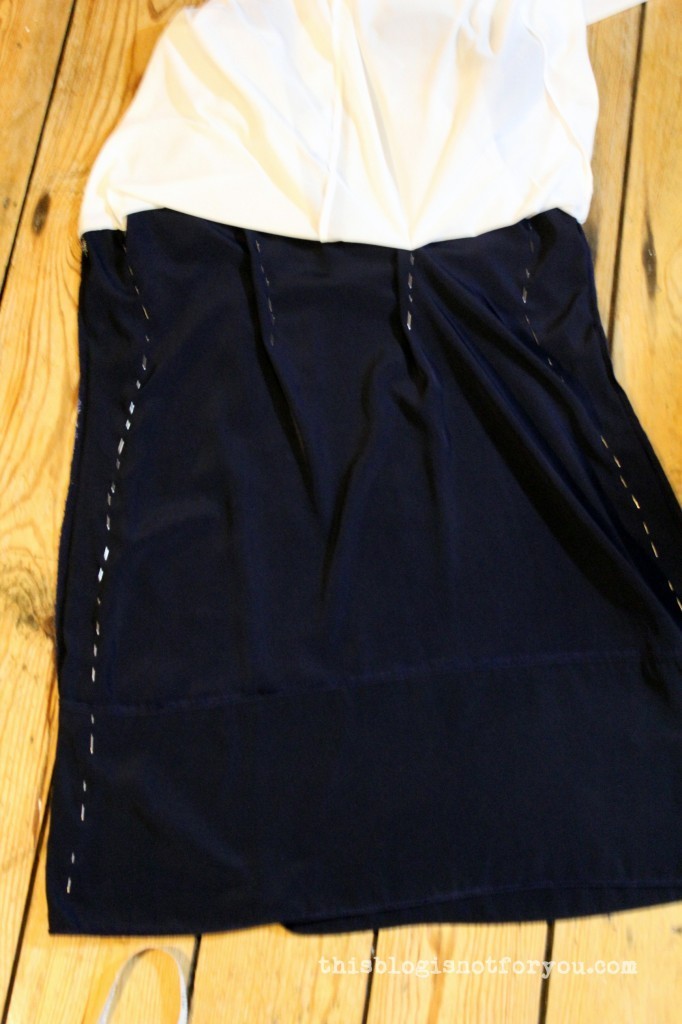
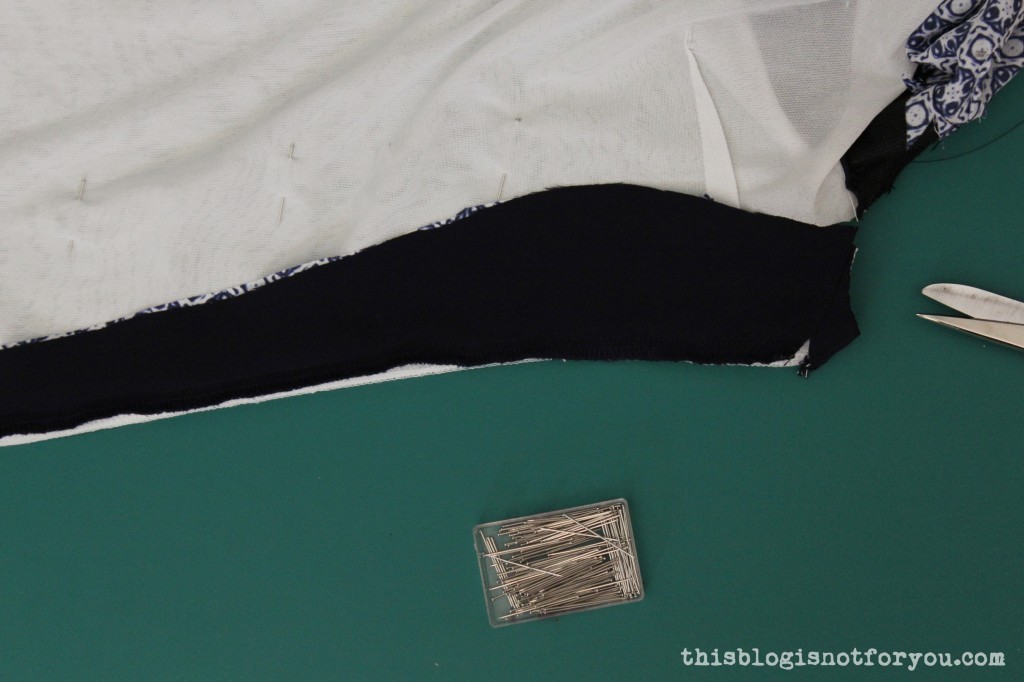
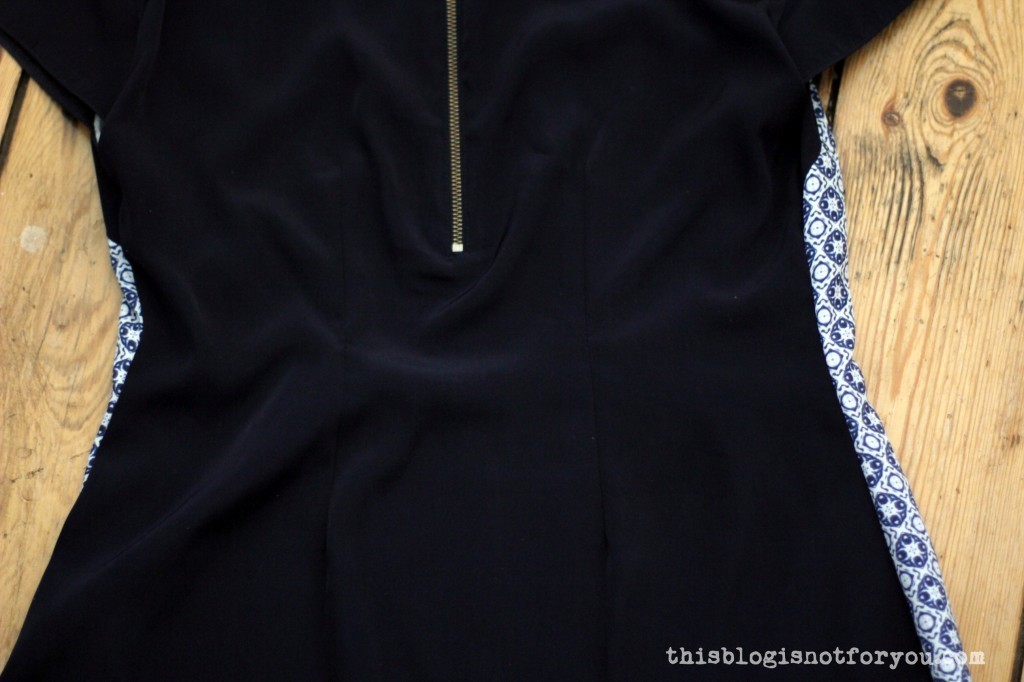
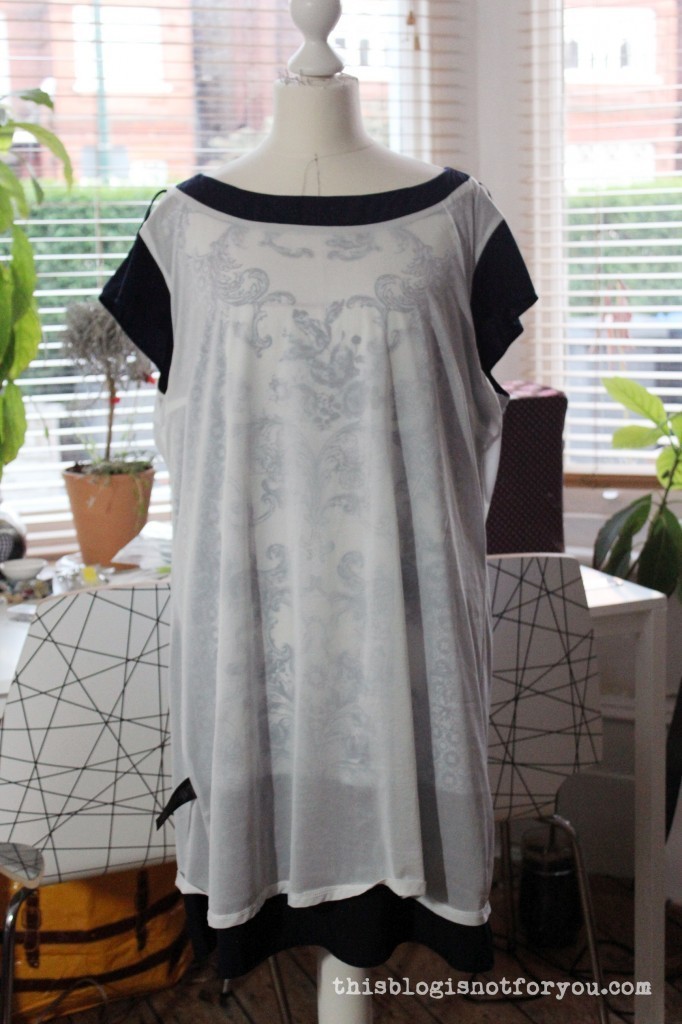
I threw the dress on my dressform, inside out. Pinning the lining out of the way I took in the sides of the dress, which actually took a bit longer than it sounds. Pinning, trying it on, repeat. Until I was satisfied with the fit. The tricky bit was the fact that there is just a very short zip in the back. I couldn’t take it in too much at the waist as it still had to fit over my shoulders and bust.The Porcelain Dress by thisblogisnotforyou.comThe Porcelain Dress by thisblogisnotforyou.com

After pinning comes the fun part: chop, chop!The Porcelain Dress by thisblogisnotforyou.com

I used the chopped-off bits of the blue fabric as a template for trimming the lining. I finished the raw edges of both fabric and lining side seams and then created two darts in the back add more shape.

The Porcelain Dress by thisblogisnotforyou.com


I also created to tucked pleats in the front, which I just quickly sewed down with a few hand stitches. The fabric was very delicate and I didn’t want to accidentally ruin the whole dress with machine sewing them down.The Porcelain Dress by thisblogisnotforyou.comThe Porcelain Dress by thisblogisnotforyou.comThe Porcelain Dress by thisblogisnotforyou.com

The dress now fits very nicely, but I still prefer to wear it with a little blue belt. It breaks it up nicely and cinches it in a bit more at the waist.The Porcelain Dress by thisblogisnotforyou.com

(The pictures where taken in my parent’s beautiful garden. Ahh – I miss it so much now that the only green bits I see here in London on a daily basis are from the hedge in front of our flat, yes, the one you’re all familar with!)The Porcelain Dress by thisblogisnotforyou.com

My Dad caught me knitting on a sunny 25°C Easter sunday. Well, I couldn’t fit my sewing machine into my suitcase. Ryanair, meh. Here’s a sneak peek of the tiny cardigan I was knitting for my mom-to-be sister-in-law.Knitted Baby Cardigan by thisblogisnotforyou.com
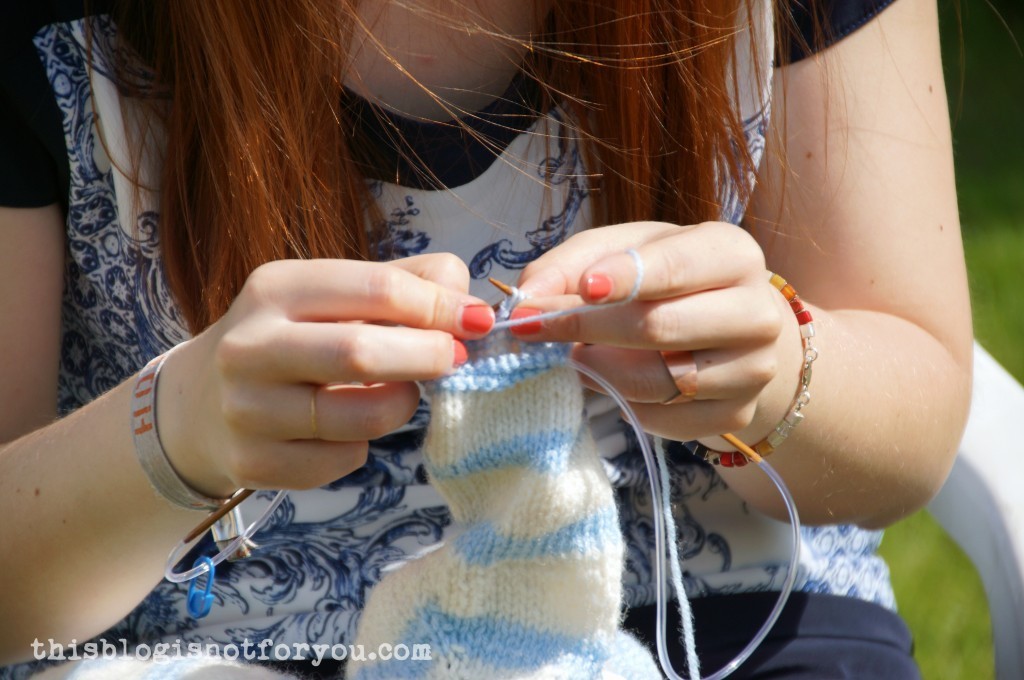
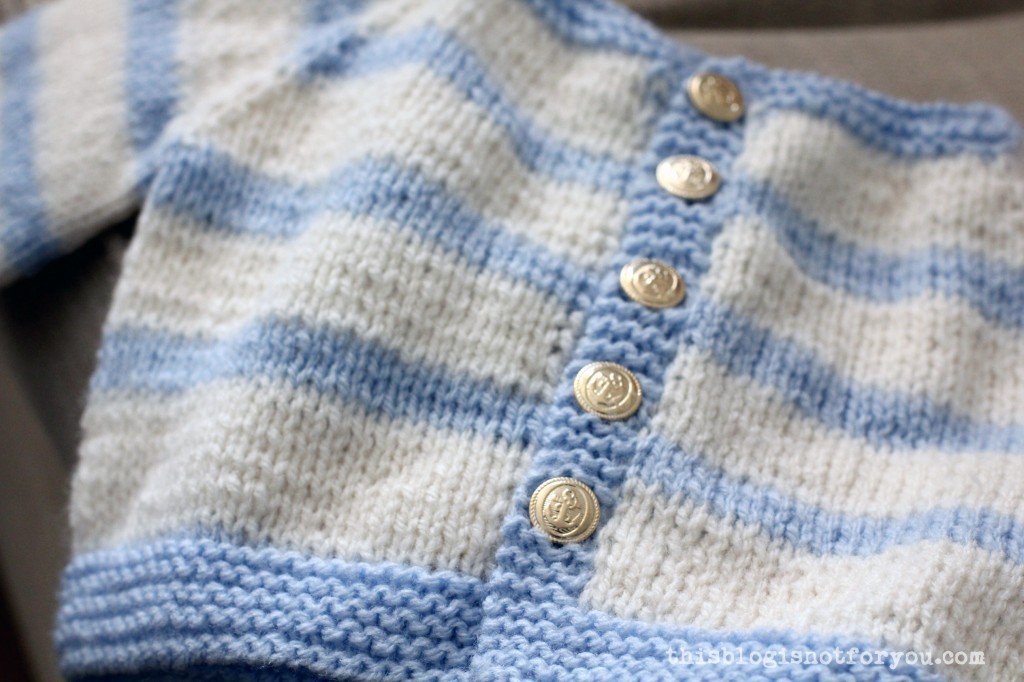
As a soon-to-be-auntie I will have loads of excuses to sew tiny clothes and practise pretend-tea drinking. Ha!The Porcelain Dress by thisblogisnotforyou.com


Happy sewing!

facebook/bloglovin/pinterest
Stay in touch!