Refashion It! The Summer Dress

Beach Dress tutorial and pattern by thisblogisnotforyou.comsummer dress refasion by thisblogisnotforyou.com

Hello my lovely readers!

After using this dress for making a fun and super easy Beach Dress pattern I finally got down to doing what I was supposed to do: taking off the sleeves. My mum gave it to me to alter the sleeves and make them less flutter-sleeve-like.

Since it was a rather quick and easy refashion I thought I’d share it with you.

summer dress refasion by thisblogisnotforyou.com

This is how the sleeves looked before the alteration. I love them because they’re super comfy. First, I thought the refashion would be quite tricky since the dress is basically a rectangle sewn together at the sides, so I had to do more than simply chop off the sleeves. I decided to make the dress a bit more fitted, but to also keep the drawstring at the waistband so it wouldn’t need a zipper.
summer dress refasion by thisblogisnotforyou.com

I put the dress on the dress form and cut off the sleeves at the shoulders on one side only.

As you can see in the pic above, the shoulder part looks a bit weird and pointed. I made a simple dart to solve this problem, first just pinning the dart, and then sewing it before adding the binding to the armscye.

summer dress refasion by thisblogisnotforyou.com

Looks much better, right?summer dress refasion by thisblogisnotforyou.com

summer dress refasion by thisblogisnotforyou.com

I then cut off the side seams to give the dress a more A-line-like  shape. Clever me made sure to cut them off in a way that allowed me to keep the drawstring casing (If you read the Beach Dress tutorial, you hopefully know what I mean).summer dress refasion by thisblogisnotforyou.com

The quickest way to make both sides symmetrical is to simply fold over the dress at the center line and use the altered part as template.
summer dress refasion by thisblogisnotforyou.com

Chop, chop!summer dress refasion by thisblogisnotforyou.com

Keep the hem and remnants! I used them to make bias binding for the armscye.summer dress refasion by thisblogisnotforyou.com

I cut off approximately 2cm/1inch wide strips including the already hemmed part. For proper bias binding you usually cut the strips on the bias, but I was really lazy lazy and also wanted to make use of the already hemmed edges.summer dress refasion by thisblogisnotforyou.com

I pinned the strips onto the armscye part, right sides facing.summer dress refasion by thisblogisnotforyou.com

After sewing the binding onto the fabric I trimmed the raw edges and then, first folding them over and thereby enclosing the raw edge, topstitched the binding onto the right side of the dress.
summer dress refasion by thisblogisnotforyou.comI finished the side seams using the french seam technique where you first sew left sides together with a very narrow seam allowance. After pressing, you fold the fabric over, press again and sew the seams right sides together with a wider seam allowance, thereby enclosing all the raw edges. This technique is super useful when dealing with fabric that frays like crazy (this one did). french seams tutorial for pleated skirt by thisblogisnotforyou.com

Sleeve-less dress done!
summer dress refasion by thisblogisnotforyou.comsummer dress refasion by thisblogisnotforyou.com

It’s still super comfy and mum loves it. What more could one want?

  facebook/bloglovin/pinterest
Stay in touch!

Reversible Tie-Side Pinafore #2

reversible pinafore cupcakes by thisblogisnotforyou.com

Hey everyone! I just quickly wanted to share the second reversible tie-side pinafore I made from the Little Dress Kits pattern I reviewed a few weeks ago!

I made another version, just using the pattern and my own fabric – a cute pink polkadot and a green cupcake cotton. This time I also found a cute little model (who was allowed to keep it after the photo shoot, of course 😉 ) and took these pictures – isn’t she adorable?

reversible pinafore cupcakes by thisblogisnotforyou.comreversible pinafore cupcakes by thisblogisnotforyou.comreversible pinafore cupcakes by thisblogisnotforyou.com

reversible pinafore cupcakes by thisblogisnotforyou.comreversible pinafore cupcakes by thisblogisnotforyou.comreversible pinafore cupcakes by thisblogisnotforyou.com

  facebook/bloglovin/pinterest
Stay in touch!

Featuring You: Hannah from “Made with Hugs and Kisses”

Featuring Made with Hugs and Kisses by thisblogisnotforyouThanks everyone for your lovely responses to last weeks Featuring You guest post by Amy from SewsNBows!

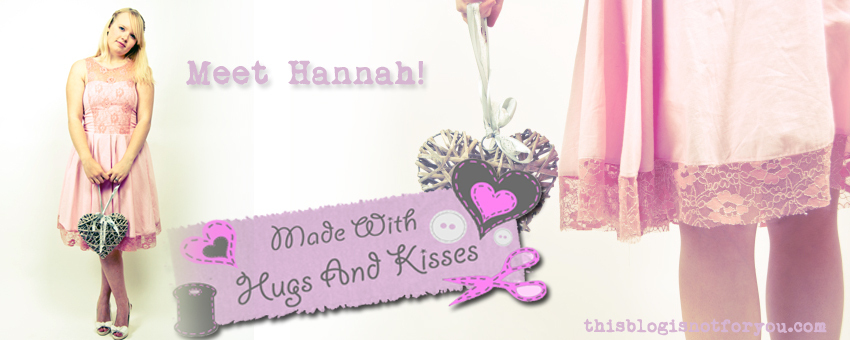
This week, I’m very happy to introduce this very versatile and chic young lady to you: Hannah. I’ve been a follower of hers for quite a while now and am totally on love with everything she makes. If you love vintage clothing, girly dresses and everything that’s cute – prepare yourself for this lovely sewing blogger!

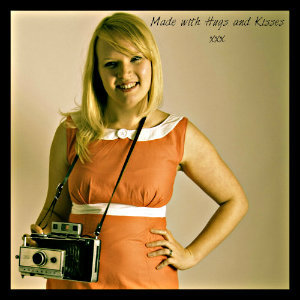
Well Hello There! My name is Hannah Smith and I blog over at Made with Hugs and Kisses where I share my obsession with sewing and all things creative.

myself buttton

I have been blogging for just over a year now, although it took me quite a while to get to grips with things. I was probably six months in before I finally figured out how to actually blog – you know, how I wanted it to look, what I wanted to say, where I wanted it to go. There is so much more to blogging than I originally realised but I have loved every second of it and am so excited for every post to come.

H&K Banner

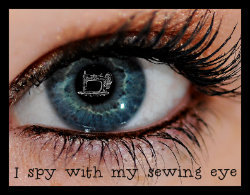
What has surprised me the most, however, is the people I have ‘met’ through blogging. My confidence and belief in my sewing skills is continually on the increase due to the amazing feedback and encouragement I receive from my lovely readers, and I thoroughly enjoy keeping up to date with the many, many blogs I follow, stealing tit bits of inspiration, and sometimes sharing them as part of my Eye Spy With My Sewing Eye series.

i spy with my sewing eye

So a little bit of background info about little old me and my relationship with sewing.  To start with, I am completely self taught. Exactly 4 years ago I was preparing to start university and had a month or two off before I began with nothing much to do. I had a sewing machine stored away that had never really been looked at never mind used, and decided to get it out and just have a go. Not being one to take things slowly I just jumped at the deep end and start making dresses ( sadly I don’t think I have any of these to take pictures of anymore). Of course there were a lot, and I mean a lot of mistakes made in those early days, and being impatient and a perfectionist did not help, but I persevered and did my best to work out what things meant and how to do things. And before I knew it I was completely addicted. Now, four years later, I have graduated from university, I have started a job as a primary school teacher and I am more obsessed with sewing than ever before, oh, and I have married my lovely husband, who best of all, supports my crazy obsession with sewing!collage

I mainly make dresses although I have been challenging myself to branch out into skirt and tops more recently. I would even love to try a coat this autumn, but we shall see.

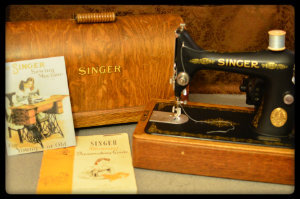
My sewing style has developed a lot over the last few years as well. I suppose the most appropriate word to describe my sewing style would be girly! Team this with my love if a traditional silhouette, the big skirts the fitted bodices and an obsession with vintage was a natural progression and over the past year in particular I have seen many more vintage elements sneaking into what I sew, not to mention the start of a vintage pattern and sewing machine collection.

Singer collection

Q: Why did you decide to start a blog?

I suppose I started my blog because I felt like I was putting an awful lot of hard work and effort into learning how to sew and creating handmade clothes but, being self taught,  I didn’t know if I was actually doing it ‘right’. I wanted to push myself, develop my skills, gather new ideas, but most of all I wanted to know that what I was doing was ok, that what I was making was ok, perhaps even bordering good! It sounds silly, and perhaps a little self centered, but I severely lacked confidence in my sewing ability when I started out my blog and was looking for a way to reach out, get to know likeminded people and generally improve. I now feel like a completely new person. I have come to learn that the only ‘right’ way to sew it to just make sure you are enjoying it, and the same stands for blogging too!

Q: What where your first ever blog posts about? How do you feel about it now?

Oh dear, I cringe when I think back to my early blogging days. Like I mentioned earlier I had no idea what I was doing back then. Looking back at them, and I urge you not to, I think they seem so impersonal. But hey, we all have to start somewhere. If it wasn’t for those early months I wouldn’t know what I know now about blogging. I know for a fact I will look back at my blog in another years time and probably cringe about everything I am writing at the moment, cursing myself for being too chatty or not having good enough pictures.  I look at some of the blogs that are starting out now and think, oh my goodness they are so fantastic and clear, so professional looking and full of personality, how do they do it and how have they figured this all out so quickly! But it is all a learning curve and I am proud of what I am in the midst of creating.dsc_0258

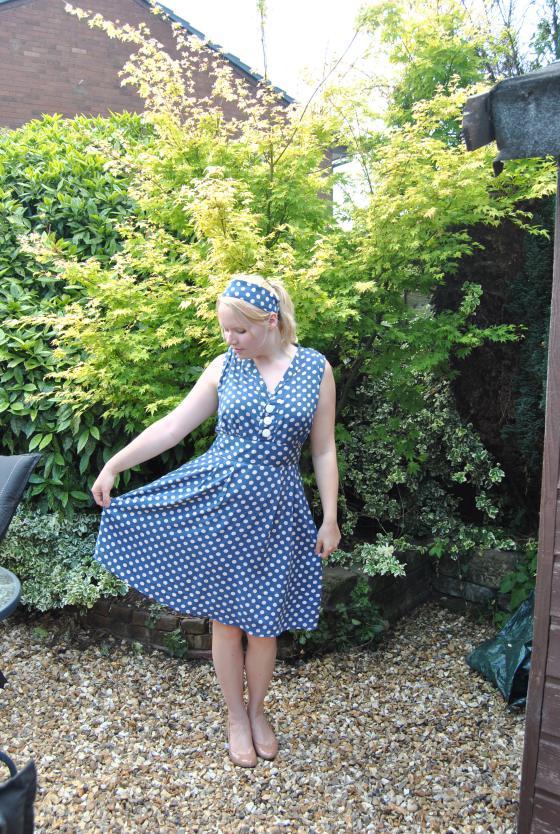
Q: What are you doing when you’re not sewing or writing blog posts?

This question is a joke right… what is there to life other than sewing and blogging?! 😀

Nah, I’m only joking, although sewing, blogging, work and sleep tend to take up all 24 hours of my day. Of course I love spending time with my hubby too and I also have a multitude of animals that require my love and attention. When I find time I do like to dabble in lotother creative outlets from jewellery making to baking. A few extra hours in the day would be useful though.

Q: Do all of your friends/family know that you are a blogger?

Of course! I rarely meet someone new without talking about sewing and blogging!

I find a lot of the time people don’t understand what I mean by ‘I have a sewing blog’. They certainly don’t understand how time consuming, addictive and rewarding it is. But to be fair, a year ago I wouldn’t have known what that meant either.

3

Q: What are you working on at the moment?

A few posts ago I let slip that I have been working on drafting some patterns to put up on my blog for my readers to download for free to use for themselves. This has taken up a lot of my time recently but I have learnt a lot from the process. I am hoping to have the first one up very shortly. I don’t want to ruin any surprises so that is all I will say for now 😀4

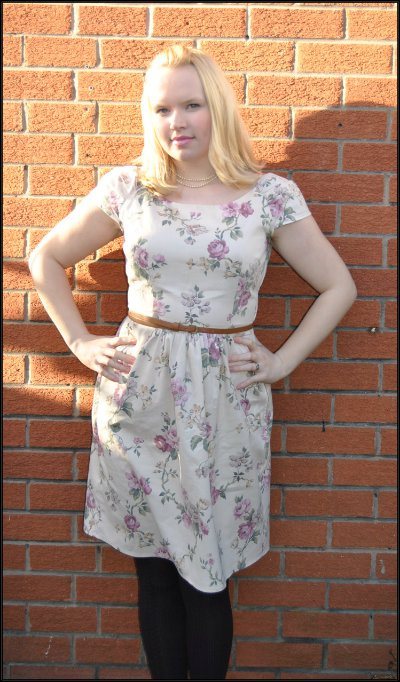
Q: If you had £500 to spend on your blog/hobby, what would you buy?

I would like to migrate over to wordpress.org so that I can have more control over my blog, but this is a very complicated process from what I have read so I would want to pay for the WordPress squad to do this for me.

There would be quite a bit left over so with this I would organize a sewing bloggers meet up, perhaps in Birmingham again, and go on a HUGE shopping spree and lunch!

Q: What can we look forward to seeing on your blog in the future?

Well, not only will there be some free patterns to download, I also have plenty more tutorials planned, some indie pattern reviews and of course lots more handmade creations. I have BIG things planned for Made with Hugs and Kisses it would be great if you could follow along with my journey 😀

Now… I just need to find the time to do all of this!


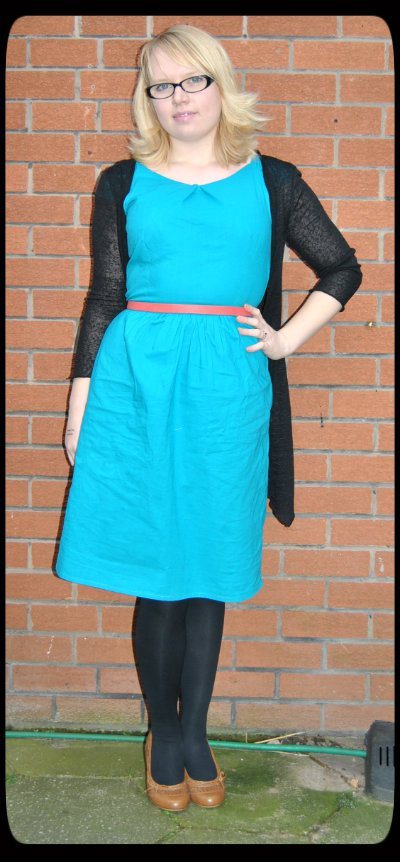
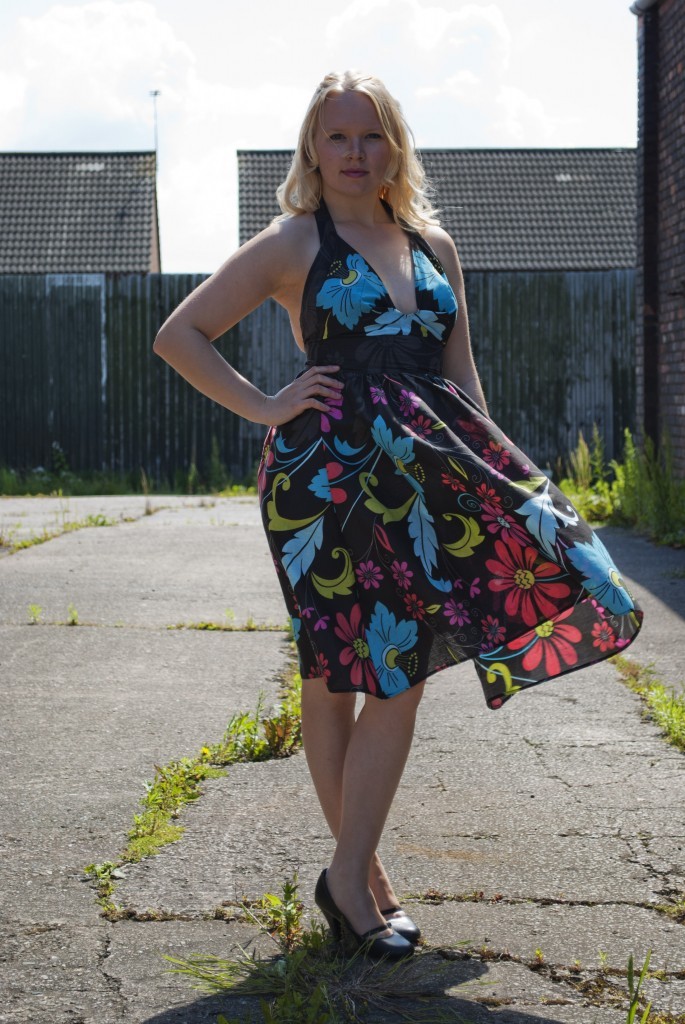
Here is a quick round up of some of my favourites

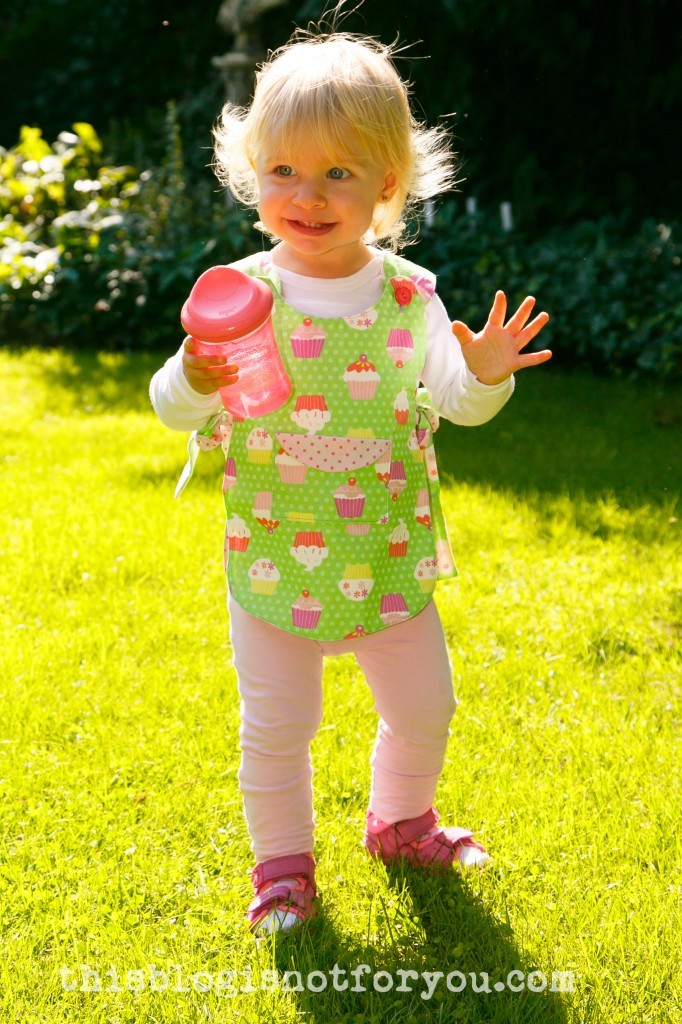
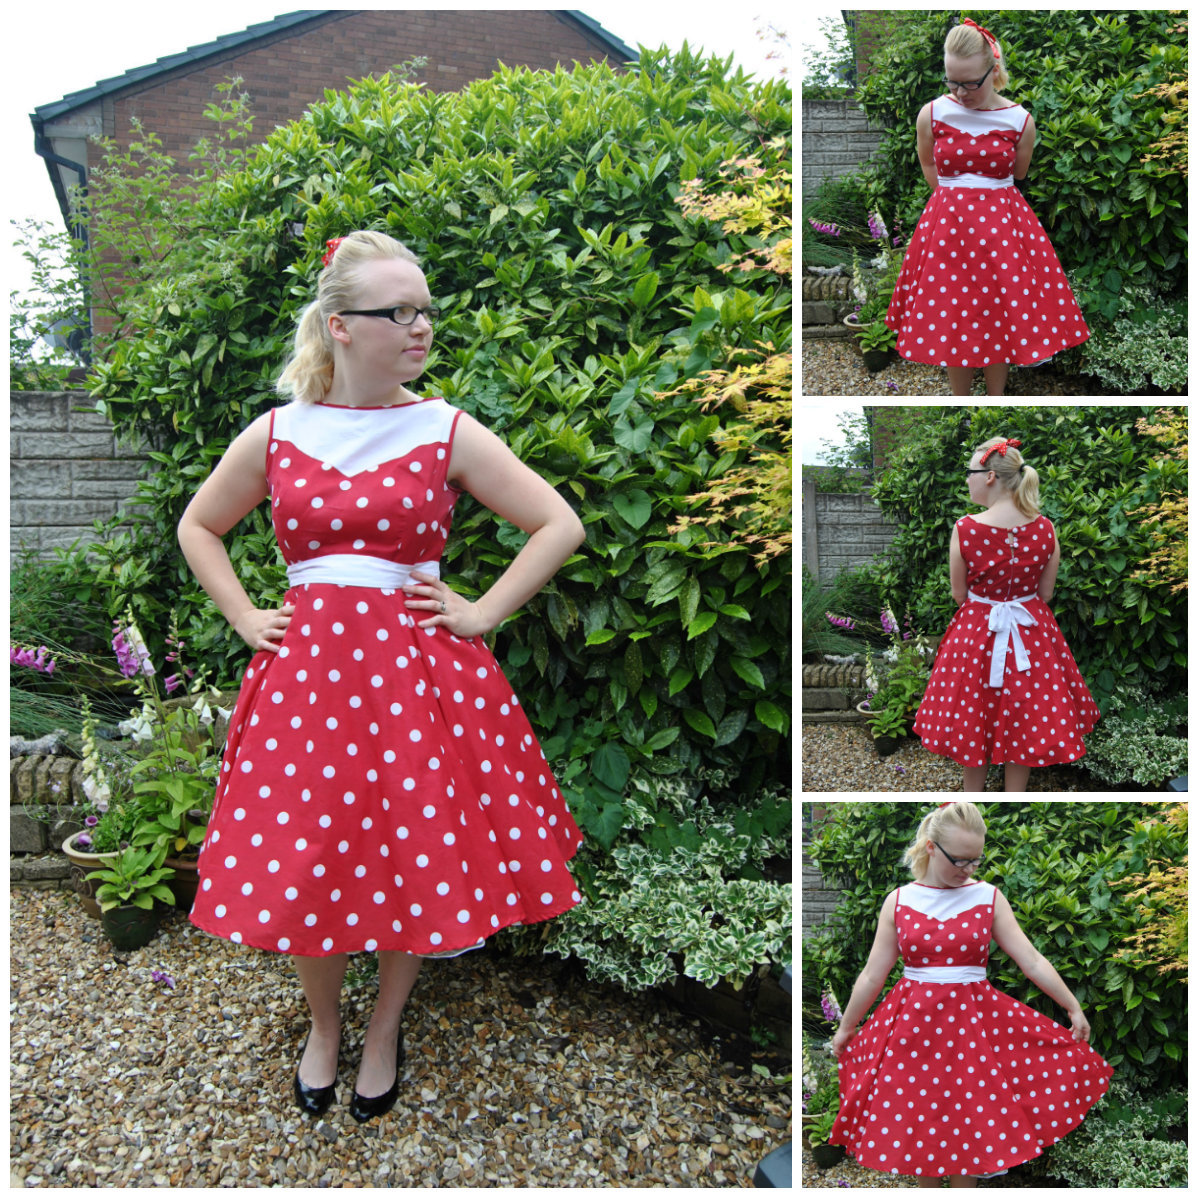
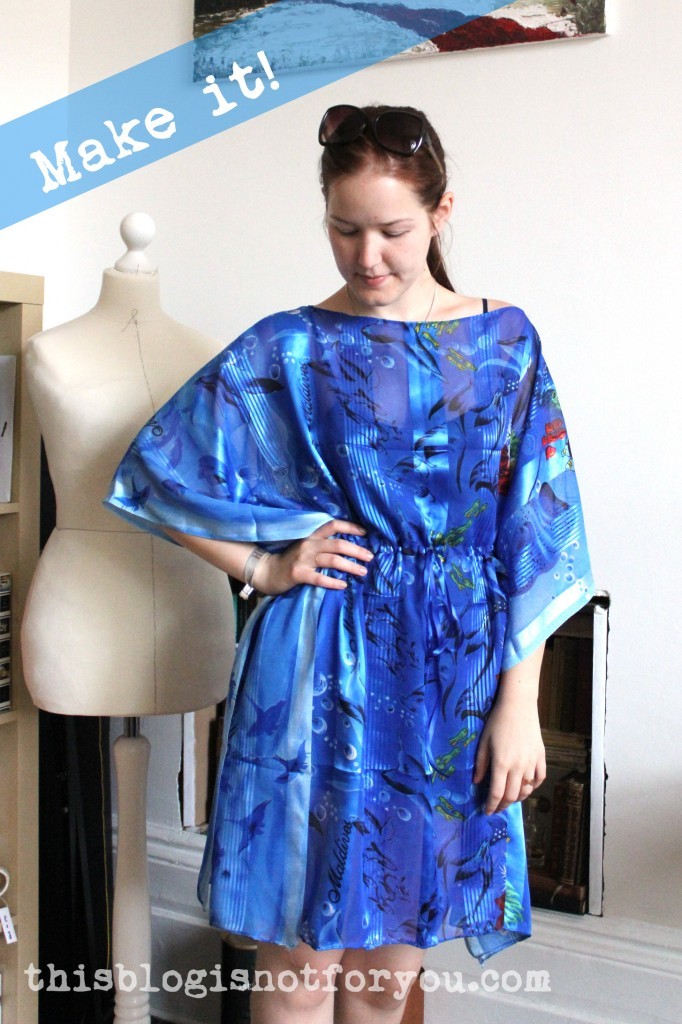
My favourite handmade creation:

DSC_0025 copy

              DSC_0045 copy

My favourite blog post:

2 (1)

Perfectly Vintage – read it here!

My favourite fabric:

favourite fabric

My favourite pattern (that I have used):

New6002

I have lost count of how many dresses I have made with this pattern!

My favourite pattern (that I want to use):

 Victory patterns – Anouk
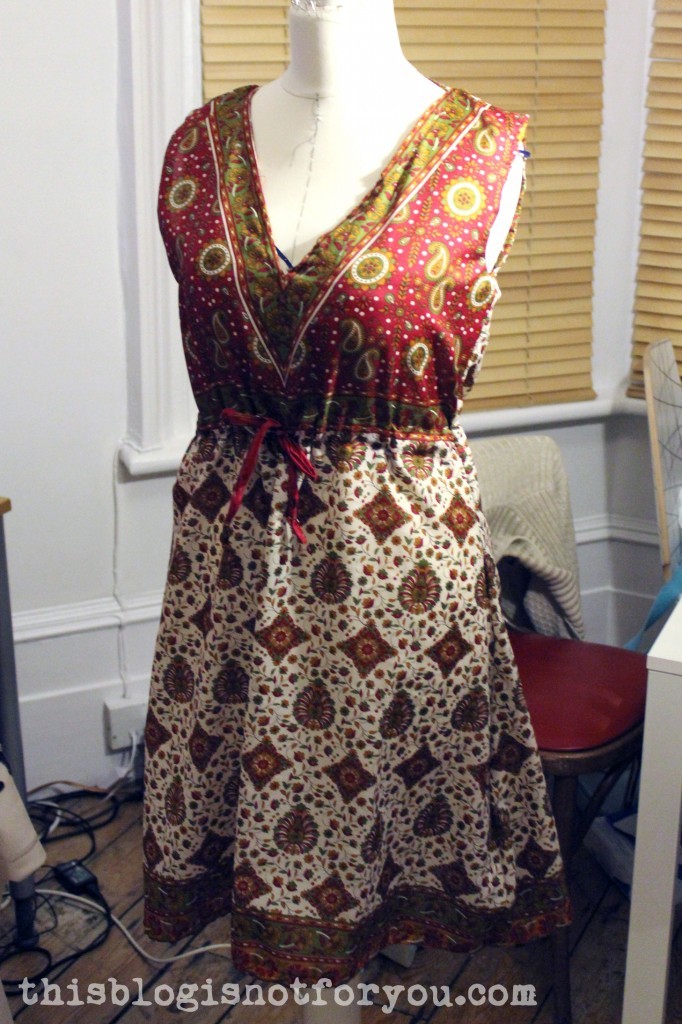
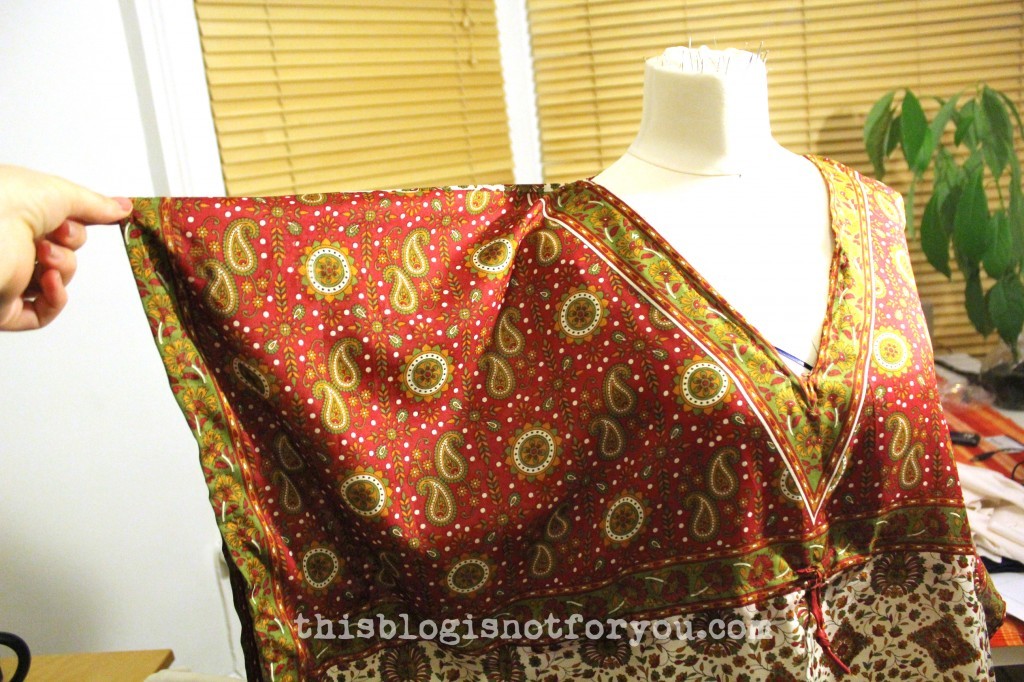
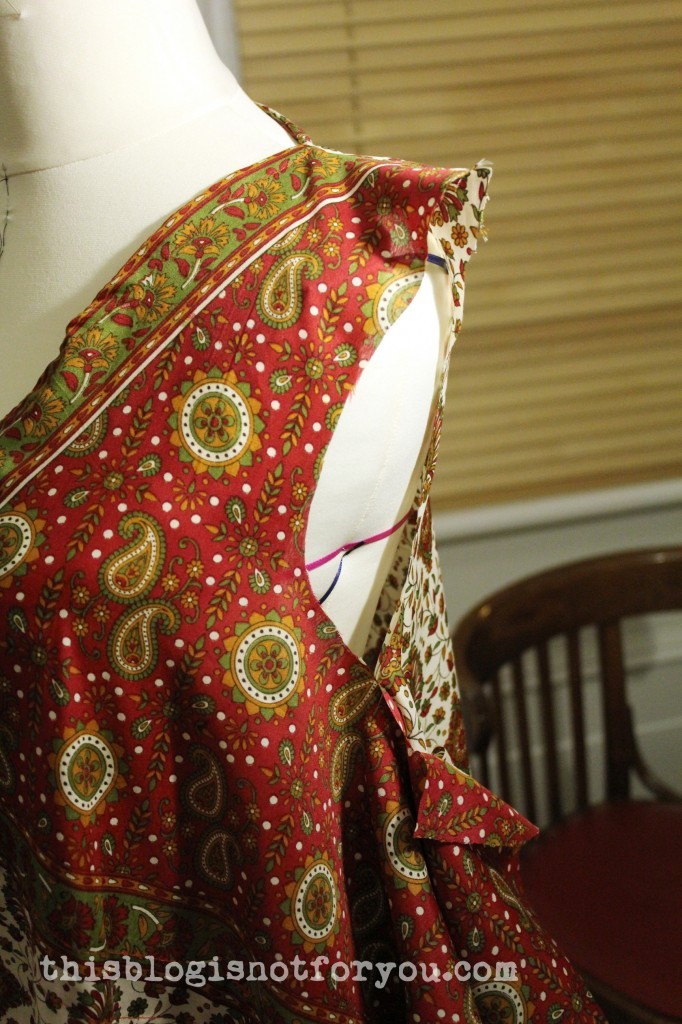
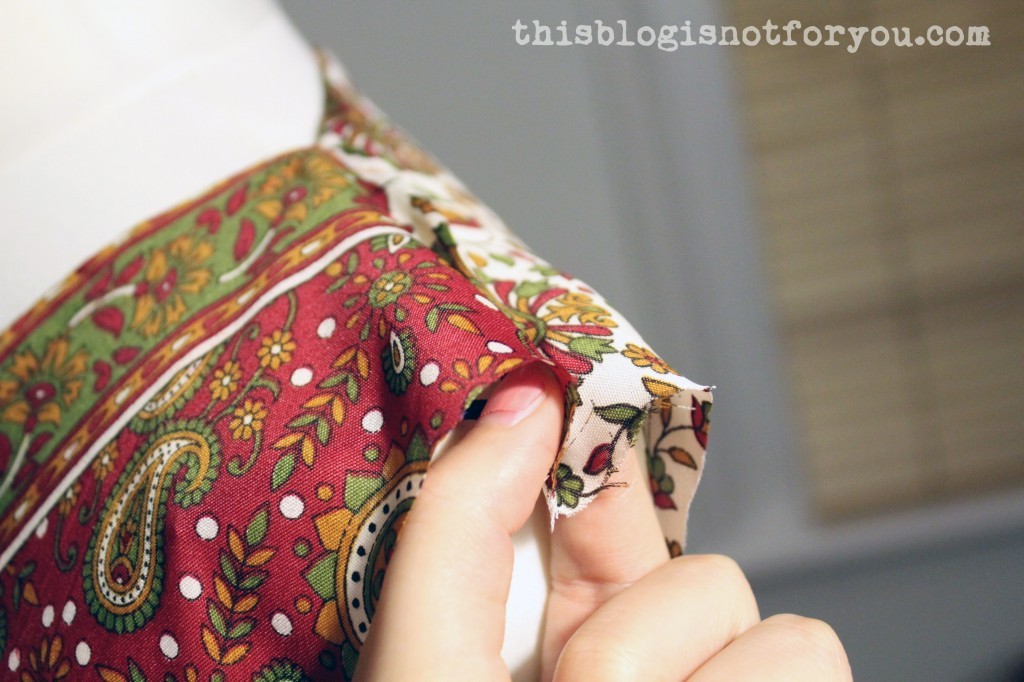
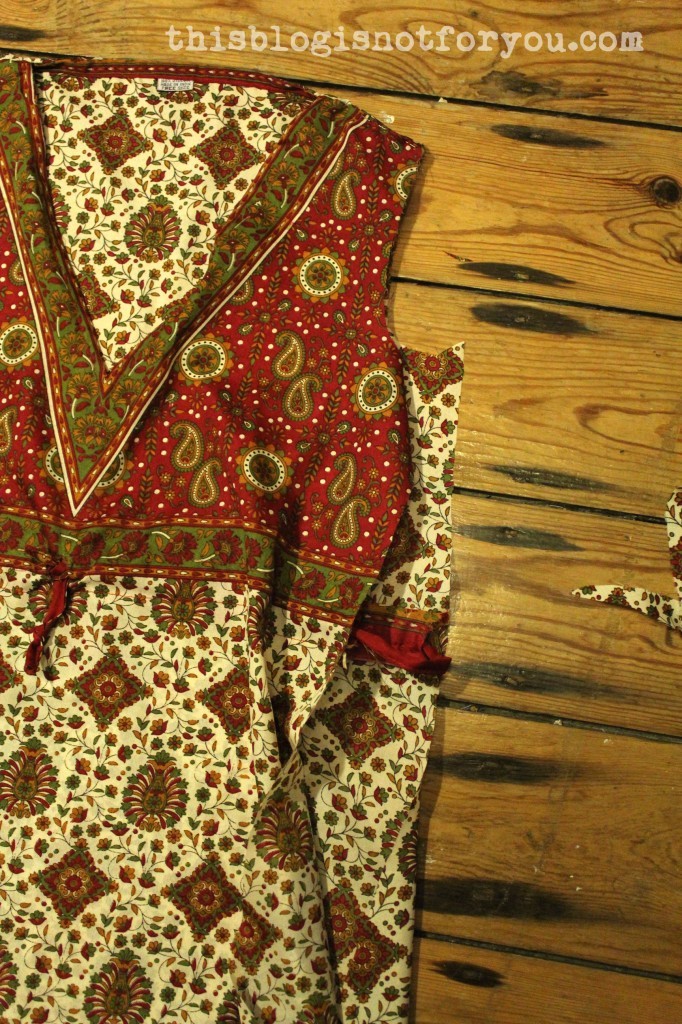
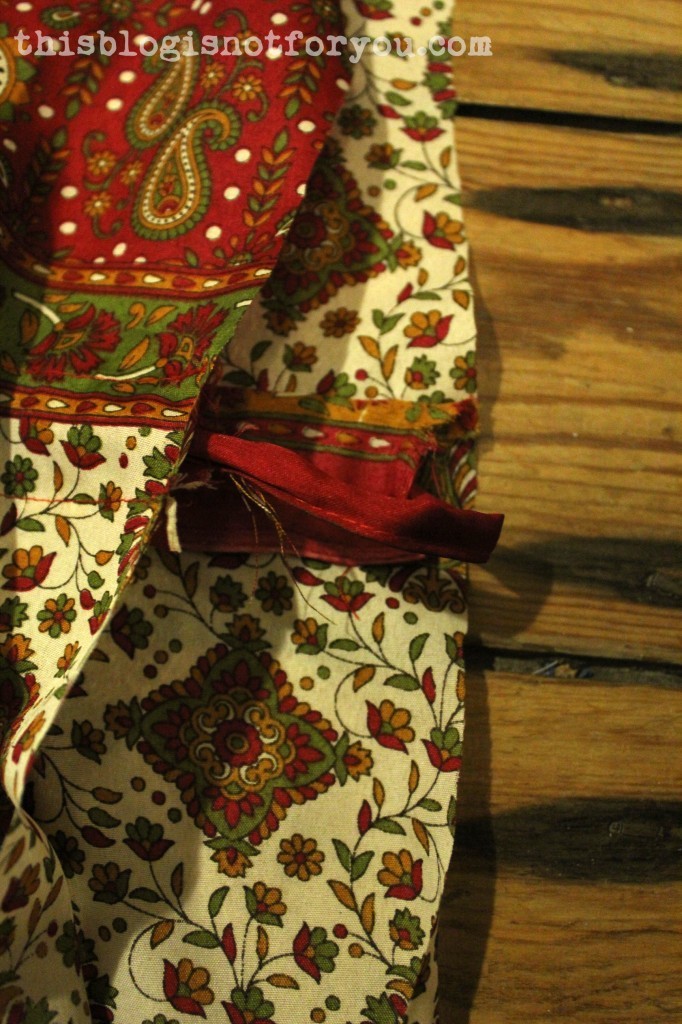
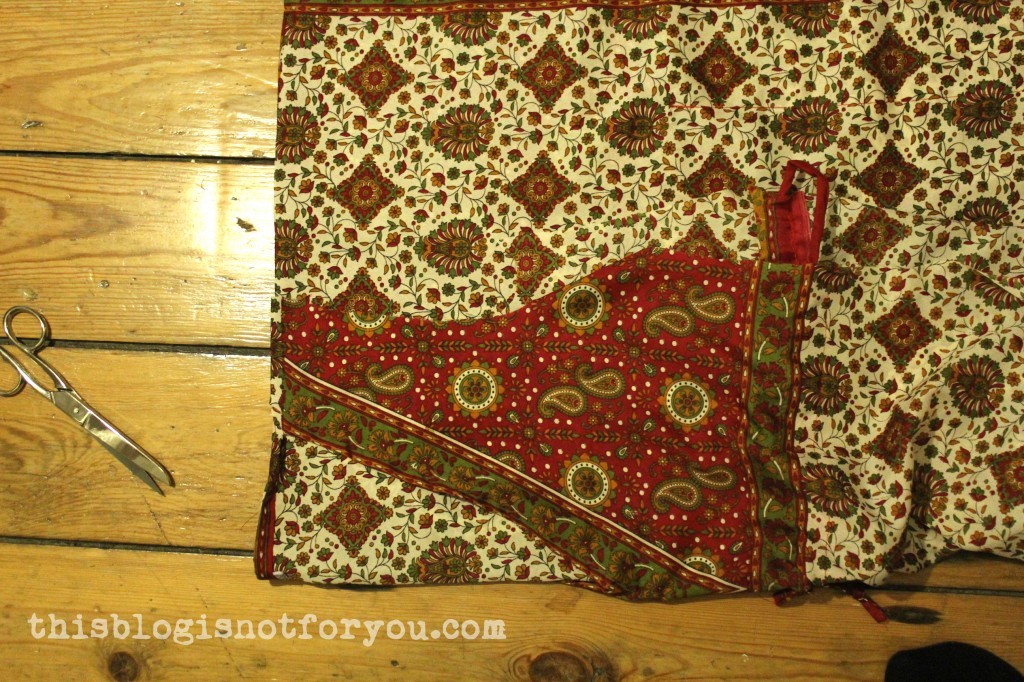
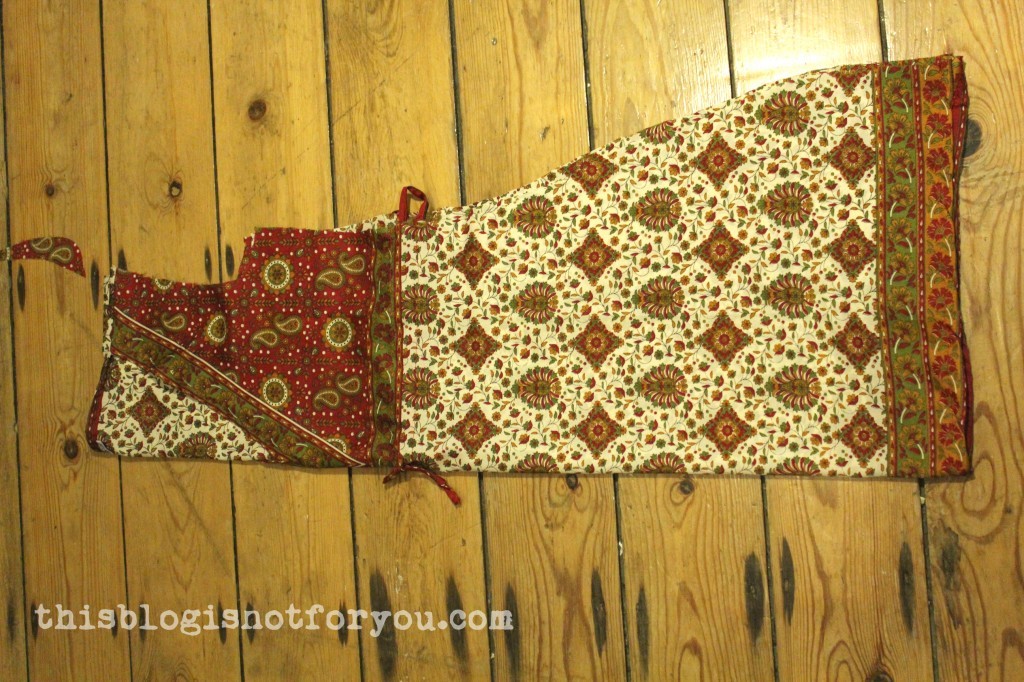
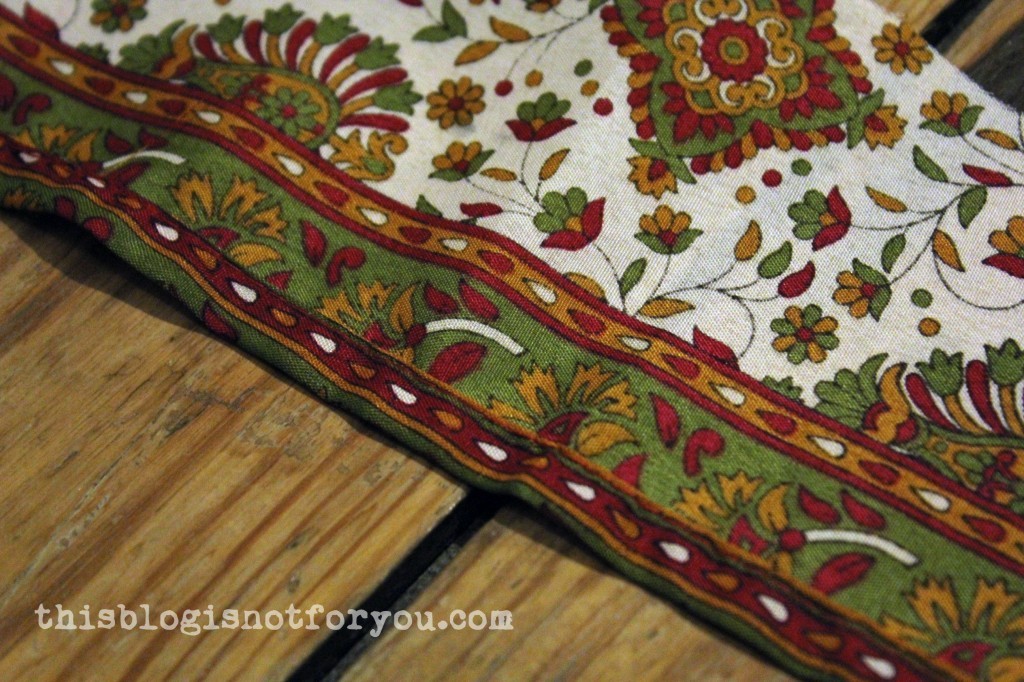
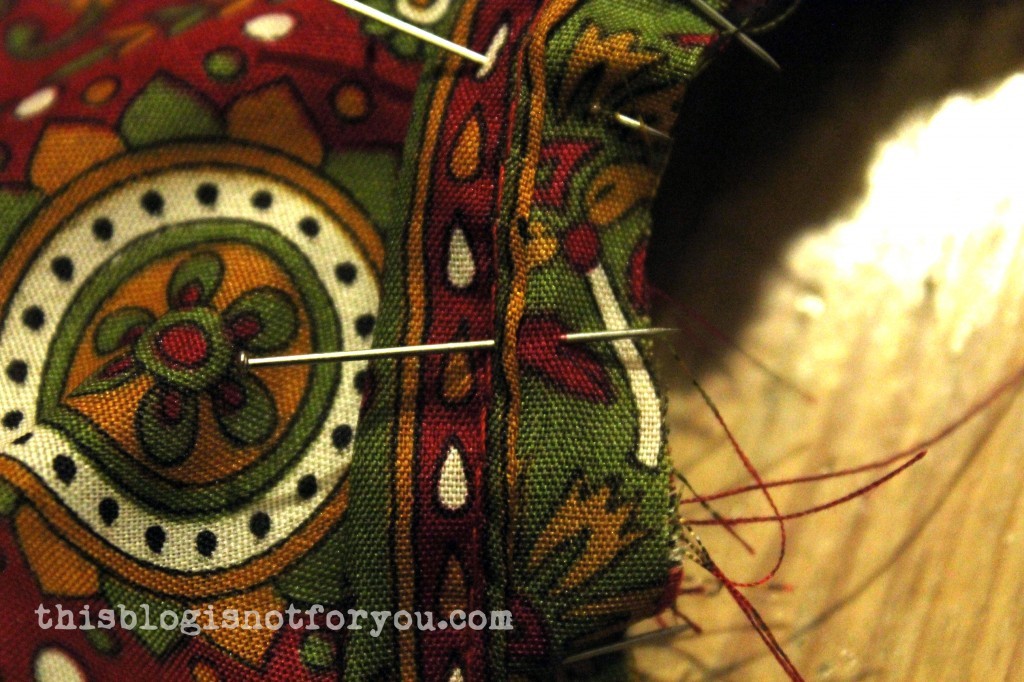
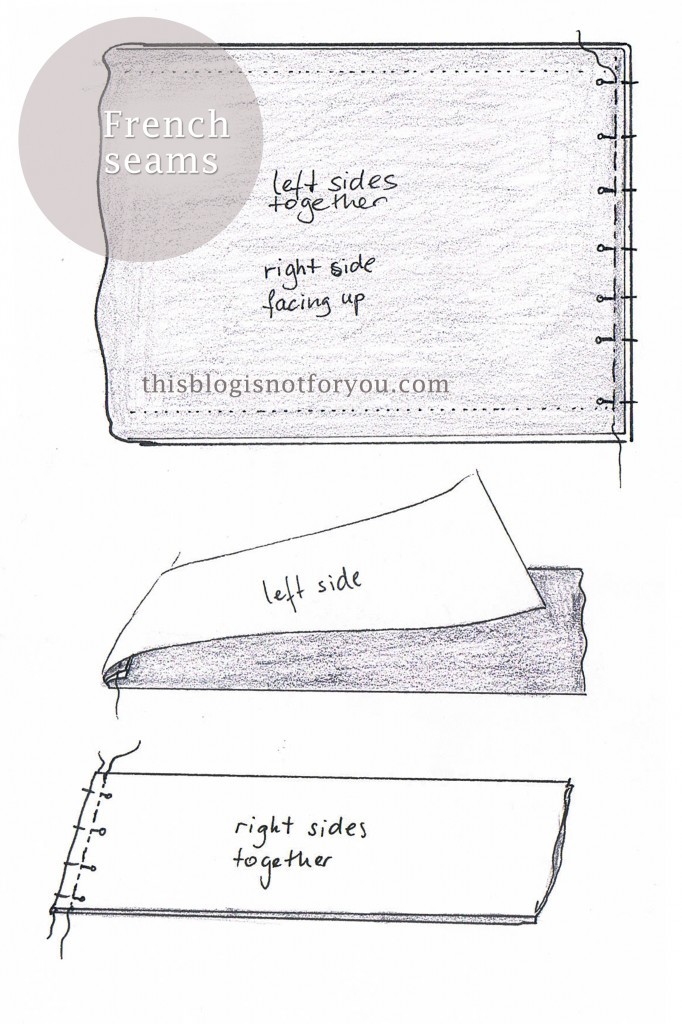
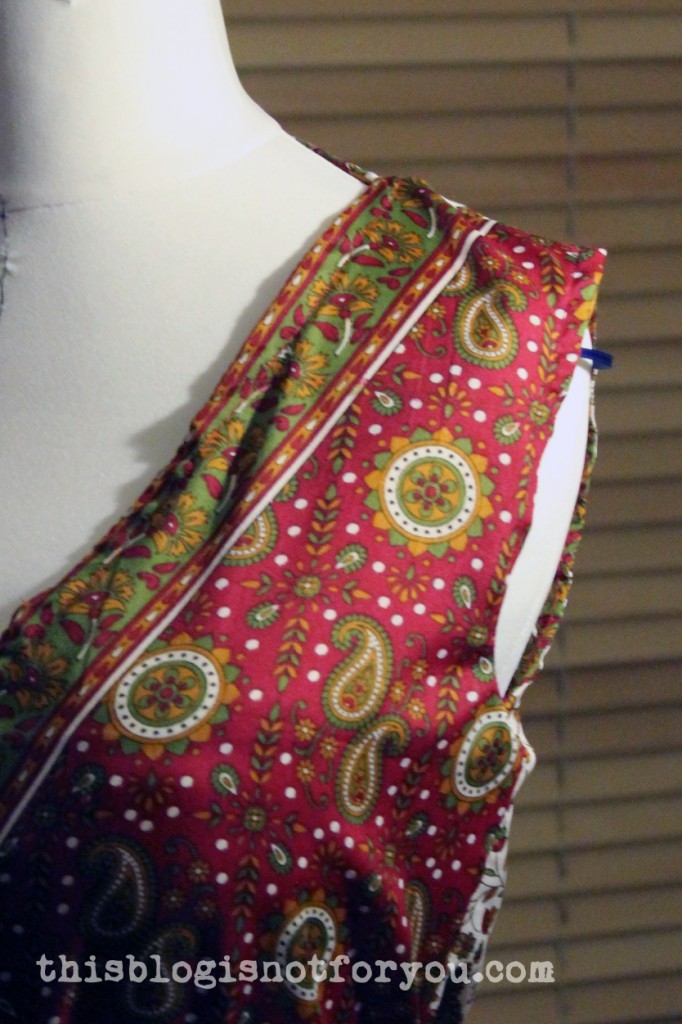
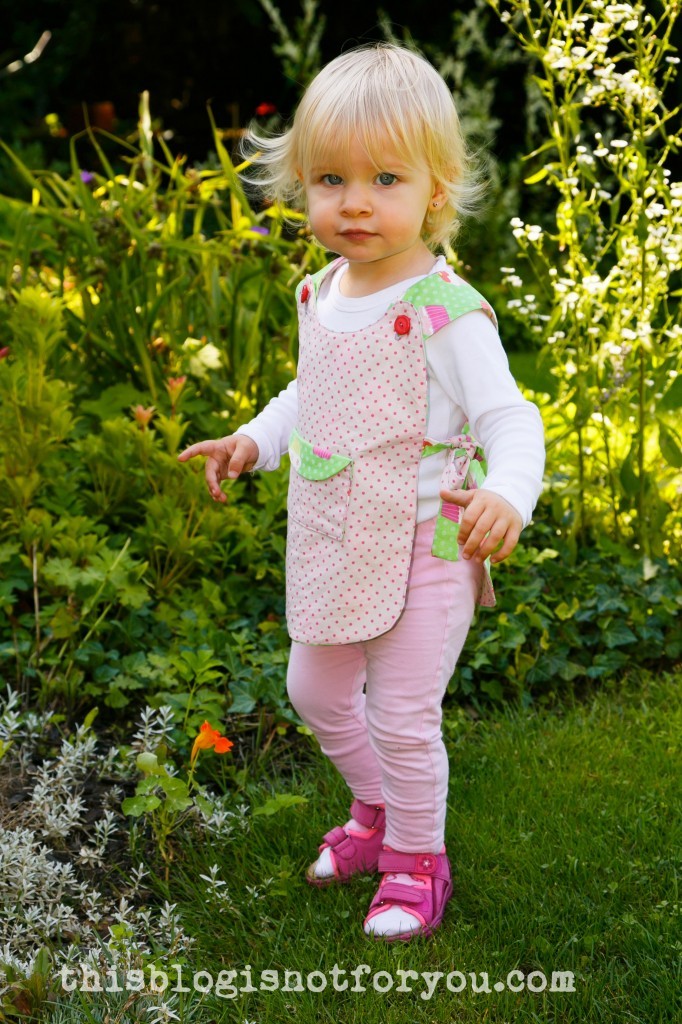
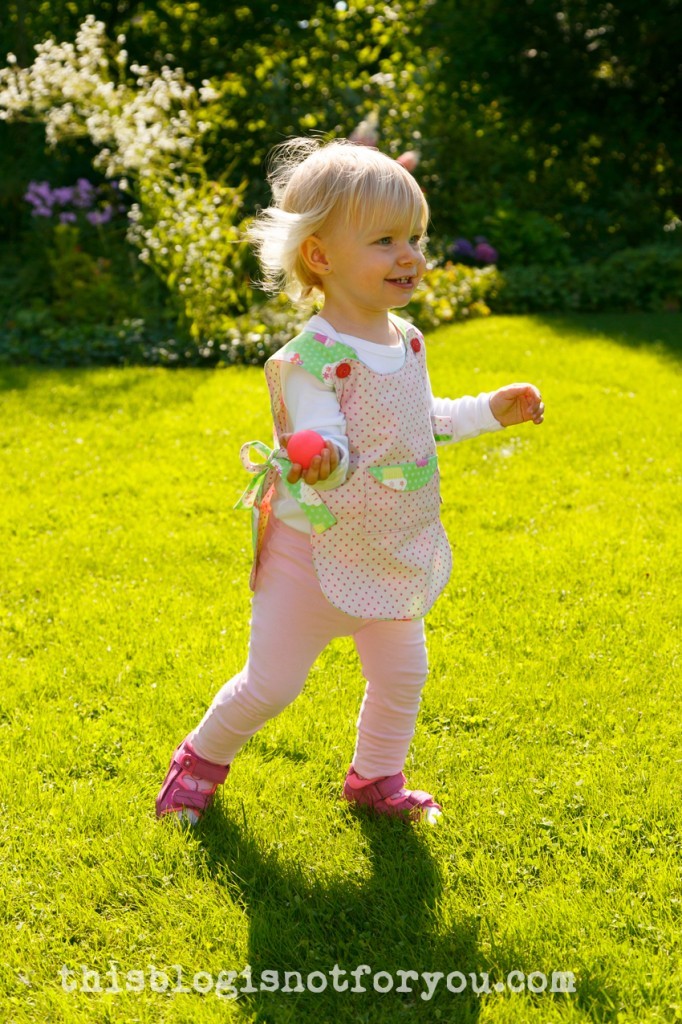
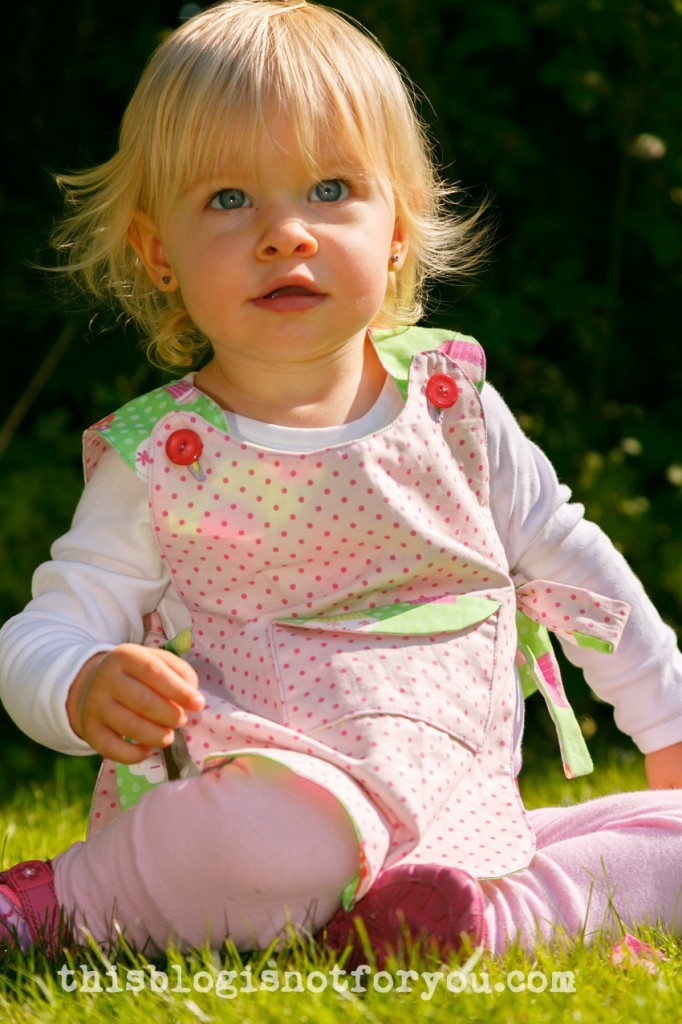
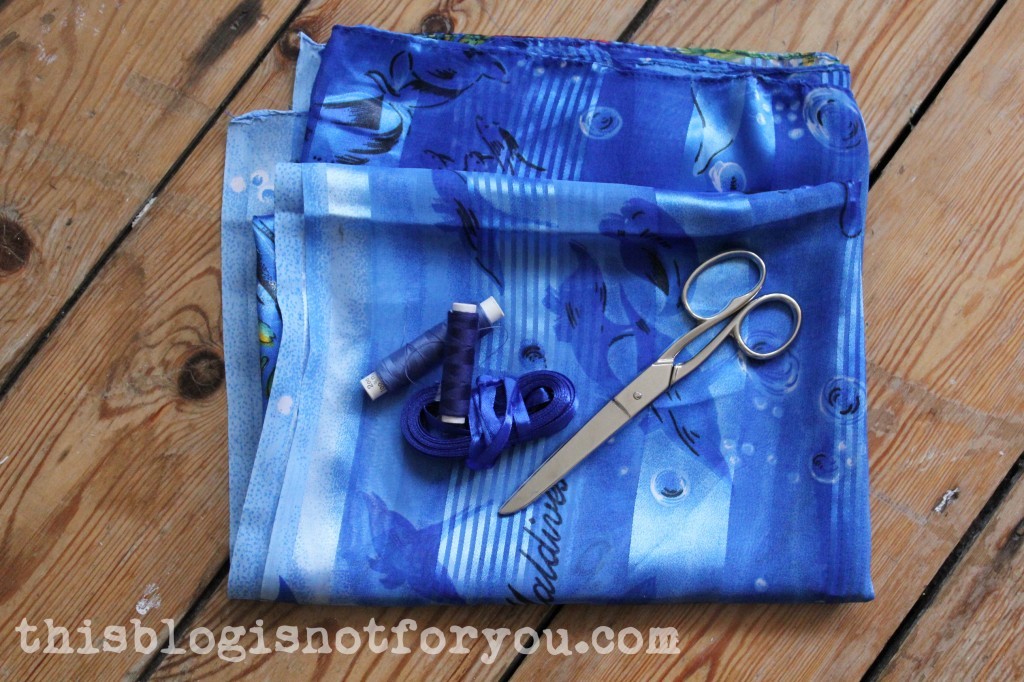
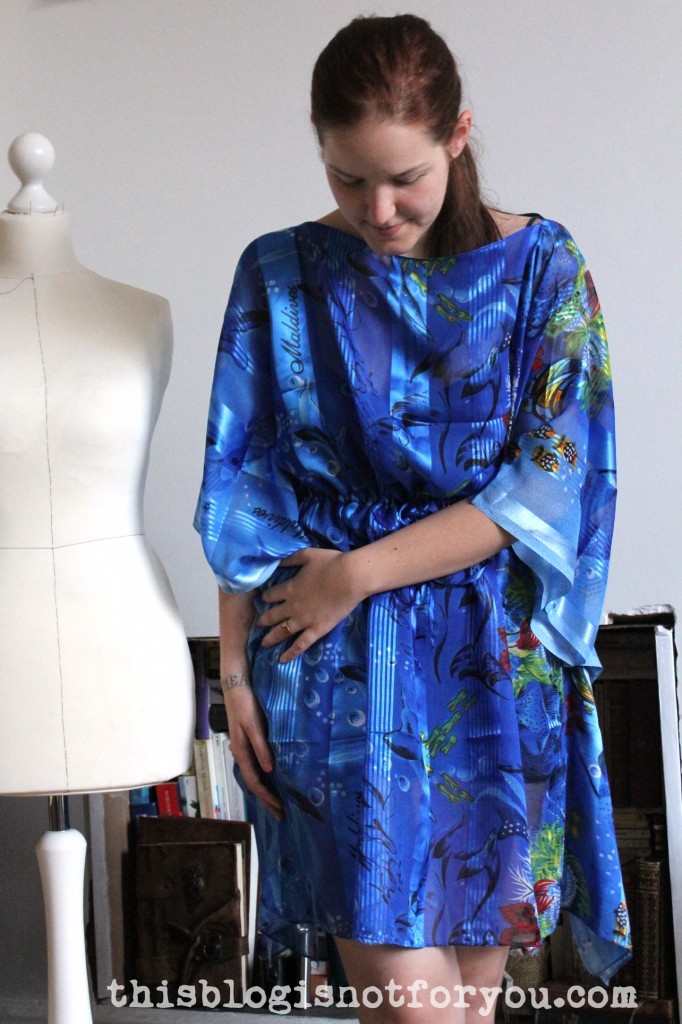
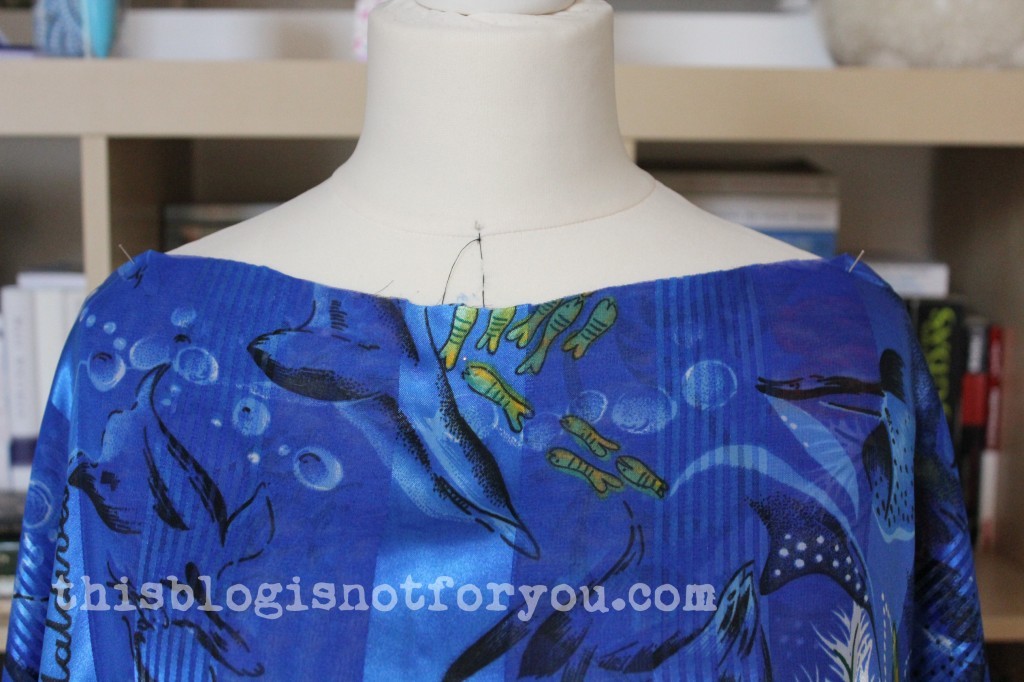
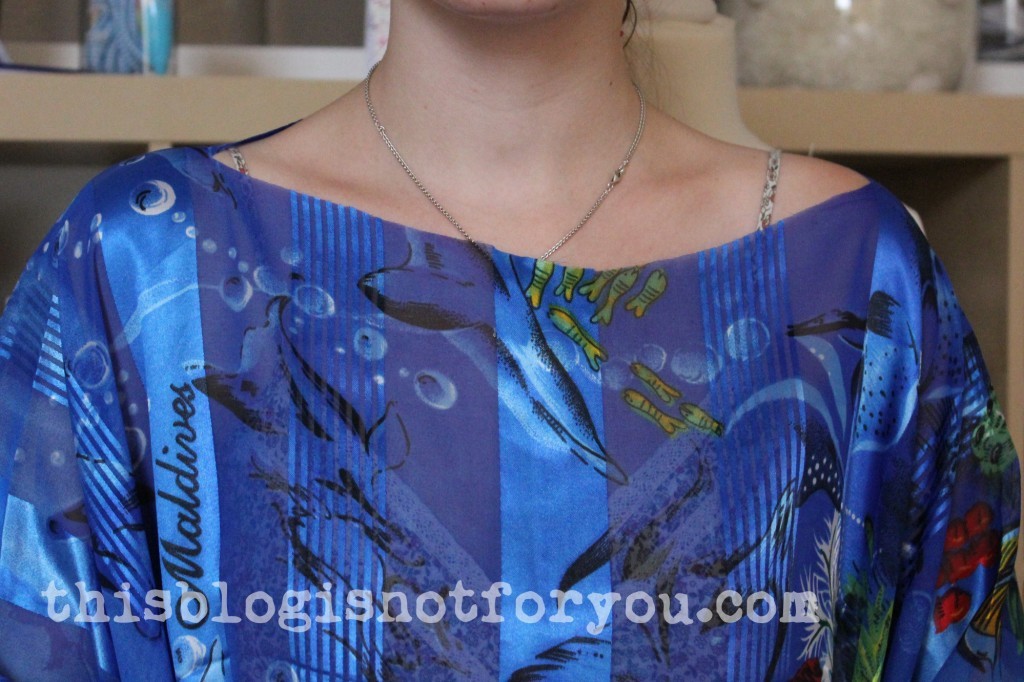
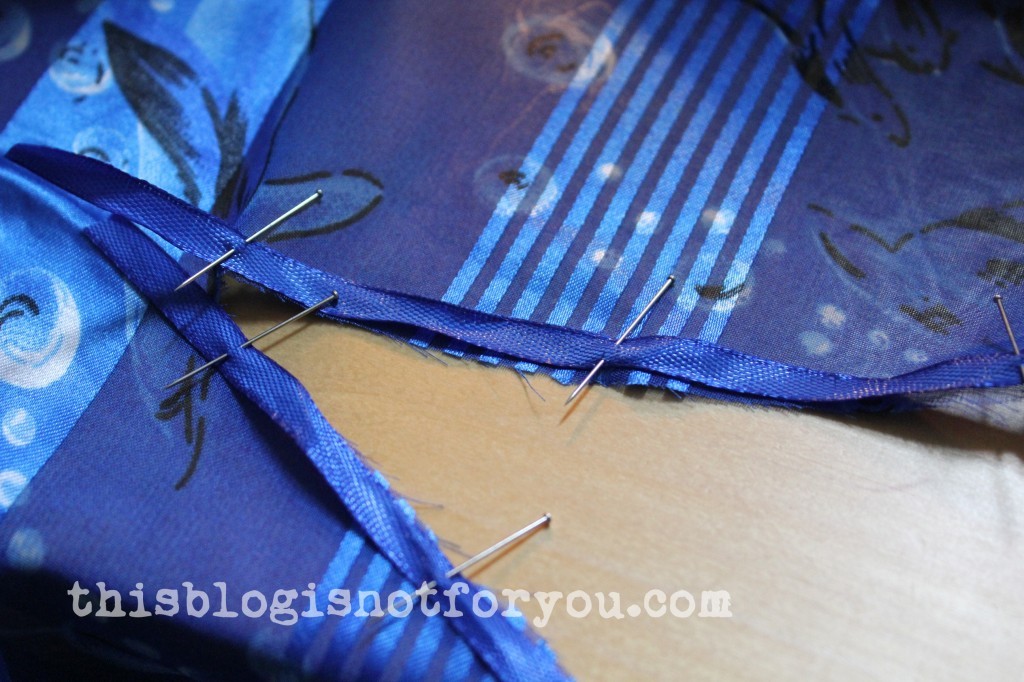
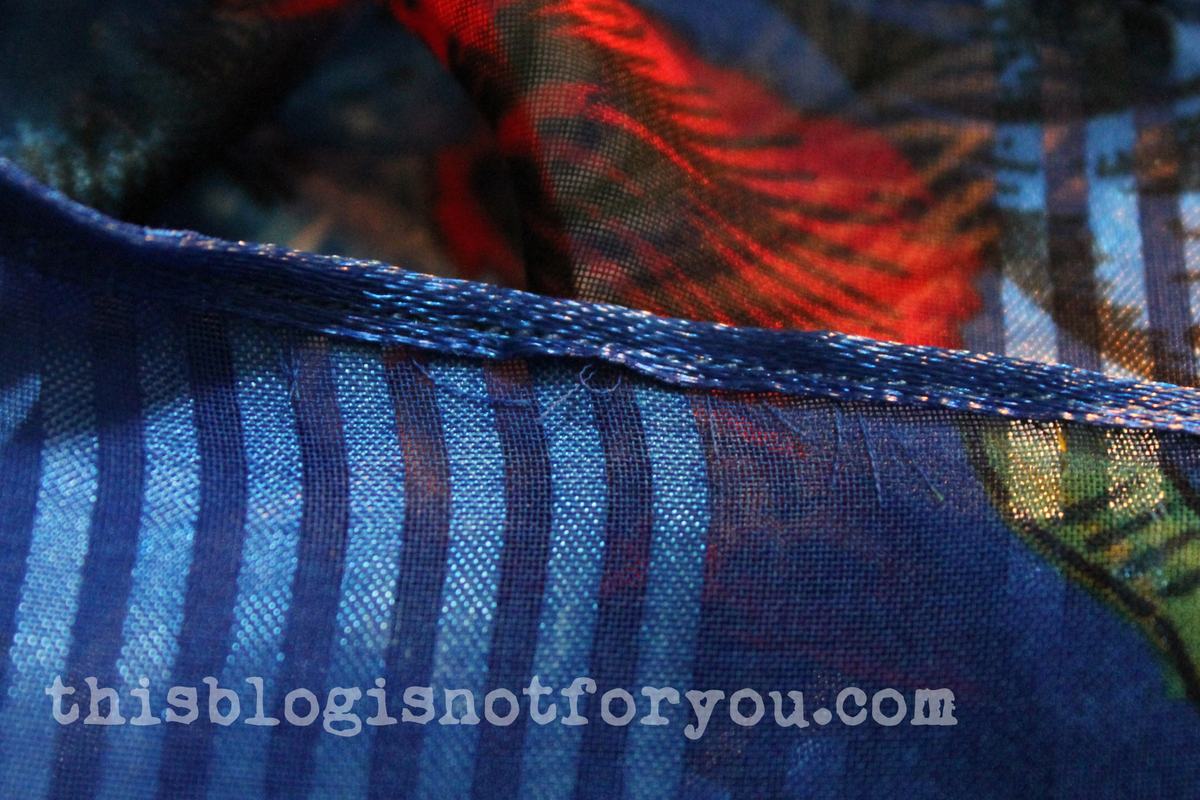
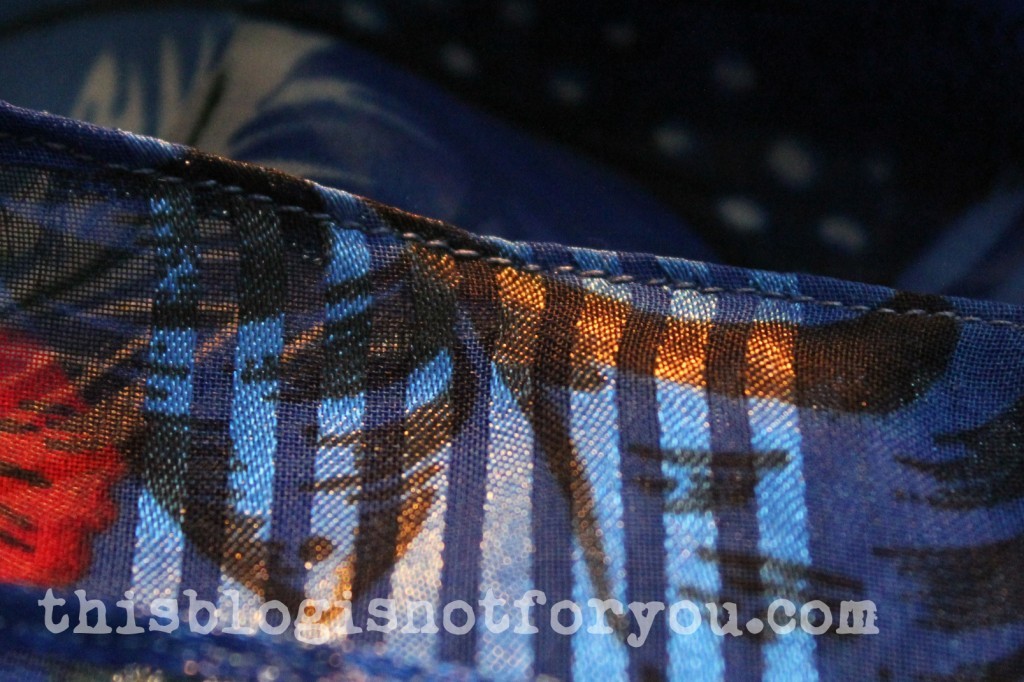
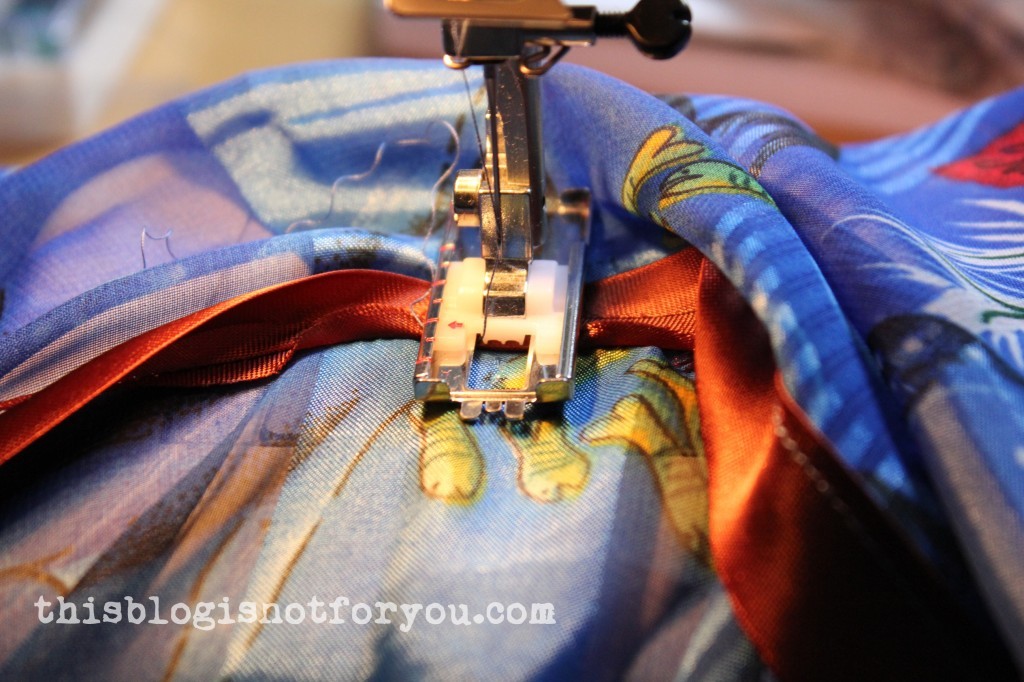
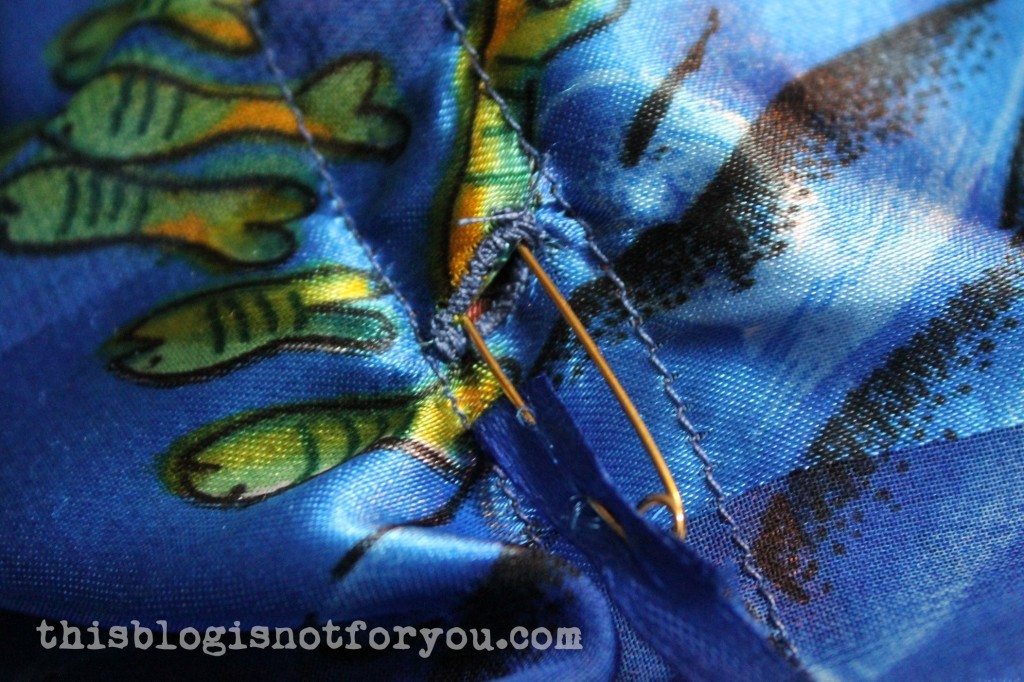
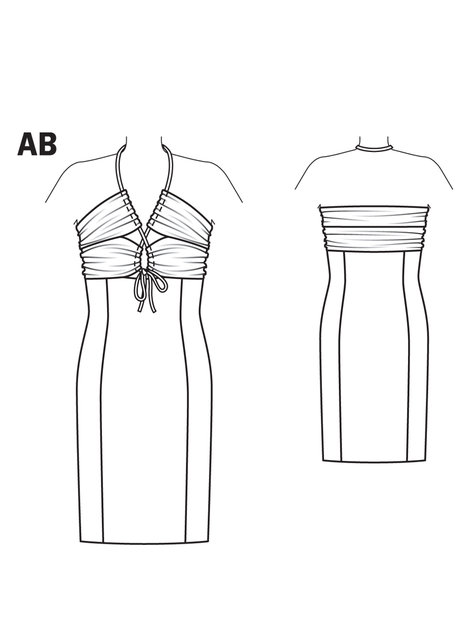
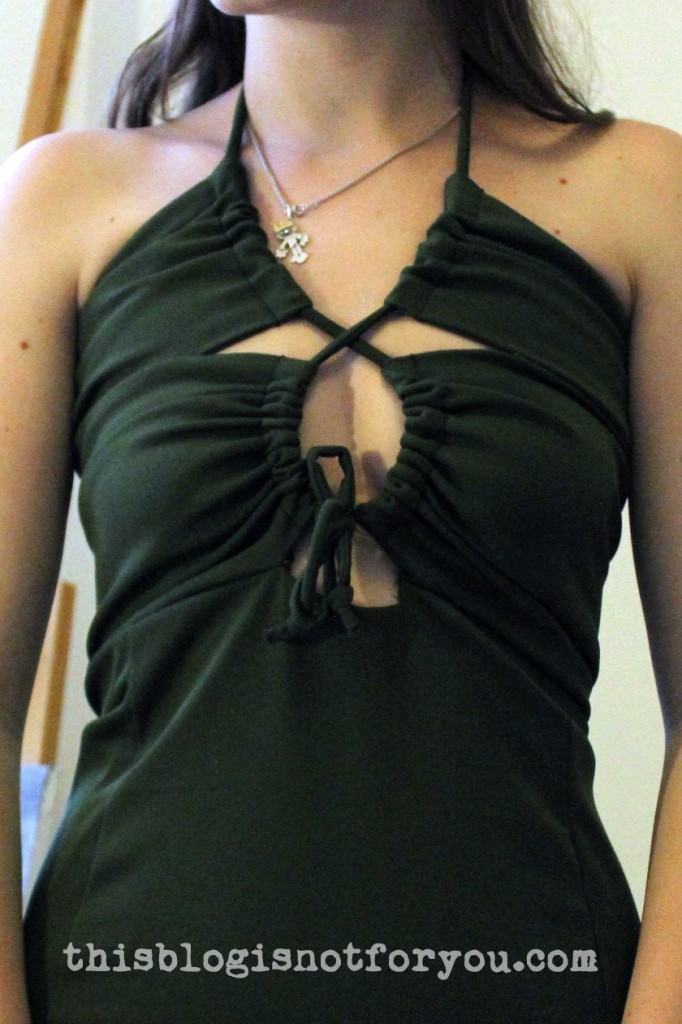
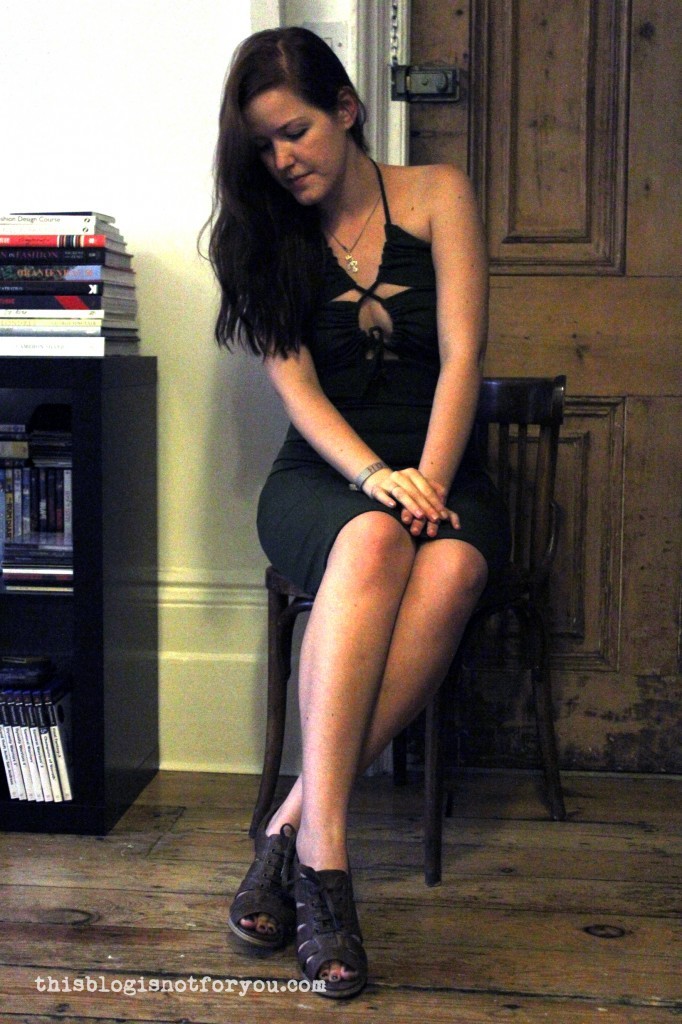
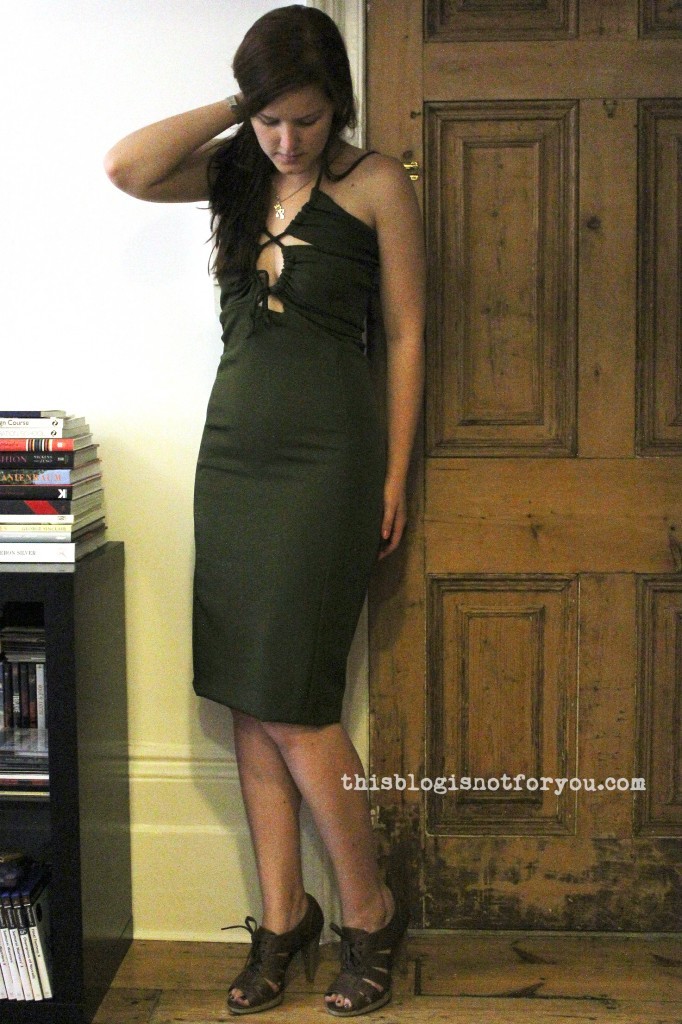
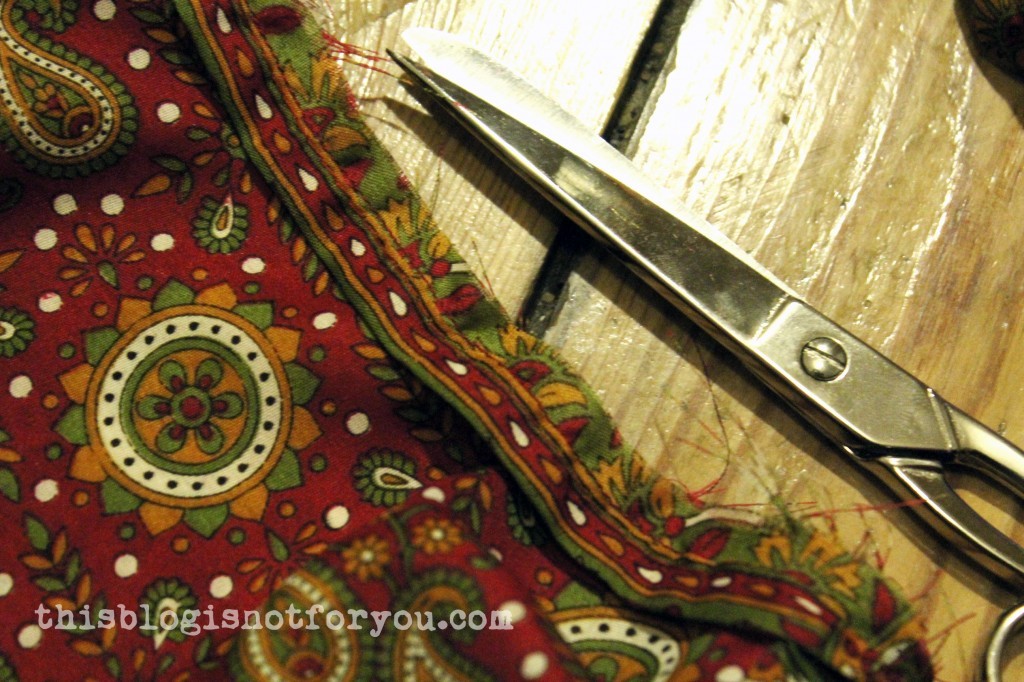
Make it! Beach Dress tutorial + pattern

Beach Dress tutorial and pattern by thisblogisnotforyou.com

Hello fellow sewing enthusiasts!

My lovely mum recently sent me a dress to make alterations and I decided to make a pattern from it first before cutting it apart. It’s a super easy and super quick sew and I thought I’d share it with you. Beach Dress tutorial and pattern by thisblogisnotforyou.com

This is the dress I will refashion (taking off the sleeves). The blue one is the version I made yesterday.

In this post I’ll share the pattern and instructions on how to sew everything together. It’s one size fits all!

Beach Dress tutorial and pattern by thisblogisnotforyou.com

All you need

– a 90x180cm or 37×71” piece of fabric

– scissors, pins, matching thread

– matching ribbon or bias binding

Beach Dress tutorial and pattern by thisblogisnotforyou.com

Here’s the pattern!

Beach Dress tutorial and pattern by thisblogisnotforyou.com

As you can see, it’s super easy. It’s basically a rectangular piece of fabric you sew together on two sides and then add a waistband.

I used a 90x180cm scarf which was already hemmed on all sides. If your fabric has raw edges, hem it before you start. If you’re using lightweight fabric (which I recommend!) you can use a narrow hem foot. They work great!

You start with the neckline. You can either make it a V-neckline like in the pattern above or do something totally different. The V in the red dress starts 24cm/9.5” below the center fold. I decided to make a boat neckline which is even easier to do.

Beach Dress tutorial and pattern by thisblogisnotforyou.com

To get the boat neckline, I pinned the fabric to the dressform and cut off fabric until it had the shape I wanted. Try it on and see if you need to make changes!

Beach Dress tutorial and pattern by thisblogisnotforyou.com

I liked it the way it was and left it like that.

To finish the raw edges I used 7mm ribbon. Bias binding would be even easier. If you have neither at home but a bit of fabric left, you can make the bias binding yourself by cutting out strips at a 45 degree angle.

Beach Dress tutorial and pattern by thisblogisnotforyou.com

Pin the ribbon to the neckline, right sides together. Edgestitch about 2-3mm from the edges.Beach Dress tutorial and pattern by thisblogisnotforyou.com

Fold the ribbon over and topstitch it on 2-3mm from the edge.

Beach Dress tutorial and pattern by thisblogisnotforyou.com

It should look like this on the right side of the fabric. All raw edges perfectly enclosed!

For the side seams, fold the fabric on the center line, left sides together. Sew the back and front together as shown in the pattern. Starting 20cm/8” from the bottom edge and 10-15cm/4-6” from the sides. The stitched line should be approximately 42cm/16” long.

To be on the safe side, you can pin the sides together first before you start sewing and see how it looks on you.

Now you need to add the casing for the drawstring/waistband. I used 2cm wide bias binding. You can also use ribbon or a strip of remnant fabric.

Beach Dress tutorial and pattern by thisblogisnotforyou.com

Stitch the casing//ribbon on in the front and back (left side of the fabric!) as shown above leaving the casing open at the side seams to form a tube for the drawstring.

In the front, sew on the casing only on one side as you need to make a little button hole first!

Now that you’ve secured the casing, mark the center of the waistband in the front and make a little buttonhole wide enough for your drawstring. Make sure it doesn’t get larger than the casing/ribbon is wide! I used the buttonhole setting on my sewing machine. You can also sew a buttonhole by hand, but I’m lazy lazy!Beach Dress tutorial and pattern by thisblogisnotforyou.com

Now stitch on the rest of the front drawstring casing.

To get the drawstring through the narrow tube use a safety pin. (Start on the right side of the fabric)Beach Dress tutorial and pattern by thisblogisnotforyou.com

Make a few knots or add some beads to the ends of the drawstring to keep it from slipping back into the casing.

And you’re done!

Beach Dress tutorial and pattern by thisblogisnotforyou.com

Now I feel a bit silly wearing blue dolphins here in London city, but I’ll be in Germany over the weekend, so hopefully I can take this dress on a little trip to one of our bathing lakes (and look slightly overdressed. Certainly no dolphins there either haha).Beach Dress tutorial and pattern by thisblogisnotforyou.com

As always, if you have any questions just pop me a comment! I also LOVE seeing and featuring your makes! If you’re making this dress, sent me a picture of it. Contact details on my about page!

Happy Sewing! xxx

 facebook/bloglovin/pinterest
Stay in touch!

A wiggle dress and some serious wardrobe malfunction

wiggle dress Burda 7/2013 #122A by thisblogisnotforyou.com

Hi everyone! Phew, what a weekend! I not only attended the London Sewing Blogger Meet-Up on Saturday and met a few dozen lovely seamstresses, but now I’m also officially done with my master’s after handing in my last essay yesterday. (Yep I went fabric swapping instead of working on my last assignment ever and it was awesome! If you want to read about the Meet Up, lovely Claire who organised everything wrote about it on her blog!)
And by the way, I did not forget to choose some blogs for the Liebster Award nomination, I was just too busy being a student and a seamstress at the same time 🙂

I know, stop talking and get down to business!

I finished dress #12 of my 27 Dresses Challenge! A green halter dress which reminds me a lot of the Marilyn wiggle dresses and believe me, this dress is so tight – there’s a lot of wiggling!

wiggle dress Burda 7/2013 #122A by thisblogisnotforyou.com

I used the #122A pattern of the Burdastyle magazine July issue.

Besides all the wiggling, there’s some serious risk of wardrobe malfunction with this dress. I was stupid enough to ignore the Burda instructions (like always…) and chose a stretchy, but obviously not stretchy enough fabric for making this dress.

Now it’s not only super super tight, but I’m afraid I’ll never wear this dress outside our flat. Why? Look at this!

wiggle dress Burda 7/2013 #122A by thisblogisnotforyou.com

It doesn’t look too bad in the picture, but in reality my boobies look like stringed ham on Christmas.

wiggle dress Burda 7/2013 #122A by thisblogisnotforyou.com

There are also some other things that went wrong which you (lucky me) can’t see in these super blurry pictures (sorry, broken lightbulb and both me and Mr.Thisblogisnotforyou were too lazy to get a new one.)

The fabric of the bodice part of this dress is basically the wrong way up. Yes! Stupid! Why?

I decided to cut out the fabric while watching a movie (distraction) in the living room (broken lightbulb). On the first look the fabric looks the same from both sides. If you look closer (which I obviously didn’t) you see that the fabric on the right side is slightly shinier than on the left.

Where is Tim Gunn when you need him? A “This concerns me enormously” would have helped. Thanks, Tim.

wiggle dress Burda 7/2013 #122A by thisblogisnotforyou.com

I’ll better not tell you that I sewed on the skirt wrong side up the first time, ending up with the raw edges on the outside. No, I better won’t.

 facebook/bloglovin/pinterest
Stay in touch!