Green Jersey Alice Top (SEW OVER IT online class)

Sew Over It Alice Top by thisblgoisnotforyou,comSew Over It Alice Top by thisblgoisnotforyou,com

Sew Over It Alice Top by thisblgoisnotforyou,com

Hi everyone!

A few weeks ago, I got to try out the new SEW OVER IT online class ‘Intro to Sewing with Knit Fabrics’. (As always, all opinions are my own!) I’ve never really made use of online courses before. I bought a couple on Craftsy ages ago but never actually made anything from it.

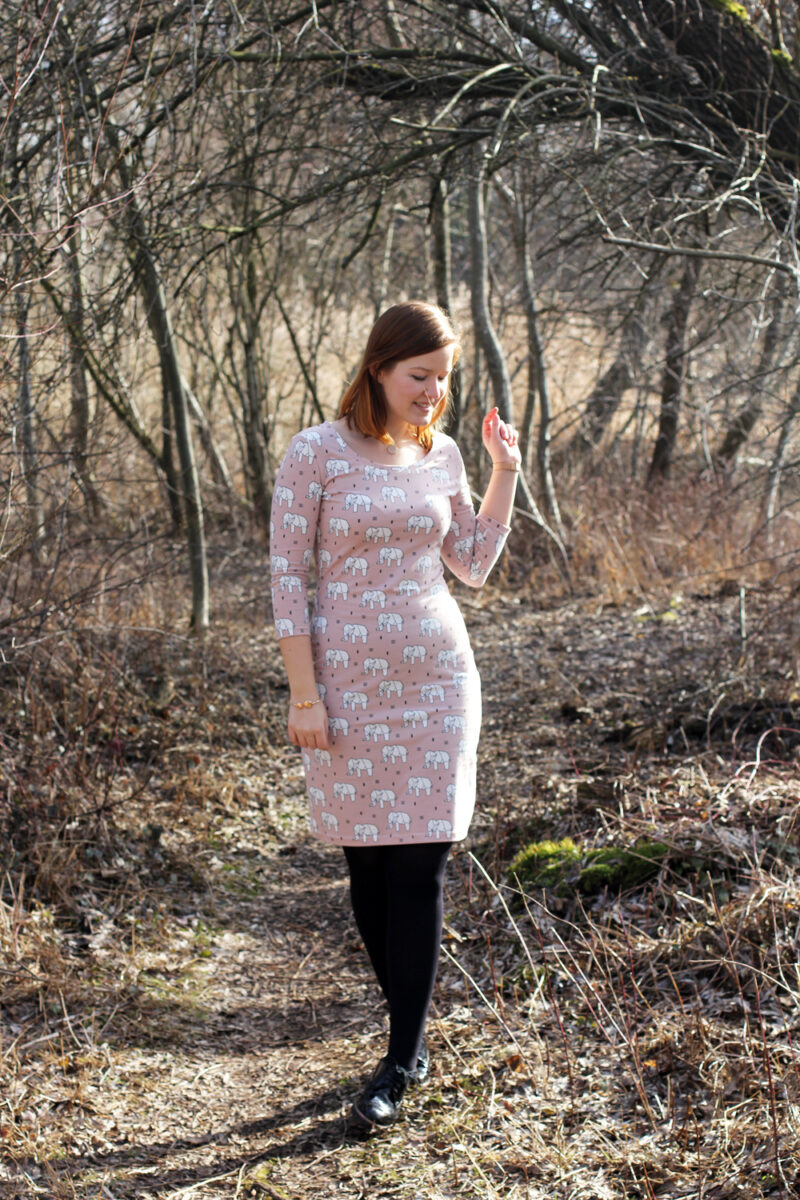
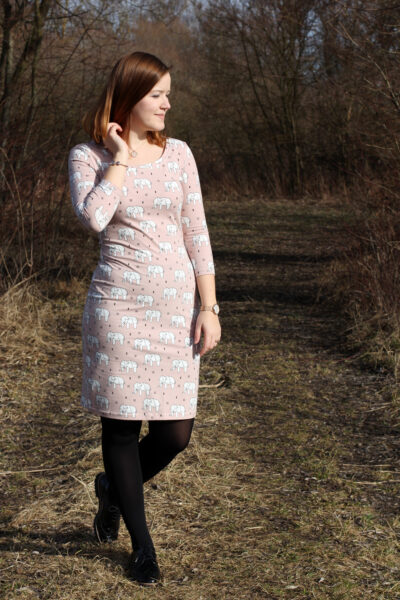
When the lovely ladies over at SEW OVER IT approached me, I immediately wanted to try after getting a glimpse at the patterns included in the class. I love their work and most of my favourite patterns are from SEW OVER IT. The Alice Top, with a faux bow front, was incredibly tempting! (There’s another pattern included, the Emma dress, which looks lovely, but I haven’t tried it yet.)

About the class:

It was pure joy to follow this online course. It’s always great to see lovely Lisa in action and she perfectly explains all the steps involved in making this cute top. The construction is not too tricky, but a bit unconventional and seeing it being put together on camera helps a lot. There’s a lot of useful information about sewing with knits included. As a more experienced sewer, I really enjoyed this class, none-the-less. It’s delightfully relaxing, as you really get immersed in the project.
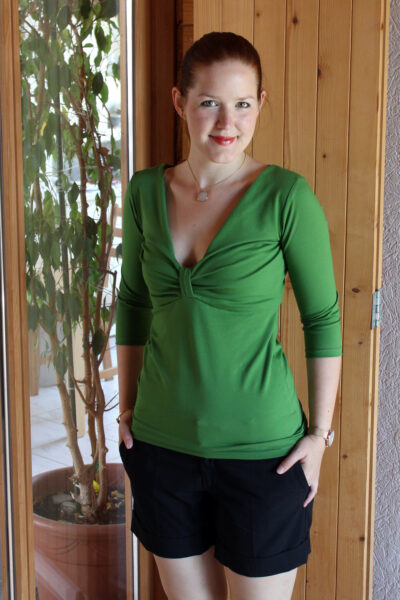
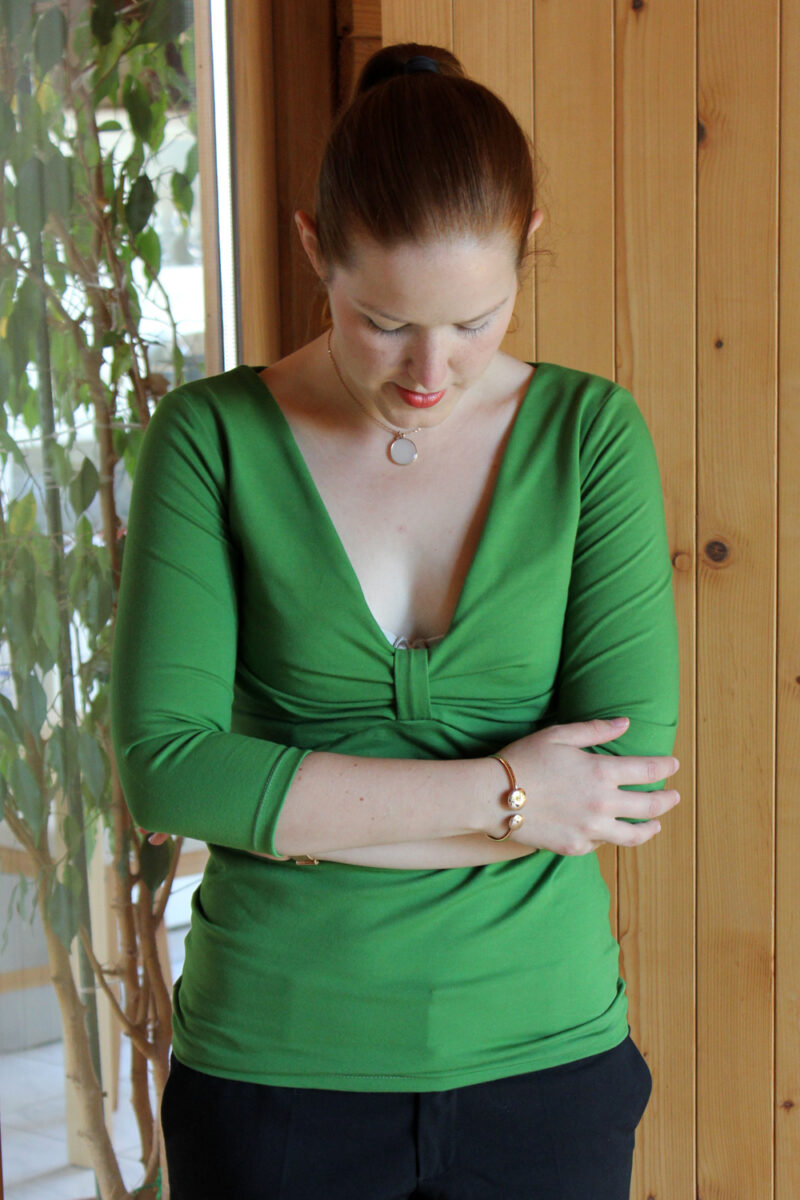
My first Alice Top:

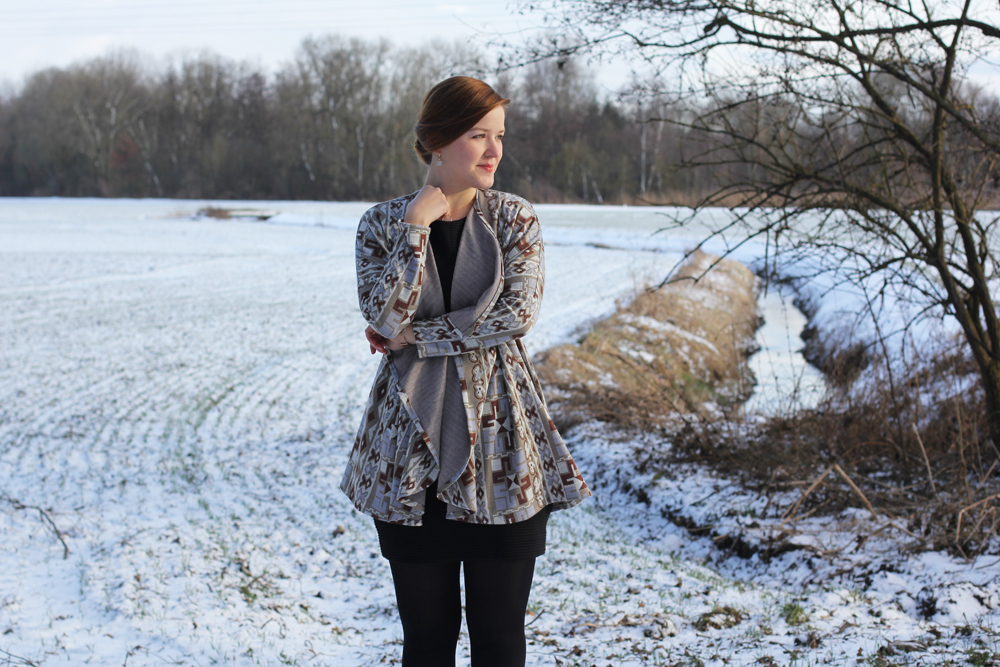
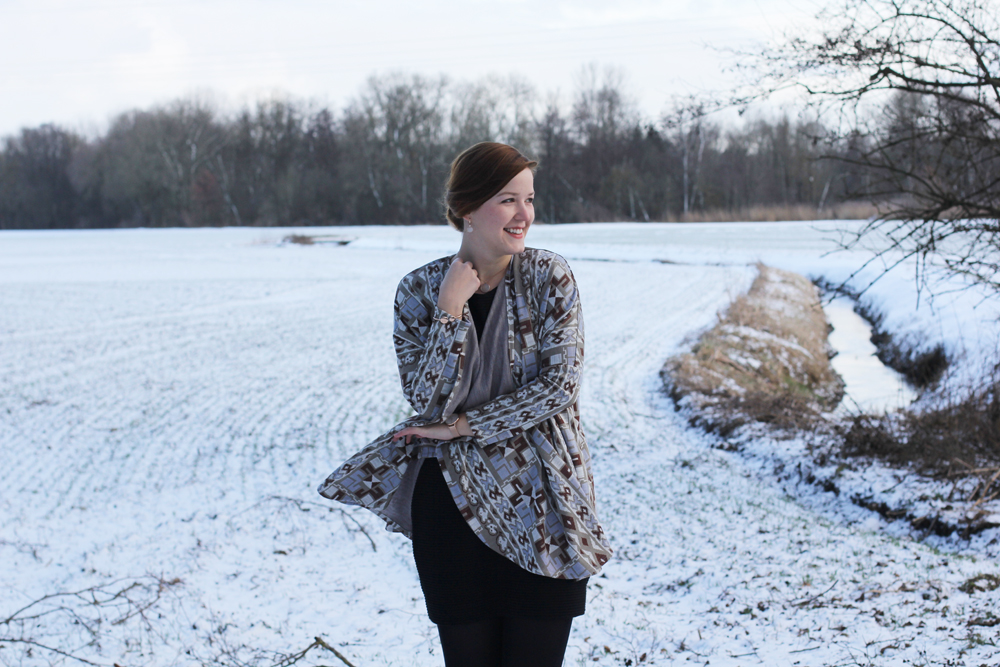
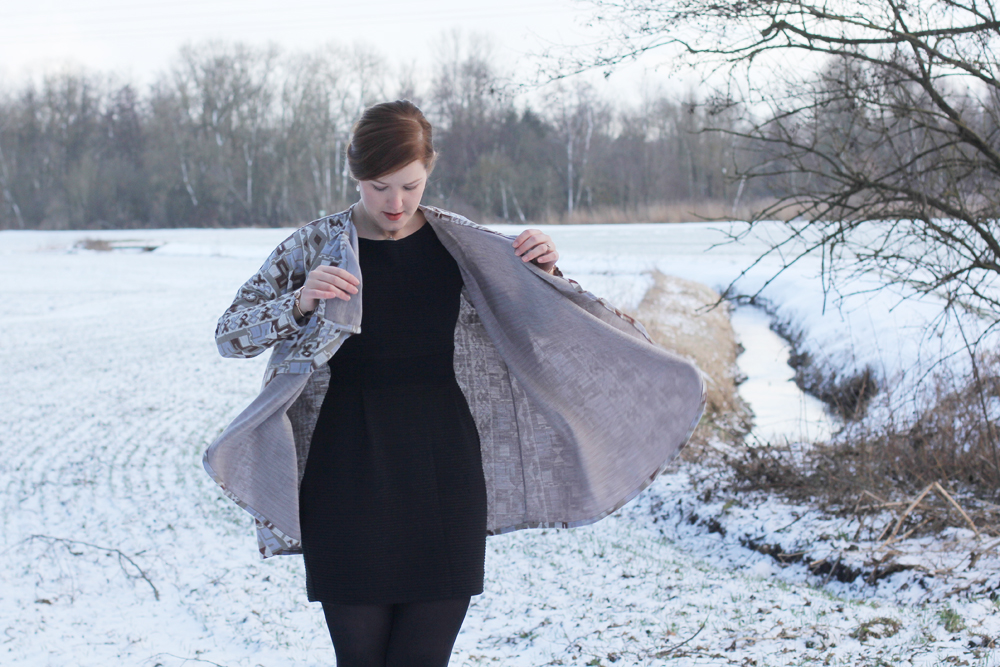
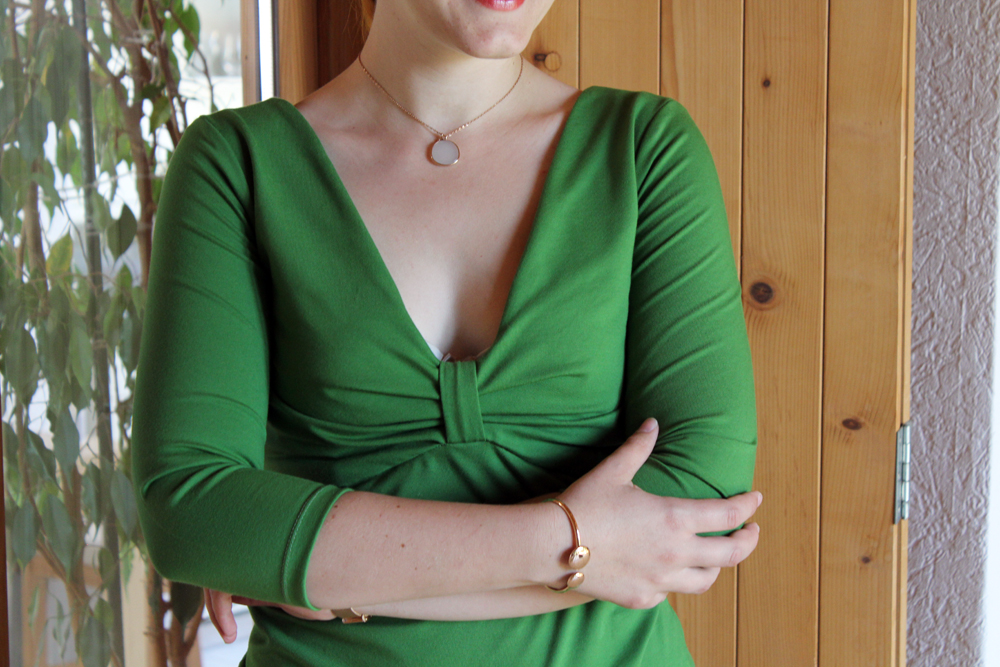
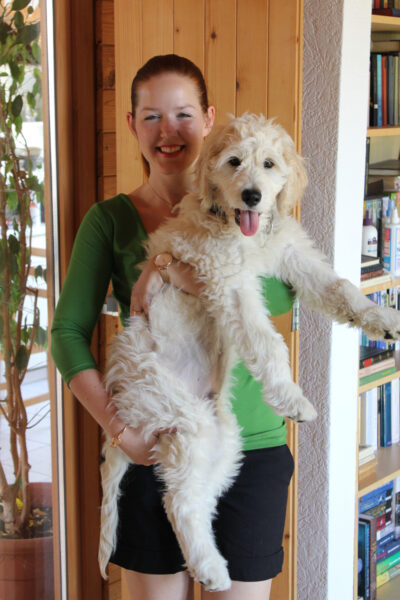
I used a green lightweight jersey, as was recommended in the class. (The fabric was gifted to me by my mother-in-law, so I’m afraid I cannot tell you where to buy it!)

For this first version of the Alice Top I went through the class step-by-step, pretty much cutting a straight size 10 without making any fit adjustments. It turned out really well! There were a couple of minor fit issues, I could easily fix before cutting another version of this pattern:
(Remember, these have nothing to do with the pattern itself, but are specific to my body measurements and posture)

  • The front neckline is gaping ever so slightly
  • The sleeve were rather tight
  • The fit at the waist was quite loose

The only thing I adjusted on the green top was taking in the waist by approximately 2 cm on each side. I’ll show you the fitted version of this top in the next post!

But perfect fit or not, this trial round went really well, don’t you think? The top is perfectly wearable and I’m really happy with it.

A few words about the construction: The Alice Top is fully faced, front and back, to create a perfect, close-fitting V-neckline and stabilise the gathers at the front. With the very detailed video instructions, this rather unconventional pattern isn’t very hard to construct. Once I finished the first top, I hardly had to revisit the course to make the second one.
The construction takes a bit longer than the average jersey top, as you have to stabilise the neckline and sew a couple more seams because of the facing. But the finishes look incredibly neat and professional.

No overlocker needed!

For this first top, I only used my sewing machine. So if you do not have access to an overlocker, this is the perfect project for you. Because of the specific construction techniques used in this course, you’ll get very neat finishes without having to use any professional equipment.

Sew Over It Alice Top by thisblgoisnotforyou,com

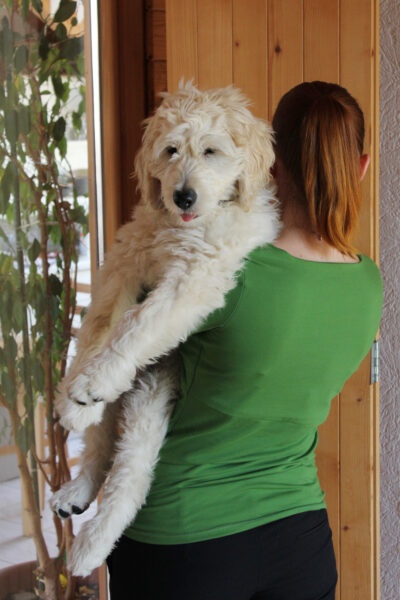
This was also the first project Aslan very helpfully assisted with modelling. I didn’t realise he might be a bit too big to use as accessory until after seeing these photos! Man, he’s grown so much in the past two months!

As I don’t want to post too many sewing-unrelated pics on my blog’s social media accounts, Aslan now has got his very own…For those of you, who want to see more of this cute little face, you can FOLLOW ON INSTAGRAM to watch him grow up!

Sew Over It Alice Top by thisblgoisnotforyou,com

What are your thoughts about online classes? Are you a fan?

xx

Charlie


Happy sewing!

facebook/bloglovin/pinterest
twitter/instagram

Stay in touch!


TUTORIAL: Make washable, eco-friendly chew toys for your dog!

DIY Dog Toys by thisblogisnotforyou.com

DIY Dog Toys by thisblogisnotforyou.comDIY Dog Toys by thisblogisnotforyou.comDIY Dog Toys by thisblogisnotforyou.com

Hi there! Thanks for stopping by! In this post I’m going to show you how to make some really cool chew toys for your dog!

There’s a very detailed step-by-step tutorial when you scroll down, explaining the basic technique I am using for making these sturdy fabric toys. But before we start, a few notes on durability and use.

First of all, recycling stuff while making eco-friendly and washable toys for your dog is amazing, right? You can throw these toys into the washing machine when they get grubby! They are soft and won’t hurt your pup’s teeth and you do not have to worry about little plastic bits breaking off which your dog could choke on. They are really sturdy if you tie the knots really tight. Our puppy is quite a heavy chewer and hasn’t managed to destroy any of these yet after using them for almost three weeks.

But there’s a note of caution, nonetheless.

As with any other chew toys, never leave your dog unattended or at least check on him every now and then when they’re playing with toys. Every toy might break at some point. No toy is indestructible. Check your dog’s toys every night and throw away any toys that are broken or hazardous in any other way. 

We also use these toys to teach. If your dog manages to destroy any toy in minutes, don’t leave him alone to get on with it. Use toys to teach him “leave it” and “take it”, “be gentle” or do some fun retrieving exercises. Your toys will last much longer! If your dog tends to be bored by this kind of toy: We never leave more than three toys out and rotate them on a regular basis, so the dog doesn’t start ignoring them. They’ll stay much more interesting this way!

Alright, here we go then!
DIY Dog Toys by thisblogisnotforyou.comDIY Dog Toys by thisblogisnotforyou.com

MAKE YOUR OWN!

Here’s what you’ll need:

  • some leftover cotton jersey fabric (less than half a yard/metre is more than enough!)
  • scissors

Yep, that’s really all you need. If possible, use two different colours of fabric as this makes it easier not to get confused tying the knots when you try this the first time!

You do not necessarily need to use jersey fabric. Any other natural fibre would be OK for your dog, as well. But the stretch of the jersey makes the toy much more durable, as the knots are a lot tighter!

DIY Dog Toys by thisblogisnotforyou.com

Cutting the fabric:

There’s no rule about how wide or long the fabric strips need to be. It depends on how big a chew toy you want to make. I found the narrower the strips are, the sturdier the toy seems to be. Large strips of fabric might come loose after a while. I cut narrower strips and worked two as one while making the knots.

I cut 50-70 cm long strips about 3 cm wide for making the toys shown in this post.

How many do you need to cut? If you are using two different colours and you want them to run diagonally, you need to work with four bands (So eight in total, four of each colour, if you want to work two as one as I did). If you want the colours to run vertically, use six bands (four of one colour and two of the other – which makes 12 strips of fabric in total!).

The start:

The technique is roughly the same no matter how many bands you’re using. The beginning is exactly the same for both:

DIY Dog Toys by thisblogisnotforyou.com

Gather all the strips together at one end and tie a really tight knot like so:DIY Dog Toys by thisblogisnotforyou.com

Tighten the knot by pulling hard on every single end. You will see the knot tighten and the fabric roll up as shown below.DIY Dog Toys by thisblogisnotforyou.comDIY Dog Toys by thisblogisnotforyou.com
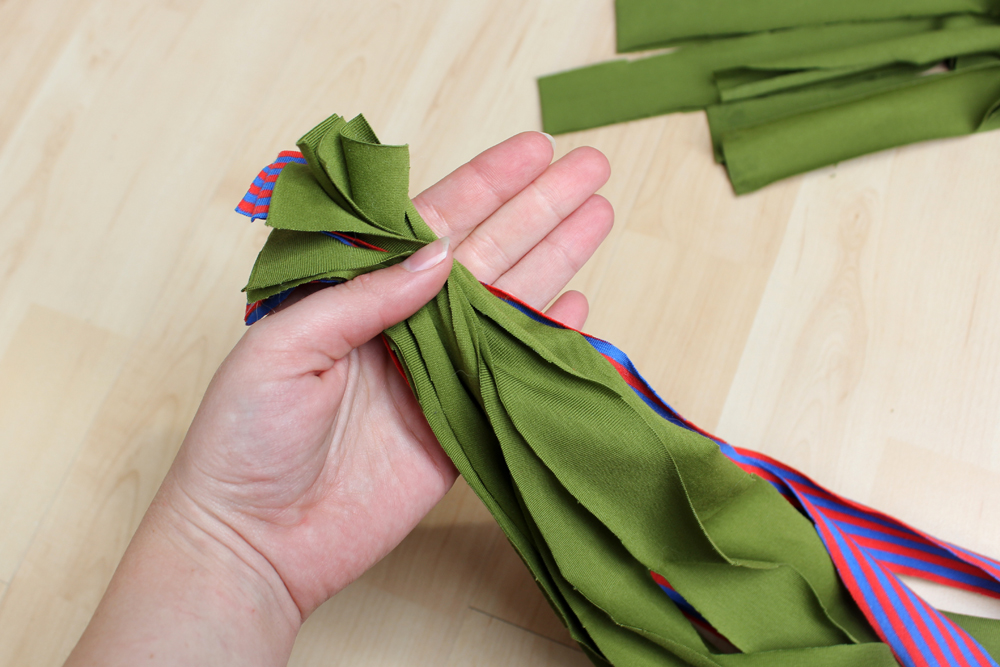
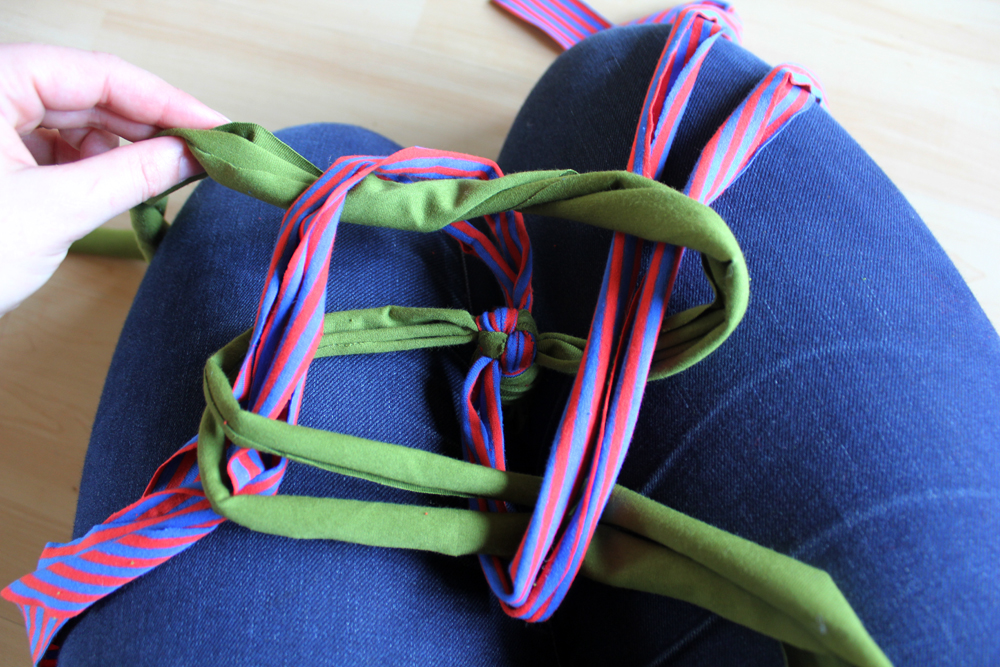
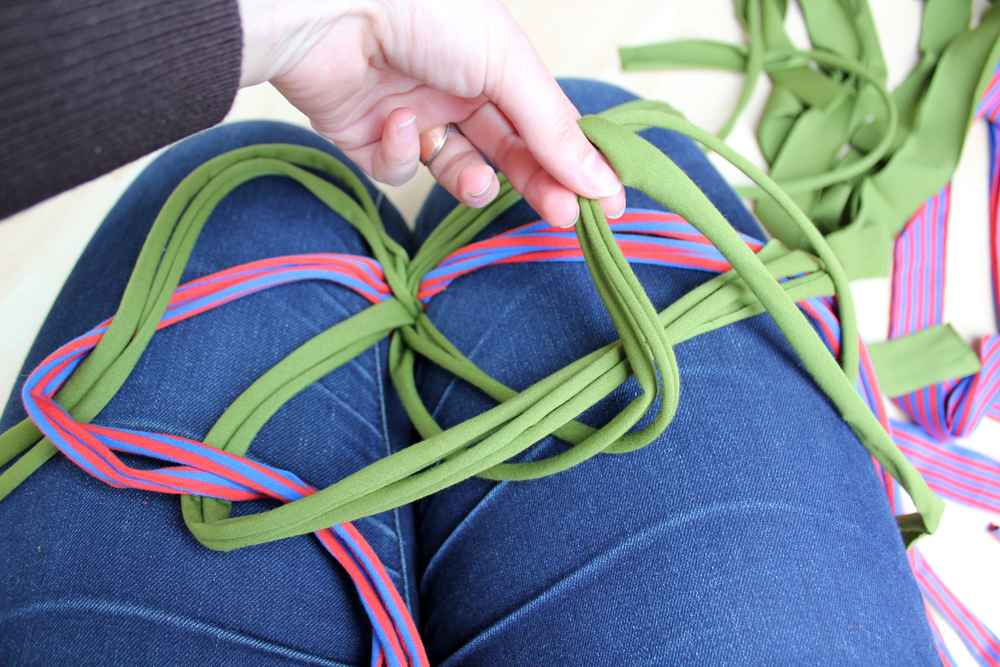
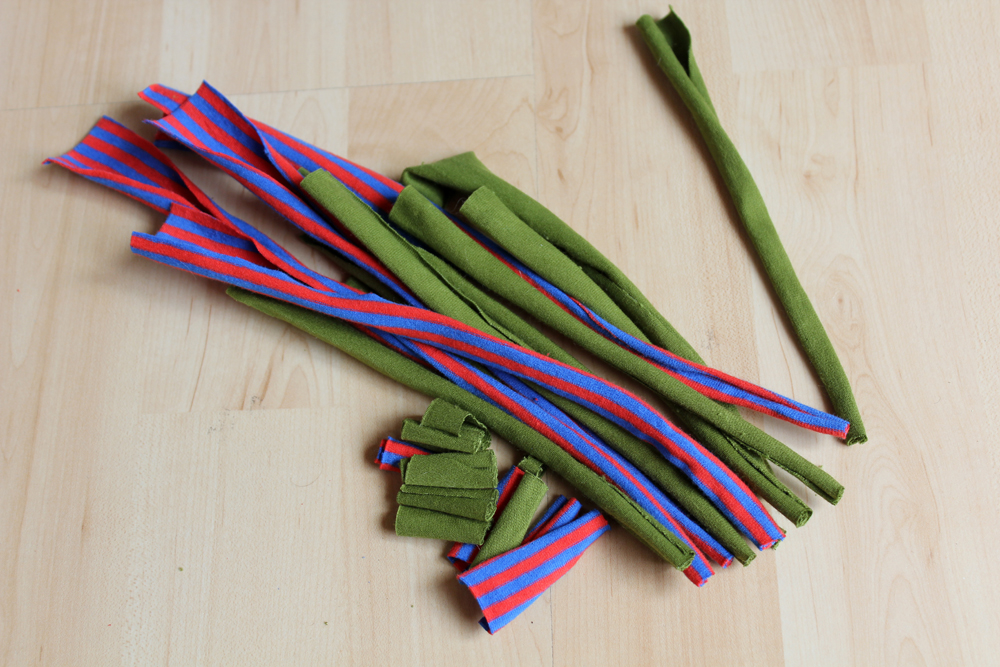
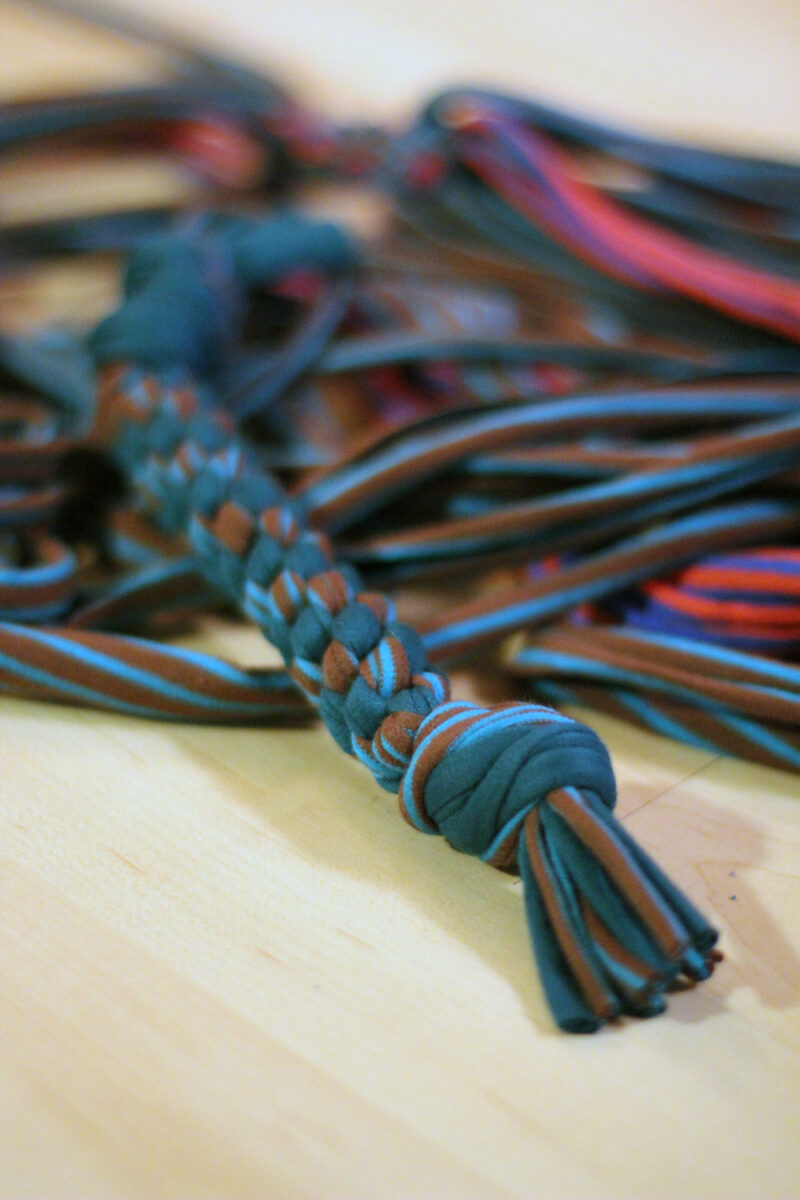
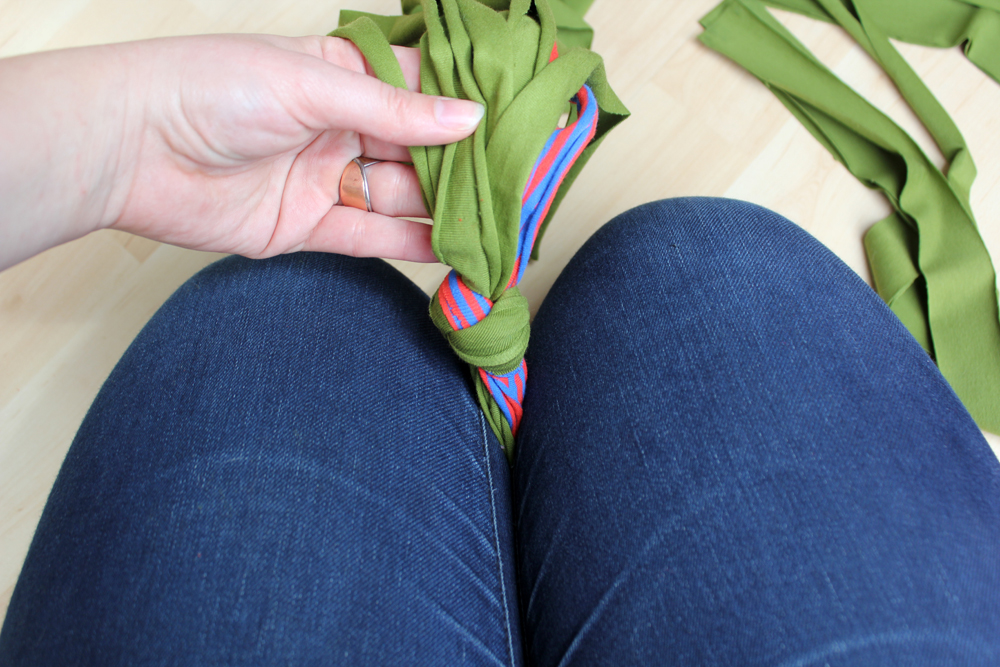
In this example I am making a toy using two colours and four bands, each one consisting of two strips of fabric of the same colour:
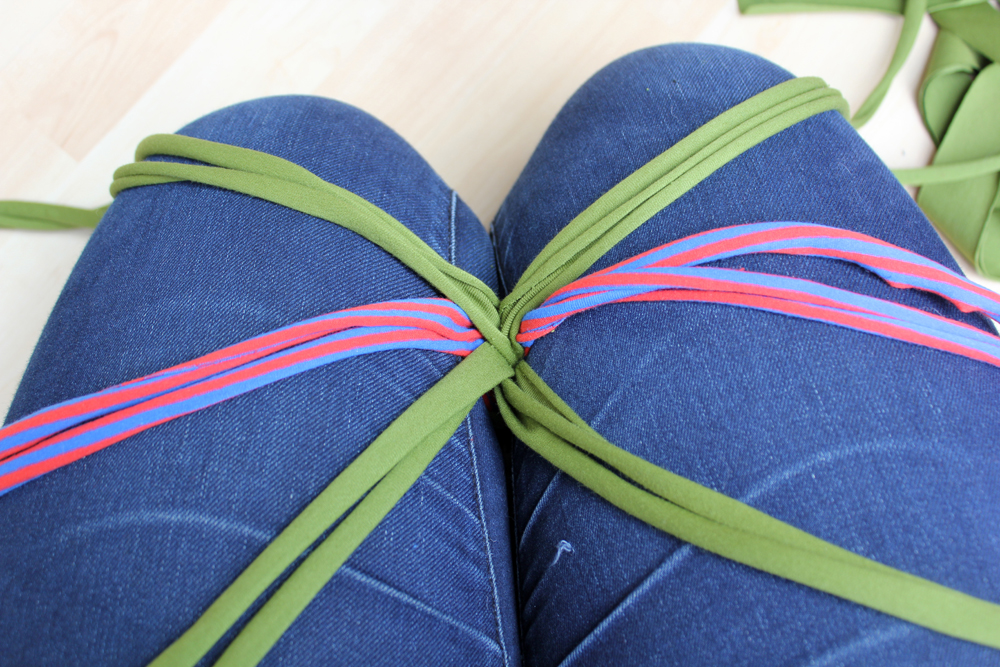
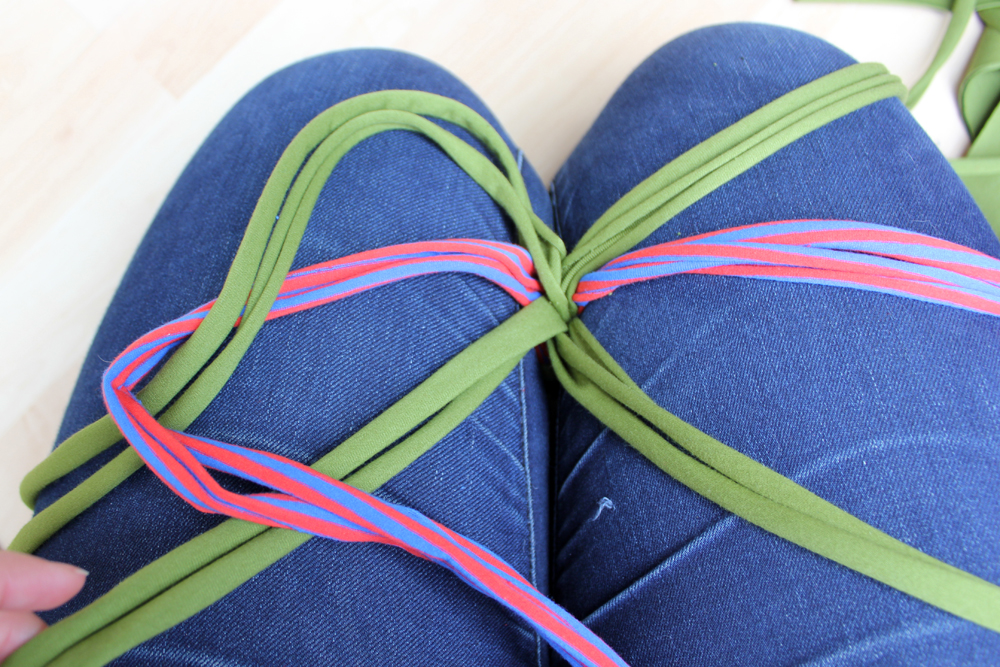
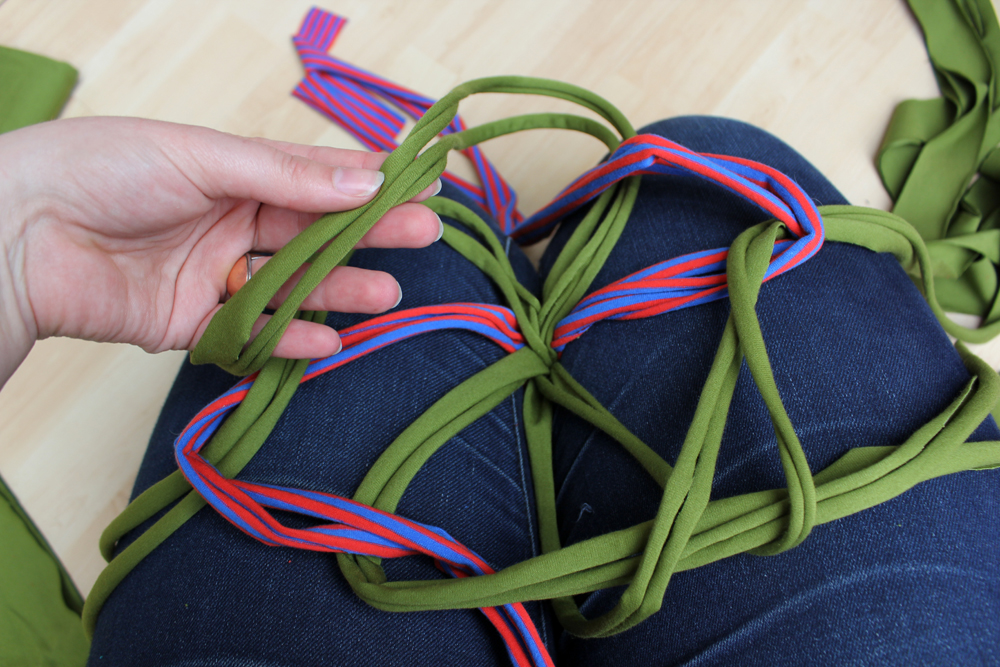
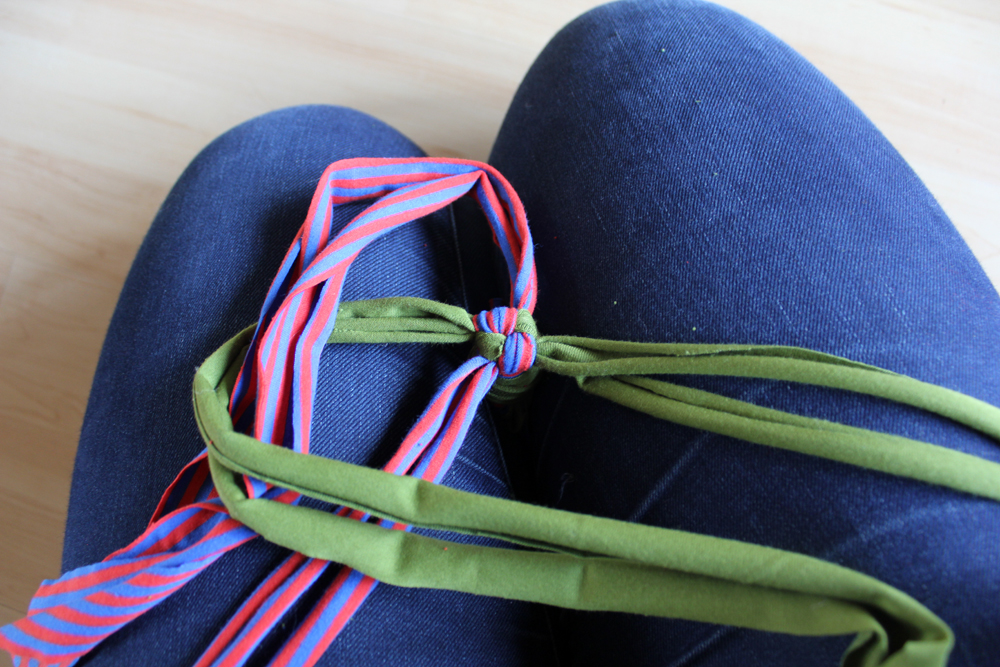
DIY Dog Toys by thisblogisnotforyou.com

You can use a hook or safety pin, as well, but I find this method easier: Place the ends between our knees (sitting or kneeling) and hold it that way. Both of your hands are now free to work.

DIY Dog Toys by thisblogisnotforyou.com

Knotting using four bands:

Sort out the strips according to colour. You should have four bands. Place them like shown below. You should be looking at the knot you tied. (In this picture there’s already one row of knots tied, so yours will look slightly different). DIY Dog Toys by thisblogisnotforyou.com

Start by placing the first band (it doesn’t matter which one you start with!) over the next one on the left. Then take the ends of that left one and, again, place them over the one next to it on the left. DIY Dog Toys by thisblogisnotforyou.comRepeat. DIY Dog Toys by thisblogisnotforyou.com
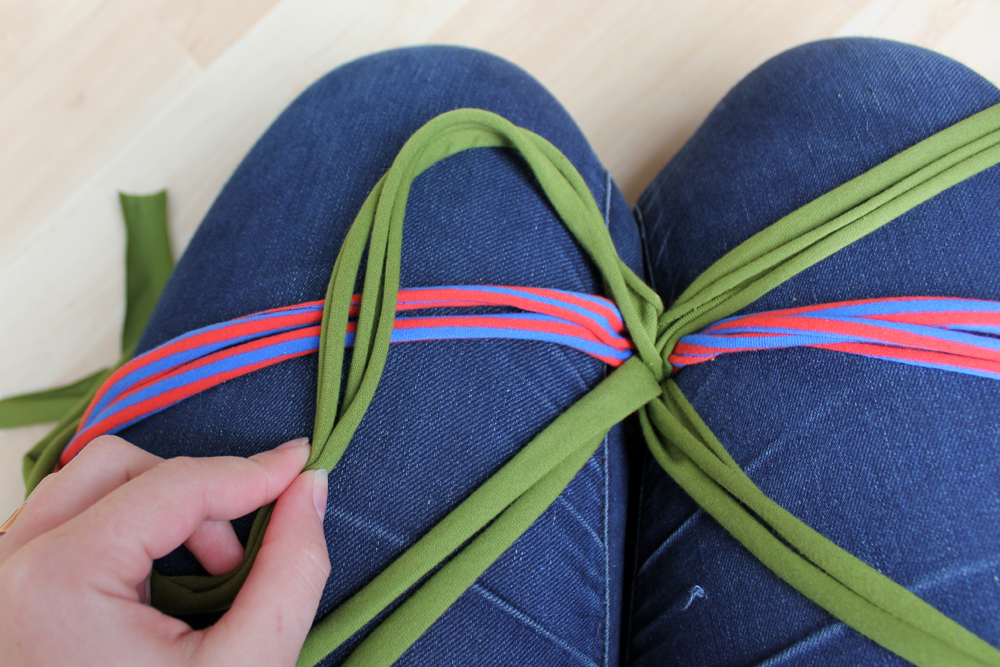
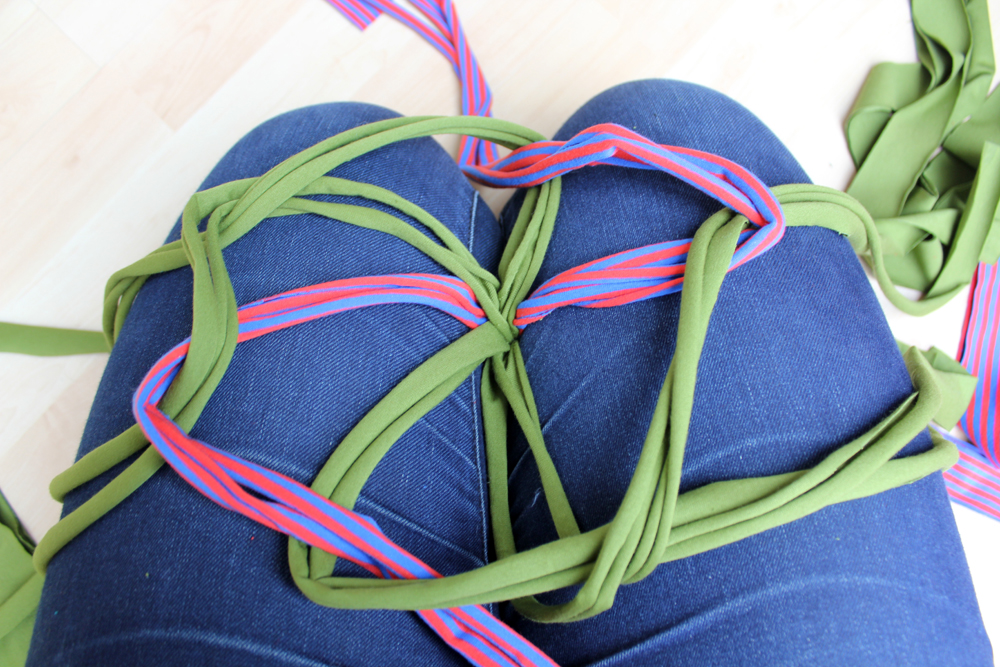
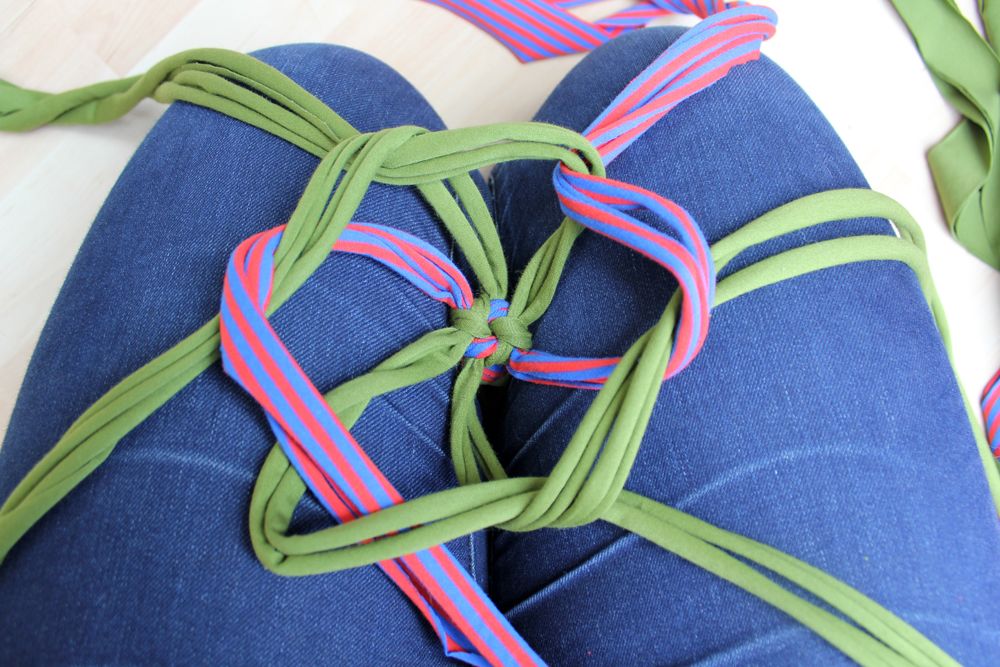
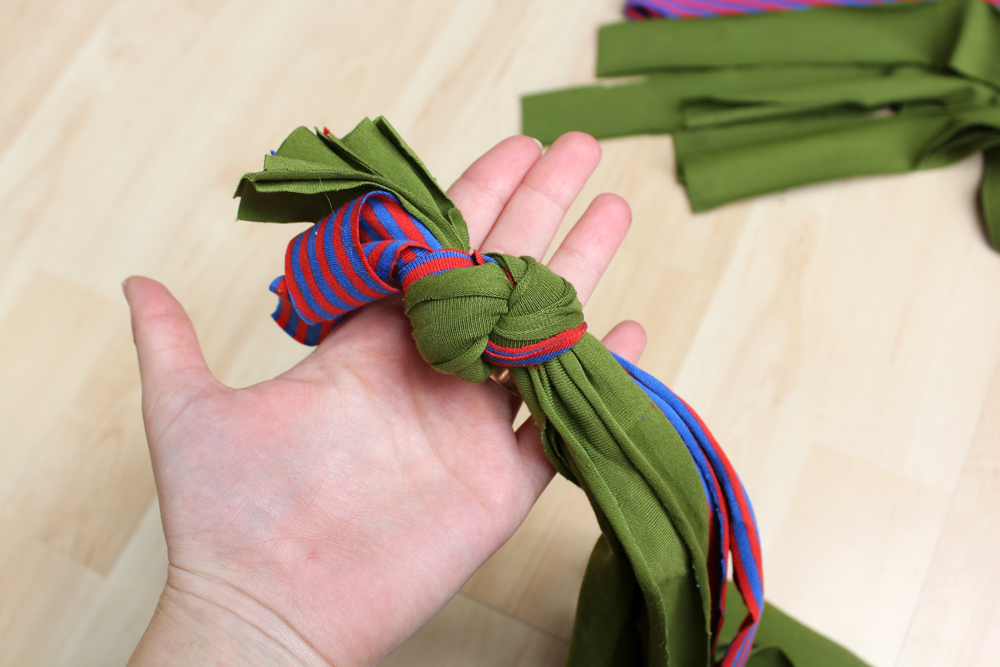
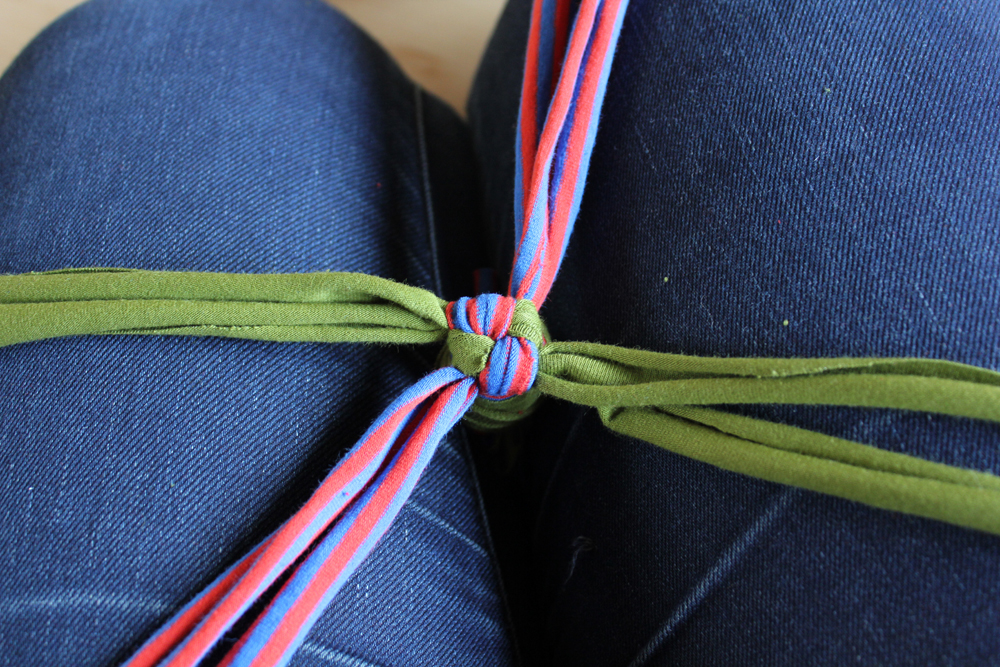
Work your way around until you reach that first band again. Take the end of that fourth band and pull them through the loop you created when you crossed the first two. It should look like this:DIY Dog Toys by thisblogisnotforyou.com

Now you pull that knot tight. You will need to pull on all four ends and repeat that pulling several times until the knot is really tight and even.

Knotting using six or more bands:

Here’s the same technique using more than four bands. You can use any amount of bands, but the more you use, the bigger the toy gets. (Note: At some point there’ll be a gap in the middle of the toy which you might fill with something while braiding around it. If not, the braid might be quite loose.)

I used six bands for the next one. Start as described above. Sort out all the different colours before starting.

DIY Dog Toys by thisblogisnotforyou.comDIY Dog Toys by thisblogisnotforyou.comDIY Dog Toys by thisblogisnotforyou.comDIY Dog Toys by thisblogisnotforyou.com

As you can see, we’re doing the exact same thing here. We just don’t stop at the fourth but continue until we’ve finished the whole round again until we pull the last one though the loop.DIY Dog Toys by thisblogisnotforyou.comDIY Dog Toys by thisblogisnotforyou.comDIY Dog Toys by thisblogisnotforyou.com

Pulling this one tight is a bit trickier. I recommend starting to pull at one end and then working your way clockwise for two or more rounds until everything is tight and neat.DIY Dog Toys by thisblogisnotforyou.comDIY Dog Toys by thisblogisnotforyou.comDIY Dog Toys by thisblogisnotforyou.comHow to finish the toy:

And that’s almost it! Work for as many rounds as you like. A smaller toy will need around 15-20 repeats until it’s long enough. It will look like this:DIY Dog Toys by thisblogisnotforyou.com

DIY Dog Toys by thisblogisnotforyou.com

Tie another knot, just as you did at the beginning. Pull at every single end to get it really tight.DIY Dog Toys by thisblogisnotforyou.com

Then cut off all excess fabric… and you’re done!DIY Dog Toys by thisblogisnotforyou.com

Ps.: Don’t throw away these scraps! We’ll use them as stuffing for another toy that I’ll be sharing with you soon!DIY Dog Toys by thisblogisnotforyou.com

Now off to present it to your doggie!

DIY Dog Toys by thisblogisnotforyou.com

Getting creative:

Once you got the hang of the basic technique (which is after finishing your first toy!), you can start playing around with it. You can divide the strips mid-toy into several smaller ones, add some knots or even weave two toys together into a cross. You can knot the ends together to create a doughnut-shape or learn to tie diamond knots at the ends to create this bone-shaped toy:

DIY Dog Toys by thisblogisnotforyou.comDIY Dog Toys by thisblogisnotforyou.com

For the one above, I used strips about 150 cm long. I wove two really long toys together in the middle and tied the ends together, as well. I did not cut the ends but braided them together in threes. Now it looks like a fun octopus toy. Your dog will love the different shapes and textures, guaranteed!

Here’s another one I created freehand. When I reached the middle of the toy (roughly after about 9-10 knots) I divided the strips into two big ones which I tied off using a basic knot. I then used the same technique (working only single strips) for a few repeats, tied another knot and then braided all four bands (8  strips) normally until reaching the end. Our puppy loves this one!

DIY Dog Toys by thisblogisnotforyou.comDIY Dog Toys by thisblogisnotforyou.com

If you have any questions about making a specific toy shown above, let me know in the comments! Hope you have as much fun making these as I did!

xx

Charlie


Have fun!

facebook/bloglovin/pinterest
twitter/instagram

Stay in touch!

Elephant Print Agnes Dress

Agnes Dress by thisblogisnotforyou.comAgnes Dress by thisblogisnotforyou.comAgnes Dress by thisblogisnotforyou.com

Agnes Dress by thisblogisnotforyou.com

Agnes Dress by thisblogisnotforyou.comAgnes Dress by thisblogisnotforyou.com

Agnes Dress by thisblogisnotforyou.com


Hey guys, hope you’re all having a fantastic Sunday!

After spending the last couple of weeks mostly sewing for friends and family, I finally could squeeze in a sewing project for myself. I really have to be more selfish with my sewing if I want to keep wearing handmade clothes! I find it really hard to say no to requests and then also I often find myself offering my help. Sounds familiar, anyone? For some reason I can find little joy in sewing for others, especially if there’s no opportunity for a fitting. Putting a lot of work into something not knowing whether it will fit is just not enjoyable to me. (The exception is my nieces, really. Sewing for babies is always fun as fitting is easy and you can just go wild with your fabric choices and use up all your fabric scraps.)

I bought this amazing elephant print jersey on Stoffe.de (myfabrics.co.uk in the UK). I loved the print right away. I wanted to make an Agnes top at first, but had enough fabric left for the dress hack. The last Agnes dress I made has become such a wardrobe staple for me, which can easily be dressed up or down for the occasion, that I had to make another one. It was my husband’s birthday that weekend, and a dress would be much cuter for the party than jeans + top.

As mentioned before, I used the Tilly & The Buttons Agnes Top pattern, which I have sewn and hacked many times before. (Check out my project gallery for all the different versions!) Hacking the top into a dress is really, really simple. I also added 3/4 sleeves and went for the simple scoop neckline, as the print was busy enough.
Agnes Dress by thisblogisnotforyou.com

Agnes Dress by thisblogisnotforyou.com


As always, the fit of the Agnes pattern is amazing. As the fabric wasn’t as stretchy as I had hoped, it was a little bit tight at first, but stretched out after the first wear. The Agnes pattern is super versatile and so quick to cut out and sew. I wasn’t really lucky with the first bunch of Tilly patterns (especially from her Love At First Stitch book), as I just couldn’t get them to fit right no matter what I tried. But Agnes really makes up for it!

The pattern is perfect for busy prints like my elephant fabric. Although I used this pattern quite a few times before, all the clothes I made with it look so different, that you can’t really tell it’s the same pattern.

Will there be more Agnes’ in the future? Hell, yeah!Agnes Dress by thisblogisnotforyou.com

Agnes Dress by thisblogisnotforyou.com

Agnes Dress by thisblogisnotforyou.comAgnes Dress by thisblogisnotforyou.comAgnes Dress by thisblogisnotforyou.com

I’m so happy that spring’s back! The sun is luring me out of the house. Luckily there are enough rainy weekends still, to get some sewing done for the warmer season…

Do you have any recommendations for wardrobe staple patterns? And what are your spring sewing plans?

xx

Charlie


Happy sewing!

facebook/bloglovin/pinterest
twitter/instagram

Stay in touch!

A KEIRA Hack: The Waterfall Cardigan

Keira Cardigan free pattern by thisblogisnotforyou.comKeira Cardigan free pattern by thisblogisnotforyou.com

Keira Cardigan free pattern by thisblogisnotforyou.com

Keira Cardigan free pattern by thisblogisnotforyou.com

Hello everyone! I hope you are all cosy and warm behind the sewing machine or on the couch. As gorgeous as it looks, the weather is quite unpleasant at the moment. I spend most of the time these days on the sofa, I have to admit. As much as I love sewing, nothing beats a hot tea or coffee and a great book when it’s freezing outside. I will try and squeeze in some sewing tomorrow, though. I’m in desperate need of some thick, cosy sweaters!

Today I’m sharing another version of the KEIRA Cardigan with you. This time I tried hacking the pattern into a waterfall cardigan. They’ve been fashionable for the last few years and are super comfy during the cold season while looking quite chic. The extra fabric at the front ensures a bit more warmth even when you’re wearing the cardigan open.Keira Cardigan free pattern by thisblogisnotforyou.comKeira Cardigan free pattern by thisblogisnotforyou.comKeira Cardigan free pattern by thisblogisnotforyou.comKeira Cardigan free pattern by thisblogisnotforyou.com

The pattern hack is quite simple. First, print out and assemble the PDF pattern. (You can download it for free or pay whatever you think is appropriate.)

Once you cut out your size, you’ll need the front and back pattern pieces and a large piece of paper. Dot-and-cross paper works really well, but you can also tape together some printer paper.

As I wanted to preserve the original pattern that I had already assembled, I traced it first. I’d recommend keeping one set of original pattern pieces to use and trace for multiple hacks, if it’s a pattern you use often. If it’s a one-time project, you might as well glue additional paper onto the pattern and apply all changes directly onto it.Keira Cardigan free pattern by thisblogisnotforyou.com

Once traced, I lengthened the shoulder seam by 3.5 cm, as I did not want to add any binding. Thus, the neckline would sit a bit higher up and closer to the neck. I then moved the centre front by 36cm (14in). This is the extra fabric that will create the waterfall effect.

You will need to redraw the curved neckline which now doesn’t plunge down as far (approx. 5cm) and then proceeds as a straight, perpendicular line until it meets the centre front line. There are two style options for the hem. You could either  just draw a straight line towards the centre front or, as I did, go for a curved hem and shave off that lower corner on the new front pattern piece.

If you leave that corner, the fabric will dip down below the hemline as the fabric drapes into the waterfall. I tried that at first, but it wasn’t for me.
Keira Cardigan free pattern by thisblogisnotforyou.com

There are only minor changes to be made on the back pattern piece. Just add those extra 3.5 cm at the shoulder seam line, so both pattern pieces match up in the end. You’ll also need to redraw the neckline here.
Keira Cardigan free pattern by thisblogisnotforyou.com

And that’s basically it! You can now cut out and construct the cardigan as shown in the instructions. Instead of using a binding, I folded the hem over twice by 1 cm, stitching everything in place close to the edge of the fold. This needs a bit of skill where the hem curves. I used a lot of pins to create a smooth, even curve and gave it a thorough press before machine stitching the hem. Keira Cardigan free pattern by thisblogisnotforyou.comKeira Cardigan free pattern by thisblogisnotforyou.com

Keira Cardigan free pattern by thisblogisnotforyou.com

Keira Cardigan free pattern by thisblogisnotforyou.com

Cardigan: handmade (Keira Cardigan)
Dress: handmade
Lace trim socks: Primark
Shoes: Clarks
Jewellery: Skagen

Hope you liked this easy pattern hack! Feel free to download the pattern and try it yourself. It’s such a quick project – perfect for a lazy Sunday afternoon! I’ll definitely make another one. Next time probably is an even cosier fabric, such as wool or fleece-back jersey.

Have a great weekend & keep warm!

You can DOWNLOAD the pattern HERE.

xx

Charlie


Happy sewing!

facebook/bloglovin/pinterest
twitter/instagram

Stay in touch!

Keira Cardigan in Black

Keira Cardigan free pattern by thisblogisnotforyou.comKeira Cardigan free pattern by thisblogisnotforyou.comKeira Cardigan free pattern by thisblogisnotforyou.com

Keira Cardigan free pattern by thisblogisnotforyou.com

Lately, I was so busy sewing (and reading and knitting in order to muster some willingness towards the cold season) that I completely forgot to blog some of the makes we photographed a little while ago. One of these is another version of my KEIRA CARDIGAN, which I released a few weeks ago:

Keira Cardigan by Thisblogisnotforyou.com

The KEIRA Cardigan pattern is a pay as you wish pattern – so it’s basically free unless you choose to pay for it. You can download it here and read more about it here.

Pattern & Adjustments: As mentioned above, I used one of my own patterns for this cardigan. This one is actually one of my test versions I made prior to releasing this pattern. I sewed it up pretty much over a year ago, as I was planning to release the pattern last winter. I made the version with the wide binding around the edges. I only tweaked the sleeves a bit after this one, as the fit was a bit too snug – still wearable though.

Fabric: This jumbo ribbed jersey, which I suspect is almost certainly 100% polyester, is really comfy and was a breeze to sew with. I bought it ages ago in a local fabric store when I still lived in Queen’s Park, London. It was £1.50/m, 60 inch wide. I bought 2 metres of it. The fabric has made an earlier appearance on the blog, as a Lady Skater/Ultimate Pencil Skirt Frankendress. A little black dress I made with a self-drafted sequinned cardigan which is the original KEIRA cardi I based the pattern on.
After wearing this cardigan for more than a year, I am surprised how well this fabric holds up. As you can see in the picture we took recently, there’s no trace of the innumerable times this garment has been in the wash. Pretty good for spending no more than £3 on it considering I managed to squeeze out two garments.

Keira Cardigan free pattern by thisblogisnotforyou.com

Keira Cardigan free pattern by thisblogisnotforyou.com
img_8764

Keira Cardigan free pattern by thisblogisnotforyou.comKeira Cardigan free pattern by thisblogisnotforyou.com

cardigan: handmade, KEIRA Cardigan by Audrey & Me Patterns
skirt: handmade, Ultimate Pencil Skirt by SEW OVER IT
belt: Primark
T-shirt: C&A

I’ve worn this KEIRA loads in the past year. All through last winter and spring and now again since it’s become really chilly again. Through summer I sometimes wore it instead of a light jacket. It goes with pretty much anything; mini skirts, fitted dresses, skinny jeans – it really is your wardrobe BFF! So far I’ve made four KEIRAs which are rotating pretty quickly as I love wearing them at the moment.

What’s your favourite (handmade?) garment this season?

Have a great week!

xx

Charlie


Happy sewing!

facebook/bloglovin/pinterest
twitter/instagram

Stay in touch!