FREE Knitting Pattern: Slouchy Beanie

Free knitting pattern: Slouchy Beanie by thisblogisnotforyou.comHello my lovely readers!

I’ve got a little treat for you! Well, at least for the knitters amongst you!

As promised, I took the time to make a PDF pattern with instructions for knitting the slouchy beanie with the pretty lace and cable pattern I’ve knitted 4 times already. You can see some examples here and here.

Free knitting pattern: Slouchy Beanie by thisblogisnotforyou.comhandmade knitted beanie by thisblogisnotforyou.com

The pattern is fairly easy in my opinion. I only started knitting last year and knitting a beanie isn’t hard at all once you’ve got the hang of knitting with circular needles.

Free knitting pattern: Slouchy Beanie by thisblogisnotforyou.com

If you stumble upon something in the instructions that isn’t explained, google it. There are loads of very helpful Youtube tutorials and blogs on knitting techniques. That’s how I learned.

Free knitting pattern: Slouchy Beanie by thisblogisnotforyou.com

I’ve encrypted the PDF pattern with a password which you can find right under the download link. Also, there is a printer friendly version of the pattern without pictures. Please respect that all of this is copyrighted material.

Lace and Cable Slouchy Beanie

Slouchy Beanie pattern printer friendly

PDF password: freeL&CSBpattern4u

You can download this pattern for free. If you want to share this pattern, just link to this page. Copying, distributing or uploading this material and/or the password somewhere else without permission is not allowed.

Copyrighted material. All rights reserved. For personal use only.

Happy Knitting!

facebook/bloglovin/pinterest
Stay in touch!

How to draft flared half-circle sleeves (plus more close-ups of the bridesmaid dress)

self-drafted bridesmaid dress by thisblogisnotforyou.com

Heeeello everyone!

As promised, here are more pictures of my self-drafted bridesmaid dress and a brief tutorial on drafting flared half-circle sleeves.

If you think you’ve seen enough of that dress already, feel free to skip this post – there will be a massive amount of pics 🙂

self-drafted bridesmaid dress by thisblogisnotforyou.com

Btw, this is the original sketch of the dress. I was thinking about adding some fabric-covered buttons in the back, but discarded that idea pretty soon after starting to draft the pattern. It just didn’t fit in and would’ve been even more time consuming.

self-drafted bridesmaid dress by thisblogisnotforyou.comself-drafted bridesmaid dress by thisblogisnotforyou.com

As you can see in the above pics, the colour of this dress is absolutely ‘unphotographable’. Neither of the two colours is quite right, it’s probably something in between.

self-drafted bridesmaid dress by thisblogisnotforyou.com

That’s what the dress looks like without the belt. Not bad, but I personally prefer the contrast of the creme coloured belt.

self-drafted bridesmaid dress by thisblogisnotforyou.com

self-drafted bridesmaid dress by thisblogisnotforyou.com


The bow can be worn the classic way, in the back, or, with the flower on top, in the front.

self-drafted bridesmaid dress by thisblogisnotforyou.com

The flower is made from two cut-out circle. A bigger one cut out fo the creme fabric and a slightly smaller one in blue. Both hemmed with a narrow hem foot, sewn together in the middle and then gathered rather randomly, creating the flower shape.

self-drafted bridesmaid dress by thisblogisnotforyou.com

The dress is fully lined. The lining (same fabric in a contrasting colour) is right side up. Both layers, dress and lining, are made from the same pattern, same darts etc. The only difference is, the lining has a slightly different (higher and rounder) neckline, so it shows under the v-neckline and the circle skirt is about 4”/10cm longer. The sleeves are not lined.

self-drafted bridesmaid dress by thisblogisnotforyou.com

Both layers are handsewn together at the shoulder seams and waist seams and machine stitched around the armskye.self-drafted bridesmaid dress by thisblogisnotforyou.com

I inserted the invisible zip with my sewing machine, the lining around the zip is handsewn with a slip stitch. When attaching the lining to the zip, be careful to leave some space between the folded edge of the lining an the zip. Otherwise the constant opening and closing of the zipper will tear all your handstitching over time.self-drafted bridesmaid dress by thisblogisnotforyou.com


How to Draft Half-Circle Sleeves


To get the right amount of flare for the sleeves, I tried out different styles, but decided to make half-circle sleeves in the end. For drafting these, you basically begin with a simple sleeve pattern. If your bodice pattern does not have sleeves, you will have to draft one according to the bodice pattern and your own measurements and liking.

how to draft half-circle sleeves by thisblogisnotforyou.com

After cutting out the sleeve pattern, you divide the pattern into six pieces (or more if you like) by putting five folds in the sleeve foundation or marking the lines with a ruler.


Before cutting up the folds, measure the lentgh of the sleeve curve, so you can check the measurements of the sleeve cap with the armhole later.

how to draft half-circle sleeves by thisblogisnotforyou.com

Now cut up the folds and spread into a half circle, making sure to keep the strips together at the cap end (to make this easier you can tape them together).

how to draft half-circle sleeves by thisblogisnotforyou.com

Tape the strips evenly spaced onto your new pattern paper. Check the measurements of the sleeve cap with the armhole and adjust if needed. Raise 1cm at the sleeve cap. Shape sleeve cap smoothly with a flowing line.

Make a muslin and see if the sleeve has the right length for you, adjust the pattern if needed.

self-drafted bridesmaid dress by thisblogisnotforyou.com

I played around with different lengths and shapes.

You can always adjust the amount of flare and fullness by reducing or increasing the spread of the pattern pieces.

Please note:

Before hemming your half-circle sleeves or circle skirts, adding binding etc. – Always leave the cut-out fabric hanging for at least one day/over night (works best with on a dress form if you have one)!!

The parts that are cut on the bias (something that is inevitable when cutting out circles or half-circles) will probably stretch after hanging for a while.

self-drafted bridesmaid dress by thisblogisnotforyou.com

As you can see in this pic, the hem is slightly uneven after hanging on the dressform for two days. Carefully even out the skirt and sleeve hem by cutting off the excess fabric before hemming or adding binding to the edges. I recommend finishing the sleeves’ raw edges with a narrow hem, or binding off with bias binding made from the same fabric or in a contrasting colour.

Before wishing you all a happy weekend full of sewing, let me share this gem with you 🙂

half-circle flared sleeves tutorial by thisblogisnotforyou.com
source: modestprom.com

Audrey Hepburn Dress now also available in Plus Size!

I made this fabulous dress a little while ago and just wanted to announce, that Burdastyle now also will have the pattern in Plus Sizes!

Audrey Hepburn sheath dress

They will also have 8 more 40’s Hollywood style plus size patterns in the new Augst issue of Burdastyle magazine! Happy Sewing!


How to draft your own asymmetrical hem dress pattern

how to make an asymmetrical hem dress by thisblogisnotforyou.com

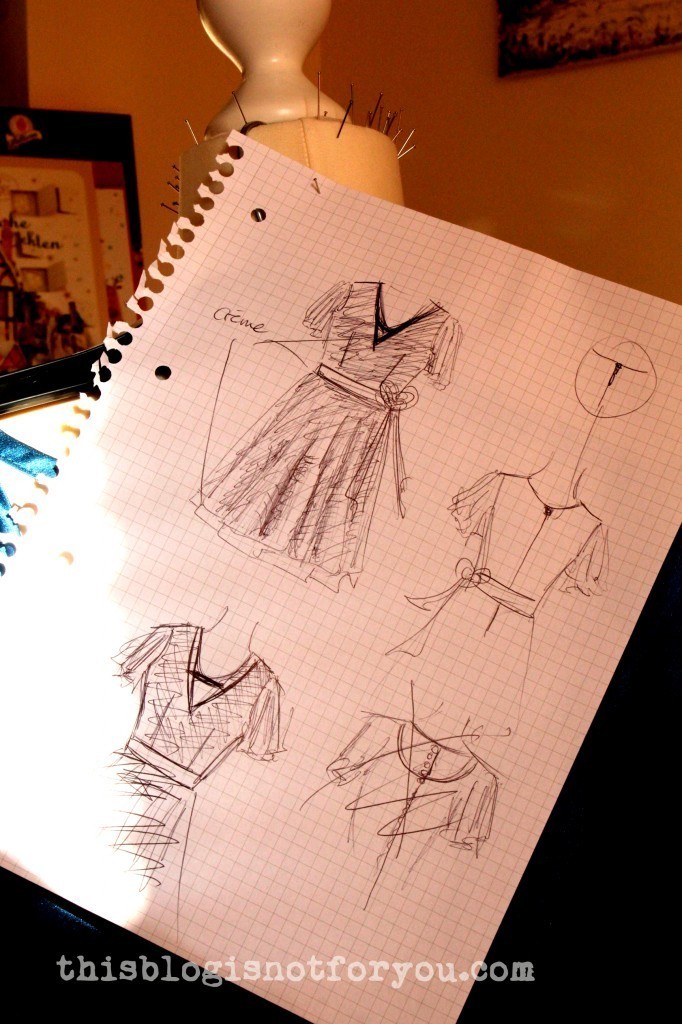
We all love pattern hacks, don’t we? I really do like patterns, especially the Burdastyle ones, and there are so many that I’ll never be able to sew them all. Nevertheless, sometimes you just want to add your own personal touch. And when you have a certain design in mind, but you just can’t find that particular pattern you’re looking for anywhere, you probably have to.

Summer is (hopefully) coming soon and last year’s asymmetrical hem maxi dresses are in stores again (I like!). I actually didn’t buy any last summer, but I’m totally planning on sewing loads this spring. A lot of the patterns I have are from last year and older and Burdastyle didn’t have too many good asymmetrical hem dresses so far.

That’s where the pattern hack comes in handy. You can just pick whatever dress pattern you like and change the dress skirt pattern into an asymmetrical one. You can also start drafting one from scratch and combining it with your favorite bodice pattern.

A lot of people are afraid of drafting patterns. Yes, it’s complicated. Yes, you need to learn a lot of technique before you’re getting good at it and yes, it’s not too much fun in the beginning. But seriously, no one expects you to become a Lagerfeld, Marc Jacobs or Michael Kors overnight.

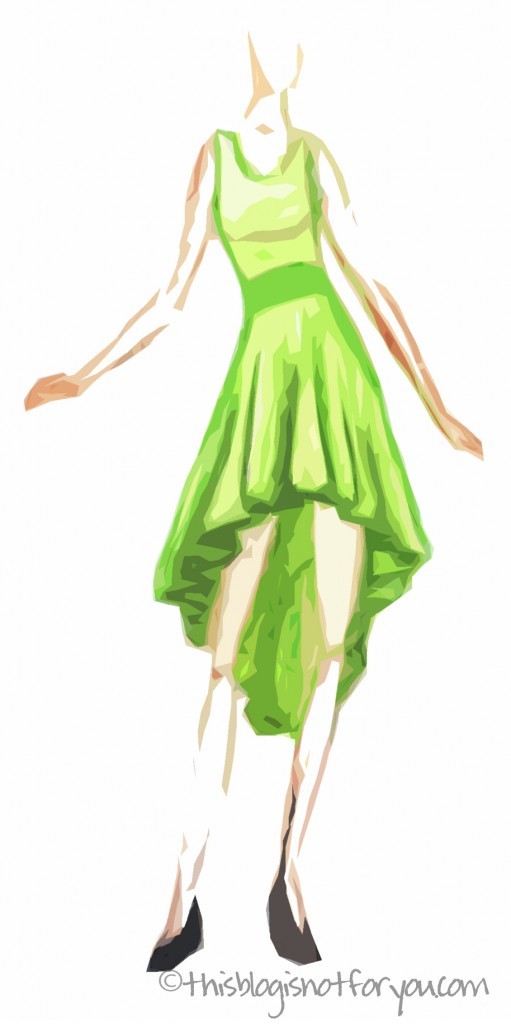
I found that it’s less frightening and really fun to start with trying out minor pattern hacks, changing patterns you’re already familiar with. As you’ve seen with my waterfall dress, I just used a simple Burdastyle pattern and changed it a bit.

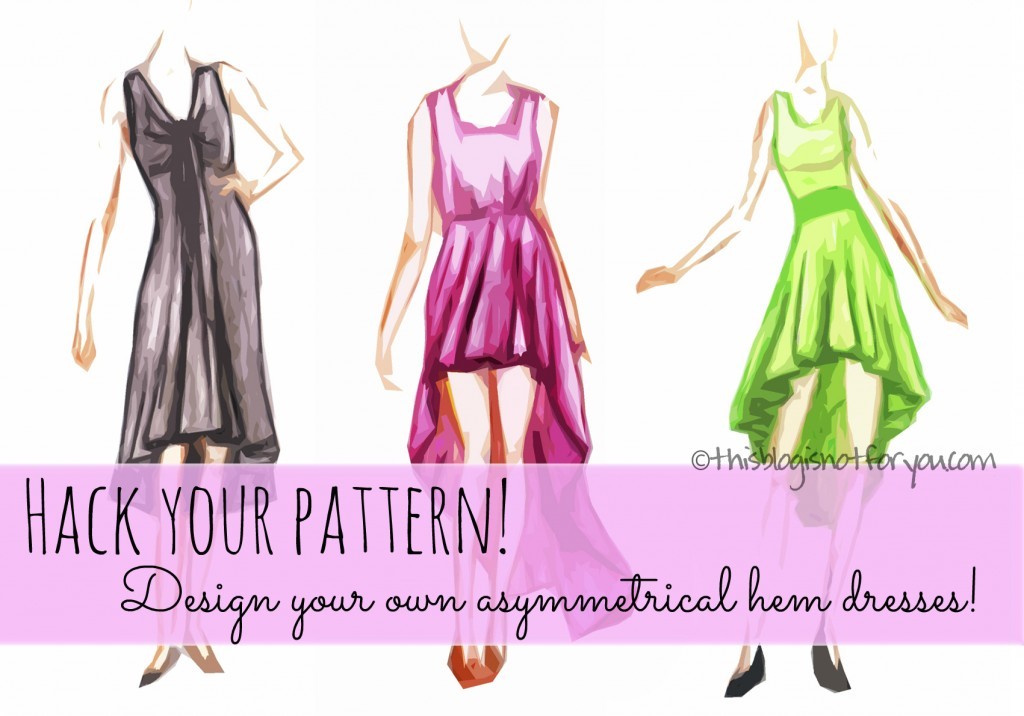
As promised, I’m going to show you how I did it. Furthermore, I’ll show you what other changes are possible to get slightly different looks – there are so many different asymmetrical hem dresses!

THE FIRST LOOK: oval shaped with a straight hem in the back

How to draft your own asymmetrical hem dress pattern by thisblogisnotforyou.com
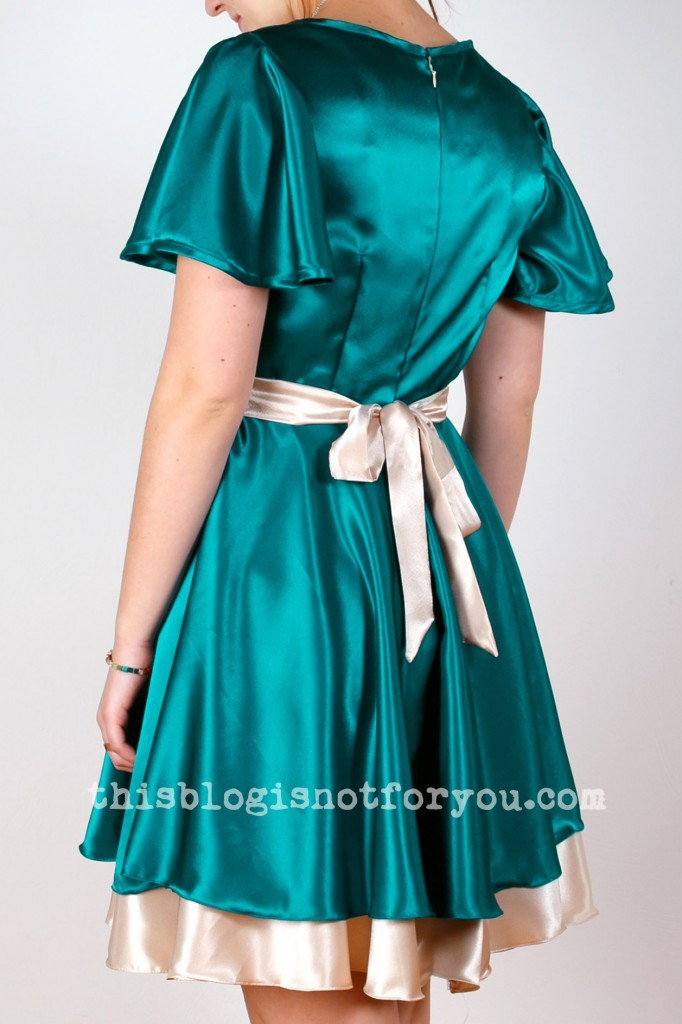
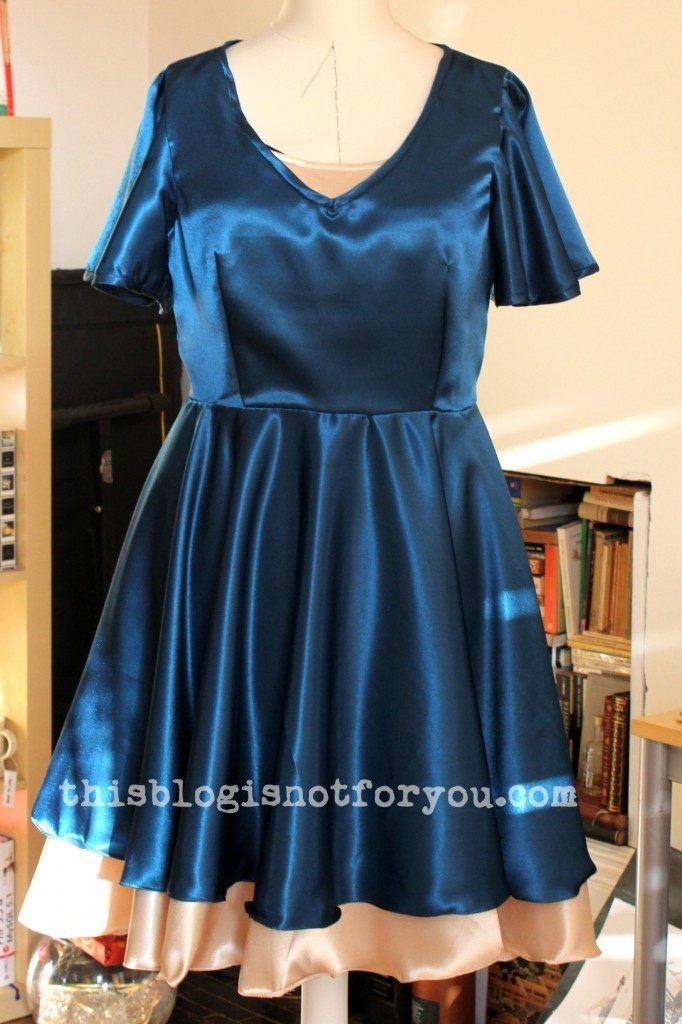
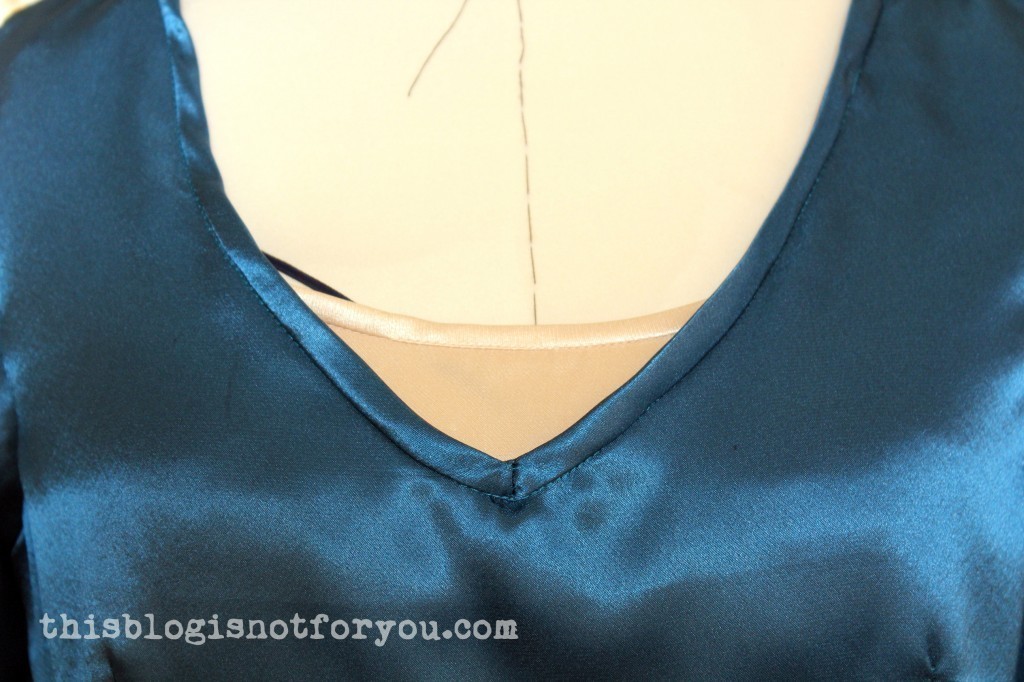
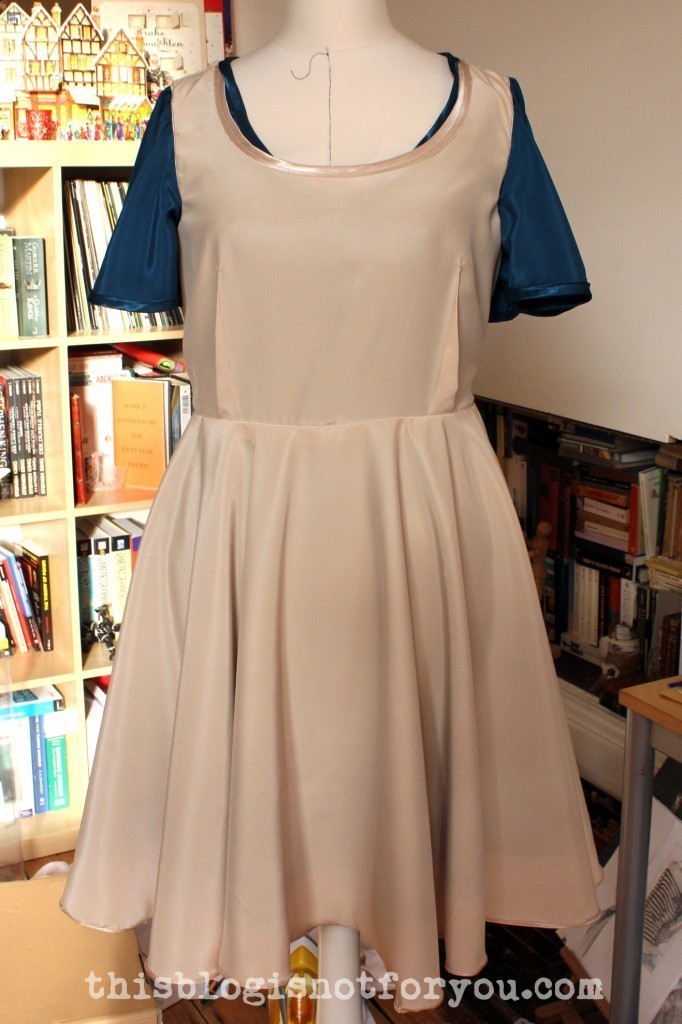
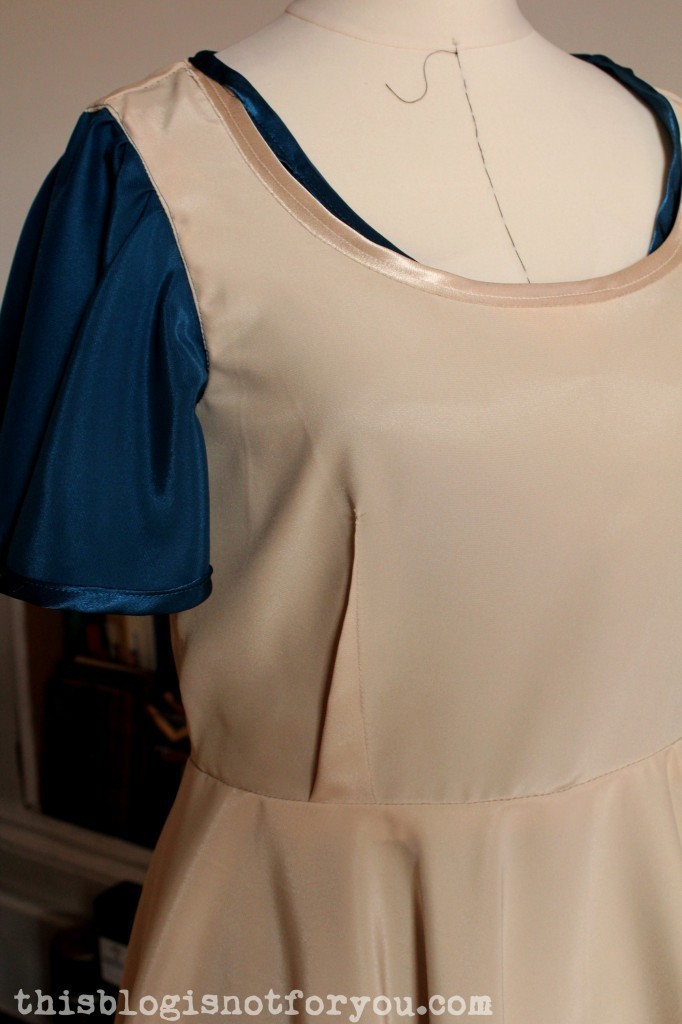
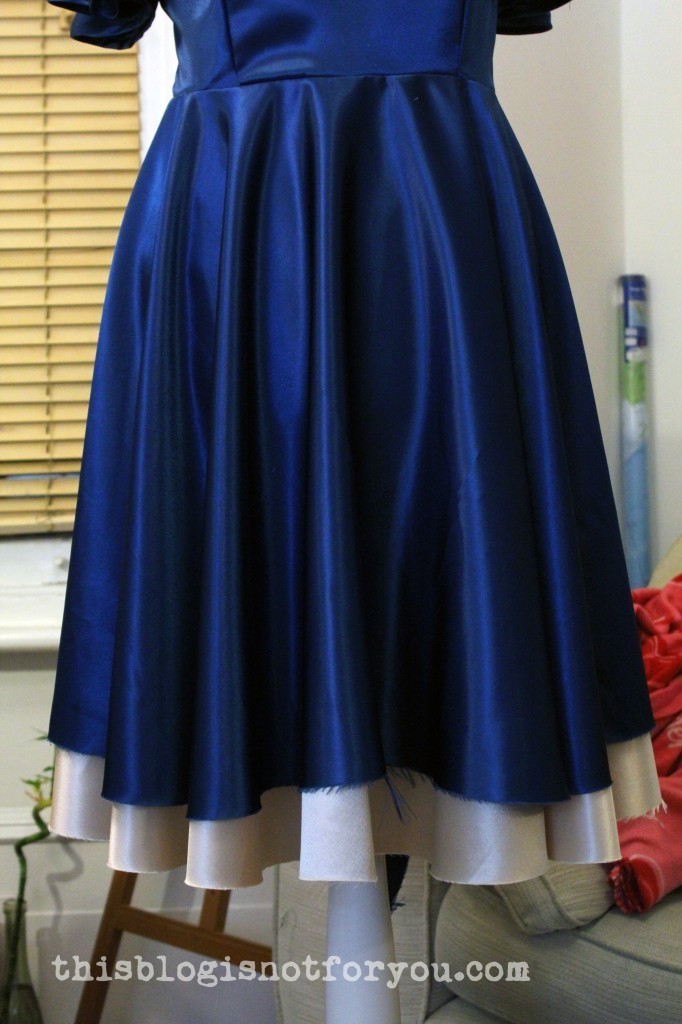
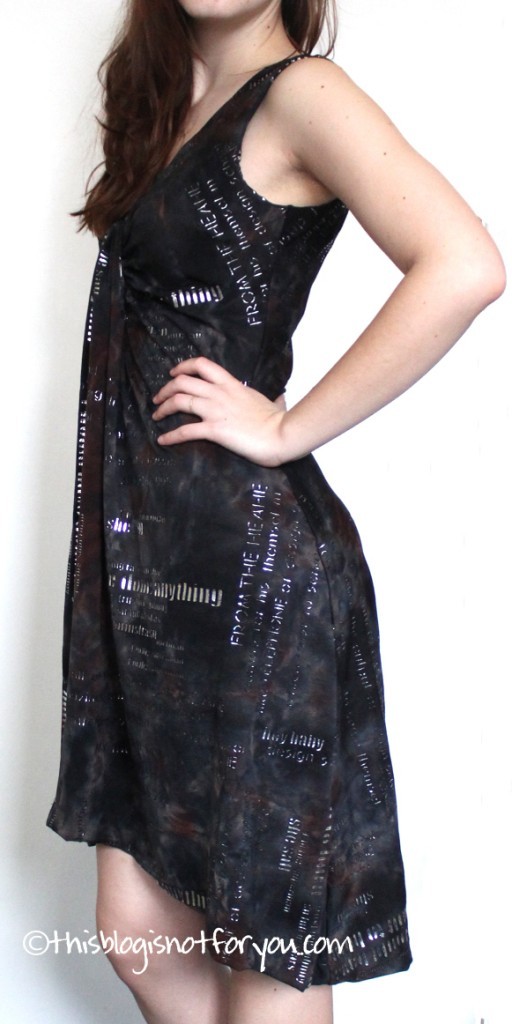
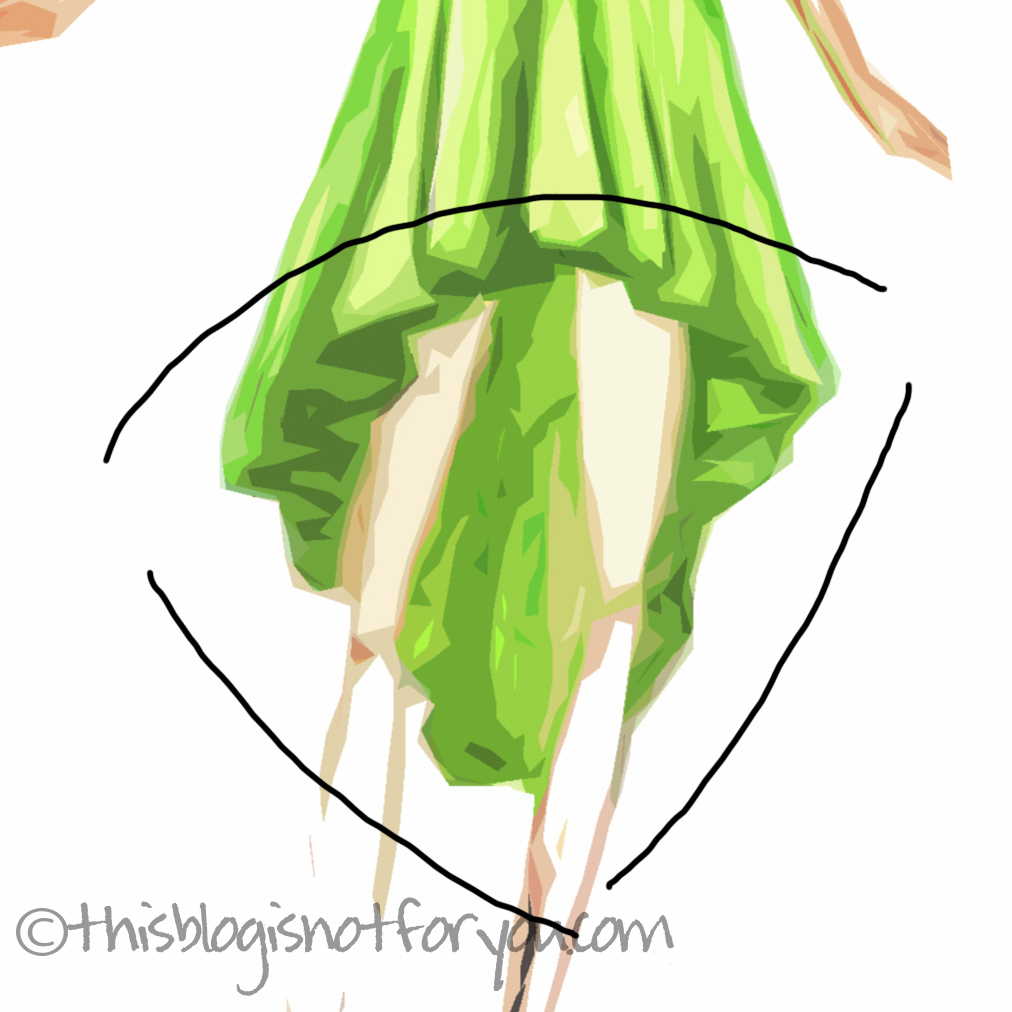
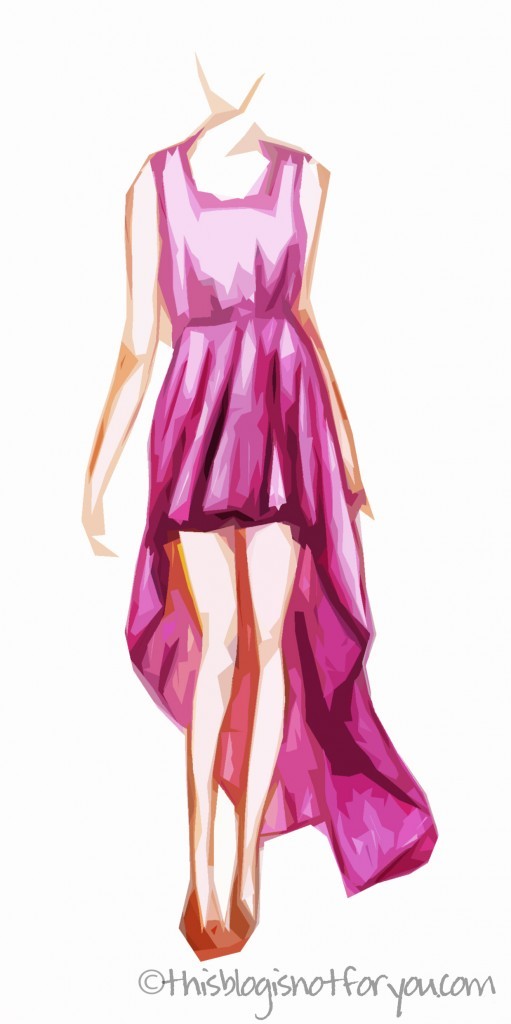
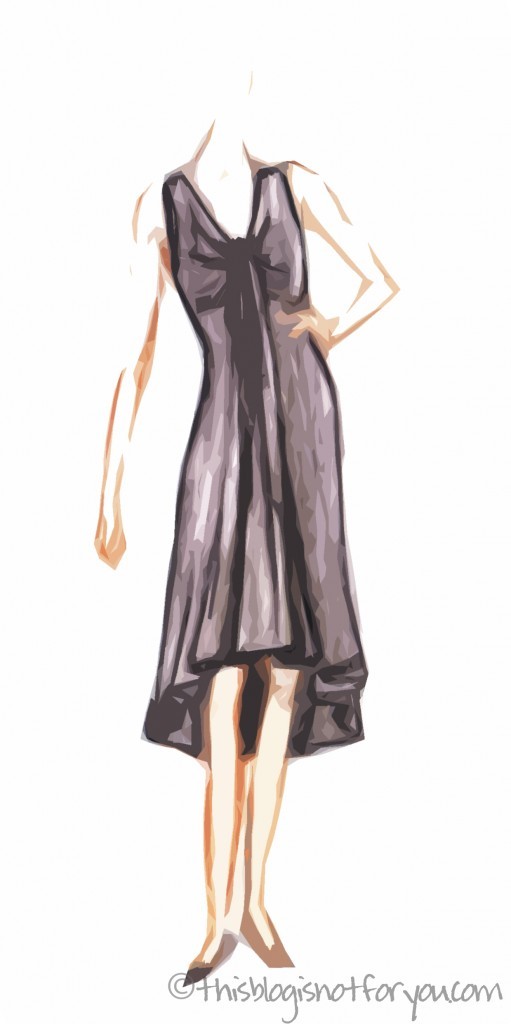
This is a draft of an asymmetrical hem that just about the same as the one of my waterfall dress. As shown in the picture below, the hem is straight in the centre front, sloped down at the sides and is quite straight (although not a 100%)  again in the back.

How to draft your own asymmetrical hem dress pattern by thisblogisnotforyou.com
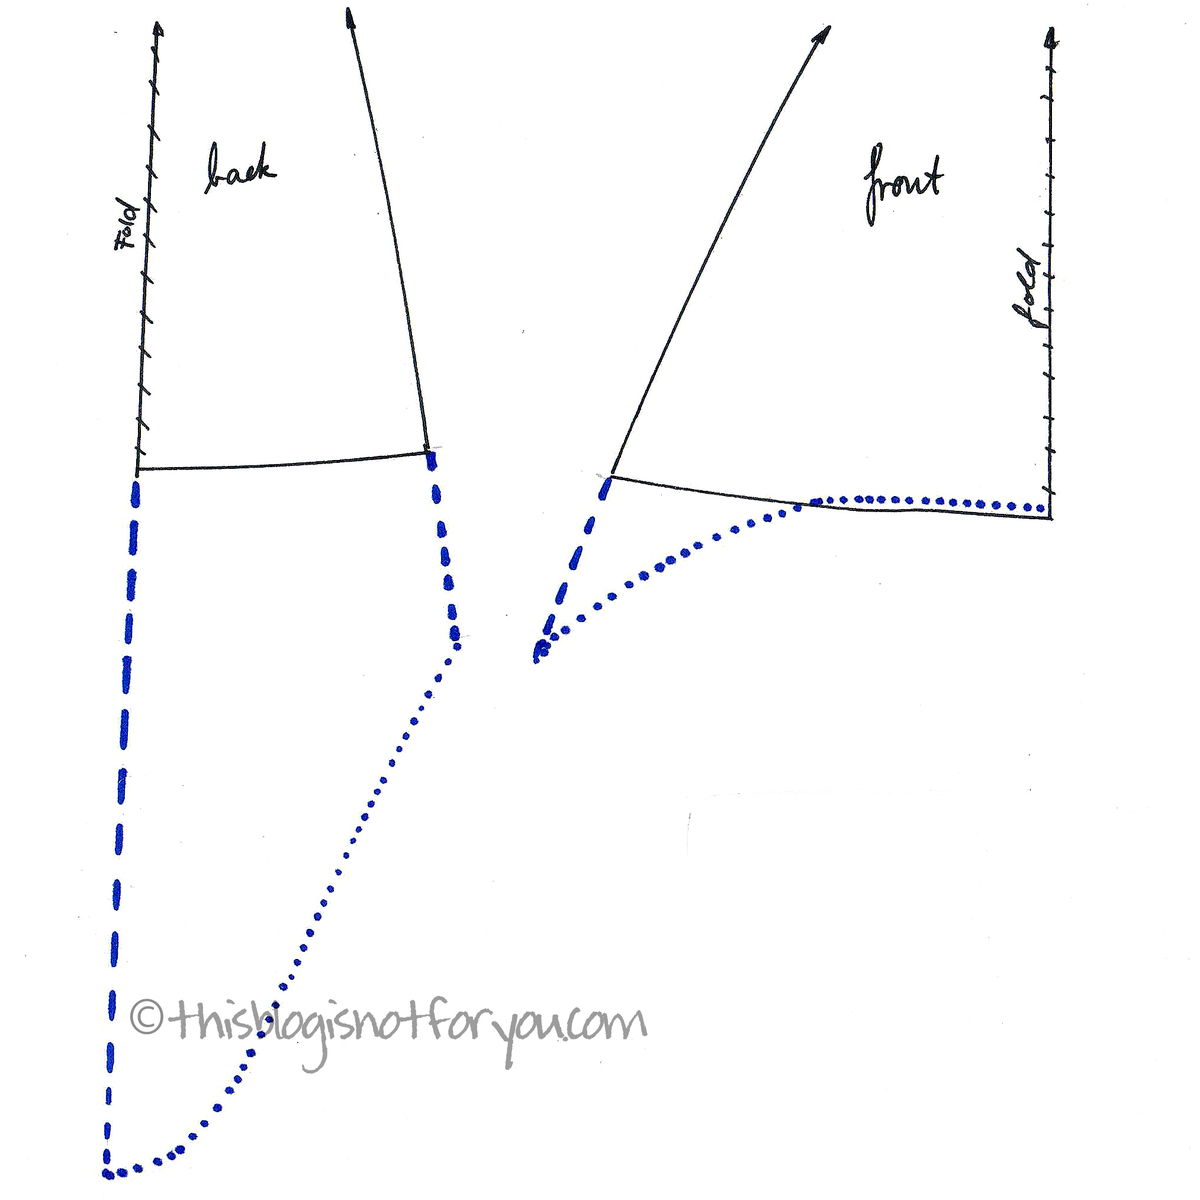
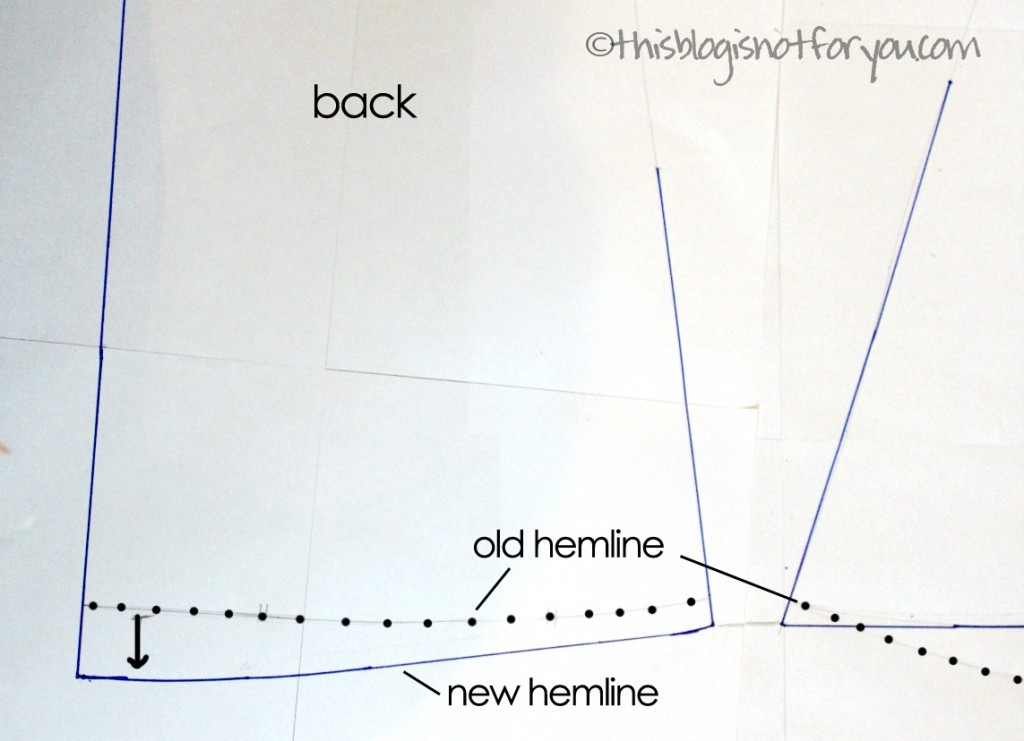
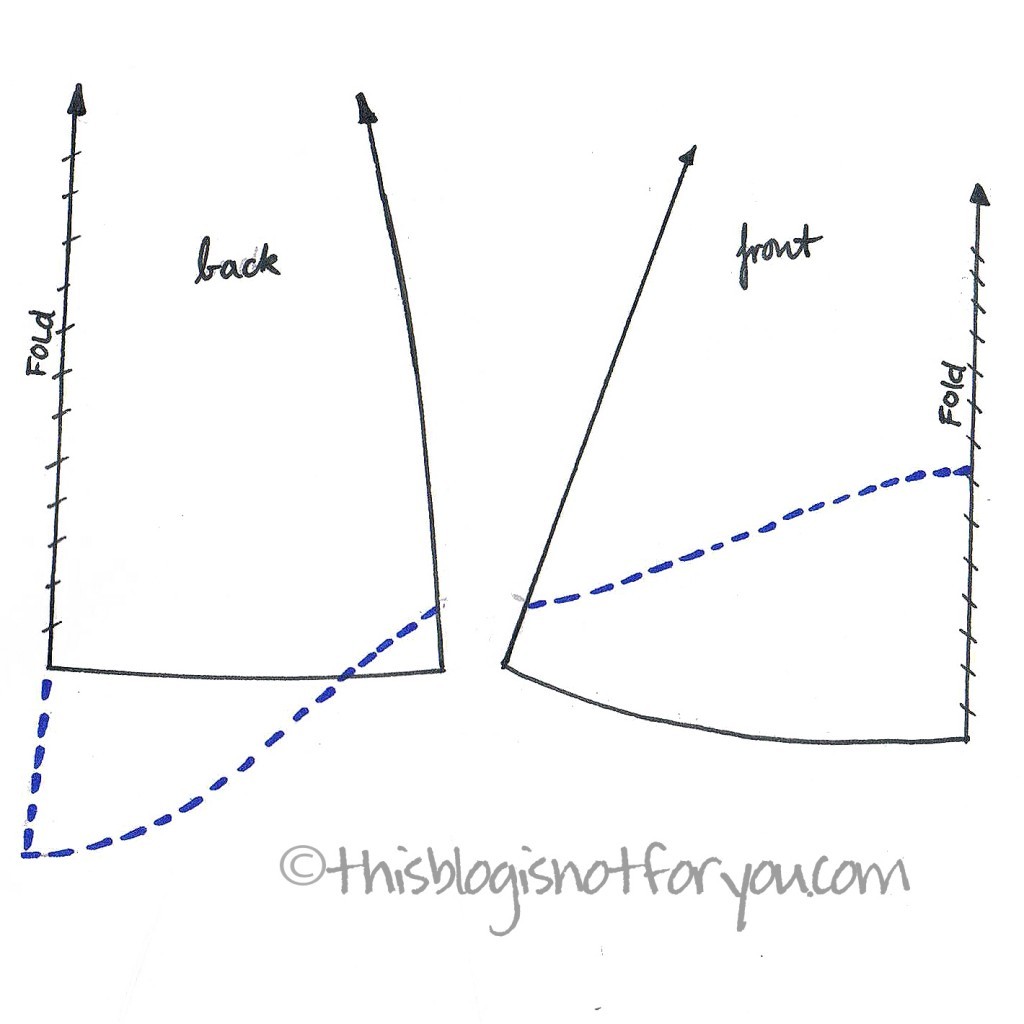
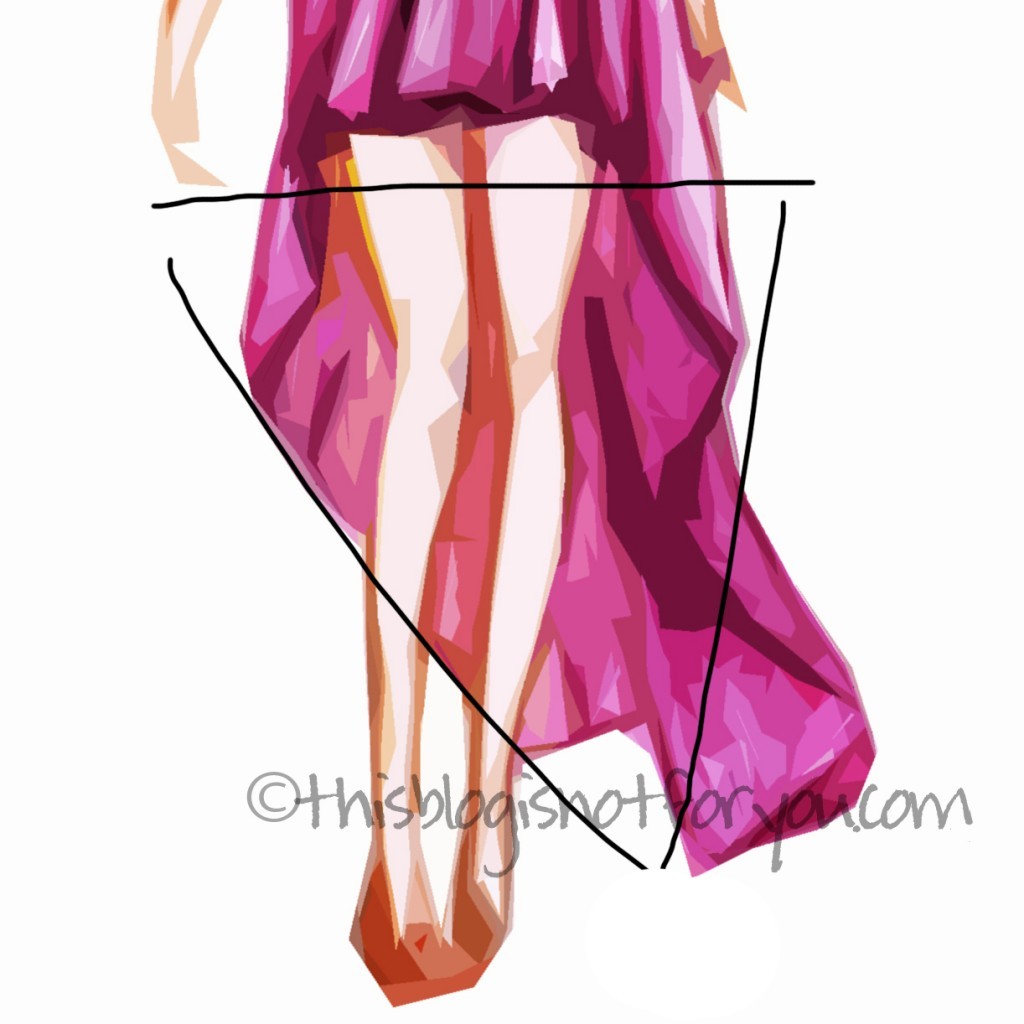
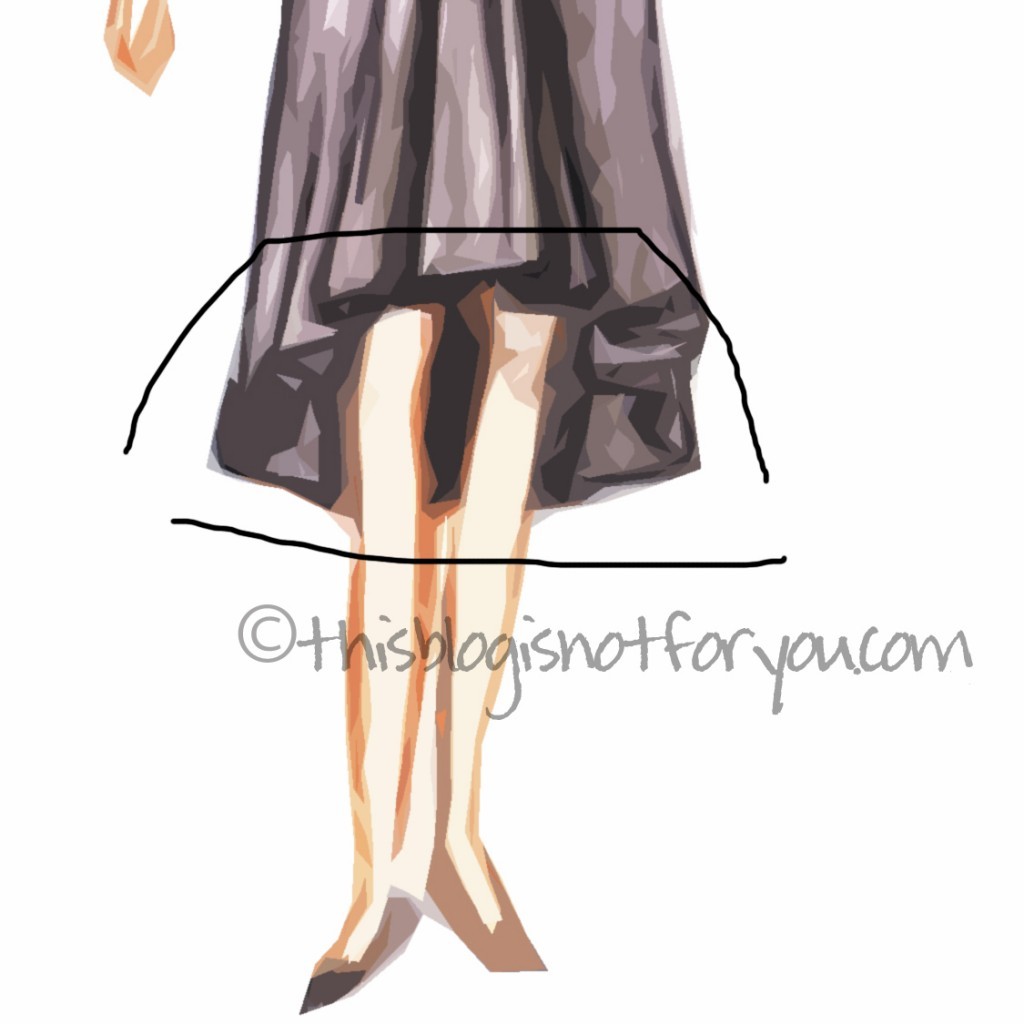
What you need to do is either shorten your pattern in the front or lengthen it in the back. Since I made the hem shorter anyway, I made the changes in the front. To get a more softer edge instead of a very triangular shape, you can’t just draw an asymmetrical staight line. The slightly s-shaped curve creates a smooth transition between front and back. You also see the line sloping down more steeply only after it reaches the middle of the front pattern piece. There are only small changes to the back pattern, to make the changes look  less abrupt and to avoid having it look like you combined two different pattern pieces.

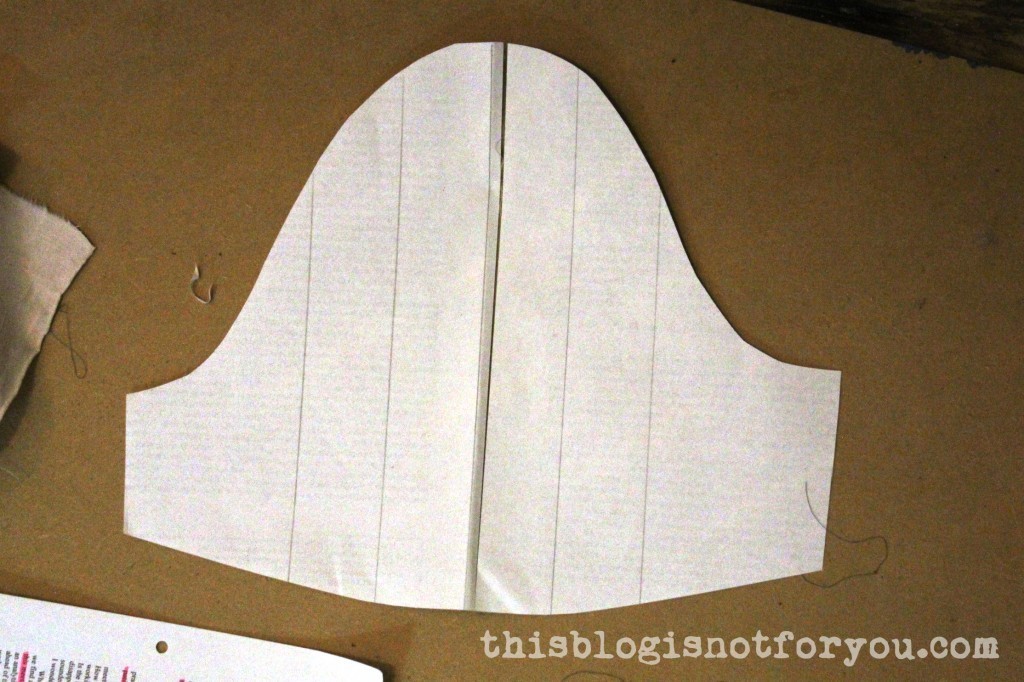
It’s also very important to make the pattern pieces the same length at the side seam.

How to draft your own asymmetrical hem dress pattern by thisblogisnotforyou.com
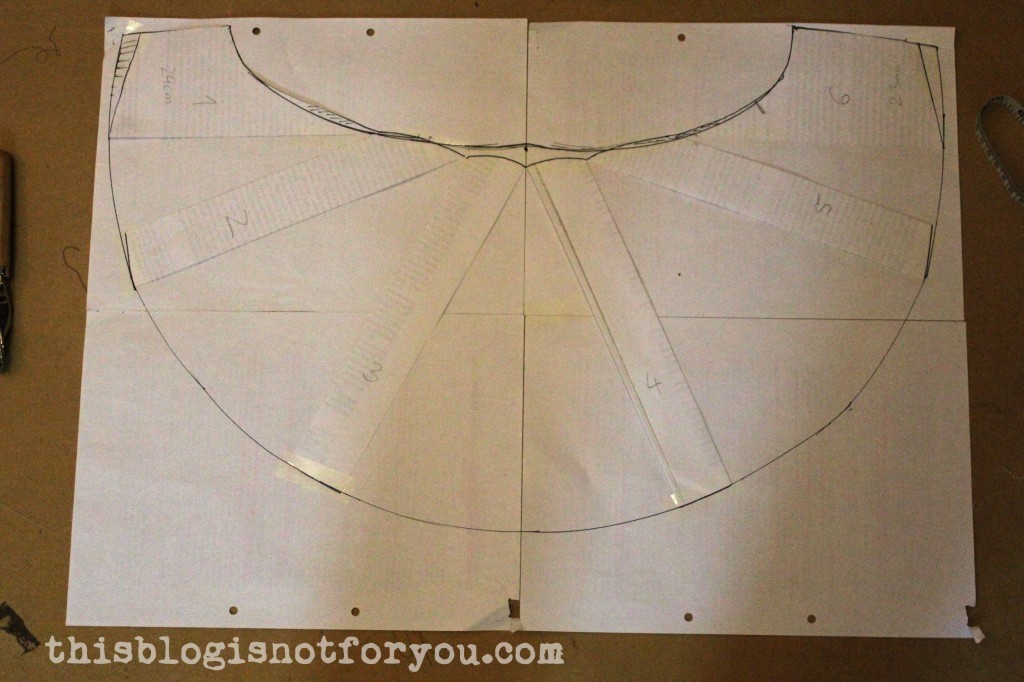
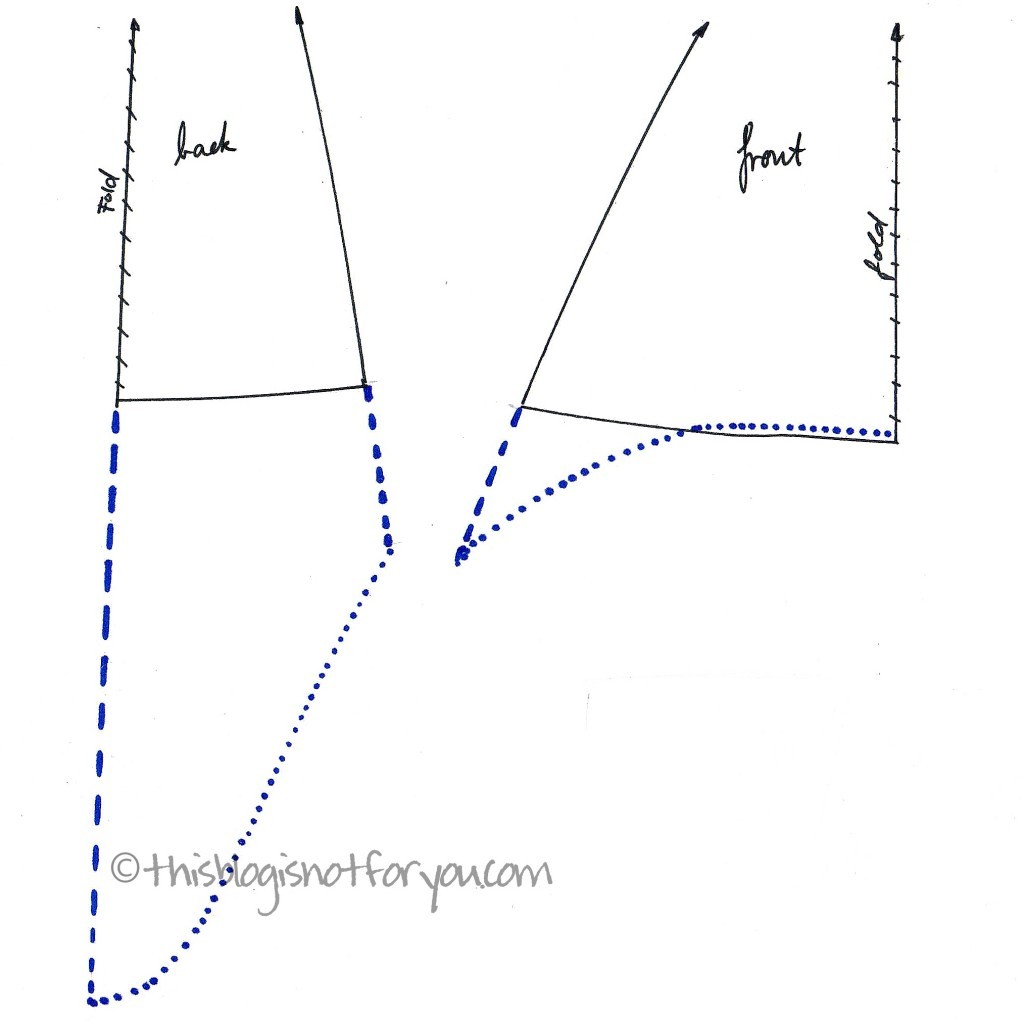
Here are some pictures from the modified Burdastyle pattern:
How to draft your own asymmetrical hem dress pattern by thisblogisnotforyou.com How to draft your own asymmetrical hem dress pattern by thisblogisnotforyou.com

Burda 2/2013 #114 by thisblogisnotforyou.com
THE SECOND LOOK: oval shape in the front, slightly longer v-shape in the back

How to draft your own asymmetrical hem dress pattern by thisblogisnotforyou.comI very much love this look, because it looks quite romantic. Here the shape in the front is almost like the one in the first look, but the back is much longer and the transition from front to back is very smooth and it’s much more asymmetrical.
How to draft your own asymmetrical hem dress pattern by thisblogisnotforyou.comTo get this look you have to shorten the front and lenghten the back quite a bit. If it’s a knee-length dress, I’d suggest shortening the front by at least 20cm/8” and lengthing the back by about 20-25cm/8-10” or more. Give the line a smooth curved shape in the centre front and back to avoid awkward triangular edges.
How to draft your own asymmetrical hem dress pattern by thisblogisnotforyou.com
THE THIRD LOOK: straight in the front, maxi v-shape in the back

How to draft your own asymmetrical hem dress pattern by thisblogisnotforyou.comThis is my favorite look and I’m de-fi-nite-ly making a dress like this for summer. It’s such an awesome femine look. Here, the front is straight almost until it reaches the side seams and then steeply slopes down to that long flowing train.
How to draft your own asymmetrical hem dress pattern by thisblogisnotforyou.comThe front will be almost miniskirt-length, the back about ankle-length. (Take your measurements, waistline to ankle,  to get the right length)
How to draft your own asymmetrical hem dress pattern by thisblogisnotforyou.comWhat you should always consider is the width of the hemline:

To get a beautifully flowing skirt, you need not only to lengthen but also to widen the pattern. You could also just use a gathered-skirt pattern, if you don’t feel confident enough to make the changes yourself. If you have one that fits you well, use it and simply make the changes described above.

Here’s an example of an asymmetrical dress with a very wide hem (which also means you’ll need loads of fabric!).

If you use a pattern of a slightly flared skirt it will probably look similar to this:

found at Bershka

found at Nordstrom

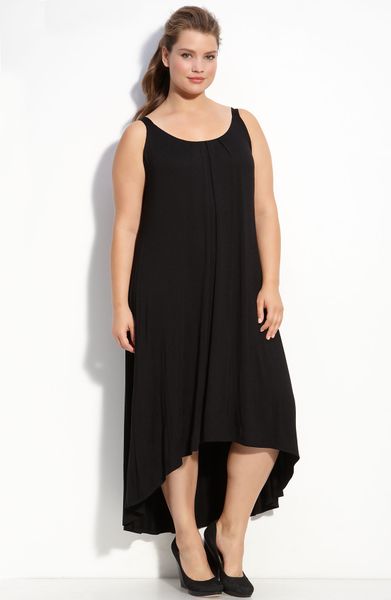
When you do not widen the hem of the pattern, the hem will probably end up looking like the one in the picture below. It’s also nice, but less romantic and flowing and probably more suitable for sporty and casual looks.

found at Zara

I hope this was somewhat helpful and I’ll see loads of pretty asymmetical dresses in the upcoming months!

In case you decide to hack your pattern to make an asymmetrical dress for the summer, I’d love to see it when it’s done!

Just send me a picture to hello(at)thisblogisnotforyou.com!

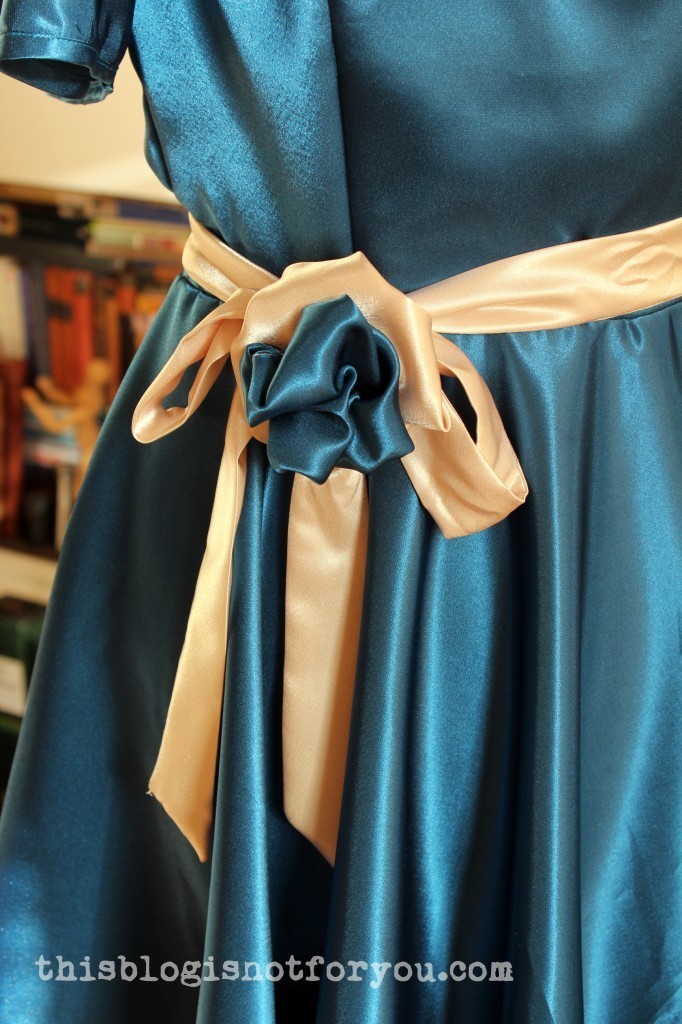
One last picture I had to share! 😉

facebook/bloglovin/pinterest
Stay in touch!

How to make a mobile phone case {the custom pattern}


Maybe you still need an idea for a last minute Christmas gift? Or you have a mobile phone yourself that just doesn’t seem to fit in any case? Or maybe you simply want to customise a phone case for fun.

Well anyway, this is part 1 of How to Make a Mobile Phone Case where I show how to make a custom-made pattern. And it’s fairly quick and easy. Pattern-making and sewing together takes about an hour. But if you’re figuring it out for the first time it might take a little longer.

I had the idea of doing this after looking for an iphone case pattern. I found a German youtube video on how to make an iphone case and figured you can basically make this with mobile phones of any size. The phone case with the owl fabric was made for an iphone, the one in this tutorial is for an old nokia phone.

#1 take measure of your phone

Measure width, length, height and diameter.

#2 Prepare a sheet of paper for your pattern

Now you need a long, narrow sheet of paper. You can glue together two sheets of paper and then cut off a strip that’s as wide as half your phone’s diameter + seam allowance.

The phone I made the case for was 12cm in diameter. Seam allowance on both sides was 1cm. So I made the strip 8cm wide.

In this tutorial I made the phone case out of curdoroy. Therefore I made the strip 8,5cm since the fabric is quite thick and I was afraid that the phone might not fit it. Now it fits perfectly.

In case you’re not sure if the phone case fits, make the pattern wider rather than narrower. Otherwise you won’t be able to make adjustments if it’s too small!

Here you see the marked seam allowance. Use 1,5cm for the bottom edge and fold it over.

Now fold the bottom edge over your phone to find the correct height for the pocket. Take into account that the phone should protrude a little so you’re able to pull it out quickly without having to fumble for minutes.

Mark the height, measure the length from mark to bottom edge and mark on the other side as well.

Then connect the markings of the outer edge using a ruler.

Now do the same with finding the lentgh of the flap.

Mark and don’t forget the seam allowance (1cm) before you cut the rest of the paper off.

For shaping the flap you can simply cut off the corners or round them. To do that mark the edge by folding the corner, unfold, fold both sides together (see picture below) and cut off.

Now the edges of the flap are nicely uniform.

Ok, almost done.

The part for the flap needs to be a little narrower than the rest of the pattern. The part of the pocket will become narrower when you put your phone in (since we already included the width we don’t need for the flap) and you don’t want the flap to be wider than the rest.

You can do that anyway, it makes the pattern a lot easier, but it may look a little awkward. Just saying.

For narrowing the flap pattern mark and cut off about the half of you seam allowance (0.5-0.7cm) as you can see in the picture above and below.

Adjust the new seam allowance for the flap part of the pocket (make it 1cm again).

Your pattern should now look like this.

If it doesn’t: Don’t panic, just look at the pictures at of every step again. You probably just skipped a step somewhere by accident.

If it does: Well done! You can go on to part 2 of  How to Make a Mobile Phone Case. You will find a link at the end of this post.

Follow the link to Part 2 here: