Wedding Dress Part I: Decisions, decisions!
thisblogisnotforyou.comA couple of months ago, when I helped my friend Daniela with her beautiful handmade wedding dress and the various little crisis involved in such a massive project, I had absolutely no idea that I might face the same questions a few weeks later! Well, here I am and having said YES (and being a sewing addict) I’m faced with a bunch of decisions to be made.

The first big question:

WILL I MAKE MY OWN DRESS?

For me it was a definitive yes from the beginning. Here’s why:

  • Sewing my own clothes has made me super picky in regards to fit, style, fabric quality and finishes. How will I possibly manage to find a ready-made dress that ticks off all these criteria and doesn’t cost a fortune? It’s hard to control all these factors and stay within the budget if you buy a dress of the rack.
  •  I’m a big fan of couture and try to use as many techniques as possible when making garments. Having the opportunity at trying my hand at making a full on couture gown is just too tempting. It’s the perfect excuse to buy all the lovely, expensive fabrics I wouldn’t buy otherwise.
  • The thought of having a super unique dress that is 100% my style and then being able to say: ‘I’ve made this’!

Looking at it realistically, it is simply sewing a dress. I’ve sewn many dresses and most of them were pretty wearable. So why not?

The next step:

PLANNING THE DESIGN

Every sewing projects involves quite a few decisions you have to make before you start. What garment to you want to make? What style and pattern? Fabric? Colours and prints? Embellishments?

I started by looking at loads of dresses, especially the ones by my favourtie designers. Pinterest is a big help. I basically pinned everything I liked. At this point I thought I’m never going to make it. I just couldn’t make up my mind.

Kaviar Gauche

Augusta Jones

Papilio

Silk taffeta, silk chiffon, tulle, lace, satin? Embellishments? Sleeves or straps or neither? Ballgown, A-line, mermaid, empire? Short, long, tea-length? Oh, and then there’s not only simply white dresses! This struggle is real, people!

It took me about a month to realise that you really have to narrow it down to “the one” before you can start. This is the hardest, but most necessary part I think. After looking at dresses for over a month I had formed a pretty clear idea of what I liked and what I didn’t like. I dismissed some old ideas and picked quite a few of my favourite dresses.

Some of you might disagree with the idea, but I sat down with the Mr himself and tried to narrow it down to a few styles that we both liked. In the end this was the most helpful thing to do. Seriously! I wouldn’t want to spend months making something that he might hate in the end. Our tastes are quite different and in the end there was only one that we both loved. (Yes, loved, not liked! Liking, in this case, just isn’t enough!)

So we took all that we liked most of the design we picked and added some of our own touches and details we liked on other dresses. We made definite decisions on fabrics, colours and so on. The Mr is really good with making final decisions, which helps a lot. Nothing is worse than making a decision and starting to question it again and again. Make it, stick to it. The sewing process is flexible enough to change little detail here and there if something doesn’t work out the way you planned it.

Photo by Photo: Philip Friedman; Styling: Blake Ramsey Wedding Dress Fabric Glossary. Found on: www.realsimple.com

Allure Bridals

SHOPPING FOR FABRICS

First, I set a budget. The budget will also guide you when shopping for fabrics. Chiffon or silk chiffon? Satin or silk satin? Tulle or lace? This is not only a design question but also a question of costs.

If it comes down to the pennies, you might want to sew a muslin first, to see how much fabric you really need.

Also, go with your guts. When I went fabric shopping, I only wanted to get fabric for the muslin. I found the most gorgeous, perfect fabric in the end. I knew that I would regret not buying it and then spend loads of time finding something similar later on. The fabric was just within my budget and I went ahead and got it that day. It’s super scary but a relief at the same time. 

Apart from buying the fabric and fabric for making a toile, I haven’t progressed any further yet. We’re moving into a new flat soon (finally!) and I’ll wait until I have my dedicated sewing space back before I start working on the pattern.

Have any of you made your own dresses? Any advice you’d like to share? And those of you who decided against it, I’d love to hear why!

xx

Charlie


Happy sewing!
♥

facebook/bloglovin/pinterest
twitter/instagram

Stay in touch!
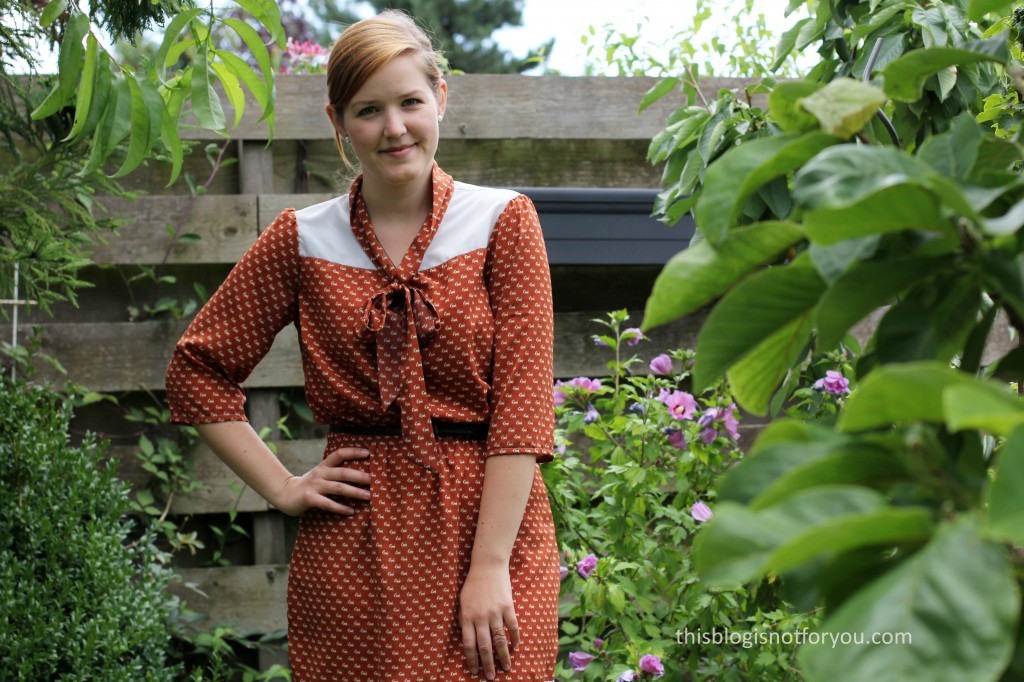
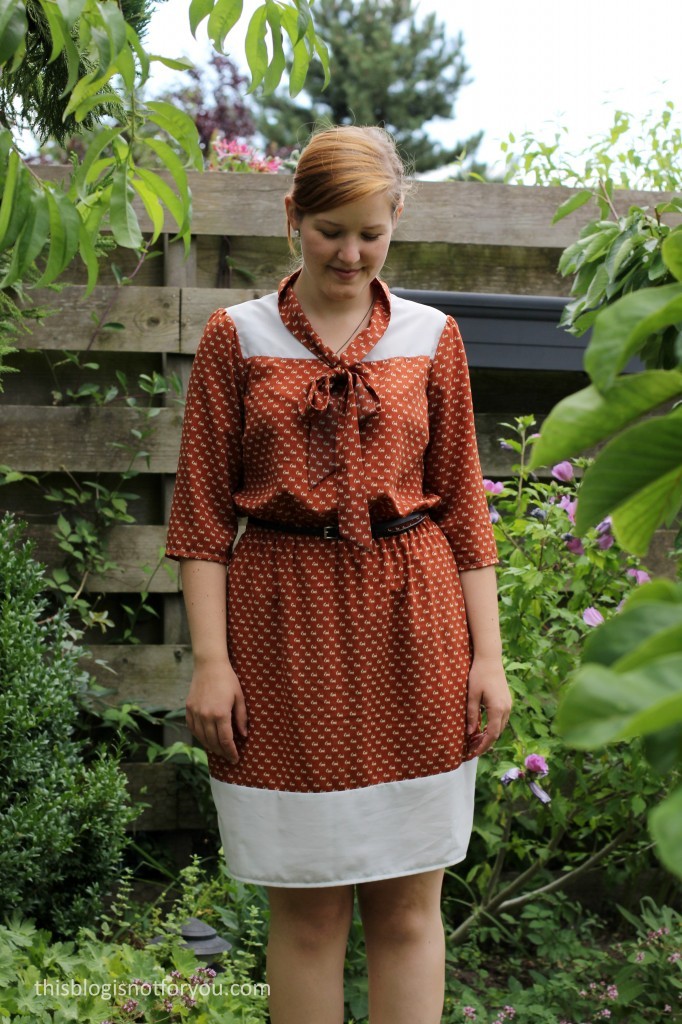
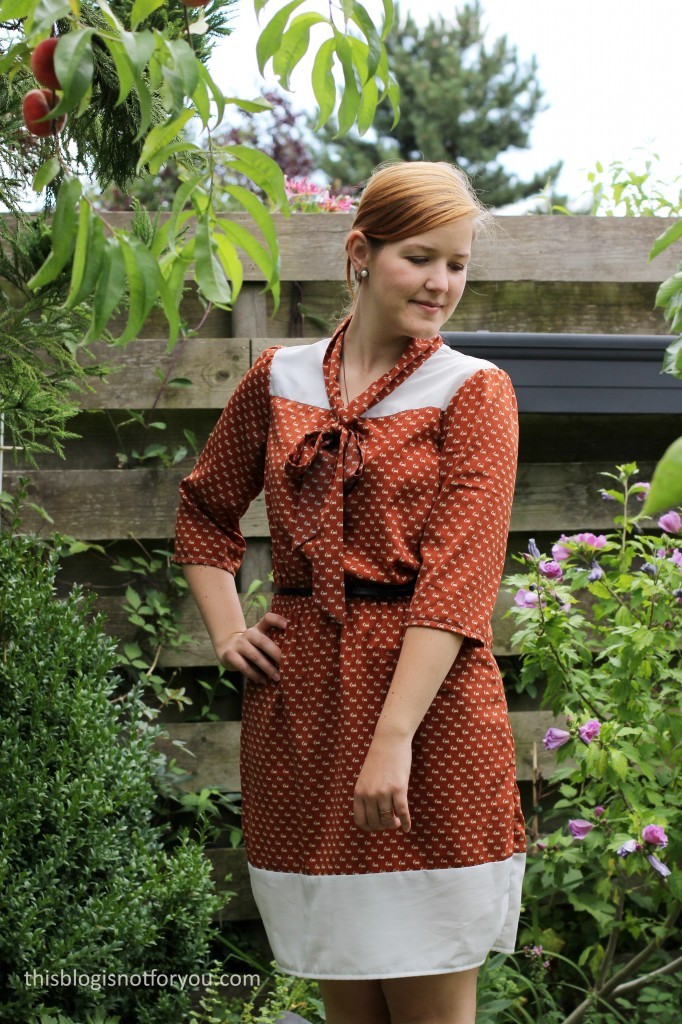
Lottie Blouse hacked into a Dress with a Doggie Print

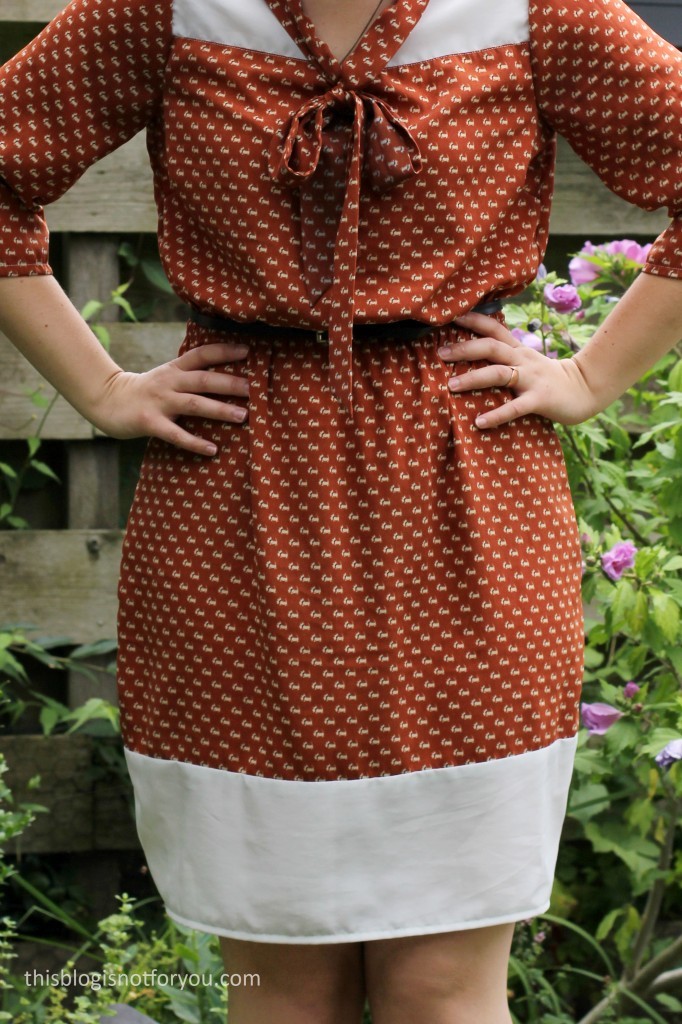
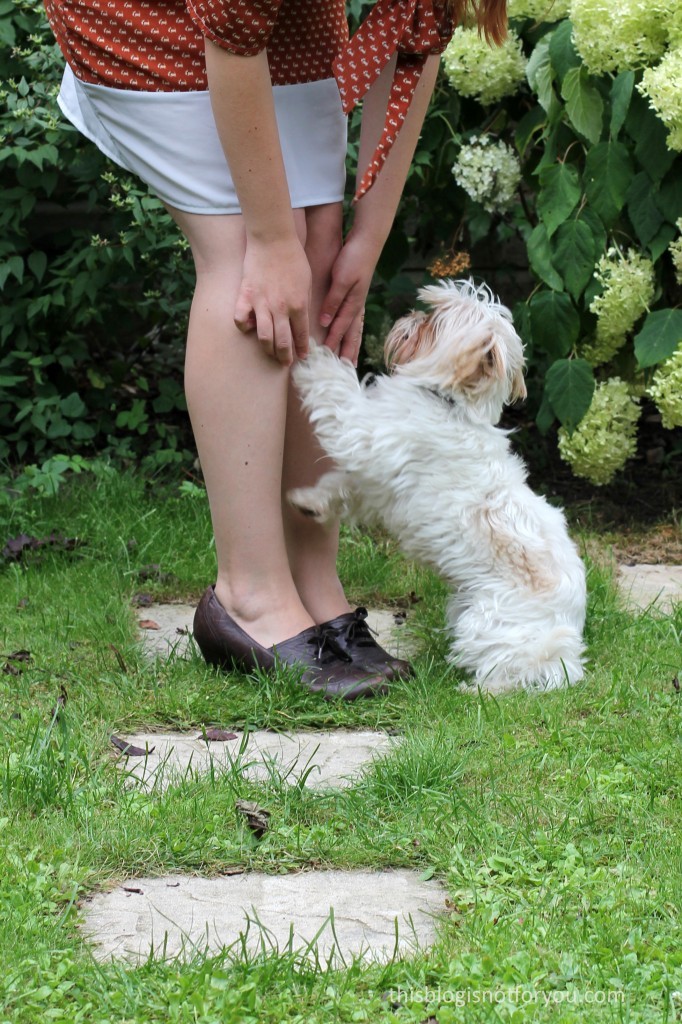
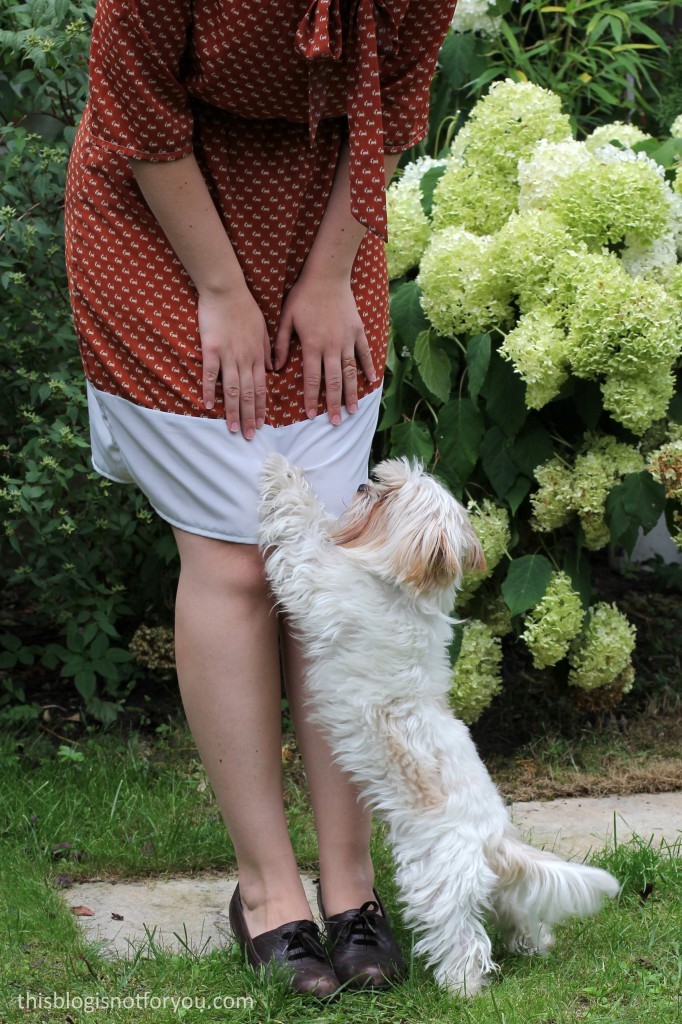
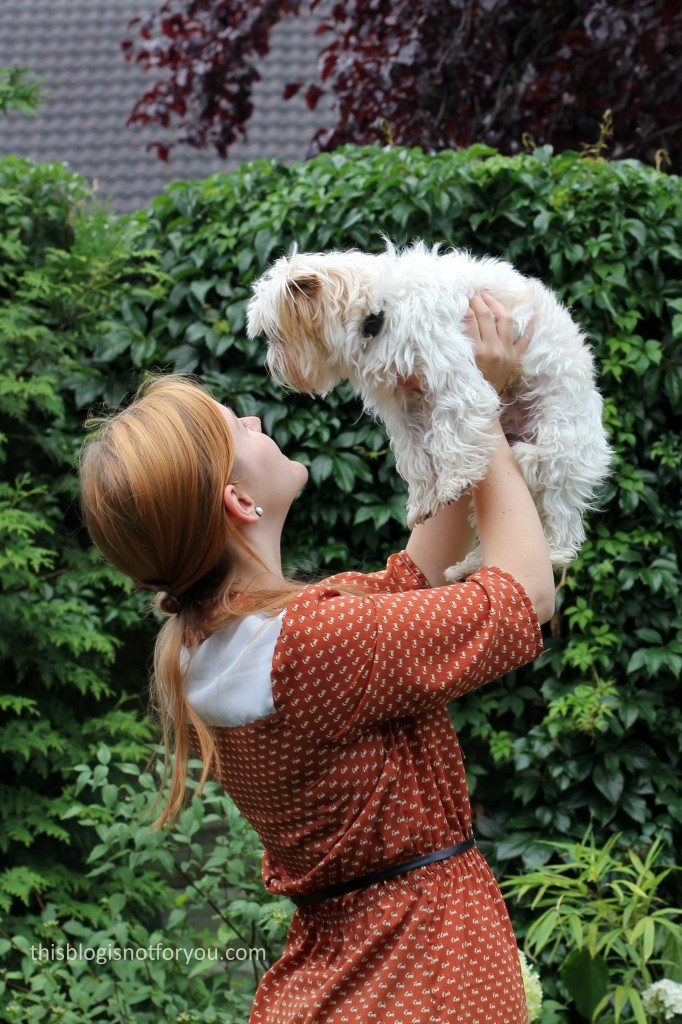
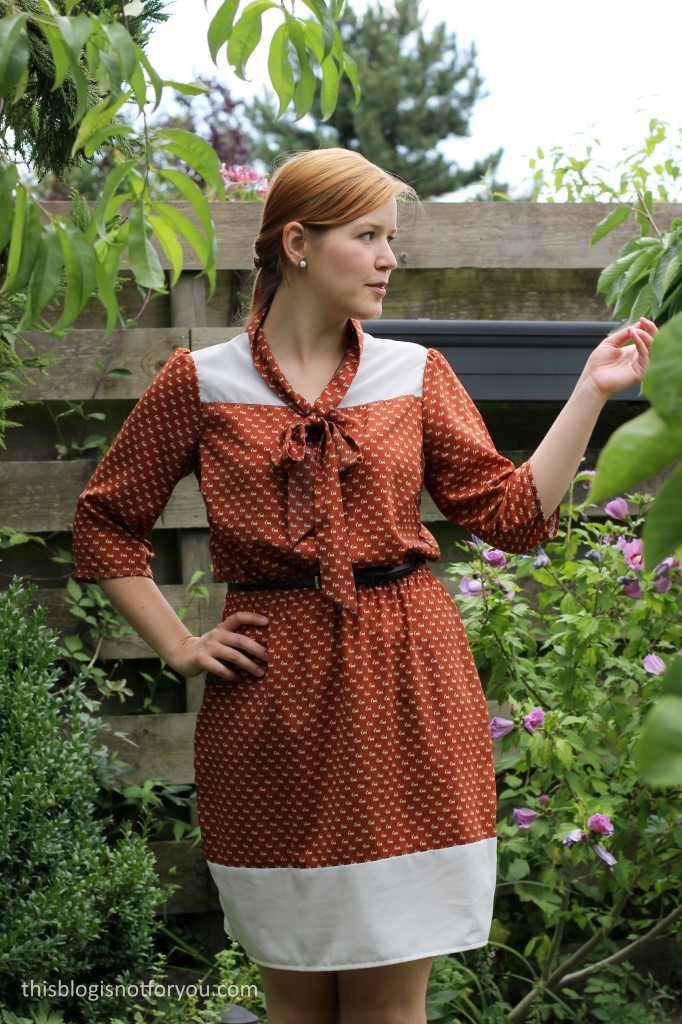
Lottie Dress by thisblogisnotforyou.comLottie Dress by thisblogisnotforyou.comLottie Dress by thisblogisnotforyou.com

A DRESS & A DOG

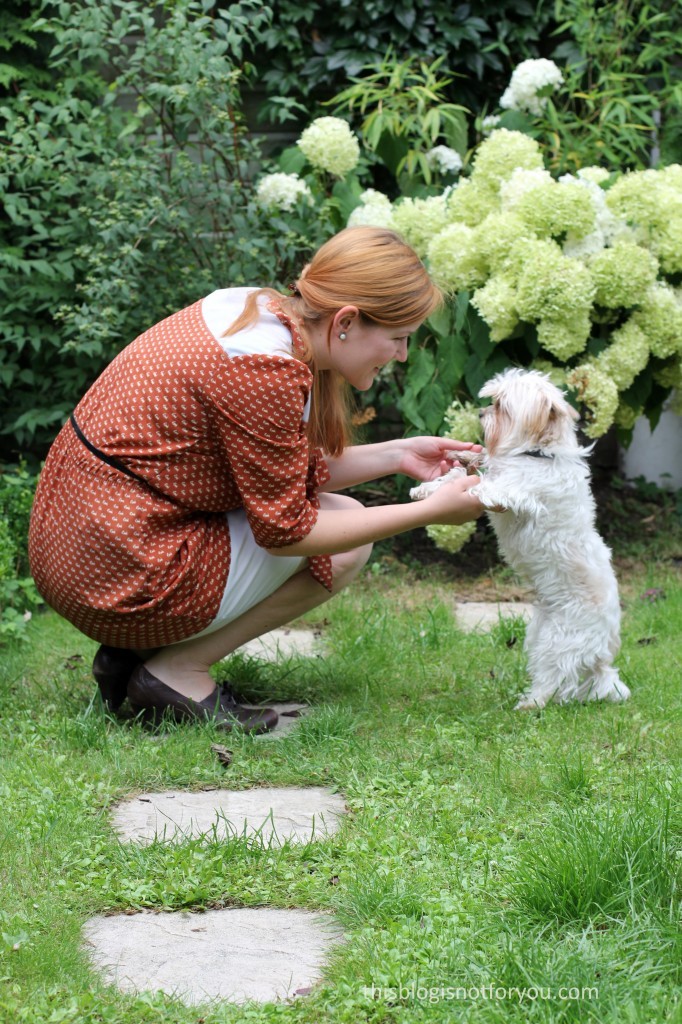
Apparently, it was National Dog Day yesterday. Perfect timing to show off the Scottie Dog Dress I made a little while ago. Our little doggie was kind enough to star as my fashionable accessory. He actually looks a bit like the dogs on the fabric’s print. A cute dress paired with a cute dog – could I wish for more?

The Fabric:

I bought the fabric ages ago in Walthamstow, London. For those of you who know the area, it’s the last fabric shop on the left side of the road, when you walk down the market coming from Walthamstow Station. I don’t remember the name of the shop, but it’s near Saeed’s Fabrics. It’s a tiny shop with loads of cheap polyester, chiffon and jersey fabrics. It’s perfect if you’re looking for fun prints but don’t want to spend a lot of money.

I usually use these kinds of fabric for wearable muslins and experimental projects, where everything can go wrong (but it doesn’t have to!) and you want to use fabric you won’t cry for later. And it’s acutally cheaper than proper cotton muslin fabric!

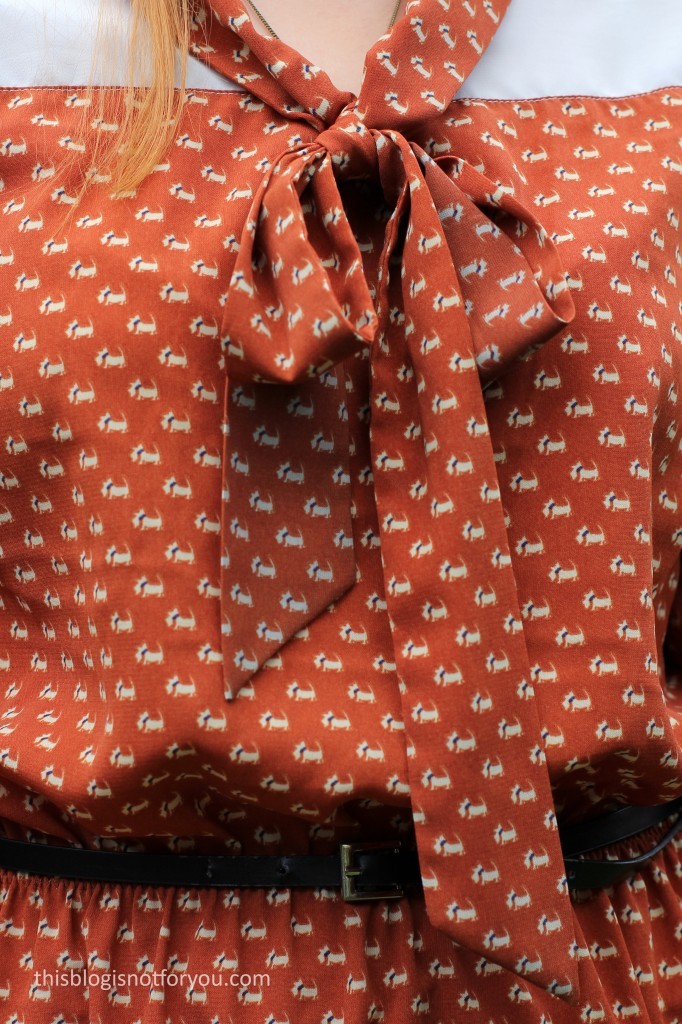
The doggie print is a £1/m polyester fabric. It’s easy to cut and sew, but you have to be careful when pressing it. It melts (and darkens) easily. Press on a low temperature using a pressing cloth! It has quite a bit of stand and doesn’t drape too well as you can see around the waist line. It adds quite a bit of volume! I also bought the same fabric in black with tiny elephants, which I used for my first Lottie Blouse.

The white, slightly sheer fabric is also a polyester which I bought on Goldhawk Road, London. I used this fabric before, for my first Lottie hack.

Lottie Dress by thisblogisnotforyou.com

Lottie Dress by thisblogisnotforyou.comThe Pattern:

The pattern is – what a surprise – the Lottie Blouse pattern from Love Sewing Magazine which I have hacked into a dress with a contrasting yoke. I’ve made the blouse loads of times using different hacks and fabrics each time (here, here, here & here). I won’t say much about the pattern, as I have reviewed it before. Check out the other posts if you want to know more about it!

Lottie Dress by thisblogisnotforyou.com

Construction & Alterations:

I more or less kept the blouse except for slashing the front and back bodice pattern to add a seamline for the contrasting yoke. This is pretty simple: you slash the pattern where you want the new seamline to be and add seam allowance to the new edges. I pressed the seam allowance downwards so you can’t see it throught the sheer white fabric. It’s topstitched into place with white contrasting thread.

I lengthened the blouse to knee-length, keeping the waist fairly straight and curving out and in a bit at the hips and knees. Again, I slashed the pattern to add the contrast panel at the hem.

To add some shape and get the cinched waist look I wanted, I added some elastic which I sewed directly onto the fabric (no casing!) using a large zigzag stitch. The elastic was sewn on slightly below the natural waist so that it pulls the skirt up and adds some more volume to the bodice. This look is super comfortable and perfect if you’re having a large meal out! 🙂

I’ve kept the bodice and skirt slightly larger than my usual size. The polyester fabric is very lightweight and nice for warmer days, but it’s not as comfy as cotton on hot summer days, so it’s better to leave a lot of ease.

Lottie Dress by thisblogisnotforyou.com

Lottie Dress by thisblogisnotforyou.com

Lottie Dress by thisblogisnotforyou.com

I’m not sure why I keep using this pattern again and again. It’s quite versatile and comes together super quickly (which is probably why). Who doesn’t love quick projects for when you have too little time to sew?

What’s the pattern you have used most often?

xx

Charlie


Happy sewing!
♥

facebook/bloglovin/pinterest
twitter/instagram

Stay in touch!
Ultimate Trousers #2 – Floral Vintage Fabric

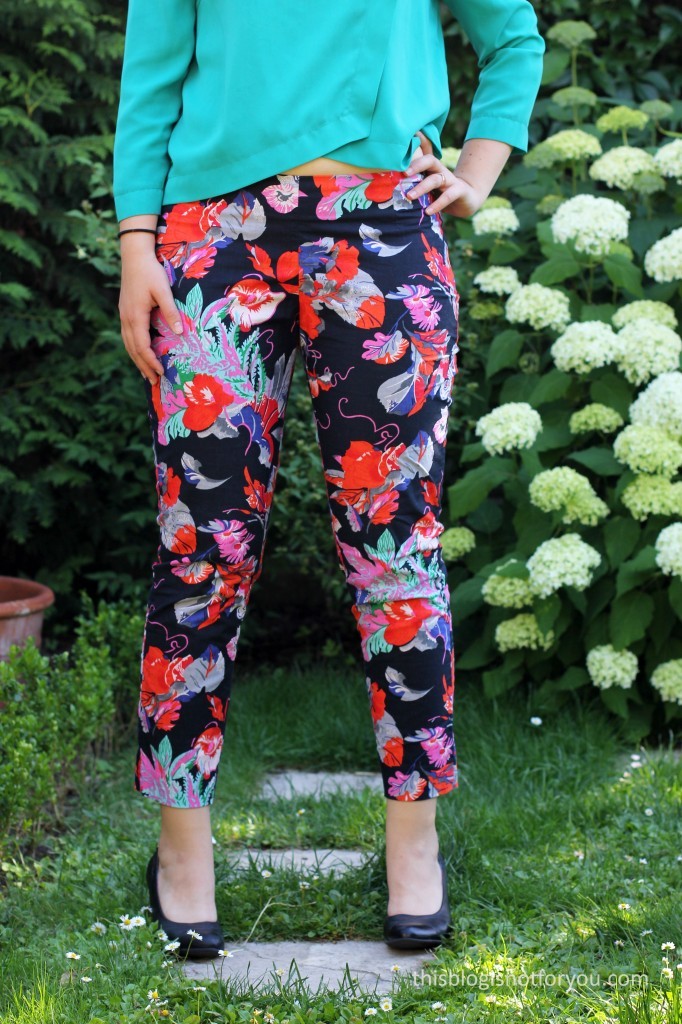
sew over it - ultimate trousers by thisblogisnotforyou.comOops, I did it again! Hope you guys are not bored of me constantly posting different versions of the same patterns.

Not being a student anymore it’s harder to find time to sew and sometimes it’s just easier to grab a pattern that you already traced and fitted.

The Pattern:

I always hated shopping for trousers, so sewing them is just as daunting. I was positively surprised and super happy with the fit of my first pair of Ultimate Trousers and knew that I would be making more.

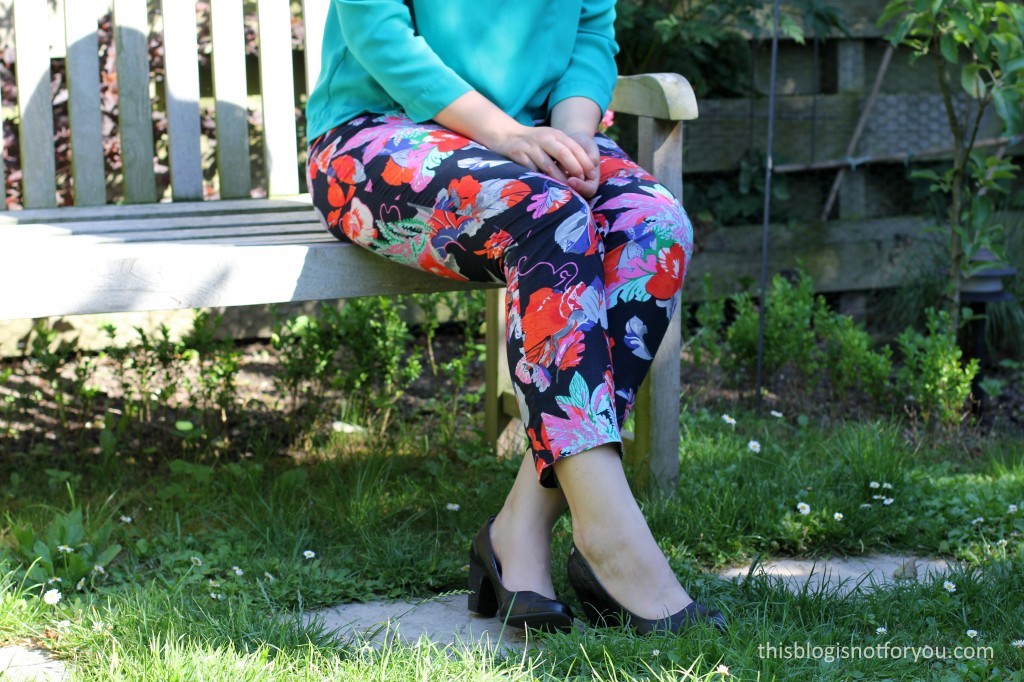
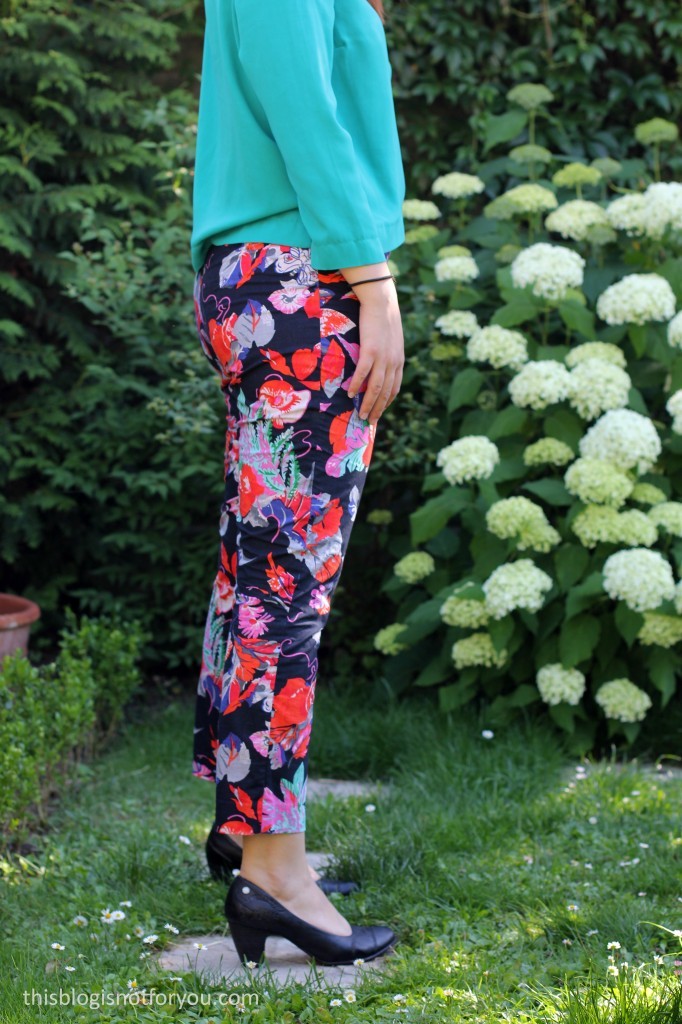
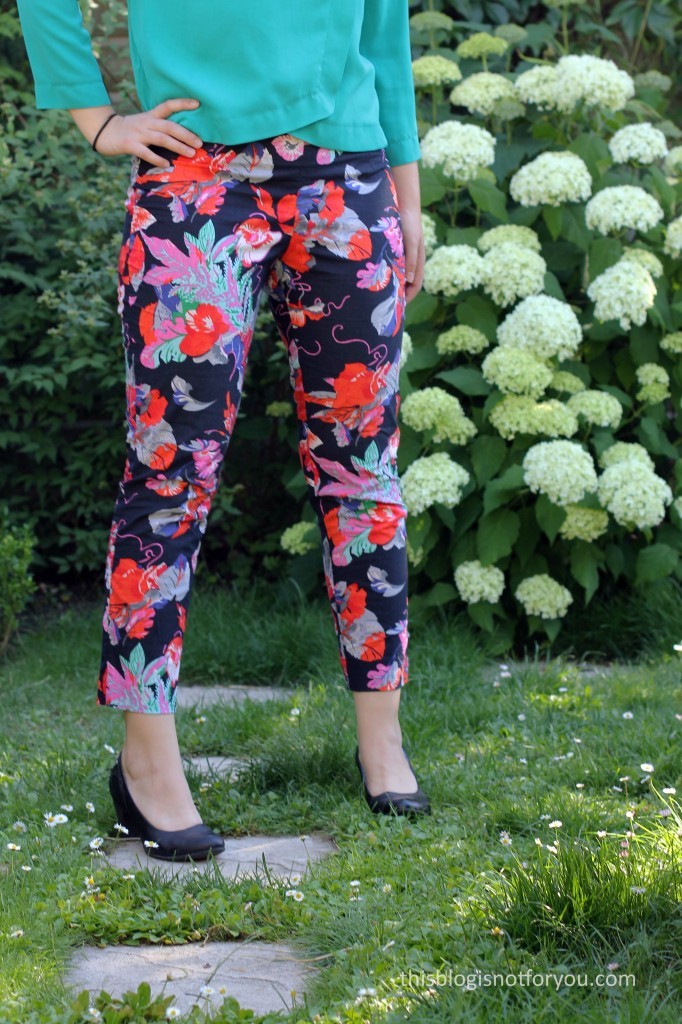
sew over it - ultimate trousers by thisblogisnotforyou.comsew over it - ultimate trousers by thisblogisnotforyou.comFit & Alterations:

I actually made this pair quite a while ago and have worn it many times since. I only made very few alterations to the pattern (a little more ease around the knees to make sitting down more comfortable!). The pattern is great for fitting your first pair of trousers if you’ve never made one before.

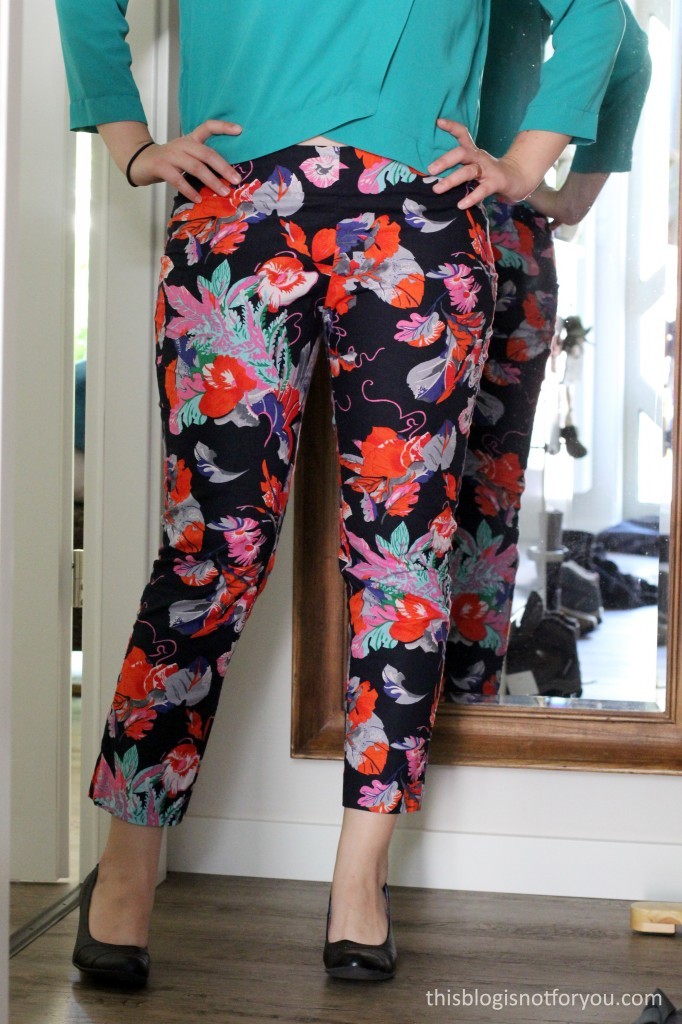
This time the fit is even better as I made them a bit wider around the knees and used a slightly stretchier fabric.

sew over it - ultimate trousers by thisblogisnotforyou.comsew over it - ultimate trousers by thisblogisnotforyou.comThe Fabric:

For some reason I used to hate floral patterns but nowadays I really love them (the big bold ones).

I got this fabric from the Mr’s grandma who basically gifted me most of her vintage fabric stash – I know! That’s super lucky! Most of the fabric is only about 75cm-100cm wide but then I have 2-4m of most of them. The narrow fabric was perfect for cutting out the trousers and I even managed to keep an eye on the pattern this time (No weird crotch pattern going on, yay!)

The fabric is a lightweight cotton with a bit of stretch – perfect for summer! It was a dream to sew with. It creases a bit but because the fit is quite tight and the print very busy I don’t really bother. I didn’t iron the trousers before taking these pics, so as you can see, it’s not really necessary.

sew over it - ultimate trousers by thisblogisnotforyou.com

trousers: handmade, Ultimate Trousers by Sew Over It
blouse: handmade, Burdastyle
shoes: s.Oliver

Will I make it again? There’s no reason why not. I seem to always need new trousers in a different colour or print and since I hate trouser-shopping I’ll happily whip up some more versions of this one! I might try and raise the waistband a bit next time of maybe add some pockets. Also, this style is perfect for my profession where wearing jeans isn’t always allowed. It would be silly not making the most of a well-fitting trouser pattern!

The heat’s unbearable, so I’m off to Iceland for two weeks! I won’t be able to sew, but maybe I can visit one of Europe’s largest fabric stores!

xx

Charlie


Happy sewing!
♥

facebook/bloglovin/pinterest
twitter/instagram

Stay in touch!
 

Burda Baby Dress 09/2013 #147 – Tilda Fabric

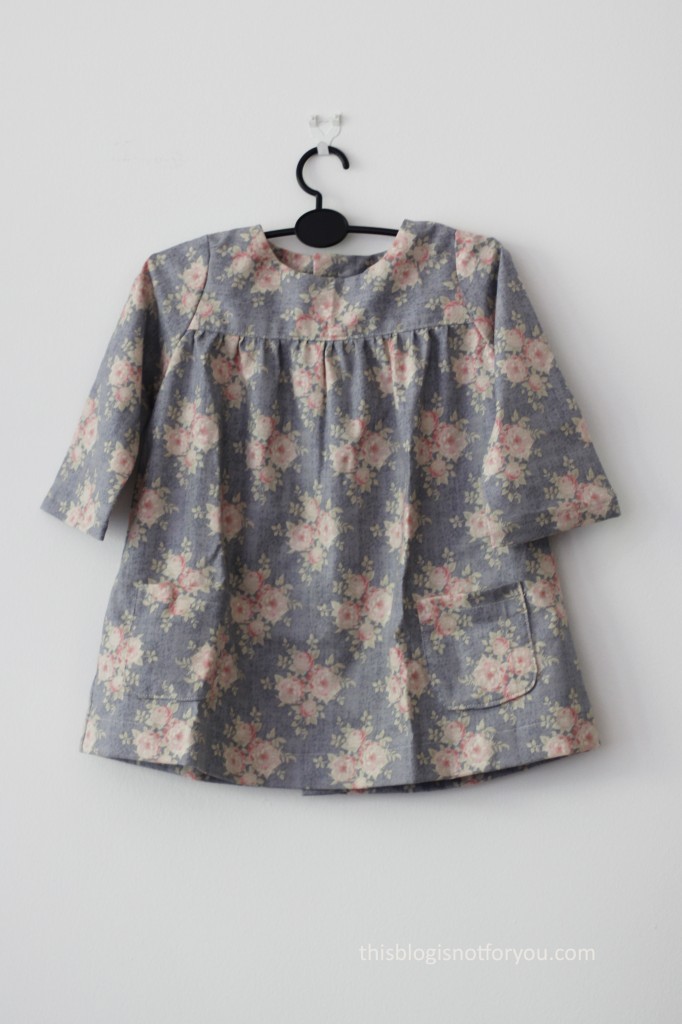
Burdastyle Baby Dress 09/2013 #147 by thisblogisnotforyou.comHelloooo my lovelies!

I’m back in Germany! It’s still kinda weird and doesn’t feel real at all at the moment but we’ll get there. I’ve got quite a few projects lined up to be blogged (sewn pre-move) so at least I don’t have to panic blog-wise. And I’ve got my little sewing corner set up with a tiny selection of fabrics for some serious stash-busting action. (I already bought fabric here, oh no!)

Just before we moved we had family visiting, including my adorable little niece, who was about ten months then. Obviously I  couldn’t contain myself and had to sew a couple of things here and there. I browsed through my Burdastyle stash – always reliable! – and found some really cute baby patterns. You can find most of them online as well.

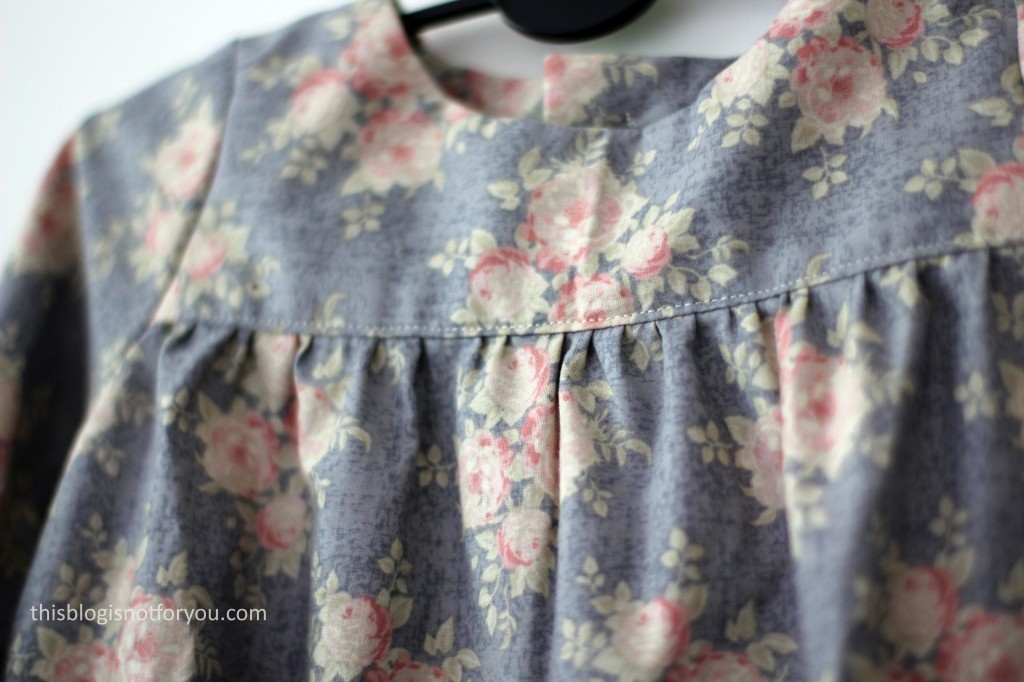
I decided to use up some gorgeous Tilda fabric that I had left from a previous project I did in collaboration with White Tree Fabrics (there’s a new project in the making, but with reduced resources at the moment it takes a while!) Sewing for babies is always great for using up fabric scraps as well! I literally squeezed this one out of the leftovers I had.

Burdastyle Baby Dress 09/2013 #147 by thisblogisnotforyou.com

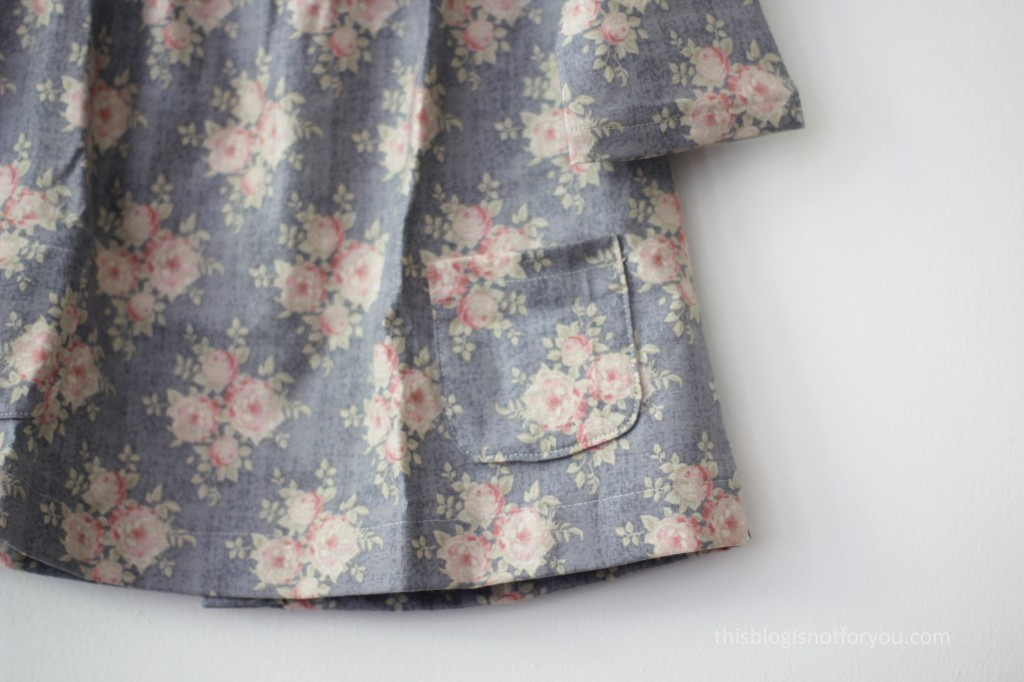
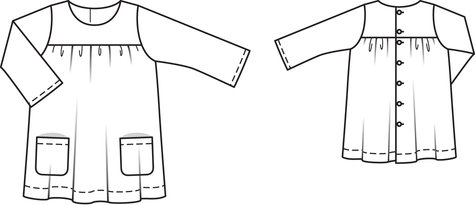
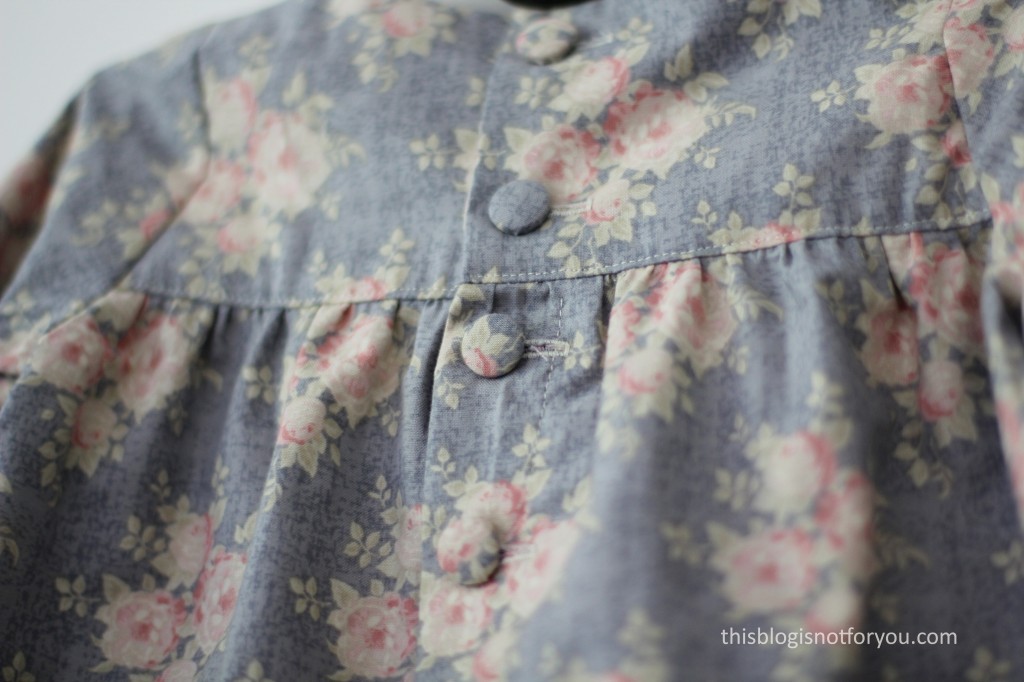
The pattern is Burdastyle Baby Dress 09/2013 #147 – a very cute baby dress all complete with patch pockets and a gathered yoke. The dress has long sleeves and buttons up the back. (Check out my pattern matching at the patch pockets, yo! It wasn’t even intentional, but it still makes me happy seeing those pictures!)

The dress came together quite easily. Sewing with the Tilda cotton was a breeze! Apart from the buttons, everything was sewn on the machine. I took quite a while though. Although it is tiny and comes together quicker than a normal grown-up-sized dress, it still took me almost a whole day to finish.

source: burdastyle.com

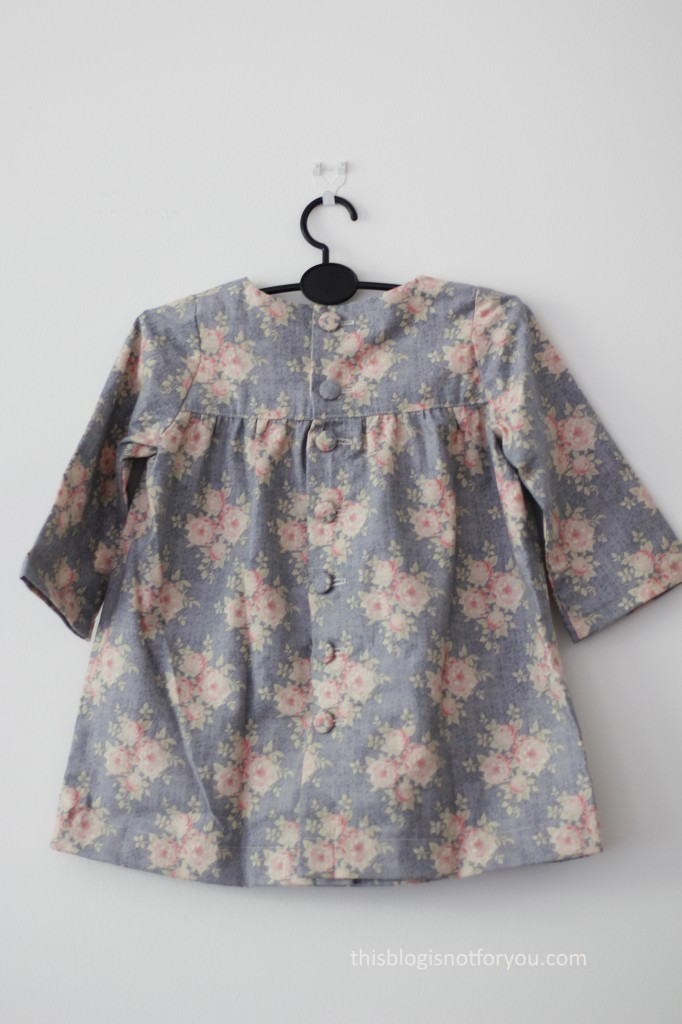
Burdastyle Baby Dress 09/2013 #147 by thisblogisnotforyou.comAnd here’s the even cuter back! I made self-covered buttons (12mm) and sew all the buttonholes with my buttonhole foot and my 4-step-sewing machine setting (15mm wide buttonholes). These buttons make me smile!Burdastyle Baby Dress 09/2013 #147 by thisblogisnotforyou.comThe dress fits beautifully and the little munchkin looks absolutely stunning in it (you can tell that she knows that, too!)

Burdastyle Baby Dress 09/2013 #147 by thisblogisnotforyou.com

Will I make it again? The pattern is great as a basis for all sorts of outfits – blouses and summer as well as winter dresses. Unfortunately, babies grow fast and by the time I feel like making it again I would have to trace it again for a bigger size. So, no, at the moment I don’t have plans to sew the exact same dress again, but I’ll keep the traced pattern – just in case 🙂

xx

Charlie


Happy sewing!
♥

facebook/bloglovin/pinterest
twitter/instagram

Stay in touch!
 

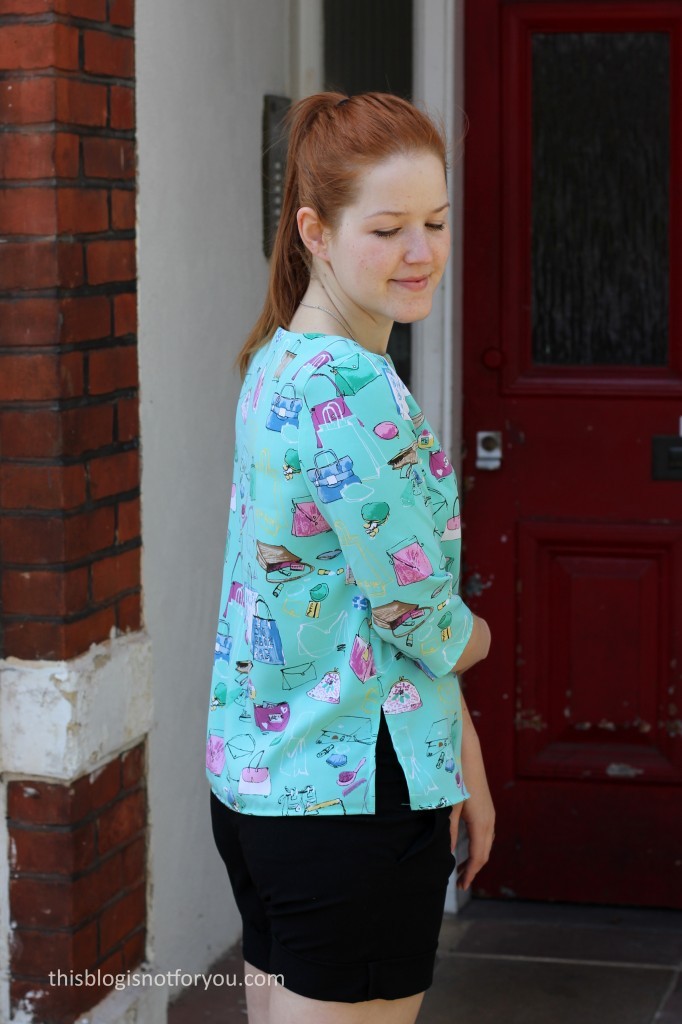
Another Lottie Blouse Hack – A simple 3/4 sleeve top!

Lottie Top by Thisblogisnotforyou.comHello dear sewing-lovers! Today I’m sharing another Lottie Blouse hack. The original Lottie Blouse pattern comes with puff sleeves and a pussy bow & keyhole neckline.
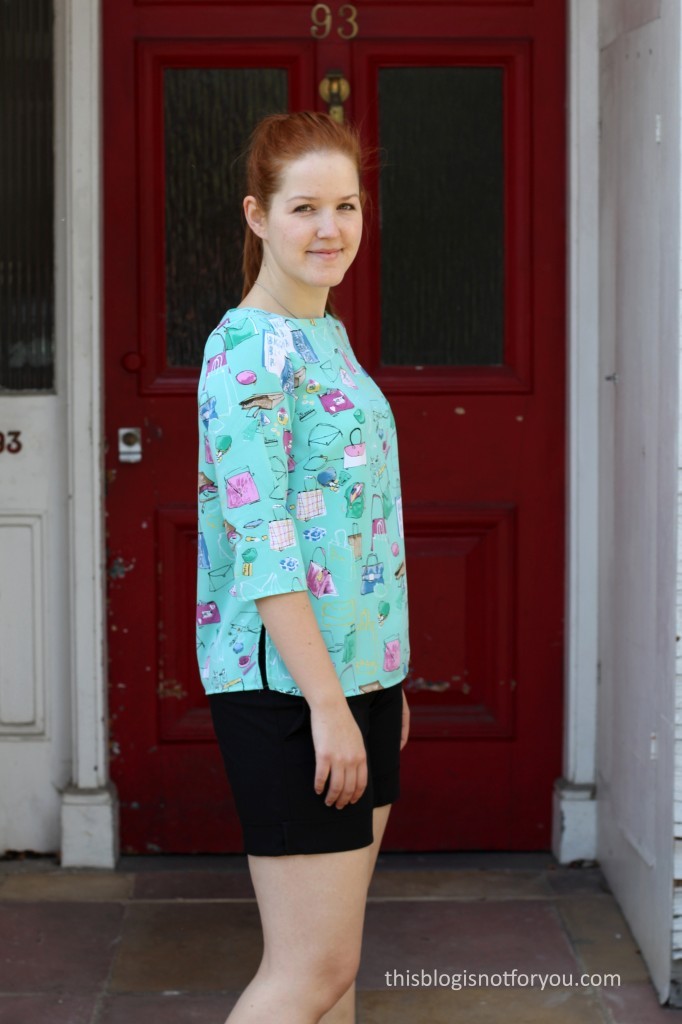
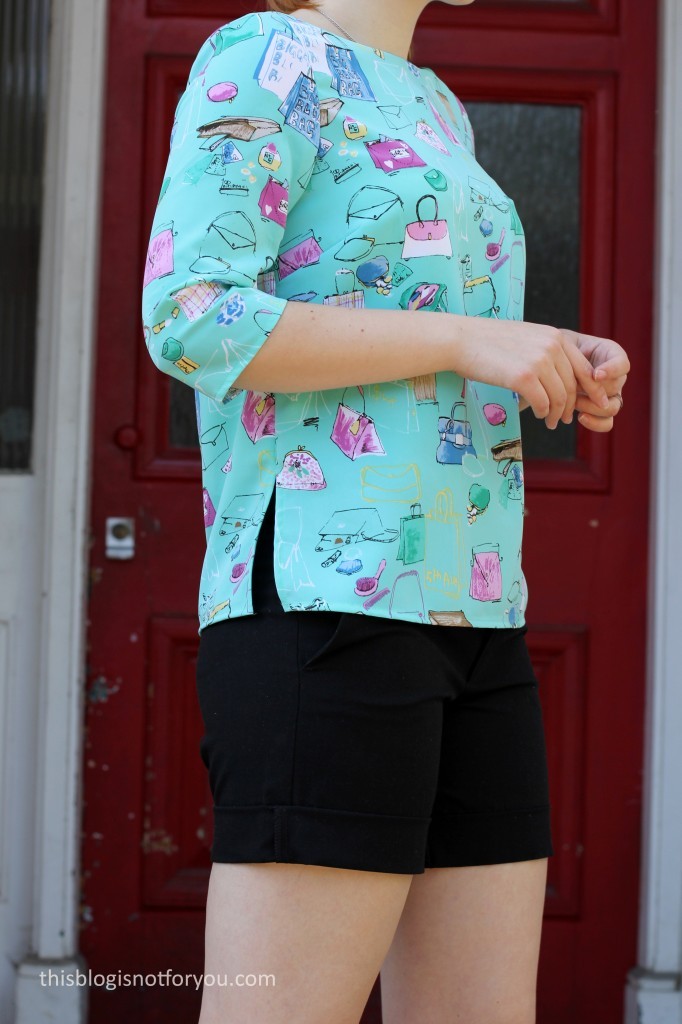
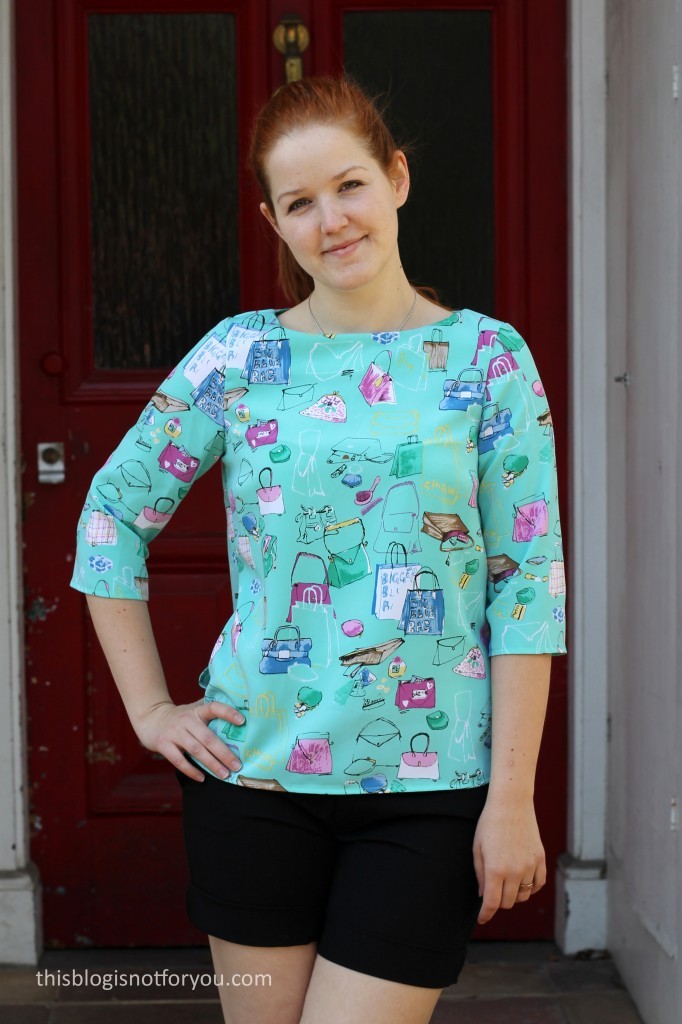
I wanted to make a simple 3/4-sleeve top to show off the busy print of this very girly bag fabric. I like the Lottie Blouse pattern (Simple Sews) and have made 3 variations already. The pattern was included in Love Sewing magazine last year.

Pattern alterations:

– slimming down the sleeves by removing the gathering at the top
– removing the keyhole and bow
– raising the neckline and adding a facing
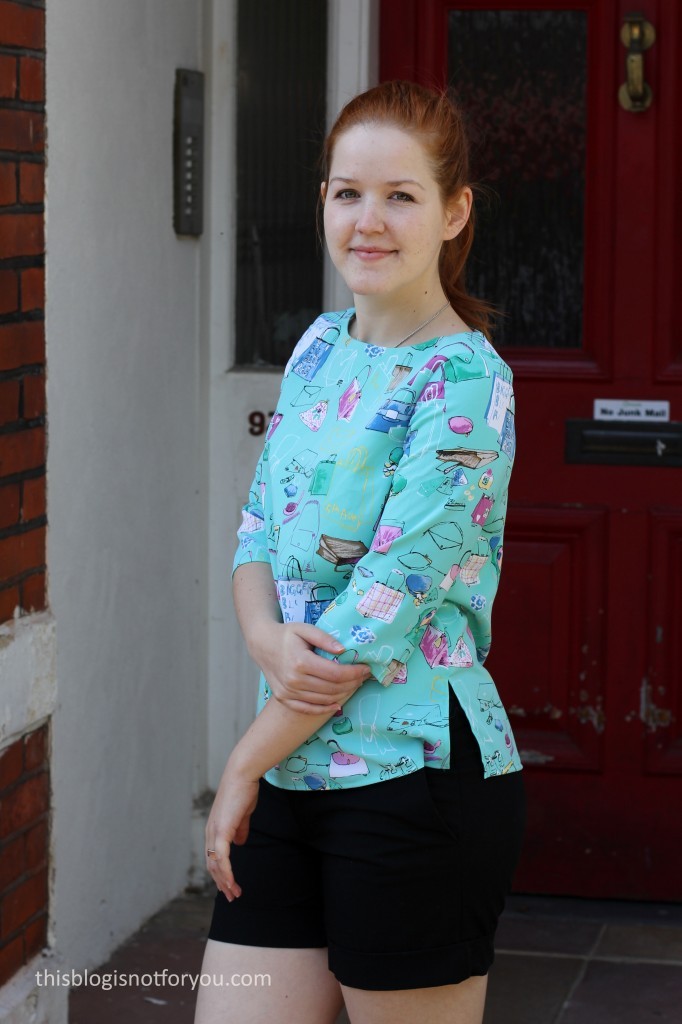
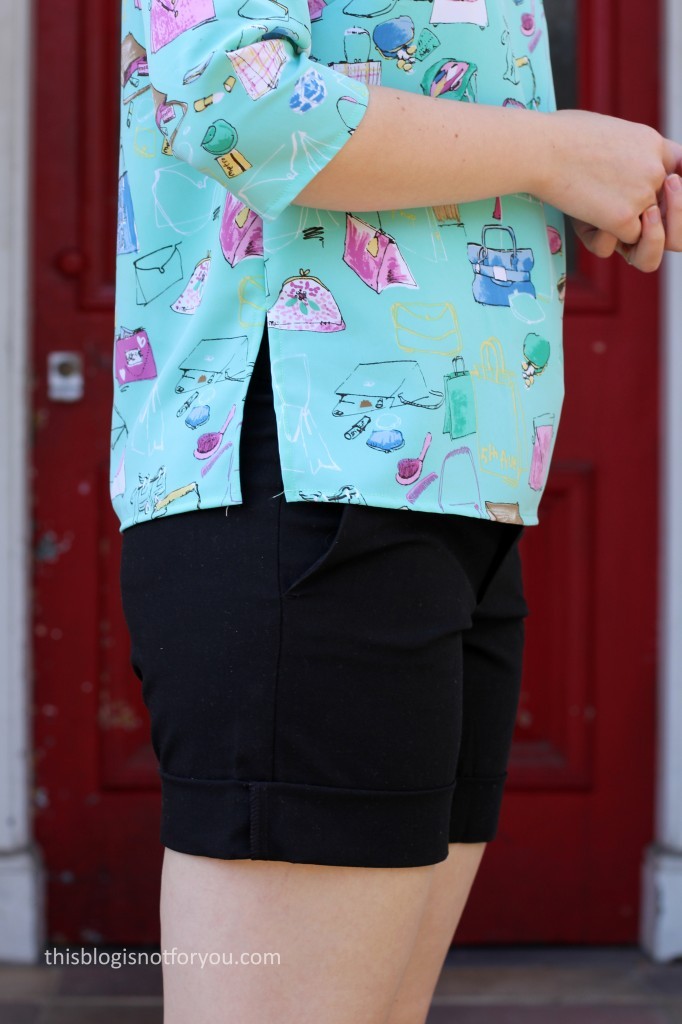
– adding 15cm slits at the lower side seam (inspired by a Boden top)

source: www.lovesewingmag.co.uk

Lottie Top by Thisblogisnotforyou.com

I didn’t follow the original instructions. The Lottie Blouse doesn’t use the set-in-sleeve technique and the sleeves are sewn in flat. This makes the gathering at the puff sleeves quite easy and generally I like using this technique for knit fabrics. As I changed the sleeves, I used the standard set-in-sleeve method to get the ease right at the sleeve cap.

The neckline facing is understitched and attached to the shoulder seam allowance with a couple of hand stitches.Lottie Top by Thisblogisnotforyou.com

I finished all seams with my overlocker. The sleeves and hem edges are all machine stitched – overlocked and turned in once and kept in place with topstitching approx. 5mm from the edge. This gives a nice neat finish and the machine stitching is barely visible.

Lottie Top by Thisblogisnotforyou.comI stitched the side seams up to  approx. 15cm from the hem. I then pressed the seams open. The seam allowance is kept in place by topstitching 5mm from the edge, starting at the hem. I stitched up to the point where the side seam stitching starts, then stitching at an 45° angle, first up, then down again, forming a little triangle shape at the top of the slit. Lottie Top by Thisblogisnotforyou.comLottie Top by Thisblogisnotforyou.comTo be honest, I’m not quite as happy with this make as I hoped to be. First, the fabric. I have 3m of this polyester blend, which I got for almost nothing at a charity shop. The quality is really nice and I saved it up for ages. I finally decided that I had enough to make a top and still have enough left for a dress. Looking at the top now, the fabric choice wasn’t the best. I just really don’t like the print on it. It would’ve looked better on a dress I guess. I might use the rest of this fabric for the Sew Over It Vintage Shirt Dress.
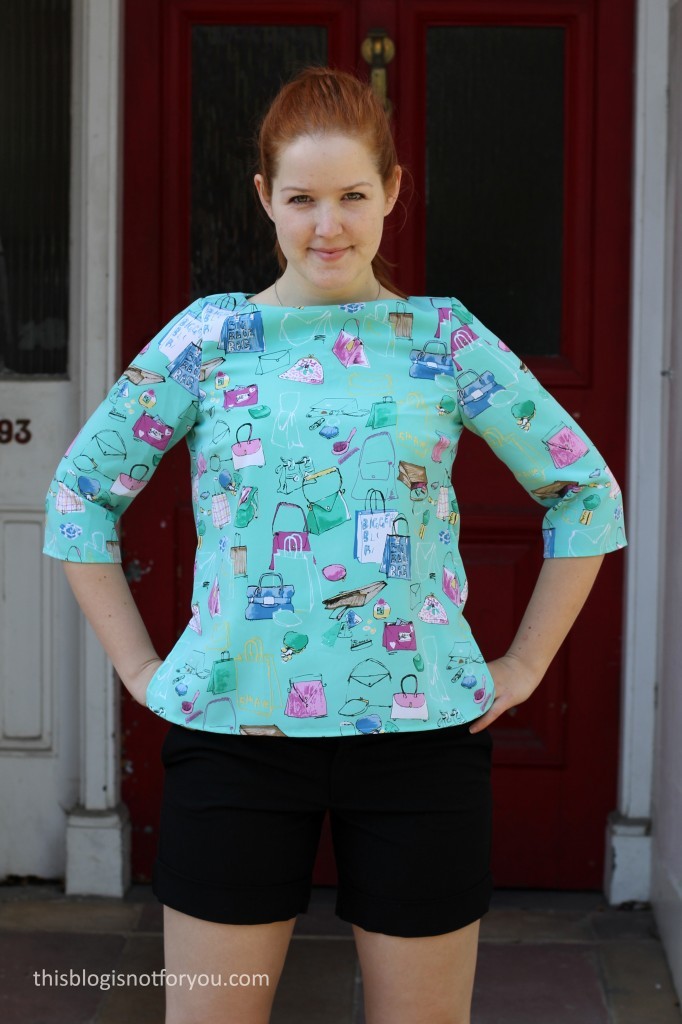
Second, the fit isn’t the best. The Lottie Blouse fits me quite well, but I never realised that it is quite tight across the bust. It now makes sense, because the keyhole always gaped a bit, but this wasn’t much of a problem as it is covered by the pussy bow.

Now that I removed the keyhole and raised the neckline, the top is a bit tight. Furthermore, removing the fullness of the sleeves doesn’t help either. As you can see in the picture below, the top rides up and distorts the neckline when I lift my arms a bit. Meh!

Lottie Top by Thisblogisnotforyou.comWell, it’s good enough to wear at home in the garden and I have learned my lesson!
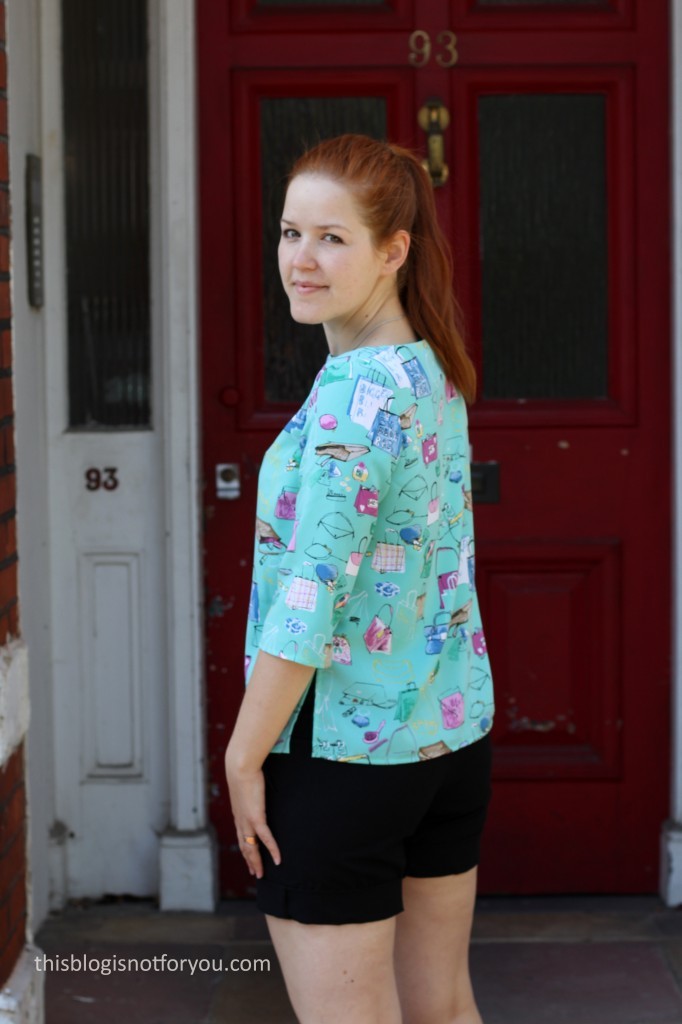
I recently made yet another Lottie hack and hacked the blouse into a dress (pictures coming soon!). Again I removed the keyhole (but kept the bow), but this time I added an extra 3cms across the bust. The fit is so much better now!
Lottie Top by Thisblogisnotforyou.com

What’s your favourite pattern hack? Have you ever been really disappointed after trying something new?


Happy sewing!
♥

facebook/bloglovin/pinterest
twitter/instagram

Stay in touch!