
A Hepburn Skirt and bold colour choices
 A little while ago, I noticed that I often go very safe in terms of fabric choices. For some reason I never go with the bold prints and colours (with the exception of bright red, I guess) and usually grab all the plain colours, especially navy blue. Since the Hepburn Skirt is perfect for colour-blocking, I decided to go with bolder colours, the ones that I didn’t have in my wardrobe yet but could see myself wearing. Well, here you can see the result!
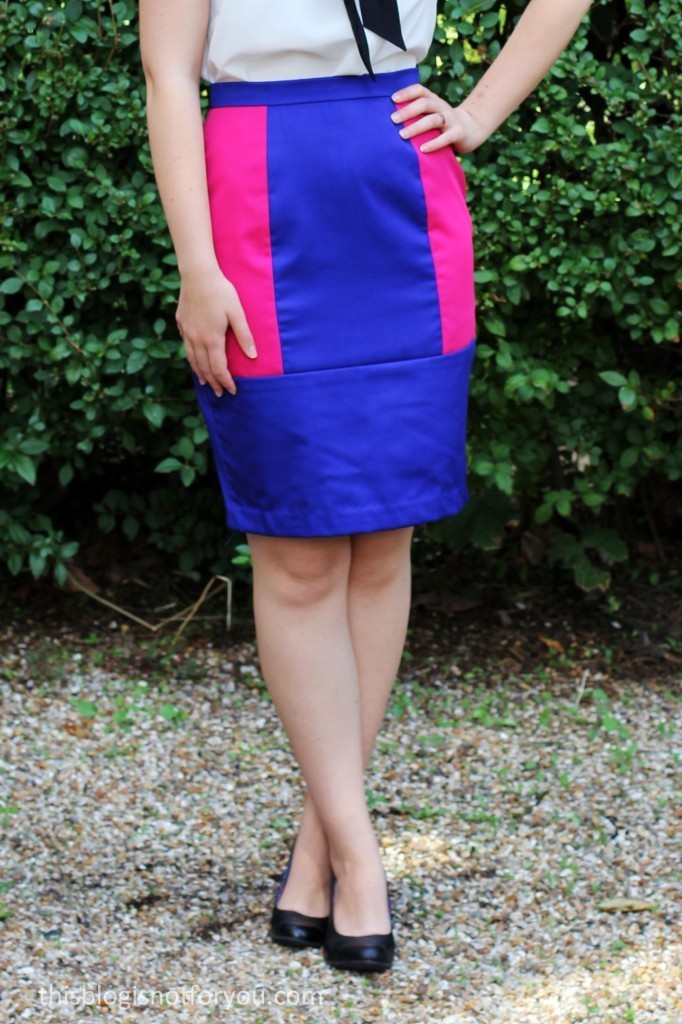
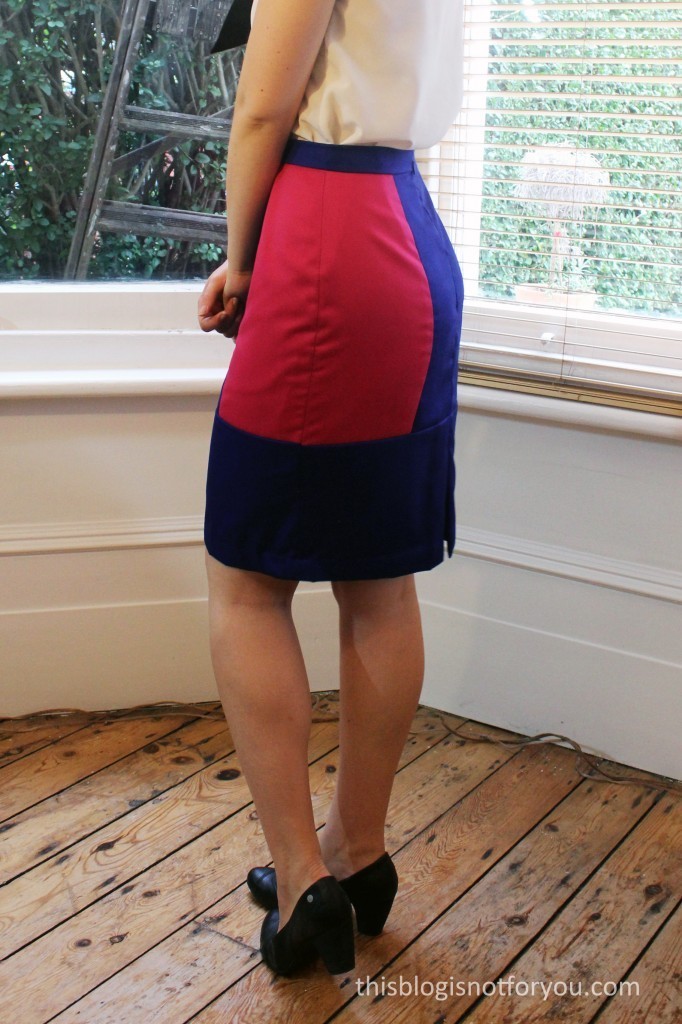
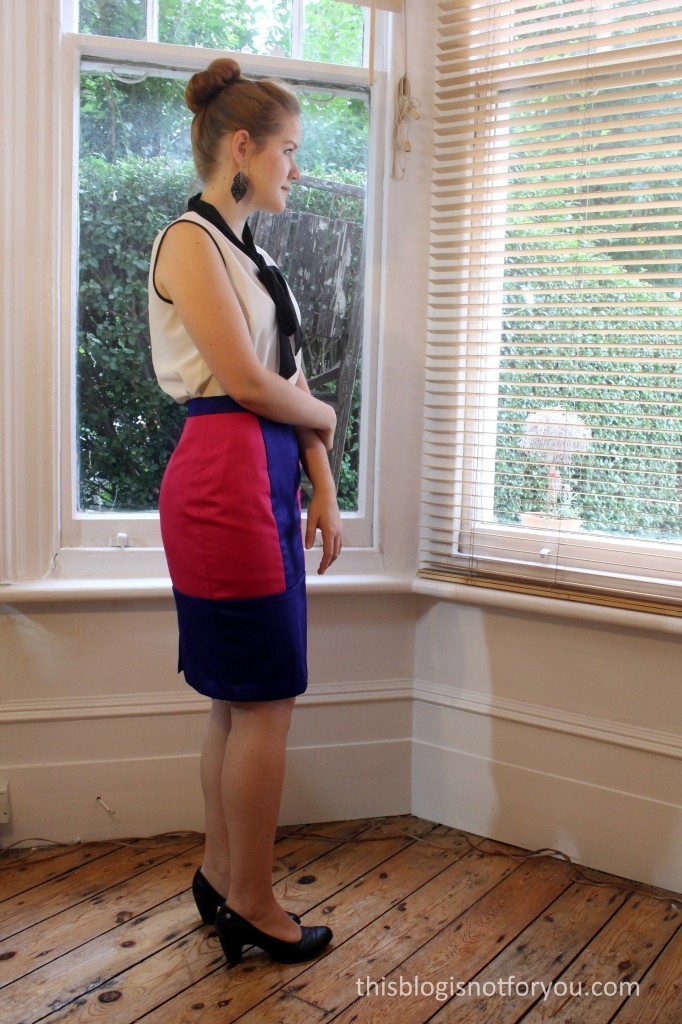
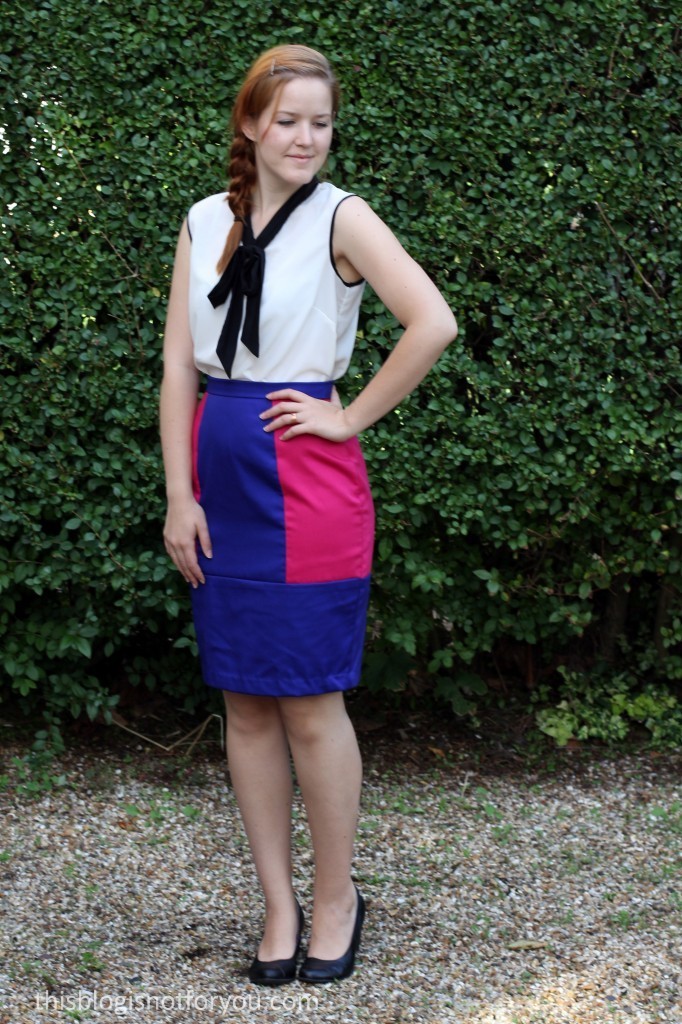
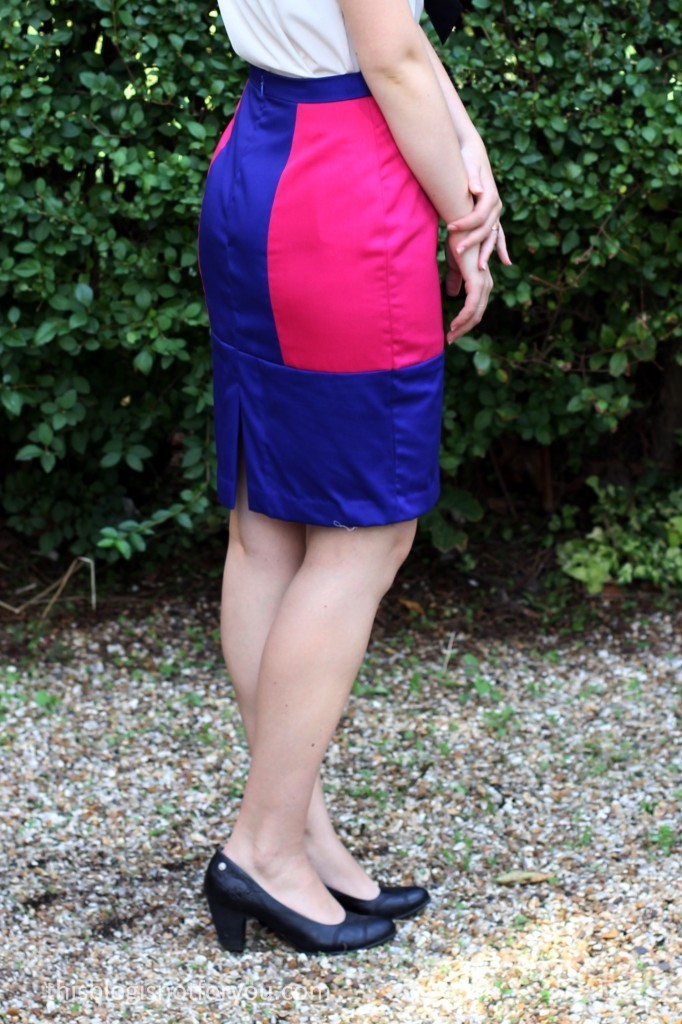
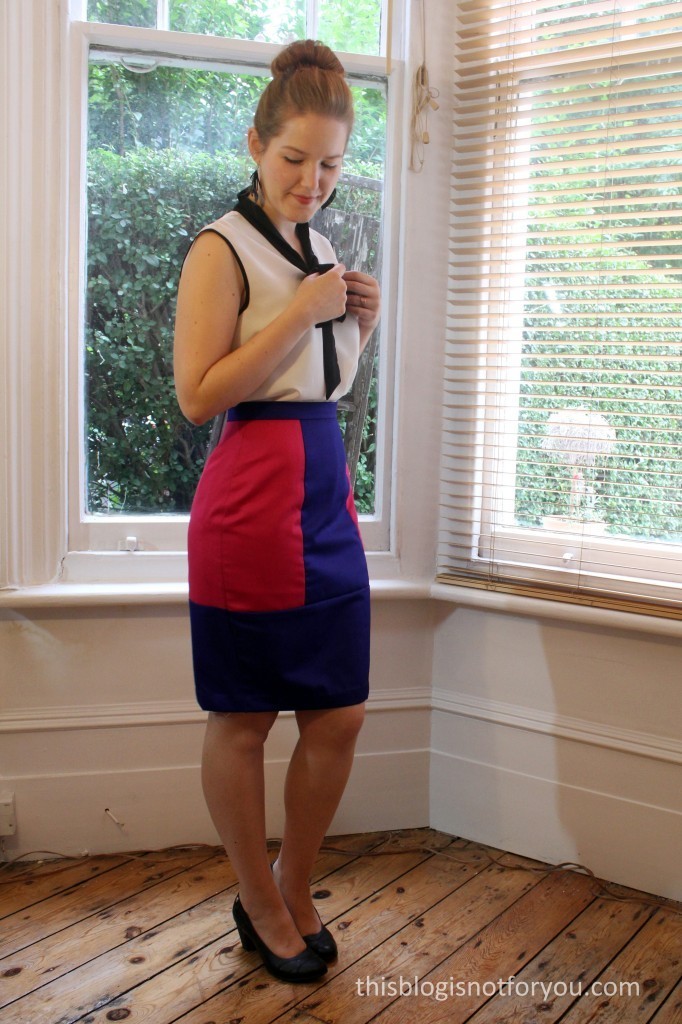 I made the knee-length variation of the Hepburn Skirt and chose to use a different for the front and back side panels.
I used bright pink and royal blue cotton drill fabric which I got for £3.50/m on Goldhawk Road. Quite a bargain, considering that I needed less than a metre for the size 10 version of the skirt. I cut out two complete skirts in both colours and just swapped the side panel pieces. I haven’t finished the second skirt, pink with blue side panels, but for that one I will go with the thigh high length.
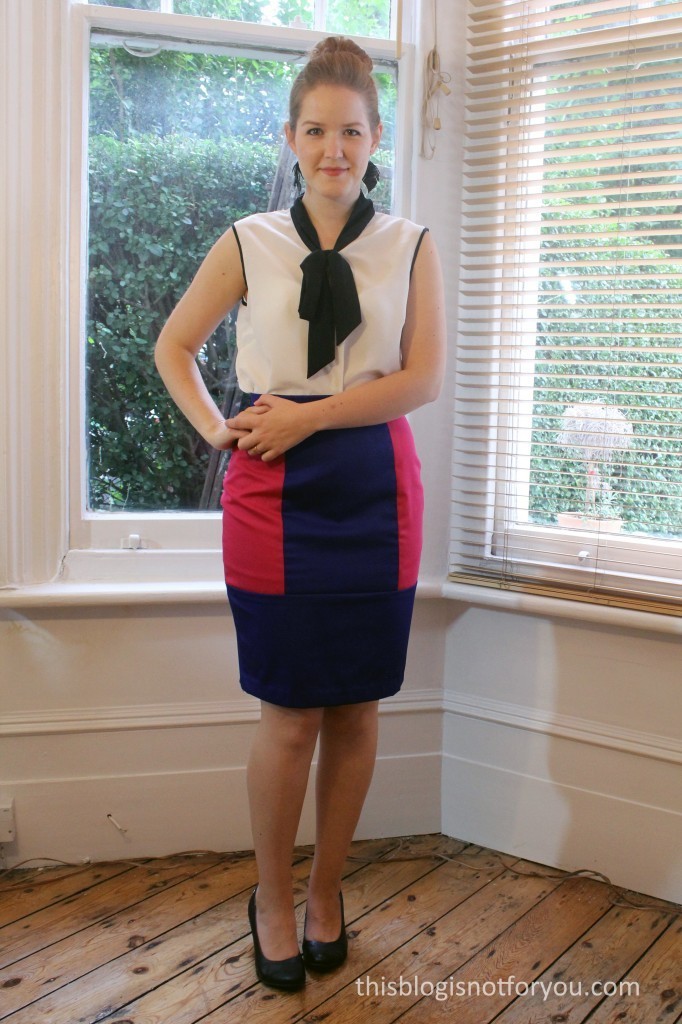
I paired the skirt with my sleeveless Lottie Blouse, a perfect combination for work. I still have to figure out which tops go together with these bright colours and for the time being black and white seems to be the best option.
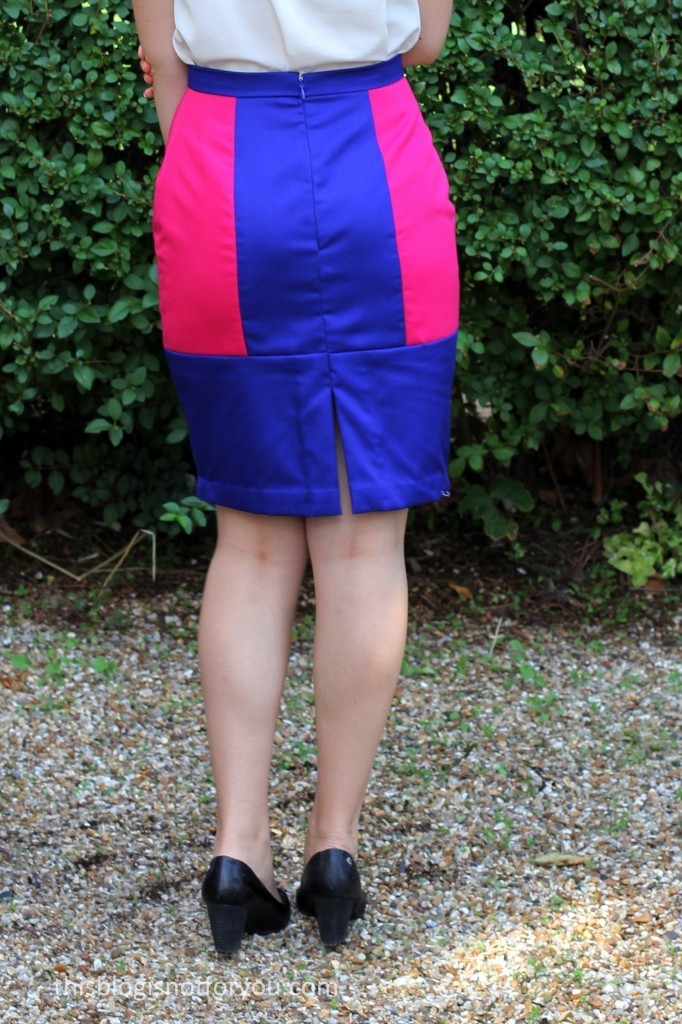
 Both variations of the skirt have a vent in the back which makes walking much more comfortable. The pattern includes instructions on two different techniques to sew a vent. Of course you can also skip the vent and wiggle around Marilyn-style.
The skirt comes together quite quickly, it took just a few hours. I always hand-stitch waistband, vent and hem which took longer than sewing the skirt. Inserting the invisible zipper is probably the most complicated part of sewing the skirt. I think a beginner could totally tackle this pattern.
I recommend using medium to heavy-weight fabric. The cotton drill was perfect for the skirt. They had loads of different colours on Goldhawk Road. I probably will pay them a visit again some time soon to pick up more.
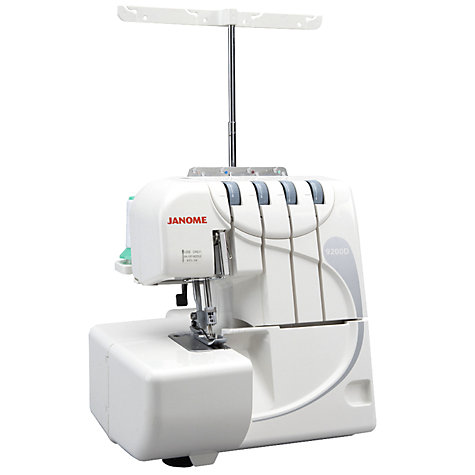
 I finished all seams with my new overlocker – such a bliss! I actually now enjoy overlocking more than sewing. Is this normal?
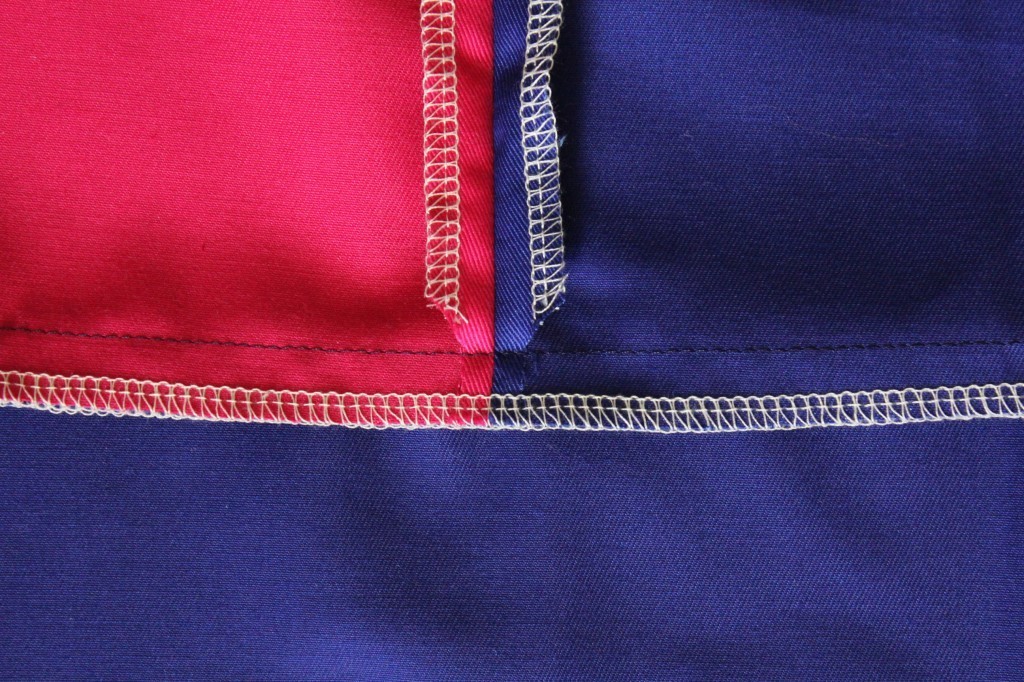
 (The seams acutally do not pucker at all, I have no idea why they look so awful in the picture above!)
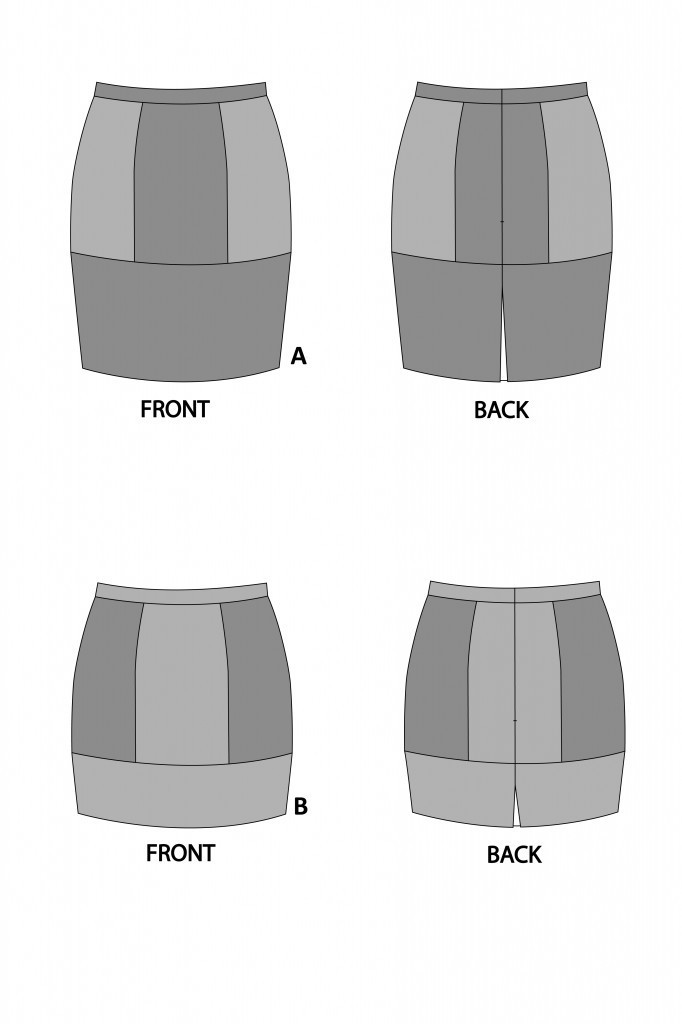
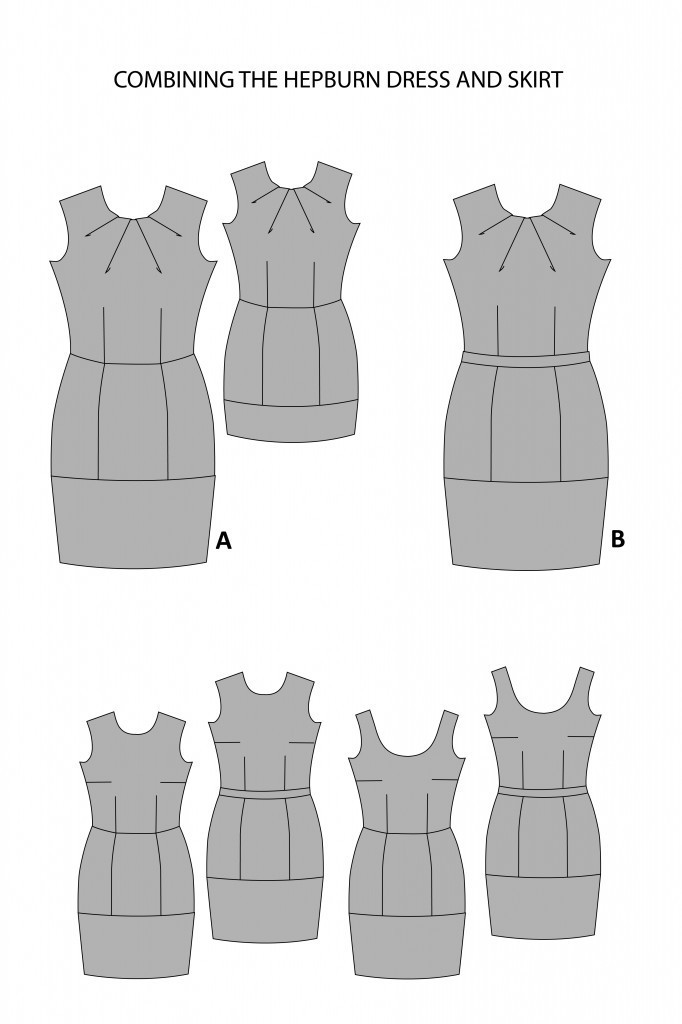
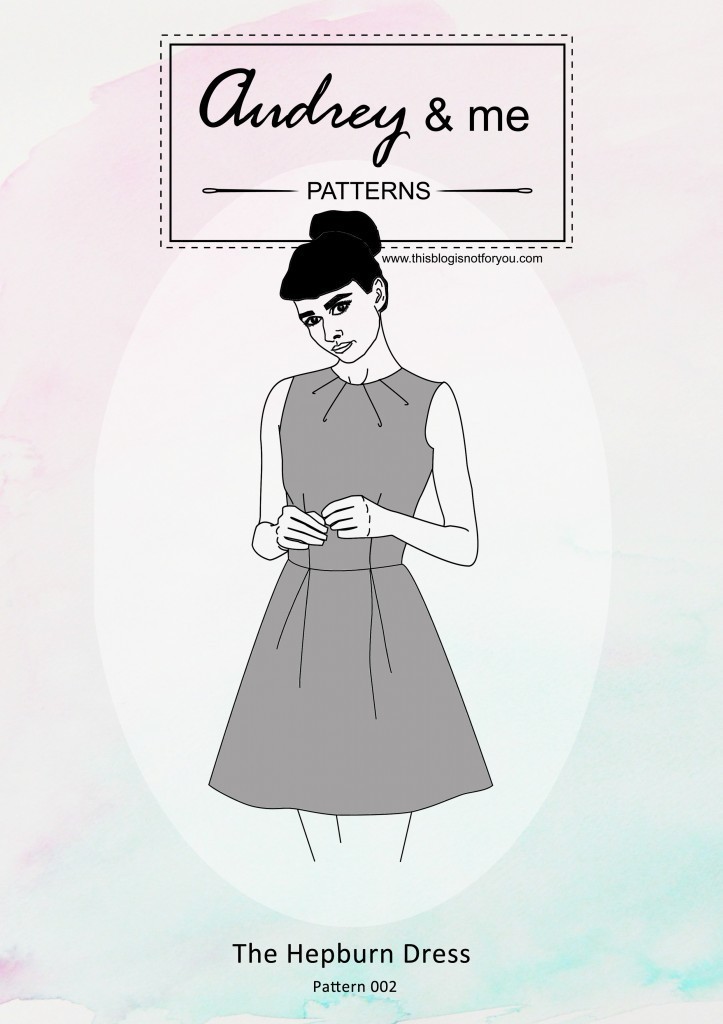
 At the moment I am also working on the fitted Hepburn dress variation which combines both skirt and dress patterns. I will make a knee-length version in a plain colour and at least one mini dress that is colour-blocked. I already picked up all the fabrics a couple of weeks ago and can’t wait to finish the dresses as soon as possible. The dress itself comes with many different variations, but (as you can see in the figure below) when combining both patterns the possibilities are endless.
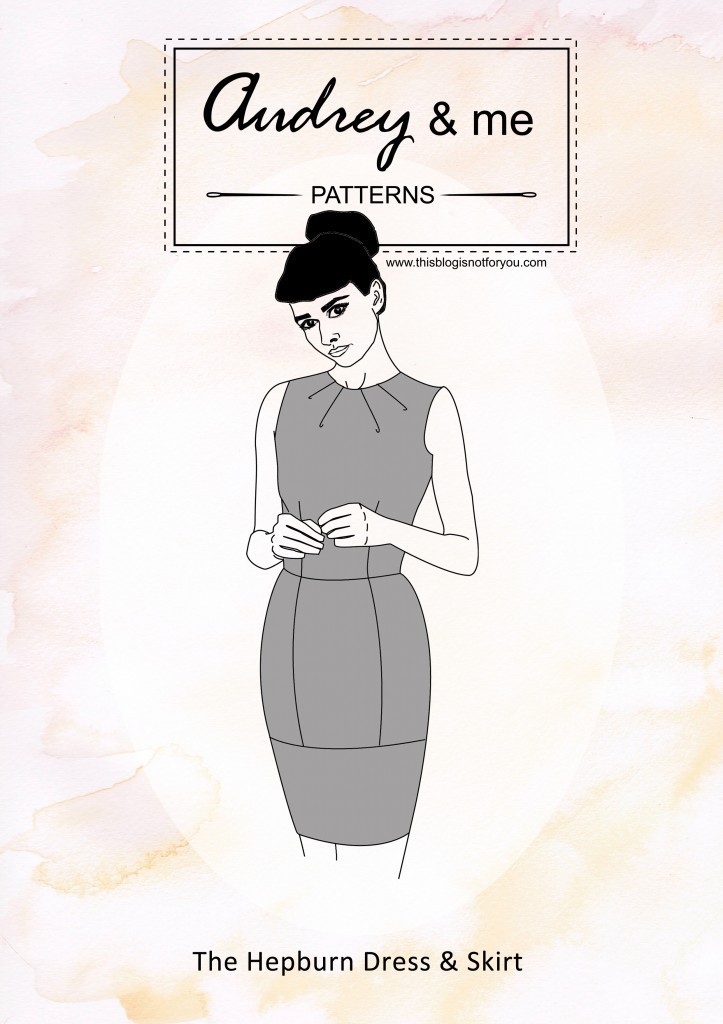
Both patterns are available on the audrey & me patterns page now. If you’d like to get both patterns, you can get them in a bundle at a reduced price (yay!).
Happy sewing!
♥
facebook/bloglovin/pinterest
twitter/instagram
Stay in touch!
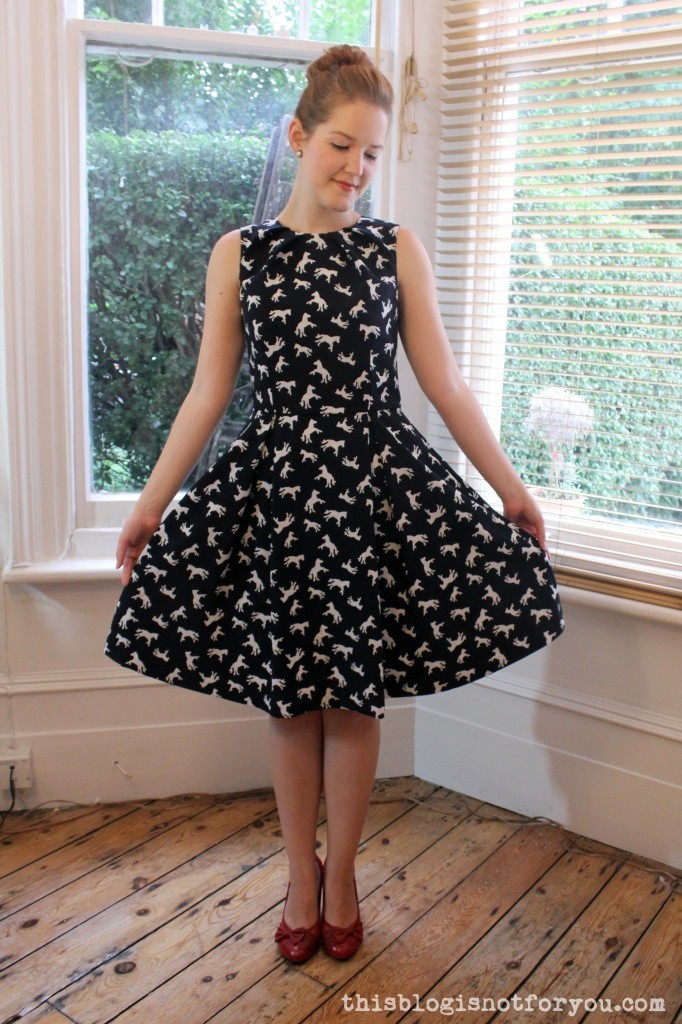
 Here a few close-ups of the neckline as it’s quite hard to see in the pictures due to the busy print:
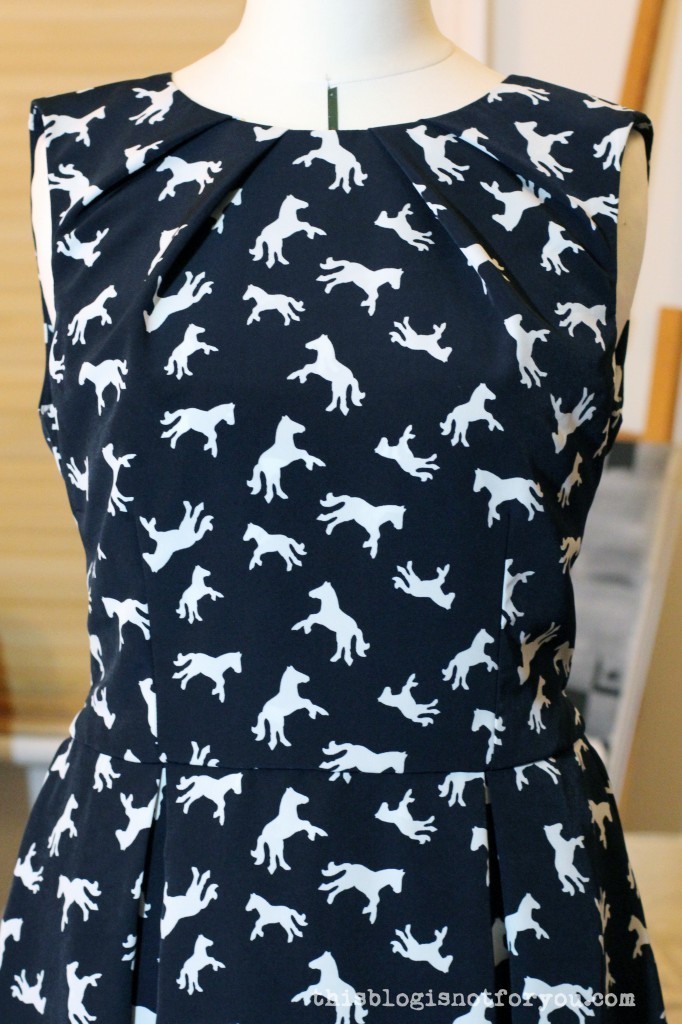

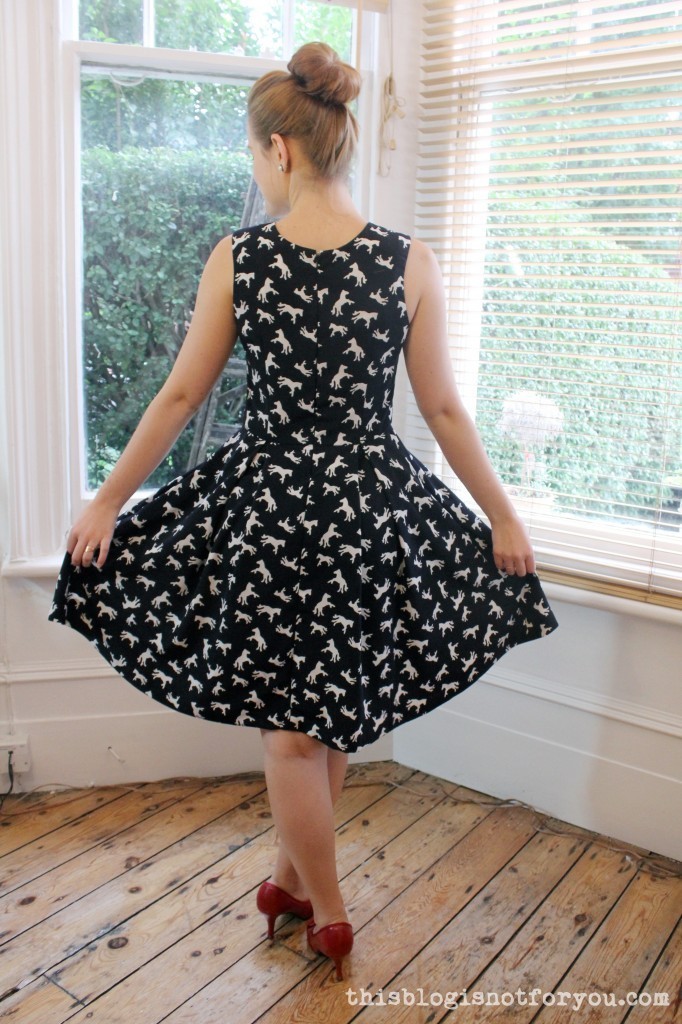
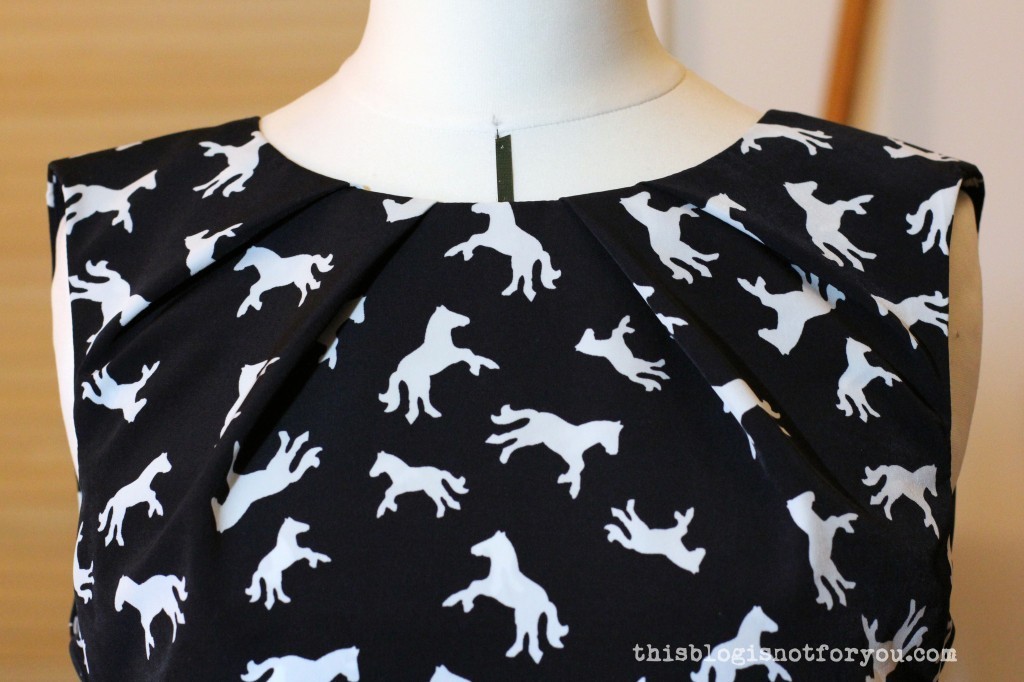 The fabric was quite a bargain – I got it for £4/m at A1 Fabrics (if I remember correctly). It’s a peachskin polyester and the quality was surprsingly good. It’s quite heavy but drapes very well and is super soft and cool to the touch. The white parts of the fabric are not see-through at all and therefore, I could use the same fabric for lining the bodice. Soft inside out!
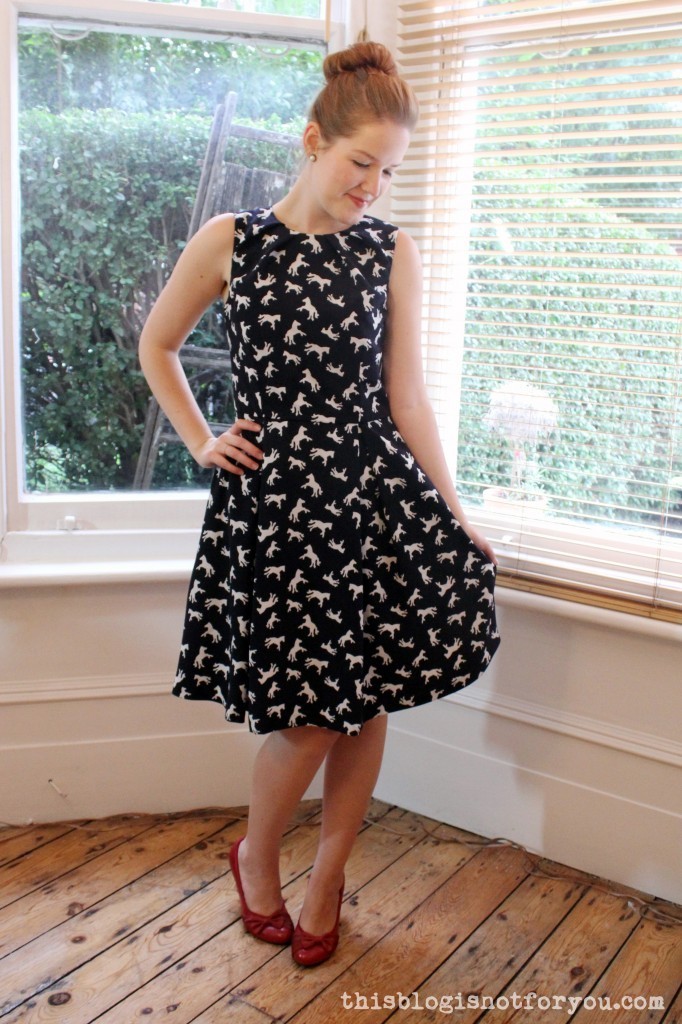
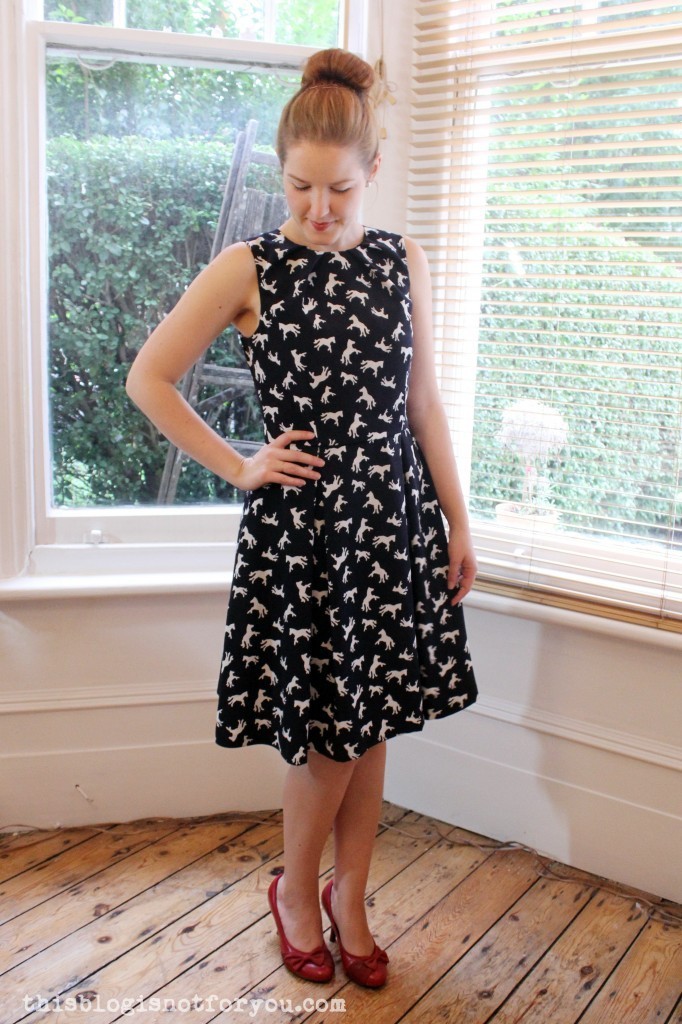
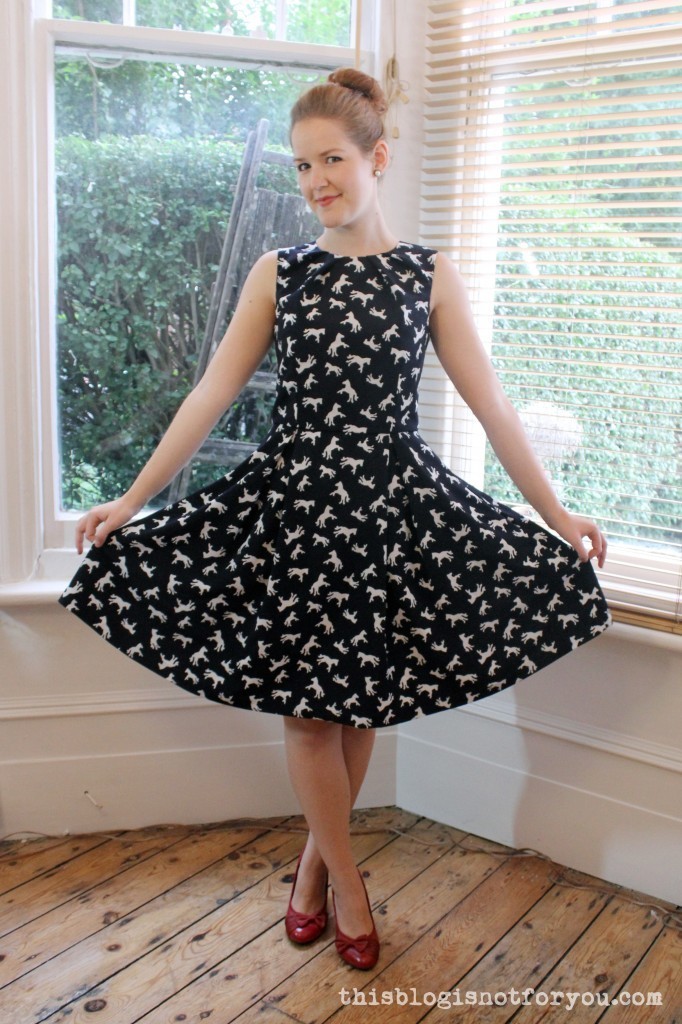 I’m a bit disappointed that the summer seems to be over so suddenly. Luckily, the Hepburn neckline works really well with a cardigan, so I will be able to wear the dress at work in the next couple of months.
 Over the past couple of weeks it’s been very quiet over here. It was not quite a deliberate blogging break, but necessary in order to sort out a few things. I’m excited to share some news with you!
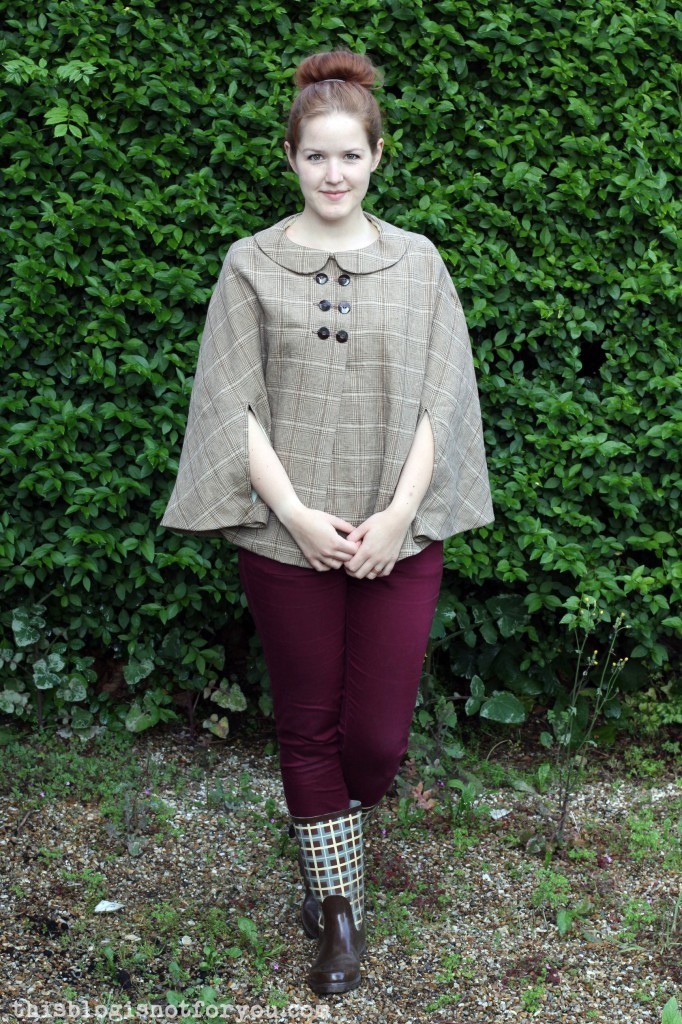 Sewing along and making the cape?
  1. Take your cape and pattern piece and mark the position of the arm opening as shown above. The position of the armslits really is up to you. I put mine closer to the centre front, others prefer it to be on the lengthened shoulder seam line.
 3. After marking the position of the arm opening (with chalk or tailor’s tacks), cut out four strips of your main fabric (or lining fabric if you prefer the contrast), two for each armslit. They should be approx. 4-5cm (2inch) wide and 3cm longer than your armslit measurement. So if your armslits are 20cm long, these strips will have to be at least 23cm long in order to include a seam allowance of 1.5 cm on each end.
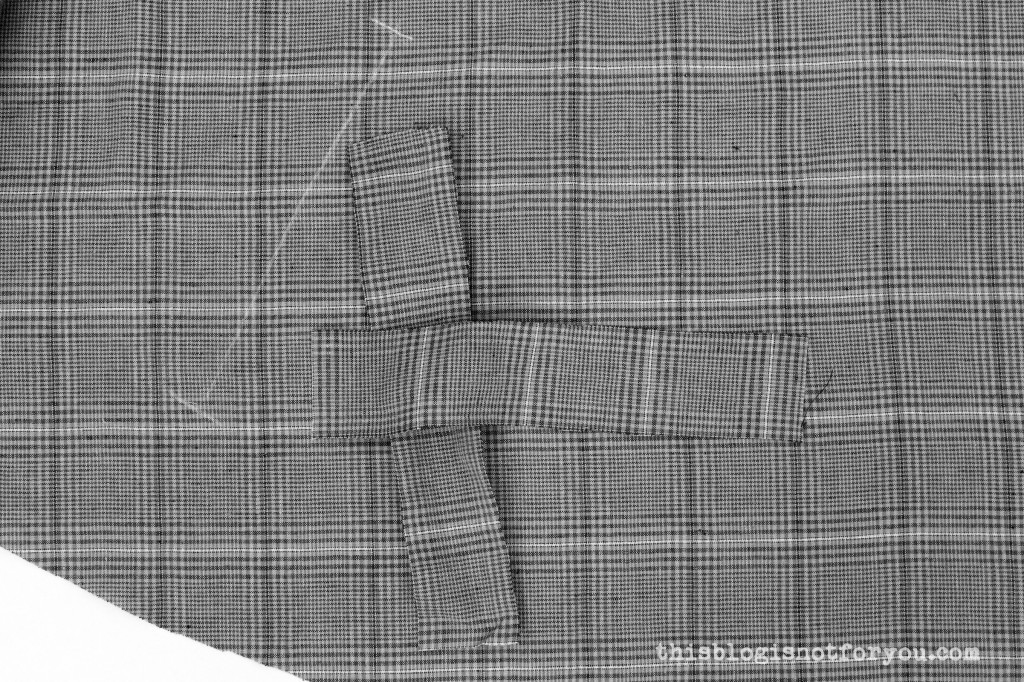
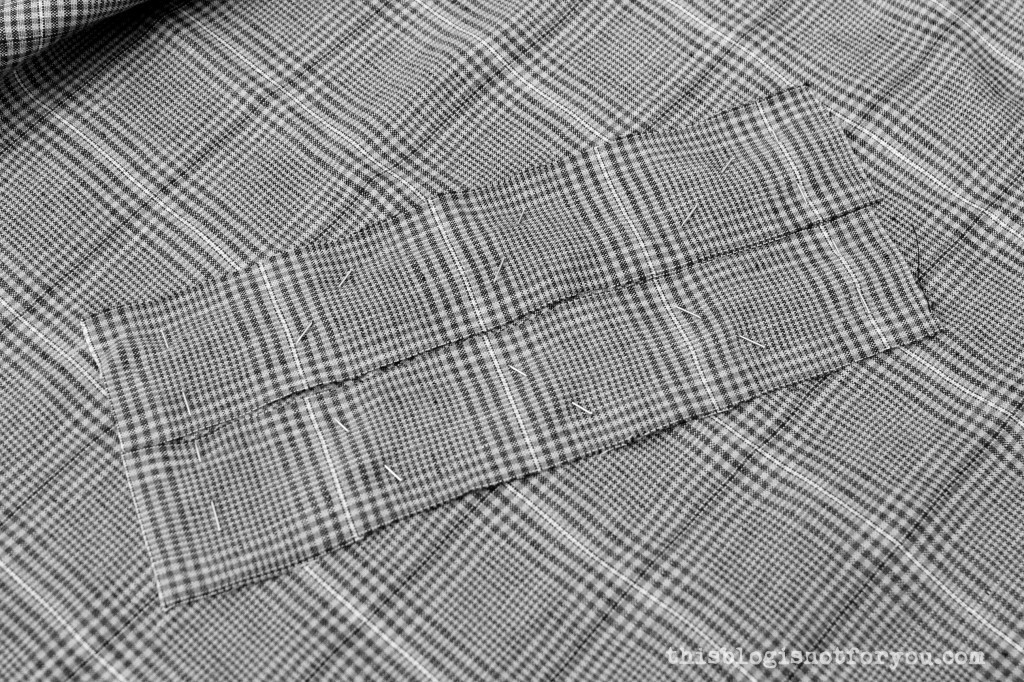 5. Turn your cape around, so that you are facing the left side of the fabric. Carefully stitch two lines approx. 7mm (2/8”) from the armhole marking, starting and ending your seam at the markings, as shown below.
 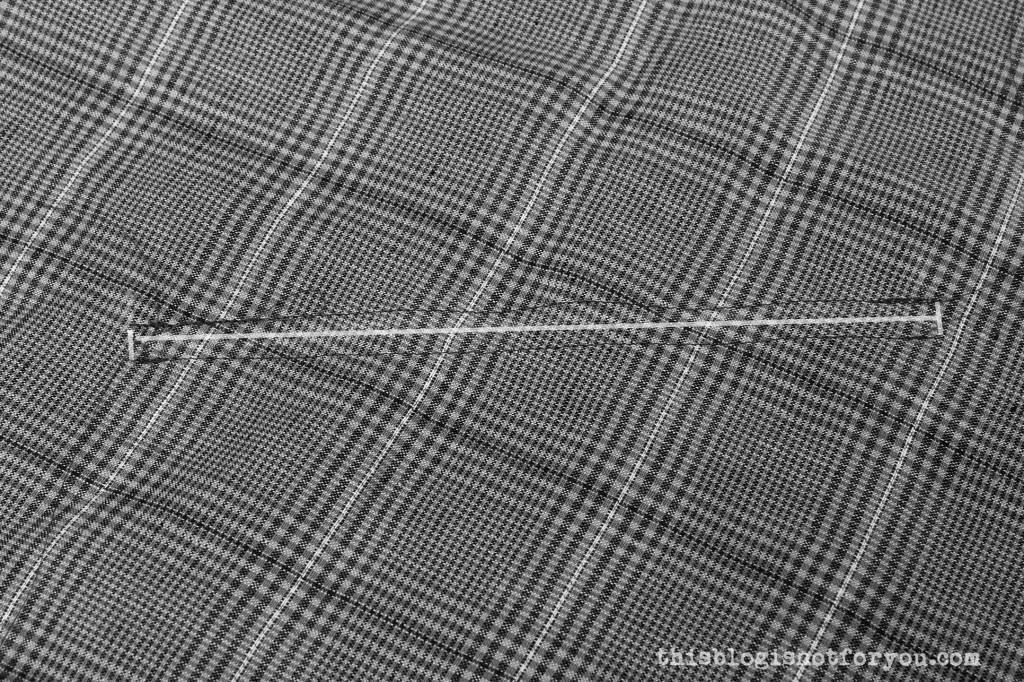 6. Cut the armslit open along the marked line starting and ending 1.5cm from the marked end of your line (see picture below).
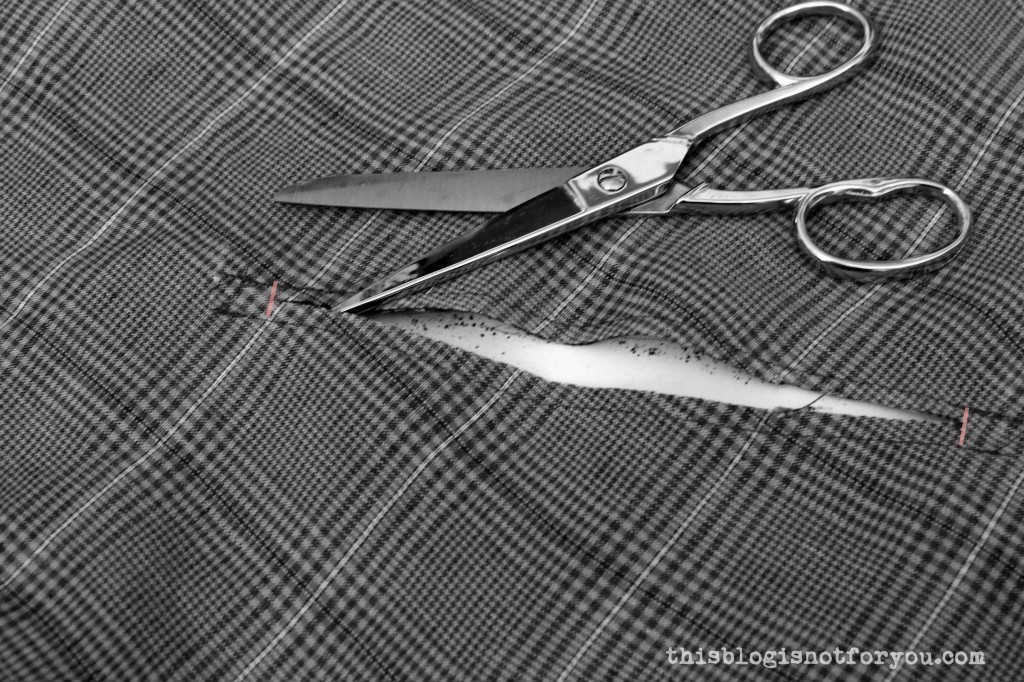 7. Cut diagonally towards the end of your stitching lines, so you will end up will small triangles.
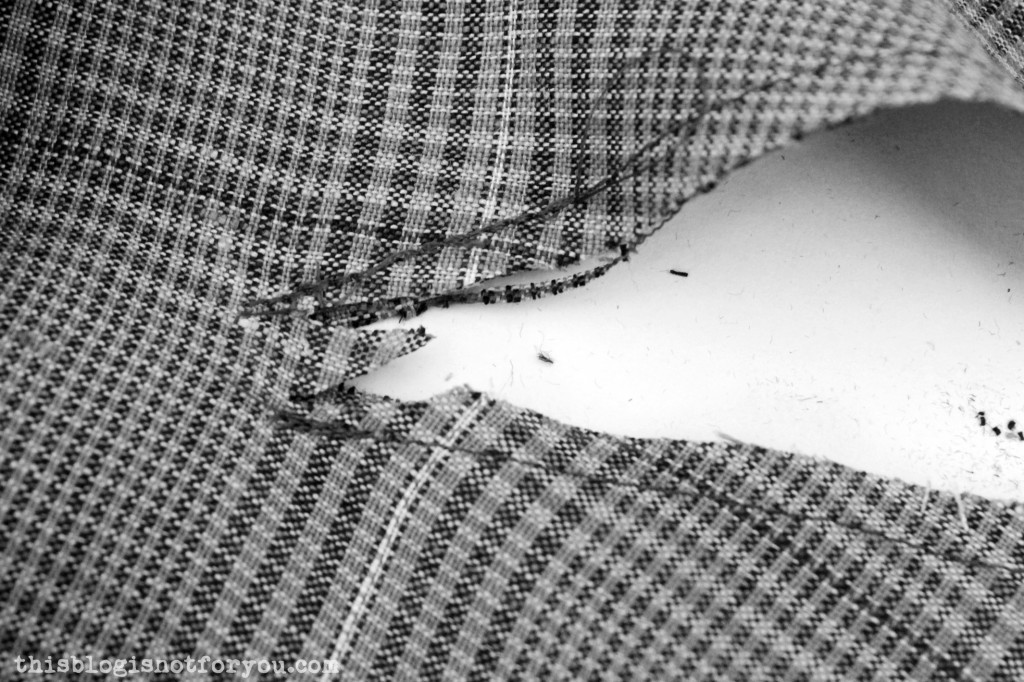 8. Push the fabric through to the other side and press.
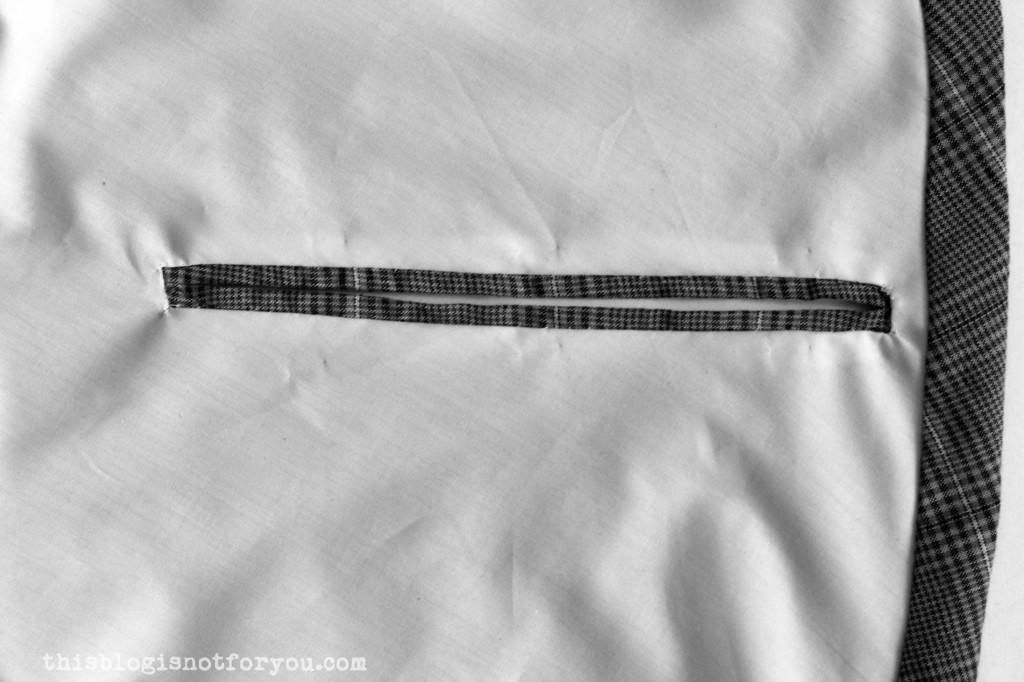
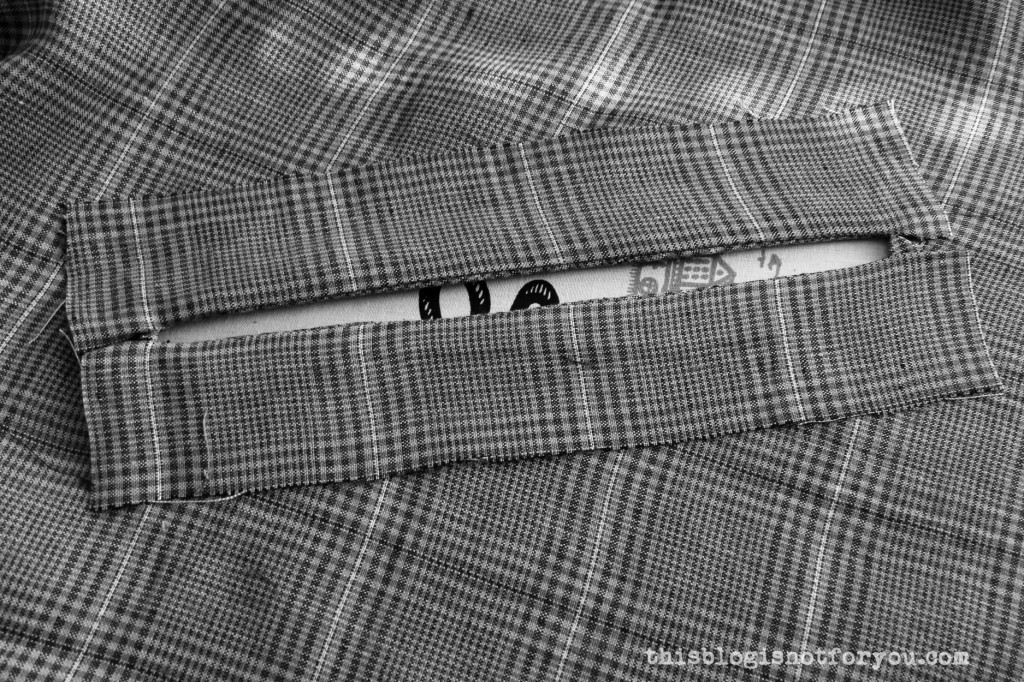 9. You could now simply understitch the facing. I decided to press the facing so that it shows through the opening on the other side.
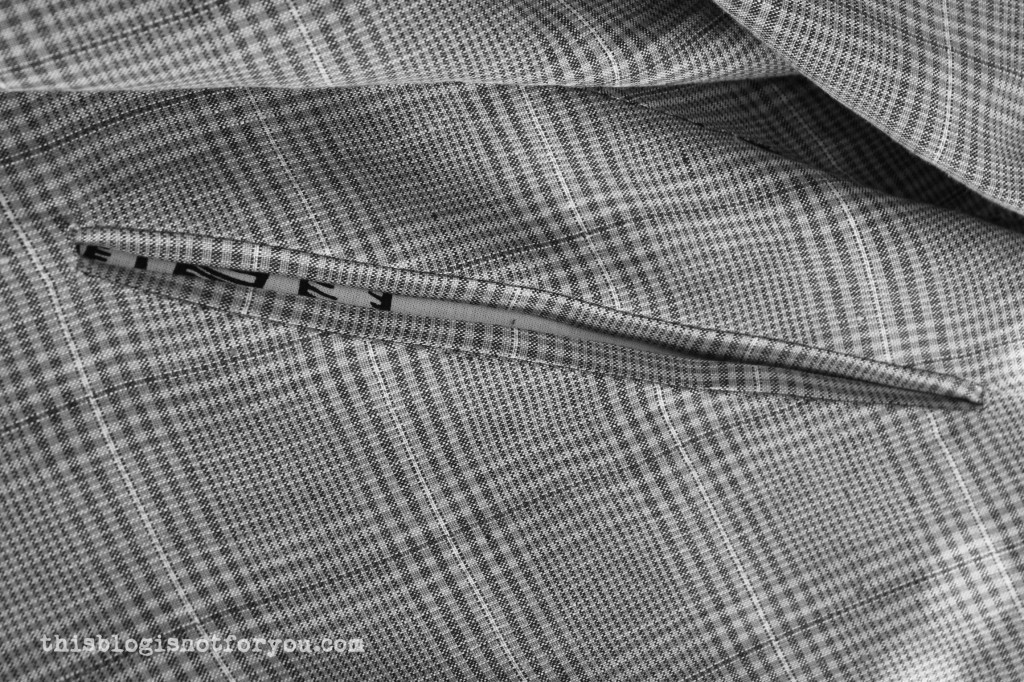 10. Stitch in the ditch to hold the facing in place.
 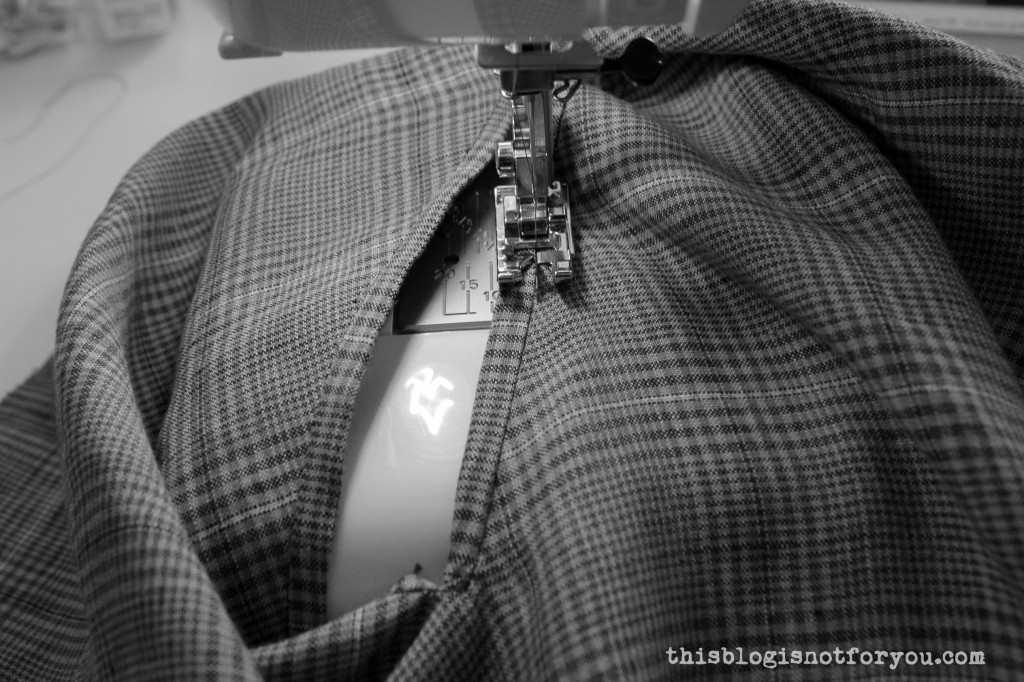 I used a special presser foot for that, but you can simply use a standard feet as well, stitching slowly on the previous seam.
 11. When you have understitched, topstitched or otherwise secured the facing, pin the small triangles in place and stitch them onto the facing’s seam allowance. You can either to that by machine or with hand.
  12. If you are not adding a lining to your cape, you can sew the outer edges of the facing onto your cape with wide catch-stitches.
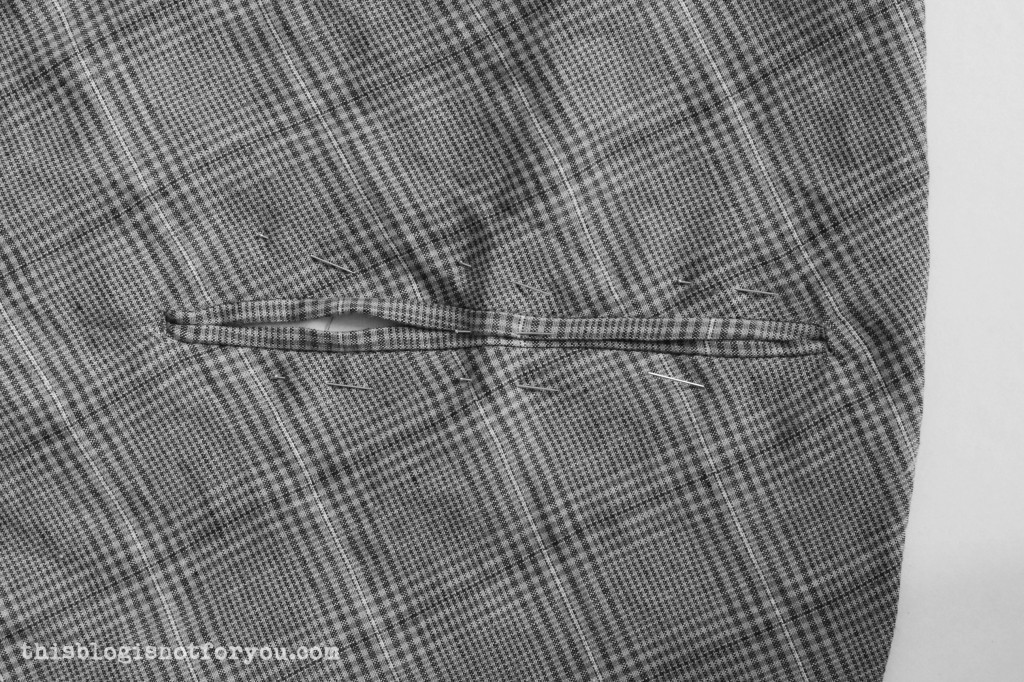 1. After your cape is lined and pressed, first pin the armslits closed and an then add some pins to hold lining and main fabric together along the opening. Make sure all layers are lying very flat before you pin (or baste) them together.
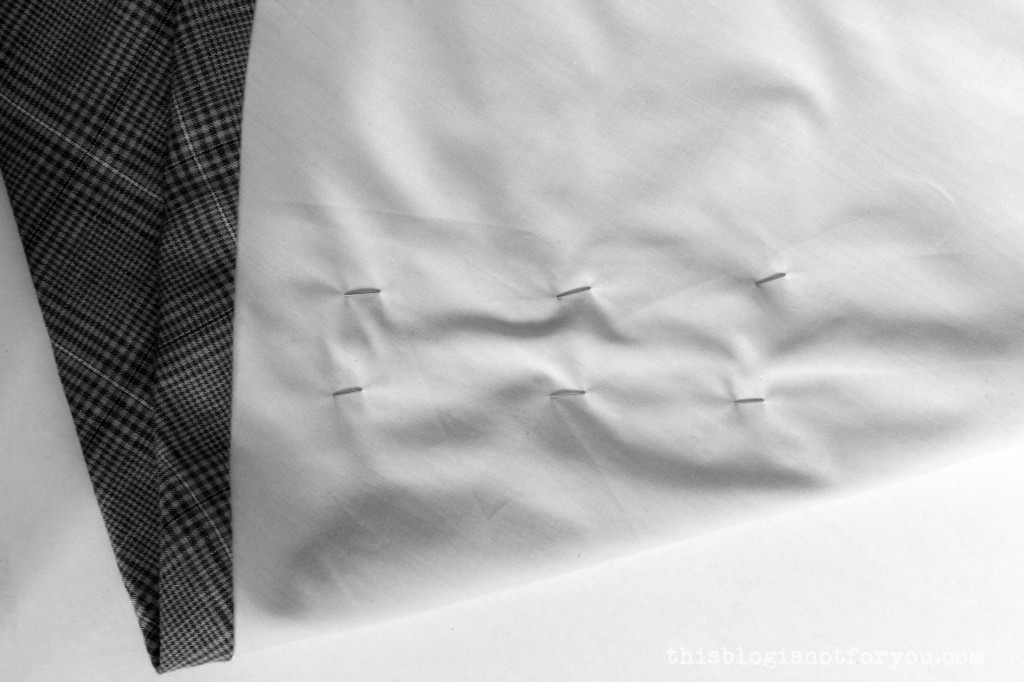 2. Take out the pins you used to close the opening and carefully cut the underlying lining open along the marked armslit line. (You can either mark the line before you sew in the lining, or before cutting, after you take out the pins.)
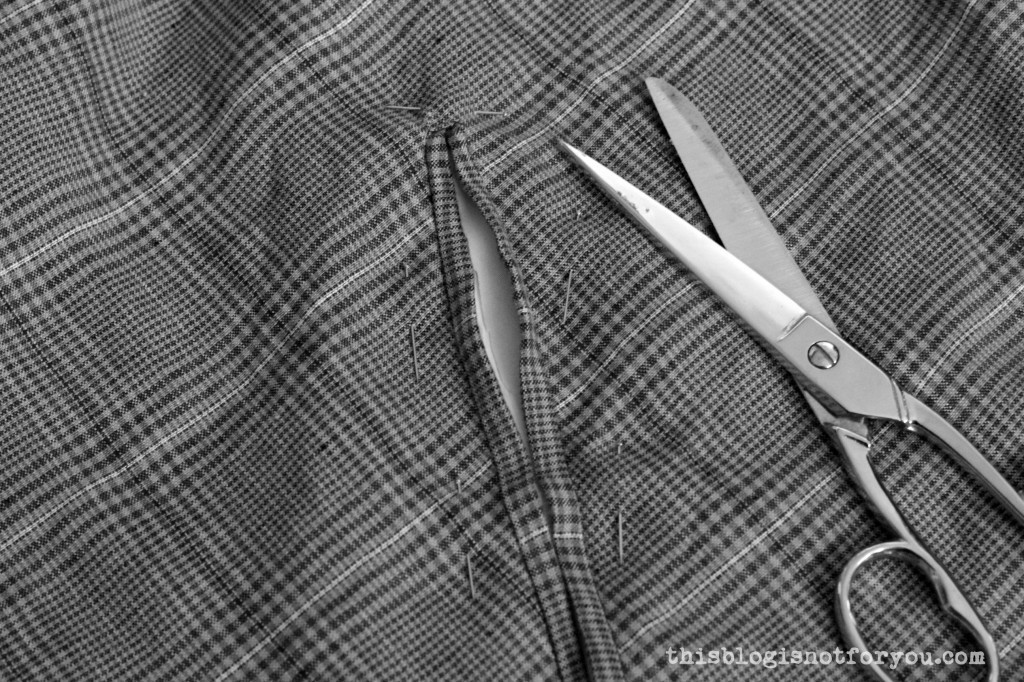 You make the cut in exactly the same way as before, ending the cut with the small triangles.
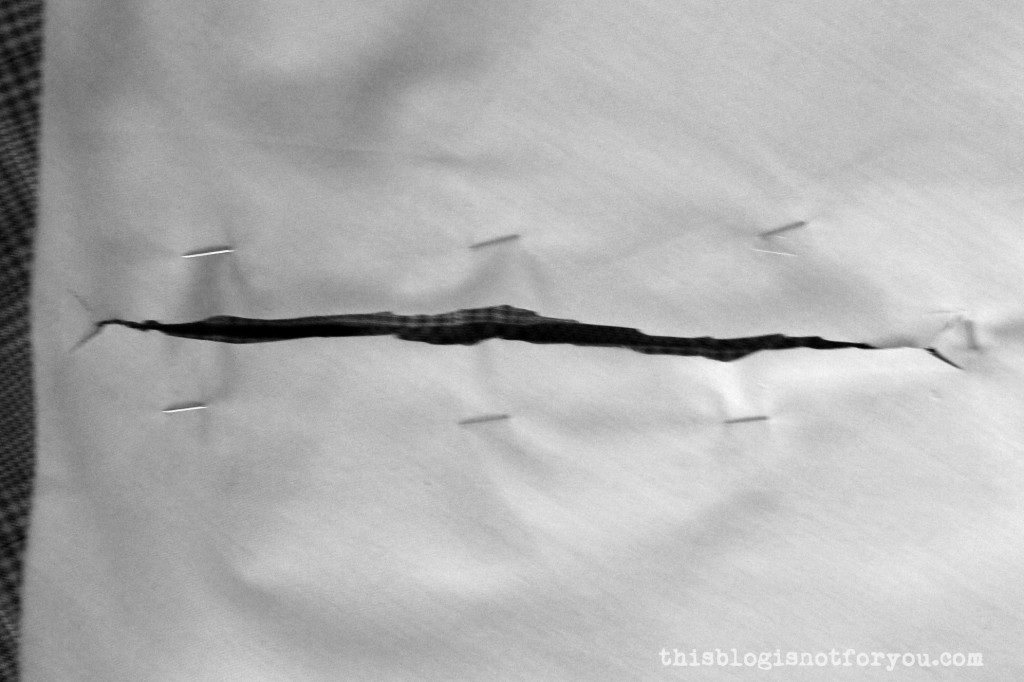 3. Push the seam allowance between the layers and pin everything in place.
  4. Using thread and a handsewing needle, slipstitch the lining to your facing. If you absolutely loathe handsewing, you can (from the right side) stitch in the ditch again, catching the lining. For a neater finish, I’d always recommend handsewing, though.
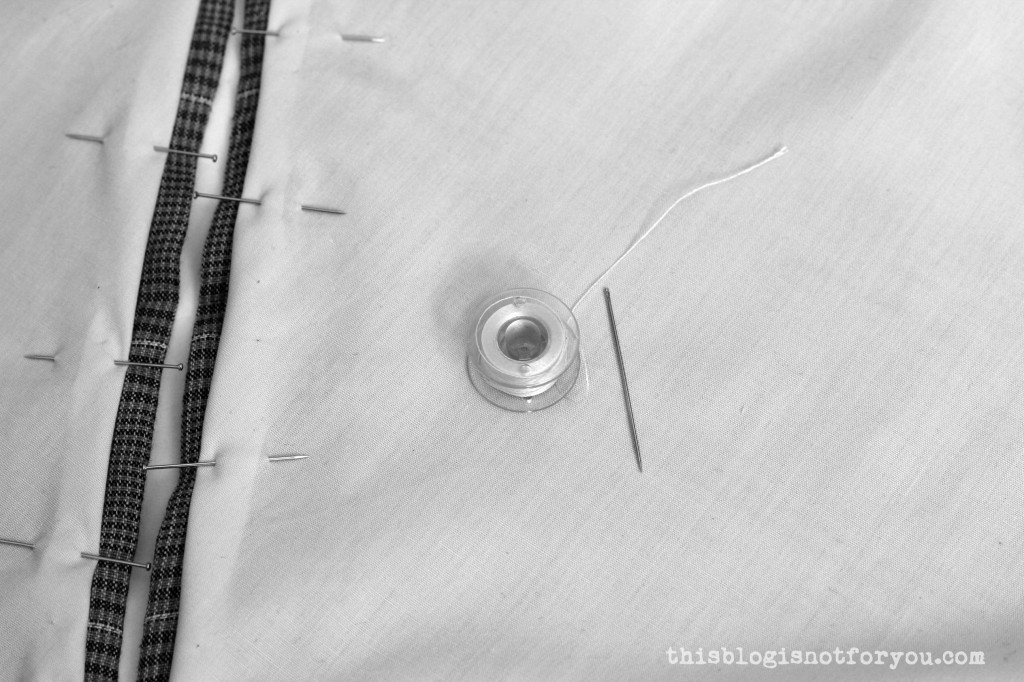
 And you’re done! Congrats!