Liebster Award

Phew!

I handed in my dissertation yesterday and still can’t believe I’m free at last…after weeks and weeks of work. And finally I have time for unpacking my sewing machine. So what else happened since my last post?

– We moved houses! Not a good thing to do right before the dissertation deadline but that’s how thing are sometimes. There’s still chaos everywhere and all my sewing things are still in boxes. But I’m looking forward to decorating my new sewing space. Unpacking starts NOW!

– I finished #10 and #11 of my 27 Dresses Challenge! I will be posting some pictures in the next days (plus the tutorial on baby seams I promised you guys a while ago on Facebook!)

– Last but not least: I was nominated the Liebster Award by wonderful Danielle from Constantly Alice! I did not know her blog before, but I’m so glad I do now! Please do check it out, it’s totally worth it!

The nomination comes with a few rules:

  • You must answer the 11 questions set by the blogger who nominated you.
  • You yourself then pick 11 blogs who in turn have under 200 followers. You must then think of 11 questions for the blogs you have picked and also tell them.
  • Finally link back to the blog that nominated you.

I still haven’t picked the 11 blogs, but will do so in the next days. If you know any really cool blogs you want me to consider or if you want me to check out your own blog, please feel to post a link in the comments! It should have no more than 200 followers, to give the smaller or newly started blogs a chance to be seen by more people!

Here are Danielle’s questions:

1. What is your favorite song?

Oh, wow. Hardest question first? There are hundreds of songs I really love and I think which one of them is my favourite changes constantly depending on my mood and what music I listened to last. I love all sorts of music from rock to techno to classic to swing and jazz. Since I really can’t decide here’s a short list of the ones I can think of right now:

– ‘Italian Radio’ and ‘HRSA’ by Blue October (probably one of the best bands in the world!

– ‘Nouvelle chance’ by Pupkulies and Rebecca

– “Wish you’d hold that smile” by Minor Majority (great great great band!)

– “The dragster wave” by Ghinzu

– “May way” by Frank Sinatra (who doesn’t love this song?)


2. If you could only have one item, what would you pick?

My sewing machine!


3. Who has been your biggest influencer/mentor?

I think I don’t really have a “mentor”. I’ve been influenced by a lot of really great people over the last years. I think there are  a lot of really good books that are very inspiring but the most inspiring people you meet in real life. Family, friends and sometime people you meet somewhere and only talk with for three minutes.


4. Favorite book?

Naw, can’t answer this question! The other lovelies in my shelves will be jealous! And I would probably end up giving you a list of a few hundred books, which I all consider the “best book in the world” 🙂


5. Favorite literary character? Why?

Man, these questions are mean. I’m a very, very indecisive person. I really love Elizabeth Bennet (I’m boring I know!), but this time I pick Momo. Read the book (Momo by Michael Ende) and you’ll know why!


6. Ice Cream or Cake?

Cake. It’s always been cake and it will always be cake. Seriously, how can ice cream be your favourite when there is cake?


7. Describe yourself in 4 words or less.

jack of all trades

(and may I add: master of none)


8. Favorite time of day or season? Why?

I love summer! I love being outside in the sun (preferably with a coffee).


9. Pepsi or Coke?

Neither. (It’s coffee!)


10. What movie character do you most identify with?

The only character that comes to my mind isn’t from a movie, but a series: Lorelai Gilmore (and not only is she a coffee junkie, but she can sew as well!)


11. Biggest blogging challenge?

My 27 Dresses Challenge which is more fun than hard work, actually. The hardest thing was probably making the decision to start a blog.


It feels so good to be blogging again. Can’t wait to run some fabric through my sewing machine!

I’m sorry if I haven’t replied to any of your comments during the last few weeks! Will do so pretty soon! xx
Summer Wrap Blouse

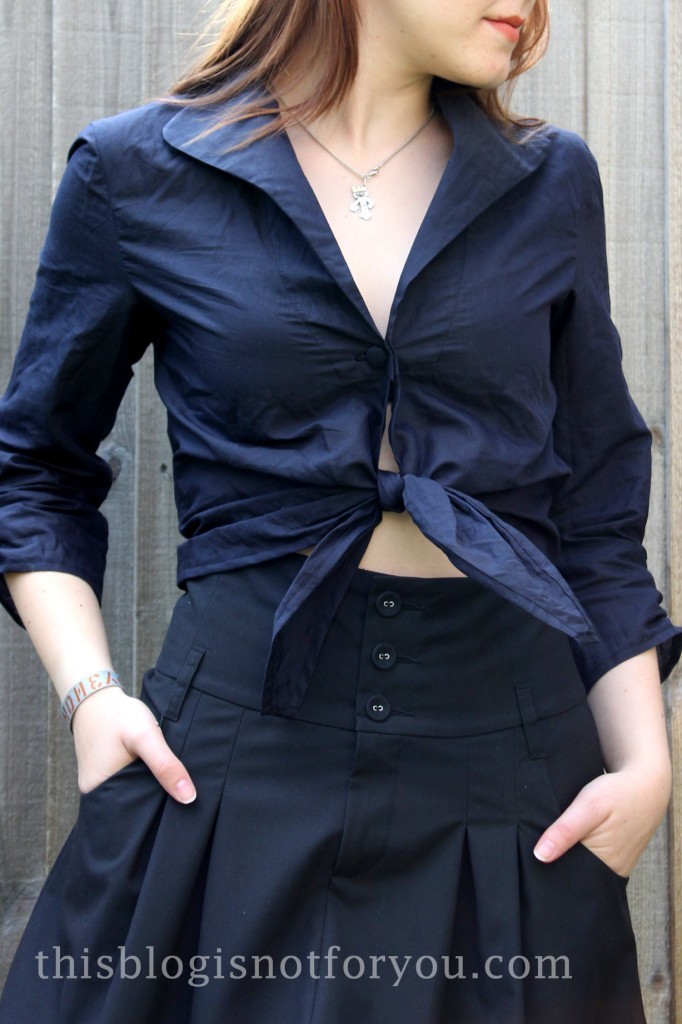
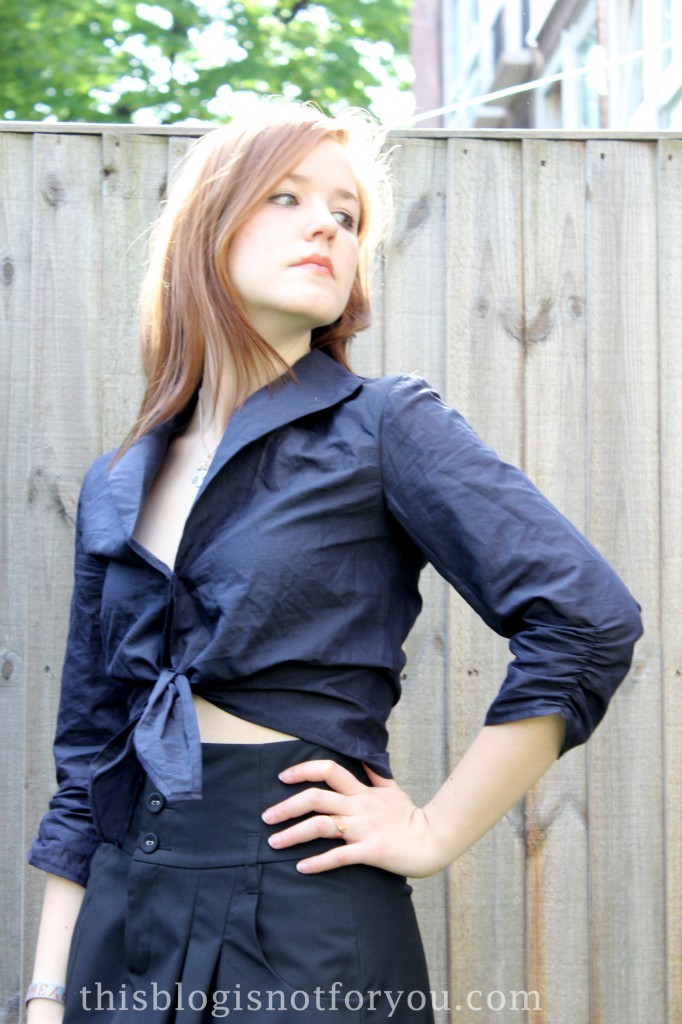
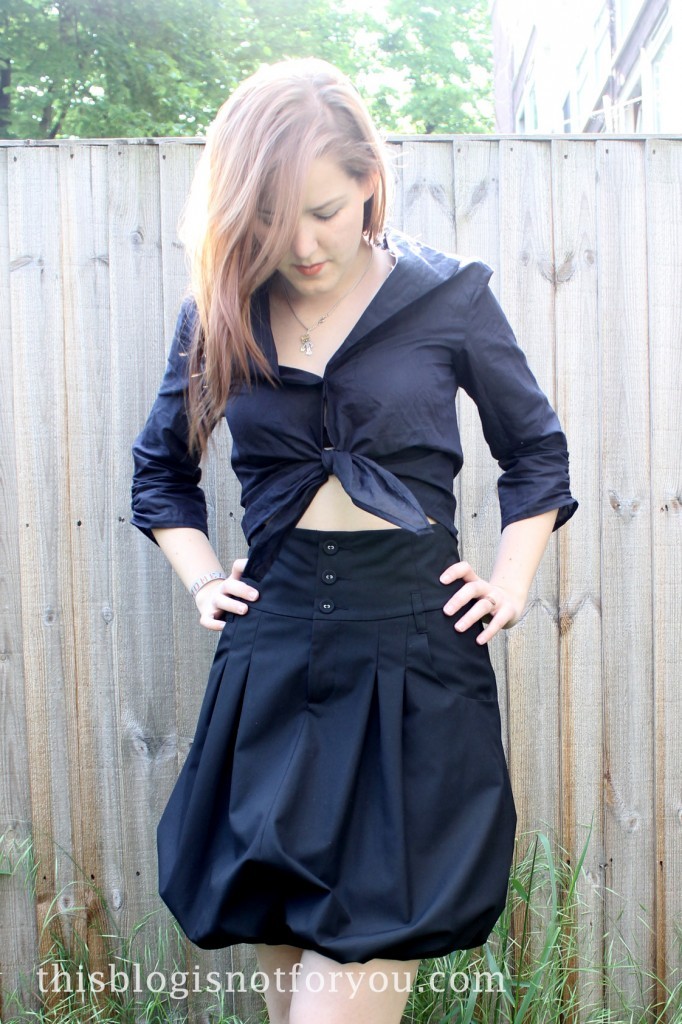
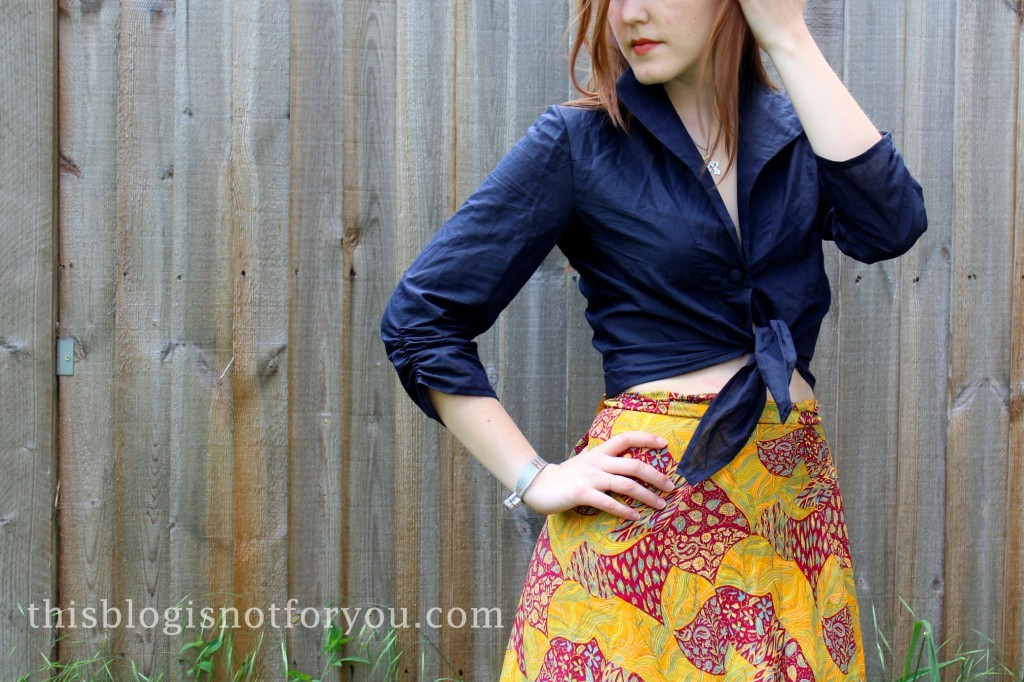
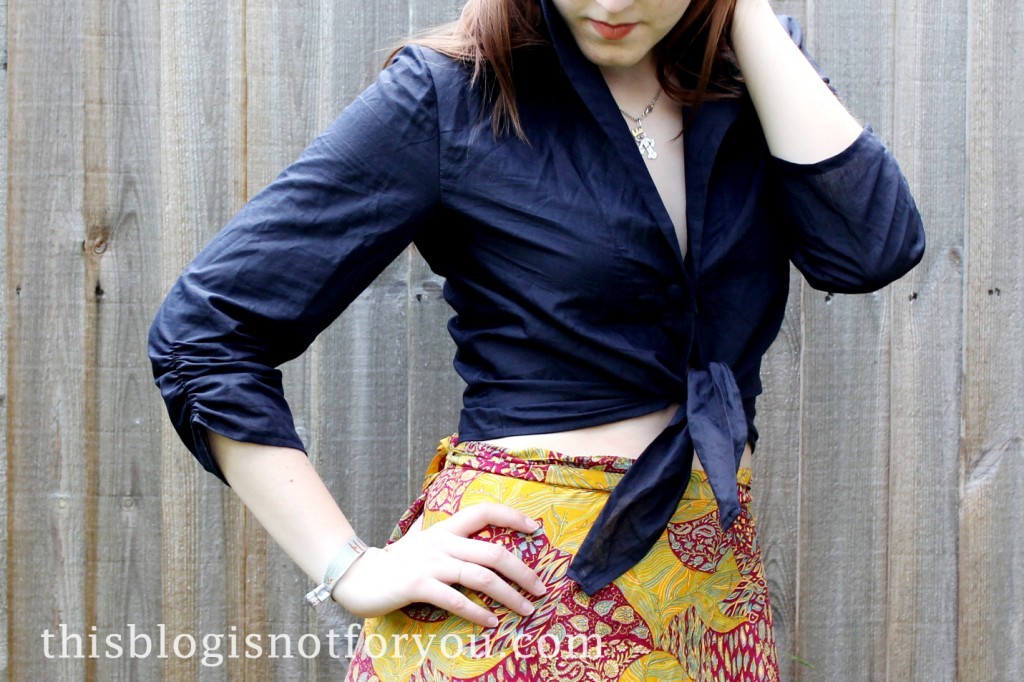
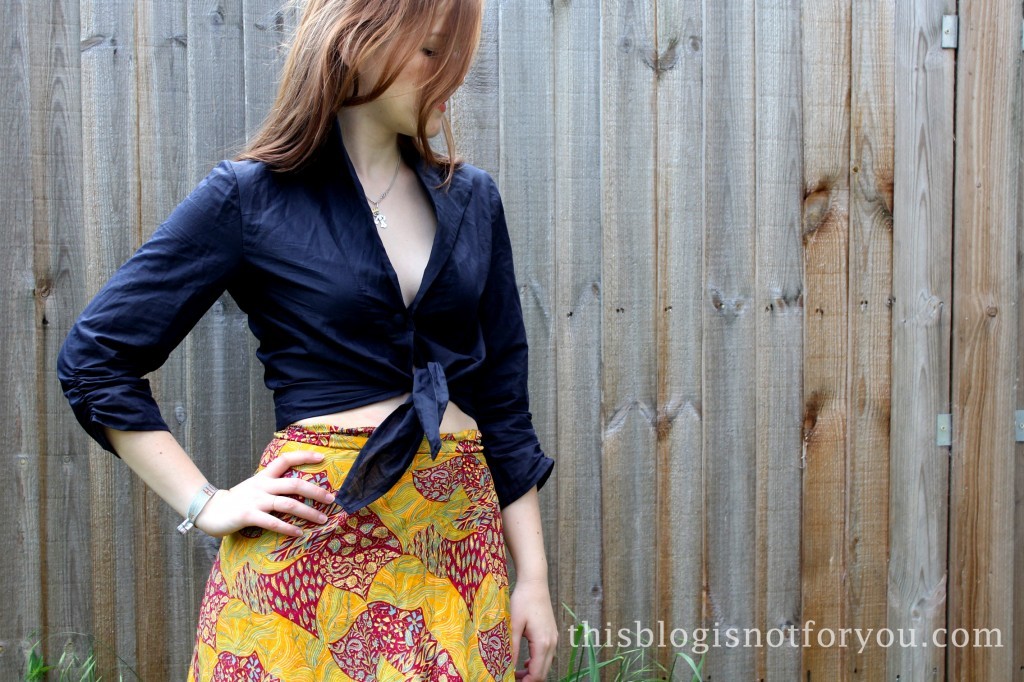
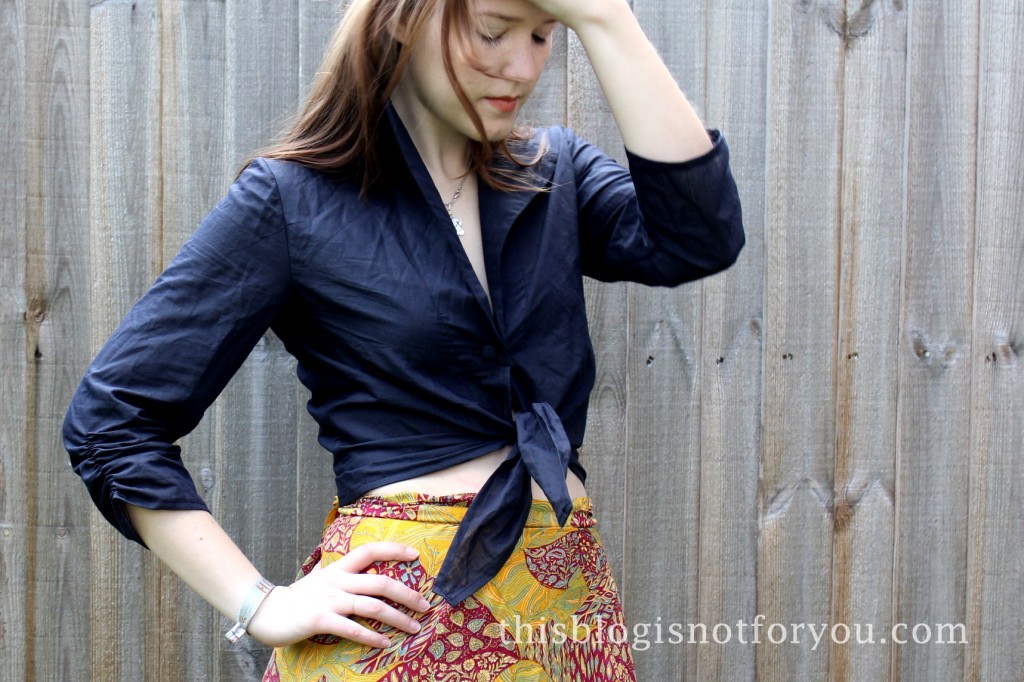
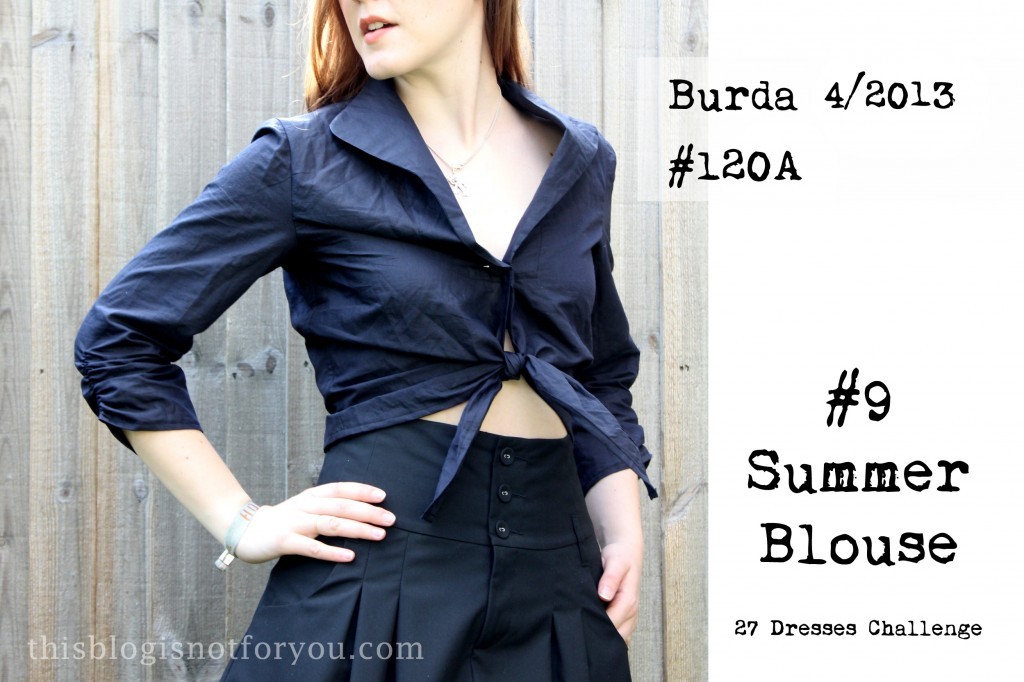
Summer Blouse Burda 4/2013 #120A by thisblogisnotforyou.com#9 of my 27 Dresses Challenge is done and ready for a trip to the park.

I finally realised that I seem to always sew dresses that are pretty, but which I almost never wear.  Furthermore they tend to take several days to make (with all my unpicking…) and this often isn’t very motivating. That’s why I decided to sew something very casual, summery and which would be easy and quick to finish.
Summer Blouse Burda 4/2013 #120A by thisblogisnotforyou.com

Summer Blouse Burda 4/2013 #120A by thisblogisnotforyou.comSummer Blouse Burda 4/2013 #120A by thisblogisnotforyou.comSummer Blouse Burda 4/2013 #120A by thisblogisnotforyou.com

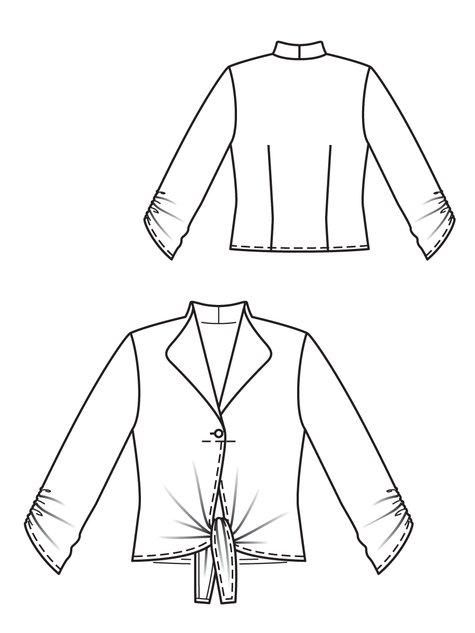
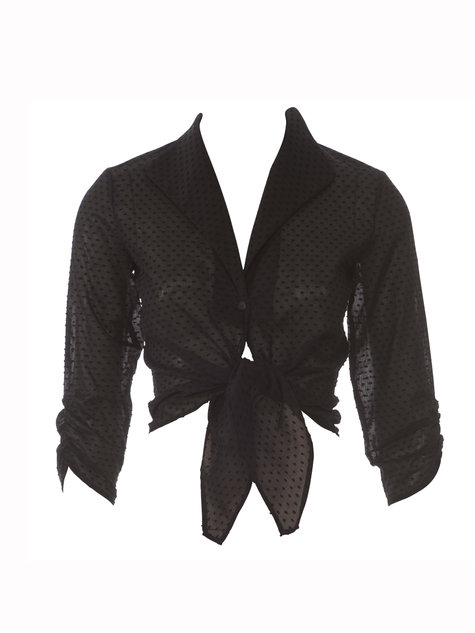
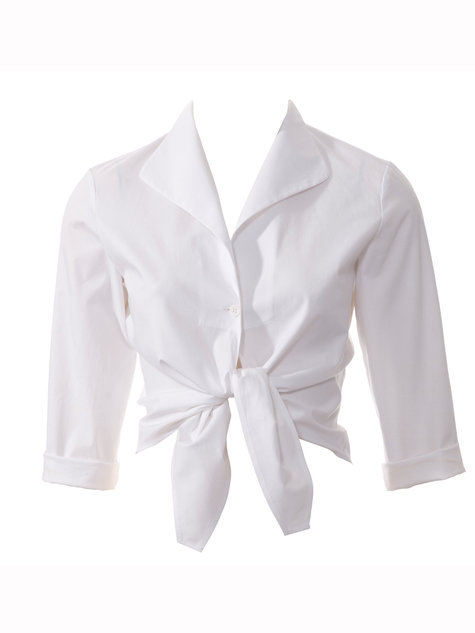
I rummaged through all my Burdastyle magazines and found this cute pattern of a summer wrap blouse. It’s in the Burda issue 4/2013, #120A (the black one). They also have the same blouse in white, but without the shirring on the sleeves (tie blouse #120B).

Summer Blouse Burda 4/2013 #120A by thisblogisnotforyou.com

Summer Blouse Burda 4/2013 #120A by thisblogisnotforyou.com

source: burdastyle.com

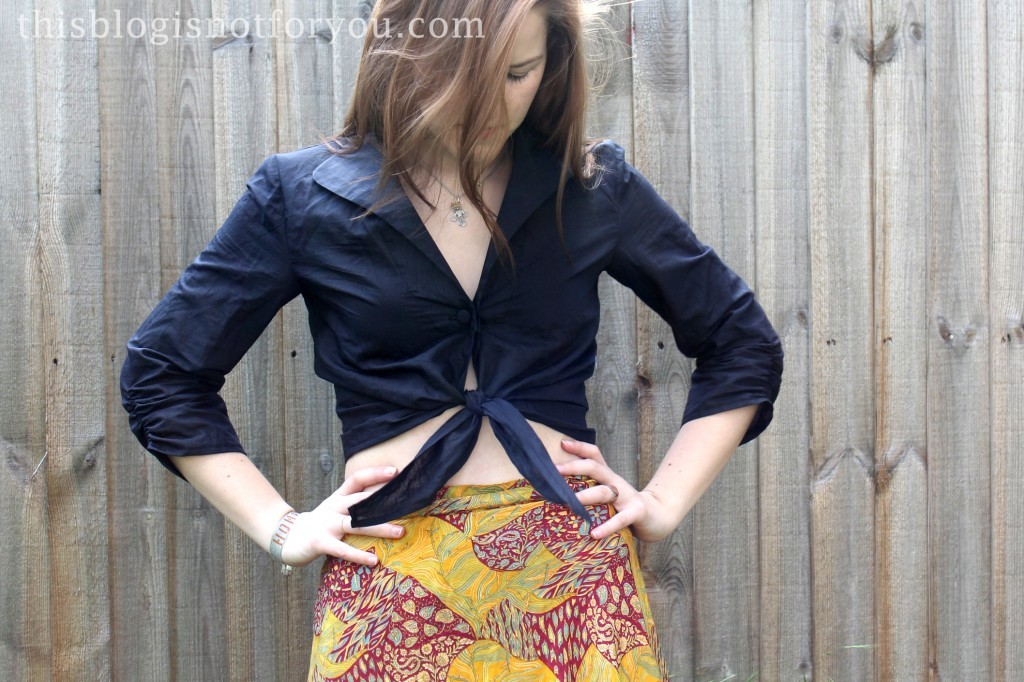
Summer Blouse Burda 4/2013 #120A by thisblogisnotforyou.comSummer Blouse Burda 4/2013 #120A by thisblogisnotforyou.com After only taking small pains to style the last dress, this time I made an effort and styled the blouse in two different ways.
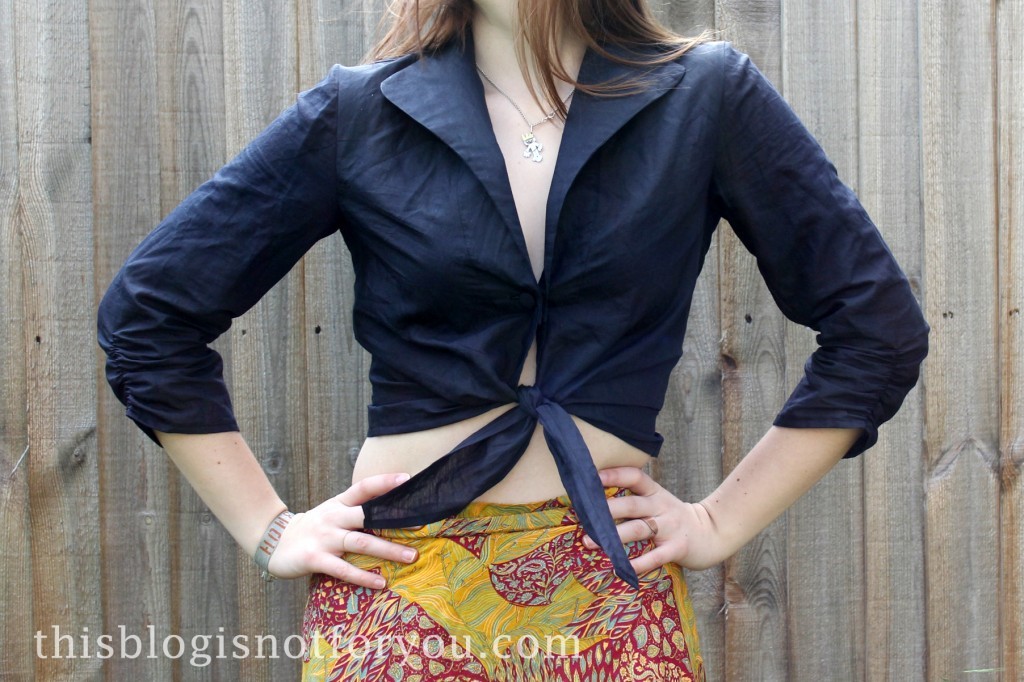
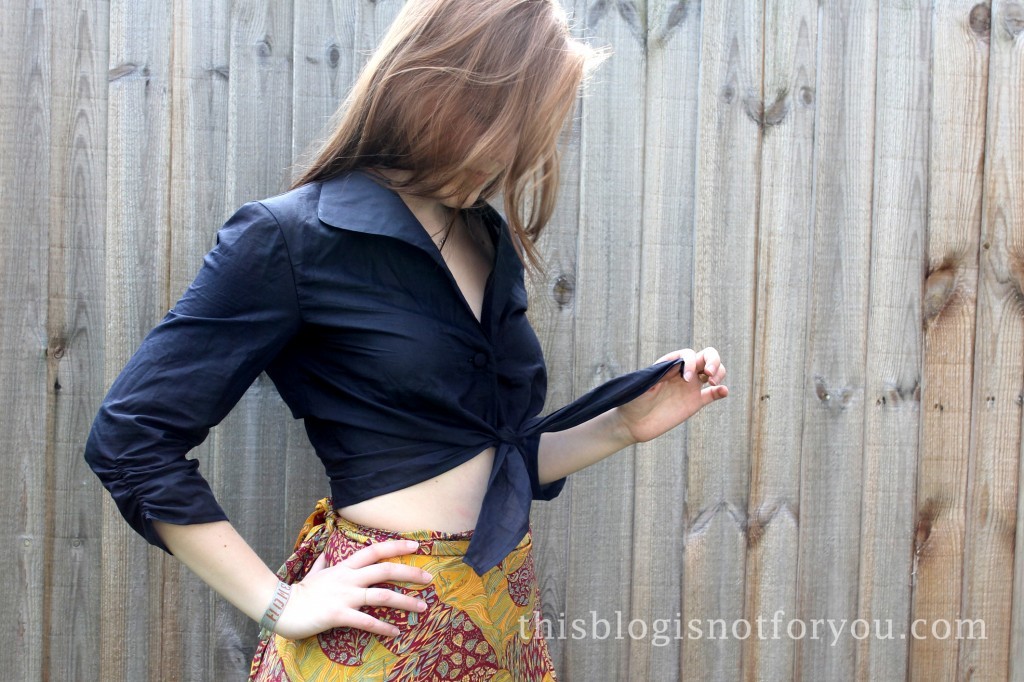
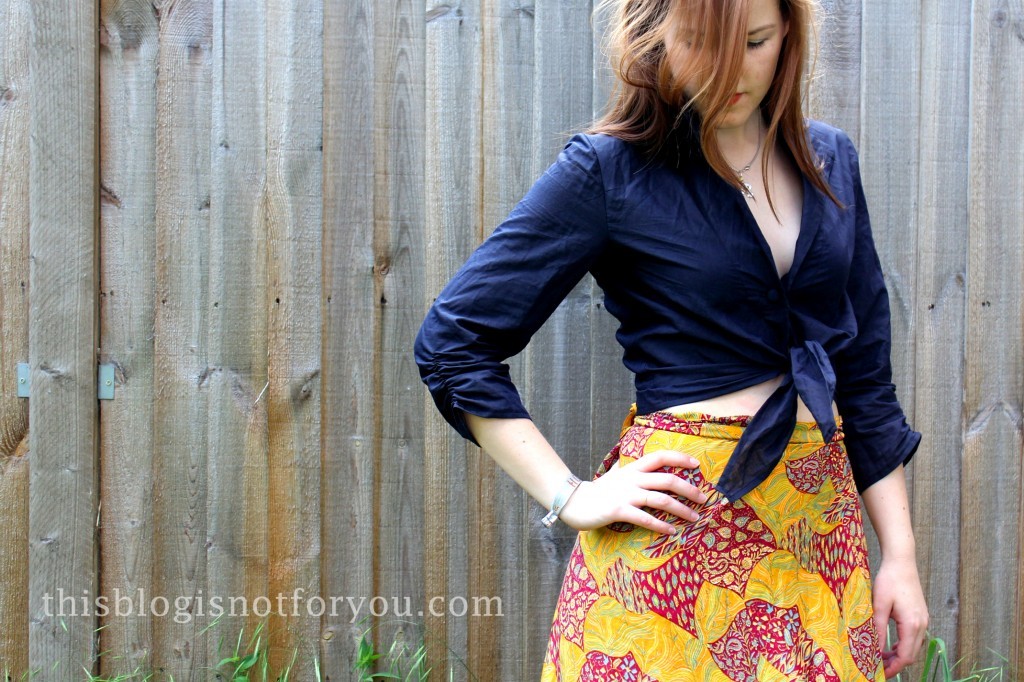
I think it looks best with a high waisted skirt, otherwise tummy shirts might look quite tacky.

The pattern was easy to work with and although the instructions aren’t the best, the pattern is sort of self-explanatory.

I used a slightly sheer black cotton. Not the best choice, since it crinkles the instant you touch it, but now I think it’s fine. a) I won’t need to press this blouse and b) it goes well with the casual cut I think.

Summer Blouse Burda 4/2013 #120A by thisblogisnotforyou.com

I covered the button myself using the same black cotton fabric.

Summer Blouse Burda 4/2013 #120A by thisblogisnotforyou.comSummer Blouse Burda 4/2013 #120A by thisblogisnotforyou.comSummer Blouse Burda 4/2013 #120A by thisblogisnotforyou.comSummer Blouse Burda 4/2013 #120A by thisblogisnotforyou.comSummer Blouse Burda 4/2013 #120A by thisblogisnotforyou.com


Making a Tailor’s Ham and Sausage

How to make a tailor's ham by thisblogisnotforyou.com

Hope you all enjoyed the long weekend (if you had one)! Did you use the long weekend for something crafty? Well, I did. Nothing too crazy, but I got a few projects done that had waited to be finished for a while.

I was sewing up a cute summer blouse and while desperately trying to press the darts into a nice shape, I thought I finally needed to tackle the tailor’s ham project I planned weeks ago.

I found a brilliant tutorial by Kristiann (the Victory Patterns lady!) who did a great guest post over at Tilly and the Buttons. Check out her site for the instructions and the patterns.

I did it a bit differently though, since I neither had sawdust nor thick cotton canvas lying around.

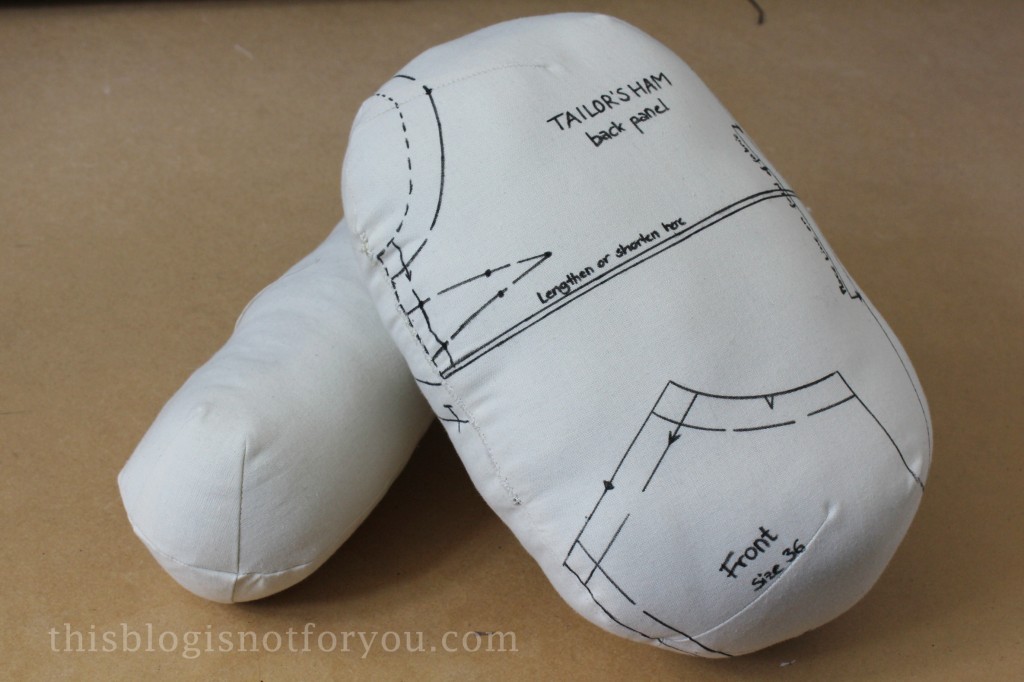
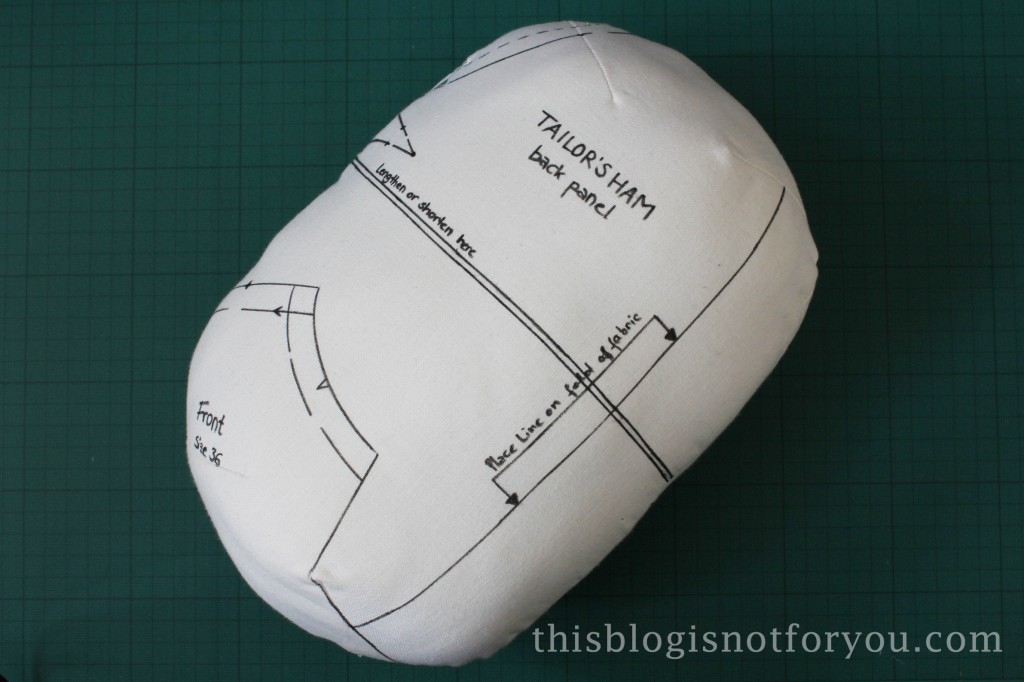
I basically used an old cheap Primark pillow and fabric scraps for the stuffing. Since I did not have cotton canvas, I used plain (muslin) cotton in two layers I basted together before sewing the darts. Using two layers creates the right thickness and makes the cotton sturdy enough.

How to make a tailor's ham by thisblogisnotforyou.com

I basically cut out each piece four times. I lengthened the pattern a bit at the fold to make the shape more oval for the ham, I personally felt it was a bit too round and was afraid it might be a bit wobbly when pressing. I added about an inch to the pattern at the fold line.

How to make a tailor's ham by thisblogisnotforyou.com

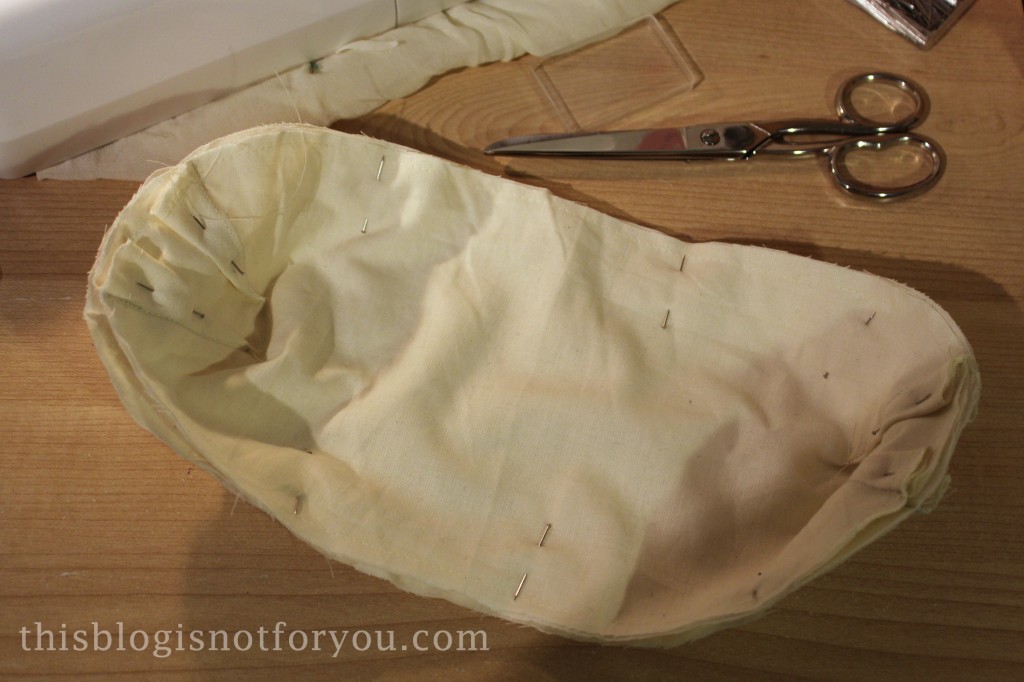
Here you can see that I basted the two layers of cotton together in the seam allowance (about 2/8” or 7mm from the edge). I then sewed the darts and basted them onto the seam allowance so they lay nice and flat and didn’t shift while I stitched all four layers together.

Make sure you leave at least 3”/10cm of the seam open on one side where the stuffing goes in.

Turn what now looks like a slightly unshapely bag inside out.

How to make a tailor's ham by thisblogisnotforyou.com

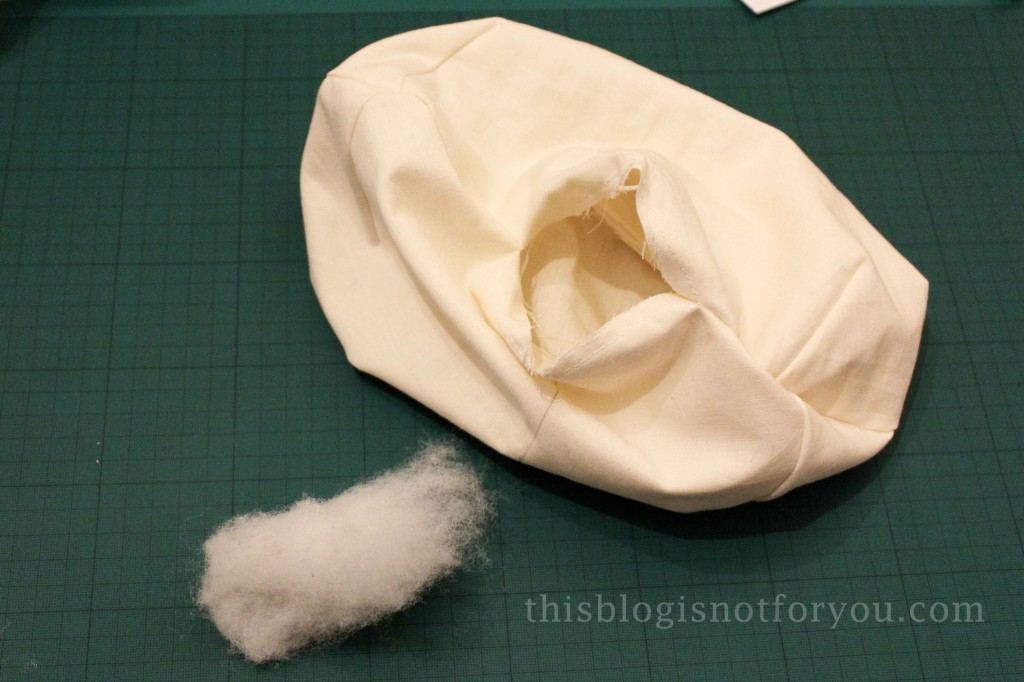
Yep, that’s how it’s supposed to look. Looks nothing like ham and sausage, right? 😉

How to make a tailor's ham by thisblogisnotforyou.com

Now comes the fun part. For the ham I basically cut apart and old Primark pillow (they are quite cheap and the whole pillow fits exactly into the tailor’s ham.
I have no idea what these cheap pillows are made of really, the stuffing was quite itchy. In case you make this as a fun weekend project with your kids, I suggest wearing household gloves.

Now, stuff it. (For the tailor’s sausage I used old fabric scraps. I always keep those useless way too tiny bits and pieces, but for this project they came in very handy!)

how to make a tailor's ham by thisblogisnotforyou.com

How to make a tailor's ham by thisblogisnotforyou.com

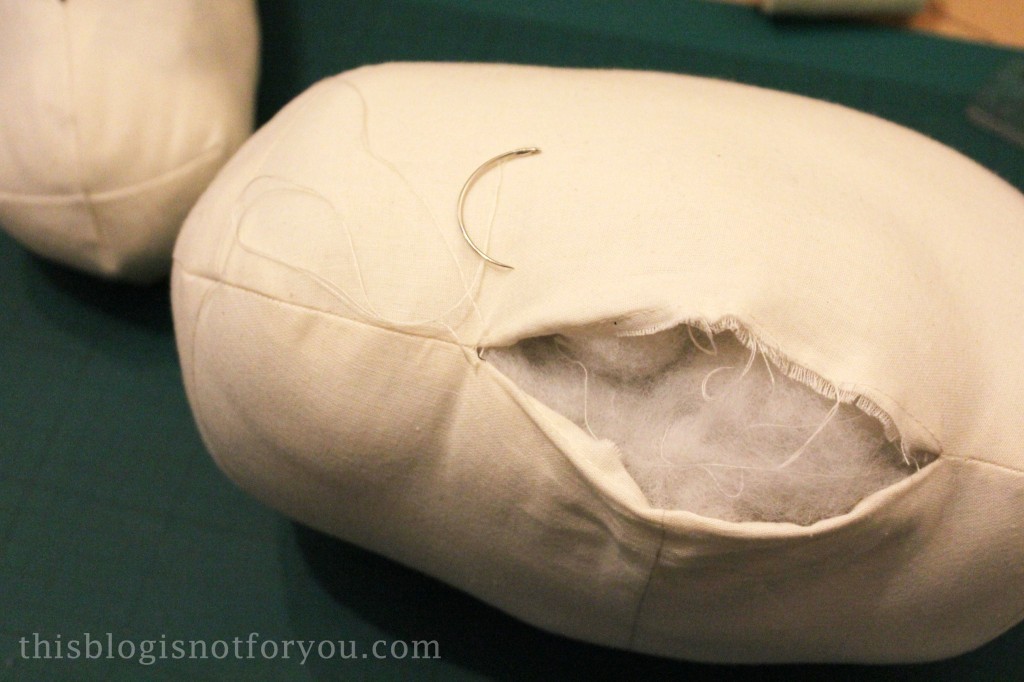
To sew up the open side I used a curved needle and double thread (I had no upholstery thread at home, doubling the thread worked just fine). A single thread will tear quickly. Just pull normal thread through the eye and double it up. Knot the two tail ends together and then sew with the doubled up thread.

How to make a tailor's ham by thisblogisnotforyou.com

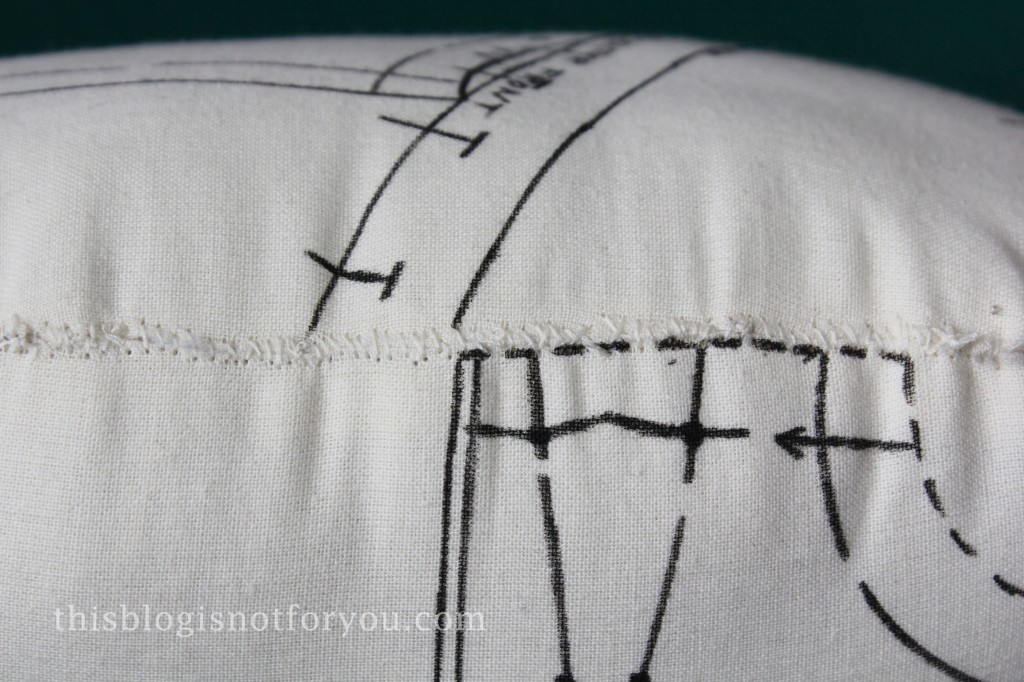
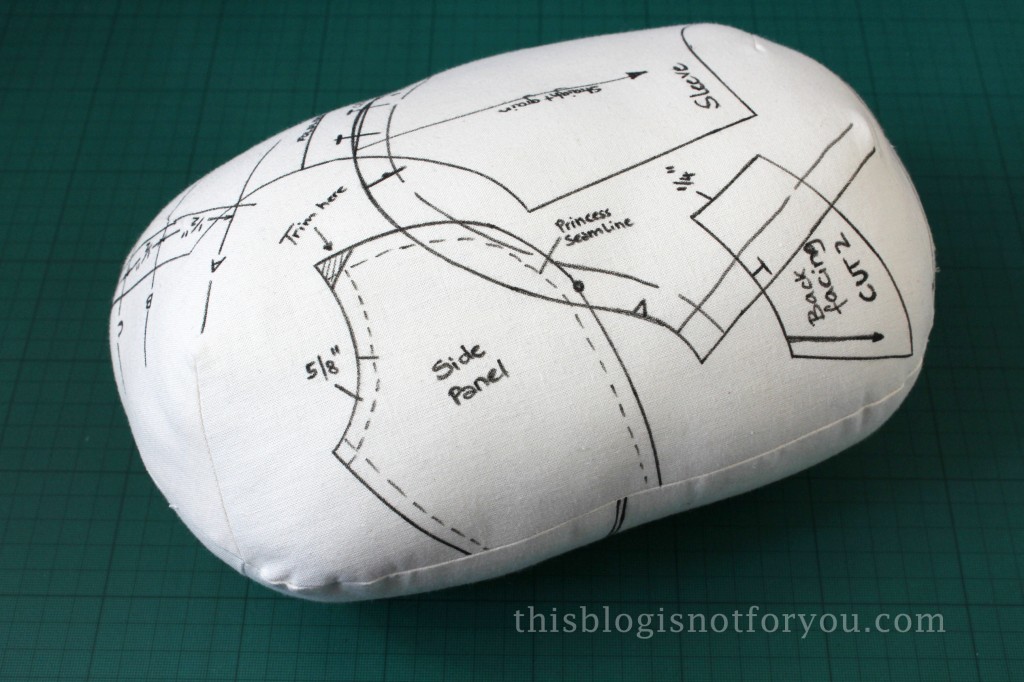
Not the prettiest seam, I know. But, voilá! Now I have my very own tailor’s ham and tailor’s sausage!

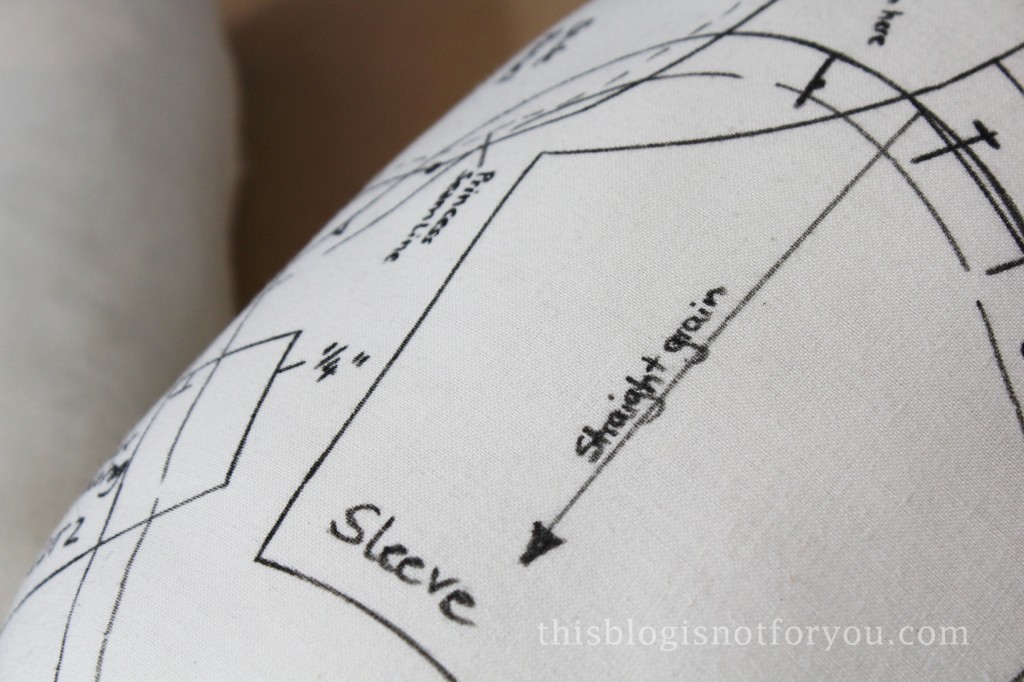
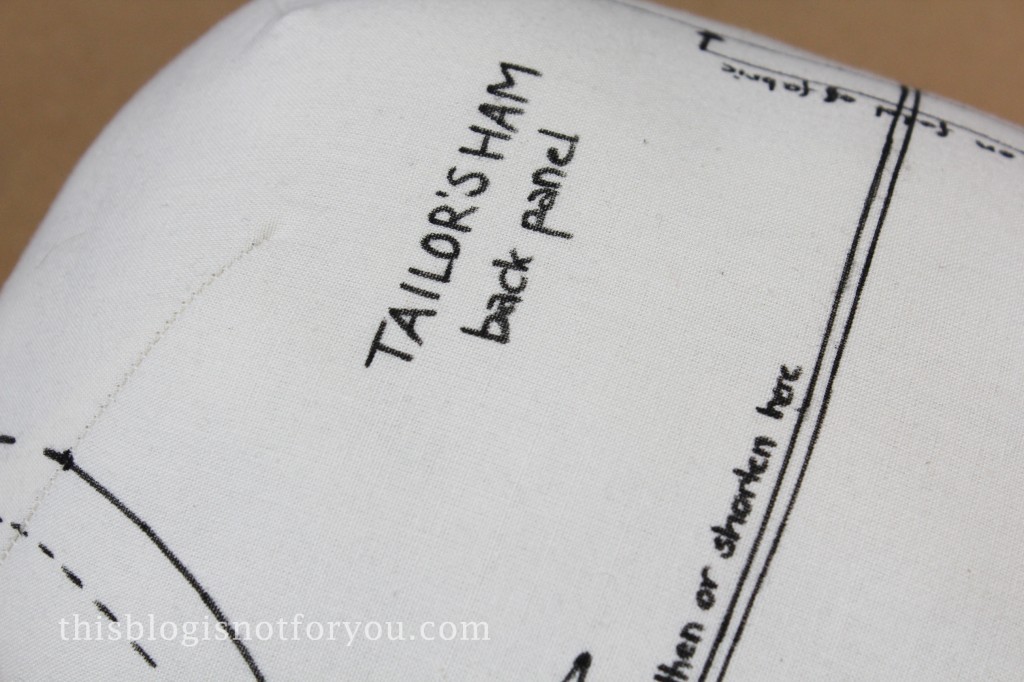
I chose to decorate the ham with a fabric marker. You could also use a cute colourful fabric instead of a second layer of cotton.

How to make a tailor's ham by thisblogisnotforyou.comHow to make a tailor's ham by thisblogisnotforyou.comHow to make a tailor's ham by thisblogisnotforyou.comHow to make a tailor's ham by thisblogisnotforyou.com

Super easy, super fun and super useful!

My man became quite alert when hearing I was making something with ham and sausage, not so excited anymore when he saw me ripping pillows on the carpet. Now he thinks the tailor’s ham makes quite a nice neck support pillow… 🙂

dress with a twist {Burda 2/2013 #115}

Dress with a Twist -  Burda 2/2013 #155 by thisblogisnotforyou.com

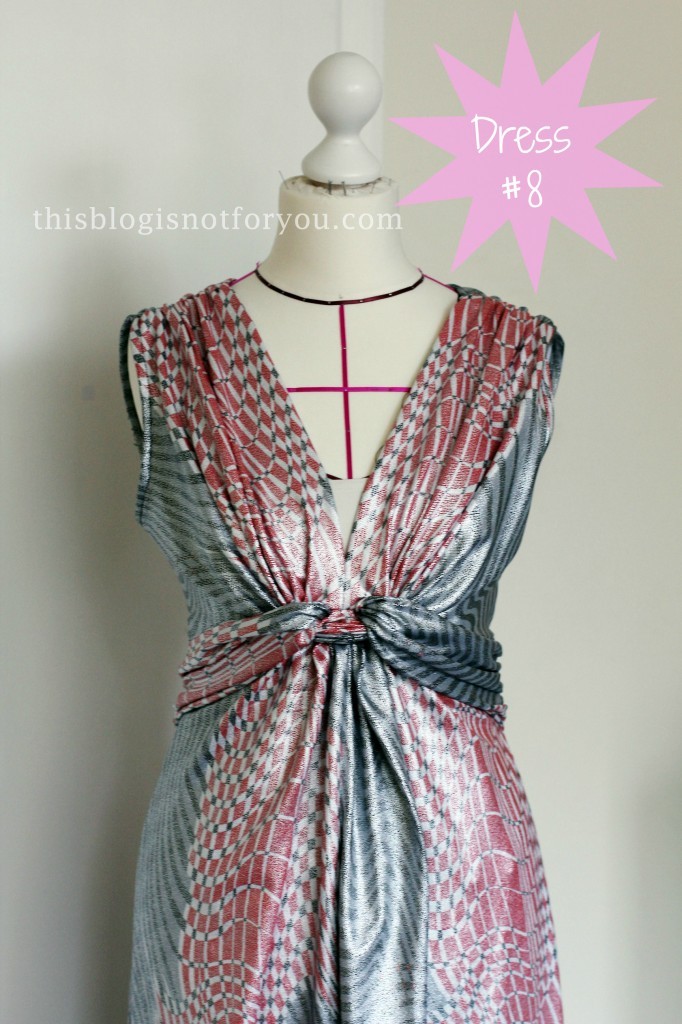
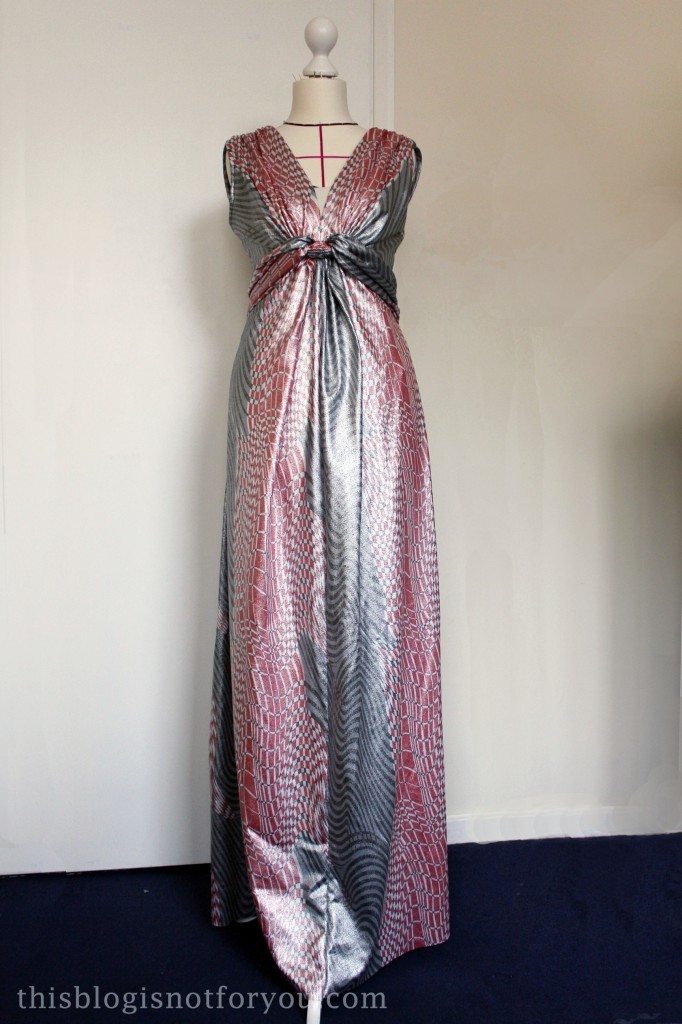
May I present…Her Ugliness! Dress #8 of the 27 Dresses Challenge is all sewn up, but I’m not too happy about it. I actually considered NOT to post a picture of this tragedy, but  this blog is not only about making progress in dressmaking, it’s also about making mistakes and learning from them. And this definitely was a mistake (and I’m pretty sure I learnt from making it…).

The pattern is actually pretty awesome (Burda issue 2/2013, #115) and since it was labeled “masterpiece” I had to try it (of course). It wasn’t too complicated and I love how this pattern is constructed.

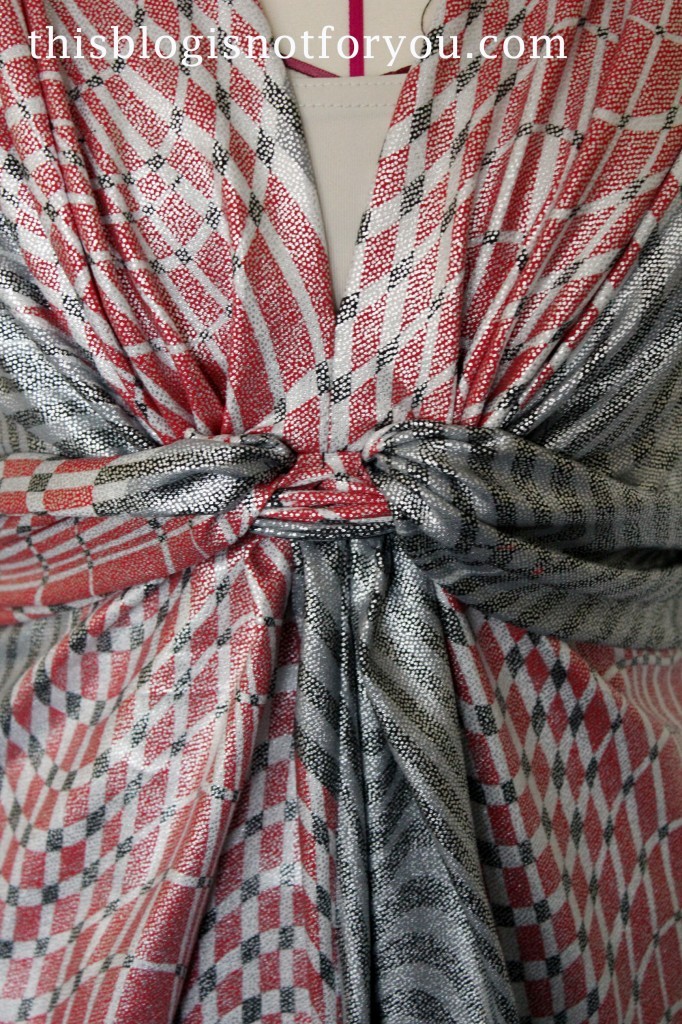
Dress with a Twist -  Burda 2/2013 #155 by thisblogisnotforyou.comBut ewww, the fabric! I know! I have no idea how I even ended up buying this crappy fabric. The original dress in the magazine was made from a jersey fabric with some kind of snake skin print and I guess this “inspired” my choice of fabric (I hate snake skin prints and this was probably the fabric that was most similar).
As I already let you know on Facebook, the moment I started cutting out the pattern I started hating it. (Which is why it took me two month until I decided to sew it up anyway). Believe me, hating the fabric already before you start to sew, is so not motivating. And honestly, I should’ve stopped at that point.

But I really wanted to try out this pattern and since it required quite a large amount of fabric I wanted to try it on the crappy fabric at first.Dress with a Twist -  Burda 2/2013 #155 by thisblogisnotforyou.com

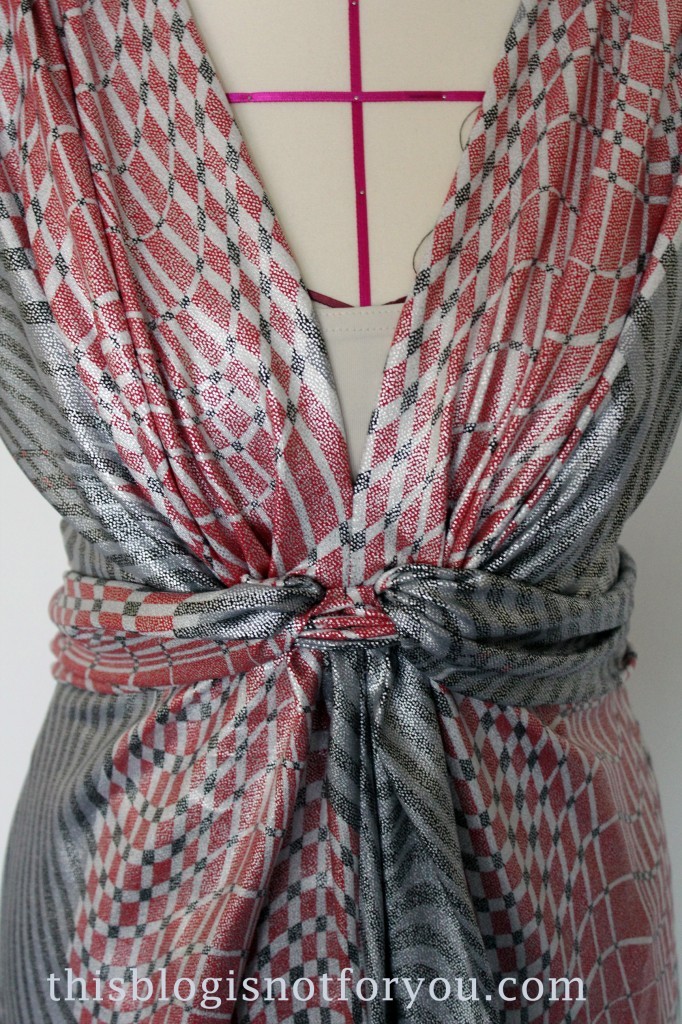
Seriously, what is this? A slightly trippy space dress? Tablecloth? Some sort of weird circus clown thing?

Dress with a Twist -  Burda 2/2013 #155 by thisblogisnotforyou.com

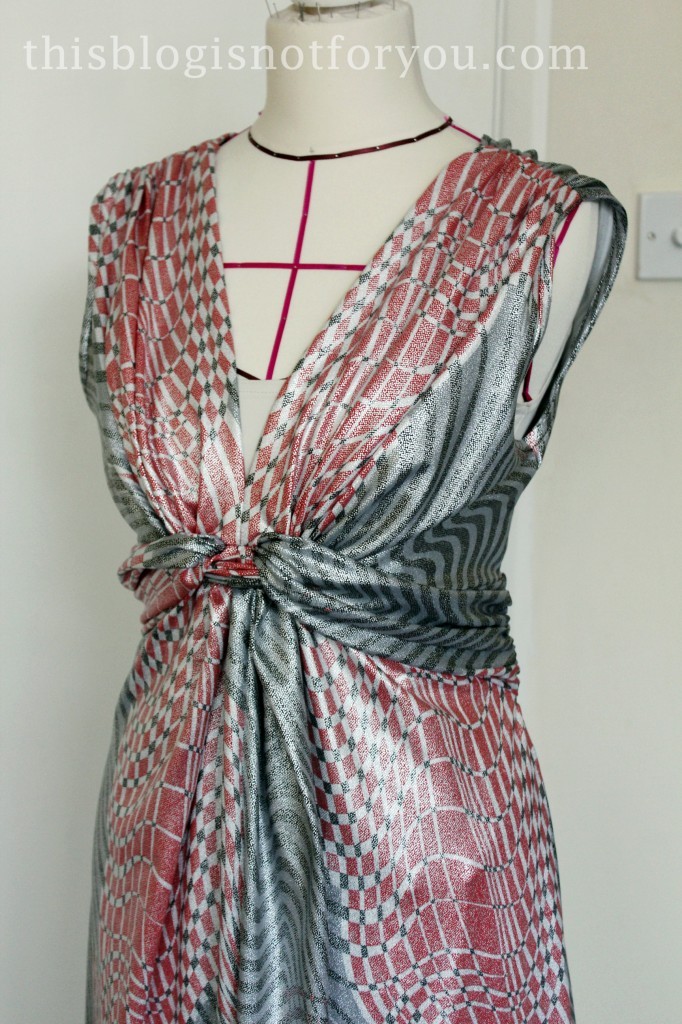
When you ignore the fabric, the dress actually looks quite nice (and fits like a glove). I’m thinking of making another (better!) version as soon as I have some closure on this one…

Dress with a Twist -  Burda 2/2013 #155 by thisblogisnotforyou.comDress with a Twist -  Burda 2/2013 #155 by thisblogisnotforyou.com

I really like the twisted details in the front, probably the trickiest bit of the pattern. Dress with a Twist -  Burda 2/2013 #155 by thisblogisnotforyou.com

It was the weekend of sewing mistakes…more stories coming up soon. I thought I’d better reveal them piecemeal… 😀

We all screw up every once in a while…What’s your latest faux pas?

Refashion It! The Shirred Scarf Tutorial

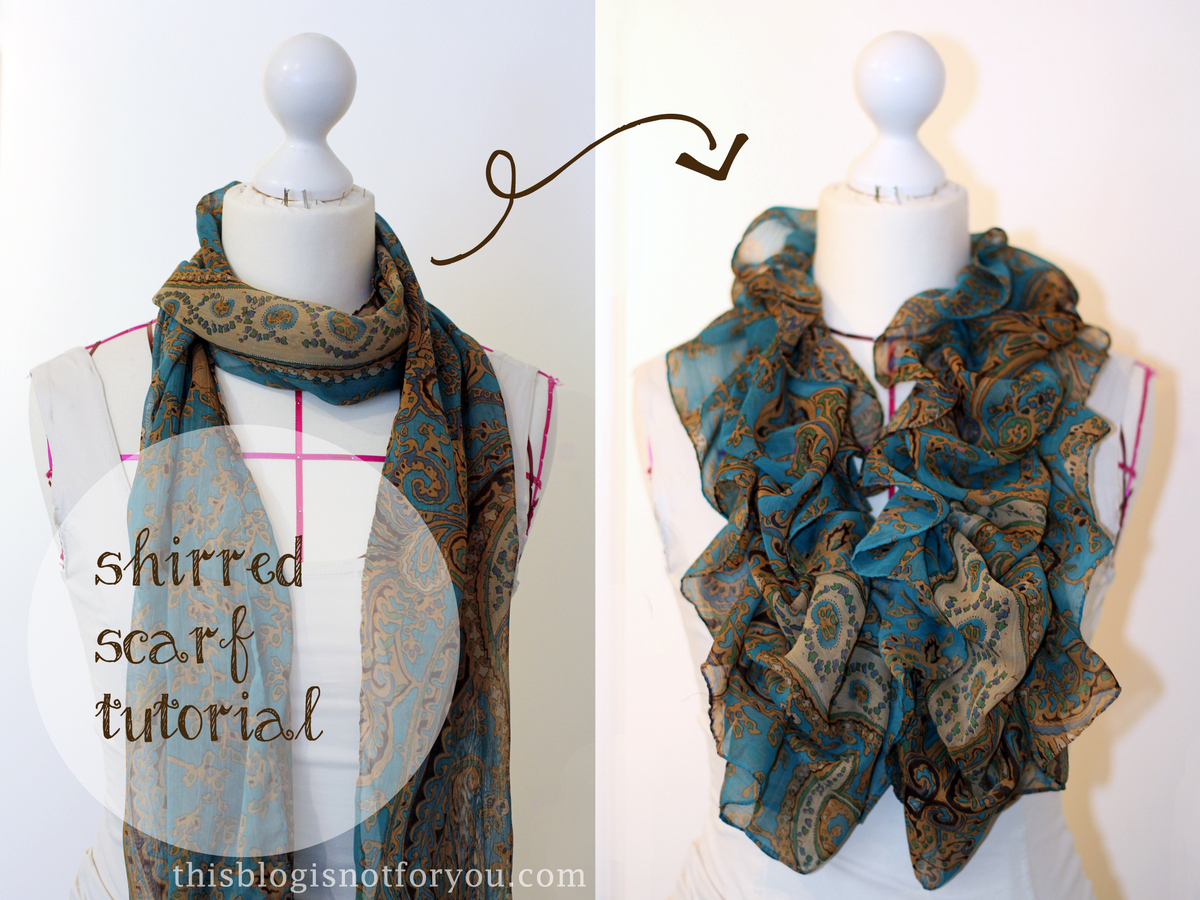
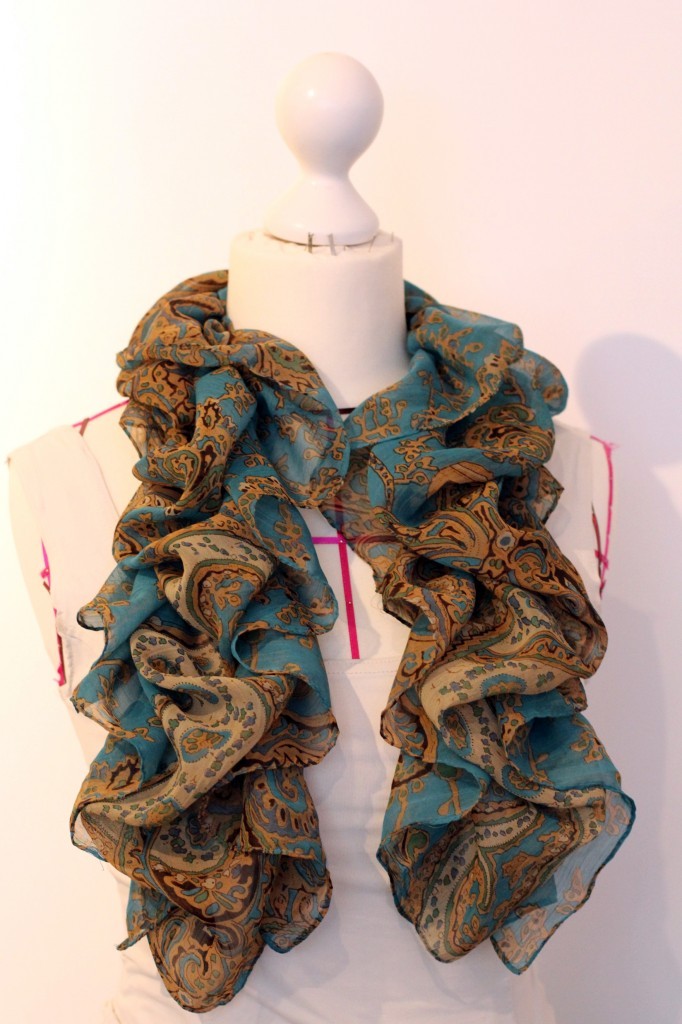
shirred scarf tutorial by thisblogisnotforyou.com


Now that exams are over, I had a little time here and there to sew and finish some things that were lying around for months. Dress #8 of my 27 Dresses Challenge is practically finished. The weather here in London just hasn’t been good enough to take proper pictures. So check out the blog at the beginning of the week if you’re interested in seeing the ‘ugliest dress I’ve ever sewn’ 🙂

Until then, here’s a quick and easy tutorial for the weekend.

It’s time for upcycling some old scarfs for summer!

All you need:

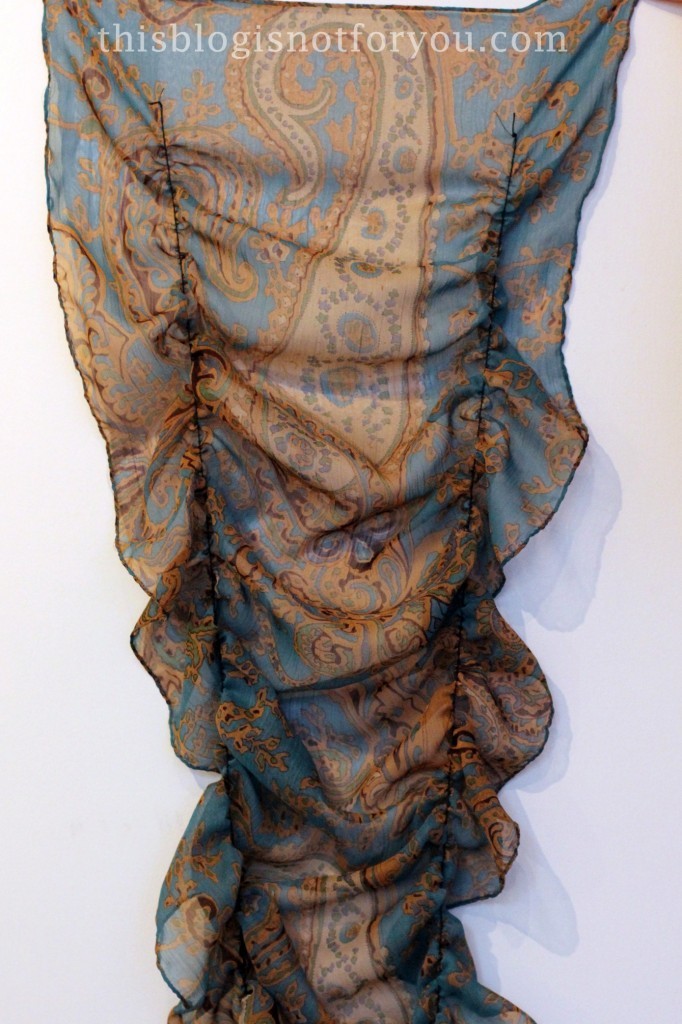
-a scarf (lightweight fabric such as silk, chiffon, …). Choose a scarf that is long enough. Consider that after shirring it will be only half as long as it used to be!

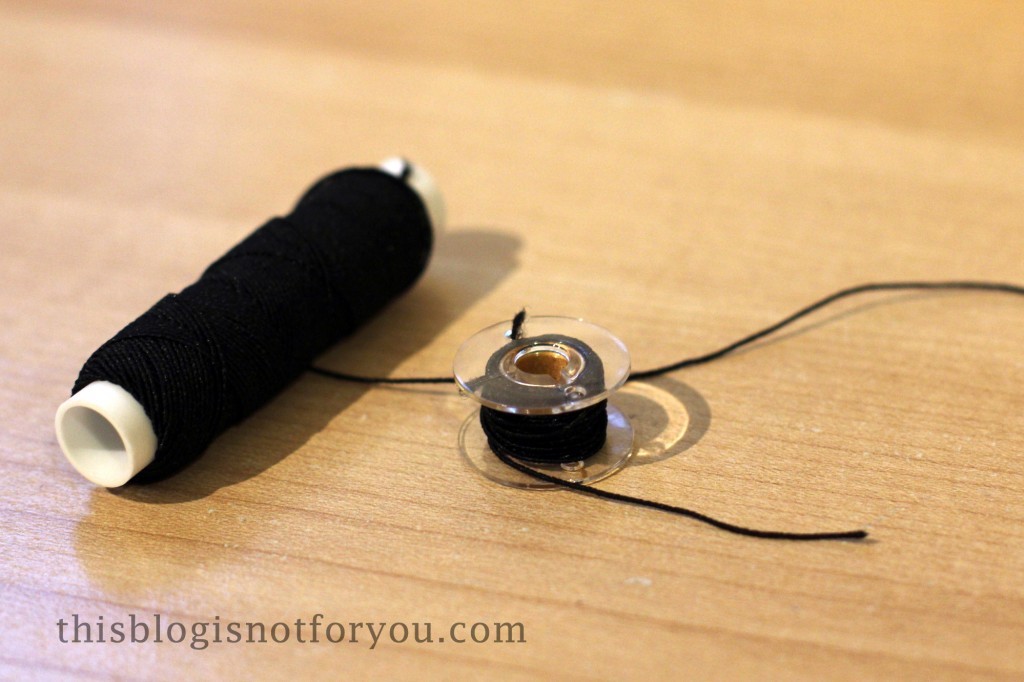
– elastic thread (and a sewing machine!)

shirred scarf tutorial by thisblogisnotforyou.com

Wind an open bobbin with your elastic thread, not too tight and not to loose. Machine winding with your sewing machine might wind it too tight. If you’re too impatient winding it by hand, you can do it with your machine, holding the thread in your hand. That way you’re able to control the tension and it doesn’t get too tight.shirred scarf tutorial by thisblogisnotforyou.com

Insert the bobbin as usual. You can make the bobbin thread tension tighter, if your machine has that option. I just left mine how it was and it worked fine.

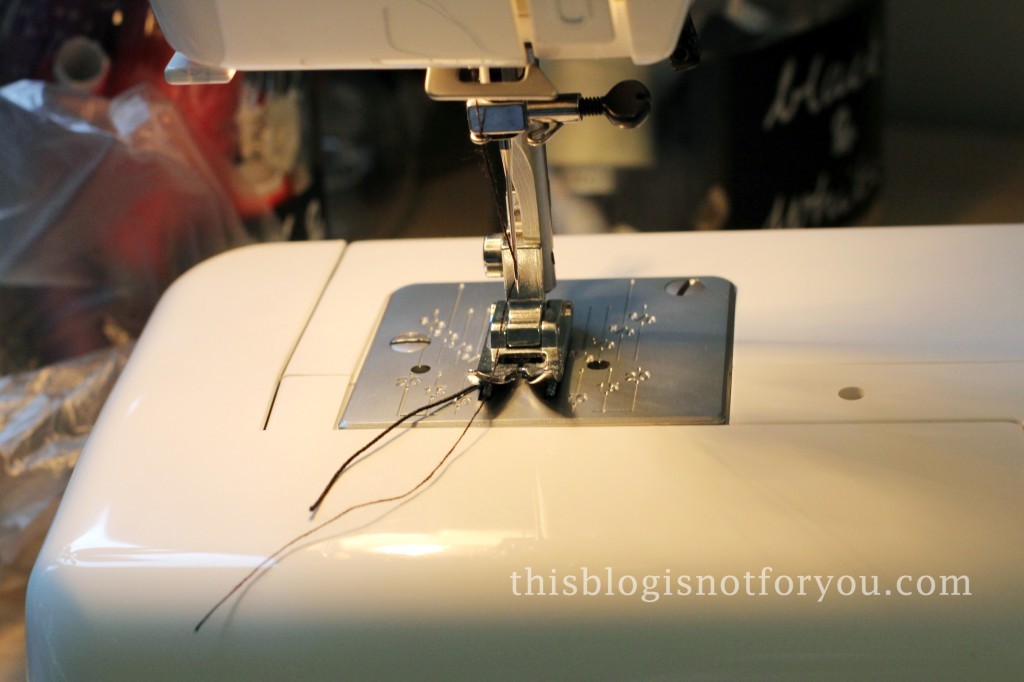
Pull the bobbin thread up manually. Make sure it doesn’t pop back into the machine (this happens when you don’t pull up enough thread).shirred scarf tutorial by thisblogisnotforyou.com

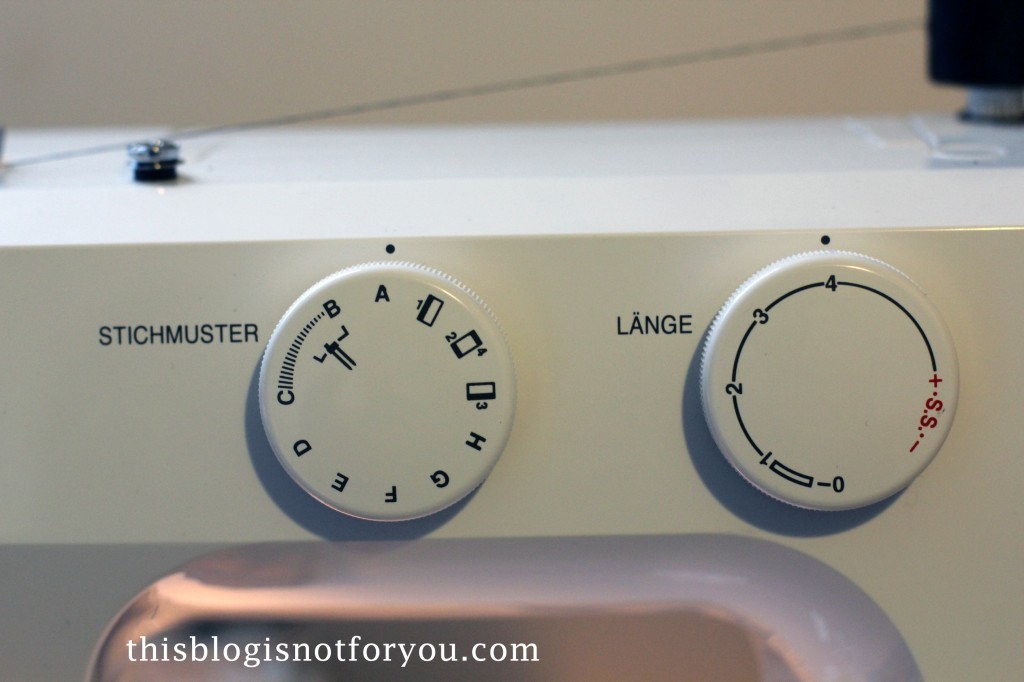
Set the machine to a straight stitch and a long stitch length (like a basting stitch).shirred scarf tutorial by thisblogisnotforyou.com

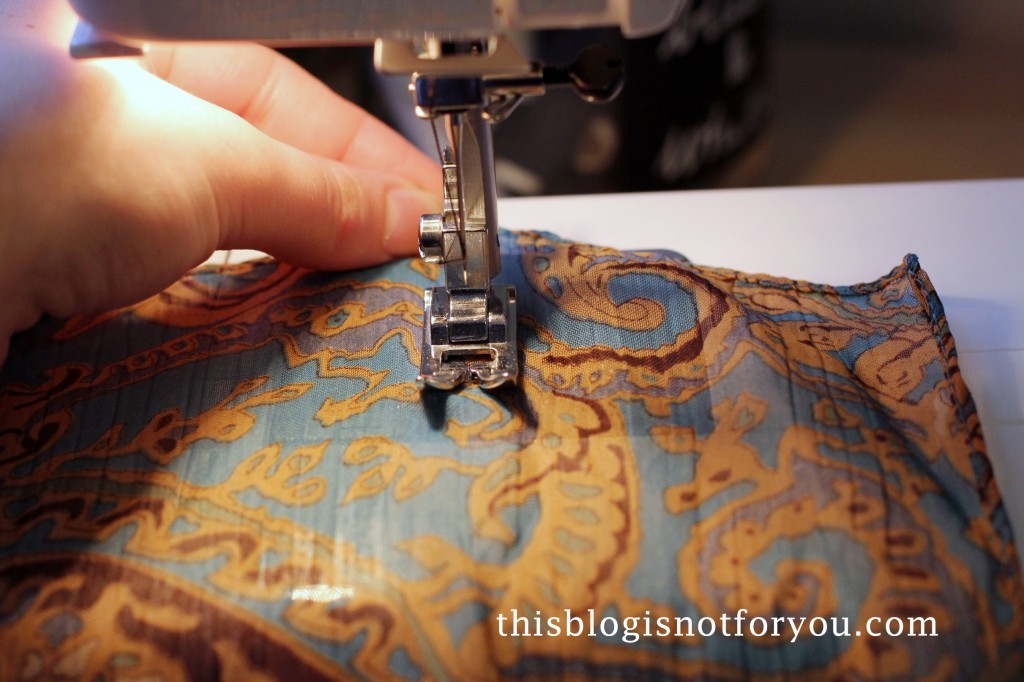
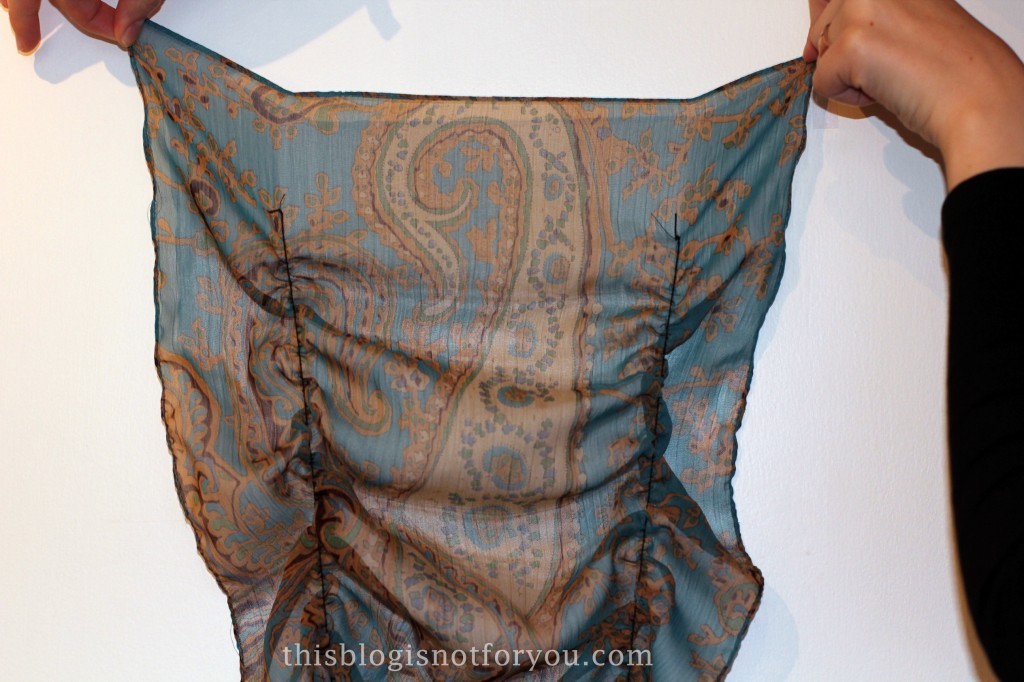
Sew two parallel rows, both the same distance from the side edge.  Don’t start directly at the upper edge, but a few inches below.

While sewing, hold the fabric behind the needle with your left hand and pull slightly. Don’t let it ruffle until you’re done. With your right hand keep the fabric straight while sewing. shirred scarf tutorial by thisblogisnotforyou.com

Before cutting the thread make sure you pull enough elastic thread out, otherwise it will pop back into the machine and you’ll have to pull it up again. You could also backstitch, but I didn’t want it to show on the scarf.

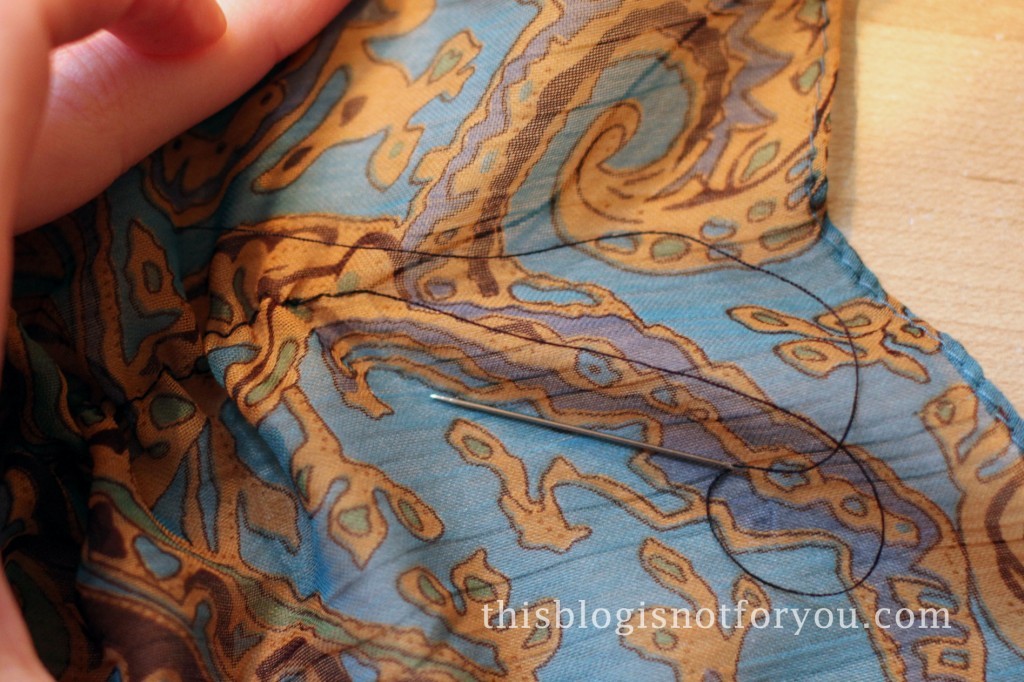
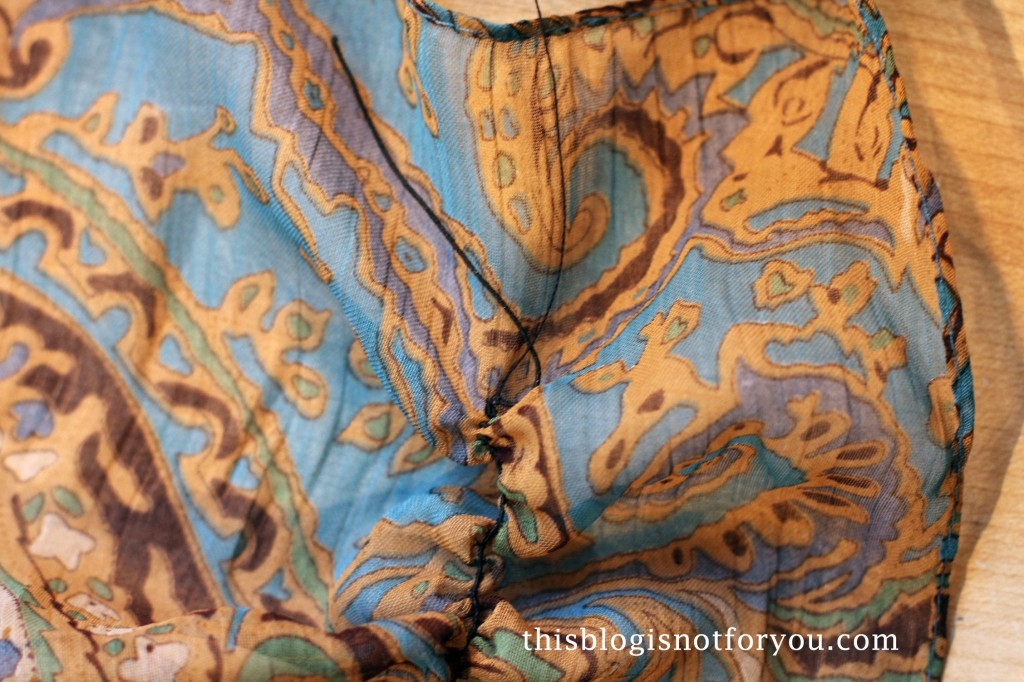
Cut the thread and use a needle to pull the upper thread through the fabric. Knots several times on the left side of the fabric before cutting the ends off.shirred scarf tutorial by thisblogisnotforyou.com

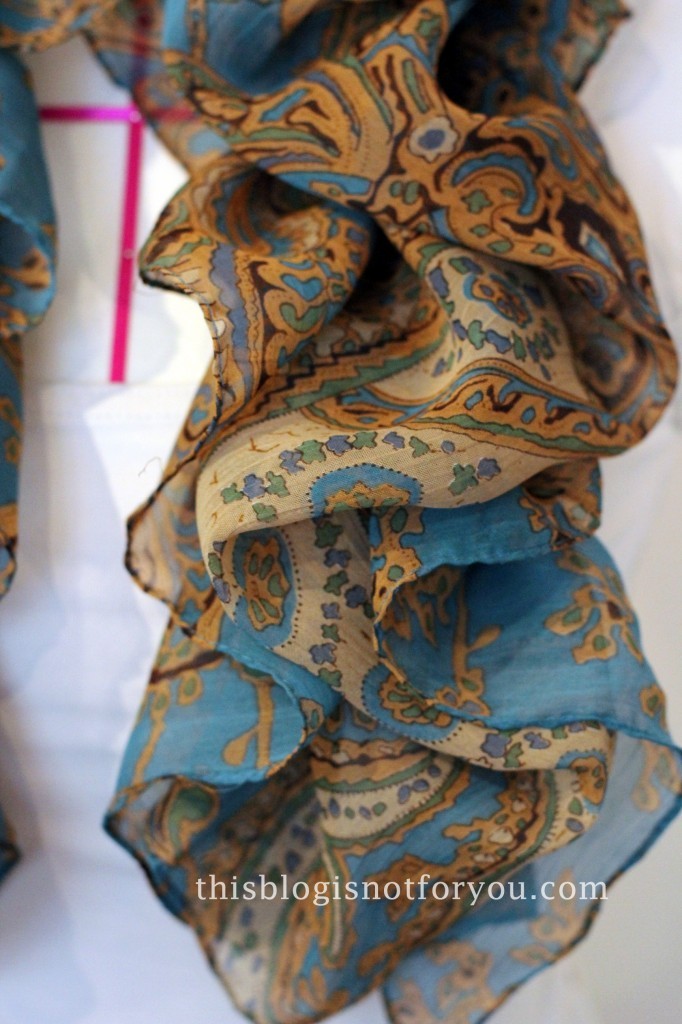
You could also sew the two rows of shirring closer together to get an even more fluffy scarf. Try it out with a few old scarf or scraps of fabric to see what works best for you.shirred scarf tutorial by thisblogisnotforyou.comshirred scarf tutorial by thisblogisnotforyou.comshirred scarf tutorial by thisblogisnotforyou.comshirred scarf tutorial by thisblogisnotforyou.com