Wedding Dress Part V: Embroidering the Bodice

Wedding dress embroidery by thisblogisnotforyou.comThis is probably the making of part of the wedding dress I am most excited to share with you! That’s very likely because it was the most fun part to create. Assembling a garment is fun, but it is also pretty repetitive as it is a similar process with many garments (even a wedding dress is just a dress after all). So trying something I haven’t done before was exciting and helping me loads to keep my sewing mojo up during the process.

The embroidery was initially part of the plan but I kind of discarded the idea once I started making my dress. I thought I wouldn’t have enough time because I procrastinated for too long and didn’t really start until five months before the wedding.

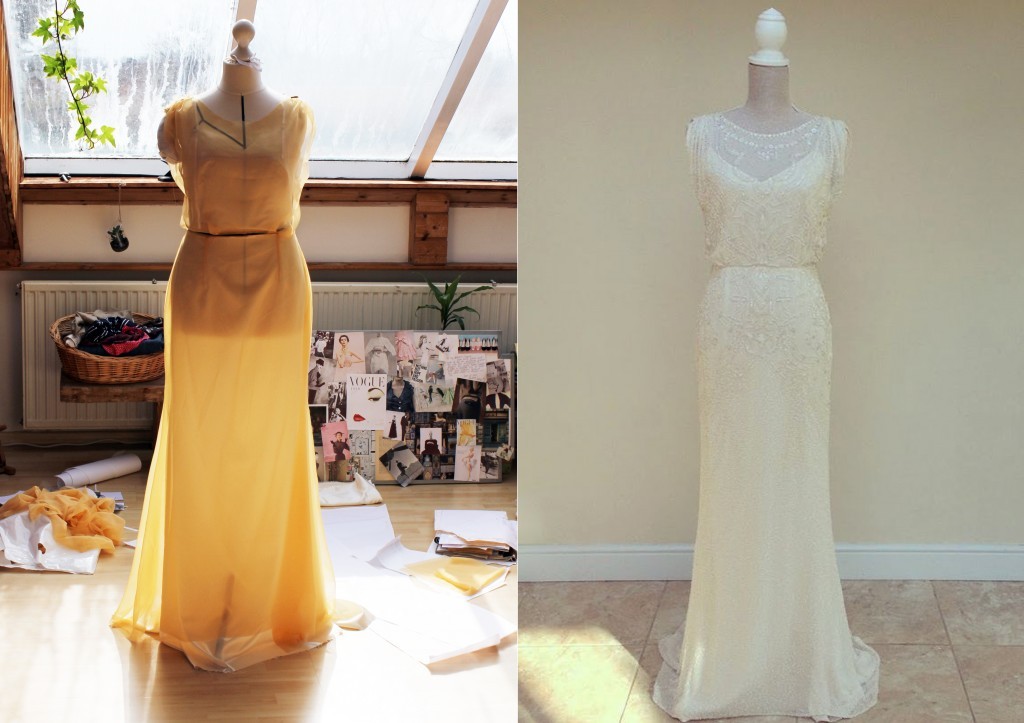
While making my dress I was really unhappy about not using embroidery and also, the dress seemed to become a lot plainer than I wished.

Eight weeks before the wedding, when I knew I could finish the dress on time, I decided to take a week out of the sewing schedule (which I didn’t stick to anyway) to try my hand at embroidering. I had never done this before, I didn’t have an embroidery frame, I didn’t even have the notions yet.

Not a particularly promising outlook, right? I decided not to get a frame and experiment with a DIY solution, and also ordered relatively cheap acryl beads, diamonds and sequins online.
Wedding dress embroidery by thisblogisnotforyou.com

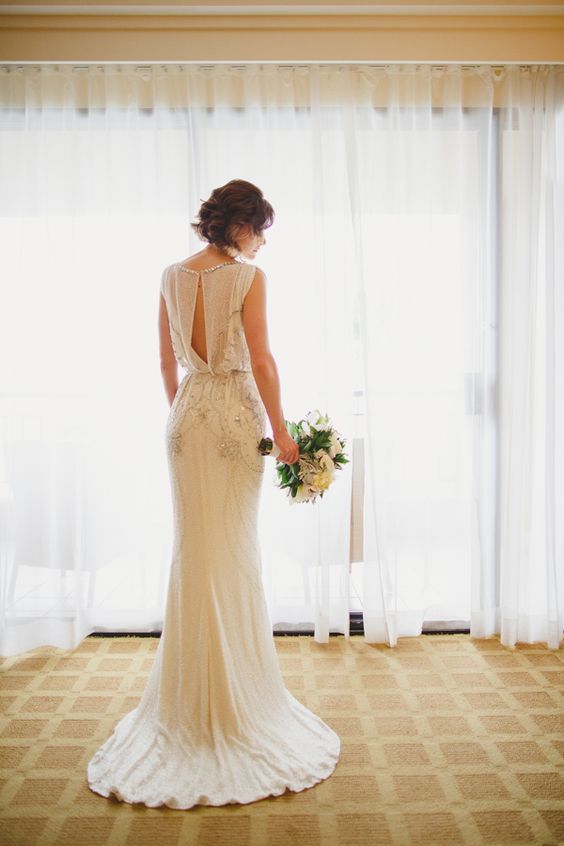
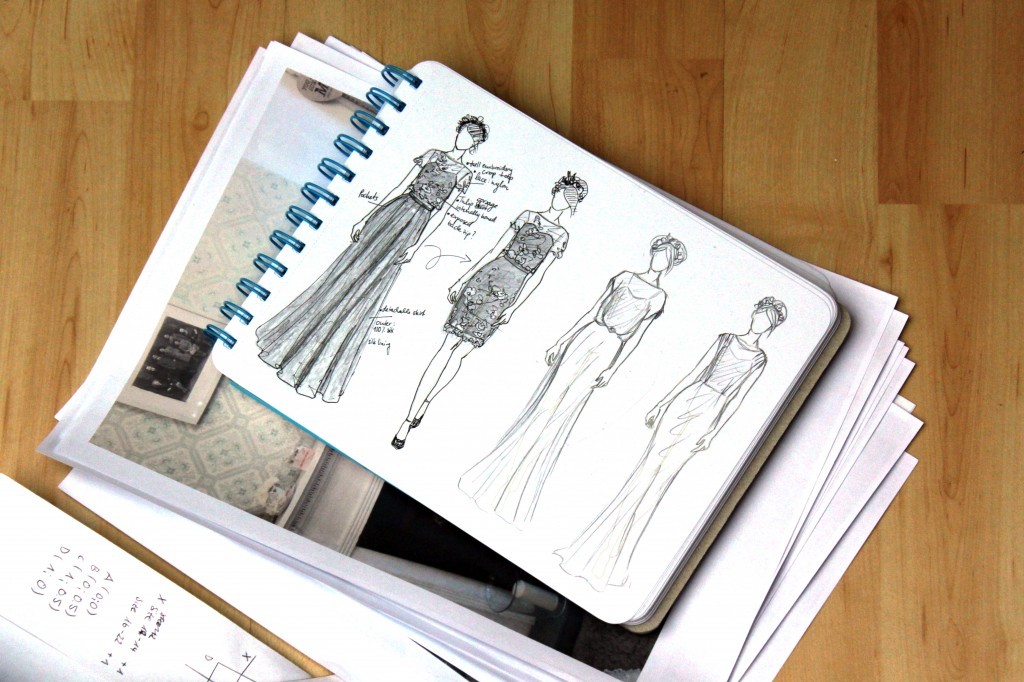
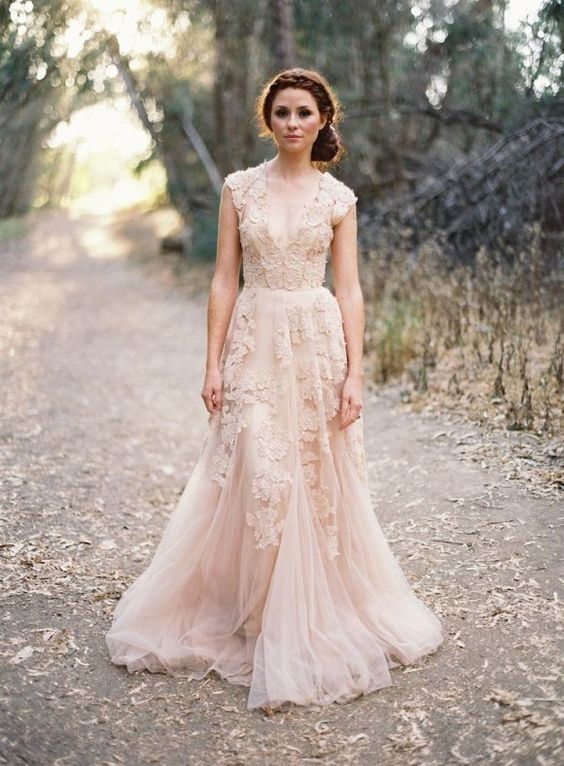
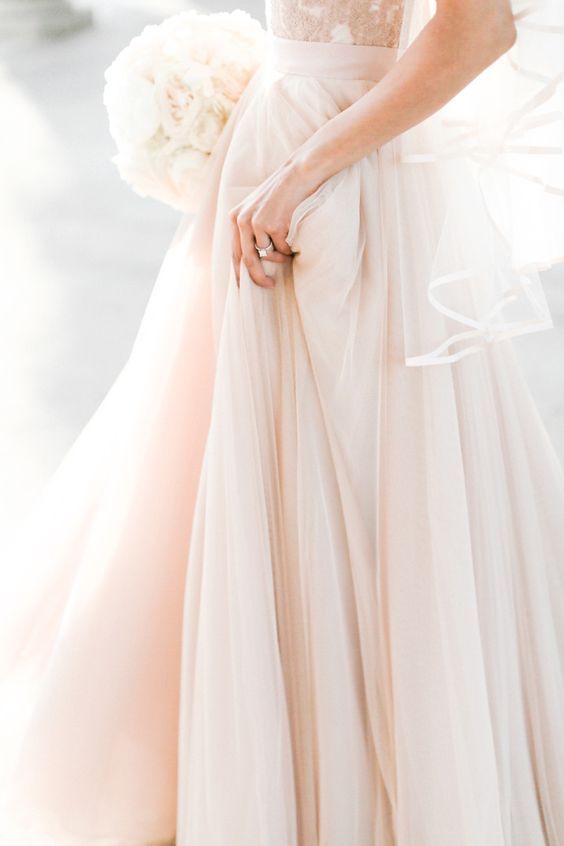
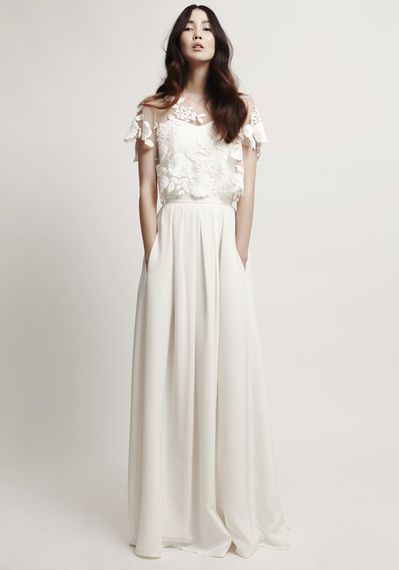
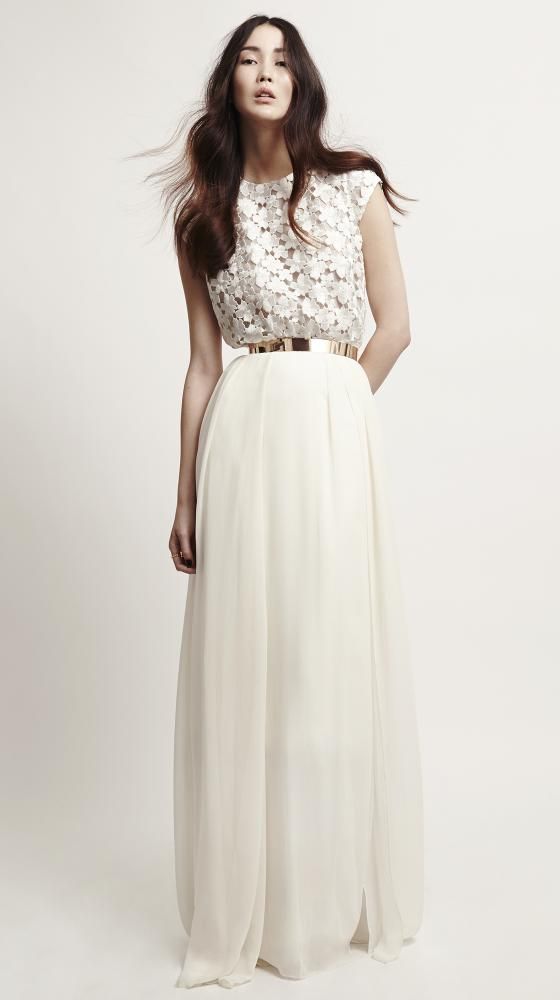
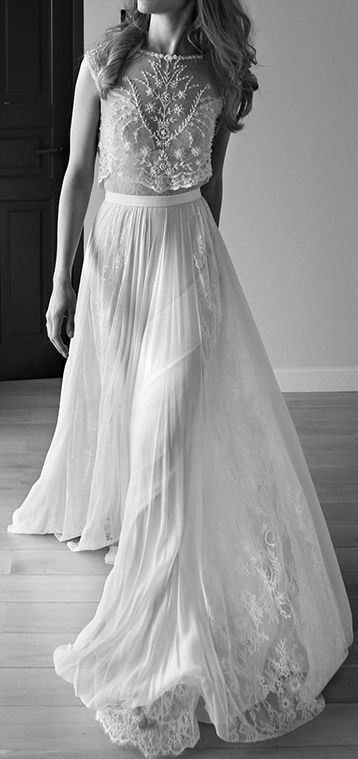
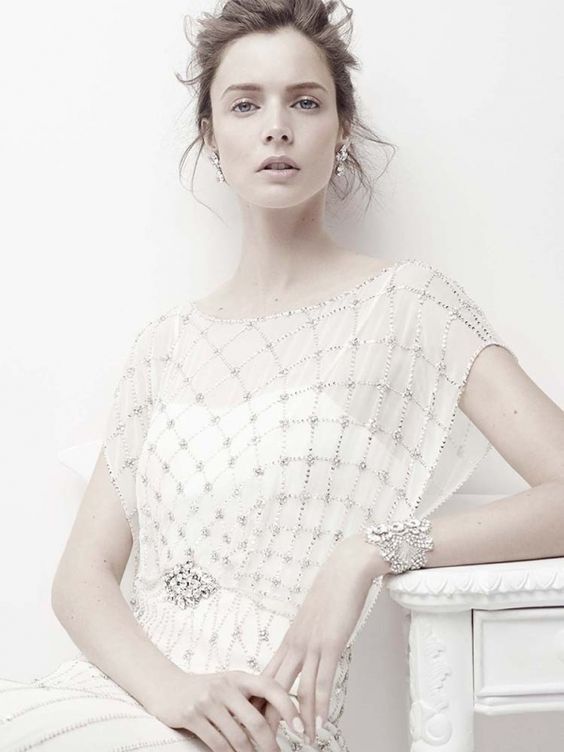
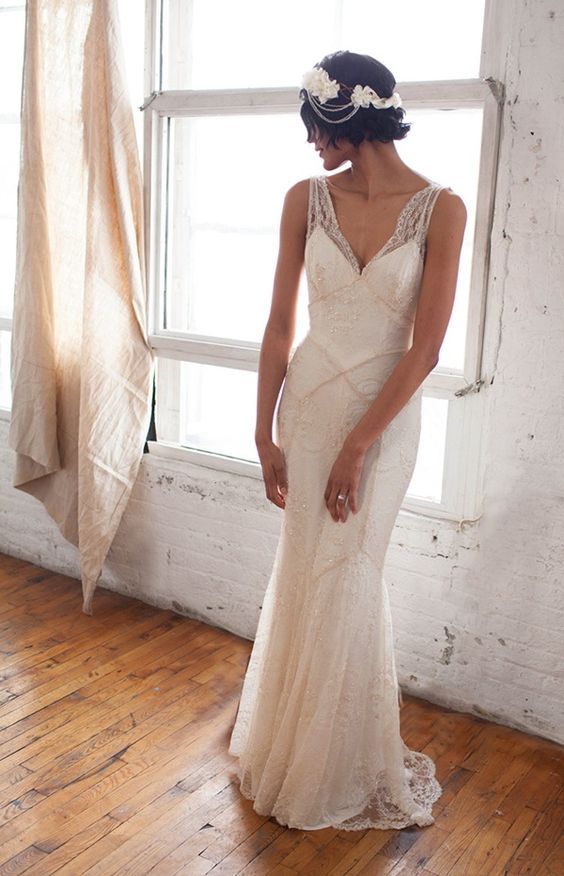
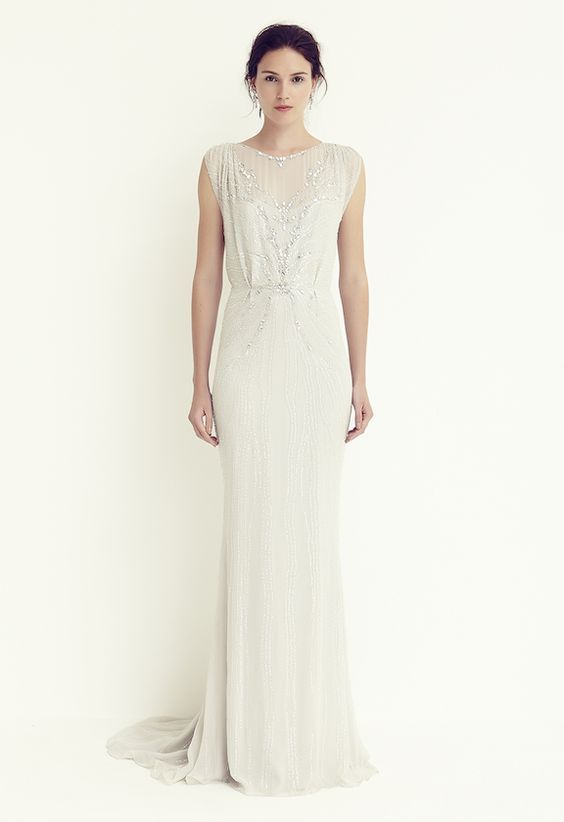
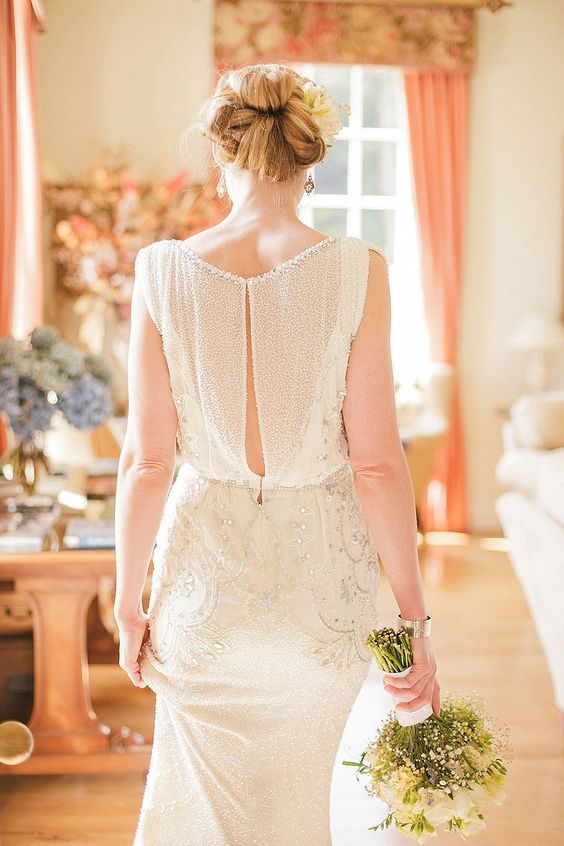
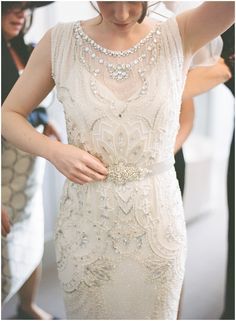
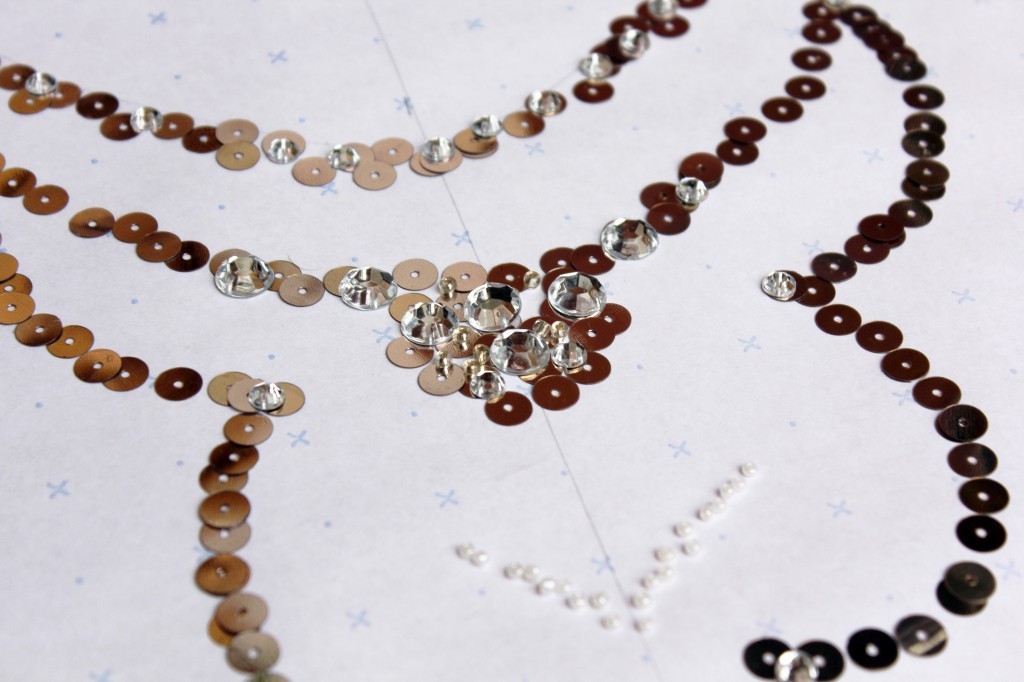
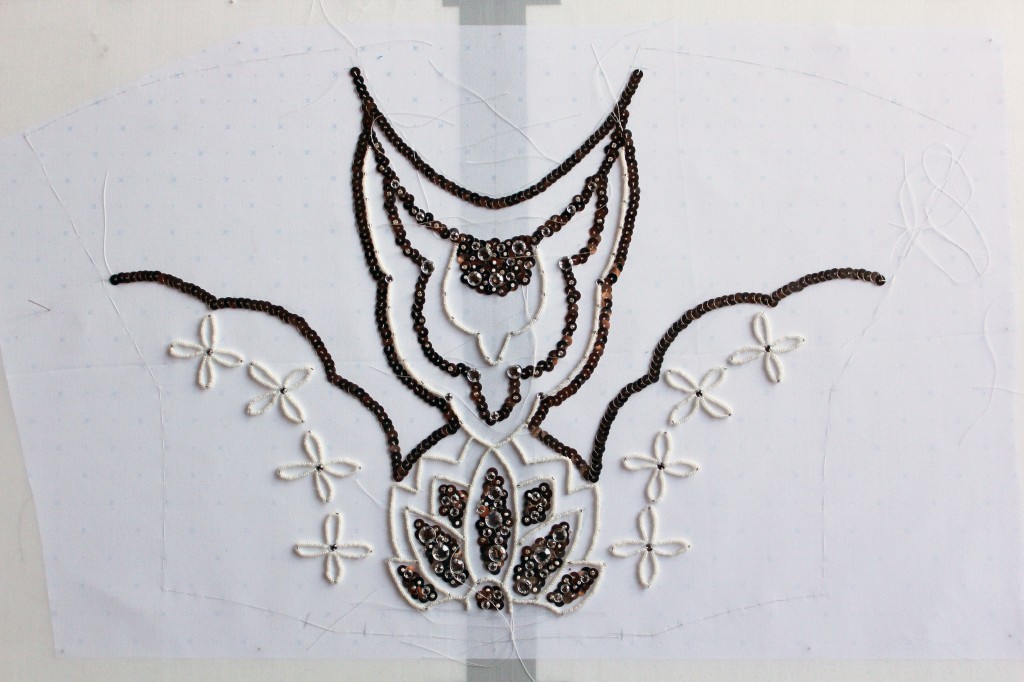
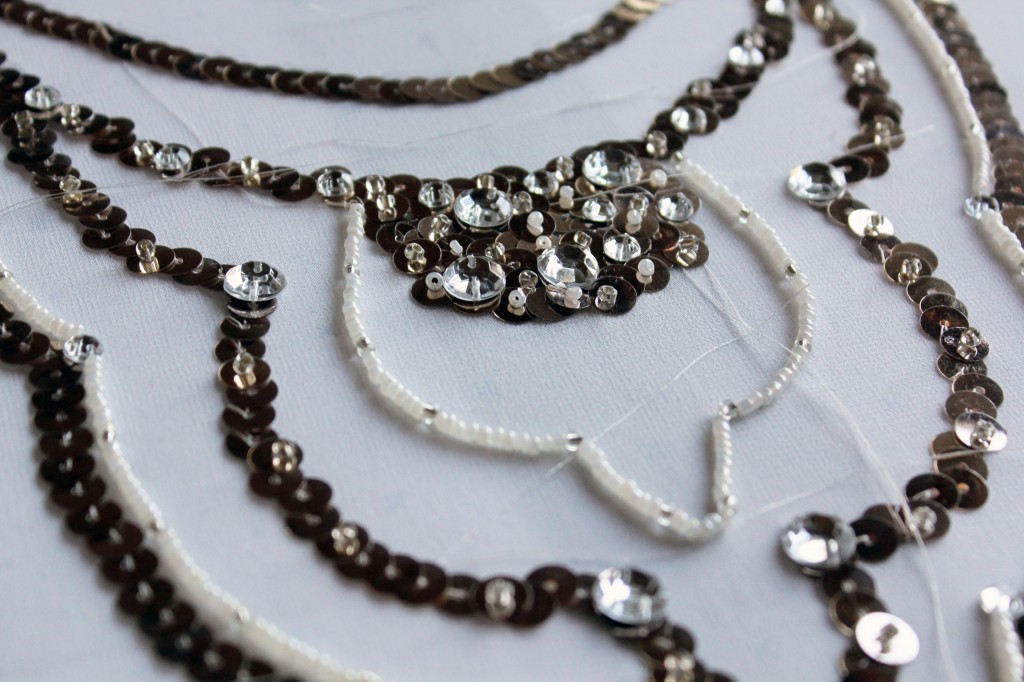
At first I experimented with shapes and arragement of the different sized and coloured beads etc. I roughly stuck to the embroidered pattern of the Jenny Packham Esme dress I based my wedding dress on.

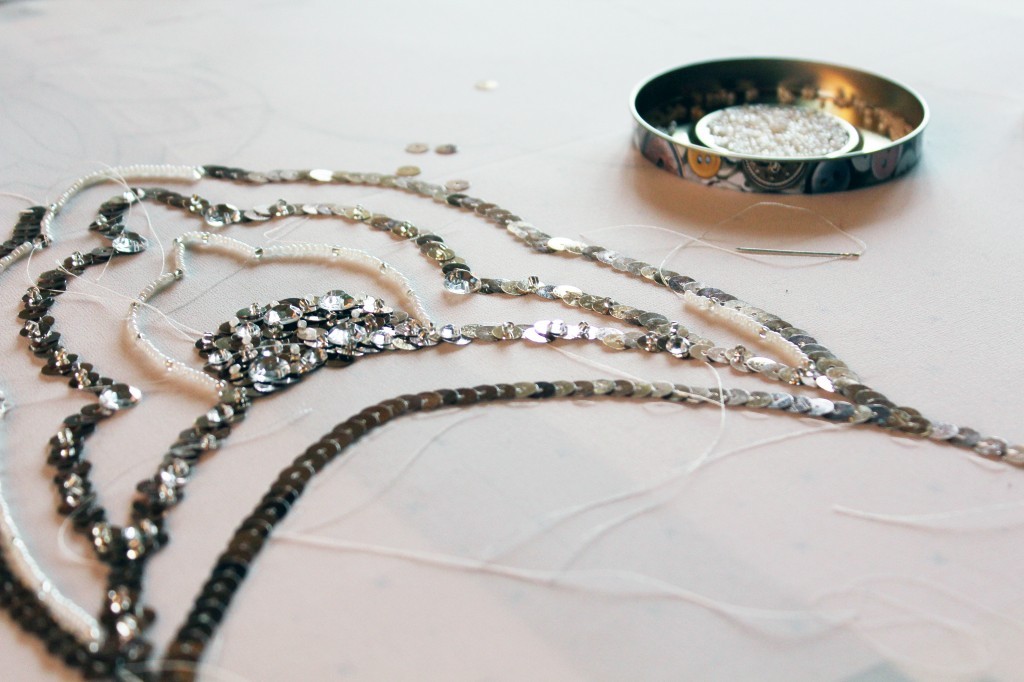
It’s a beautiful Art Deco style pattern which really suits the 1930’s silhouette of the dress. I changed it a bit here and there and also used a different colour of sequins to match my fabric. The colour of the sequins is hard to describe, it’s not gold or rose gold. Actually more like a warm silver if that makes sense? It reflected the colour of the fabric really well which helped ‘carmouflaging’ the sequins a bit so they weren’t too loud.

Wedding dress embroidery by thisblogisnotforyou.comBefore testing out DIY embroidery frame solutions, I used a small embroidery hoop to check if my fabric was suitable for embroidering.

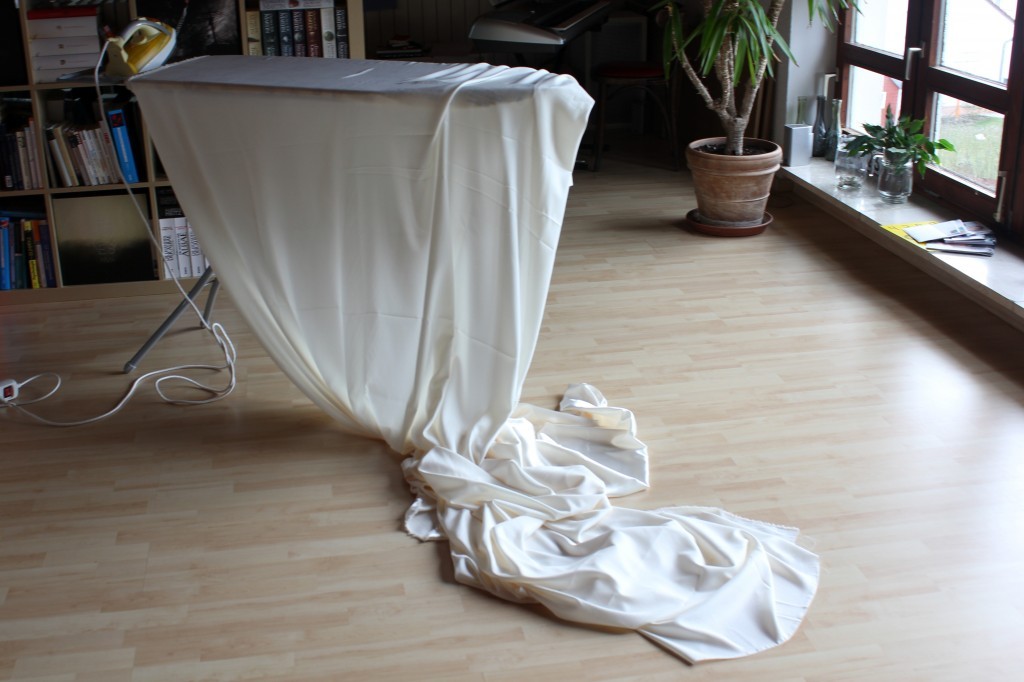
My lining fabric is silk satin and my main fabric silk chiffon (although I’d say it’s a silk organza rather than a silk chiffon). Anyway, the fabrics are way too delicate to hold the strain of heavy embroidery, so I got some extra silk georgette in the exact same colour (which was lucky) when I bought my wedding dress fabrics last summer.

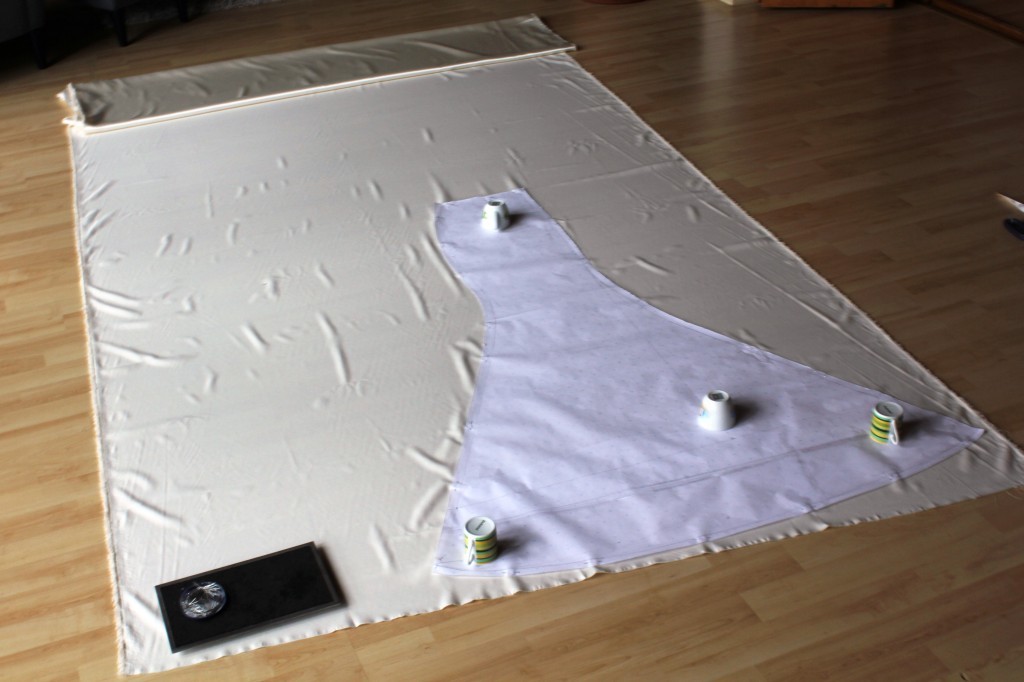
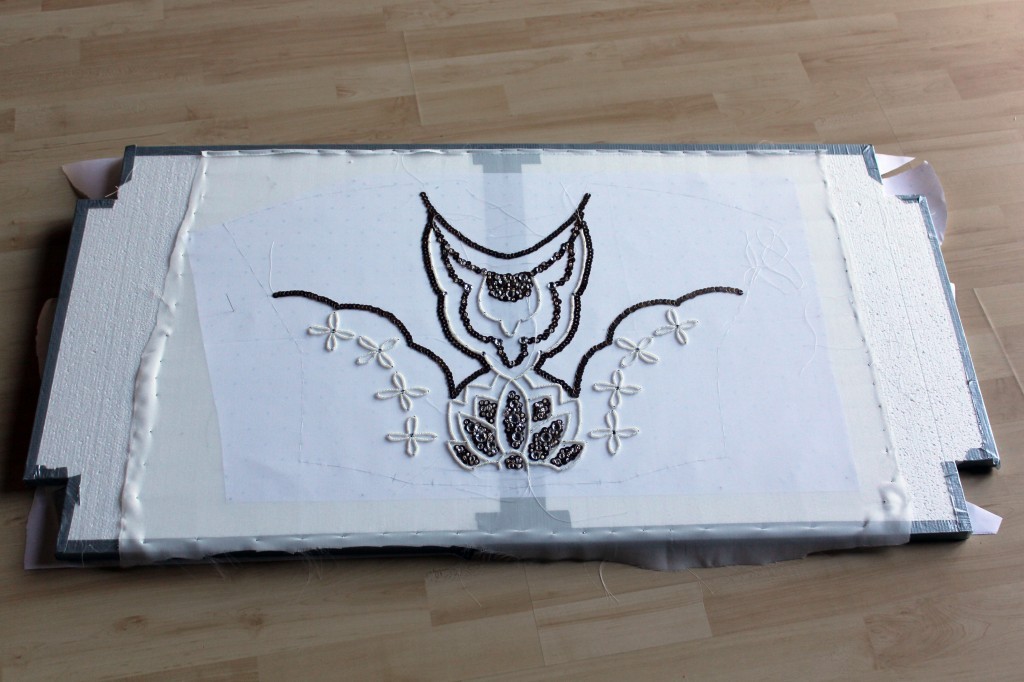
The georgette is as lightweight and transparent as the chiffon/organza, but much stronger and actually worked really well with my embroidery attempts:Wedding dress embroidery by thisblogisnotforyou.com
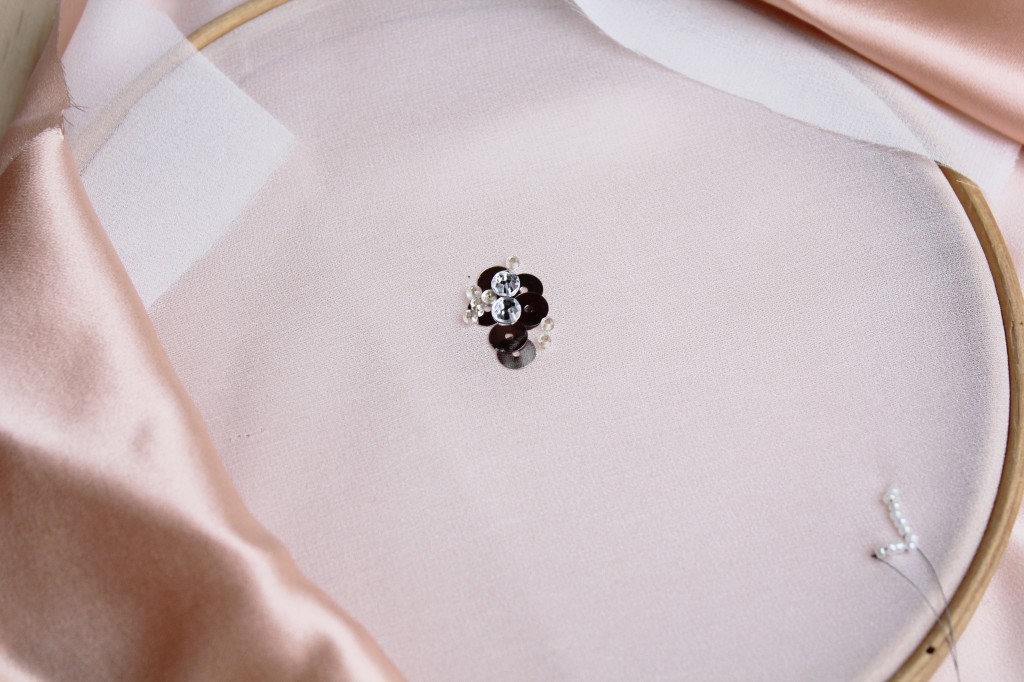
Once I got the knack of it, I had to think about creating a larger frame which would fit the whole of my bodice plus seam allowance. I used some styroform boards and pinned the fabric on it very tightly. The advantage was also that I could pin my template underneath so I didn’t have to mark the pattern on the fabric.

Wedding dress embroidery by thisblogisnotforyou.comWedding dress embroidery by thisblogisnotforyou.com
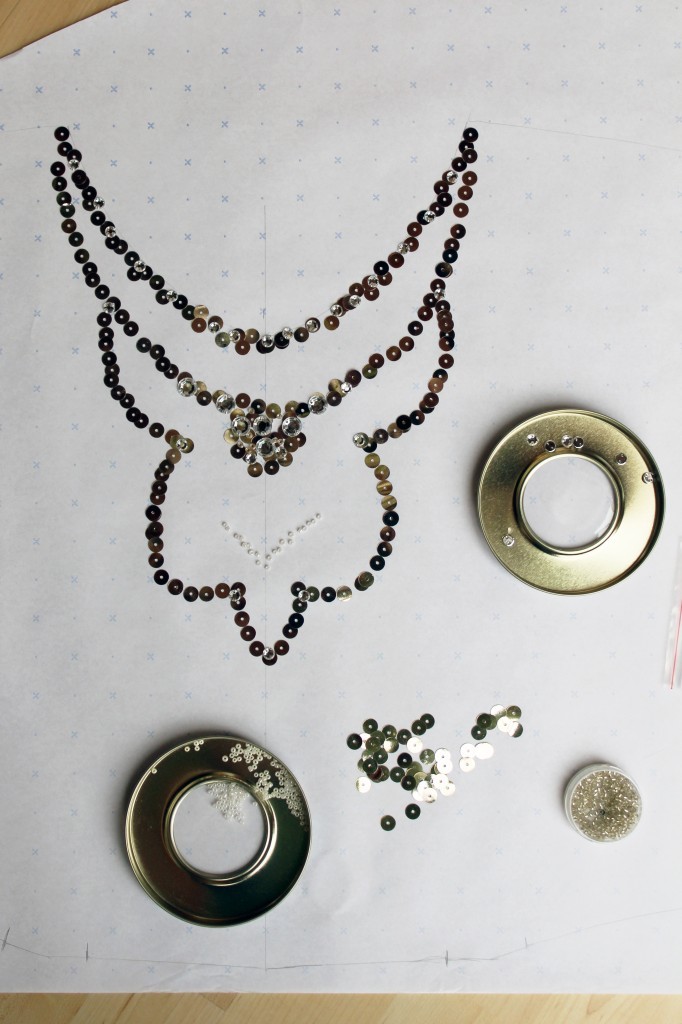
Here you can see my template underneath the fabric, which I drew with pencil on drafting paper to make sure the pattern was neat and mirrored exactly.

The outline of the seamline was marked on the fabric with basting stitches.Wedding dress embroidery by thisblogisnotforyou.comWedding dress embroidery by thisblogisnotforyou.comWedding dress embroidery by thisblogisnotforyou.comWedding dress embroidery by thisblogisnotforyou.com
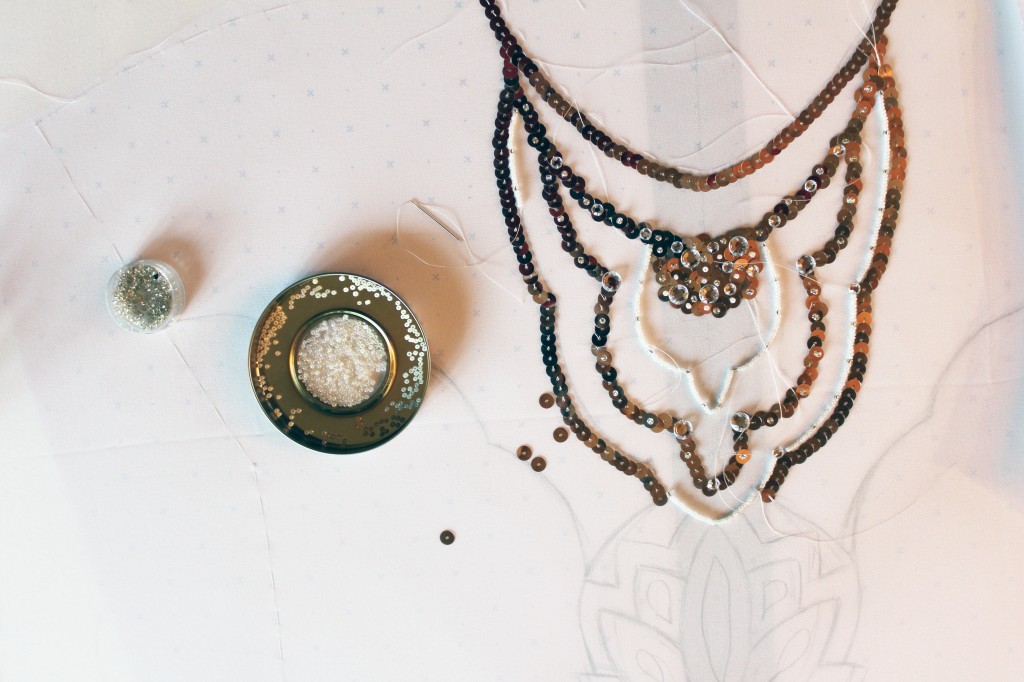
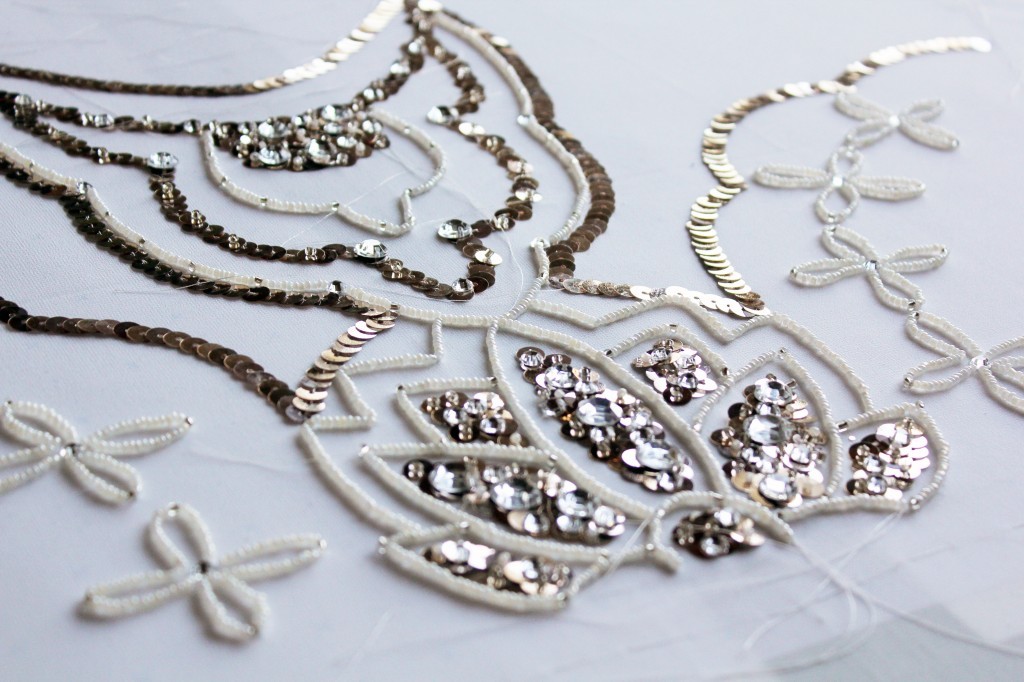
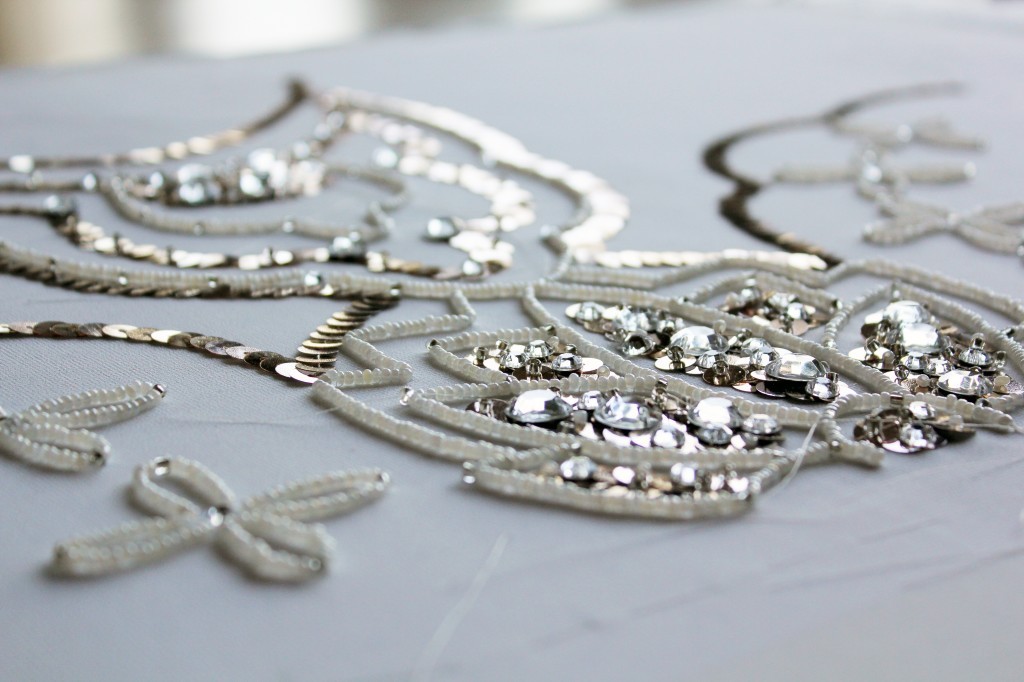
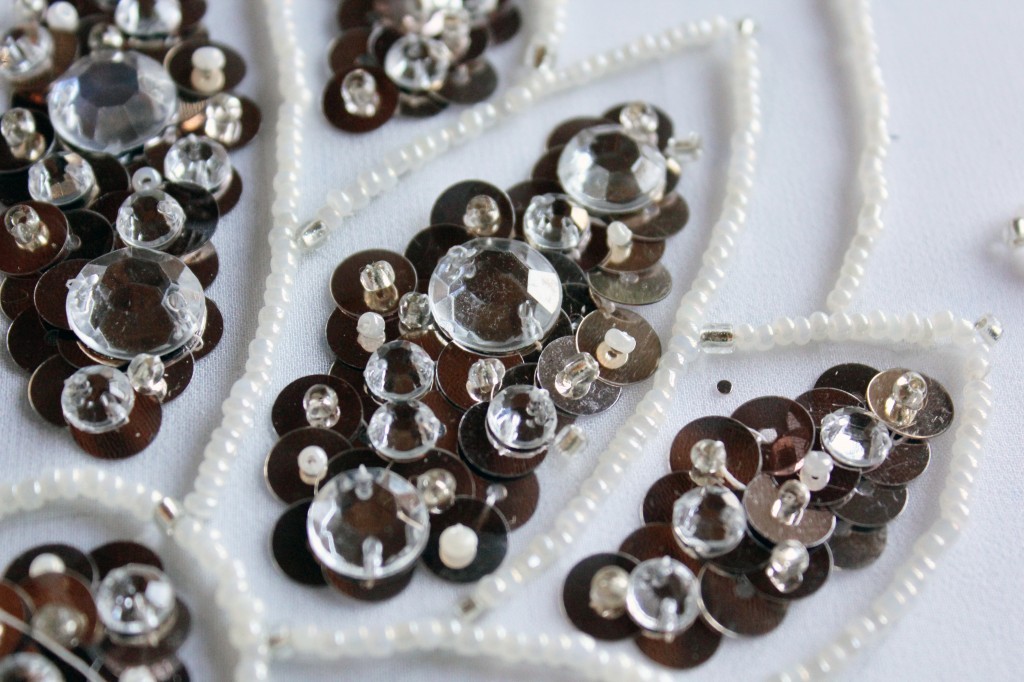
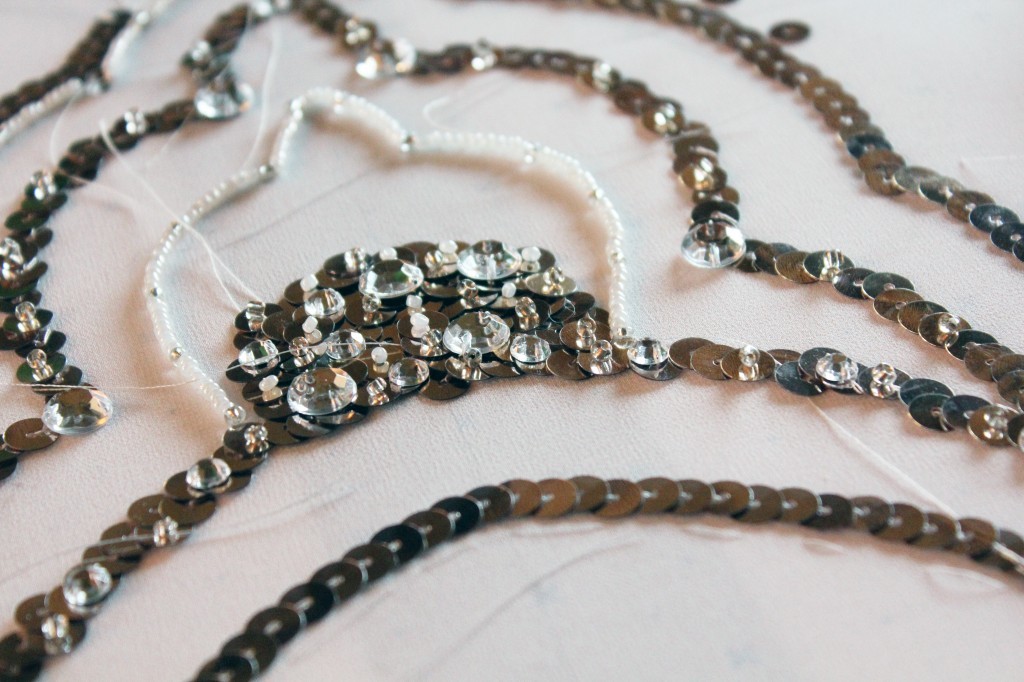
I actually didn’t use too many different kinds of beads and diamonds:

  • cream white rocailles beads
  • silver rocailles beads
  • transparent beads
  • sequins (silver/gold coloured)
  • 3 different sizes of acryl diamonds (5mm, 10mm, 12mm)

Wedding dress embroidery by thisblogisnotforyou.com
Wedding dress embroidery by thisblogisnotforyou.com
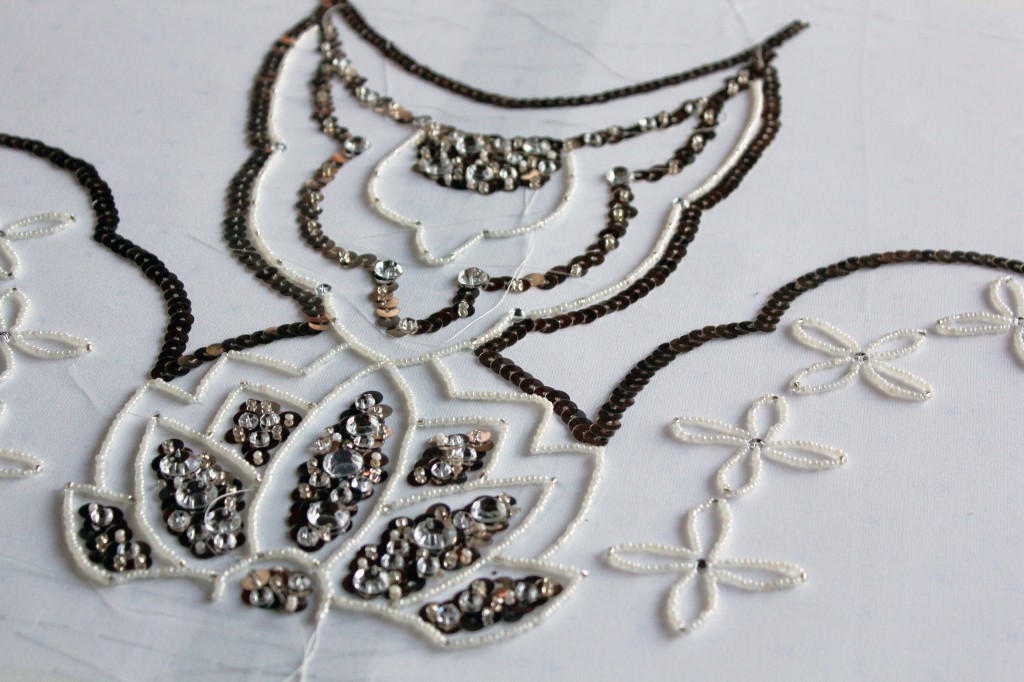
I had roughly outmapped the lines and shapes, but the exact positions and arrangement of beads and diamonds came about during the creative process.

It was so much fun, it was hard to stop. But I had to get on with the rest of the dress, so I limited the amount of embroidery compared to the Packham dress and only embroidered the bodice front and back pieces.

It took a week and three seasons of Homeland to finish.

My back hurt a lot during that time, but it was absolutely worth it. Embroidery like knitting can be very addictive because it so relaxing in a way.Wedding dress embroidery by thisblogisnotforyou.comWedding dress embroidery by thisblogisnotforyou.comWedding dress embroidery by thisblogisnotforyou.com

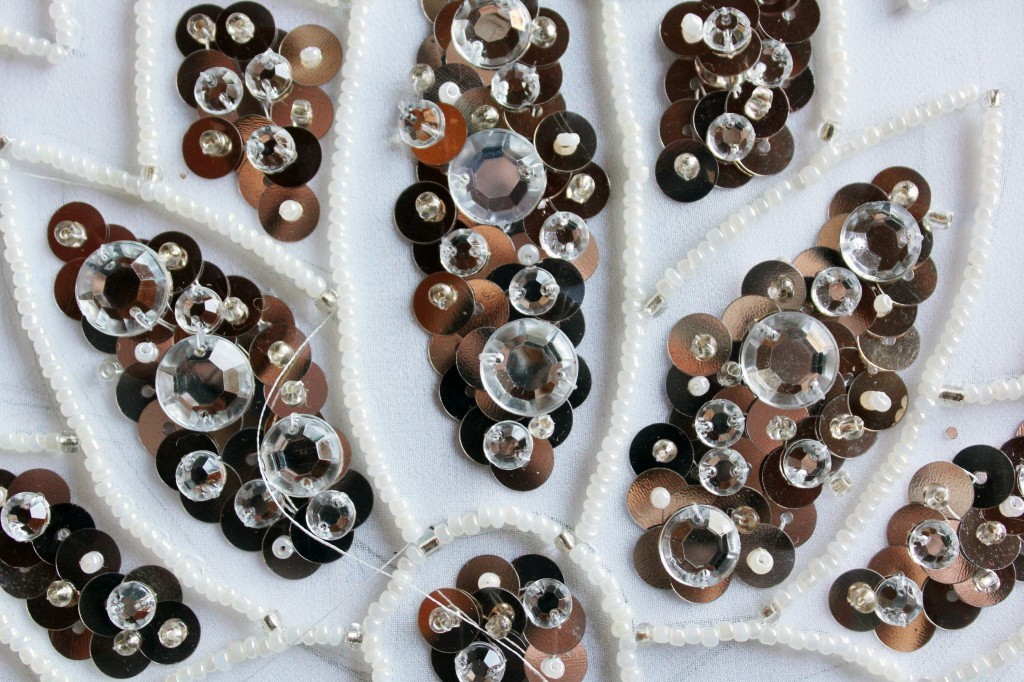
What do you think? Do you have any experience with embroidery?

Next time I’ll share the last steps of assembling the actual dress before the big reveal! So make sure you pop by!

xx

Charlie


Happy sewing!

facebook/bloglovin/pinterest
twitter/instagram

Stay in touch!

Wedding Dress Part IV: The Story of the Corset

wedding dress corset by thisblogisnotforyou.com

Hellooo lovelies!

Man, you deserve a massive thumbs up for bearing with me and being so patient! Here’s the good news: Eventually there will be pictures of the final dress (& wedding!) on the blog. Don’t despair. But I don’t want to spoil the fun by posting them before I finished showing you the Making Of!

Hint: If your curiosity gets the better of you, pop over to my Instagram where I already shared some sneak peeks a couple of weeks ago!

So today I’ll share the Story of the Corset with you. You’ll have to wait till the end to learn whether it’s a happy or sad story. Again, no spoiling!

There’s just one thing I have to spoil for you: The idea that wedding dress sewing is romantic. It’s not. It’s chaos and hard work. But mostly chaos. Here’s some evidence:

wedding dress corset by thisblogisnotforyou.comwedding dress corset by thisblogisnotforyou.comwedding dress corset by thisblogisnotforyou.com
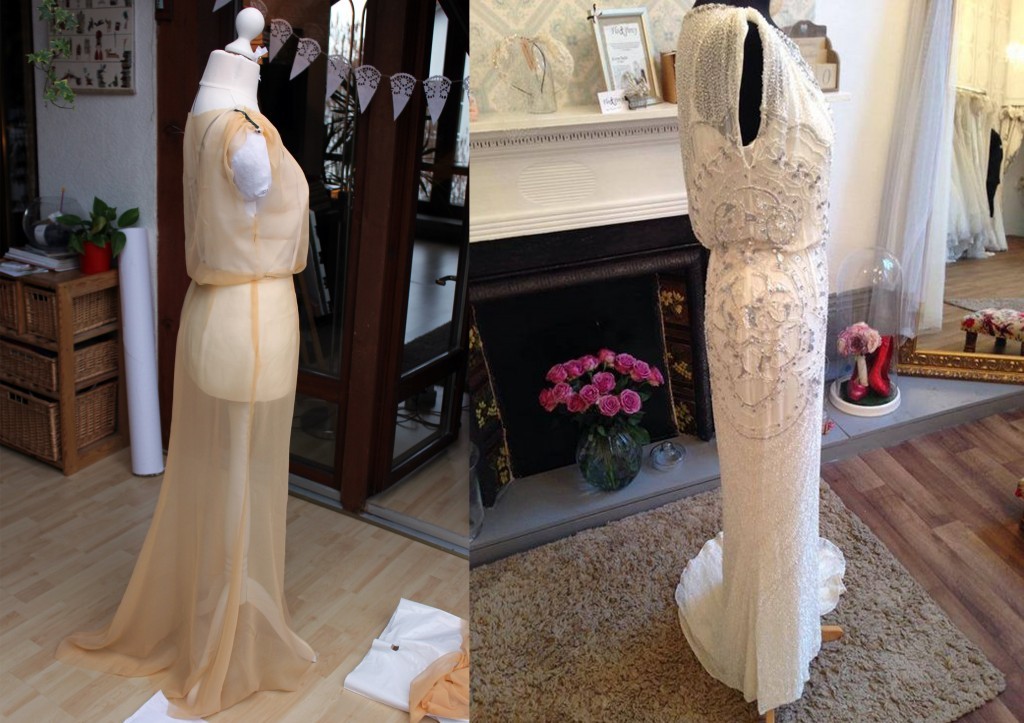
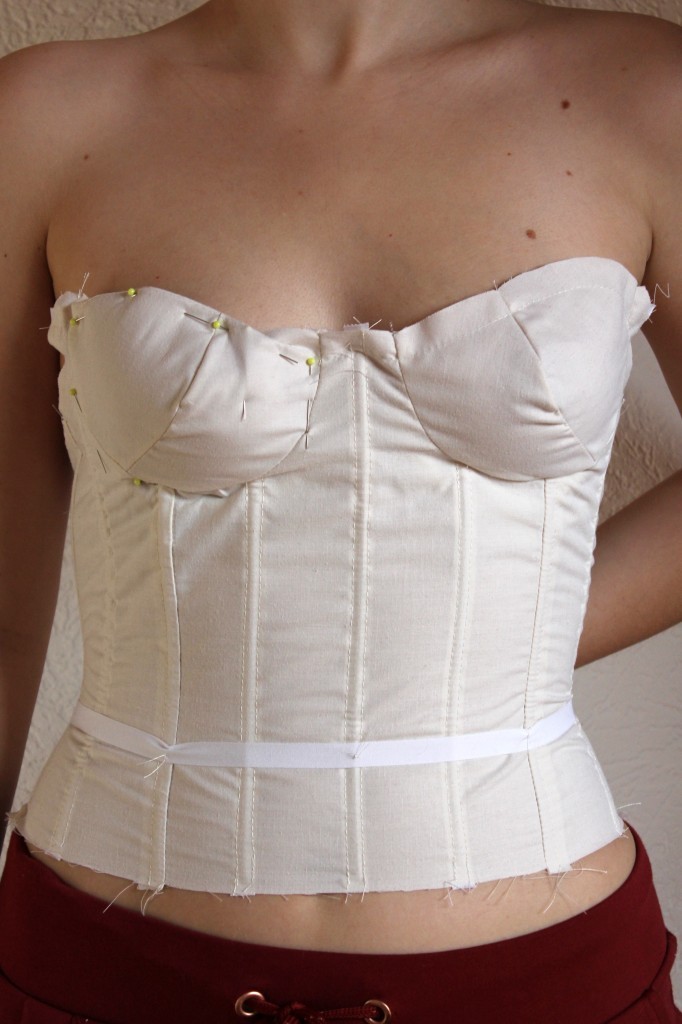
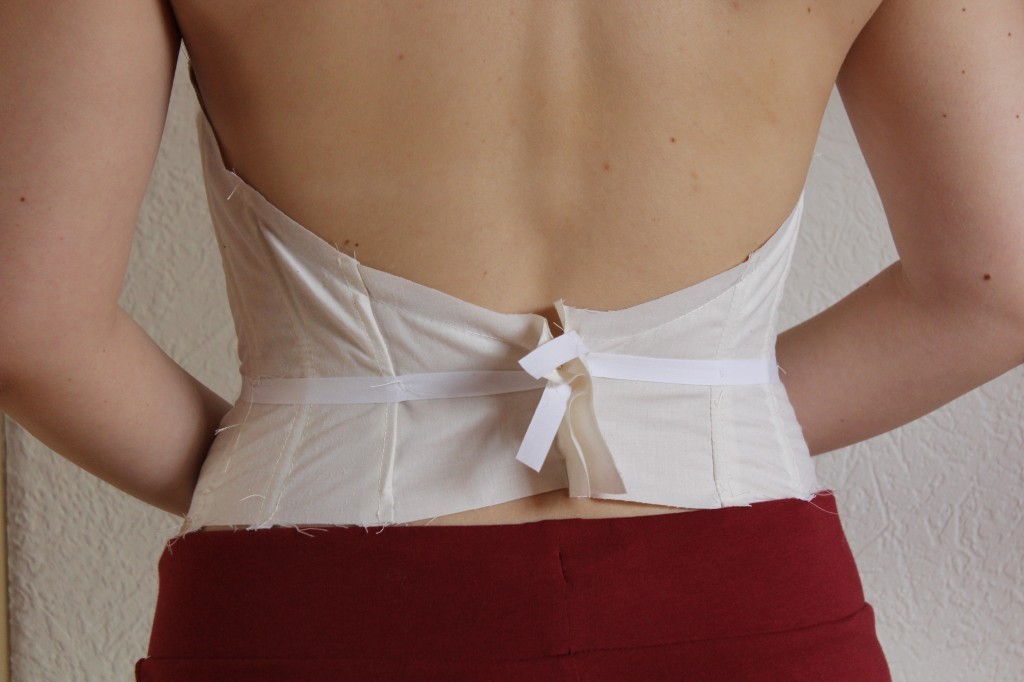
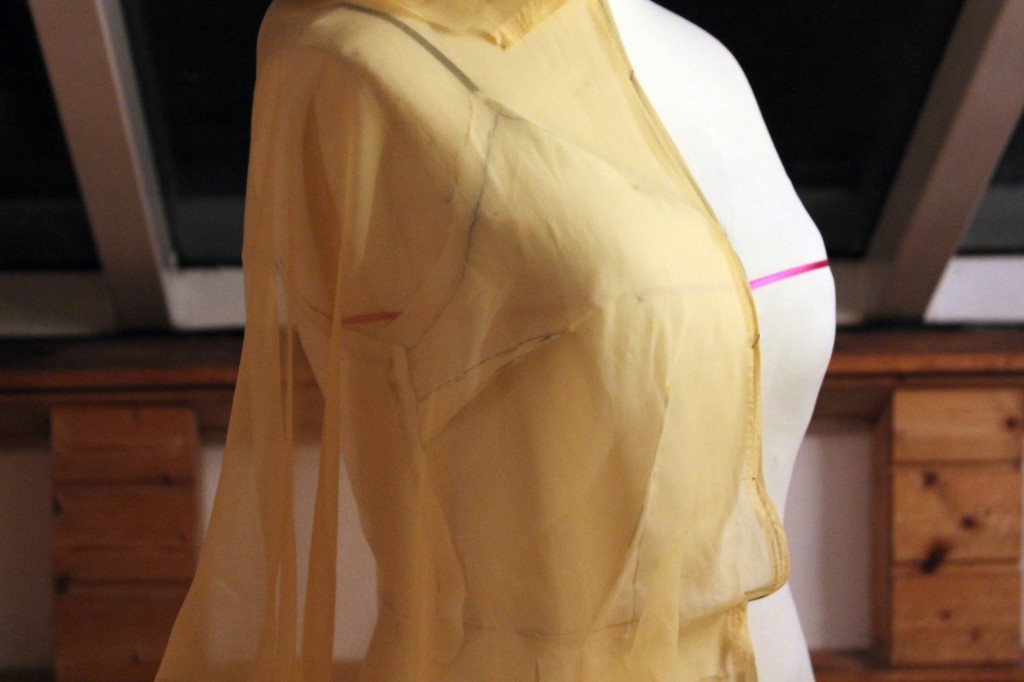
As I mentioned in the previous posts, my backless dress required an alternative solution regarding the understructure. A normal bra wouldn’t do. I always wanted to try and use a couture understructure in a garment and what better garment than a wedding dress, right?

Well, it turned out to be a pretty nerve-wracking process. As far as I know, there are no backless corset patterns out there, so I knew I would deal with a lot of adjustments.

I tried a couple of things. First, I used a corset pattern from a Lingerie Making Book I own. I changed the pattern on paper to get the shape of the back I needed for my dress:wedding dress corset by thisblogisnotforyou.comwedding dress corset by thisblogisnotforyou.com

I muslined it a couple of times, making minor adjustments (one at a time), but it just wouldn’t work. The fit around the bust was horrible, the cup pattern just didn’t work at all. The cups weren’t the typical U shape, but kinda longish and flat and there was no way of working this out.

I then drafted my own cup pattern using my beloved Patternmaking for Fashion Design Book. The fit was much better, but not to my satisfaction. In the picture below you can see some alterations after fitting, e.g. the tiny dart I pinned right under the cup. wedding dress corset by thisblogisnotforyou.com

I had some nice lightweight sew-in bra cups (courtesy of The Stitchery) which unfortunately just wouldn’t fit in my drafted cups. As neither bra cups or muslin worked, I decided to start from scratch yet again.

I kept the bodice pattern of the corset and grabbed an old bra that fit me well. I took it apart, only keeping the bound underwire and padding: wedding dress corset by thisblogisnotforyou.com
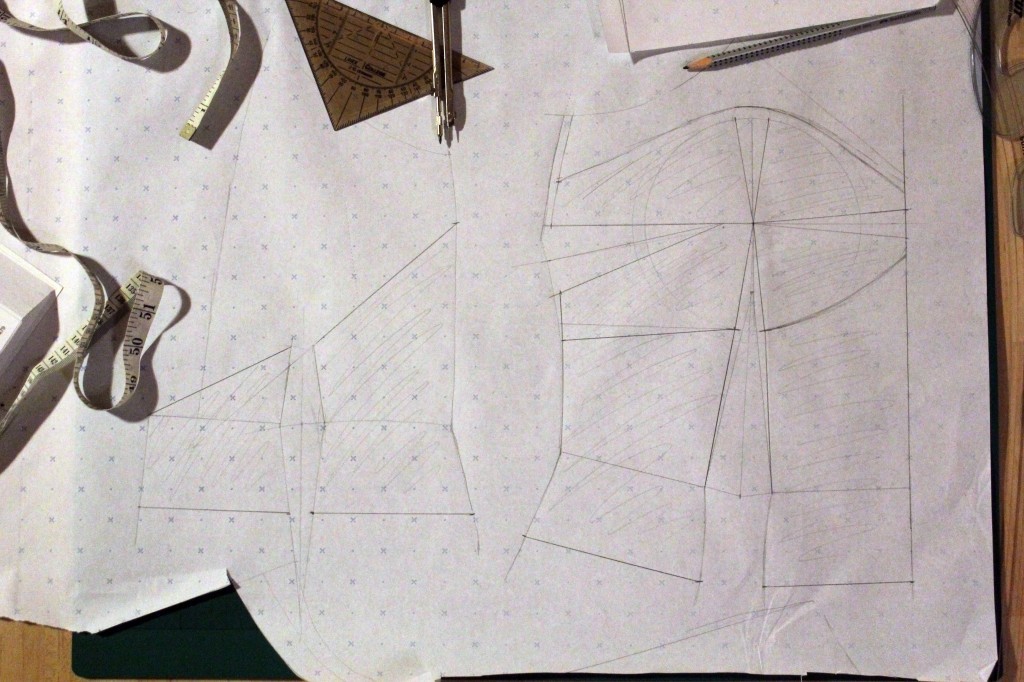
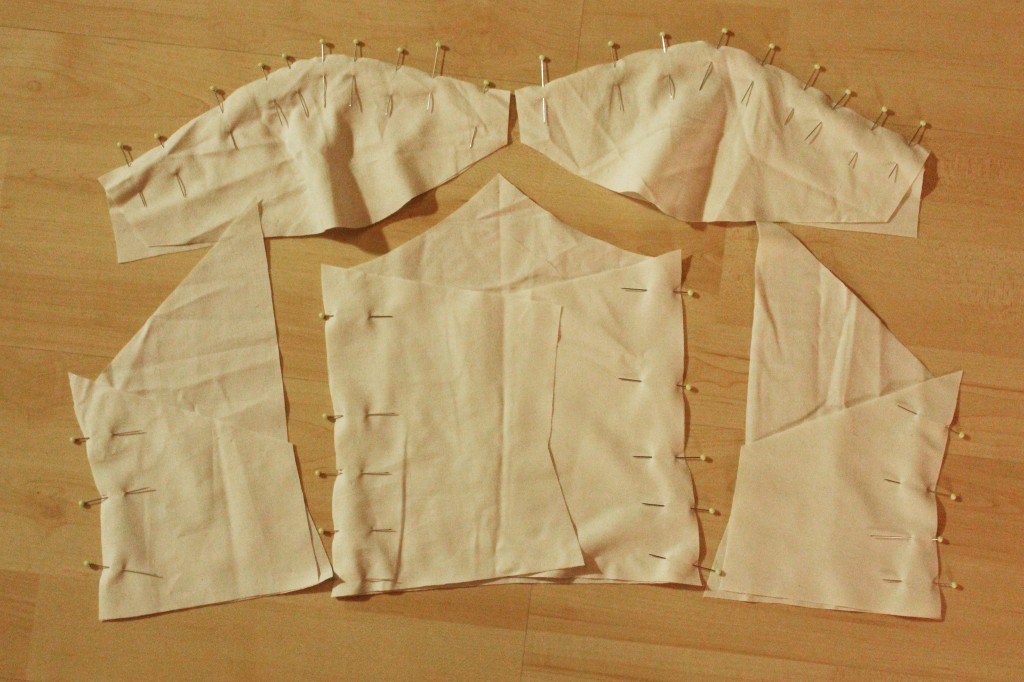
Using the padded cup, I draped some muslin fabric over it and created a cup pattern.wedding dress corset by thisblogisnotforyou.comwedding dress corset by thisblogisnotforyou.com
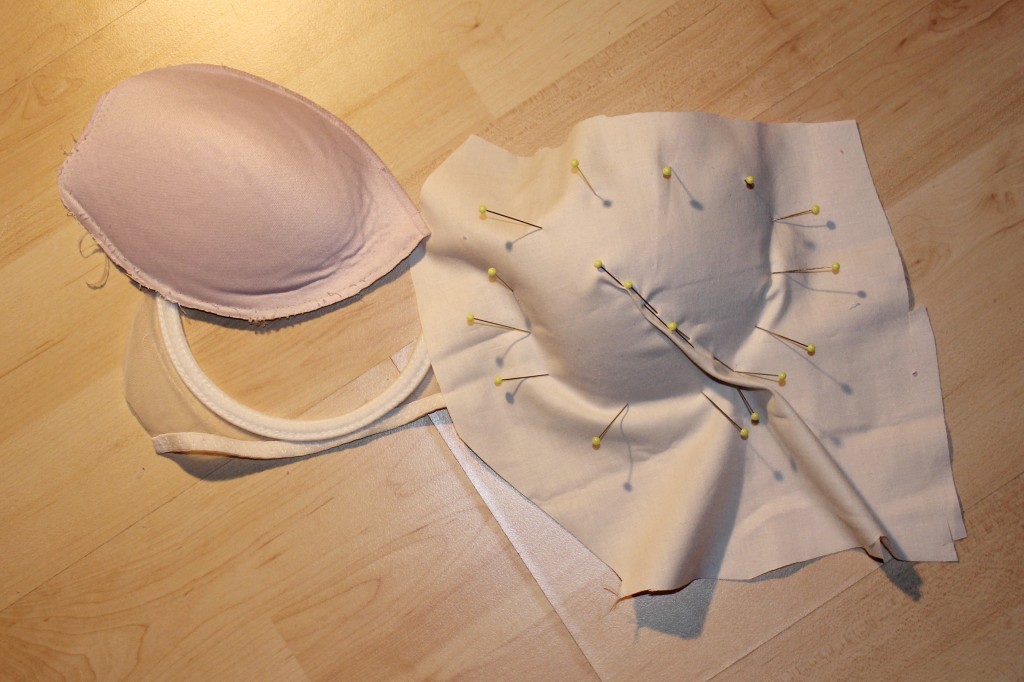
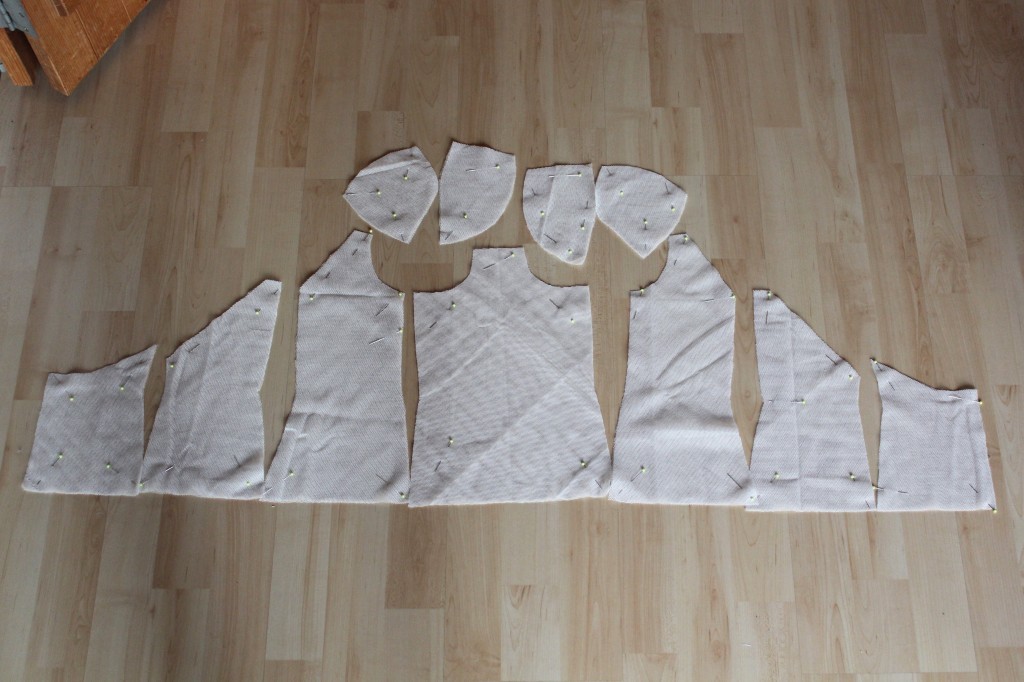
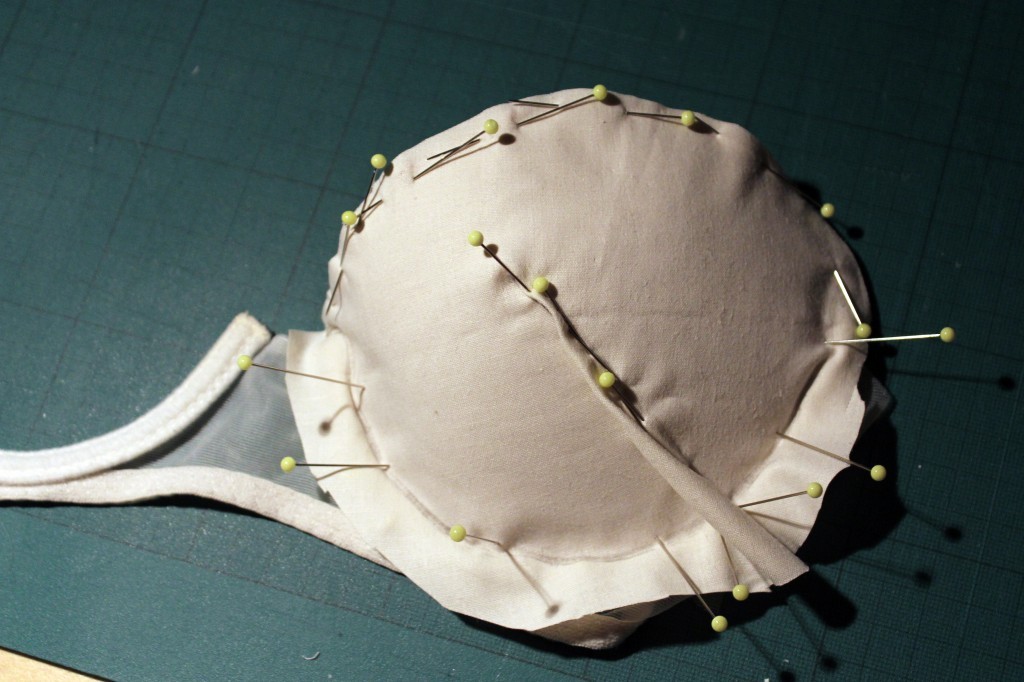
Here’s the finished cup pattern. Later on in the process, I cut up the pattern and added a seam instead on keeping the dart, for a better fit (see next pic).wedding dress corset by thisblogisnotforyou.comwedding dress corset by thisblogisnotforyou.com

Here’s the muslin with lightweight 5mm polyester boning in, a cotton waist stay and padded cups.wedding dress corset by thisblogisnotforyou.com
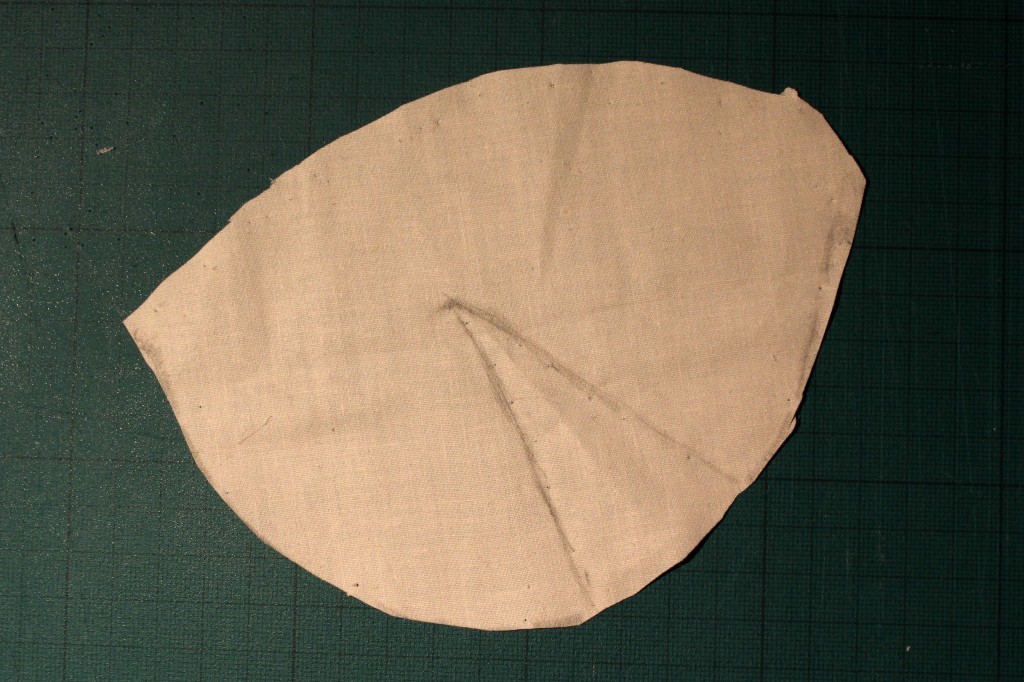
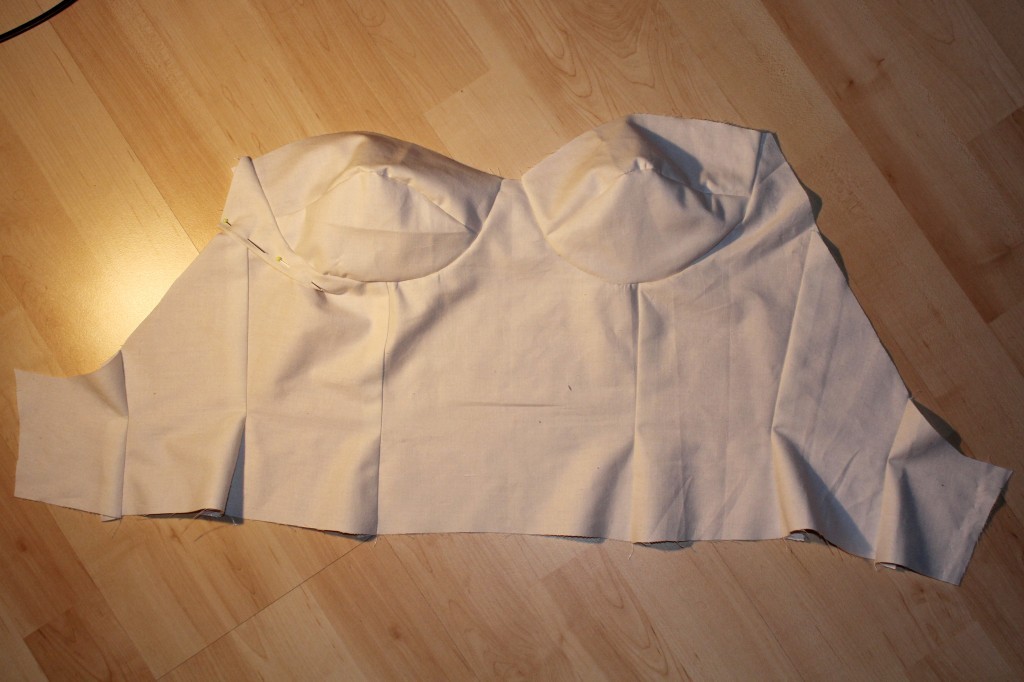
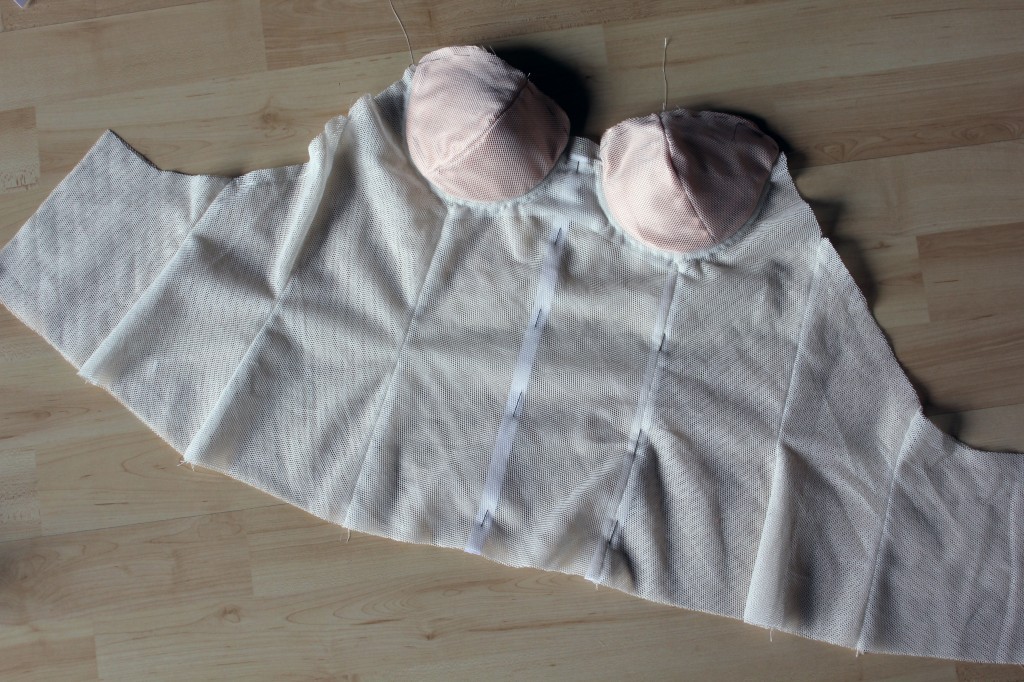
I was happy with the fit so far and only slightly changed the shape of the padded bra cups by adding a dart:wedding dress corset by thisblogisnotforyou.com
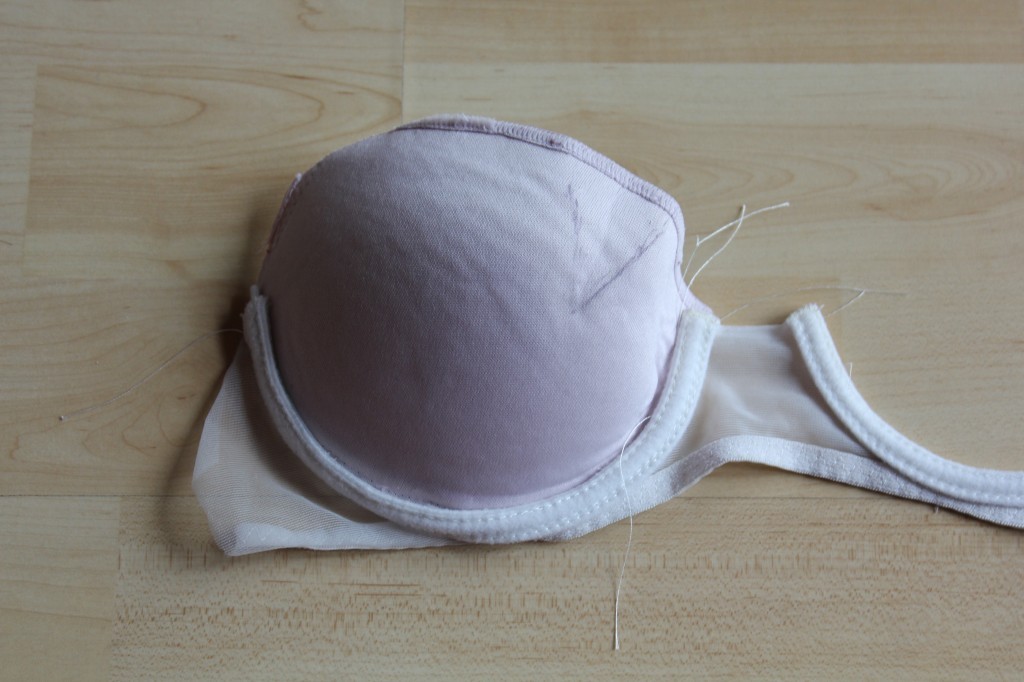
To reduce bulk, I cut out the dart and sewed the edges together by hand.wedding dress corset by thisblogisnotforyou.comwedding dress corset by thisblogisnotforyou.com

On to the corset sewing!

As used in couture understructure, I used 100% cotton bobbinet, also called Swiss Tulle, which is a lightweight, soft tulle fabric with a hexagonal weave. It’s pretty strong and holds the shape very well, doesn’t itch and it’s perfect as a base for adding embellishments in couture dresses.

I bought mine on Goldhawk Road in London. It wasn’t cheap but much cheaper than when you order some online.

wedding dress corset by thisblogisnotforyou.com
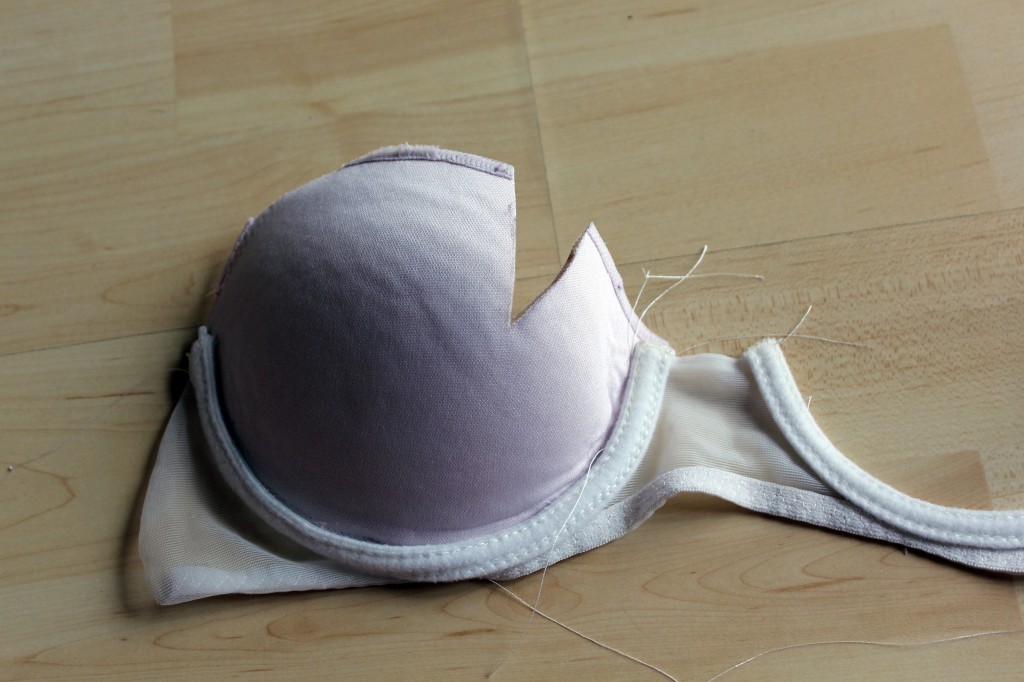
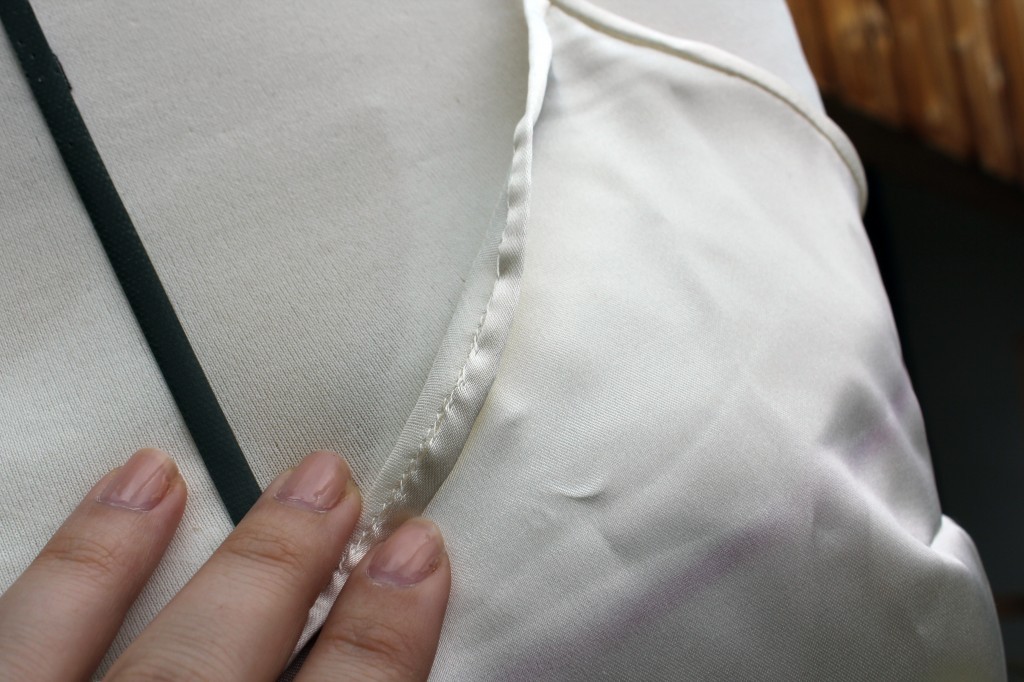
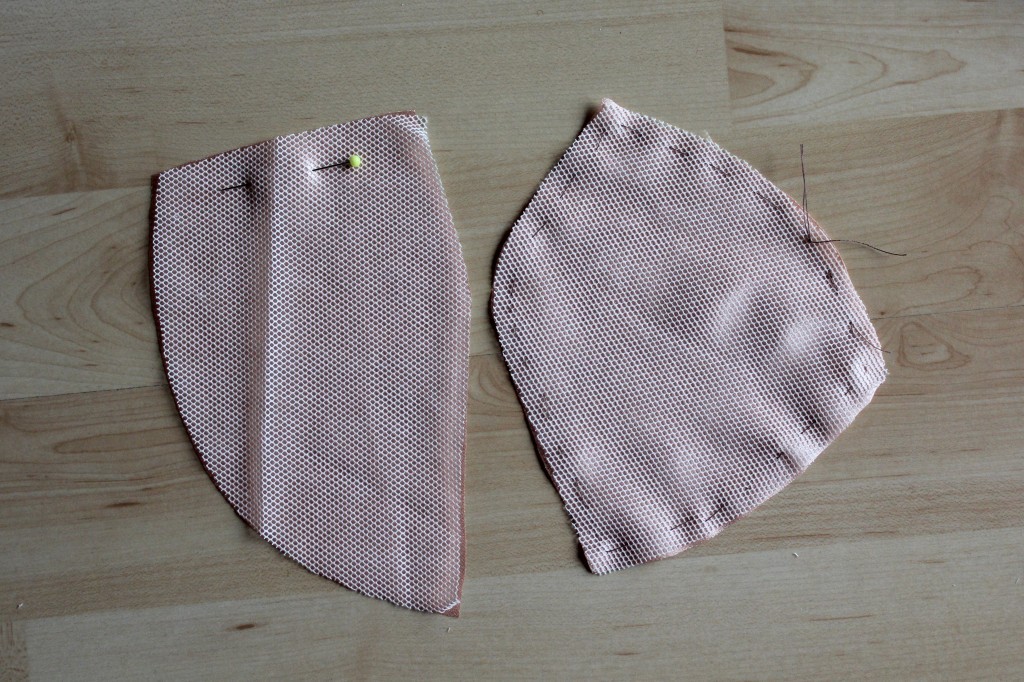
For extra strength and to prevent stretching, I cut out too layers, one on the bias and one on grain. You can see the difference in the picture below:
wedding dress corset by thisblogisnotforyou.com

Here’s everything pinned together and ready to sew:wedding dress corset by thisblogisnotforyou.com
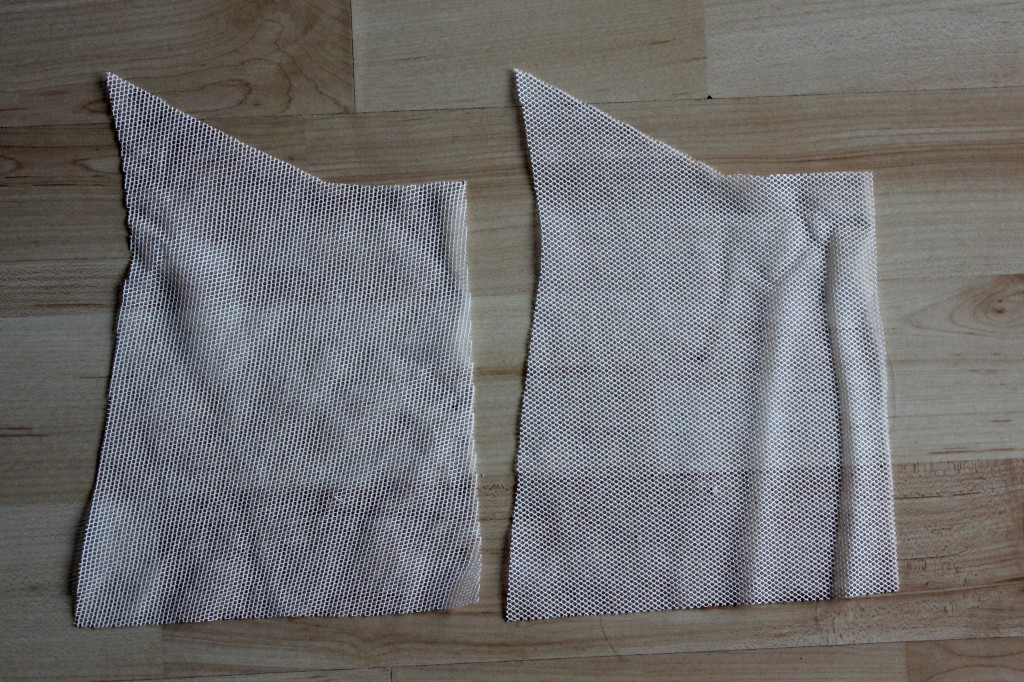
For the cups I decided to use some of my lining silk fabric to underline the bra cups (just for prettyness nothing else). As the silk was very delicate and slippery I handbasted the two fabric together before sewing.wedding dress corset by thisblogisnotforyou.comwedding dress corset by thisblogisnotforyou.comwedding dress corset by thisblogisnotforyou.com

The assembled cups. The curved seam allowance is clipped in a round shape for an extra smooth curve and handbasted to the underlining.wedding dress corset by thisblogisnotforyou.com
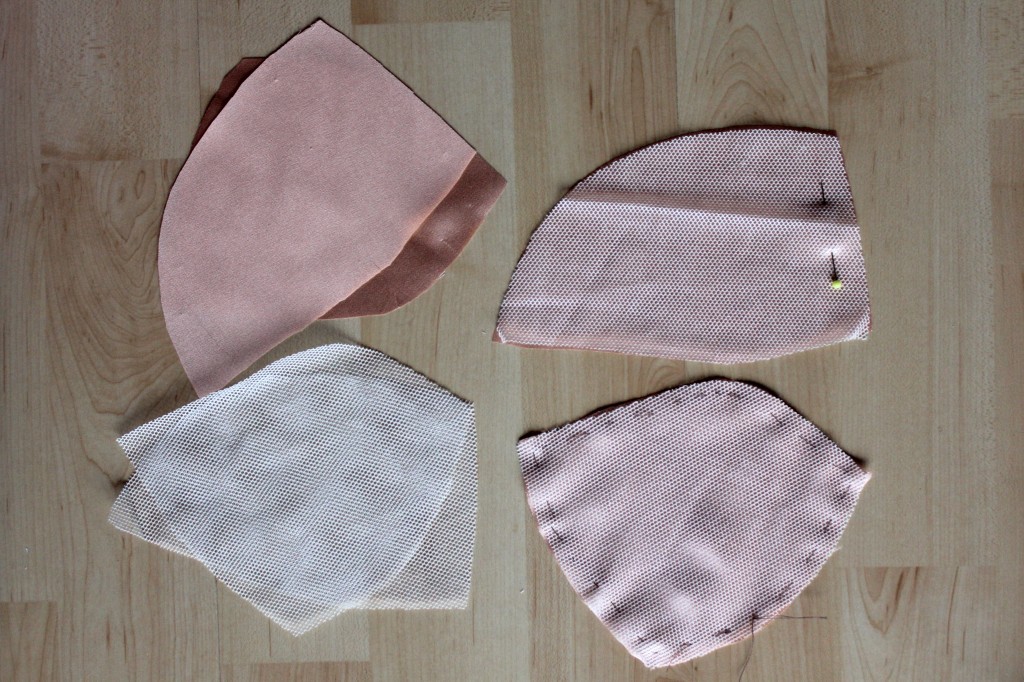
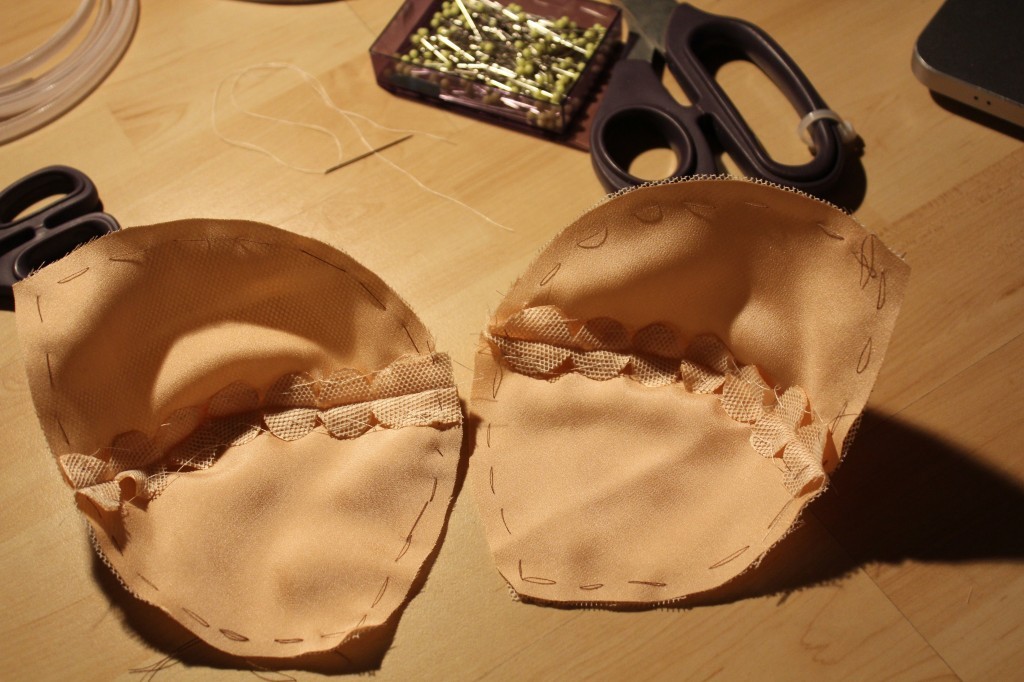
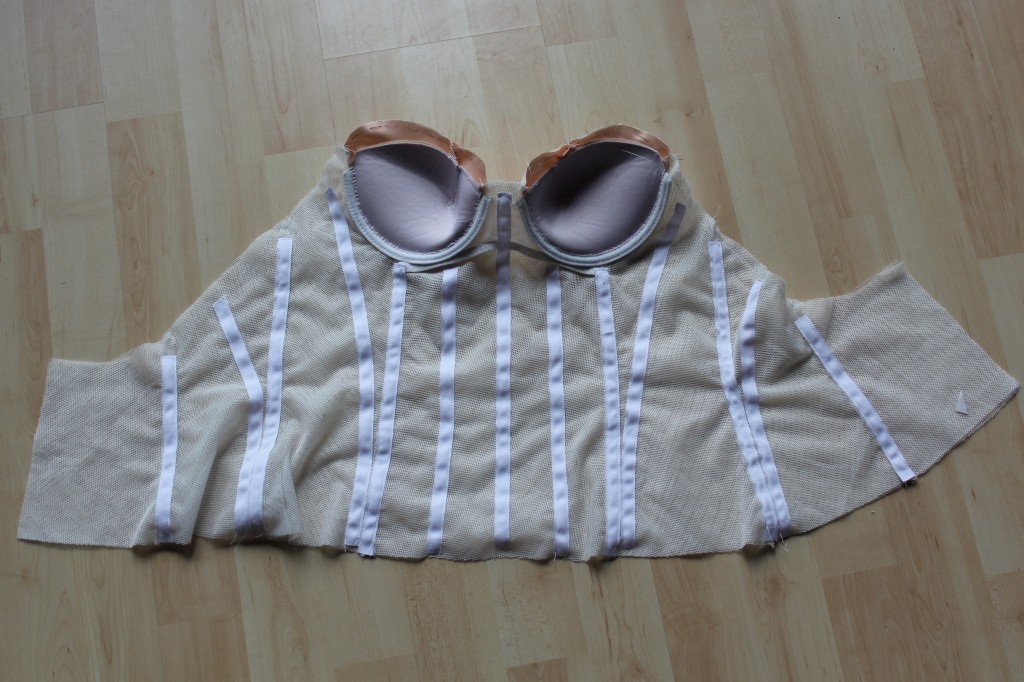
I then added the underwire which was also handsewn into the corset.wedding dress corset by thisblogisnotforyou.comwedding dress corset by thisblogisnotforyou.com
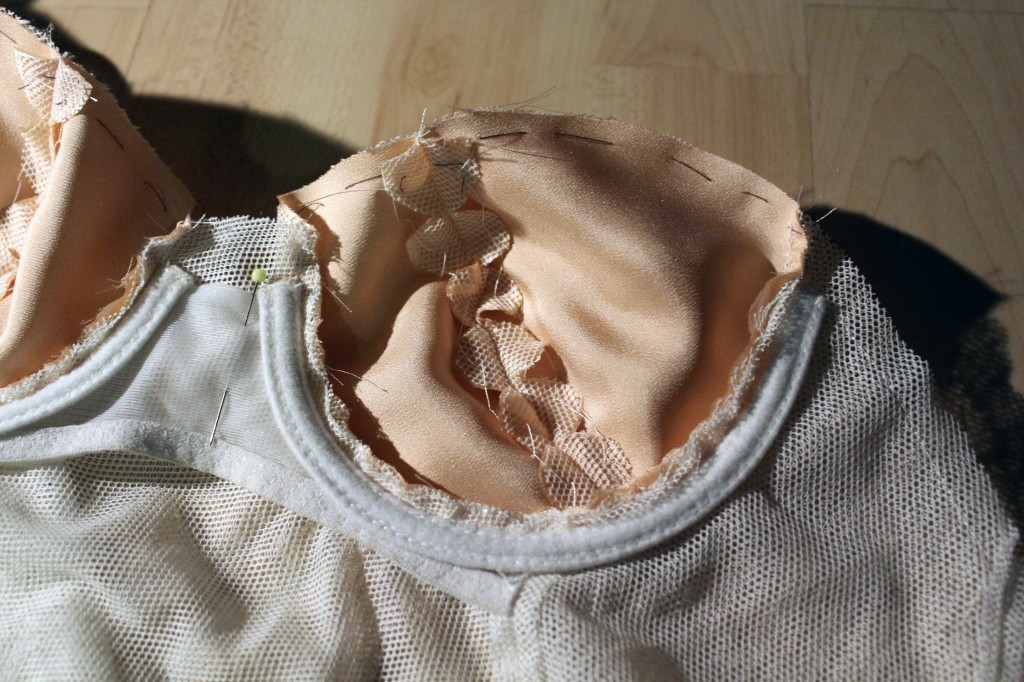
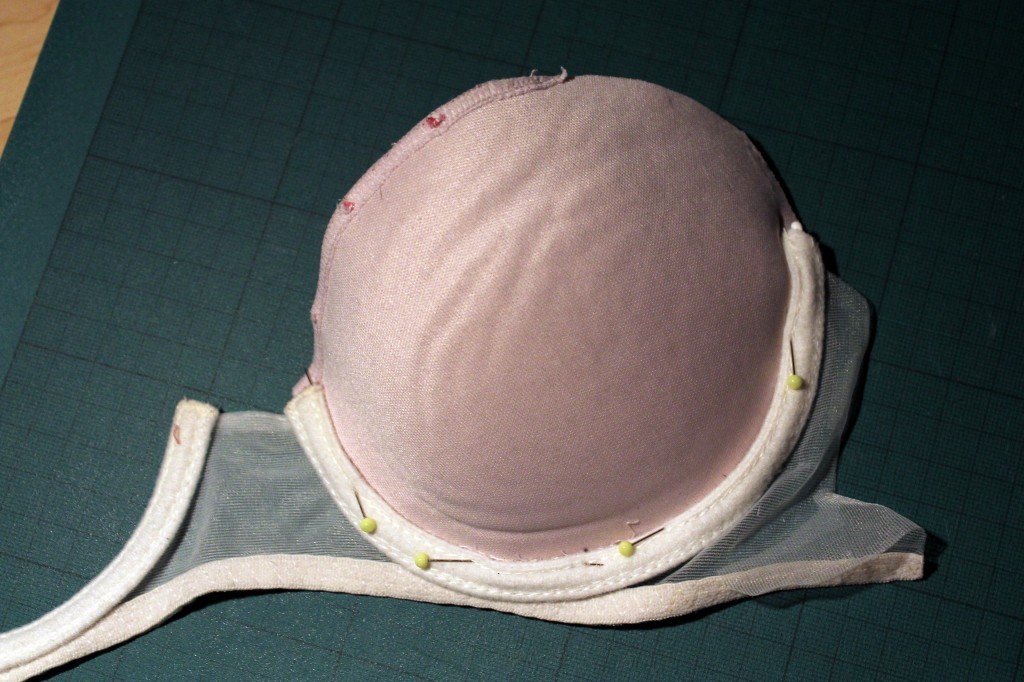
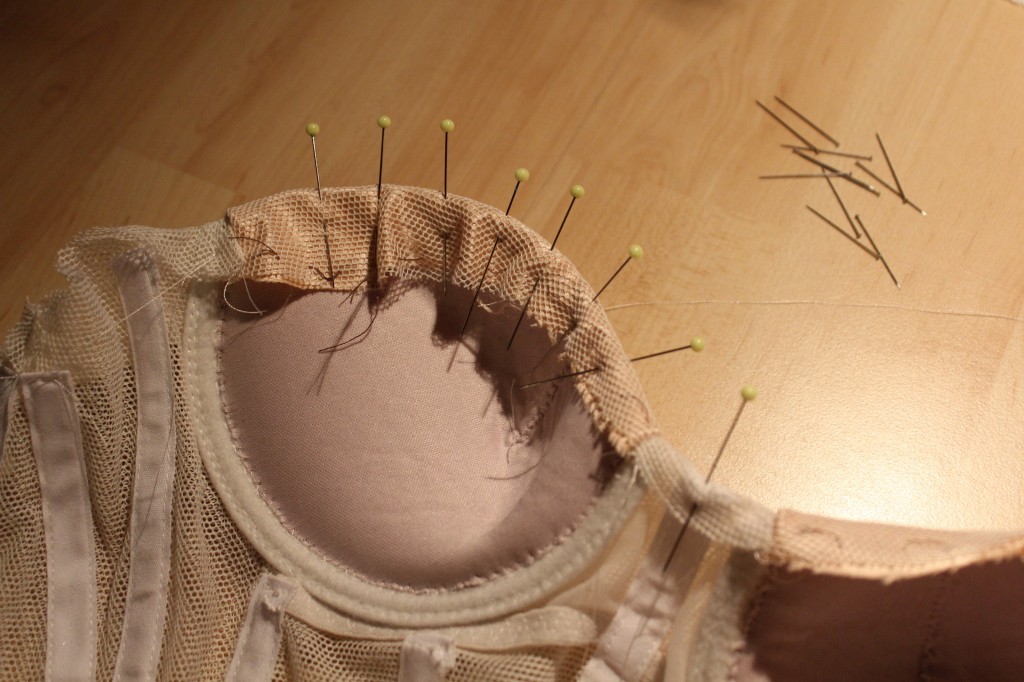
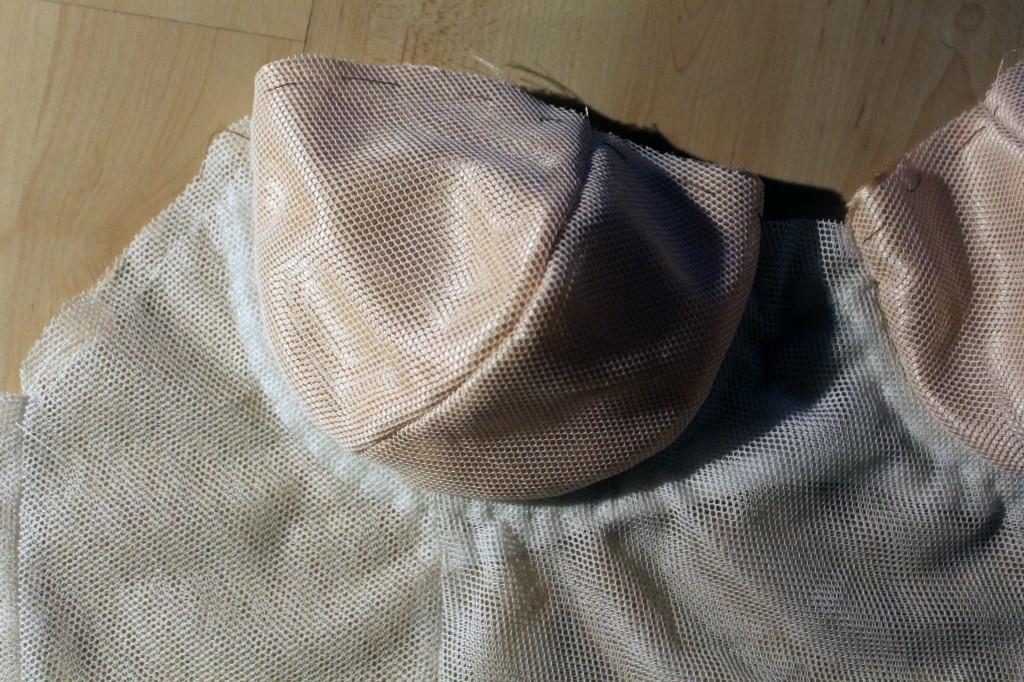
And in go the padded cups! (More handsewing!)wedding dress corset by thisblogisnotforyou.com
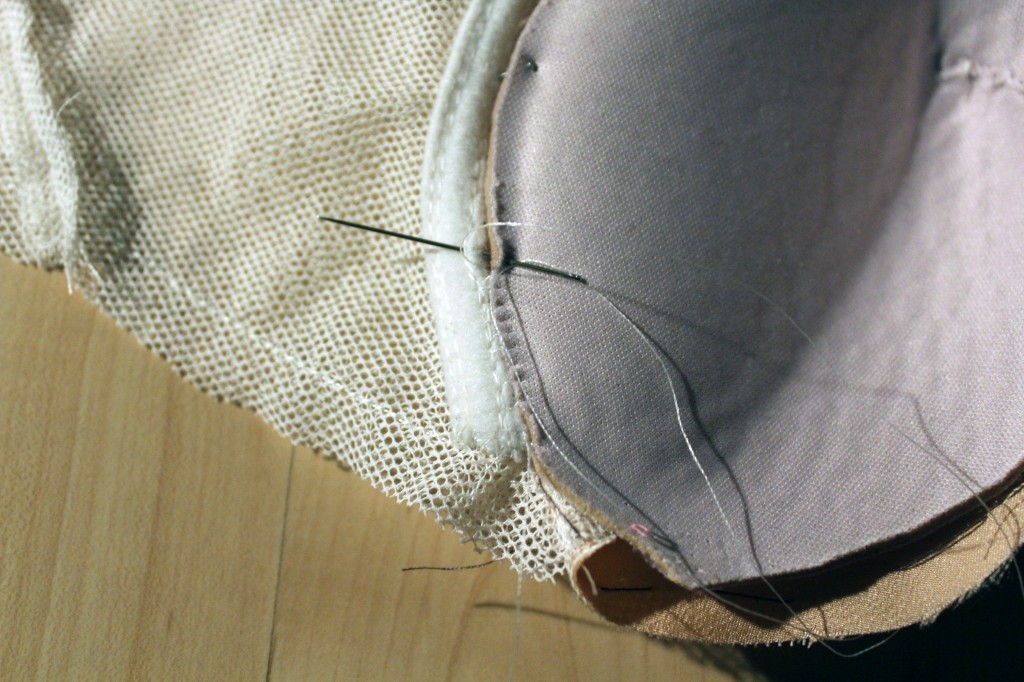
Just as a side note: I stay-stitched the curved seams to prevent stretching out. Here you can also see my cotton ribbon pinned on to repare the boning channels.
wedding dress corset by thisblogisnotforyou.com

Looks nice so far, right?wedding dress corset by thisblogisnotforyou.com
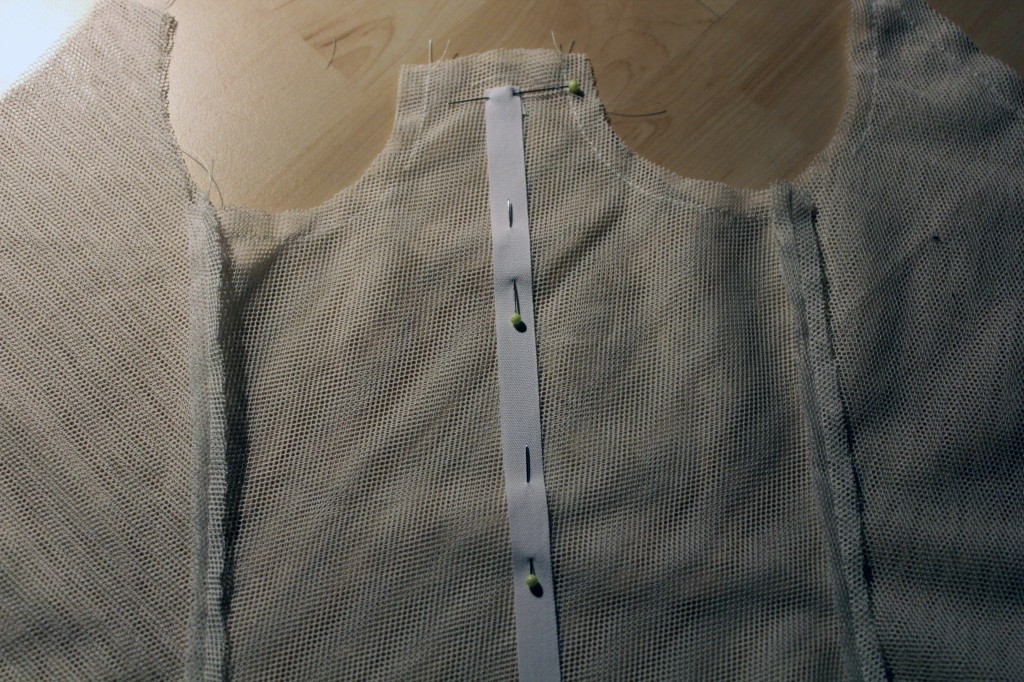
The channels for the boning are sewn onto the corset.wedding dress corset by thisblogisnotforyou.comwedding dress corset by thisblogisnotforyou.com
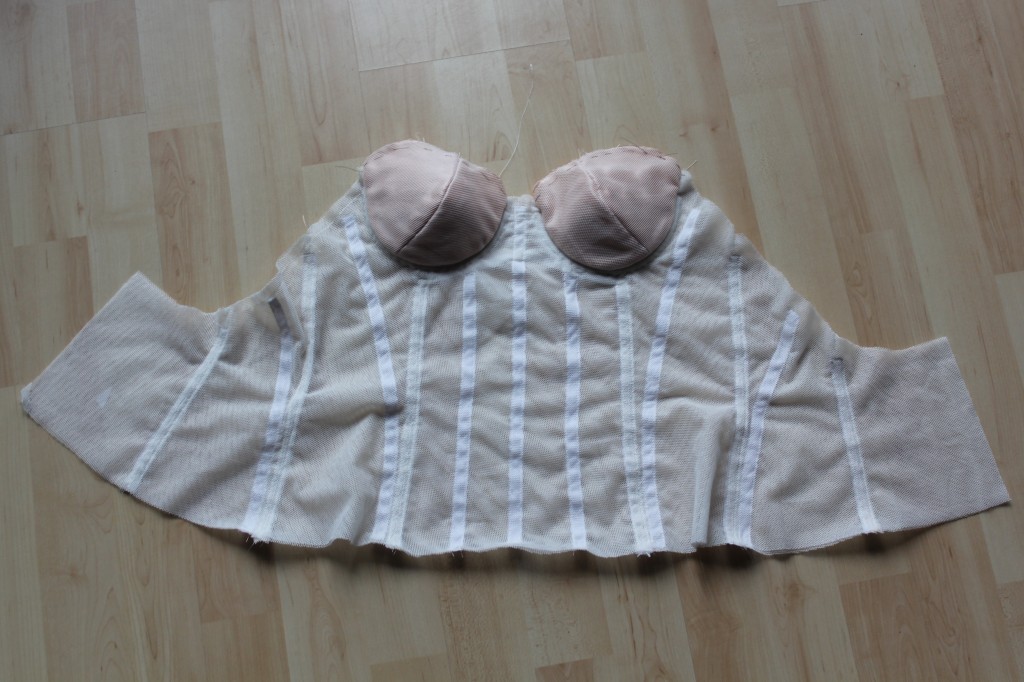
I used two different width of polyester boning (courtesy of The Stitchery). As I am using very lightweight fabrics for my dress, steel boning would’ve been too heavy and bulky for the cause.wedding dress corset by thisblogisnotforyou.comwedding dress corset by thisblogisnotforyou.comwedding dress corset by thisblogisnotforyou.com
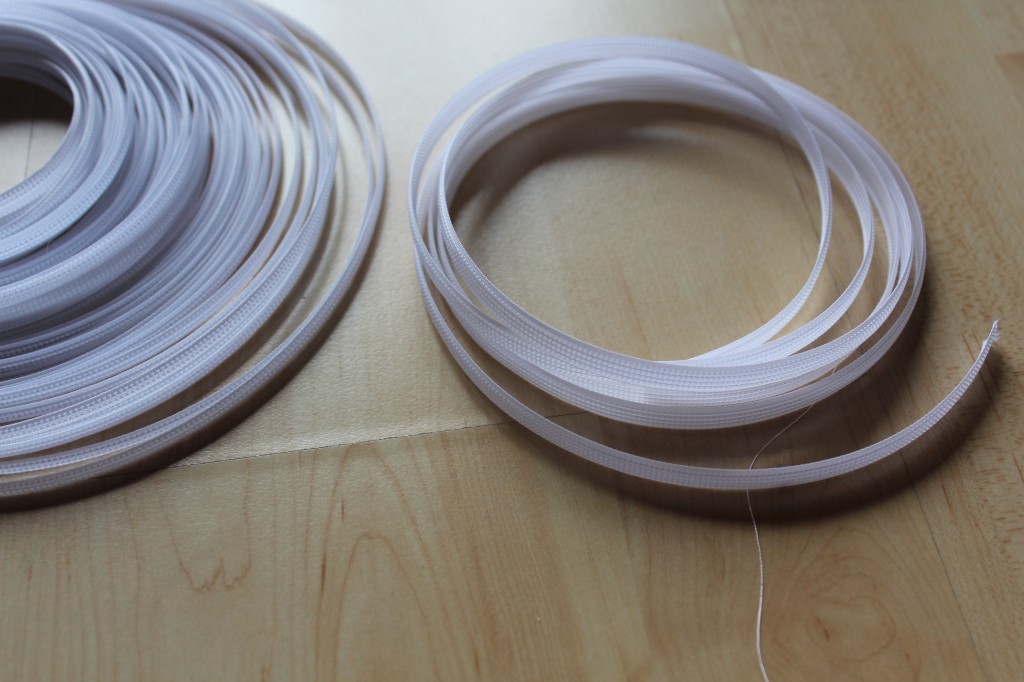
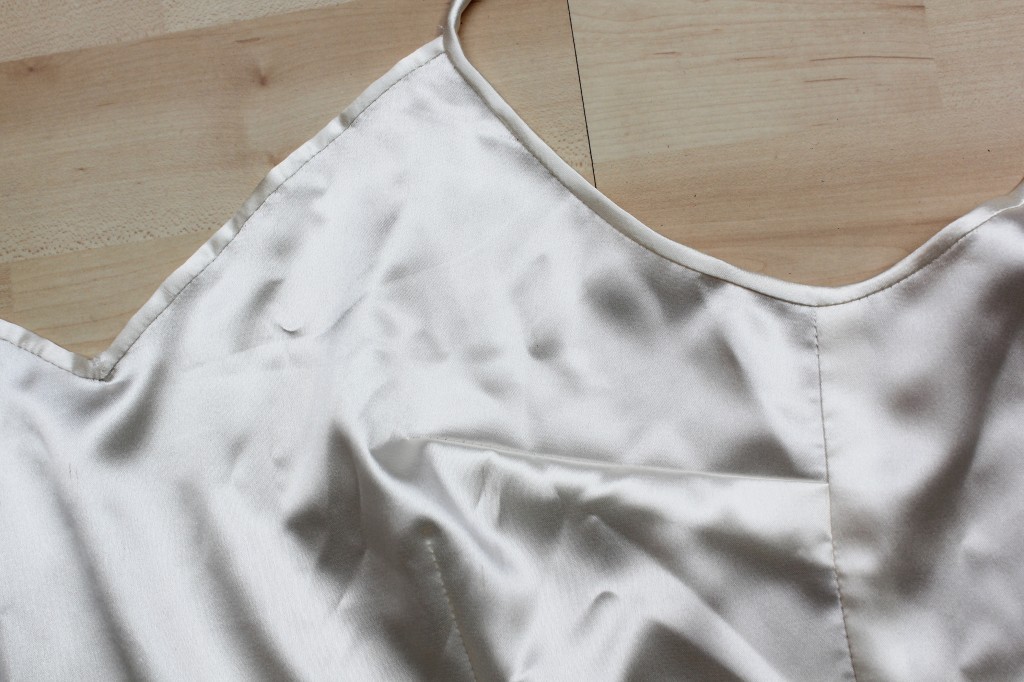
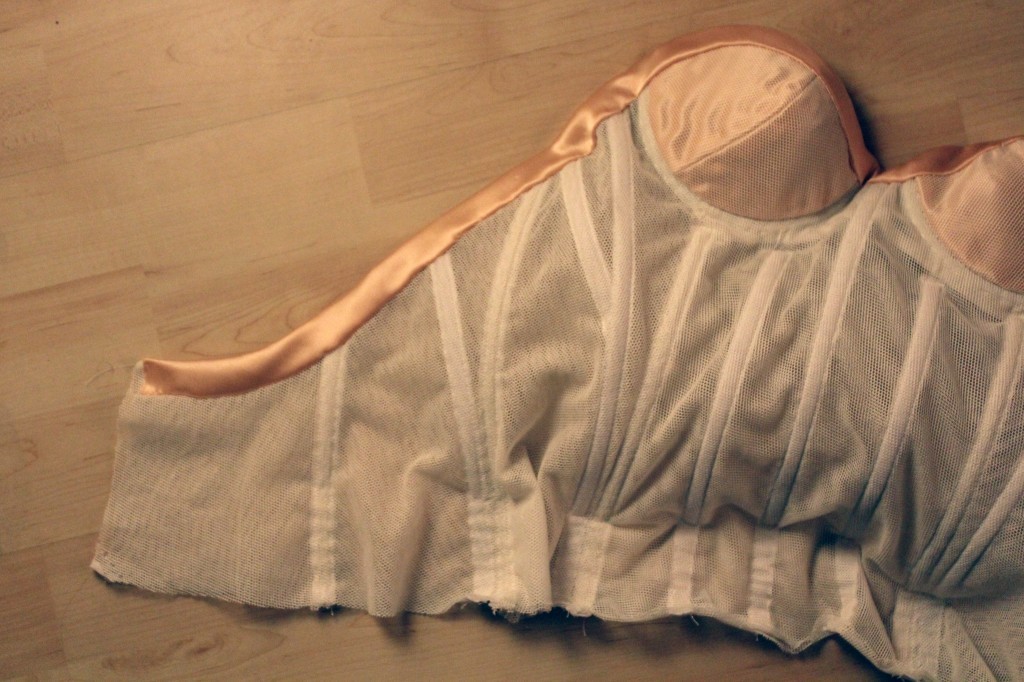
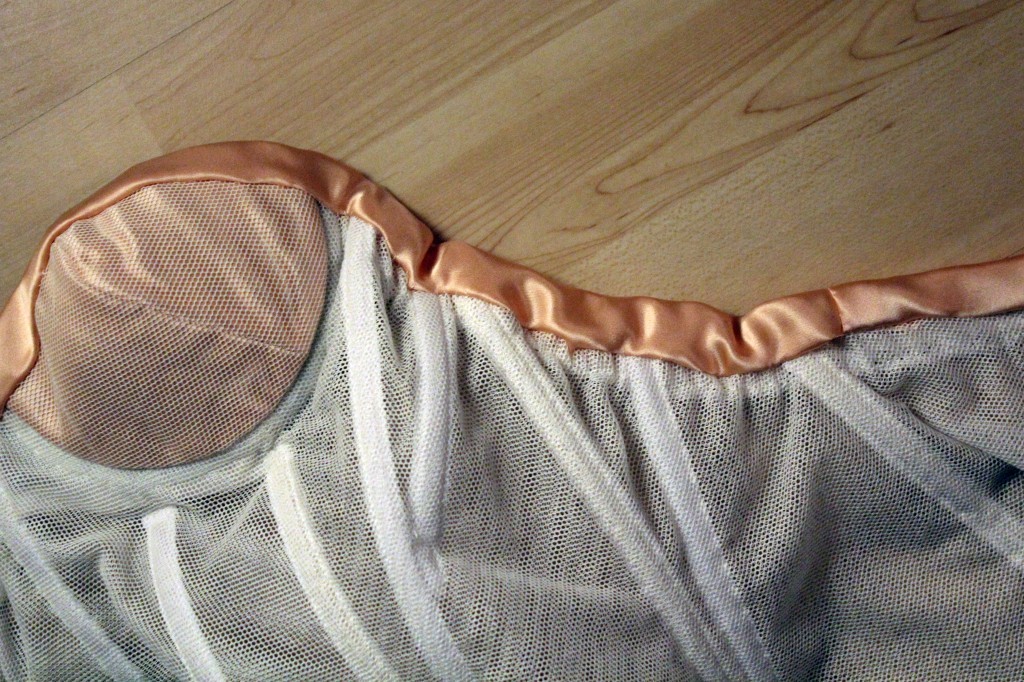
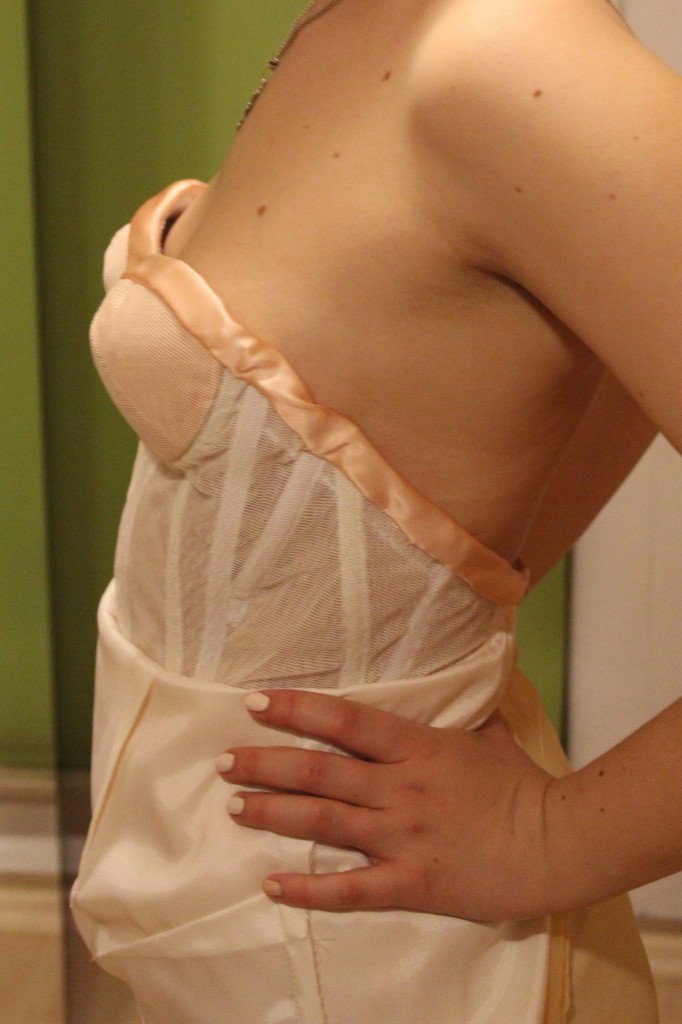
Neatening the neckline before attaching the silk bias binding strip with handstitches:wedding dress corset by thisblogisnotforyou.com
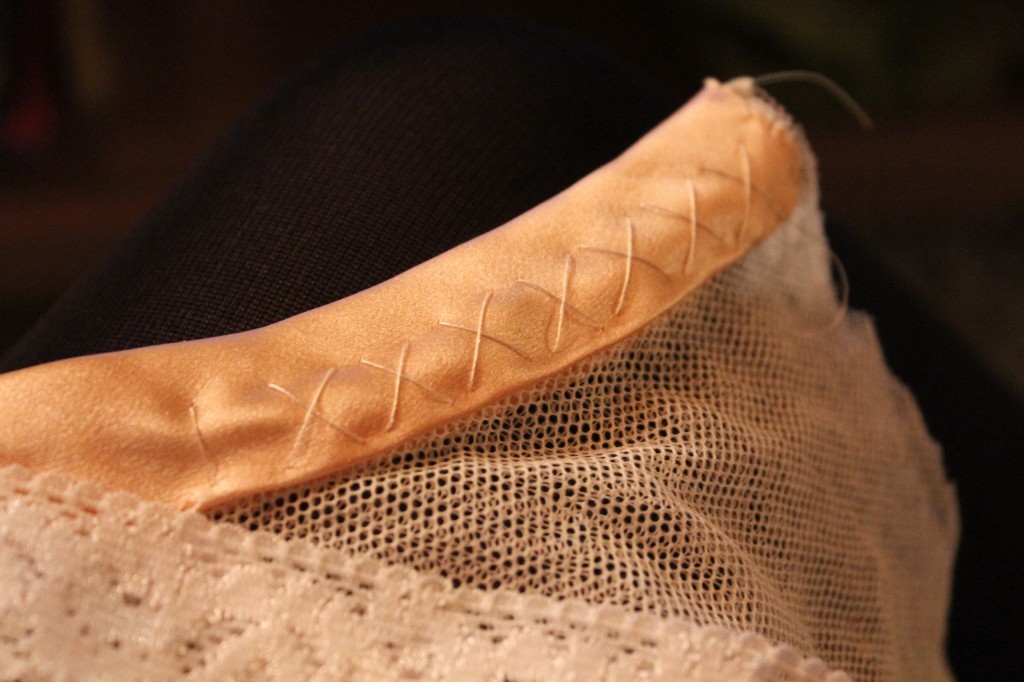
There was the issue of preventing the corset from collapsing forward as I had no straps and hardly any structure to balance it out in the back. I used some pretty lace elastic to build enough tension to keep everything in place.wedding dress corset by thisblogisnotforyou.comwedding dress corset by thisblogisnotforyou.comwedding dress corset by thisblogisnotforyou.com
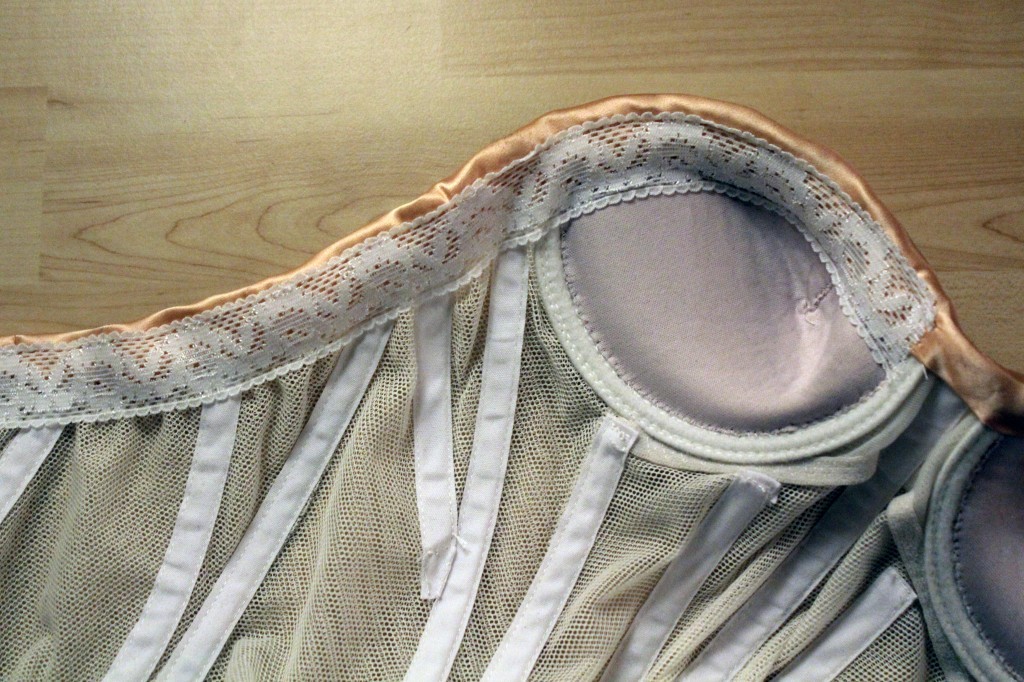
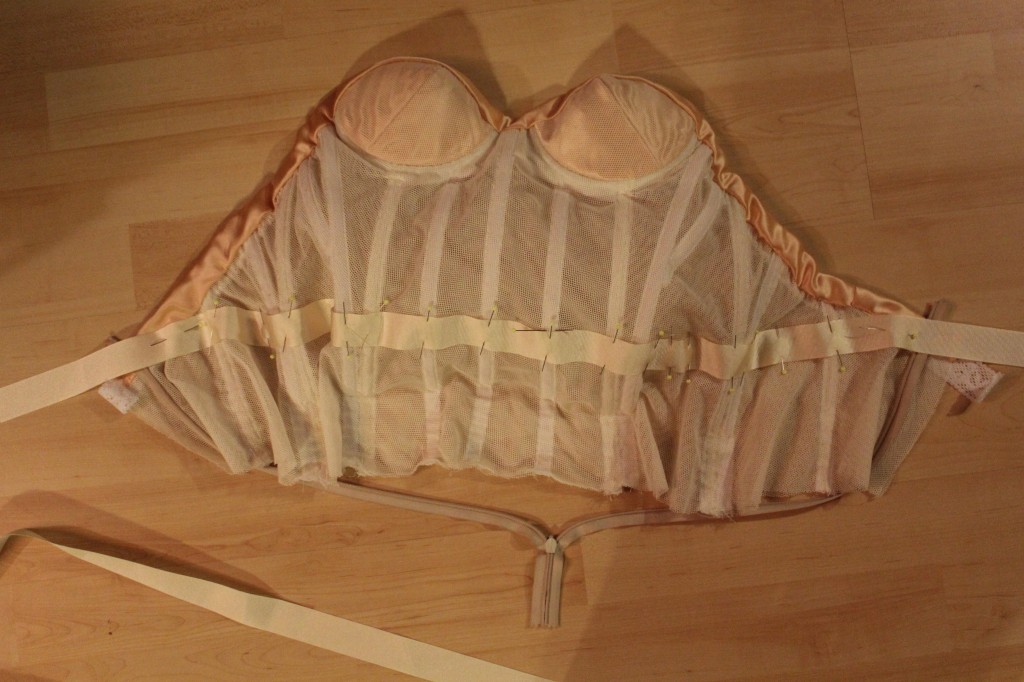
Last but not least, I added the waist stay. It’s a 2,5cm wide grosgrain ribbon that I sewed onto the boning channels.wedding dress corset by thisblogisnotforyou.com
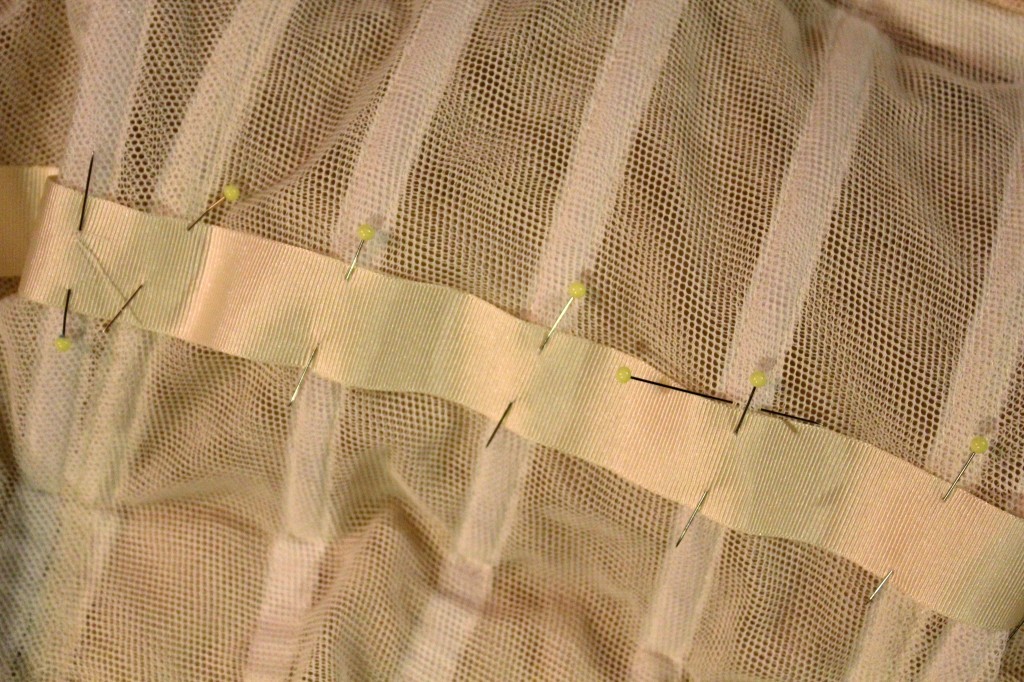
It not only helps to keep everything in place but is also super pretty:wedding dress corset by thisblogisnotforyou.com

Sounds all pretty good so far, eh? After a couple of weeks of working on this, I ended up with a pretty decent corset.

Well. I’m afraid this isn’t a happy story after all.

(No, my dog didn’t eat it. I don’t have a dog, although I’d love to.)

wedding dress corset by thisblogisnotforyou.com

As I mentioned before,  I am using very lightweight silk fabrics for my dress. Once the dress muslin and corset were finished, I basted the corset into the dress and tried it on. It just didn’t work. The corset was fine, the dress too, but they, at least, surely wouldn’t get married. The corset was way too bulky, not skin-tight enough around the bust (which is near impossible without a back and straps). Also, although I used the lightweight polyester boning, it showed through the fabric. The actual fabric was even more lightweight than the muslin fabric, so this could only get worse.

You can sort of see the problem in the photographs, but it was even worse IRL. Sooo, after a moment of uncontrolled anger and despair I realised I had to let this corset go. It would definitely not be part of the wedding dress.

Bummer, eh?

wedding dress corset by thisblogisnotforyou.com

Some of you planning to wear similar backless dress in the future might want to know how I dealt with this situation in the end. After anger and despair changed into dissapointment and eventually acceptance, I searched Amazon for about an hour and decided to get a self adhesive bra for 7€ to try and see if this was a possible solution. As it was quite cheap I ordered two different sizes, to be on the safe side.

I was very doubtful at first, but this bra actually worked. It even is the right exact same colour of my lining fabric. I wore one a whole day just to see if it would stay on and it did. They’re reusable and I kept the other one as backup on the big day. I didn’t need it though. It feels weird at first, but I got used to it. It only required a bit of boob hugging every once in a while when no one was looking, whenever I felt it was coming loose at the edges. So for someone small-chested like me, this is actually a decent solution.bra

Wow, you read through the whole thing! Thanks for that! Hope you enjoyed the post and don’t forget to enter the GIVEAWAY this week!

Special thanks to The Stitchery, who sponsored some of the dress and corset supplies and notions such as boning, ribbons, bra cups, button band and zip. You rock!

xx

Charlie


Happy sewing!

facebook/bloglovin/pinterest
twitter/instagram

Stay in touch!

Win a WE ARE KNITTERS Huayna Tee! (+ 20% discount code)

we are knitters huayna tee giveaway by thisblogisnotforyoucom
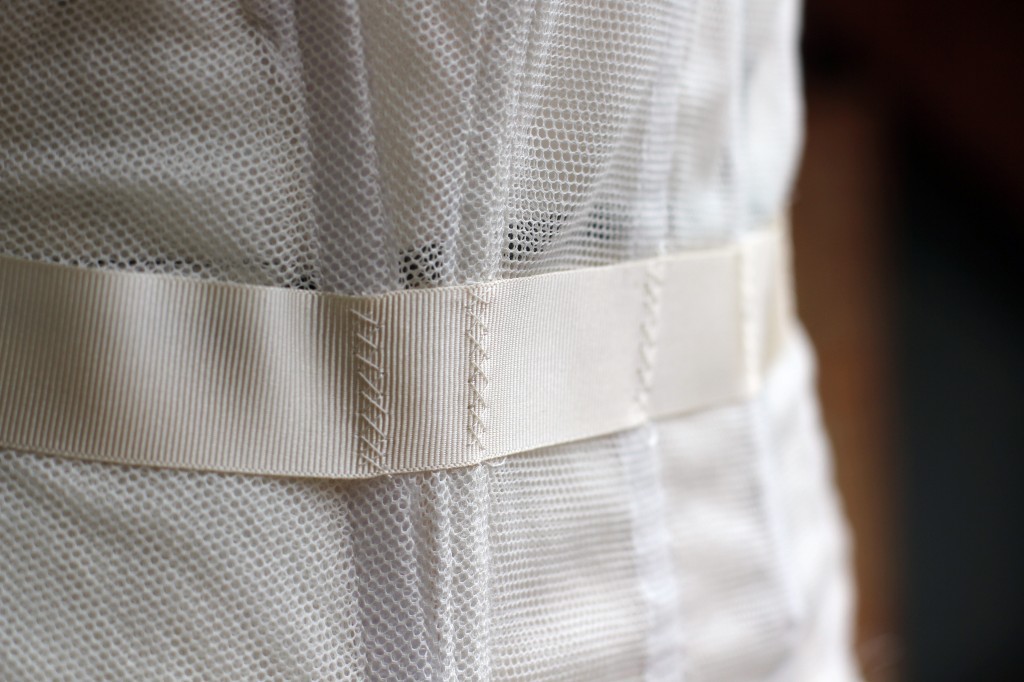
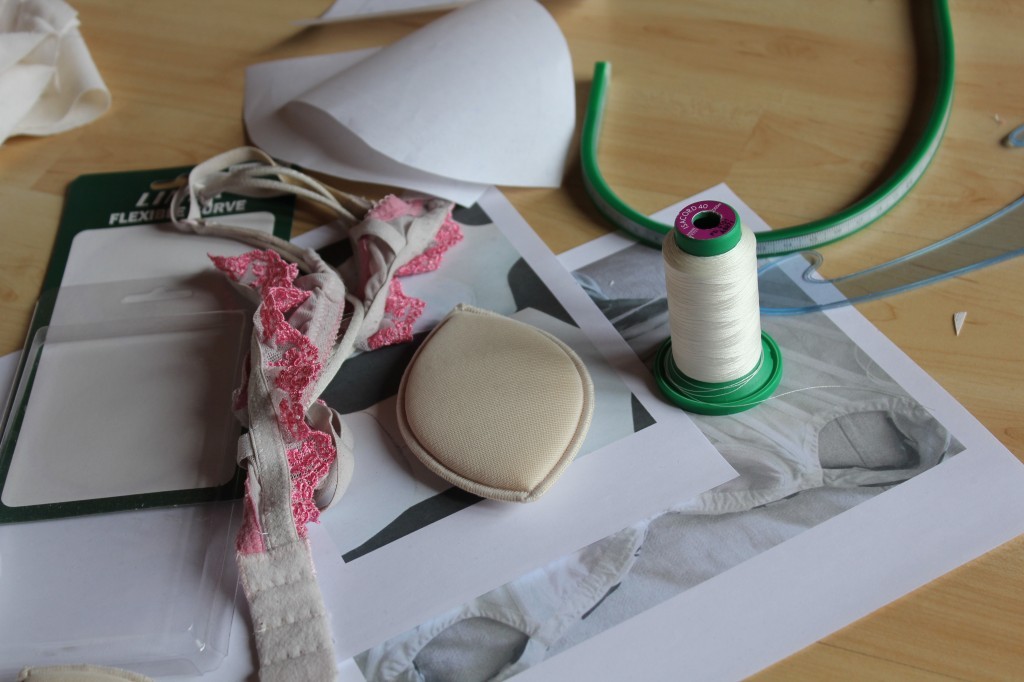
So excited to bring you this giveaway!

I teamed up with the awesome folks of WE ARE KNITTERS who offered to sent me a knitting kit to test. I chose the HUAYNA TEE in Deep Blue as it’s a perfect summer knitting project (in my favourite colour!).

we are knitters huayna tee giveaway by thisblogisnotforyoucomThe kit contains:

* 3 BALLS OF 100% PIMA COTTON (100 GR.) *
* WOODEN KNITTING NEEDLES SIZE 8 *
* THE PATTERN *
* A SMALL KNITTER’S SEWING NEEDLE *
* EMBROIDERED LABEL *
* WAK PACKAGING *
we are knitters huayna tee giveaway by thisblogisnotforyoucom

The Deep Blue wool included in this kit, is the colour you see in the pics. The wool is a dreamy high-quality 100% cotton wool from Peru. As it’s very light and super-soft on your skin it’s the perfect wool for a summer project. It’s lovely to knit with and the colour is simply gorgeous: A mix between a royal blue and a deep teal shade.

The HUAYNA TEE kit is intermediate level. I found the instructions very clear and the pattern is pretty straightforward. It’s not too complicated for beginners, and the lace part with drawings keeps it interesting enough for more advanced knitters. The boxy cut is easy to fit. I haven’t finished mine yet, but I look forward to wearing it on those cool summer nights and colder rainy days. we are knitters huayna tee giveaway by thisblogisnotforyoucom

YOUR FRIENDS ARE GOING TO BE ASKING TO BORROW THE KNIT SHIRT HUAYNA TEE THIS SUMMER. YOU CAN BE A GOOD FRIEND AND SHARE IT, OR YOU CAN BE THE BEST FRIEND EVER AND KNIT IT FOR THEM TO ENJOY.

we are knitters huayna tee giveaway by thisblogisnotforyoucomwe are knitters huayna tee giveaway by thisblogisnotforyoucom

WE ARE KNITTERS are giving away one HUAYNA TEE kit in Deep Blue!

For a chance to win simply subscribe to their newletter here:

ENTER GIVEAWAY

The giveaway is open to everyone from the US, Canada and Europe. It ends on Friday, 1 July, at midnight (UTC) and I will annouce the winner on my blog on Saturday, 2 July.

If you don’t want to bet on your luck or found something else on their website you like, you can use the discount code THISBLOG4WAK to get 20% off on all WAK stuff! The code will also expire on 1st of July.

Let me know what you think and share your experience with WAK kits! Have you used one of their kits or yarns before? What’s your favourite summer knitting project?

xx

Charlie

Please note: A winner will be selected at random from all subscriptions entered before midnight on 1 July 2016 and the winner will receive the prize described above. There is no cash alternative, and your prize is non-negotiable, and not refundable. If the prize isn’t claimed, another winner will be selected at random.


Happy knitting!

facebook/bloglovin/pinterest
twitter/instagram

Stay in touch!

Wedding Dress Part III: Creating the Pattern & Muslin

wedding dress muslin by thisblogisnotforyou.comSoo, here we go with the next part of my wedding dress series!

Today it’s all about muslining and pattern making – I know some of you just want to see the final dress, but before I finished my dress I had to make a pattern and muslin. That’s just the logical order of things. Sorry, folks.

I didn’t use a ready made pattern. Instead I decided to base my dress on a Jenny Packham design and draft it myself.

I’m not a big fan of muslins, but since we’re talking wedding dresses it’s better safe than sorry. Also, as I created the pattern from scratch I had to muslin it for a good fit. Sorry for the mediocre photography, btw. This was done in a lot of late night sessions, and I was so focussed on getting the job done, I didn’t care much about the pics at that time.
wedding dress muslin by thisblogisnotforyou.com

I needed to make a muslin anyway, so I decided to drape my bodice instead of flat drafting with paper and pencil. I had a very precise vision in mind and draping gave me much more control over shapes and silhouette. My dressform is padded to my size (sort of) which also was pretty convenient for the task at hand.

I started by outlining the shape of the spaghetti top on my dressform. I used sticky florist’s tape for that. You can see it through the muslin/cotton fabric which helps a lot.

I cut a rectangle and aligned it with the centre front. Starting from there I smoothed the fabric over the bust and created darts by pinning away the excess fabric:wedding dress muslin by thisblogisnotforyou.com
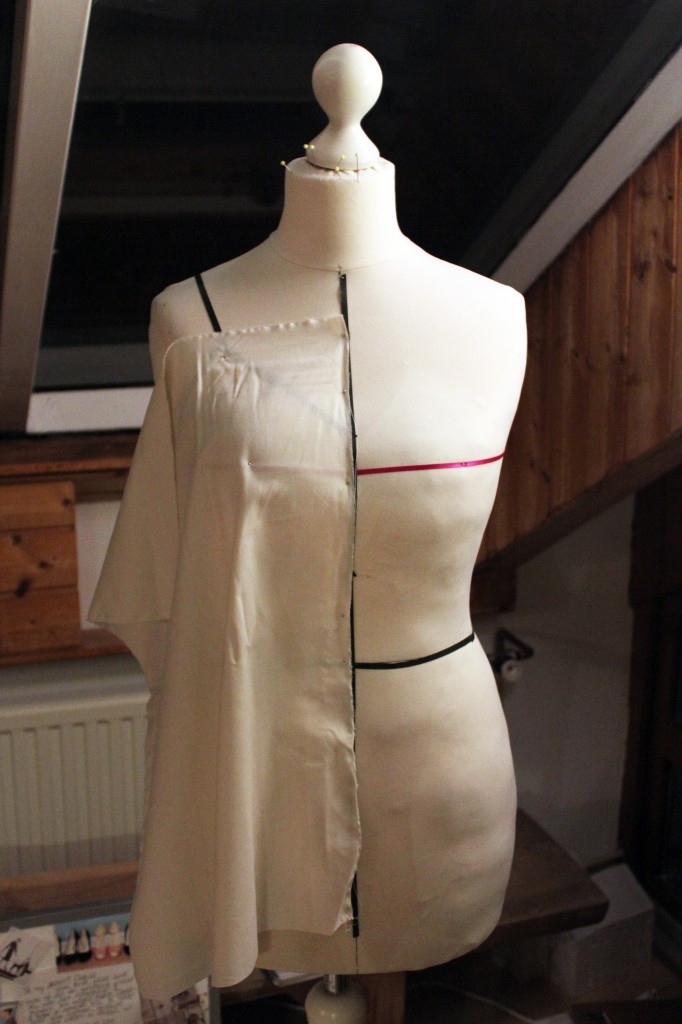
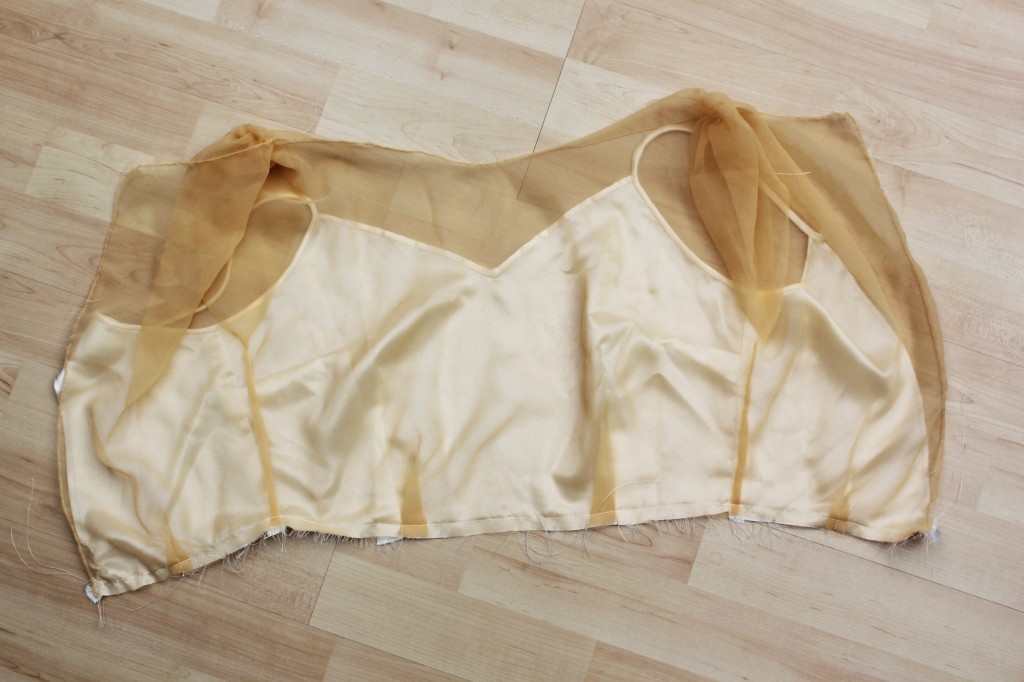
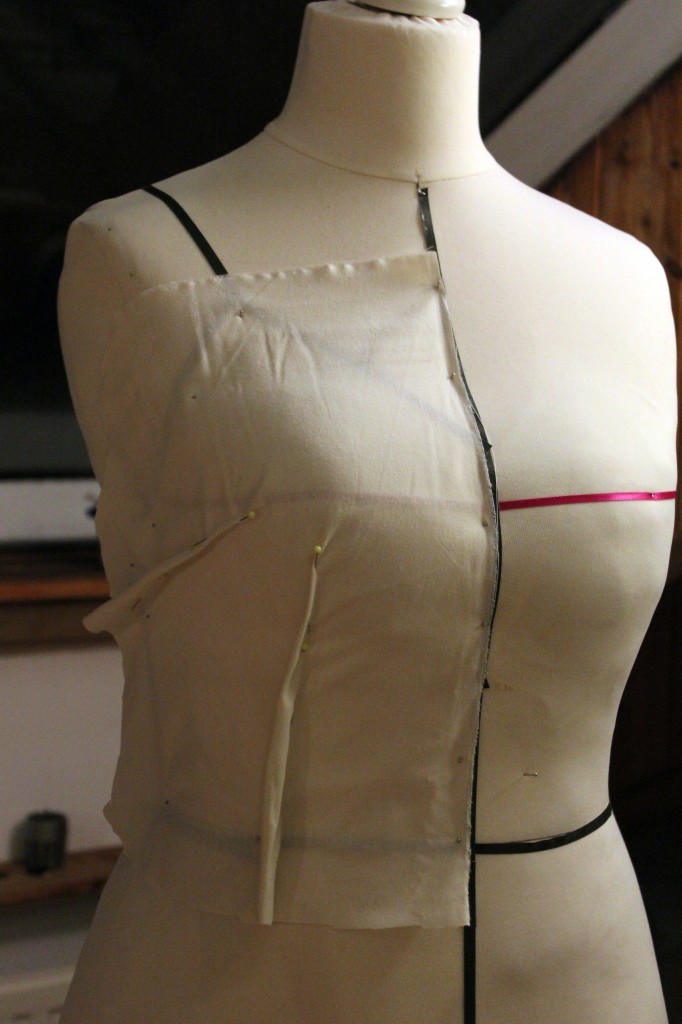
I cut off most of the excess fabric, leaving a generous seam allowance. Using a sharpie I traced the lines of the florist’s tape to transfer all the markings and seamlines. I did the same for the back.wedding dress muslin by thisblogisnotforyou.comwedding dress muslin by thisblogisnotforyou.com
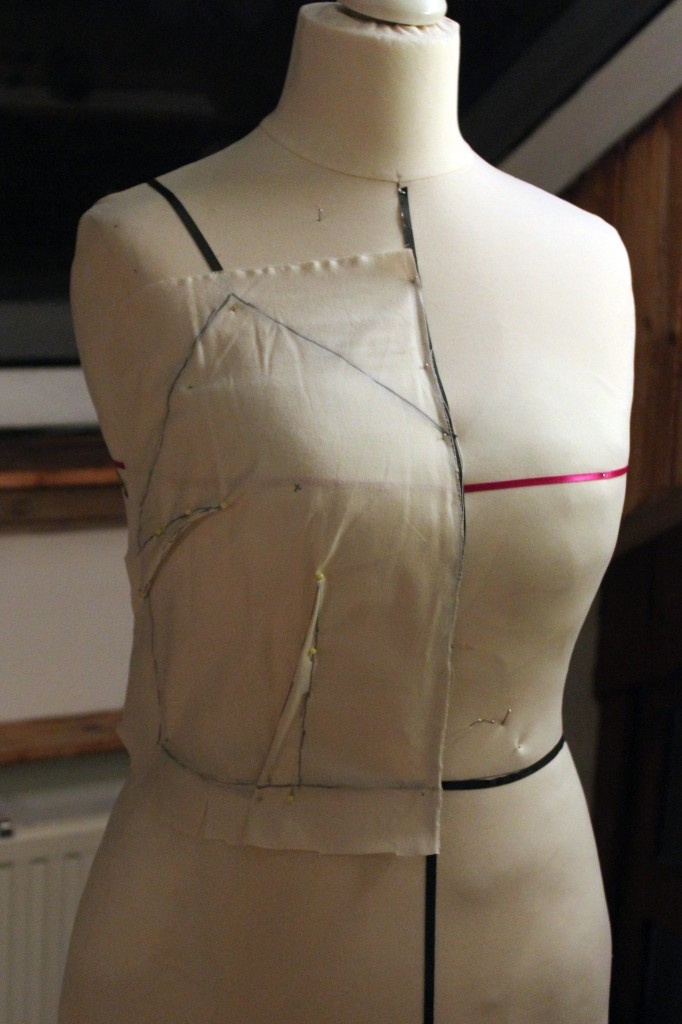
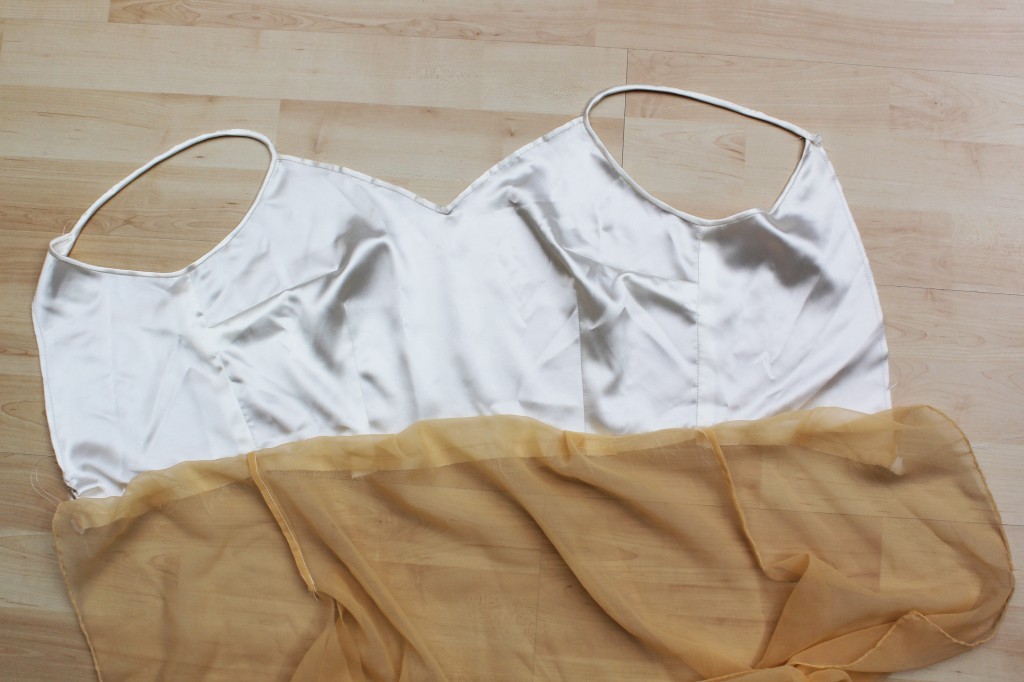
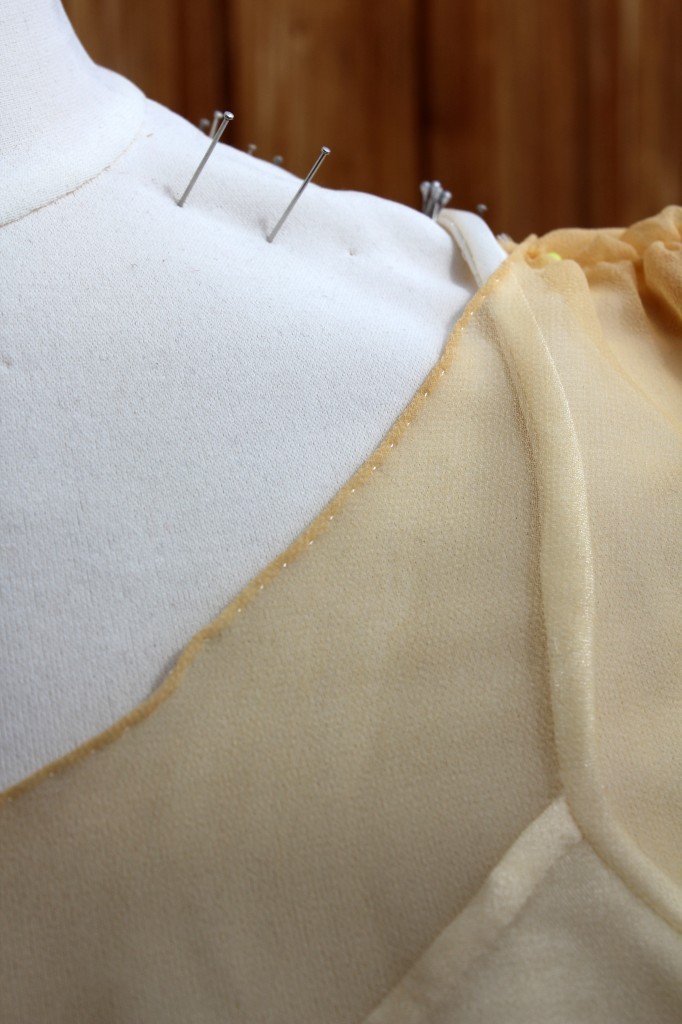
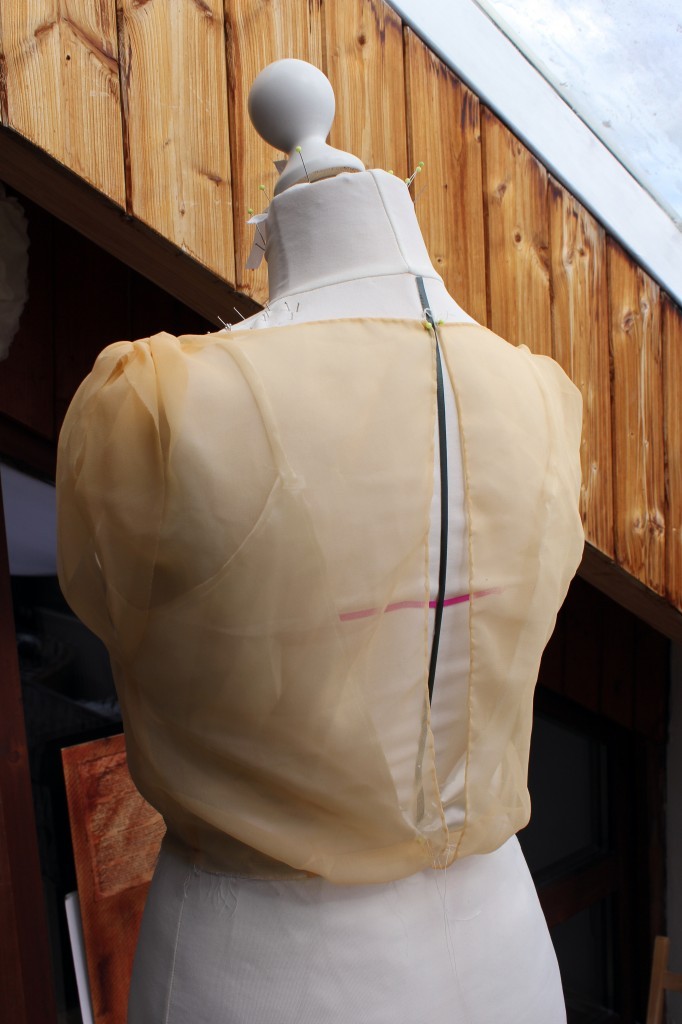
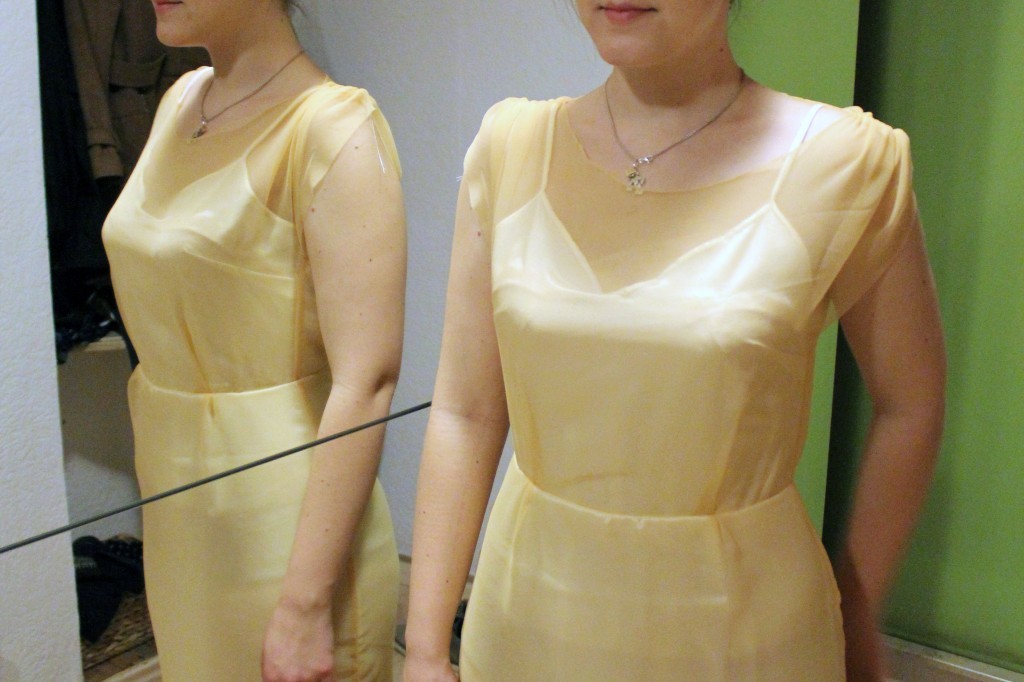
Once I was happy with the first bodice piece, I used the same technique for the sheer layer on top. This one was a lot trickier as it’s supposed to sit loosely and therefore was harder to drape on the dressform.

I used polyester chiffon of which I had bought 10m on Goldhawk Road last summer. The sheer bodice and skirt took quite a few attempts to get shape and fit right, so 10m was just enough! Keep that in mind when shopping for your wedding dress. It’s always better to have a little fabric extra, just in case. Those long skirts eat up fabric like crazy!wedding dress muslin by thisblogisnotforyou.comwedding dress muslin by thisblogisnotforyou.com

This was probably the most frustrating part of the pattern. It took a lot of muslins to get the sheer top right. I alternated between draping, copying the pattern onto paper and cutting out another muslin. In between I made loads of adjustments and kept checking measurements.

The spaghetti top was a pretty good fit from the start. I just moved the darts slightly on my paper pattern, using my bust/apex aka “nipple” measurements.wedding dress muslin by thisblogisnotforyou.comwedding dress muslin by thisblogisnotforyou.com
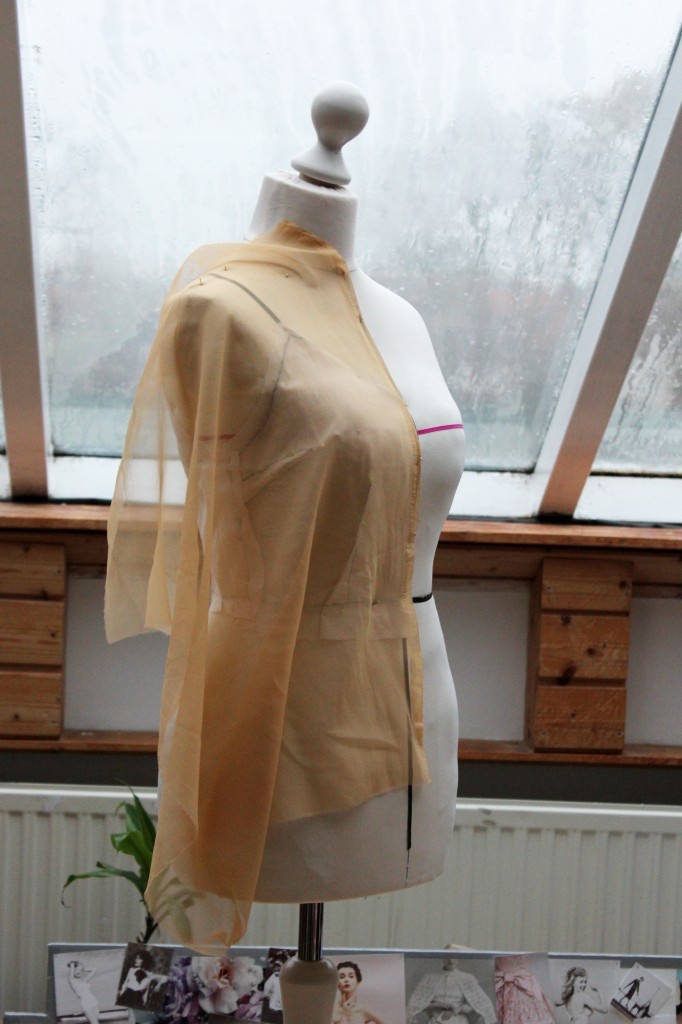
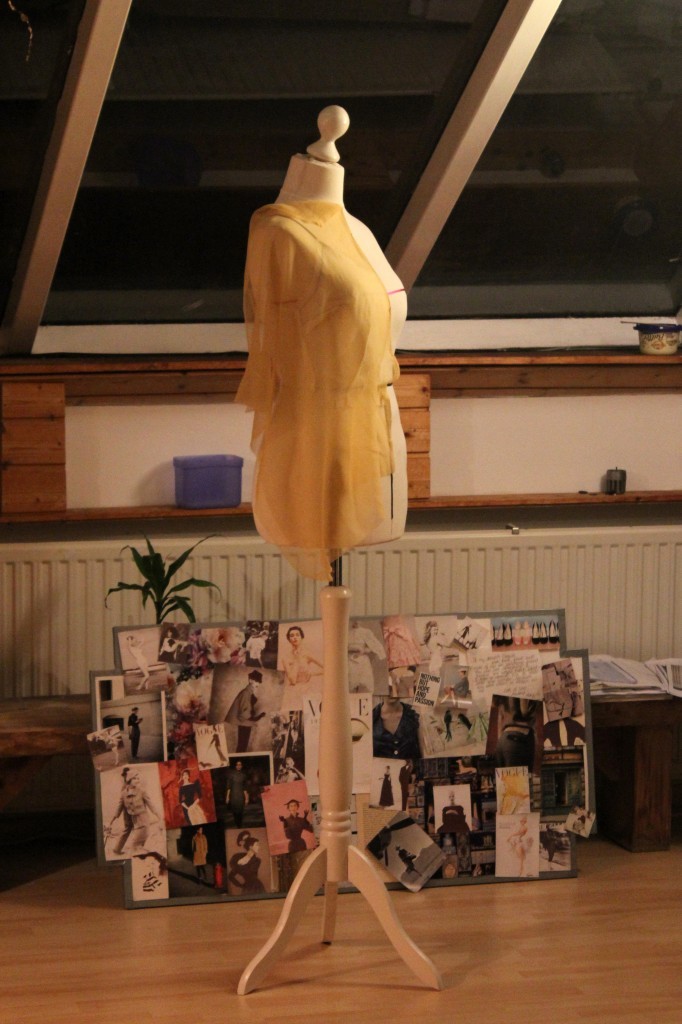
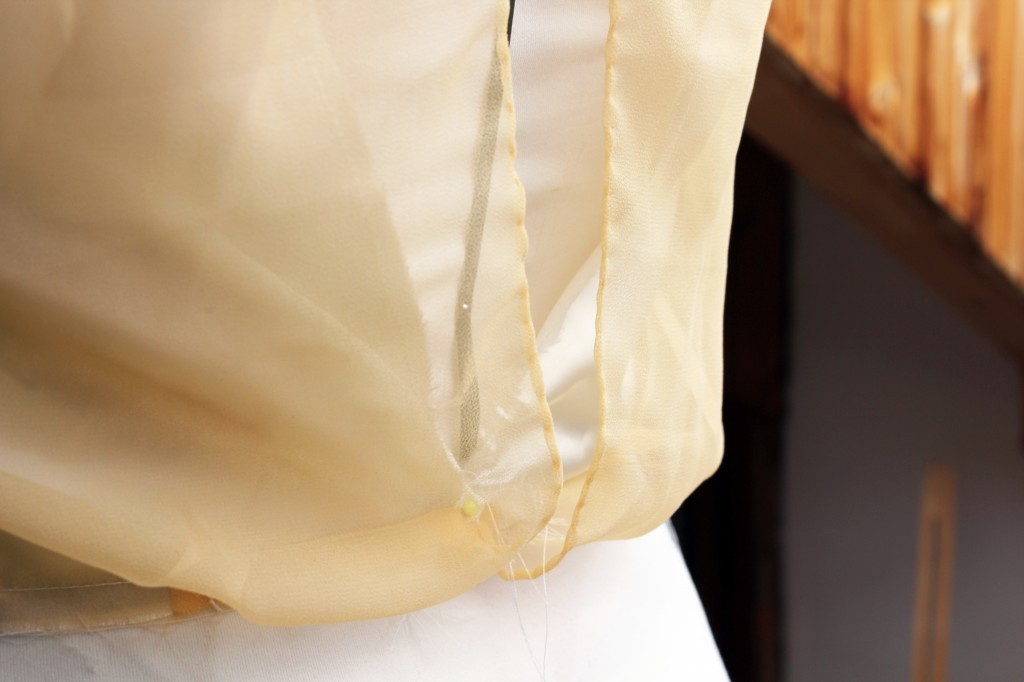
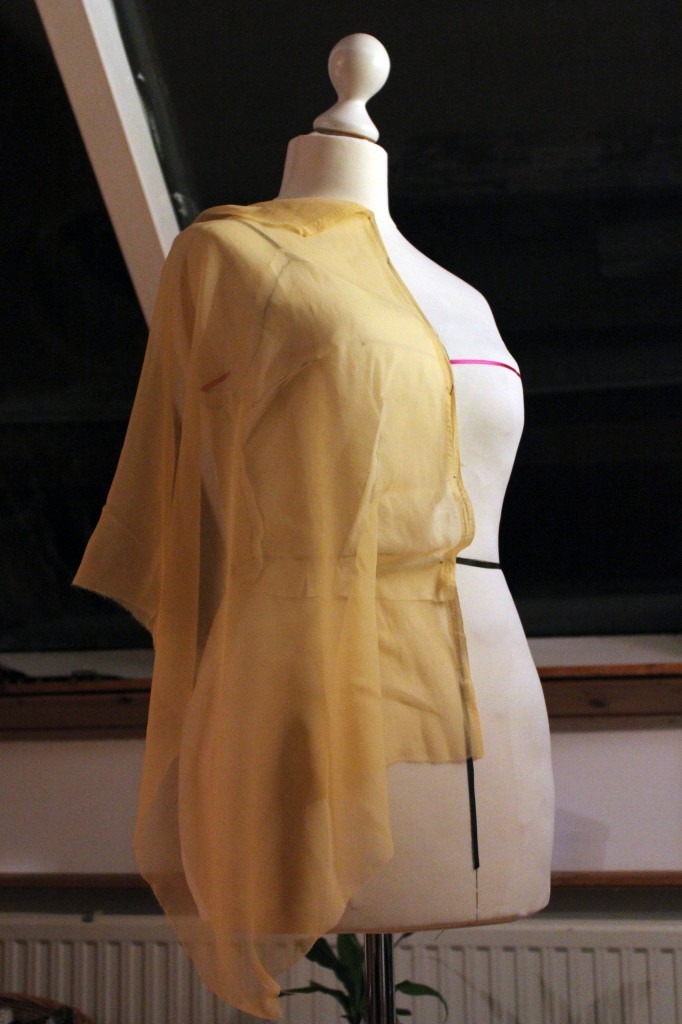
This was the last muslin before cutting out the whole dress again and sewing it together properly, finished seams and all, to get a glimpse at what it might look like.

Here’s a pic of the skirt – I changed it a bit later on to give it more fullness at the bottom and removed the train. I loved the train until I tried to walk (let alone dance) in it. Not possible! As this dress goes completely without petticoat, tulle or hoops, you really have to be careful not to get your feet tangled in all that flowy fabric. So, bye bye train it was!

(In retrospect: Best decision ever!)wedding dress muslin by thisblogisnotforyou.comwedding dress muslin by thisblogisnotforyou.com
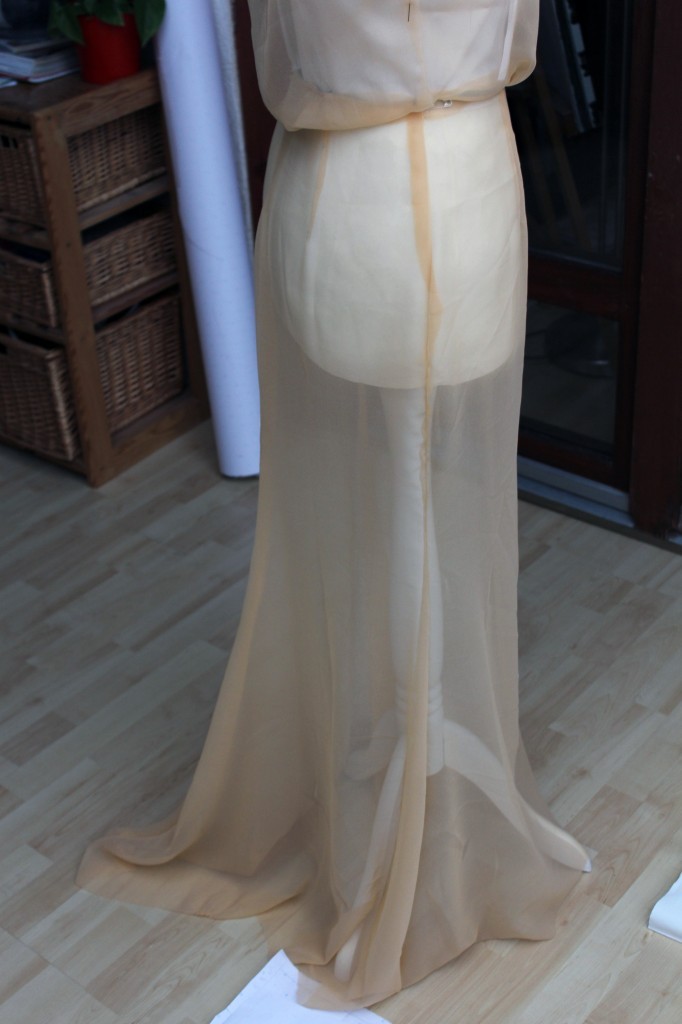
The skirt is based on the Sew Over It “Ultimate Pencil Skirt” pattern – one of my favourite patterns of all time, seriously. I have made a lot of pencil skirts from this pattern and it turned out to be a perfect base for my Jenny Packham copy.

Another advantage: I made the skirt so often, the pattern is fitted to perfection by now which saved a lot of time. I simply lenghtened the skirt pattern to floor length and added fullness to the bottom at the back and side seams. All in all I had a hem line of around 3 metres – enough to walk and dance in.

You can see the adapted skirt pattern in the background:wedding dress muslin by thisblogisnotforyou.com

Once I had my muslin ready it was time for the trial dress. I used the same sheer apricot chiffon and an ivory poly satin as lining.

This is what ironing 6m of fabric looks like!wedding dress muslin by thisblogisnotforyou.comwedding dress muslin by thisblogisnotforyou.com

Instead of lining the spaghetti top, I tried and finished the seams with bias binding. It didn’t work very well and stretched out quite a bit. I didn’t put too much effort into the trial dress and probably could’ve made this work somehow, but I didn’t want to gamble and fully lined the bodice on my actual silk wedding dress later on.wedding dress muslin by thisblogisnotforyou.com

Handsewn bias binding on stay-stitched seams:wedding dress muslin by thisblogisnotforyou.comwedding dress muslin by thisblogisnotforyou.comwedding dress muslin by thisblogisnotforyou.com

Both bodice layers attached at the waist seam.

Handrolled hem seam finish on the chiffon top:wedding dress muslin by thisblogisnotforyou.comwedding dress muslin by thisblogisnotforyou.com

I love the shape the open back. Having an almost backless dress created some issues finding a bra/suitable understructure. But more on that in one of the next posts.wedding dress muslin by thisblogisnotforyou.comwedding dress muslin by thisblogisnotforyou.com

This is the finished skirt pattern, cut out from poly satin. The hem on the top layer was still a bit too short and then again too long on the lining skirt. But since hemming is the VERY last thing to do when sewing a wedding dress, please simply ignore that.
wedding dress muslin by thisblogisnotforyou.com

I was quite happy at that stage. Obviously, it looked nothing like a wedding dress, especially in this bright orange colour. But the silhouette and fit were pretty good so far. wedding dress muslin by thisblogisnotforyou.com

Also, you always have to keep in mind, that all dresses looks very different depending on the wearer. I am not very tall and my, plus, I have a very short torso and wider hips. So an elegant long and narrow skirt appears a bit compressed on my body. If you look closely, a lot of models are standing on stools while posing with a wedding dress on, to give them the appearance of incredibly long legs. wedding dress muslin by thisblogisnotforyou.com

wedding dress muslin by thisblogisnotforyou.com

So far, so good! What do you think? Can you see a wedding dress taking shape?

Let me know what you think! Any questions? Leave a comment and I will answer as best I can 🙂

xx

Charlie


Happy sewing!

facebook/bloglovin/pinterest
twitter/instagram

Stay in touch!

Wedding Dress Part II: Inspiration & Design

Wedding Dress design by thisblogisnotforyou.com

Helloooo everyone! I’m back after my thee-month-blogging-break….and I’m married!

It still sounds pretty unbelievable, but we had the most amazing wedding anyone could imagine. And… I actually wore a handmade wedding dress.

I have to admit, there were times when I did not believe this would happen as it wasn’t an easy process and things didn’t always go too smoothly, but in the end I wore a dress I made. A dress I am very happy with and super proud of.

I promised to share the process of making my wedding dress myself, and, of course, pictures of me in my wedding dress. I didn’t share much before the wedding as I didn’t want my friends and family know too many details about the project. Of course they sort of knew about it and it was sweet of them and annoying af to ask me about my progress constantly.

In this post I’ll share some of my favourite designs that inspired me and (scroll down if you’re impatient)  the design I went for in the end.

Here’s a selection of my favourite designs from my many Pinterest sprees:

12 5

298

As you can see, one side of me was really inspired by very romantic, fairy-like dresses with long tulle skirts and lacey tops. I really love this look and was so close to making a dusty blue tulle dress! Luckily, I talked to the Mr. before and learned that he wasn’t fond of neither tulle nor lace. Happy that I asked.

It was important to me to make something he’d love as well, and this also helped me to narrow down some options. I had another design vision which was very different to the layers and layers of tulle. There would’ve been no way of combining both styles, so having the Mr speak his mind was more than helpful for my peace of mind.

104117131715

While looking for the perfect dress, I really fell in love with designers like Kaviar Gauche and Jenny Packham. I love the classic, elegant style and vintage vibe of those dress designs. The silhouette is very clear and the fabrics are very effective.

Also, on a practical matter: It’s hard to find luxurious-looking tulle in the perfect not-tacky-looking colour that also is affordable. It’s near impossible I can tell you that much! I didn’t completely ditch the tulle skirt as I made one for my hen do, but I wouldn’t have found anything wedding-dress worthy within my budget.

Anyway…

This is all good and all that, but I’m pretty sure you’re much more interested in the design I used eventually.

Once I decided to go with the more elegant, simple silhouette, I did a lot of sketching. And again I couldn’t make my mind up. Until I found THE MOST PERFECT dress of all time. It’s so perfect (in my opinion) I would’ve bought it of the rack if it wasn’t for the price tag.

I absolutely fell in love with the Jenny Packham dress design called “Esme”. (“Alicia” and “Bardot” fell in second place). 162018

This Jenny Packham design is so so elegant and has that 1930’s feel to it which I absolutely love. I love 1920’s and 30’s Hollywood gowns and this seems to be the incarnation of all those beautiful art deco dresses.

Since I didn’t want to pay for it, I had no other option than to make it myself. Luckily, I know how to sew. What a coincidence!

I decided to incorporate the following aspects into my dress design:

  • simple, elegant silhouette
  • long skirt (maybe a short train)
  • sheer layer over a spaghetti top
  • embroidery (provided I manage that technically)
  • plunging back neckline 
  • pastell colour (either champagne, blush pink or dusty blue)

That’s enough for today. I hope you enjoyed this post!
I’ll share more about the draping, drafting, muslining and sewing as well as the understructure with you in the next posts. For now, I can tell you that much: I managed to tick everything off that list, eventually!

xx

Charlie


Happy sewing!

facebook/bloglovin/pinterest
twitter/instagram

Stay in touch!