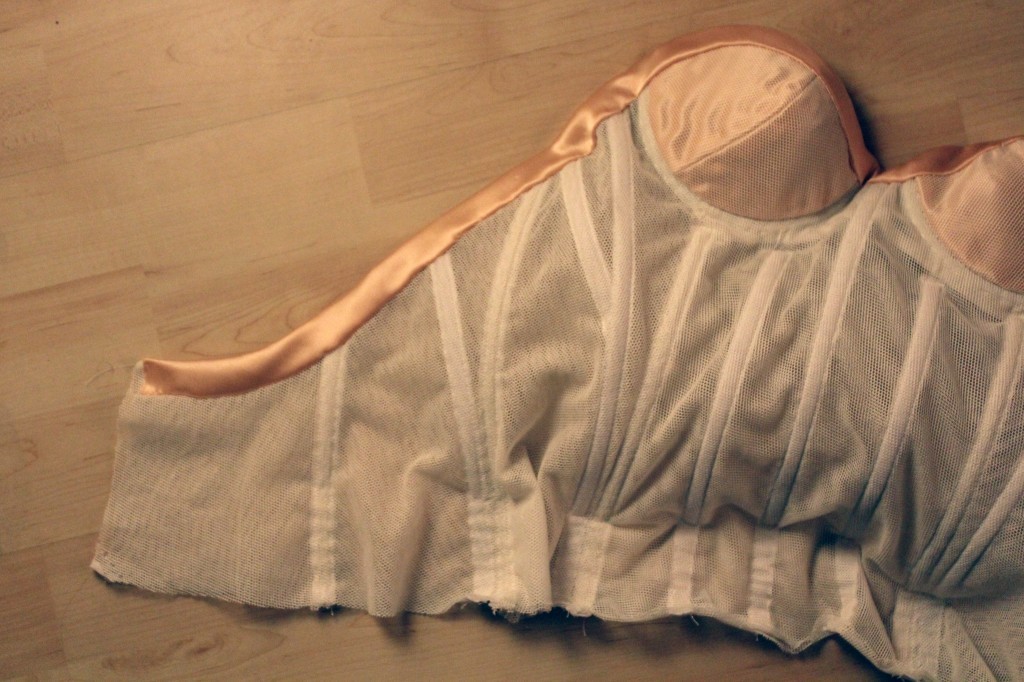
Hellooo lovelies!
Man, you deserve a massive thumbs up for bearing with me and being so patient! Here’s the good news: Eventually there will be pictures of the final dress (& wedding!) on the blog. Don’t despair. But I don’t want to spoil the fun by posting them before I finished showing you the Making Of!
Hint: If your curiosity gets the better of you, pop over to my Instagram where I already shared some sneak peeks a couple of weeks ago!
So today I’ll share the Story of the Corset with you. You’ll have to wait till the end to learn whether it’s a happy or sad story. Again, no spoiling!
There’s just one thing I have to spoil for you: The idea that wedding dress sewing is romantic. It’s not. It’s chaos and hard work. But mostly chaos. Here’s some evidence:
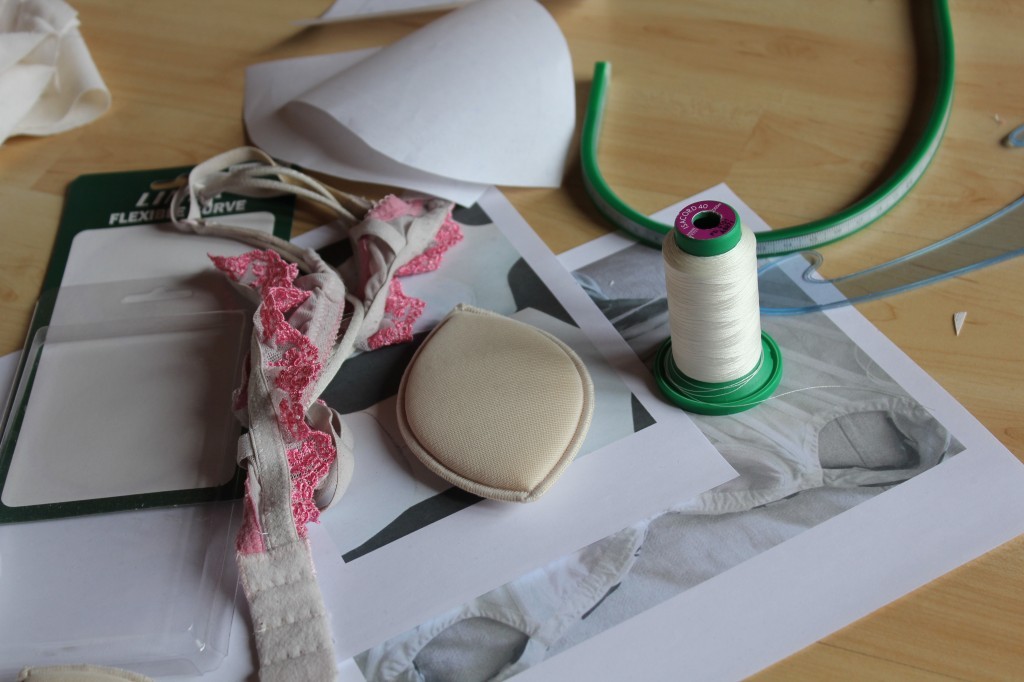
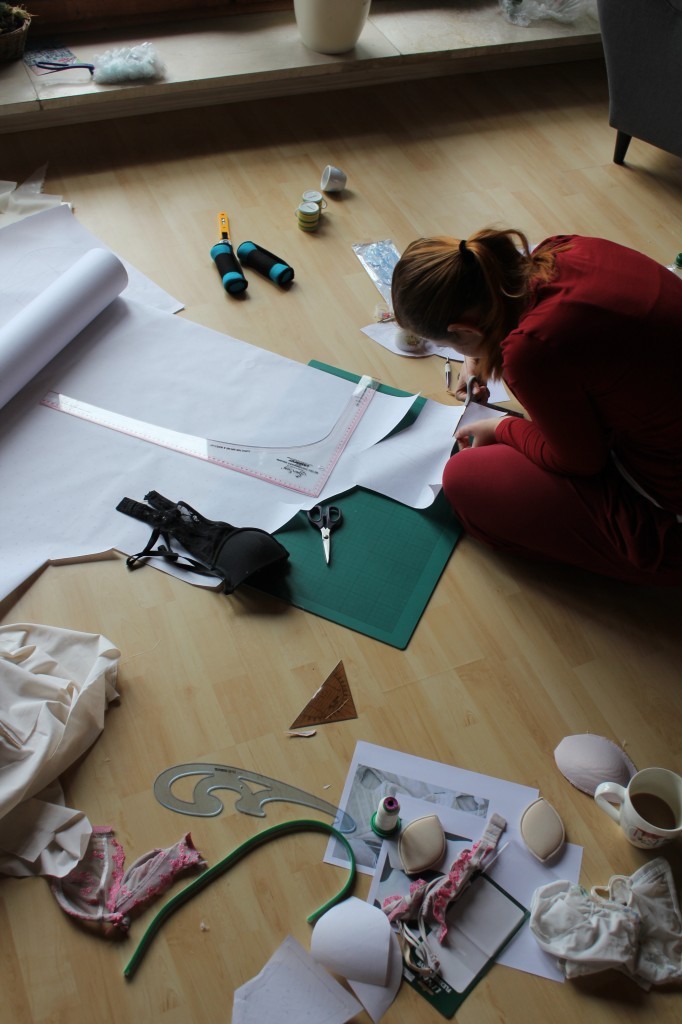
 As I mentioned in the previous posts, my backless dress required an alternative solution regarding the understructure. A normal bra wouldn’t do. I always wanted to try and use a couture understructure in a garment and what better garment than a wedding dress, right?
Well, it turned out to be a pretty nerve-wracking process. As far as I know, there are no backless corset patterns out there, so I knew I would deal with a lot of adjustments.
I tried a couple of things. First, I used a corset pattern from a Lingerie Making Book I own. I changed the pattern on paper to get the shape of the back I needed for my dress: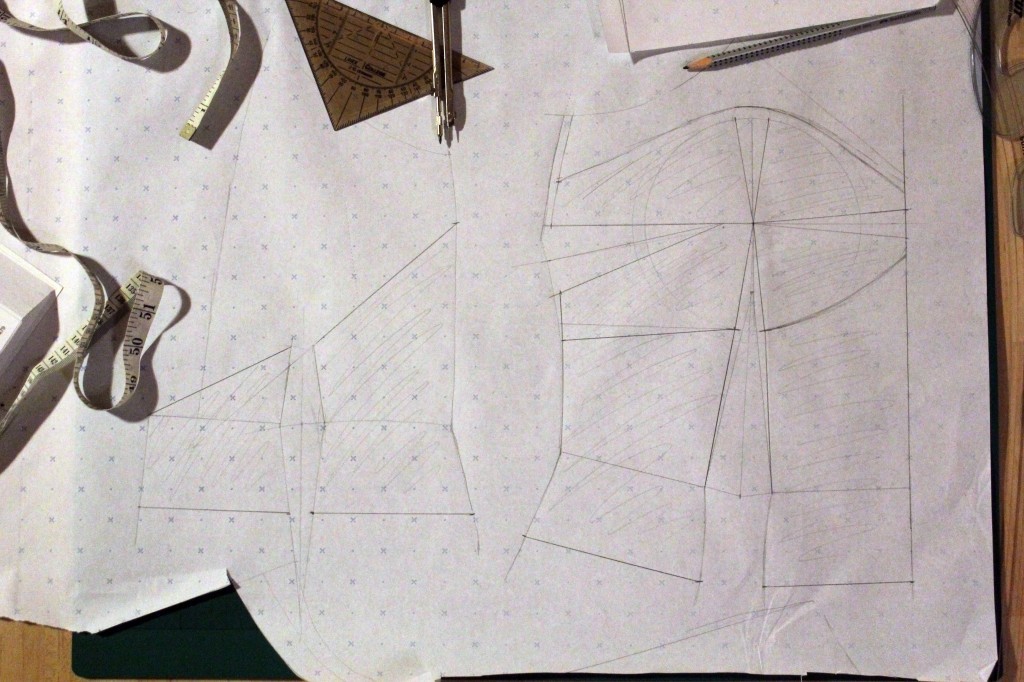
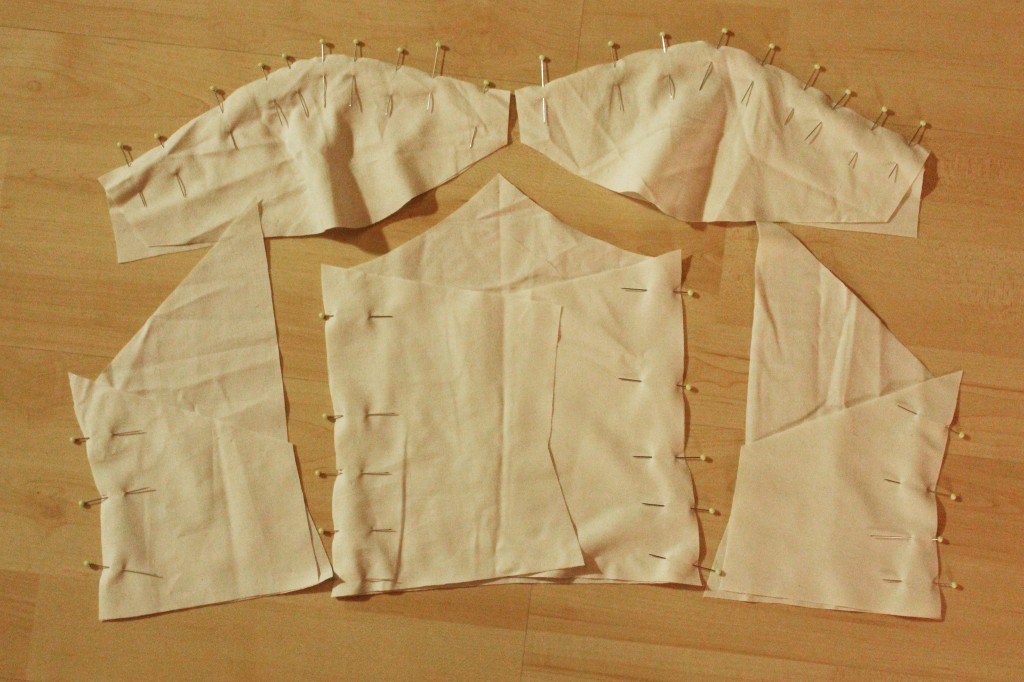
I muslined it a couple of times, making minor adjustments (one at a time), but it just wouldn’t work. The fit around the bust was horrible, the cup pattern just didn’t work at all. The cups weren’t the typical U shape, but kinda longish and flat and there was no way of working this out.
I then drafted my own cup pattern using my beloved Patternmaking for Fashion Design Book. The fit was much better, but not to my satisfaction. In the picture below you can see some alterations after fitting, e.g. the tiny dart I pinned right under the cup. 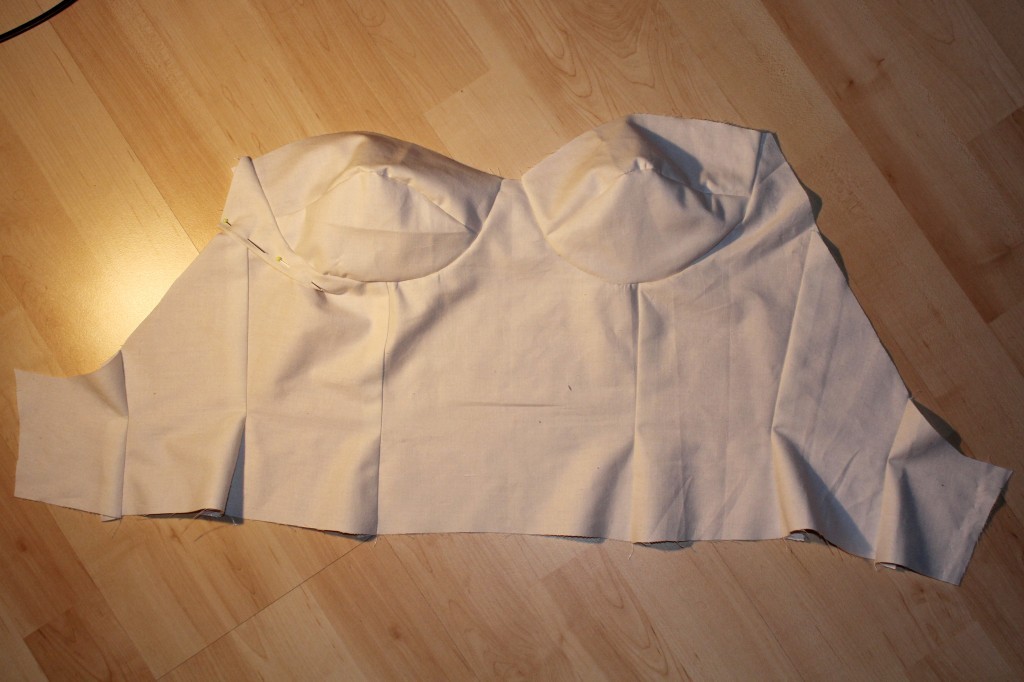
I had some nice lightweight sew-in bra cups (courtesy of The Stitchery) which unfortunately just wouldn’t fit in my drafted cups. As neither bra cups or muslin worked, I decided to start from scratch yet again.
I kept the bodice pattern of the corset and grabbed an old bra that fit me well. I took it apart, only keeping the bound underwire and padding: 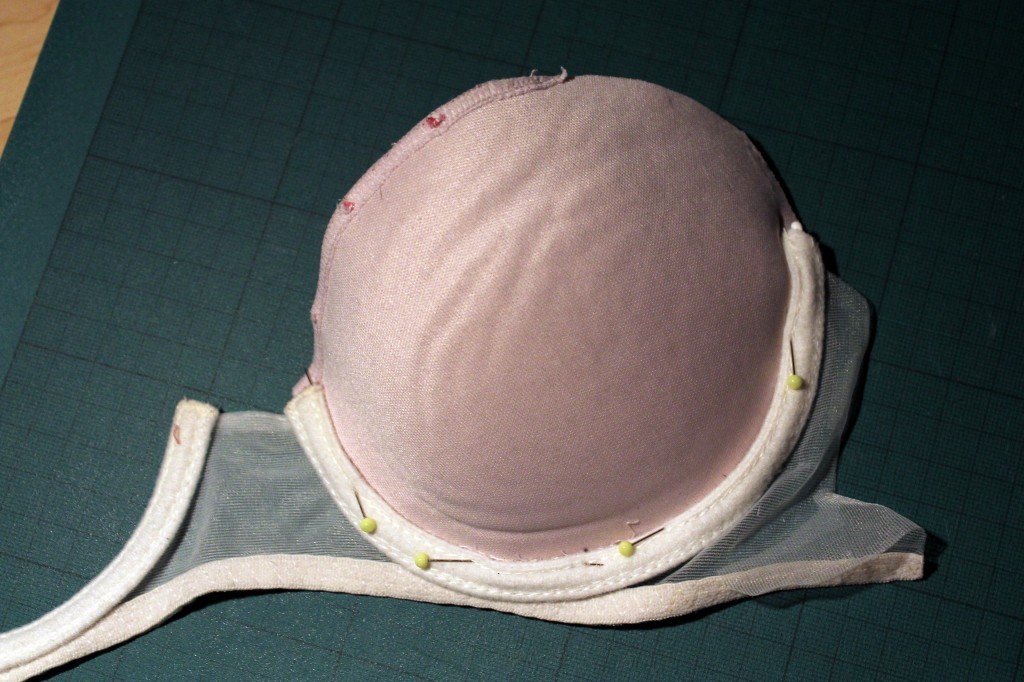 Using the padded cup, I draped some muslin fabric over it and created a cup pattern.
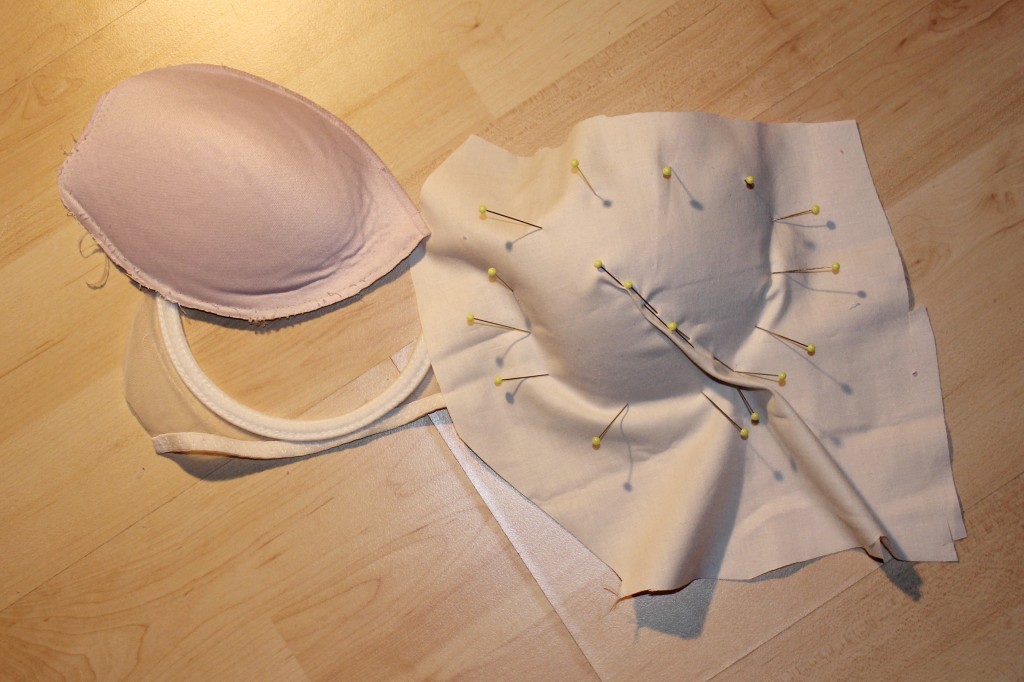
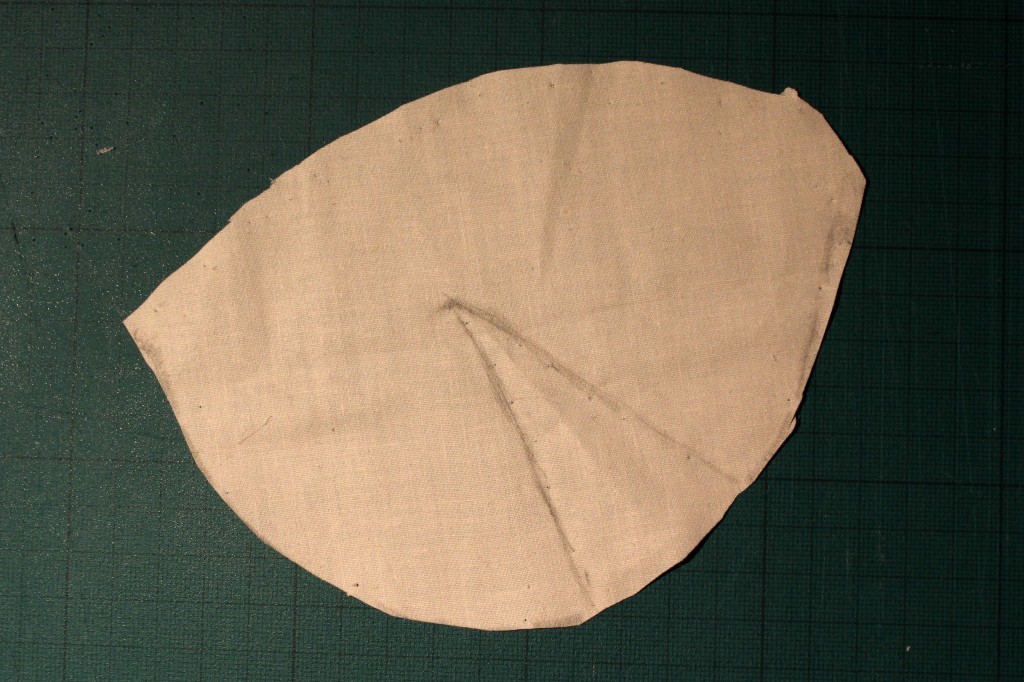
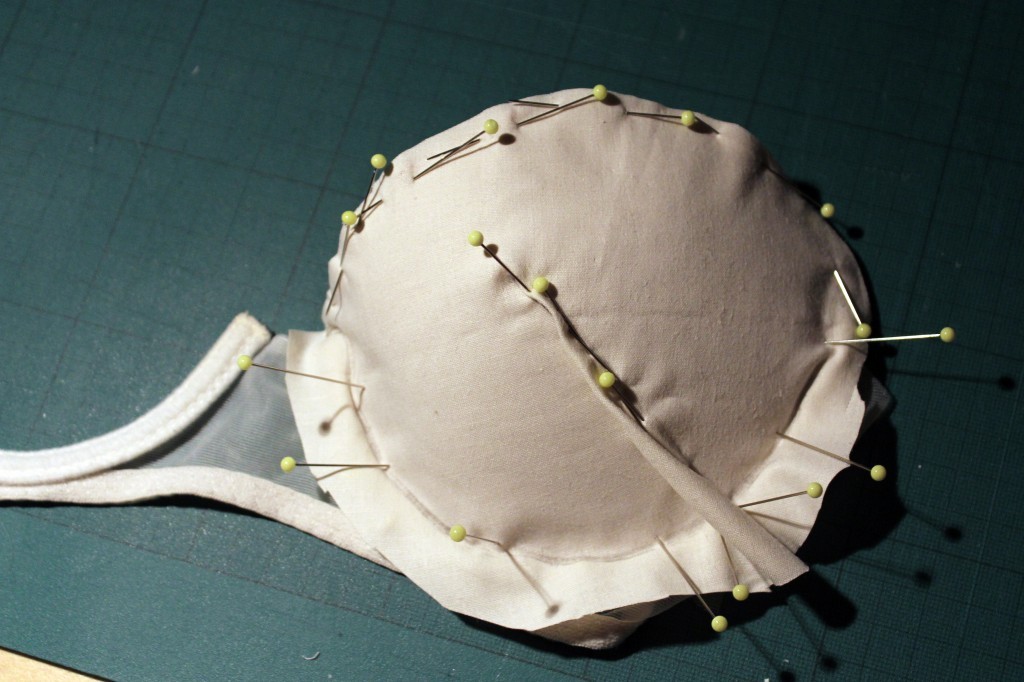 Here’s the finished cup pattern. Later on in the process, I cut up the pattern and added a seam instead on keeping the dart, for a better fit (see next pic).
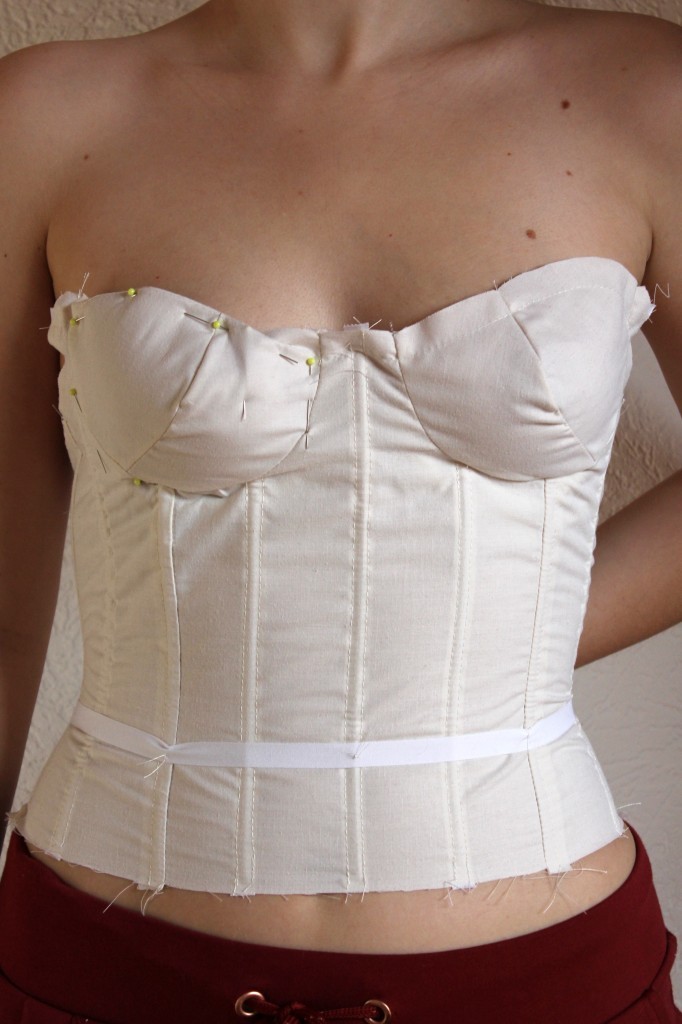
Here’s the muslin with lightweight 5mm polyester boning in, a cotton waist stay and padded cups.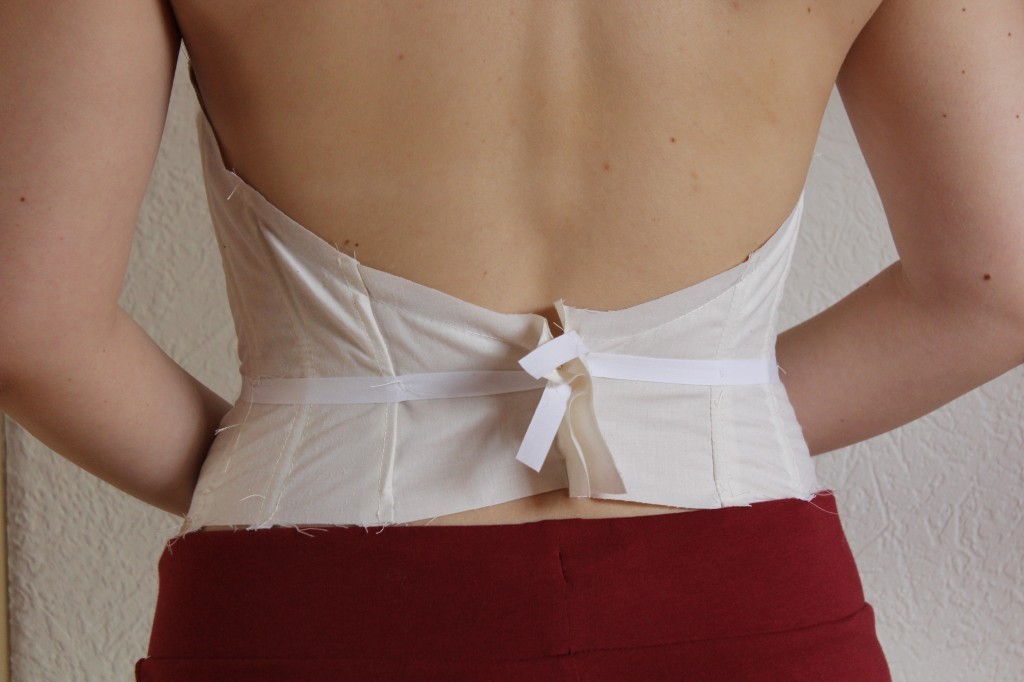 I was happy with the fit so far and only slightly changed the shape of the padded bra cups by adding a dart:
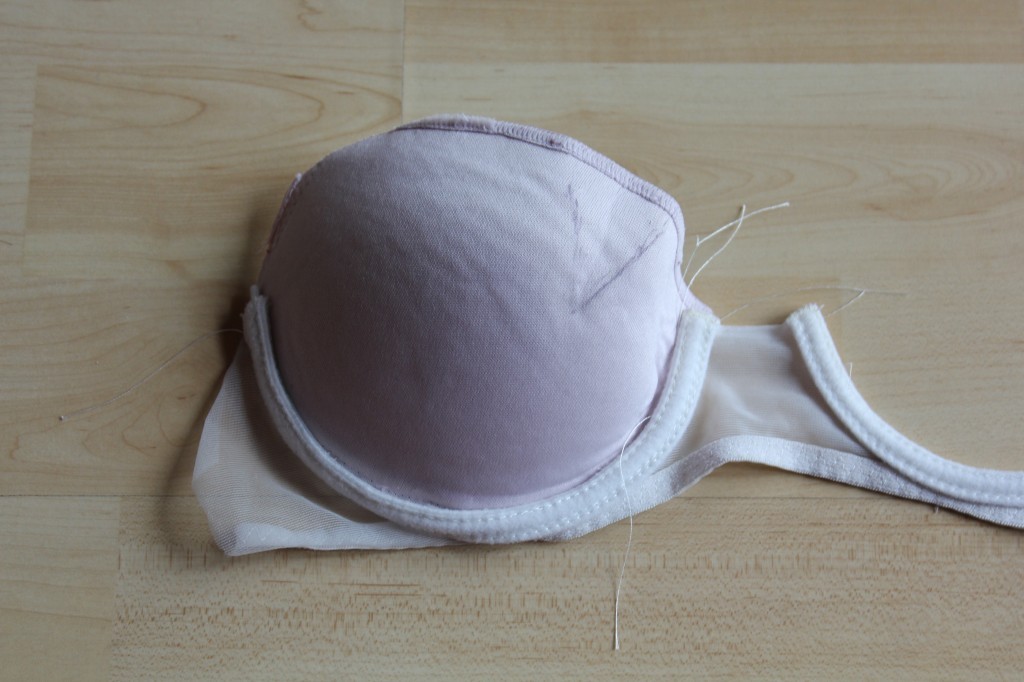 To reduce bulk, I cut out the dart and sewed the edges together by hand.
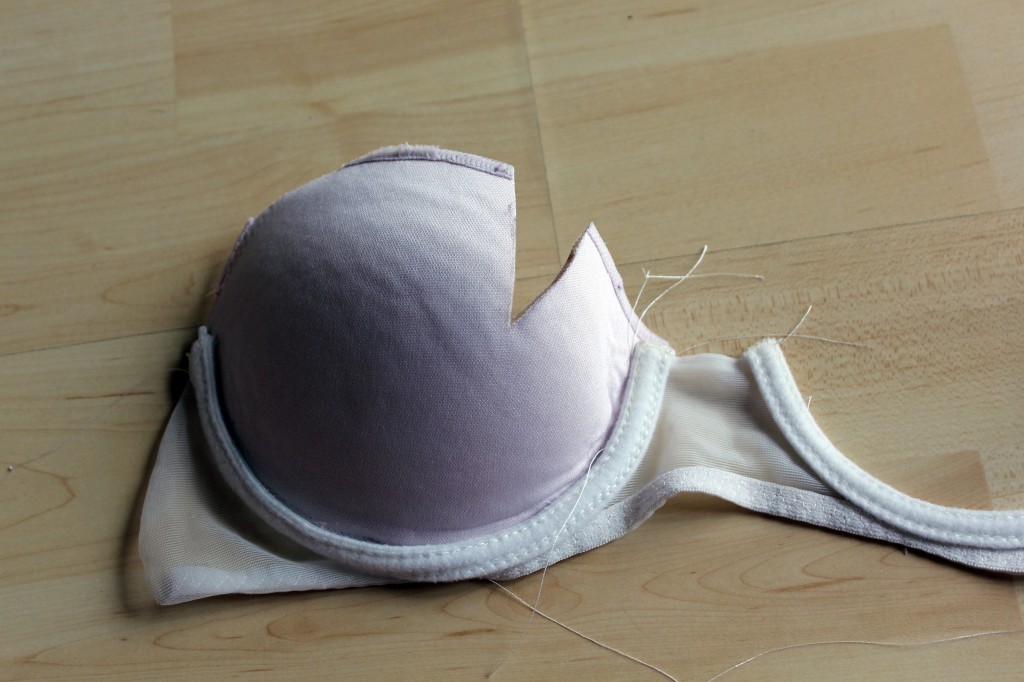

On to the corset sewing!
As used in couture understructure, I used 100% cotton bobbinet, also called Swiss Tulle, which is a lightweight, soft tulle fabric with a hexagonal weave. It’s pretty strong and holds the shape very well, doesn’t itch and it’s perfect as a base for adding embellishments in couture dresses.
I bought mine on Goldhawk Road in London. It wasn’t cheap but much cheaper than when you order some online.
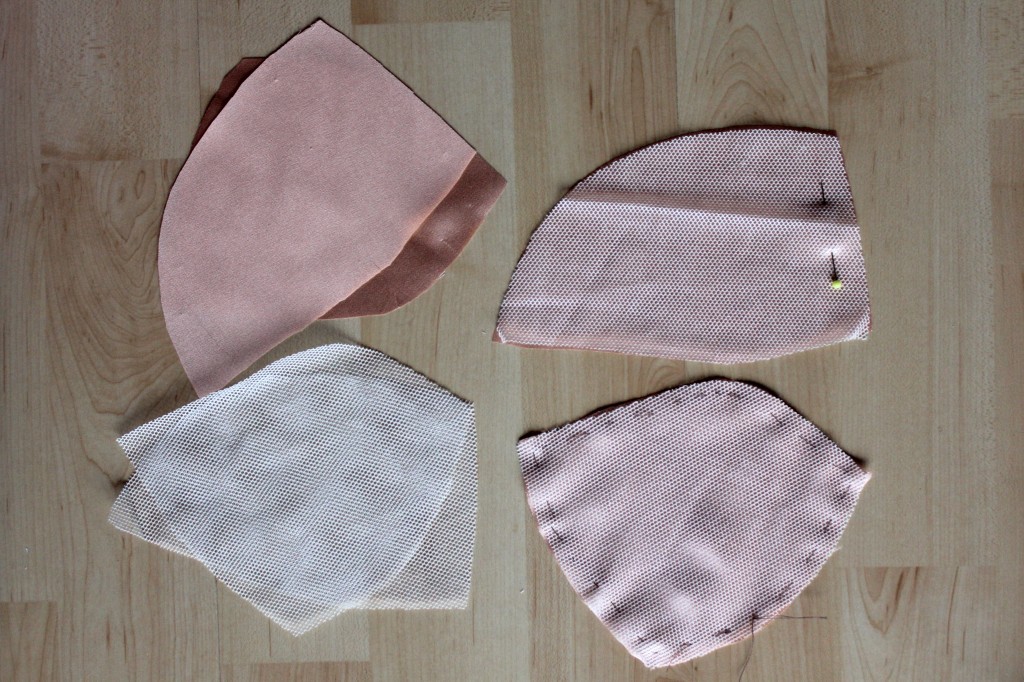
 For extra strength and to prevent stretching, I cut out too layers, one on the bias and one on grain. You can see the difference in the picture below:
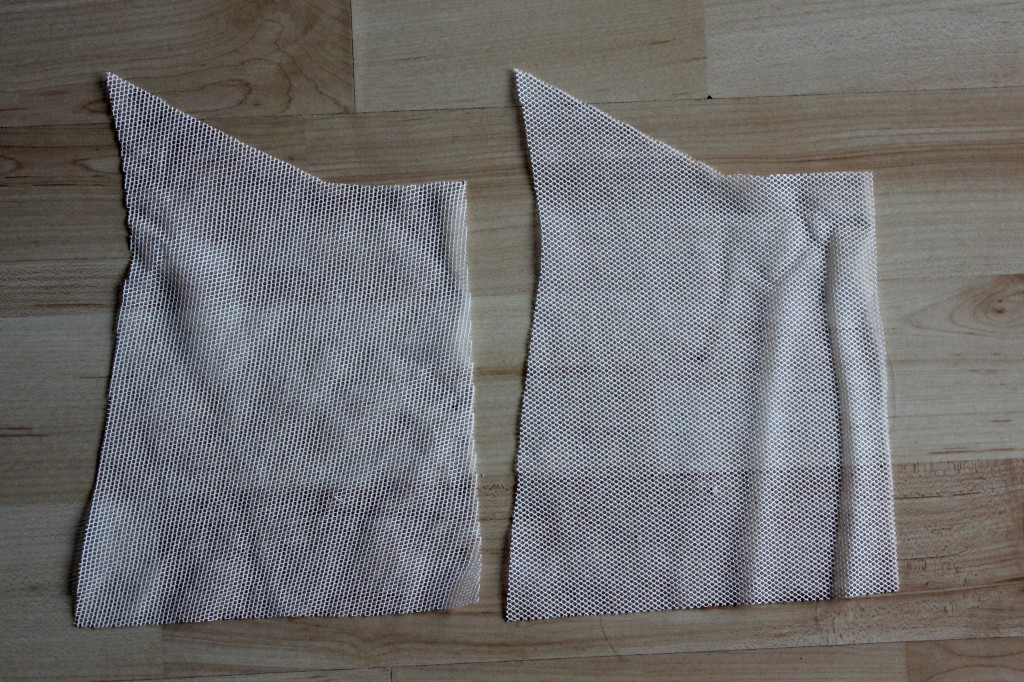
Here’s everything pinned together and ready to sew: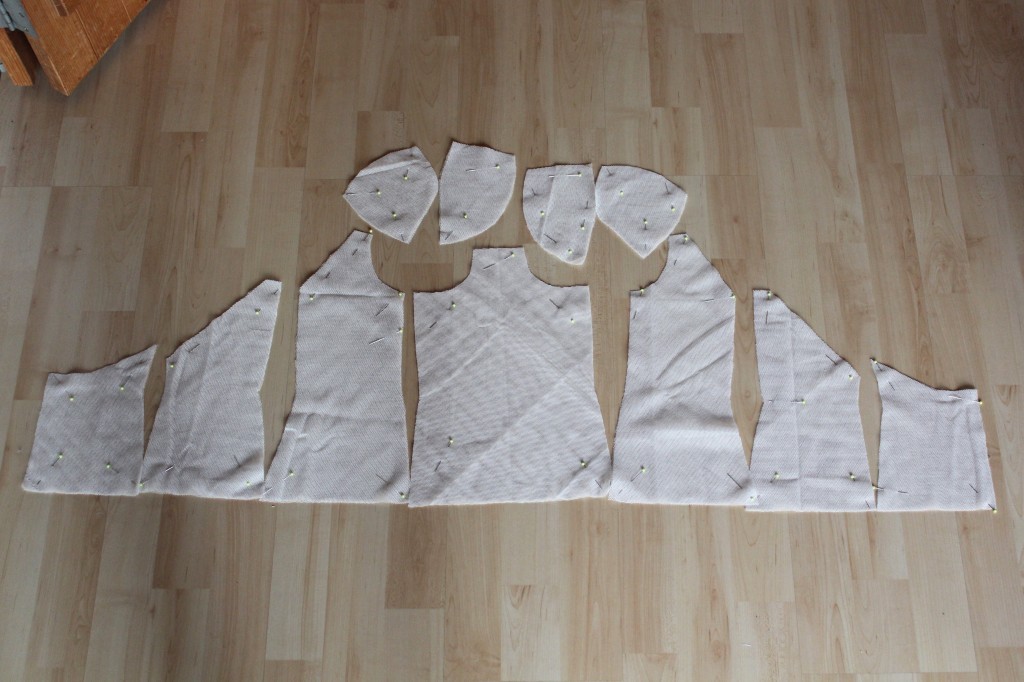 For the cups I decided to use some of my lining silk fabric to underline the bra cups (just for prettyness nothing else). As the silk was very delicate and slippery I handbasted the two fabric together before sewing.
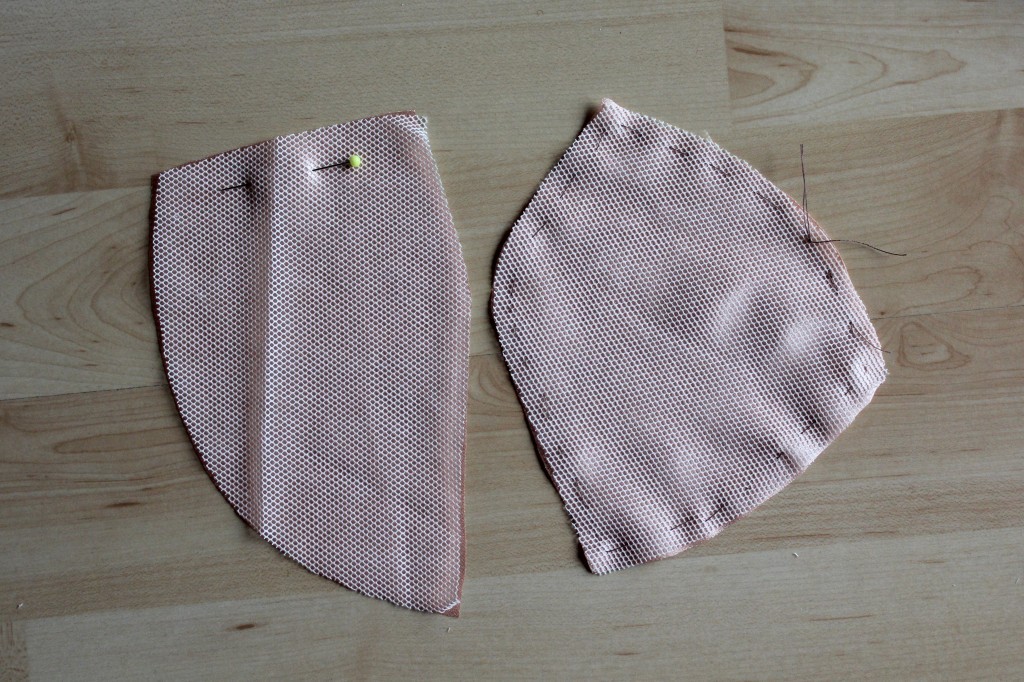
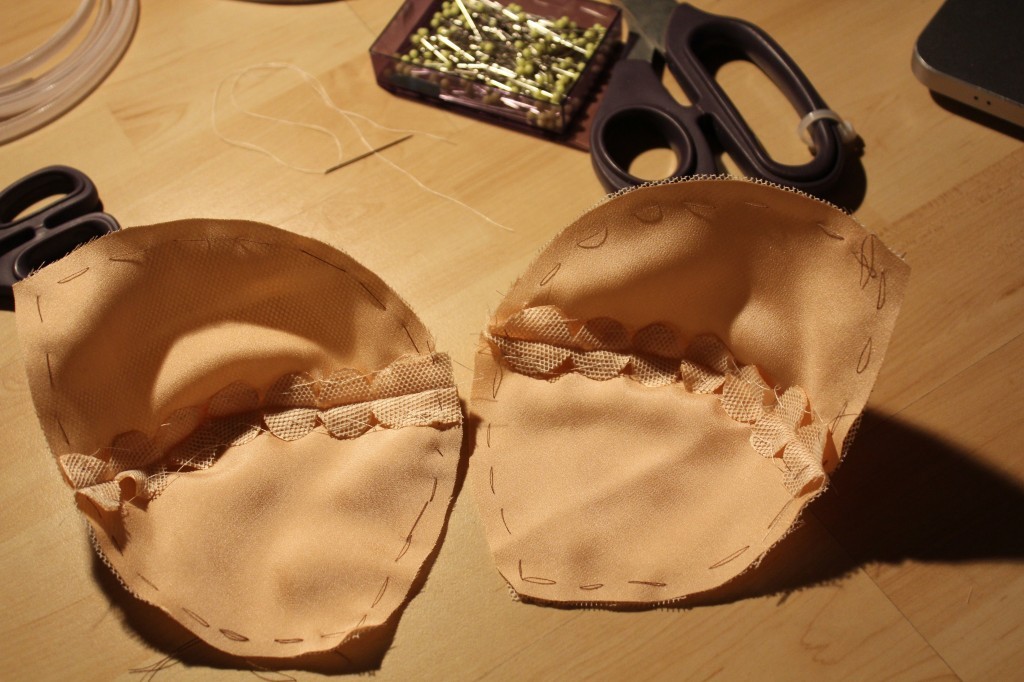
The assembled cups. The curved seam allowance is clipped in a round shape for an extra smooth curve and handbasted to the underlining. I then added the underwire which was also handsewn into the corset.
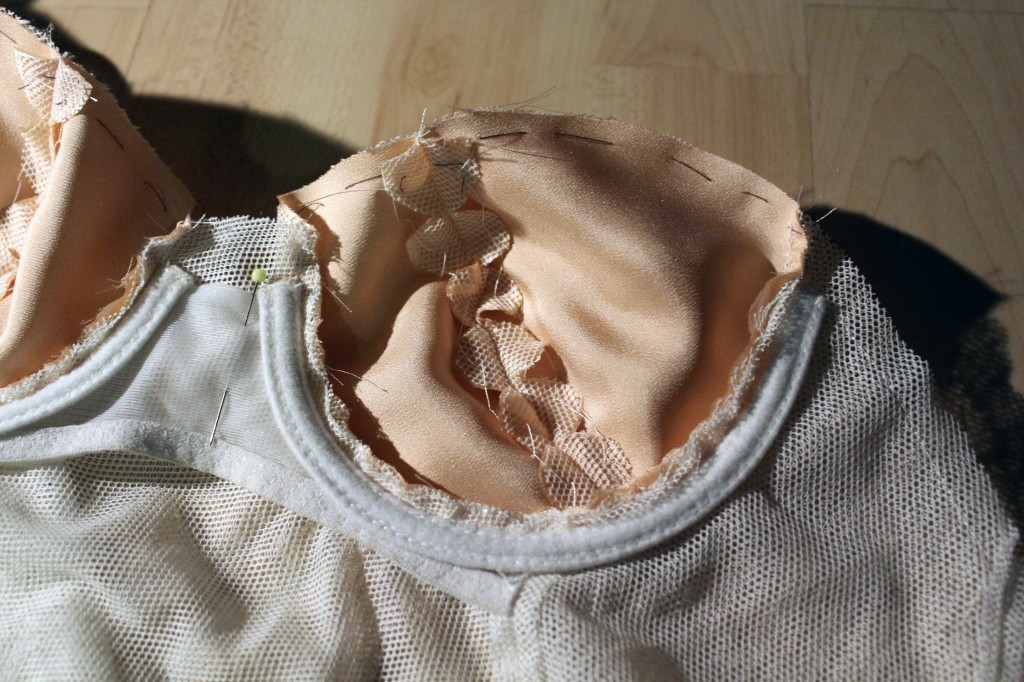
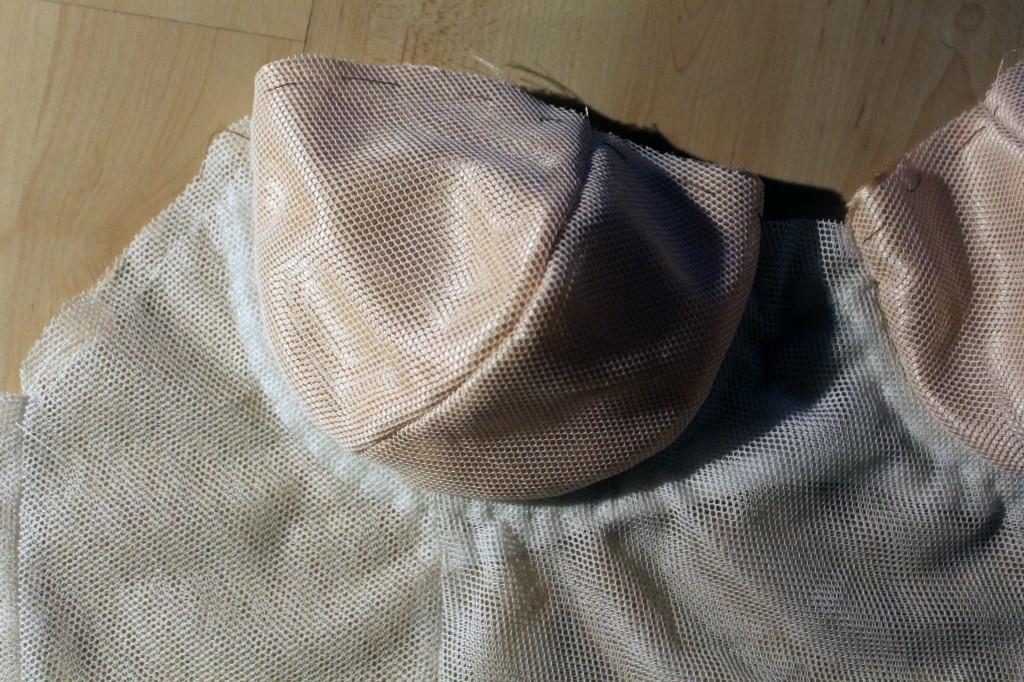 And in go the padded cups! (More handsewing!)
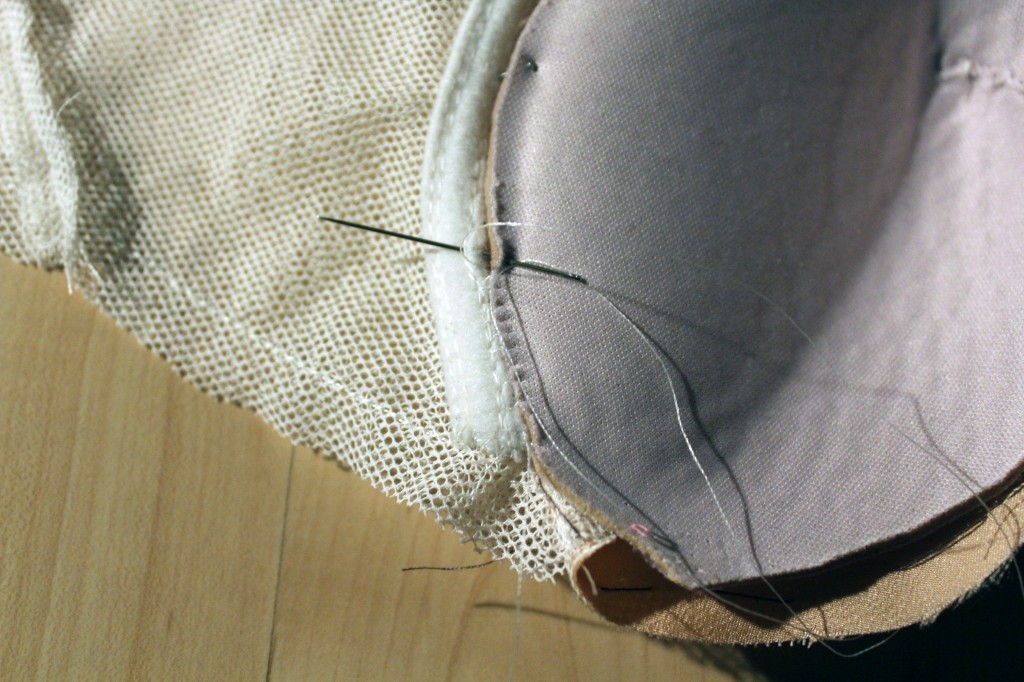 Just as a side note: I stay-stitched the curved seams to prevent stretching out. Here you can also see my cotton ribbon pinned on to repare the boning channels.
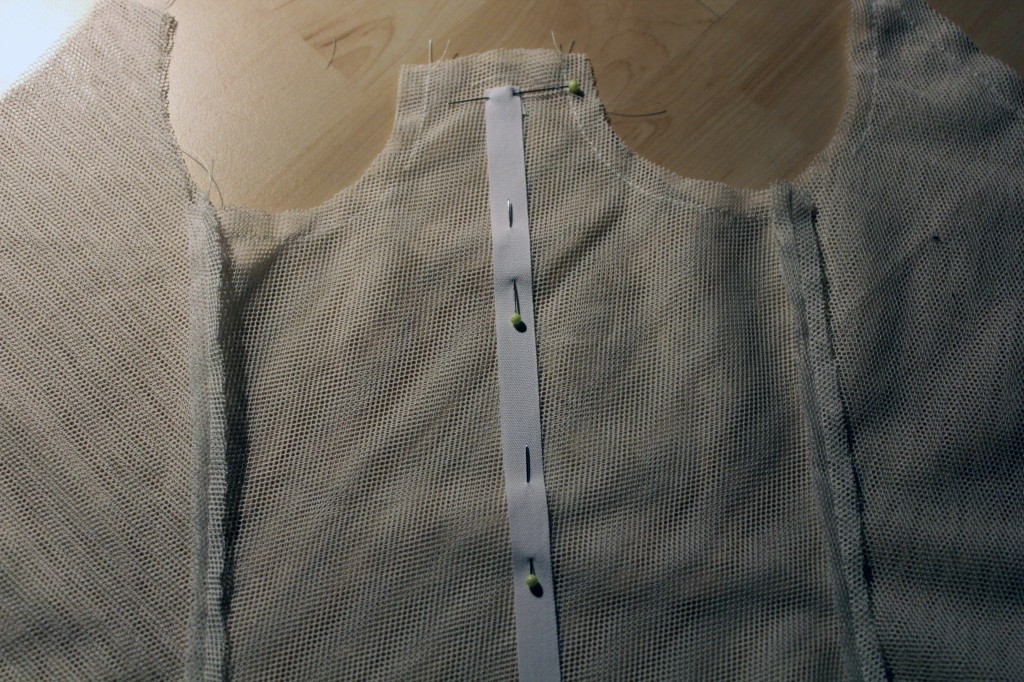
Looks nice so far, right?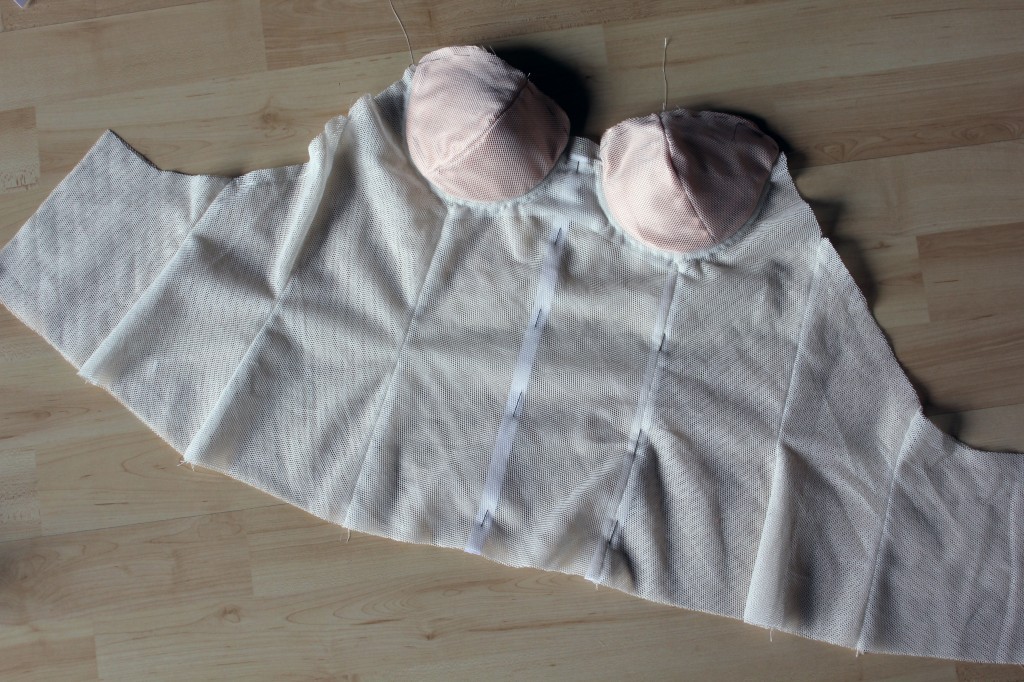 The channels for the boning are sewn onto the corset.
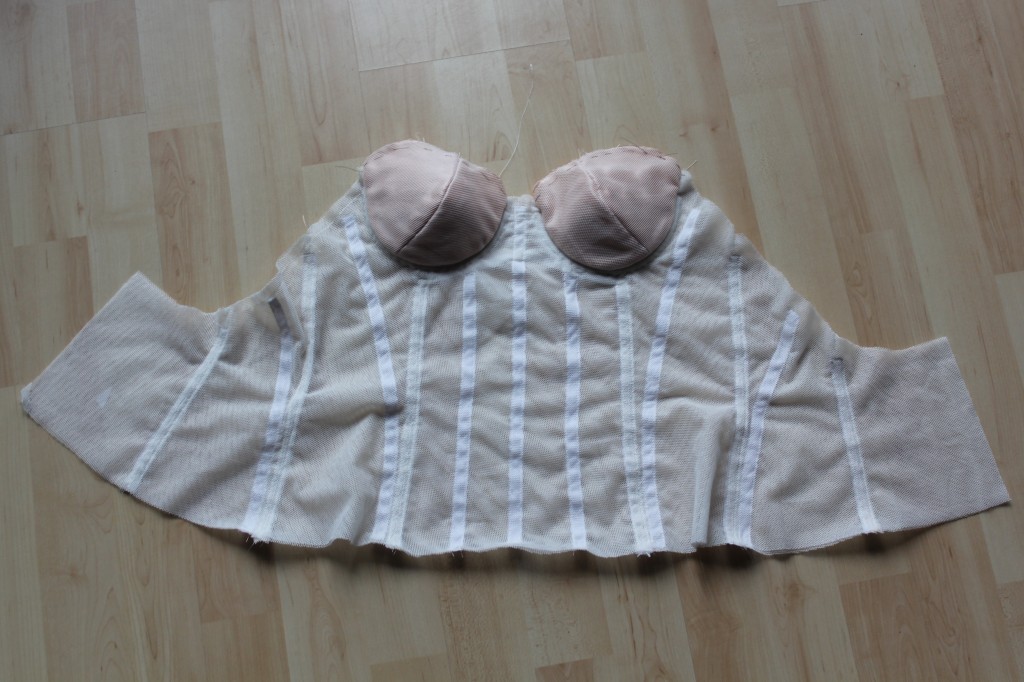
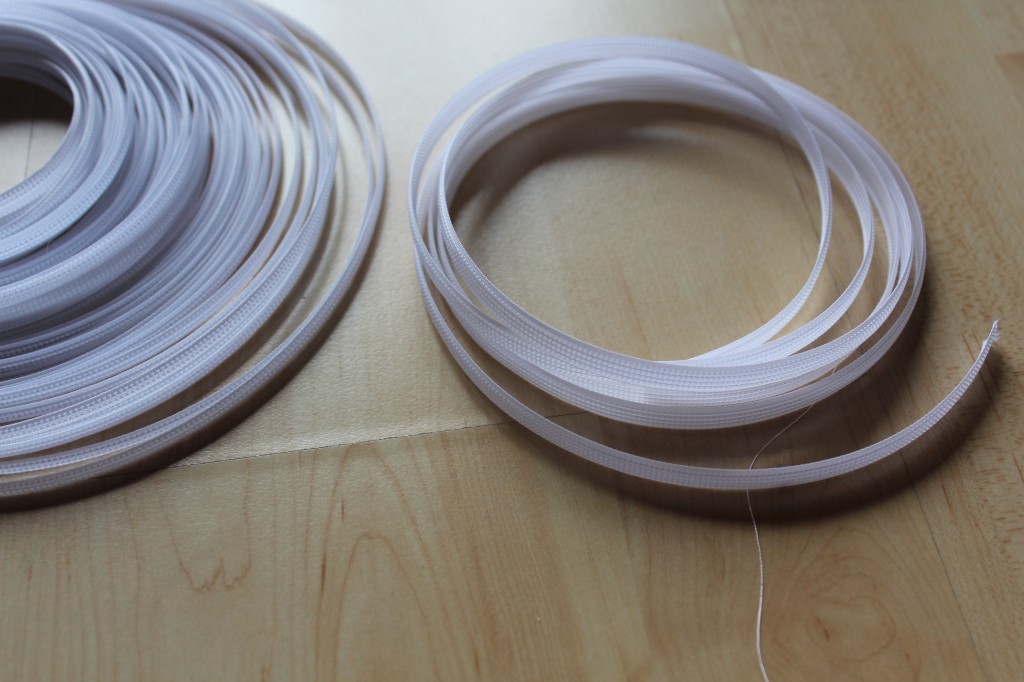
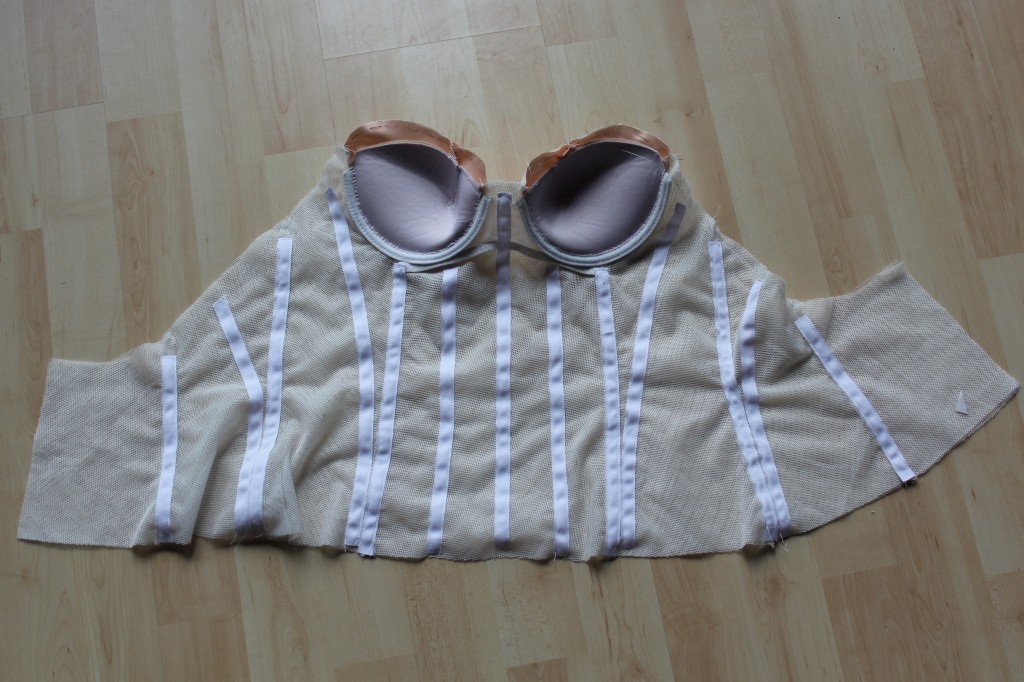 I used two different width of polyester boning (courtesy of The Stitchery). As I am using very lightweight fabrics for my dress, steel boning would’ve been too heavy and bulky for the cause.

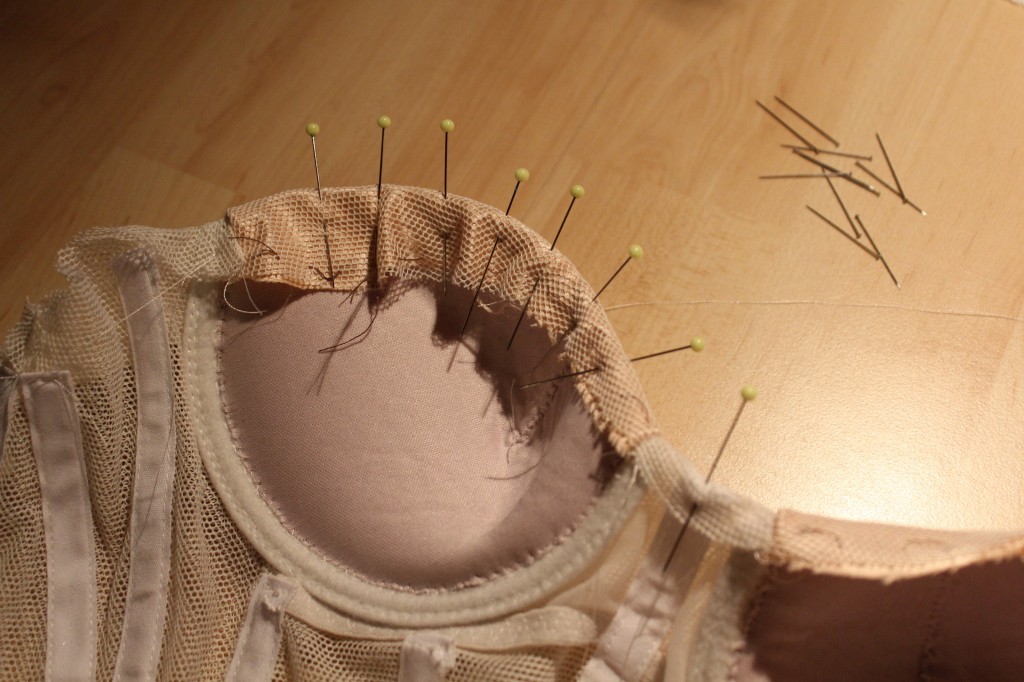 Neatening the neckline before attaching the silk bias binding strip with handstitches:
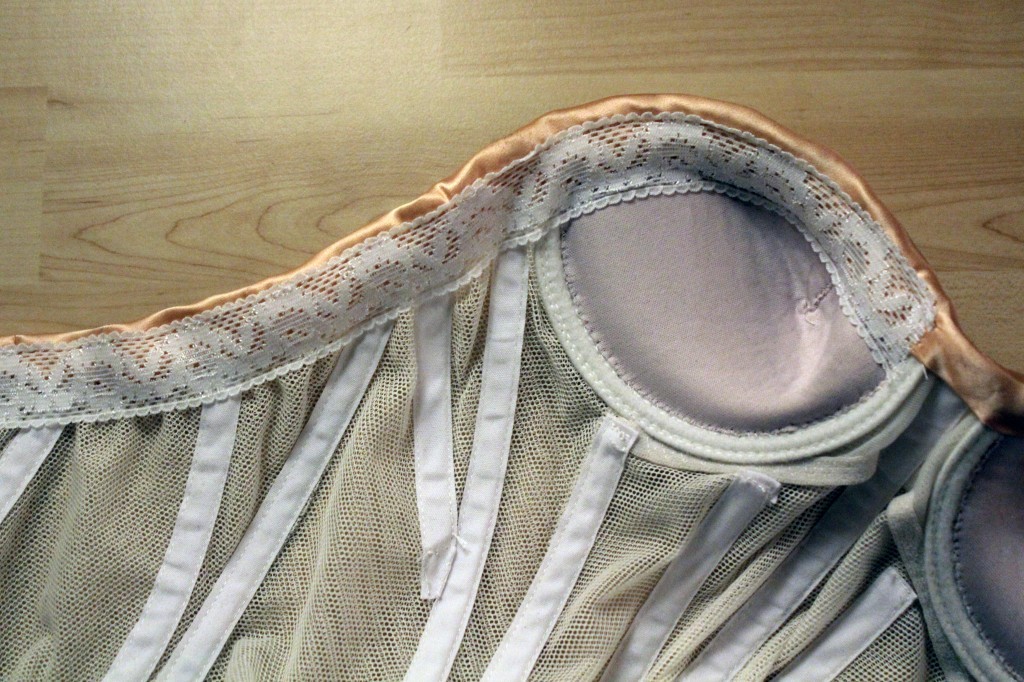
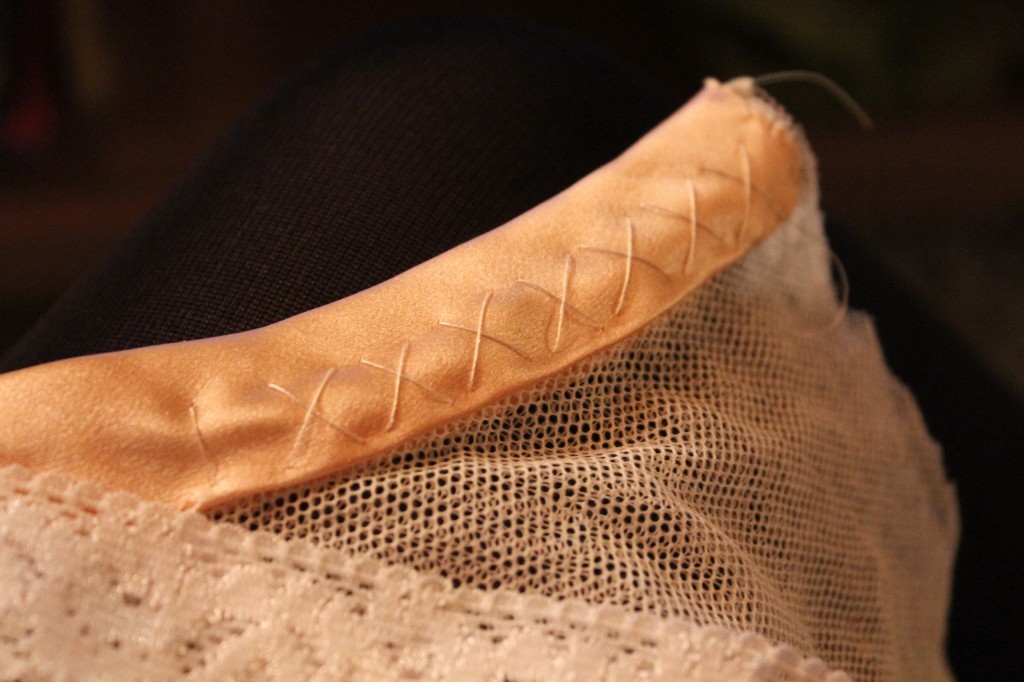 There was the issue of preventing the corset from collapsing forward as I had no straps and hardly any structure to balance it out in the back. I used some pretty lace elastic to build enough tension to keep everything in place.
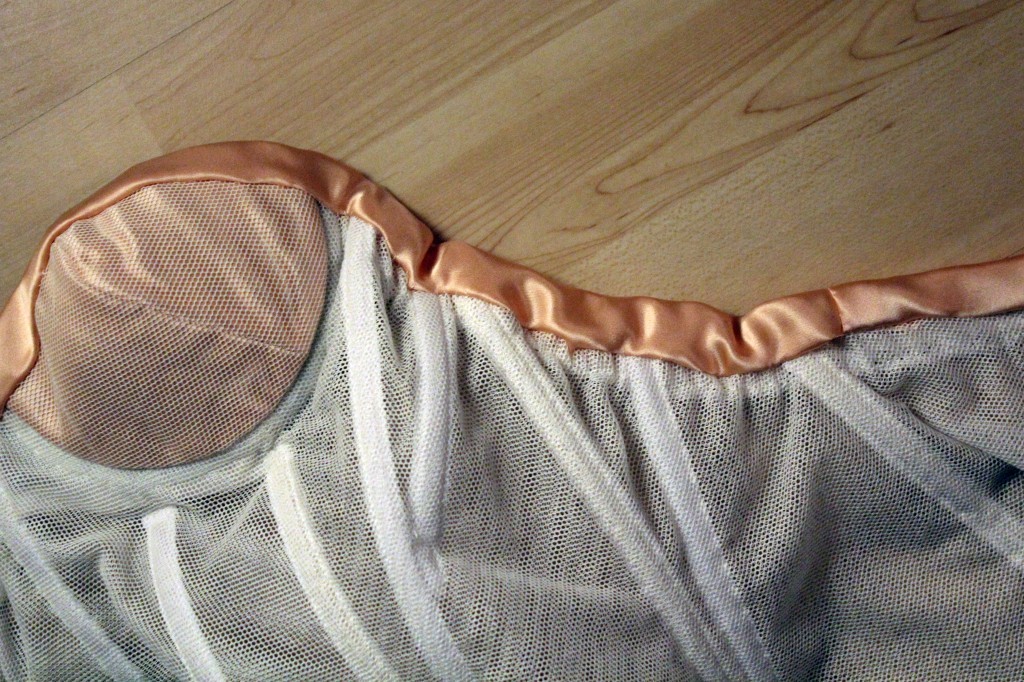
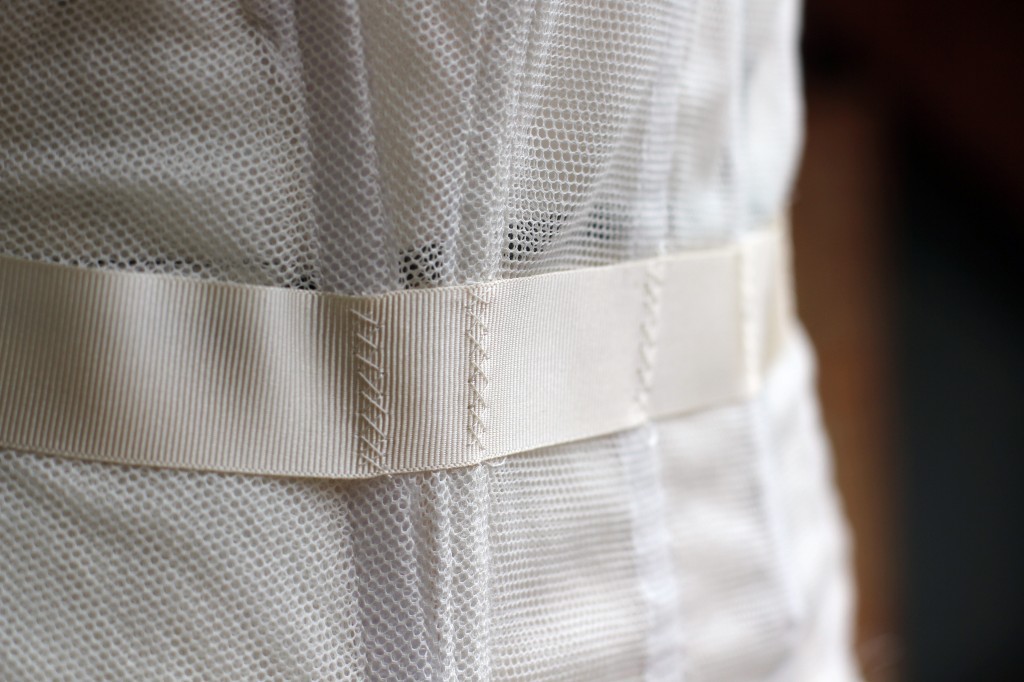
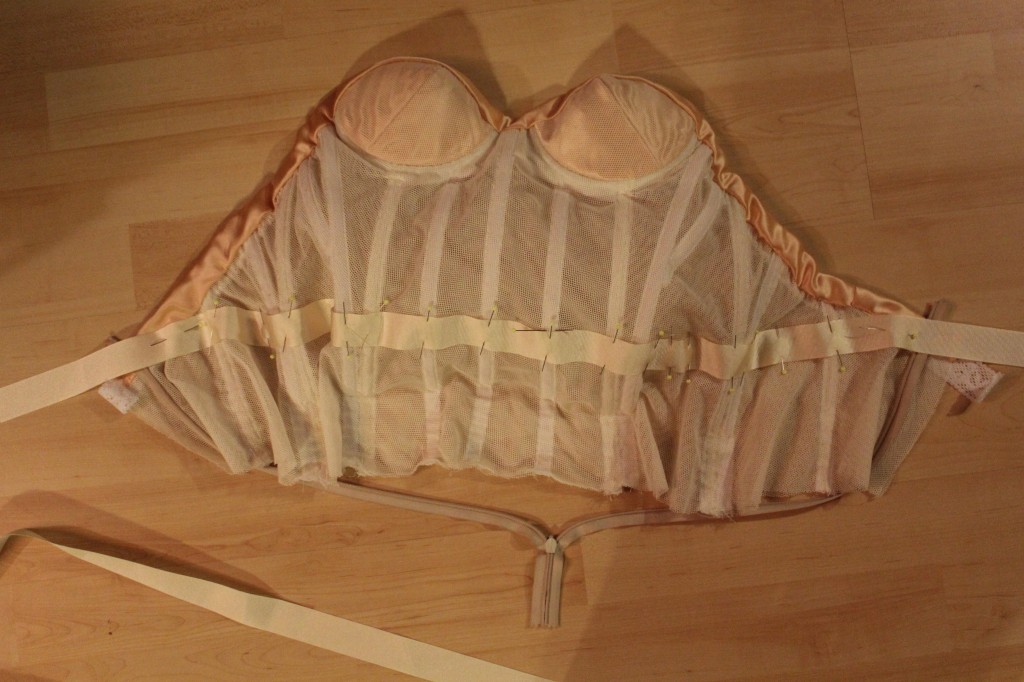 Last but not least, I added the waist stay. It’s a 2,5cm wide grosgrain ribbon that I sewed onto the boning channels.
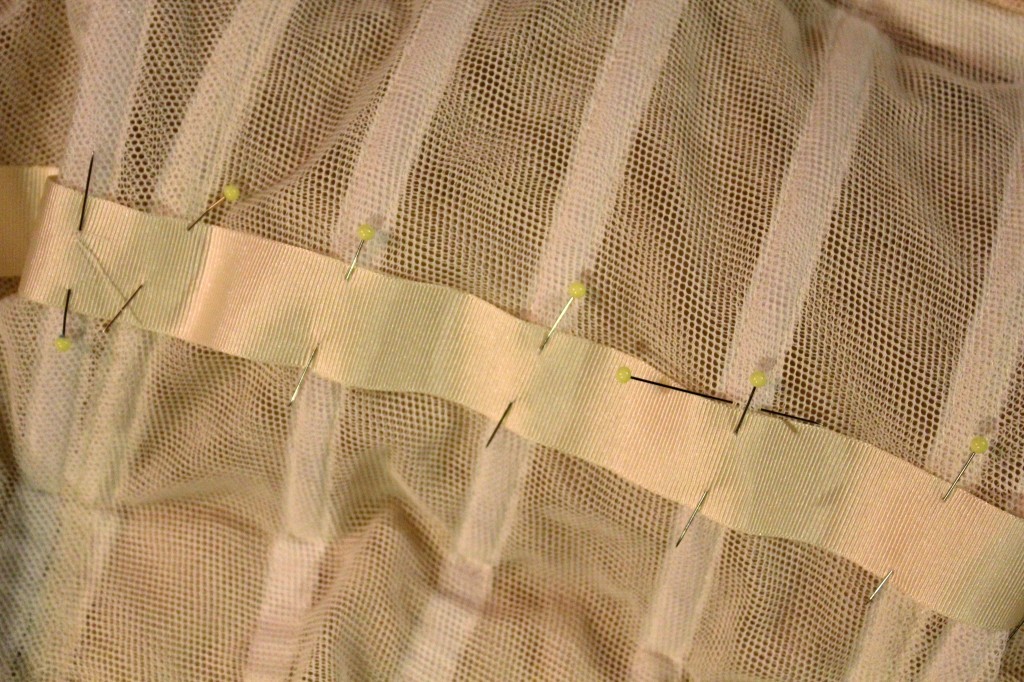 It not only helps to keep everything in place but is also super pretty:
Sounds all pretty good so far, eh? After a couple of weeks of working on this, I ended up with a pretty decent corset.
Well. I’m afraid this isn’t a happy story after all.
(No, my dog didn’t eat it. I don’t have a dog, although I’d love to.)
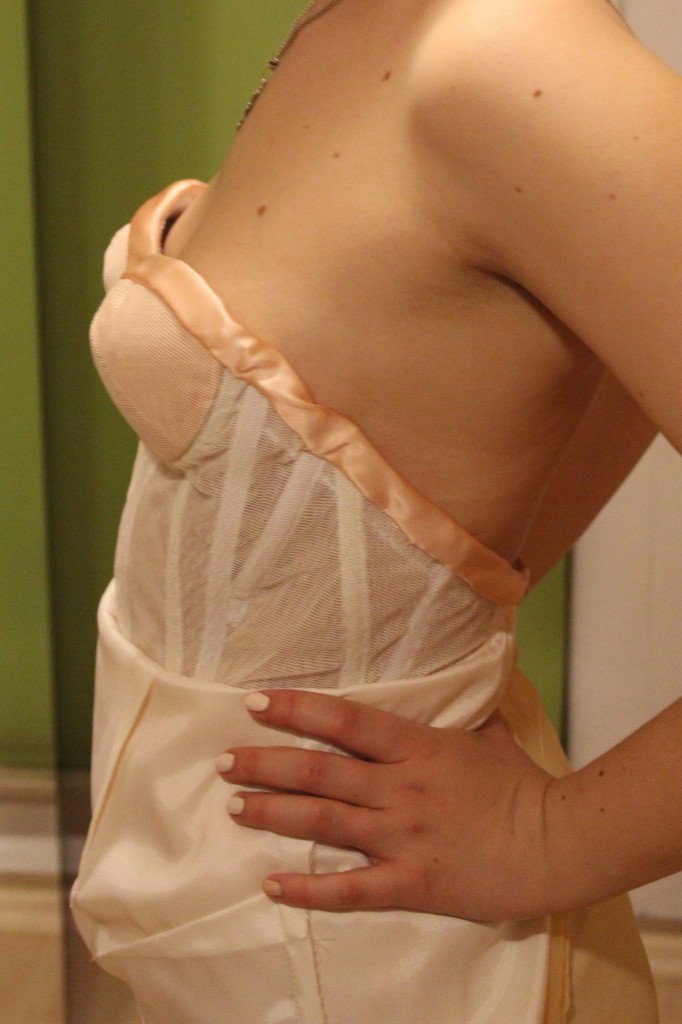
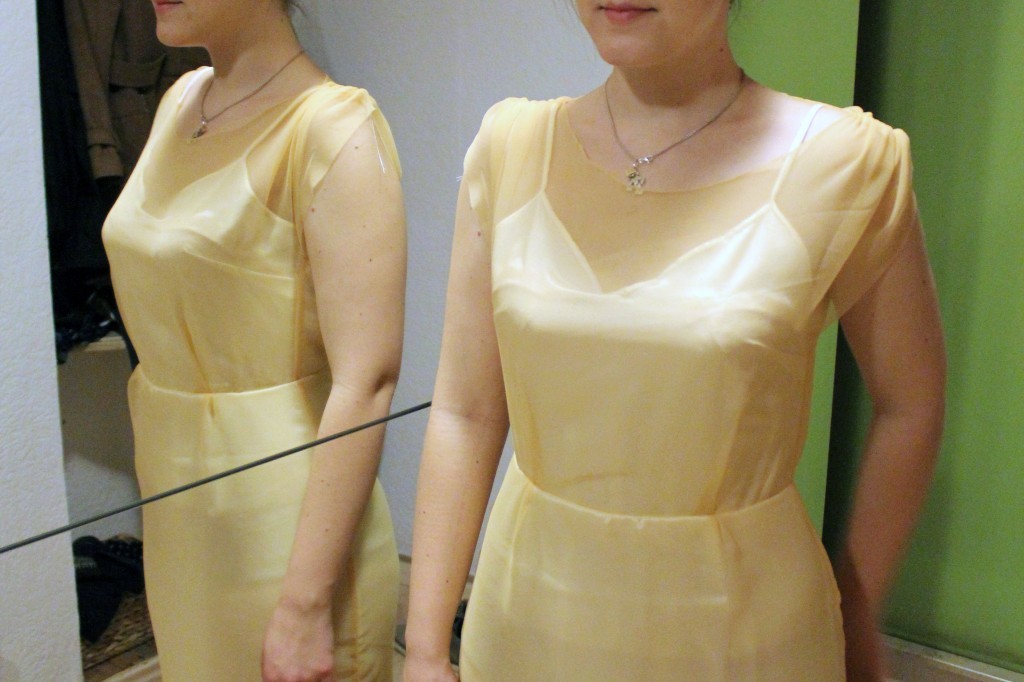
As I mentioned before, I am using very lightweight silk fabrics for my dress. Once the dress muslin and corset were finished, I basted the corset into the dress and tried it on. It just didn’t work. The corset was fine, the dress too, but they, at least, surely wouldn’t get married. The corset was way too bulky, not skin-tight enough around the bust (which is near impossible without a back and straps). Also, although I used the lightweight polyester boning, it showed through the fabric. The actual fabric was even more lightweight than the muslin fabric, so this could only get worse.
You can sort of see the problem in the photographs, but it was even worse IRL. Sooo, after a moment of uncontrolled anger and despair I realised I had to let this corset go. It would definitely not be part of the wedding dress.
Bummer, eh?
Some of you planning to wear similar backless dress in the future might want to know how I dealt with this situation in the end. After anger and despair changed into dissapointment and eventually acceptance, I searched Amazon for about an hour and decided to get a self adhesive bra for 7€ to try and see if this was a possible solution. As it was quite cheap I ordered two different sizes, to be on the safe side.
I was very doubtful at first, but this bra actually worked. It even is the right exact same colour of my lining fabric. I wore one a whole day just to see if it would stay on and it did. They’re reusable and I kept the other one as backup on the big day. I didn’t need it though. It feels weird at first, but I got used to it. It only required a bit of boob hugging every once in a while when no one was looking, whenever I felt it was coming loose at the edges. So for someone small-chested like me, this is actually a decent solution.
Wow, you read through the whole thing! Thanks for that! Hope you enjoyed the post and don’t forget to enter the GIVEAWAY this week!
Special thanks to The Stitchery, who sponsored some of the dress and corset supplies and notions such as boning, ribbons, bra cups, button band and zip. You rock!
xx
Charlie
Happy sewing!
♥
facebook/bloglovin/pinterest
twitter/instagram
Stay in touch!

So impressed with your corset, you must have been gutted! Can you wear it with something else. Love all the detail in your post.
Thanks, Mags! Yesss, such a bummer. I probably could. I haven’t hemmed it yet and it still hasn’t got any fastening. But I’ll keep it and might sew it into another dress one day. x
Def I would use it for a summer dress or a dress for a wedding as a guest. So many uses or use it for under a blazer for that chic look. You did such a great job though. Have a great day.
Be well.