

 I recently bought a white tee and refashioned it for my best friend’s birthday (yes, the one who also was lucky enough to get a made-to-measure bridesmaid dress for Christmas!).
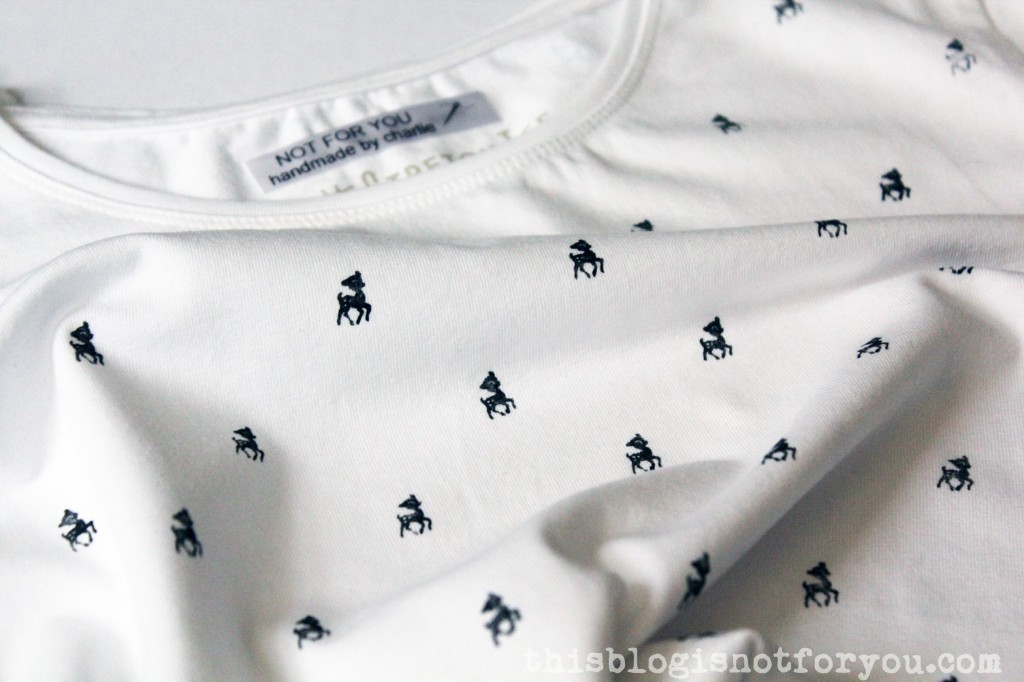
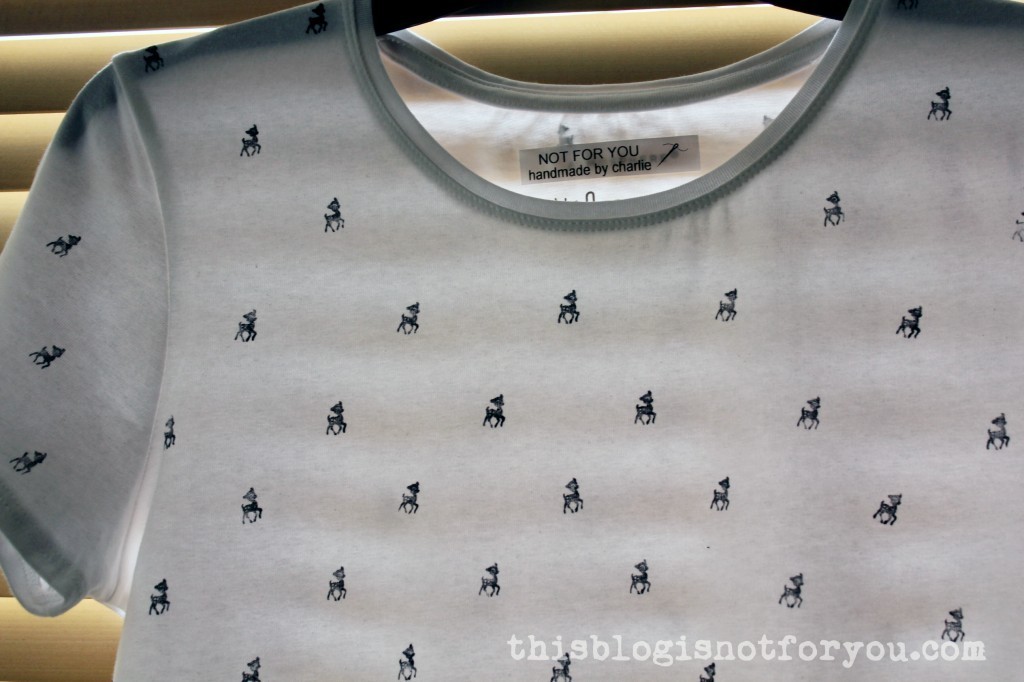
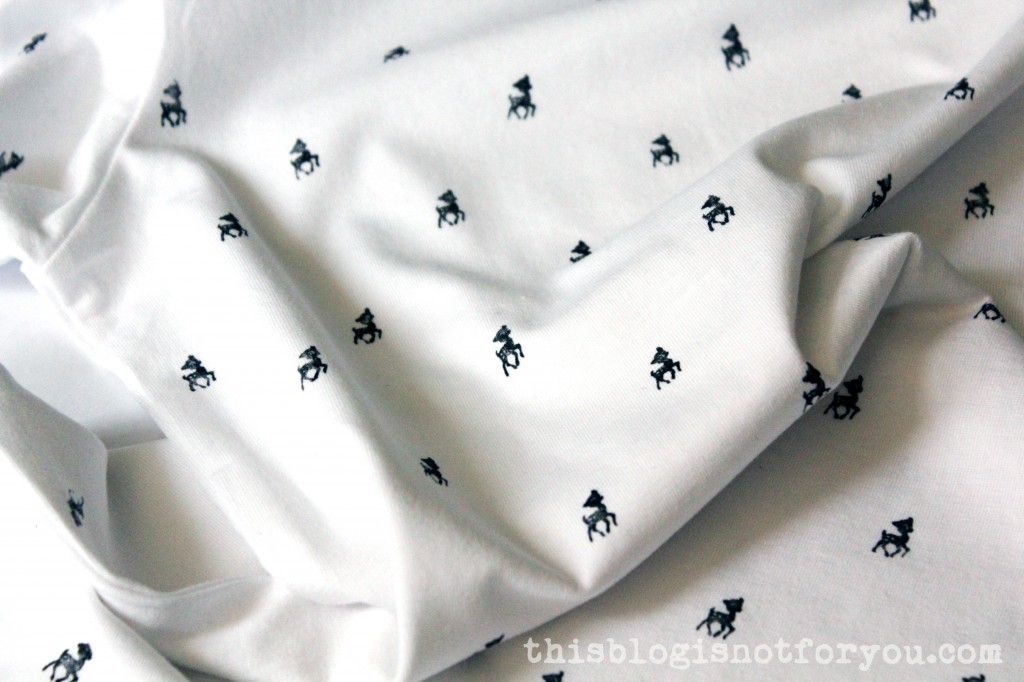
I bought a tiny Bambi stamp on Amazon. I have loads of textile paint left from the time when I spent my days stamping totes and tees (pre-sewing machine days!) and used a basic black paint for light fabrics which I bought in Oslo years ago. This paint is tried and tested many times and I know that it lasts forever without loosing its colour.
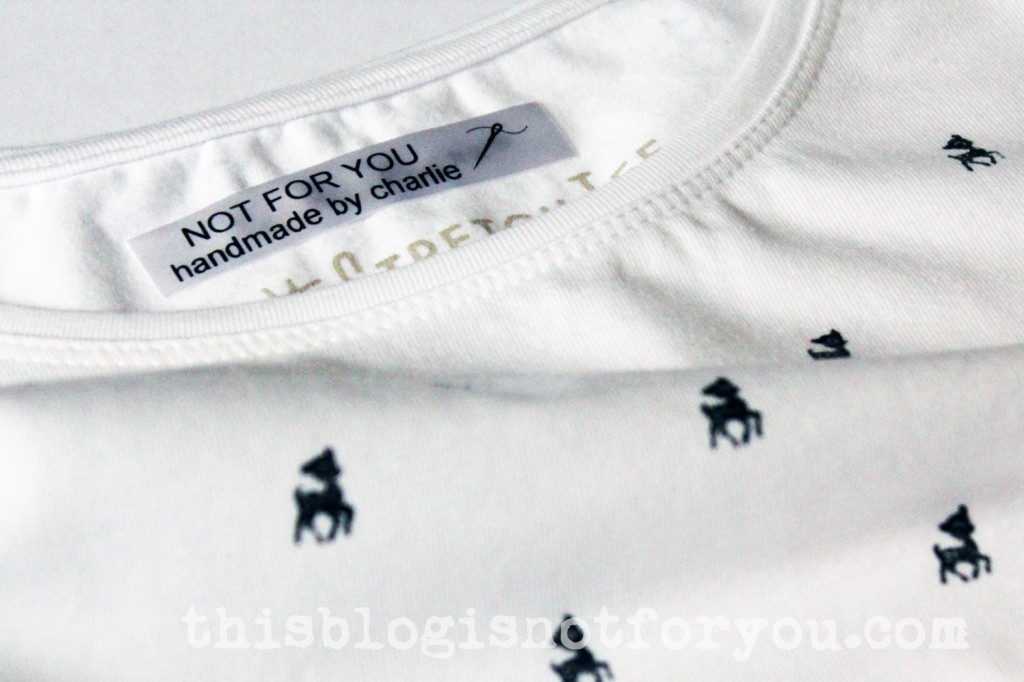
Yay! I finally have new labels! I used to have woven labels which you had to sew on (and I still have loads left), but I really wanted some that relate more to my blog, so I got these which are printed and you can simply iron them on. You can machine wash them by 40°. I might use some of the old woven ones for delicate fabrics, though as I’m not so sure if they will stick to the fabric if ironed at lower temperatures.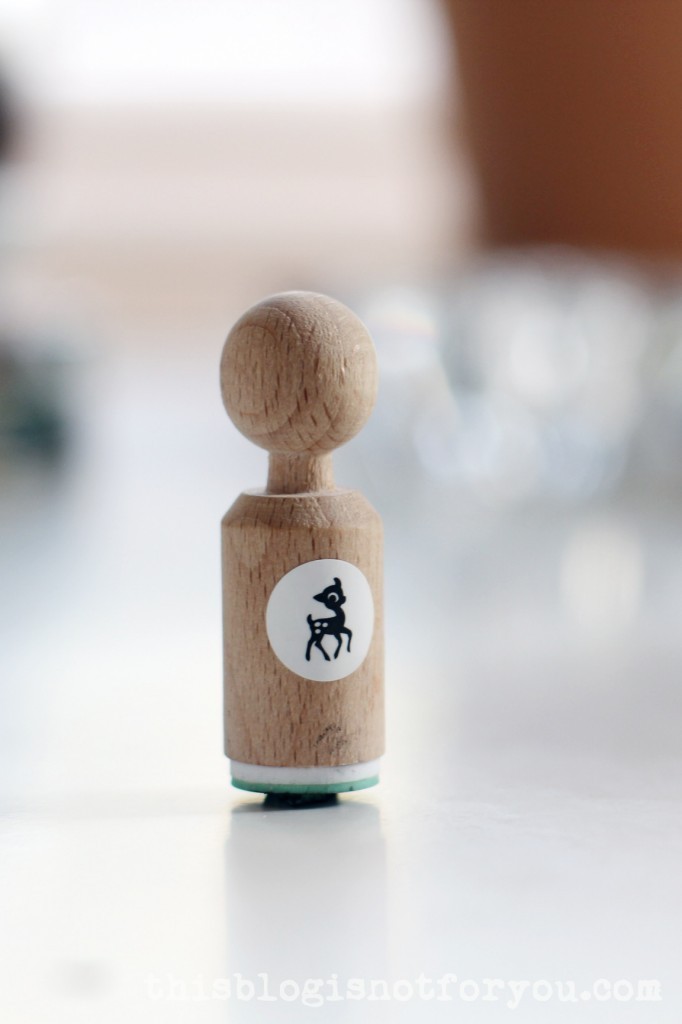
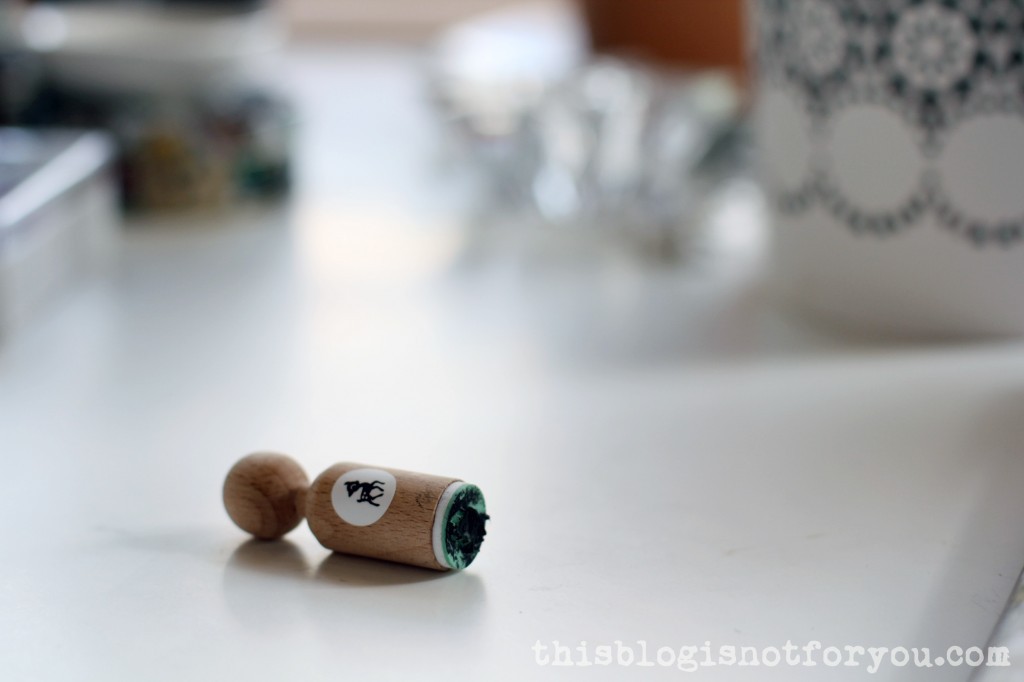 Stamps need to be cleaned before the paint dries. There will be stains that stay, but that’s fine as long as all fluff and paint gets washed off.
10 Tips for Stamping a Tee
Before you start, practise, practise, practise! It’s best to try stamp and paint on a piece of scrap fabric which is similar (in colour and structure) to the one of your shirt.
1. Wash your fabric/tee. The colour lasts much longer if your fabric is pre-washed.
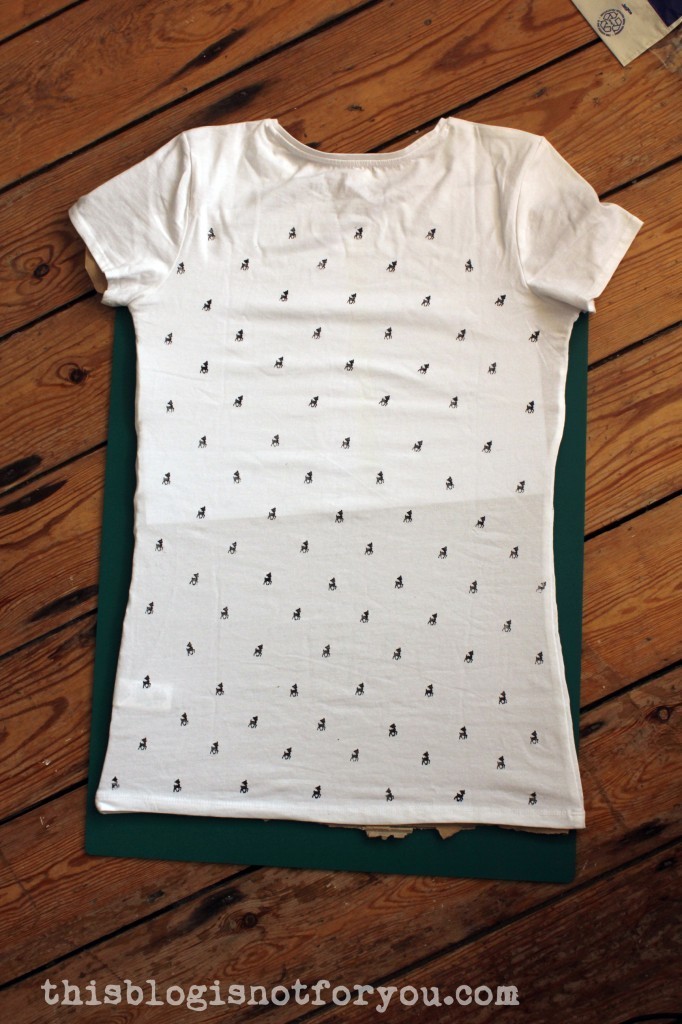
2. Place some cardboard between both layers of fabric. Don’t use newspaper as the ink might leave stains on light fabrics. I placed the tee on the cardboard and traced & cut around it. This really helped to keep the fabric even while stamping.
 3. Don’t mix the fabric paint with water. You can do that, if the paint is water-based, but if you want to have a neat and sharp print which looks stamped, I recommend using the paint as it is. You will only need a tiny amount anyway and mixing the paint with water might lead to a slightly blurry outcome.
4. Apply the fabric paint to the stamp with a small dry brush. I prefer this to dipping the stamp directly into the colour. The outcome will be much better, neater and uniform.
5. Less is more. Don’t use too much paint, otherwise the image will get blurry and you won’t be able to see the details.
6. Apply a little paint to the stamp after each step to make sure that the contrast of the motifs is consistent.
7. Make sure to clean the stamp every once in a while with water. Leave to dry for a few minutes before continuing. This is to remove any fluff or dried on colour which could make your design blurry and uneven.
8. Press the stamp down with a quick, well-aimed movement and try to avoid shifting the stamp or fabric.
9. If you are stamping the whole tee in a continuous pattern, start at the back of the tshirt working your way from bottom to top (same in the front). This way you will have perfected the method when you reach the neckline. It’s important that neckline, shoulders & bust area look good, because that’s where the image/motif will be most visible. Give the paint enough time to dry before you turn the shirt over.
10. Iron the fabric from the wrong side for about 5 minutes to set the colour. After that your print is washable (have a look at the instructions on the paint).

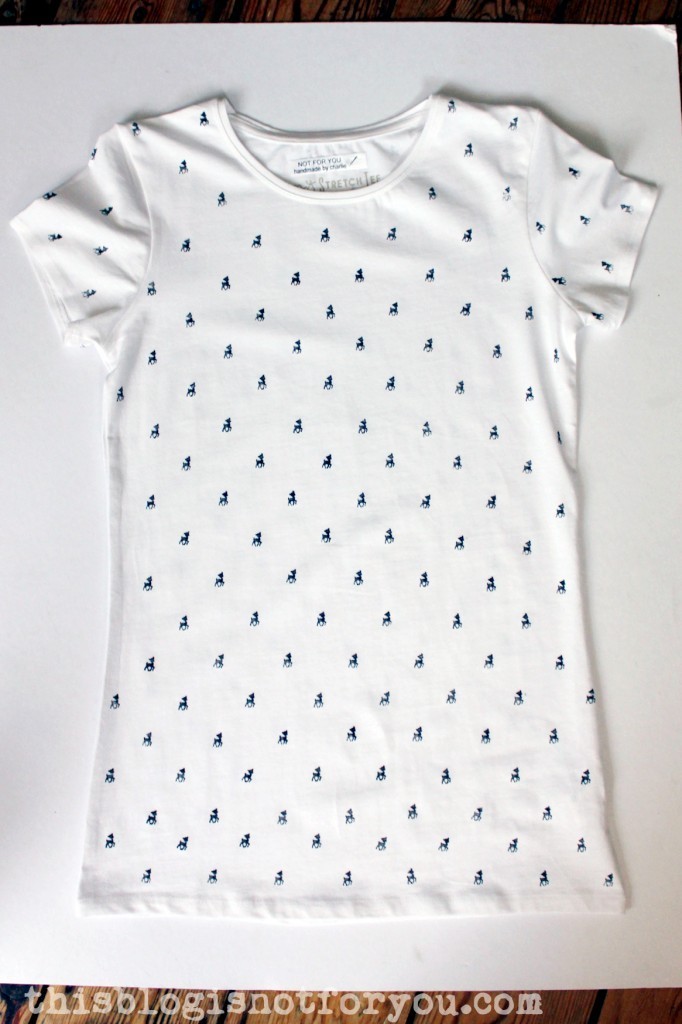
I loved this little stamp so much! So be prepared to see more Bambi tees on le blog in the future! I might even try to make a stamp myself using a rubber eraser – we’ll see! 🙂
Happy sewing!
♥
facebook/bloglovin/pinterest
Stay in touch!
This is so adorable! How do you get such a uniform design though? Did you lay down a ruler or something? It’s amazingly neat. I’m going to have to go and check out my rubber stamps now and try this! An eraser (pencil top) would work great for polka dots and even moons I bet. I can’t wait to see how it turns out! I’ve not been reading any blogs for the past six months or so, since I’ve been taking college courses. I’m glad that you posted this one between semesters! Too cute! (shutting up now)
Aww, thanks Cindy! It’s really super easy and surprisingly quick. Even with painting the stamp every time before I used it, it only took me about 45mins to do each side of the shirt. I didn’t use a ruler, just visual judgment 😀 When using a white shirt you can draw your design on a paper and place it underneath, though – if you don’t feel confident enough to just stamp away. good luck!!
Oh wow! Project Run & Play had a DIY textiles theme this week- all the creativity with fabric is making me want to try something new! Love the little deers!
Delicate fabrics can be ironed on with a presser cloth… try first on a scrap but as long as you are careful not to keep your iron on forever…. it should work just fine. Cute shirt!
Hi,
I was wondering if you could tell me the name of the company that made your labels. And also where one could purchase the stamps?
Thank you
Keep up the great works guys I’ve incorporated you guys to my own blogroll.
Nice Tutorial ..I like fabric thanku .