We all made a dress using the new collection of John Lewis 150 fabrics. Lisa helped us out with some sewing and fitting. We all had a blast and since we were just chatting away half of the time, no one finished their dress in time (except for Roisin of course, who sewed in super-speed mode, Dolly-Clacket-style). There will be a more detailed post with pictures later this week. In the meantime, here’s a glimpse of my as yet unfinished dress:
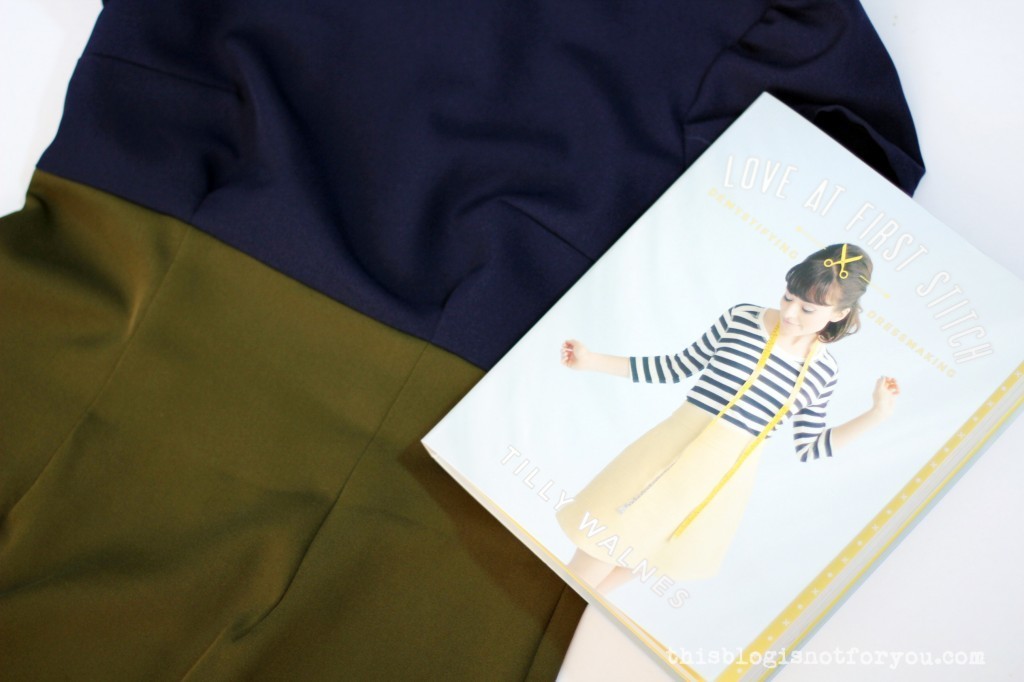
Love at First Stitch
I finally got my copy of Tilly’s new book. It directly moved from my wishlist to my bookshelf. At first I thought this book might be too basic and only for beginners, but I’ve already read it from cover to cover and absolutely loved it! The dress patterns are gorgeous and I already made a colour-blocked version of the Megan Dress which I wore on Saturday at the Sewing Bee.
Visiting Makegood Festival
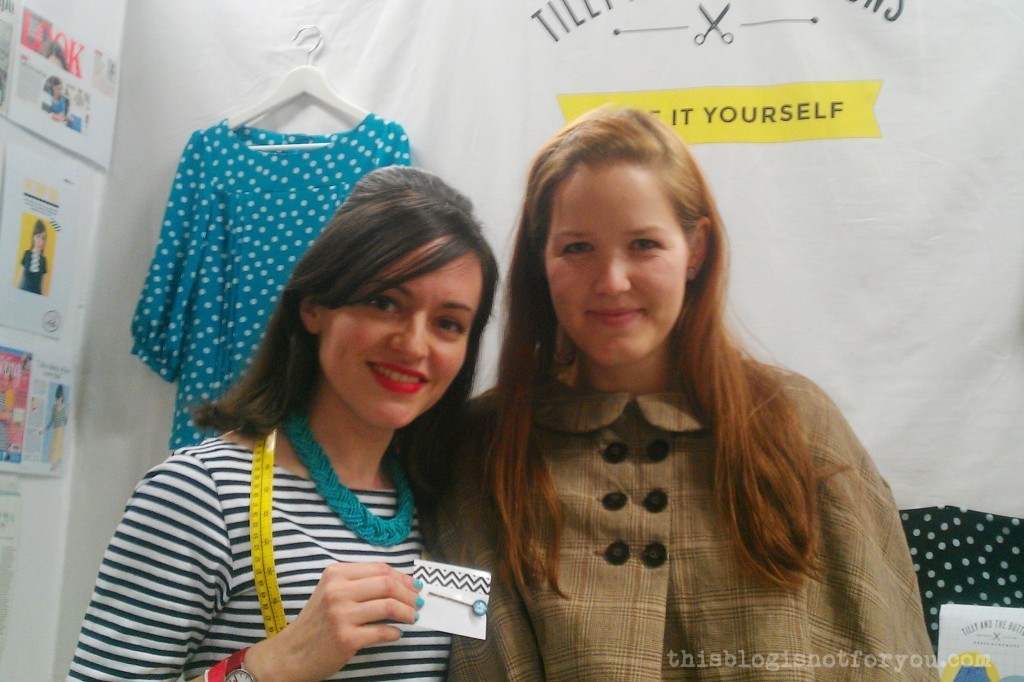
Last friday I was at the Makegood Festival and could check out some awesome new creative start-ups! Tilly was there, too, with the cutest stall on earth and I couldn’t resist getting a copy of the infamous Coco Dress. I also met the lovely Freya (Elise Patterns), who is launching her lingerie sewing patterns (hopefully!!) this week. I can’t wait to get hold of those knicker & Kimono patterns! I also really loved “Handmade by Bex” and bought one of her adorable hand-embroidered brooches! Aren’t they cute?
Sarah (Salt and Buoy) made these awesome linen cushions, embroidered with seaside scenes.
And this notebook which I loved (for obvious reasons).
New Pattern in the Making
Yep! While I’m busy with the sewalong for the Fairytale Cape, I’m already working on pattern #2, which I’m really excited about. Hopefully you’ll be, too. But you’ll have to wait a bit longer. 🙂
Twitter & Instagram!
This Blog joined Twitter (@tbinfy) & Instagram (@thisblogisnotforyou)! As I’m new to both, there’s still a lot of figuring out to do, but I’m slowly getting the hang of it.
NYLon Blogger Meet Up at the V&A
Source: Kitty Wong
NYLon2014 was two weeks ago and epic! I noticed that I forgot to take pictures of that day. Luckily, we had Kitty Wong, a professional photographer, take pictures of us. You can find them on Flickr.
Source: Kitty Wong
27 Dresses Challenge
I finished my 27 Dresses Challenge! Ha! I’ve already fallen in love with a Janome overlocker I used on Saturday’s Sewing Bee…
Phew, after these past two weeks I’m absolutely exhausted! I took a break from sewing today (just pre-washing some fabrics), but I can’t wait to finish and show off my Sewing Bee dress. So sewing it is tomorrow, I guess. 🙂
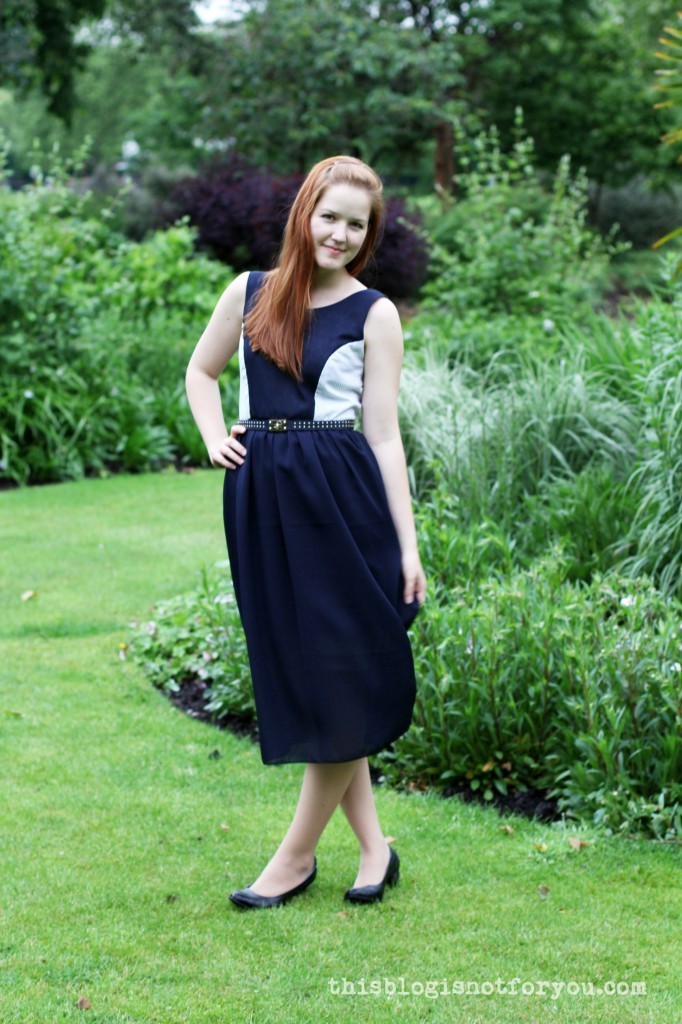
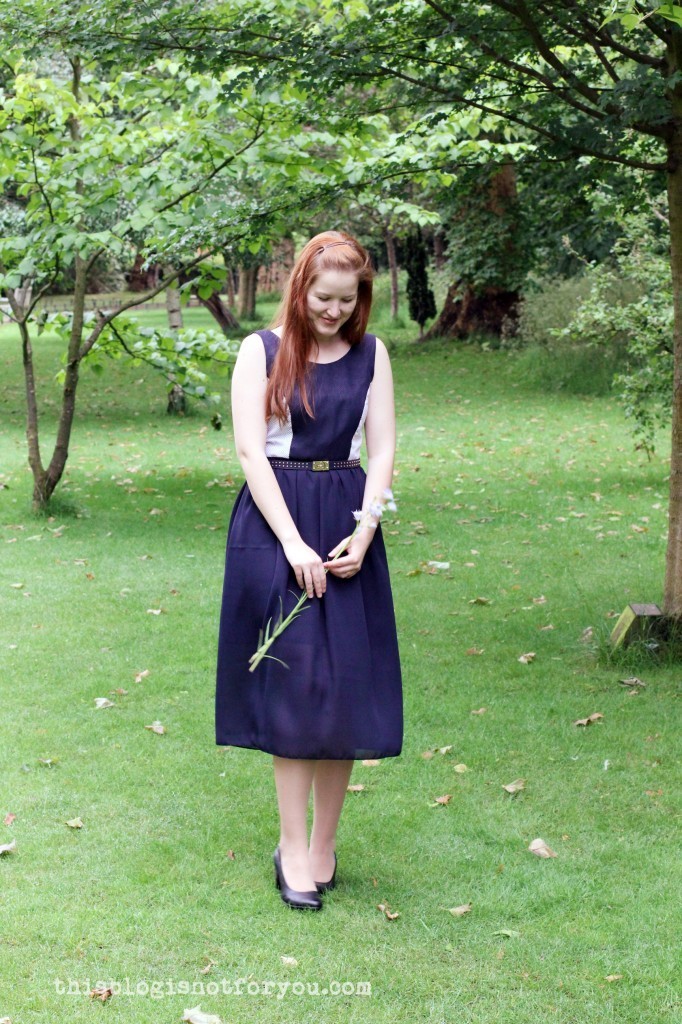
Wow, two garment posts in a row! Don’t worry, that’s not going to become a habit! I just wanted to squeeze in this dress, in time for this week’s Project Sewn sewalong. I wasn’t sure if we could take the pics on time because the weather in London was pretty crappy this week, but we managed to photograph the dress yesterday.
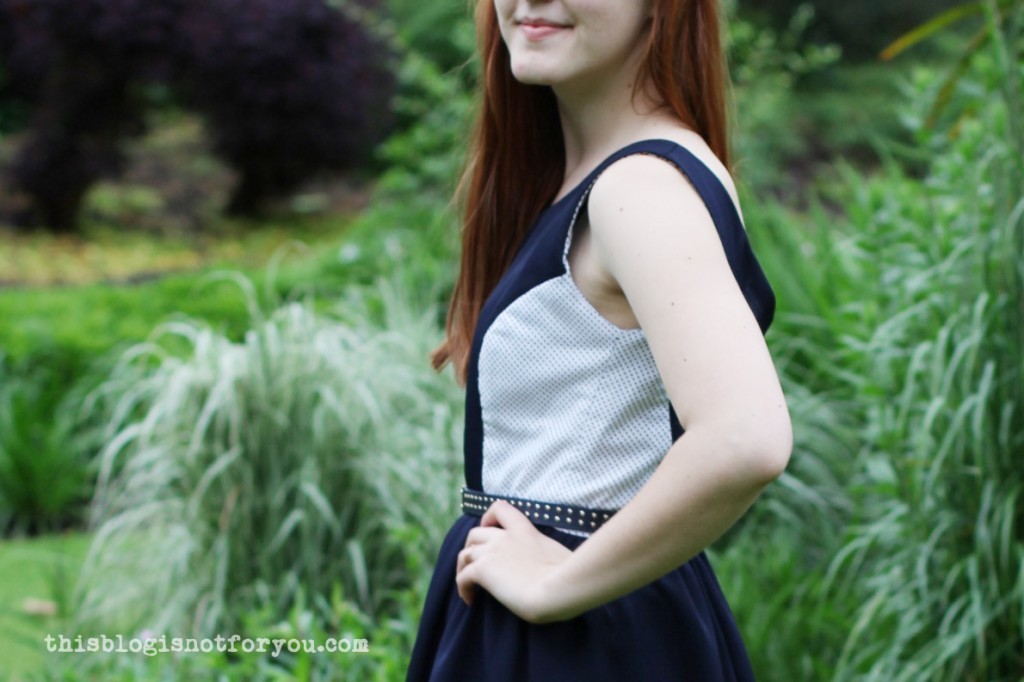
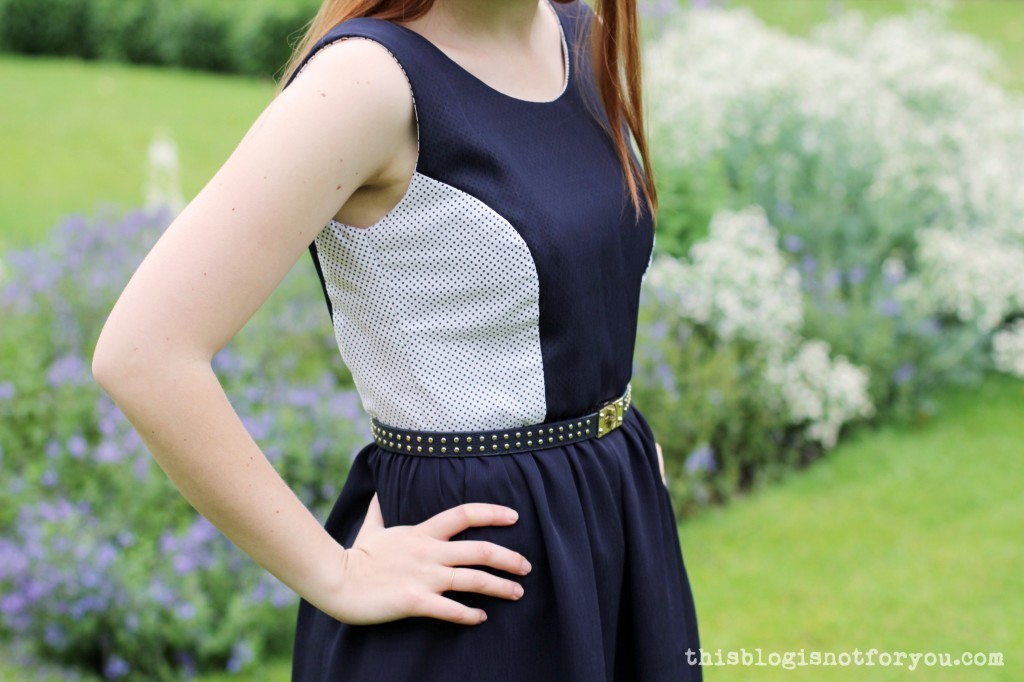
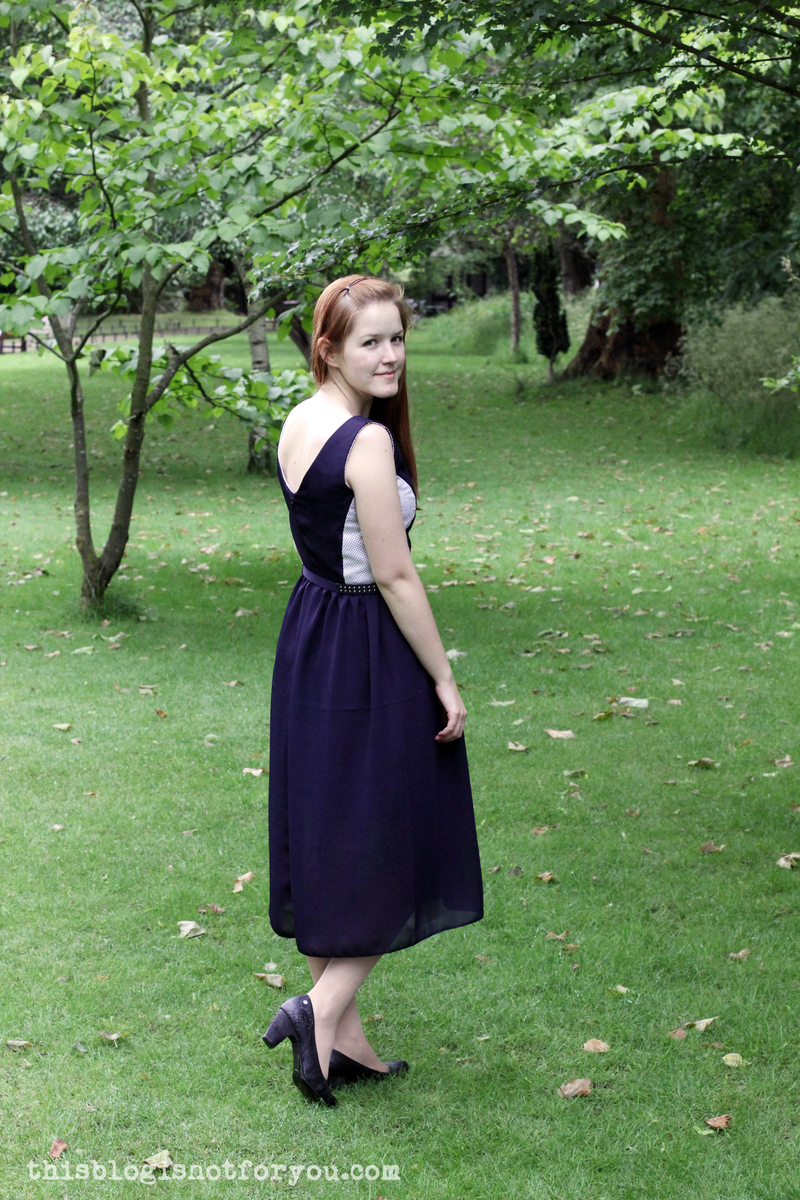
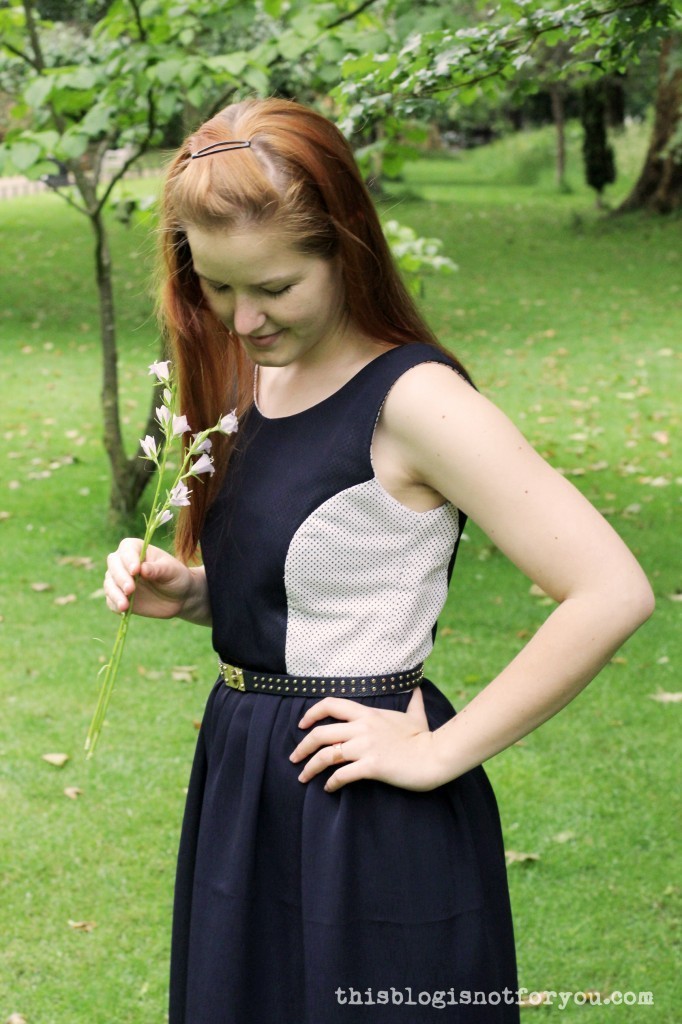
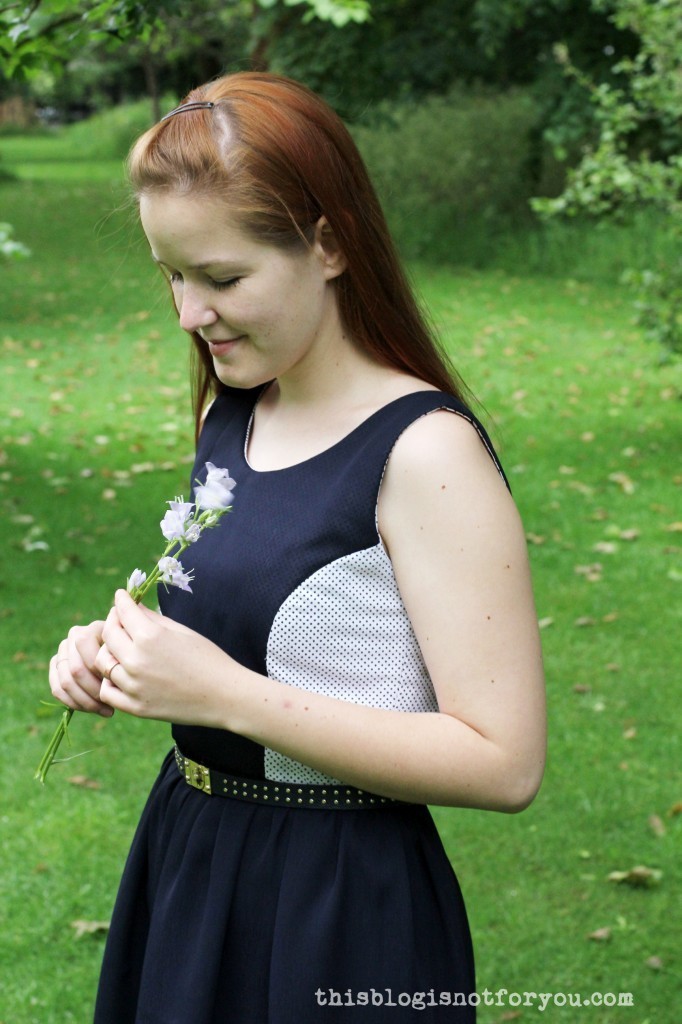
This week’s Project Sewn theme is “Signature Style” and what immediately came to my mind was: navy, white, polkadot, dress, chiffon. These are probably my favourite things (in terms of clothing) and although my closet is overflowing with navy and polkadots, I really was in the mood of making something that was totally me. I was lucky to find the right two fabrics in my stash (brownie points for stash dieting!!) and the pattern, BHL’s Elisalex was already traced and cut out from sewing my Floral Frenzy dress.
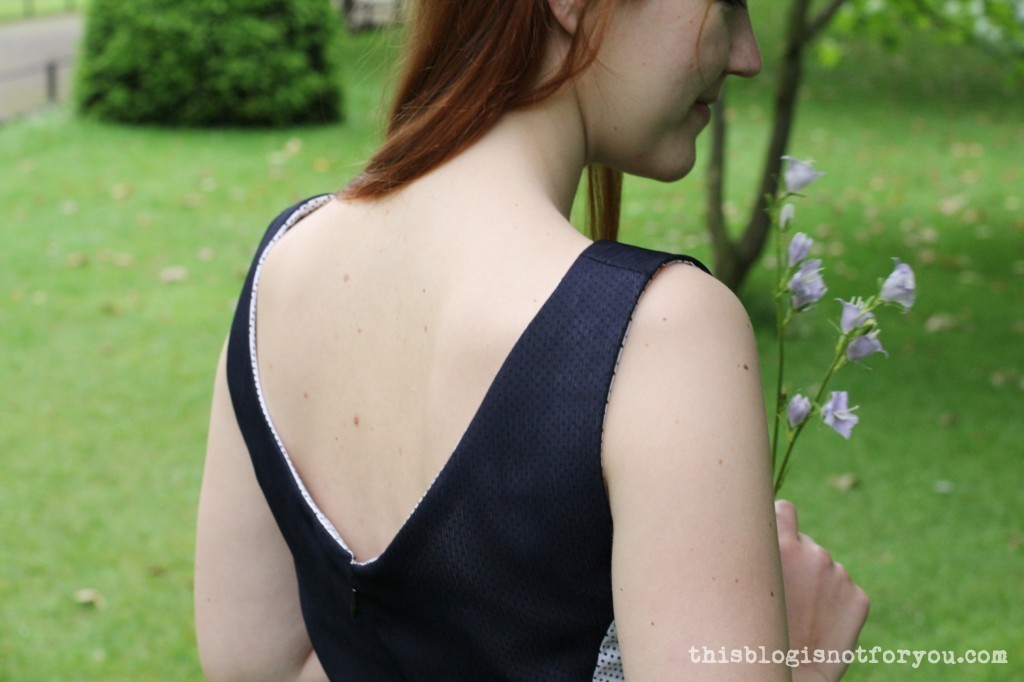
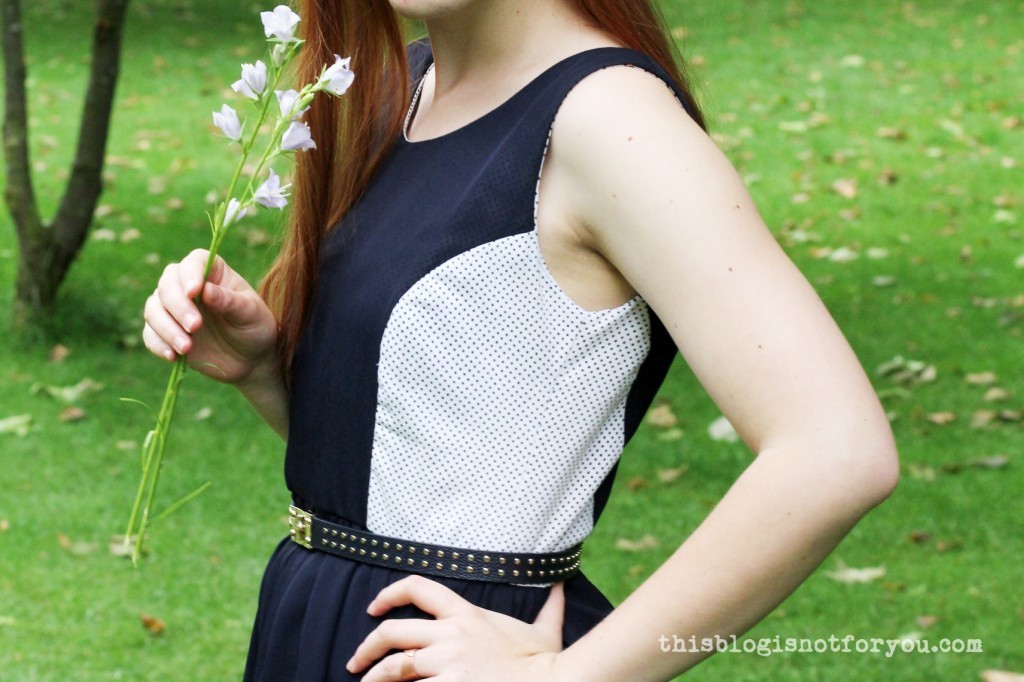
This time I made the dress without the sleeves (so much faster as you don’t have to sew on the whole lining by hand!). For the bodice I used white cotton with tiny black polkadots for the side panels and also for underlining my navy chiffon. I love how the little polkadots peek through the fabric in the front.
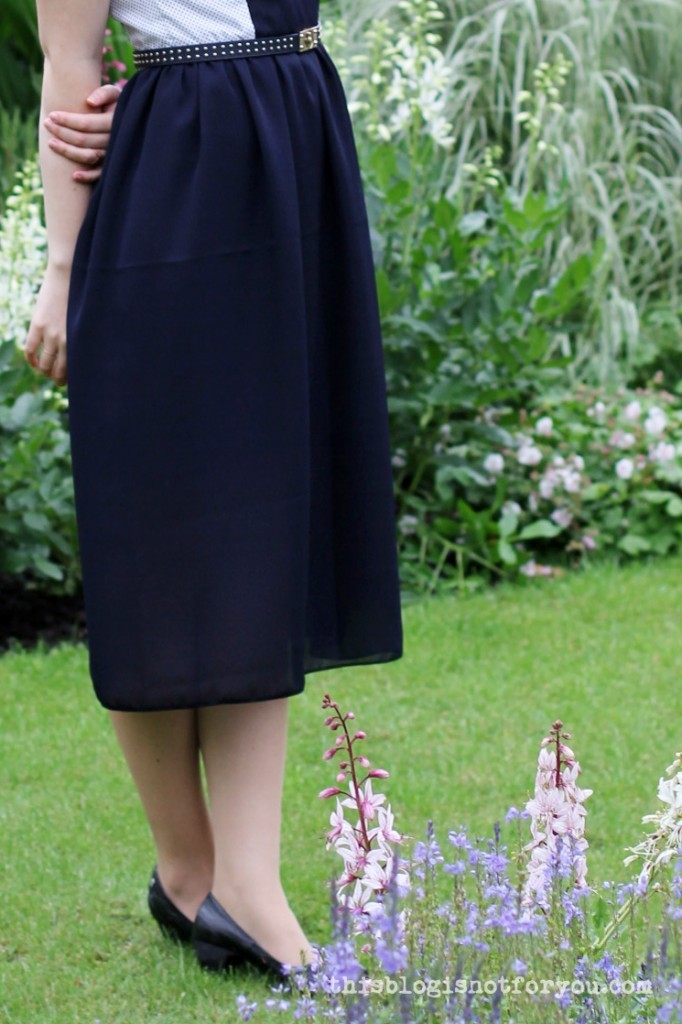
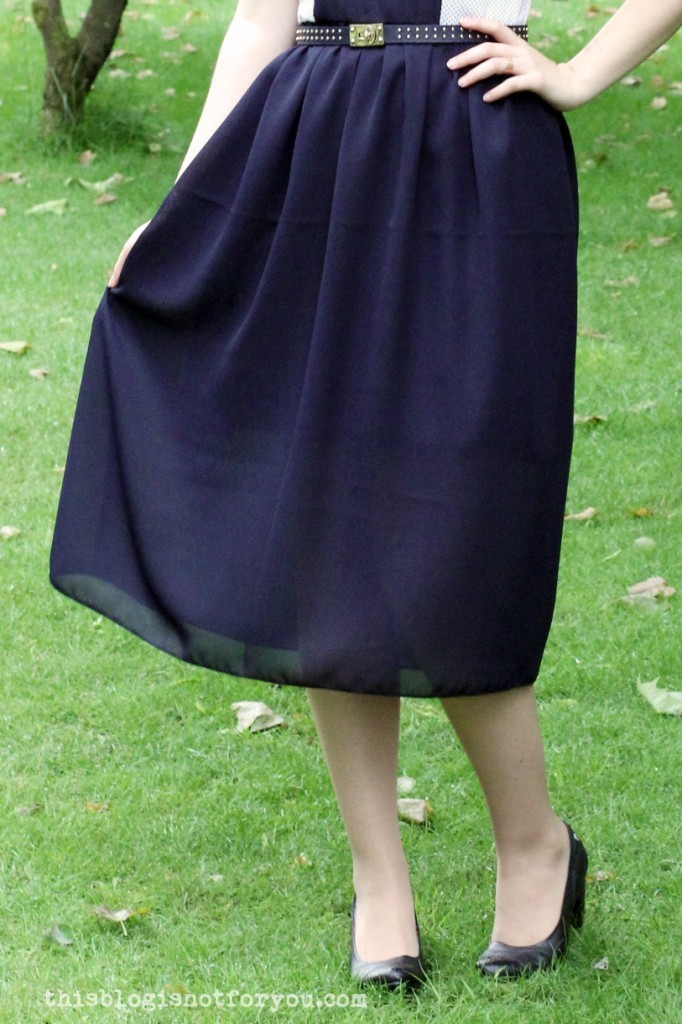
This time I didn’t go with the original skirt pattern and simply made a gathered skirt which consists of two layers (the fabric was super see-through). The second skirt underneath is much shorter and ends above the knee.
For hemming the skirt I used a narrow hem foot which made the tiniest and neatest hem you can imagine. You can buy these for very little money (if your machine uses standard presser feet). It just takes a little while to figure the best way to hold the fabric while you run it through.
Our local pub had some veeeeeeery convincing signs outside their door when we went to the park. But after we had to walk there twice (don’t forget to charge the camera batteries!) in this shitty weather, we decided to go to the off-licence around the corner and get some drinks to take home.
Oh, and BTW!
This is dress #27.
Yes! Twenty-seven! Finis! The challenge is completed! I’m free to head off and get an overlocker pour moi! I’m over the moon…and completely broke at the moment, haha. But I will be starting a new job soon (hopefully) and then it’s time to go and get this friggin overlord.
In the meantime…
♥ You can vote for my dress over at Project Sewn’s link up. ♥ The voting starts tomorrow and ends on Sunday!
Hi ladies (and gents)! Hope you had a great week so far! Mine was super busy and fun and I am greatly looking forward to the weekend which will be full of sewing events and crafts!
What you see here is #26 of my 27 Dresses Challenge which means there’s only one more to go … in theory! Inofficially I’ve already finished garment #28, which I won’t call #28 because I don’t have to keep track anymore, ha! And I will do more refashion projects again (not counting them towards the challenge wasn’t very motivating!). The piles of thrifted garments to be refashioned are taking over the flat.
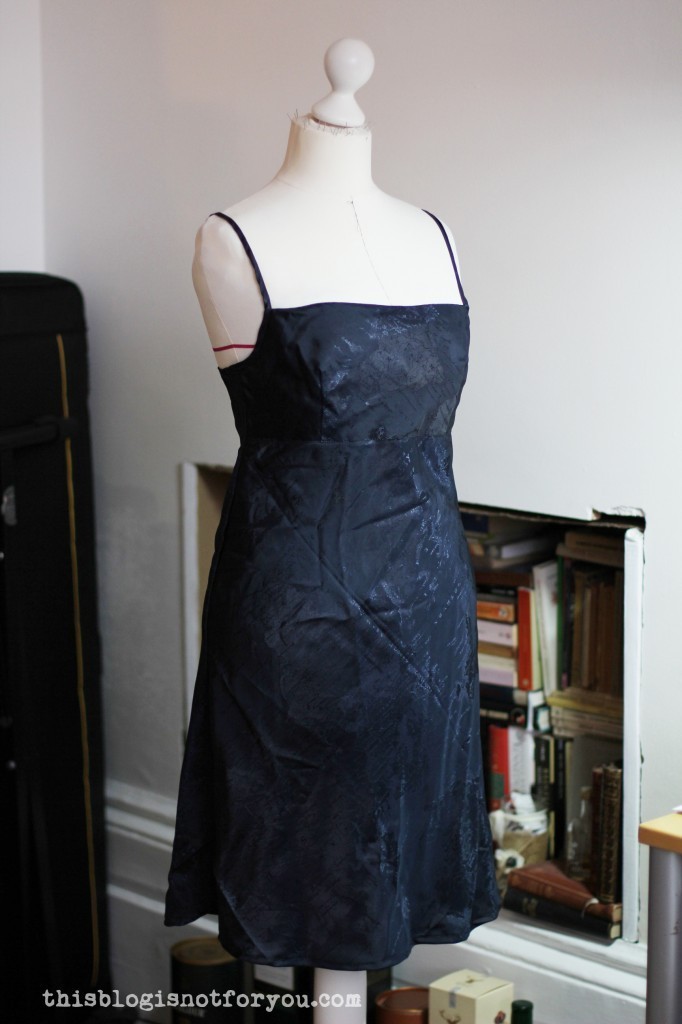
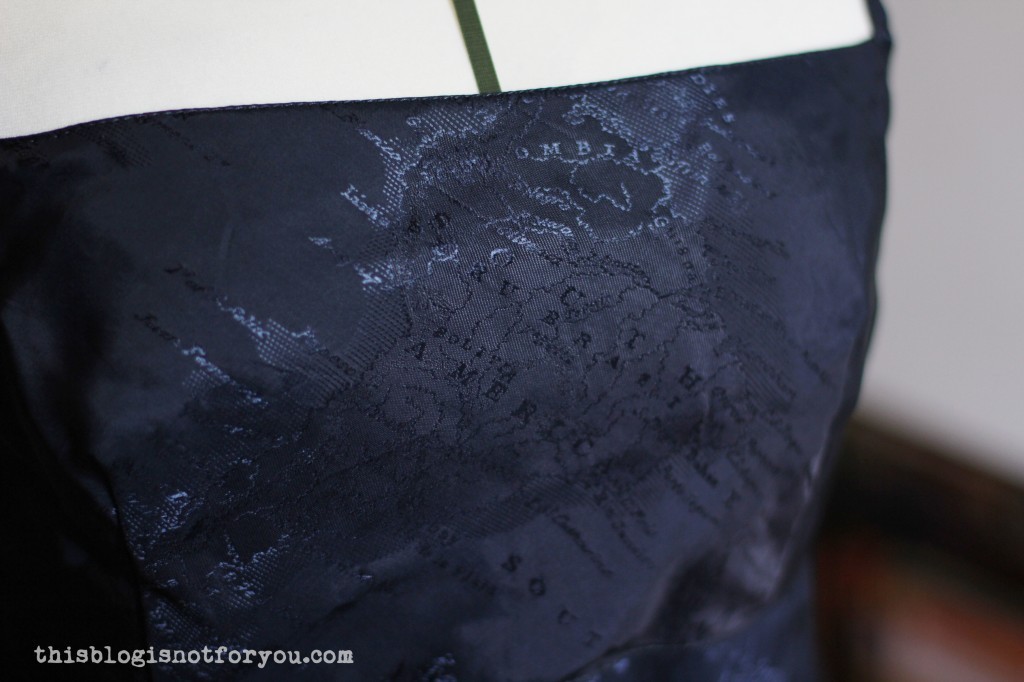
#26 actually consists of two dresses. As the dress is made from polyester, I had to sew a slip dress to wear underneath and keep the fabric from clinging to my legs like a toddler. This is why it took me so long to blog this. The slip-dress-less dress was hanging in our living room for weeks until I was sick of looking at it, so I hung it in the closet, where I almost forgot about it. (Luckily, summer in London does require some long-sleeved garments)
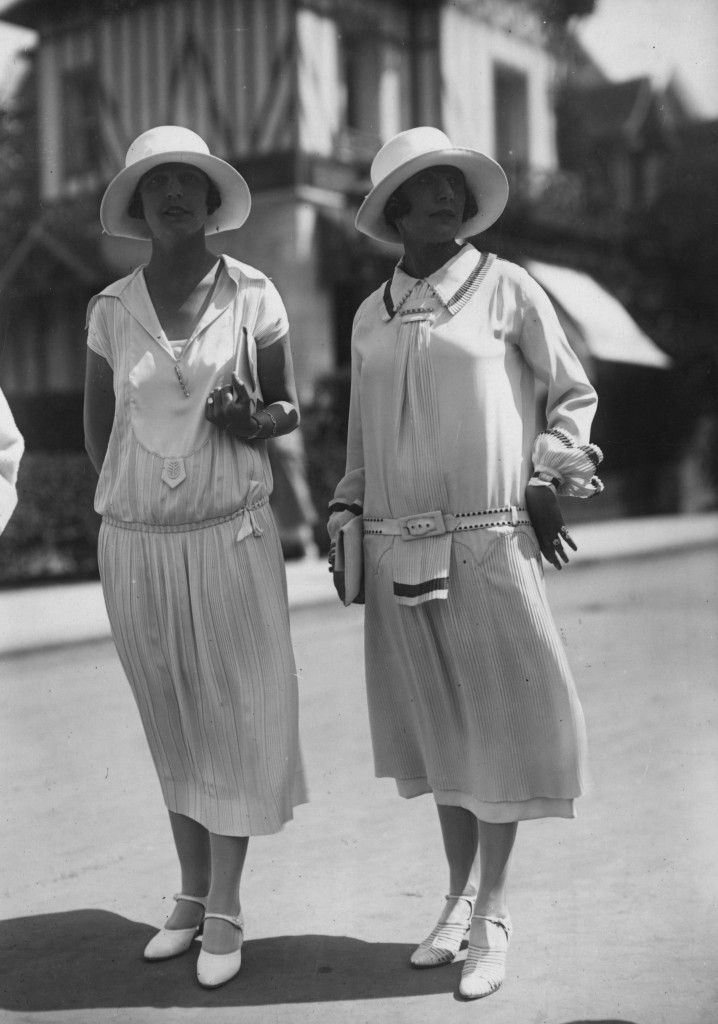
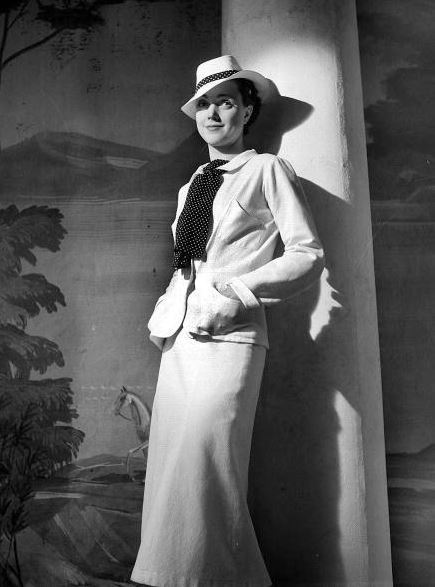
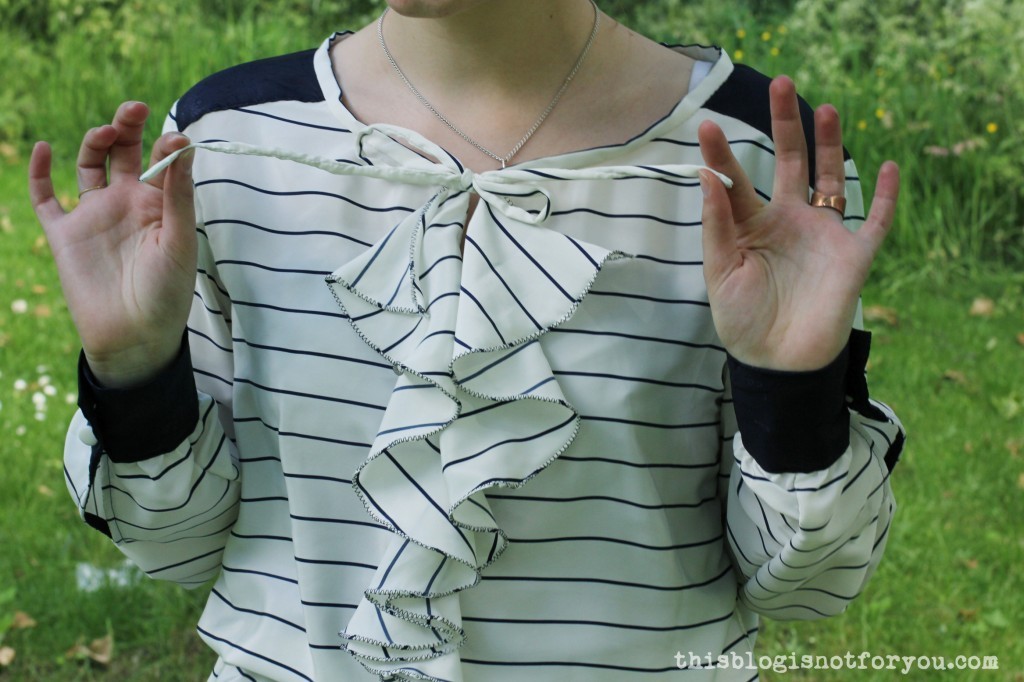
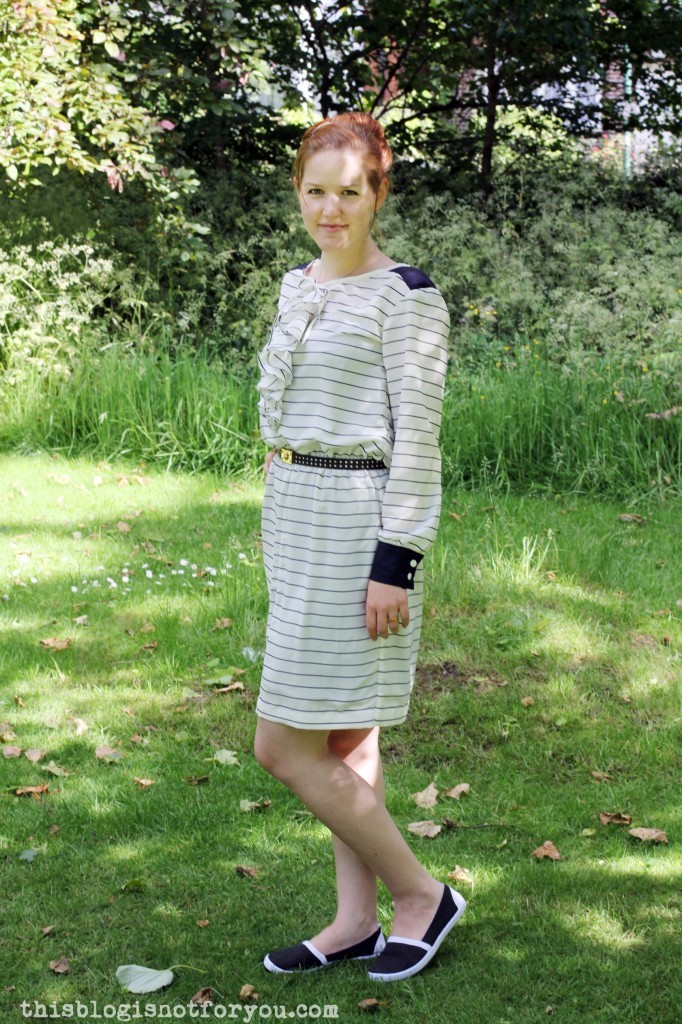
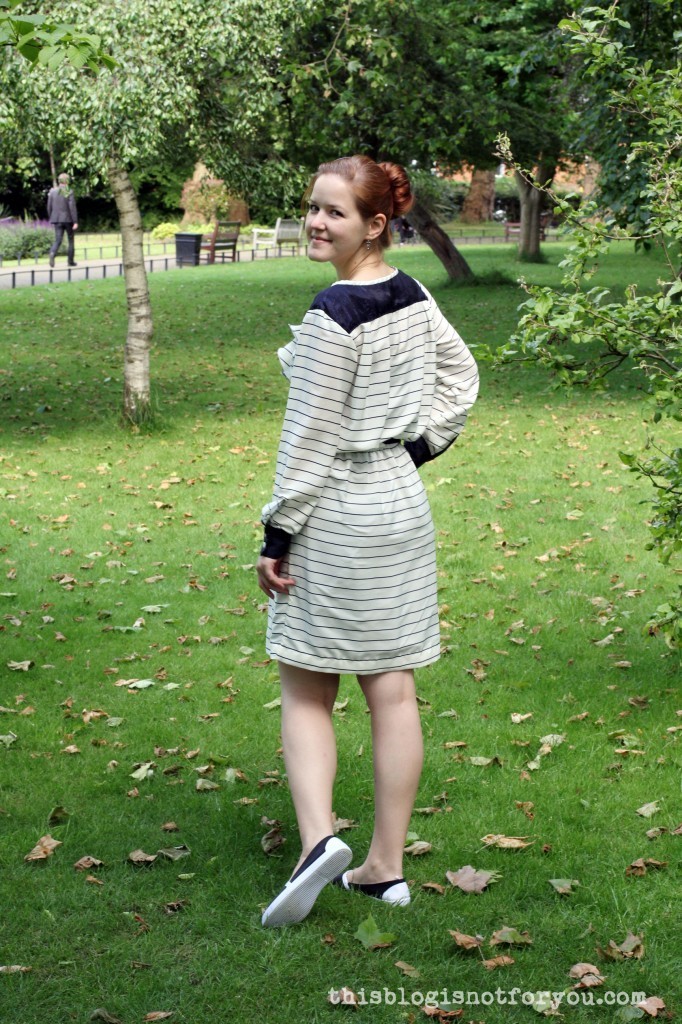
The inspiration for this dress came from my recent obsession with Gabrielle Chanel and the fashion she created in the 1920’s and 1930’s. I loved the wide, comfy loosely fitting dresses which seem so effortless. I also really liked the femininity of the dresses despite the fact that their details were inspired by gents’ clothing.
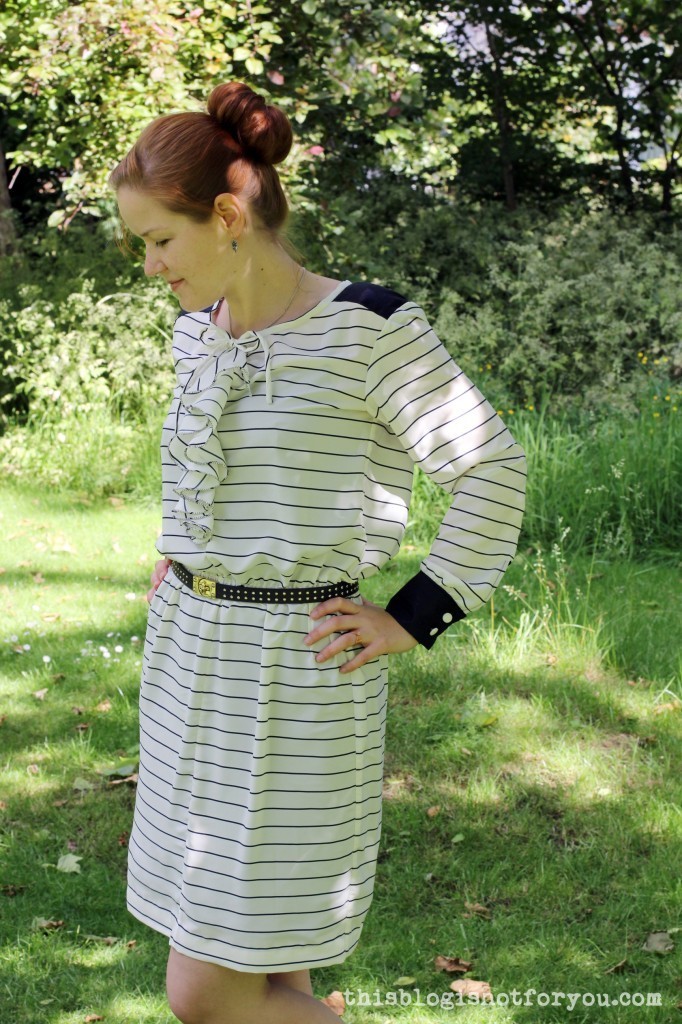
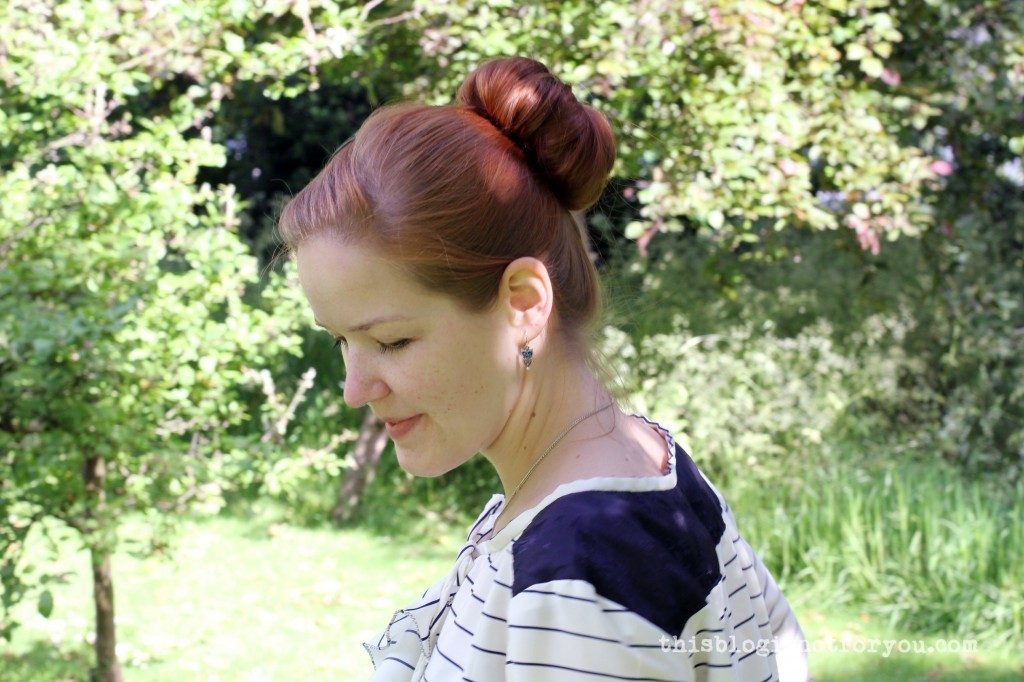
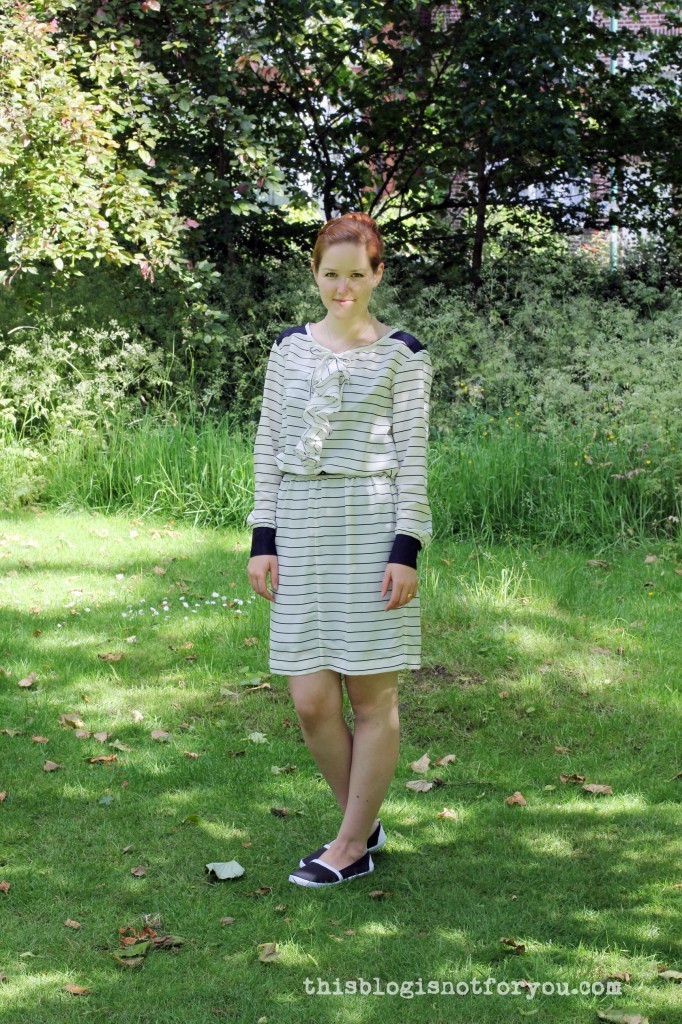
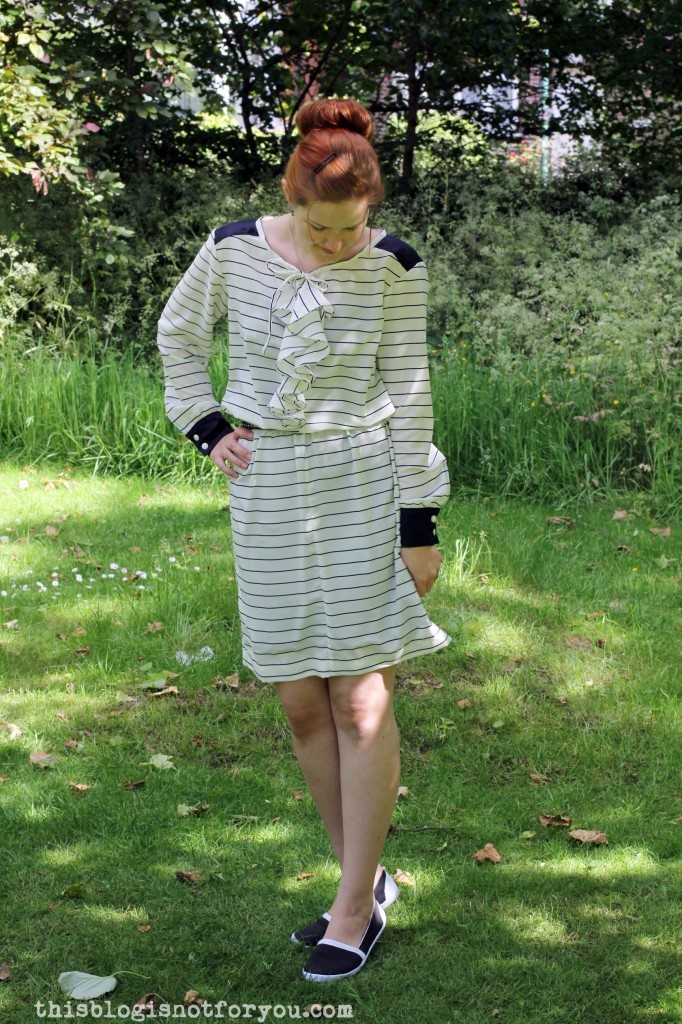
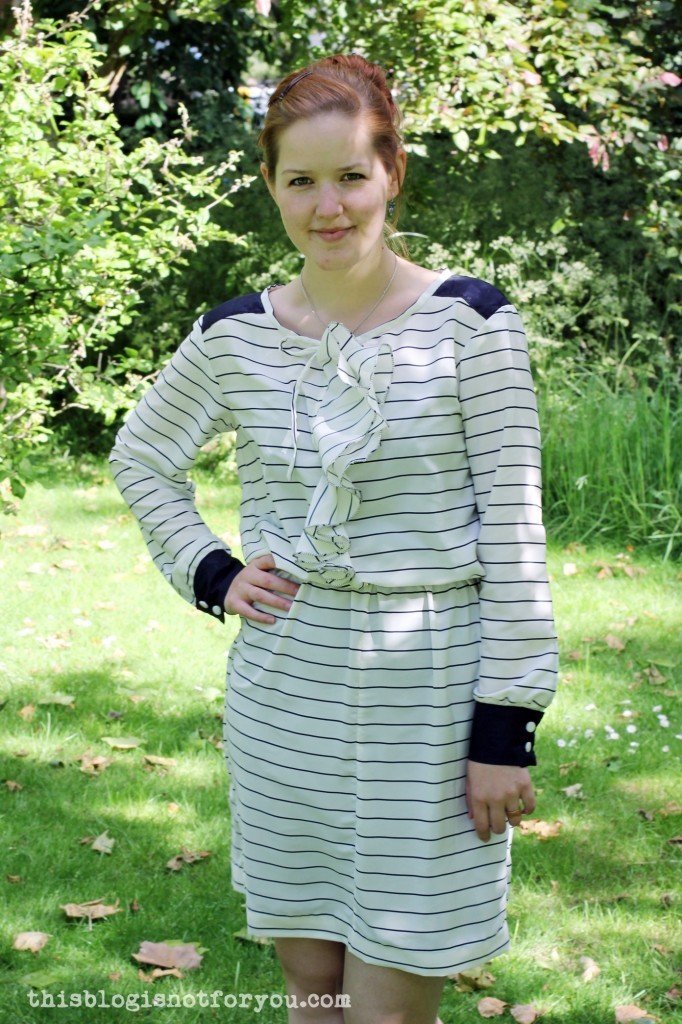
Those weird spots in my face are actually sunlight. I know, you don’t take pictures in direct sunlight, but believe me, when you’re living in London, you start appreciating any sort of sunlight. As I mentioned already, I used an off-white polyester fabric with blue stripes for the dress, combined with a navy polyester lining fabric (with a vintage map of the world print!)
The fabric was easier to sew than I thought at first. I managed to sew the layers without shifting or puckering – yay! The polyester was fraying like crazy, though. That’s why I used the french seam technique to get rid of all the fraying raw edges. The neckline is bound with binding (made from the same fabric) and the hem I slip-stitched by hand.
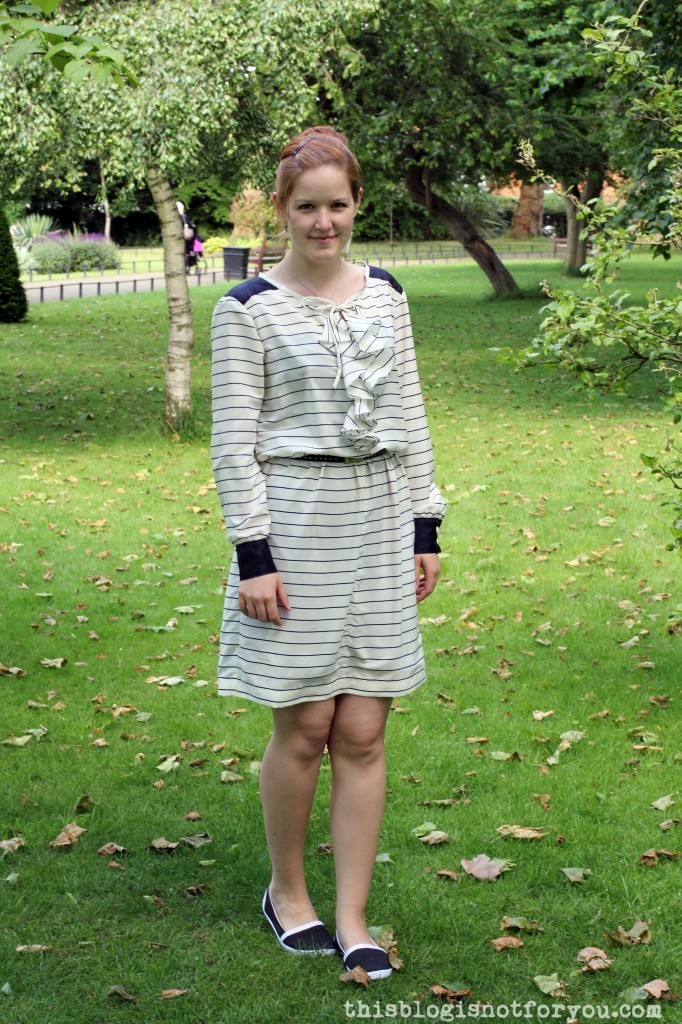
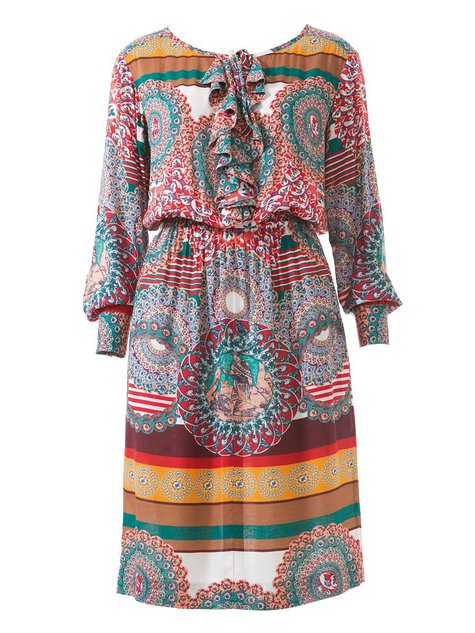
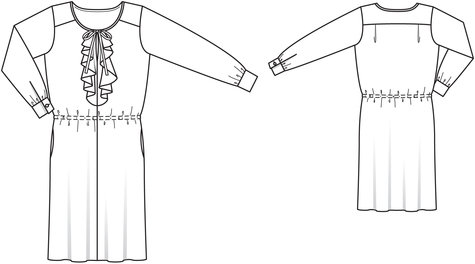
I used a Burdastyle pattern. I saw this cute ruffle blouse in the 03/2014 issue and was about redraft it to a shirt dress, when I noticed that Burda had already done this for me!
Burdastyle Long Sleeved Ruffle Dress 03/2014 #107Burdastyle Long Sleeved Ruffle Dress 03/2014 #107
I wasn’t too fond of the seam down the front of the skirt at first, but I managed to match up the stripes quite well, so that was fine. The fit of the pattern was very loose, but that’s a good thing when it’s warm outside, I guess.
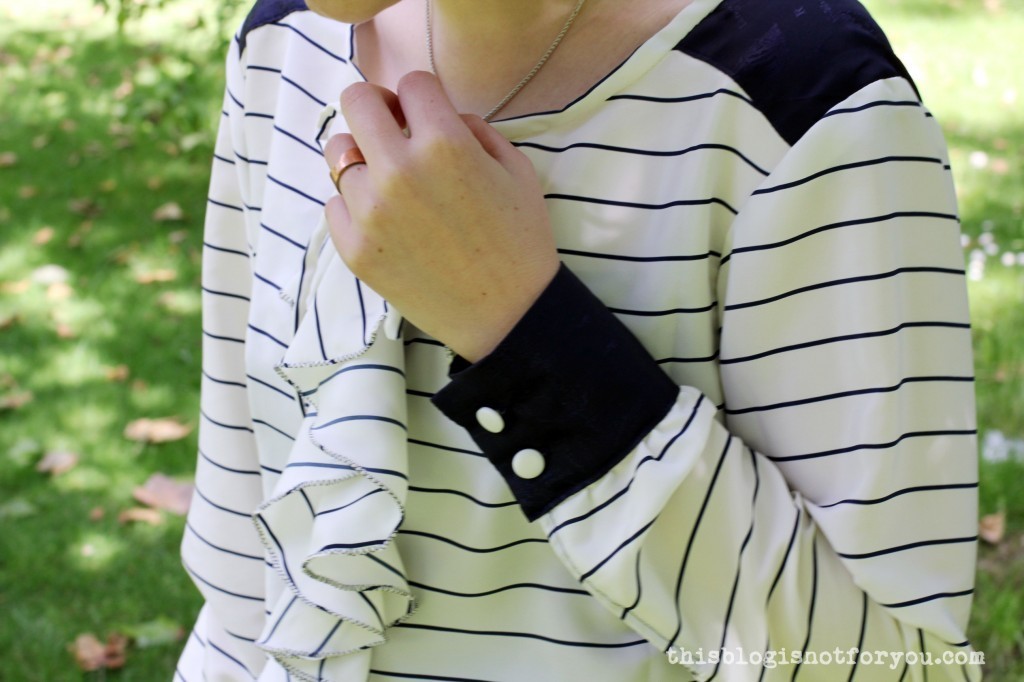
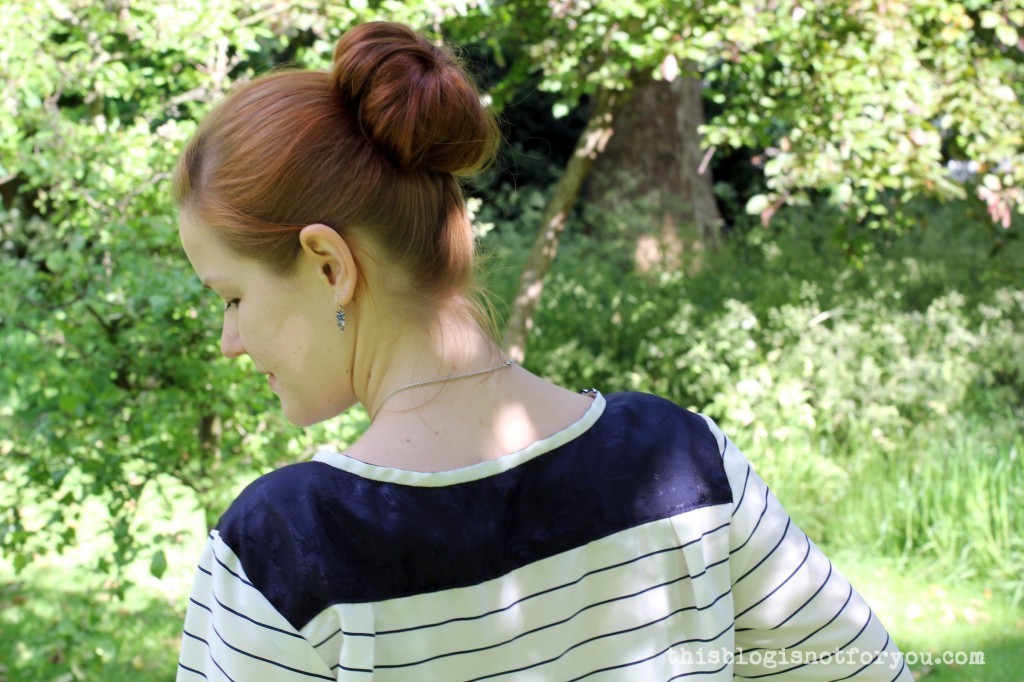
I used the contrasting navy polyester for the yoke and cuffs to avoid looking like I walked straight out of prison (if I had to go to prison I would totally add some ruffles to my uniform!).
The dress has a casing for an elastic which cinches in the waist. (The belt is from Primark and it’s my absolute favourite belt on earth!..which is why it’s in almost every outfit picture.)
The 12mm off-white buttons are vintage and I had exactly four which was pretty convenient because this way I did not have to worry whether I should keep them for a later project.Oh! And the shoes are DIY, too! They used to be a dirty white bargain from Primark, so I painted them black. Remember the other pair I refashioned? I have two more pairs sitting in a corner, waiting to get a makeover.
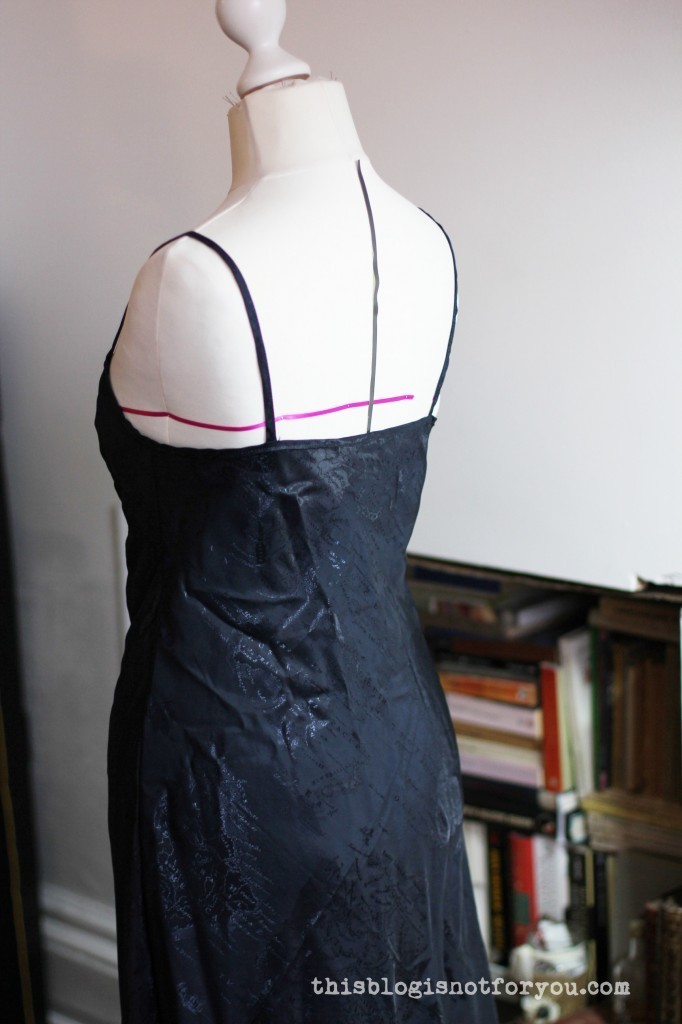
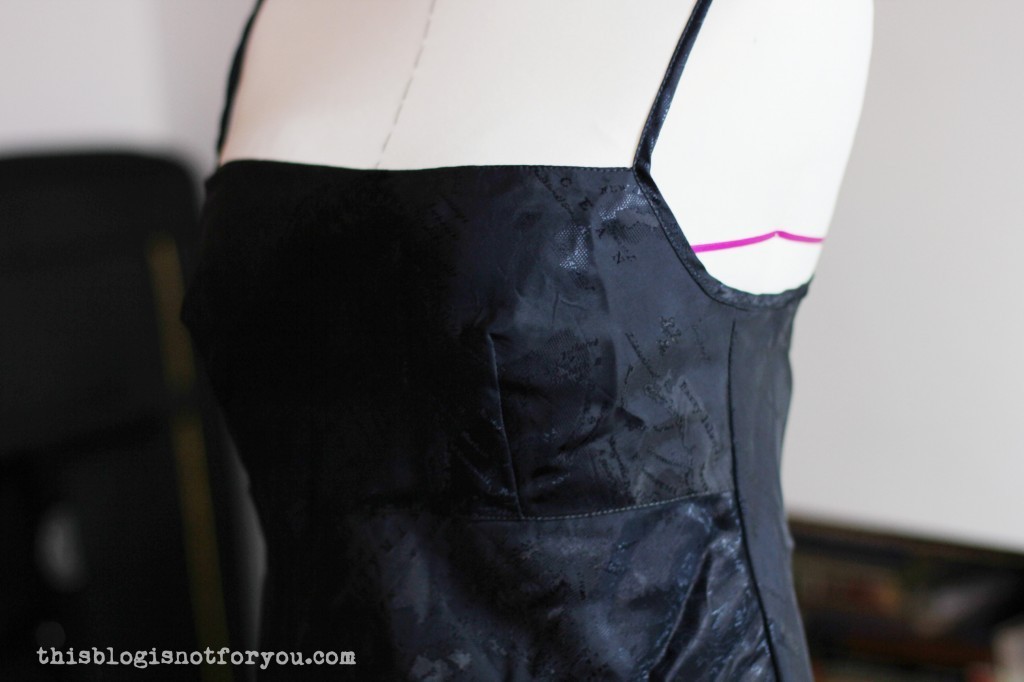
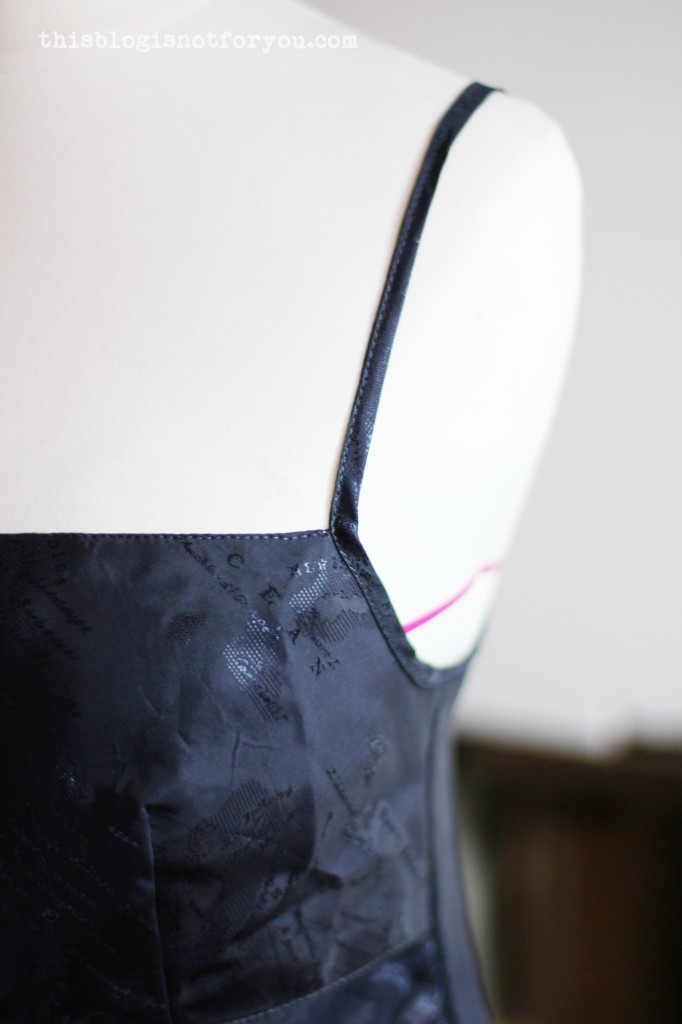
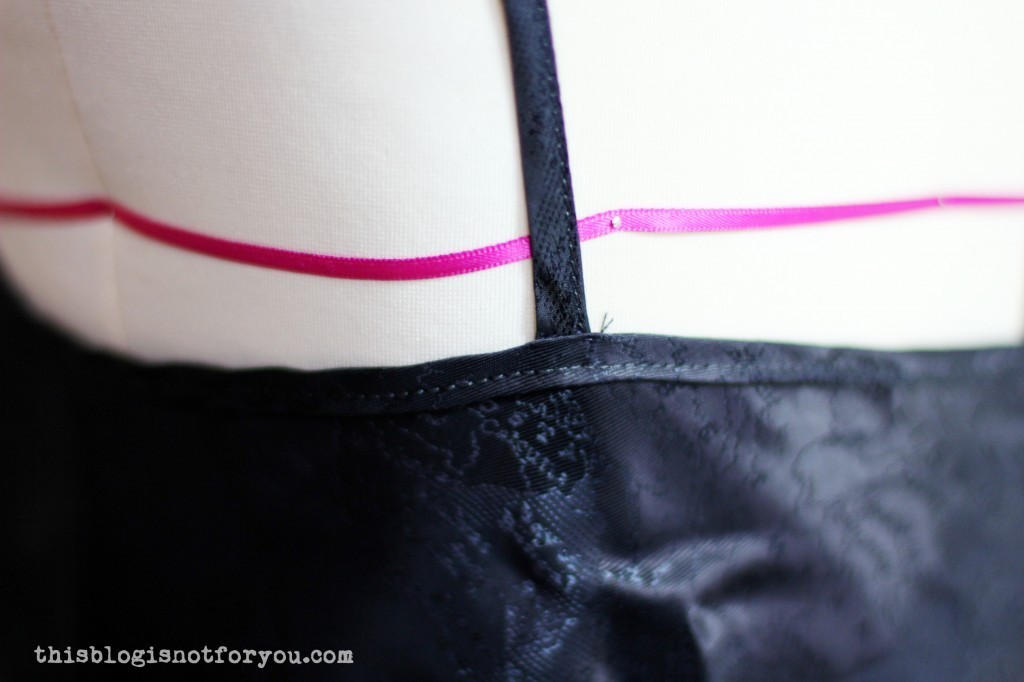
To be able to actually wear this dress I had to make a slip dress. I did this without a pattern. I made the bodice pattern by draping it on my dressform first and then used the muslin to make a paper pattern. The skirt is just a simple A-line.
The dress is cut on the bias and therefore is stretchy enough to go without any fastenings. It’s very fitted and super comfy. I was scared of bias-cut garments, but I had no problems sewing this one together. You just have to be veeeeery careful not to stretch the edges out of shape.
The bodice is lined with the off-white stripe fabric I used for the ruffle dress.
The straps were easy-peasy. I just made a massively long strip of bias binding and started to bind off the edge at the centre back, going all the way up to the front, where the bias binding magically turned to straps which I sewed on in the back after cutting them to the right length.
While it was living on a hanger for weeks I didn’t like this dress too much. But having worn it outside when it was super warm I started to love it!
After this week’s crafting and sewing frenzy our living room looks shit, so I’ll have to get back to tidying up a bit! Am I the only one? Sewing is such a messy business!
In order to do this, we will need to make some adjustments to the cape pattern piece. Best, you cut out your cape fabric before you draft the collar. If you want to cut out the fabric later, you will need to put the pattern piece back together after drafting your collar.
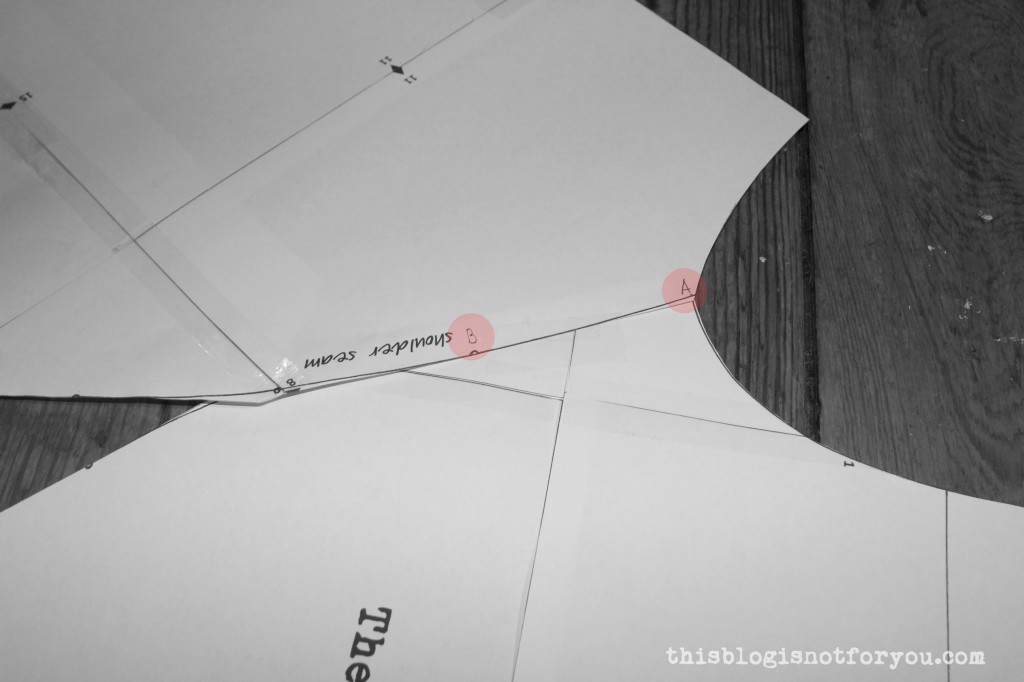
1. Take your cape pattern piece and lengthen the shoulder seamline by drawing a straight line down to the hem like so:
2. Cut the pattern apart along this line.
Now it’s much easier to join the shoulder seams, which we will do in this next step: To make explaining this step easier, I have marked two points, A and B. A is where the shoulder seamline meets the neckline. B is where the small circle is marked.
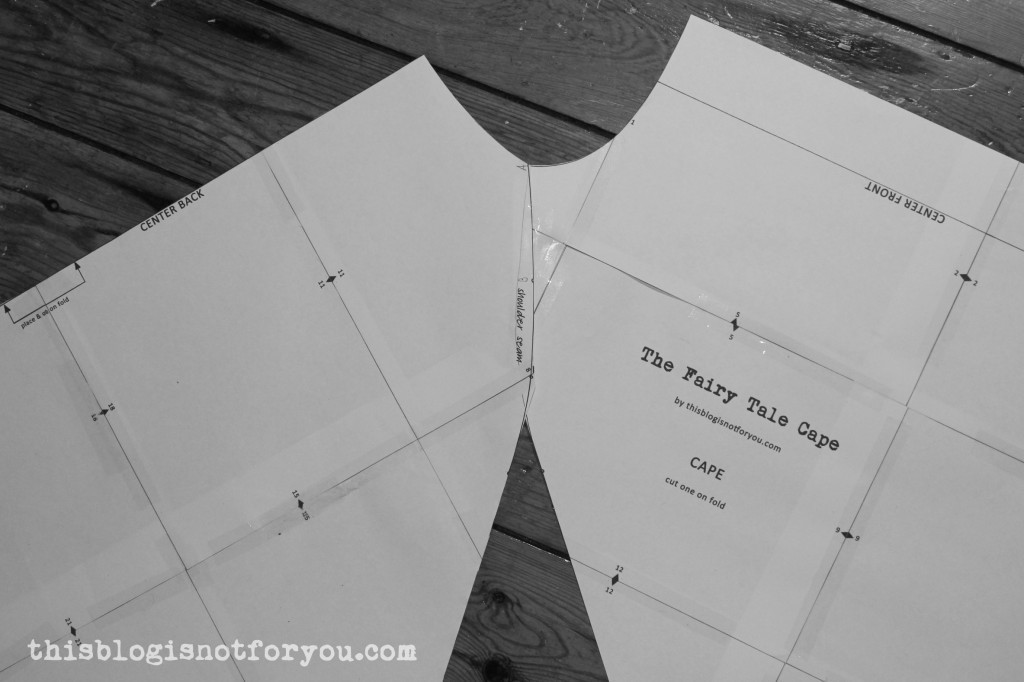
3. Fold away the seam allowance like so:4. Now join the two pattern pieces, so the As match up and the Bs overlap by approx. 1cm. Tape together (don’t glue, you will want to be able to separate the pieces again and tape them back together in order to cut out your cape if you haven’t done so yet).
The point of overlapping the two pieces is to help the collar lie very flat against your cape.Your pattern will now look like this:Now that we have a continuous neckline, we can start drafting the collar.
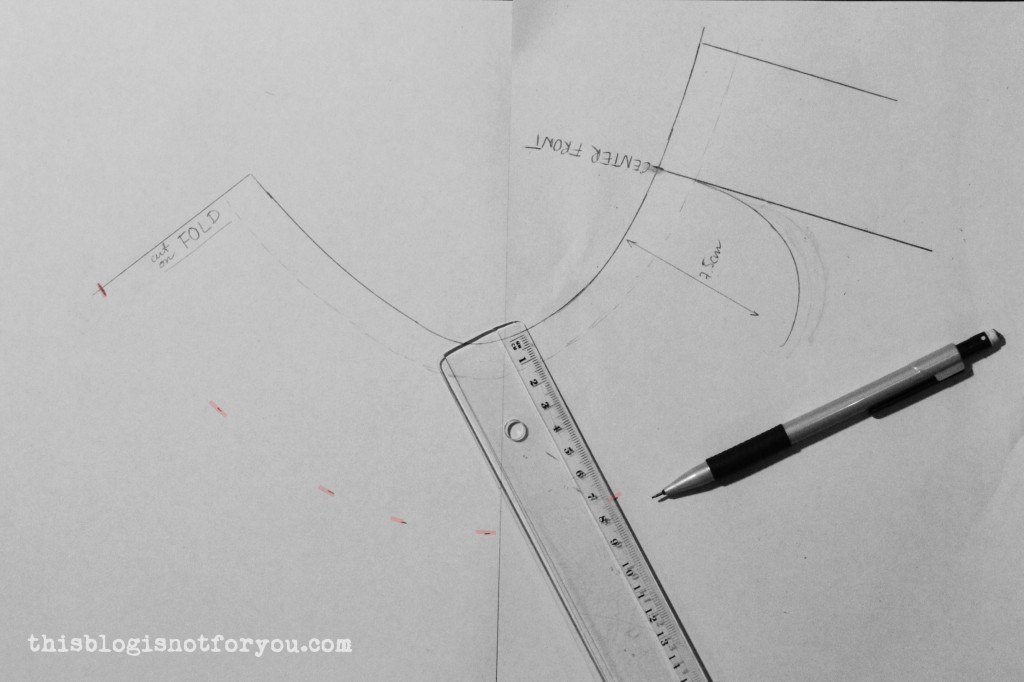
5. Place your pattern piece on a piece of paper (I glued together two A4 pages).6. Copy the shape of the neckline, also marking the position of center front & back and the shoulder seamline.It should look like this:7. Now add 1.5cm (5/8”) seam allowance. (The seam allowance is already included in the cape pattern, which is why we need to mark it on the collar piece. You don’t want your collar end up too narrow). 8. Draw the center front line (parallel to the front edge).9. For this step I used a lid, but you can also do this free hand. Starting at the center front line draw a curved line. Here it’s completely up to you how you want the shape of your collar to look. When you’re satisfied with the shape, measure the width.
As you can see in the picture below, my collar is 7.5cm wide (including seam allowance at the neckline).10. Mark the width measurement on the center back seam. Depending on the fabric you use the collar will be either cut on fold or in two pieces. If you are using fabric in a plain colour, you can simply cut the collar on fold (make a note next to the center back line). If you’re using patterned fabric which needs to be neatly lined up in the front, you will have to cut the collar in two pieces. In this case you will have to add 1.5cm of seam allowance to the center back edge.11. Mark the measured width all the way around the neckline. 12. Draw a smooth line through all of the marks.13. Now you’re almost done! Just add some seam allowance to the bottom edge of your collar.14. Mark the shoulder seam placement and center front with notches. Now grab a coffee and admire your newly drafted Peter Pan collar!
Sewing the Collar
Next to your pattern and fabric you will need: ♥ matching thread ♥ fusible interfacing ♥ scissors ♥ iron ♥ sewing machine ♥ pins ♥
Now it’s time to cut out and sew this beautiful specimen of a collar! Before you head off and cut into your lovely fabric, here a quick hint for those of you using plaid/striped fabric.
First of all, matching the pattern perfectly is easier when you only cut out one piece at a time (so no folding or layering of fabric). But that’s completely up to you.
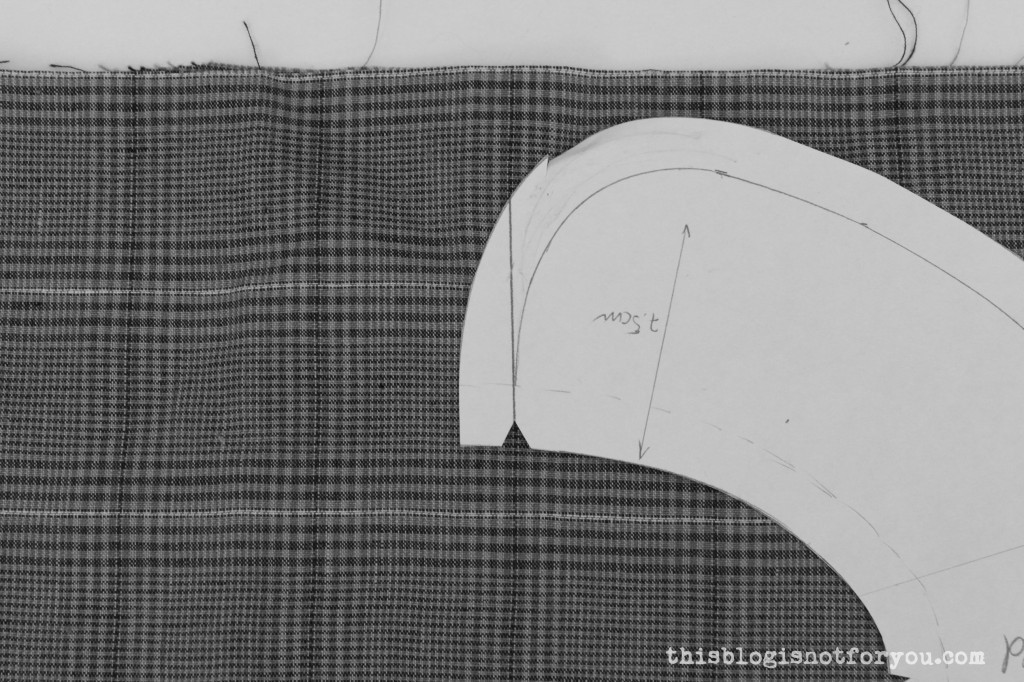
The easiest way to make sure the pattern matches up nicely in the front is to use the center front mark on your pattern piece as a guide. As you can see in the picture below, I lined up the center front with the darker, vertically running line. Using my fabric as example, you could then mark the position of the lighter, horizontally running line on your pattern piece to make sure that the next piece is cut out in exactly the same way.
1. Cut out 4x collar (or 2x if cut on fold), 2x fusible interfacing (or 1x if cut on fold). Cut out the fusible interfacing without the seam allowance (we don’t need extra bulk).
2. Using your iron, fuse the interfacing to the left side of your collar pieces. 3. If not cut on fold, sew your collar pieces together at the center back. Press seam open.4. Pin or baste collar pieces together (right sides together) starting at the seam allowance mark at the front corner, all the way along the bottom edge. Leave the top edge as it is. Don’t sew it closed!
With this step I always prefer basting instead of pinning, but that’s just my personal preference. When basting, the fabric layers are less likely to shift, which is important when you are trying to match patterns.5. Sew along the pinned/basted edge using 1.5 cm of seam allowance. Before you turn the collar inside out, clip the rounded edges to remove bulk like so:You can trim one seam allowance shorter than the other. this also helps to remove bulk.6. Turn inside out and give it a good press.
After sewing together the cape, the collar will be attached to the cape’s neckline, matched up at the center front. If you’re sewing a lined cape, you can simply sew the collar to the cape left on right (see picture below).
I will explain how to add a lining in my next sewalong post.
If you are not lining your cape, you could sew the collar onto the cape left on right, finish the raw edges, press them in and stitch them onto the cape (without catching the collar!). The stitching will be hidden under the collar.
The next part of the sewalong will be coming this week next week and covers:
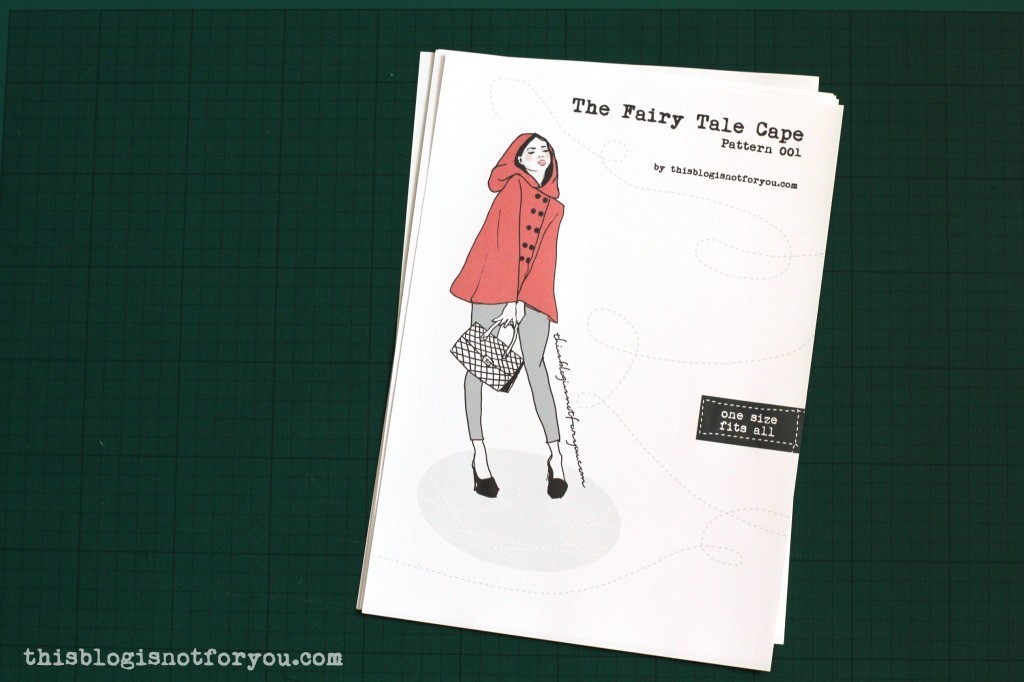
Hello! This is the first part of the Fairy Tale Cape sewalong. There will be quite a few sewalong posts coming up in the next few days/weeks. If you’re not sewing along, bear with me – I’ll try my best to throw in some other posts every once in a while! I have yet to figure out the schedule. I have quite a few finished garments that need to be photographed and blogged, but the sewalong will keep me pretty busy!
Printing & Assembling the Pattern
Before printing the pattern and cutting your fabric, make sure you have read all of the
instructions included in the pattern file.
Before printing the complete pattern, please print the page with the Test Square first and measure if the sizing (4’’/10.2cm) is correct to make sure you are printing to scale. It is also important that your printing program is set on “Actual Size”. Do not scale the pattern (e.g. “Fit to Page”) as this will affect the sizing.
I suggest leaving the pile of pages after printing as it is (without arranging all of the pages on the floor/table before glueing). To avoid mixing up the pages & getting confused by the numbers you can cut and glue the pages one by one as you go until you have reached the end of the pile. The pages are arranged in rows (you start assembling at the top/bottom working your way down/up).
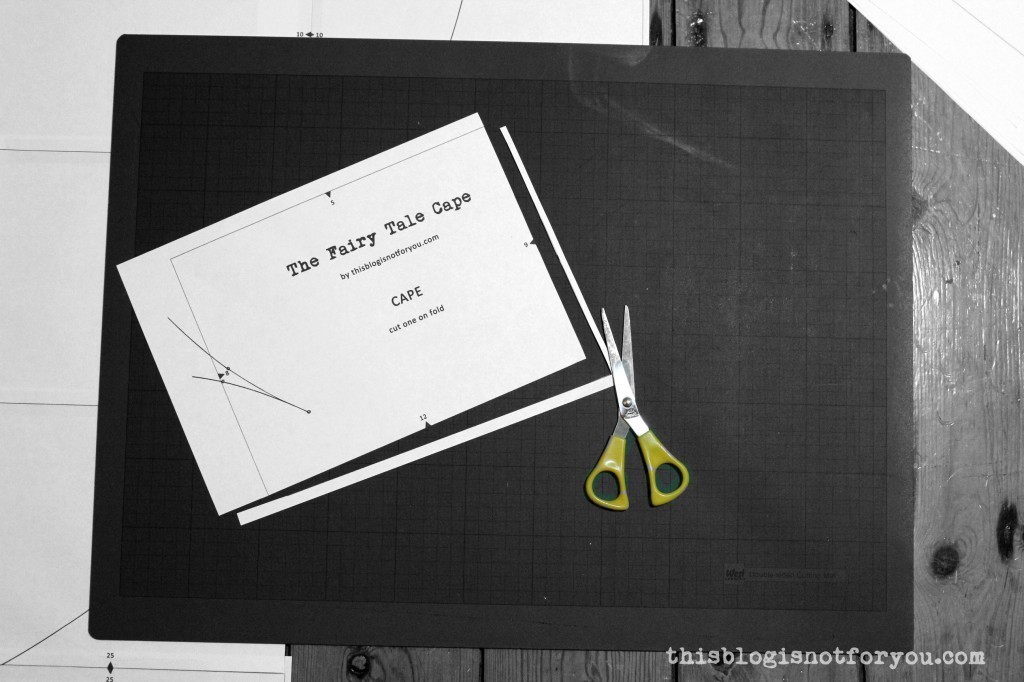
Trim the right and bottom edge of the paper off, cutting on the lines.Then start assembling the pages, either starting at the top or bottom of the pattern.
Match the numbered notches on the pattern sheets, aligning the grid lines.
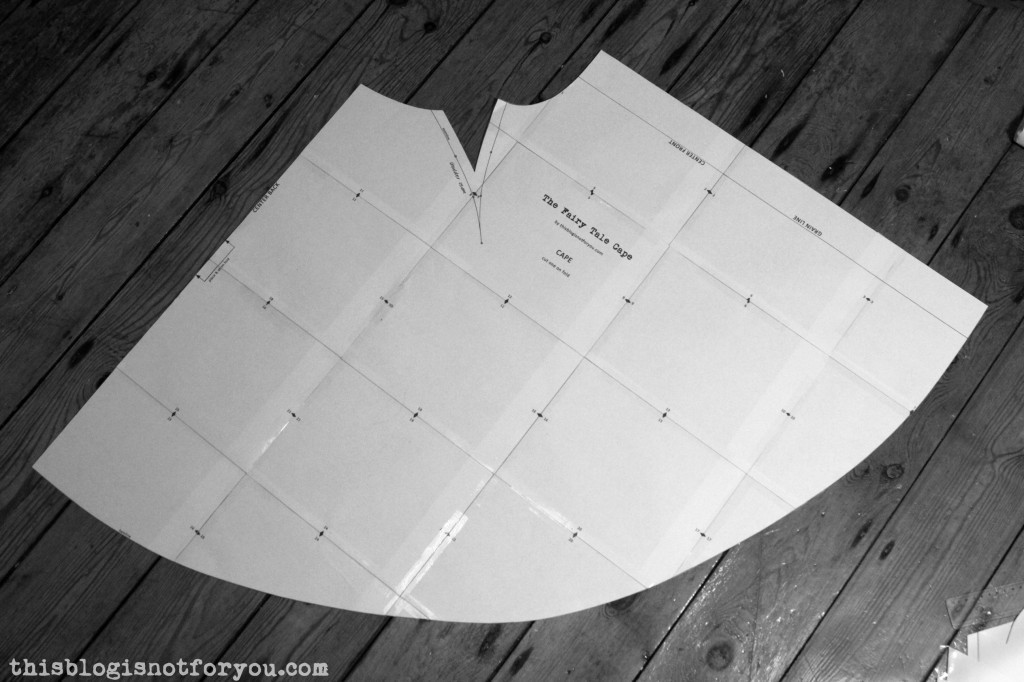
Depending on whether you cut directly on or slightly next to the gridlines, some pattern pieces might not match exactly at the notches. That’s ok. Try to match the pieces as good as you can, orienting yourself on the grid and and pattern lines rather than the notches. Use the notches as a guide to match the right pages (they can be a bit off, as long as all the gridlines are parallel/perpendicular and the pattern lines are matched up).
Tape/glue the sheets together and cut out the pattern (seam allowance is included).
Choosing Design Variations & Fabric
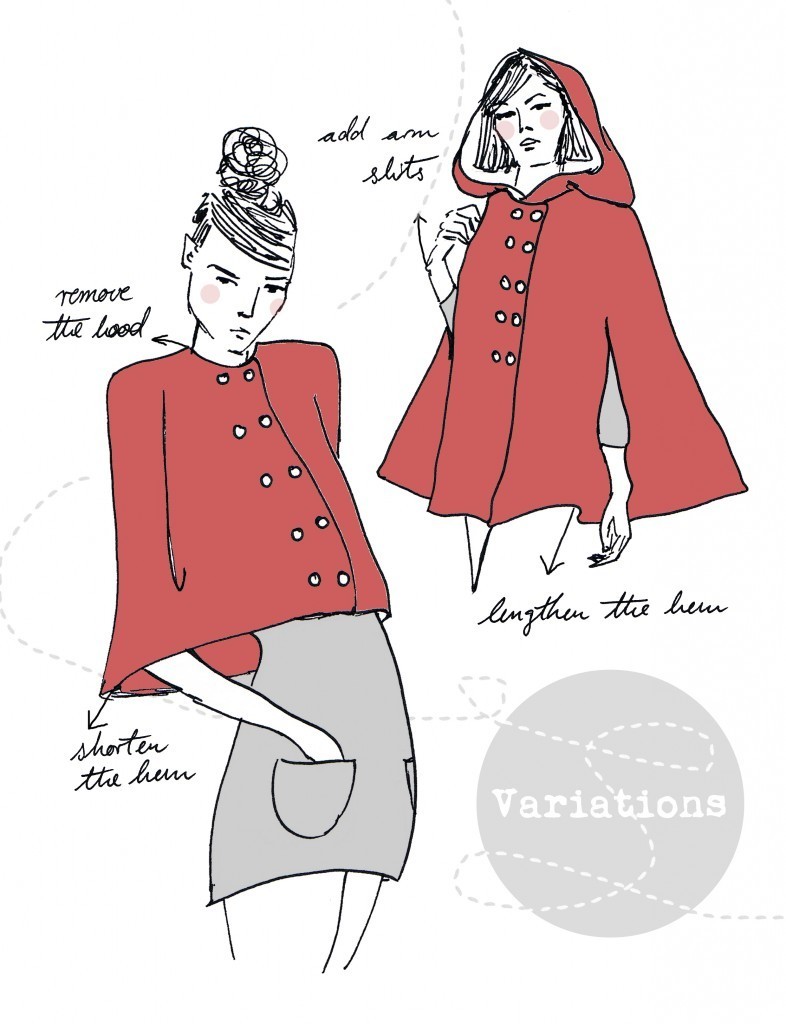
The simple cut of the cape allows for a range of variations. You can remove the hood, add buttonholes or arm slits, alter the hemline and play around with different fabrics and patterns.
Different versions may require a different amount of fabric or additional notions, so plan ahead before you start cutting into your fabric.
Neckline/Hood:
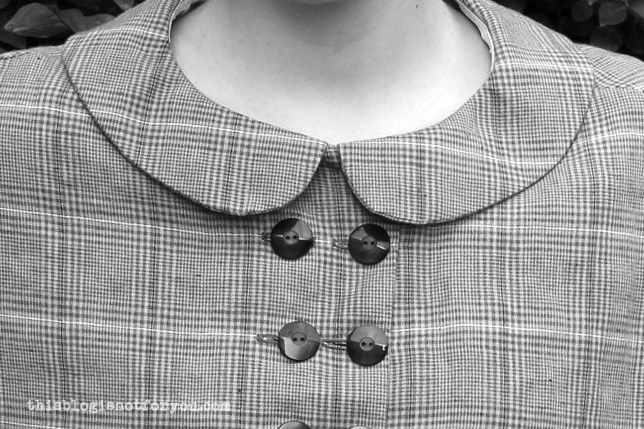
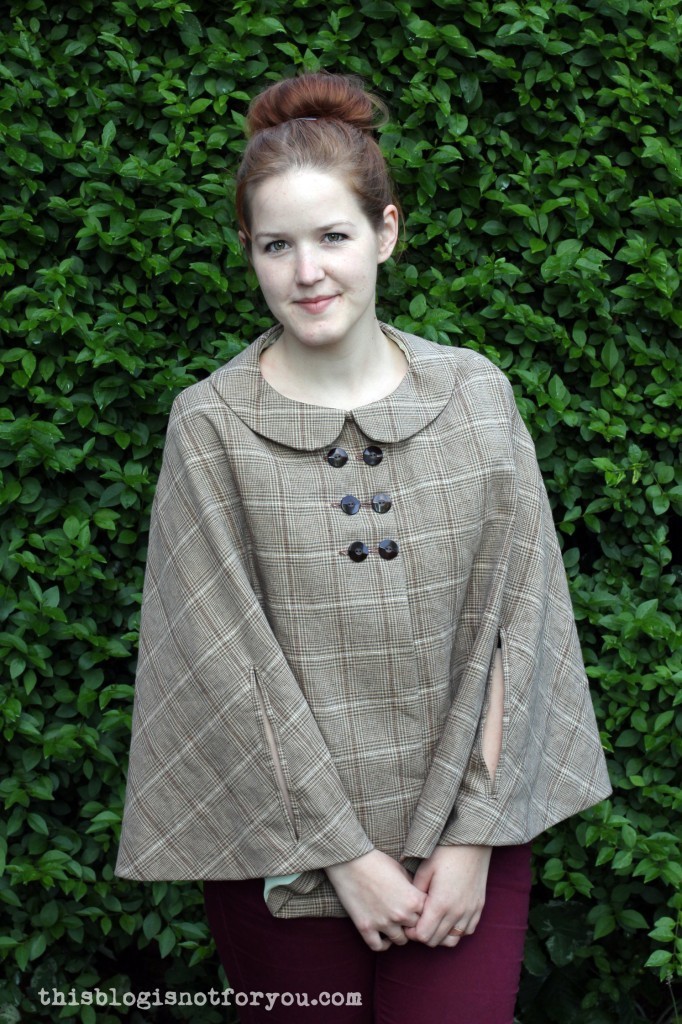
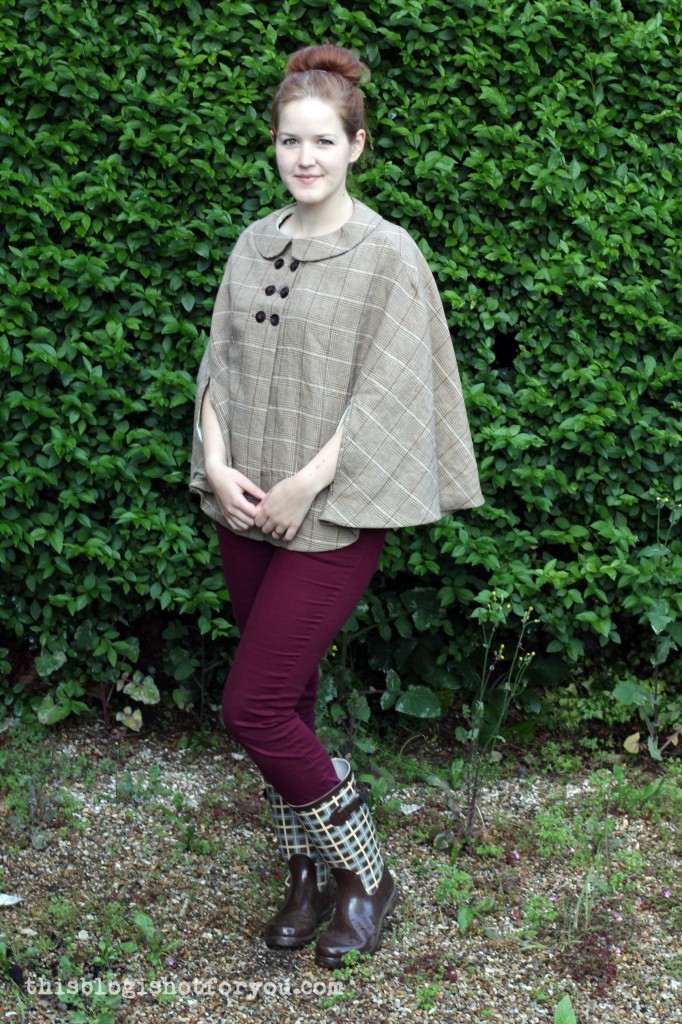
I used plaid linen for this version.
For my latest version I decided to replace the hood by a Peter Pan collar. The hood is super cosy and adds a very romantic look to the cape, whereas removing hood or adding a collar gives it a more sophisticated or vintage look.
If you want to add a colllar or sew the cape without the hood, I recommend using wovens, as they are more stable and less likely to stretch out compared to knits. It’s only a recommendation – heavier knit-fabric will probably work as well. Just be careful not to distort the fabric.
You might also want to use fusible interfacing when using wovens. Without the hood, the focus will definitely be on the neckline of the cape, so you want to make sure it looks very neat.
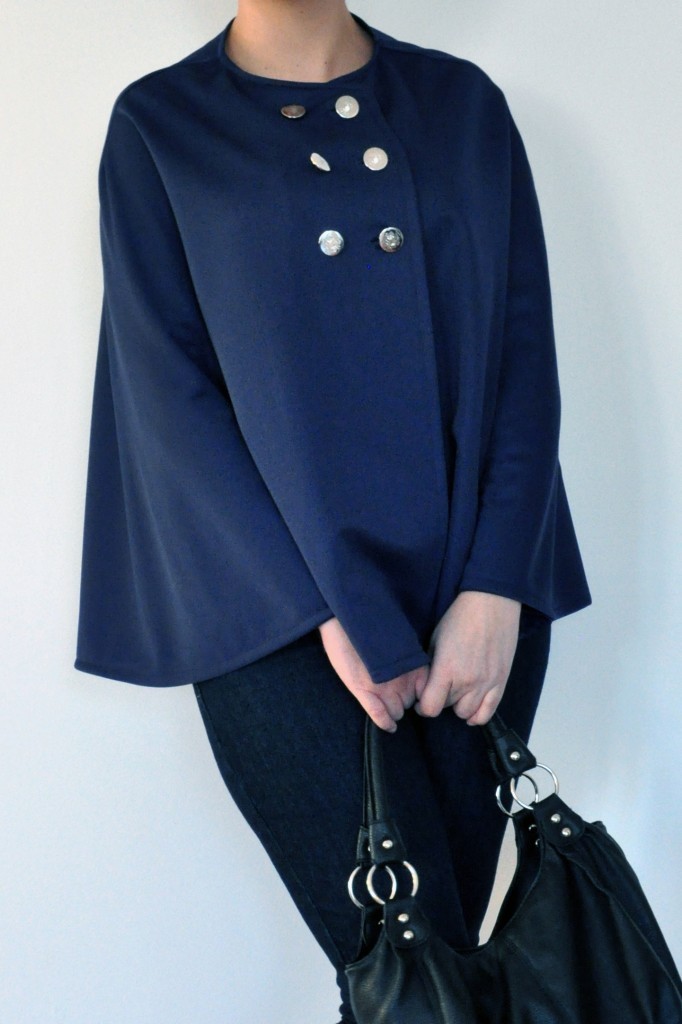
Paméla’s cape is made from navy knit fabric.
Front & Closures
When using knits/jersey you don’t have to worry about adding any closures to your cape. The neckline opening will the wide and stretchy enough for you to just pull the cape over your head like a tee. You can add buttons for some contrast, but this is completely optional.
However, when using wovens, I recommend adding actual buttonholes (if you are lazy, you can do this for top row of buttons only and skip adding lining). This will require the use of fusible interfacing and a lining or facing at the front. Think about these things and make a list of the materials you need before you start.
The placement and amount of buttons you use also has a big impact on the look of your cape.
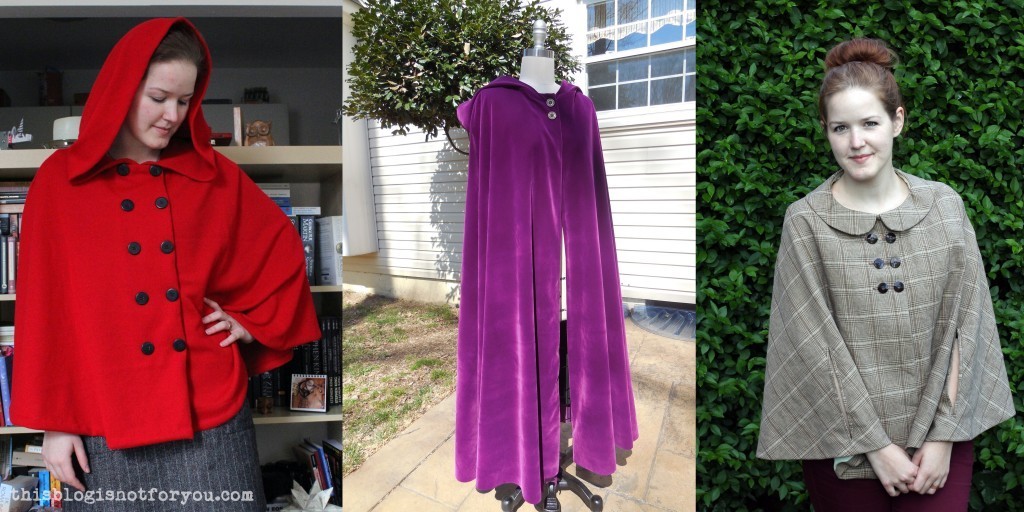
1. I used lightweigt knit fabric & 10 large buttons. 2. Rachael made her floor-length cape using velvet and only 2 buttons. 3. For this second version I used linen and added 6 buttons and 2 hidden snaps.
Hemline
Altering the length of the cape is pretty straight-forward. You can lengthen the hem by extending the front edge by a few cm/inches (see Rachael’s floor-length version here) and adding the desired amount to the marked hemline accordingly. The same thing applies to shortening the hem. Simply cut off the desired amount, cutting parallel to the hemline.
When adding extra length to your cape, consider that you will need a lot more fabric! (It’s similar to making a maxi circle skirt!) The cape is cut as a half-circle and adding a considerable amount of length will require getting a lot more fabric than stated in the fabric requirements. You might even need to add a center back seam in order to fit the altered pattern on you fabric.
Armslits
Adding armslits isn’t as hard as it might seem. I will guide you through the steps with detailed pictures.
Armslits don’t neccessarily require a lining, but for a more professional result I’d recommend adding one. The armslits are cut into the fabric at quite a late stage in the process. If your cape isn’t lined at all, you can even decide to add them at a later stage after the cape is finished. Adding armslits does not require much extra fabric, you can even use a different fabric in a contrasting colour.
Recommended Fabric
You can use both wovens or knits. I recommend wool, velvet, linen, heavy-weight knits or jerseys. Please note that the fabric choice will have a big effect on the drape of the cape.
Made by: 1.Irene used black bouclé 2. Paméla used a navy linen 3. Berry used plaid wool 4. Lisa used light-weight brown linen (?) 5. Me with my red knit cape 6. Rachael used purple velvet 7. Me and the plaid linen cape 8. Freya used grey wool and contrasting pink buttonsHannah’s very cosy version
If you want to wear the cape as a cardigan I recommend more light-weight fabrics, such as Jerseys or knits.
If you plan on wearing this cape instead of a coat, I recommend using a warm wool fabric. In this case the drape will also be much improved by adding a lining.
You can use stretch or non-stretch fabrics. When using non-stretch fabrics, I recommend adding actual buttonholes.
That’s it for today! Now it’s your turn to think about the design of your cape and what fabric you want to use for it.
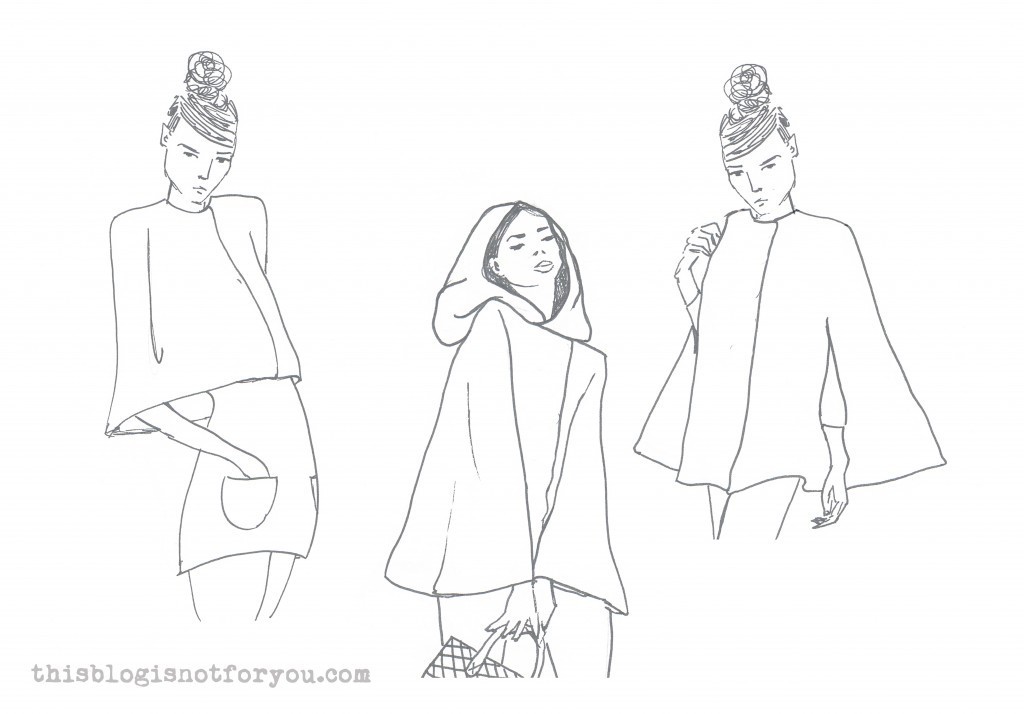
To make it easier to visualise your ideas, I prepared a template which you can use to make a sketch of your design. Sometimes it helps to colour in a sketch or technical drawing of a garment to see whether certain colours or prints work or not. It might also help to figure out the buttons and shape of the collar.
The next part of the sewalong will be coming this weekend and covers:

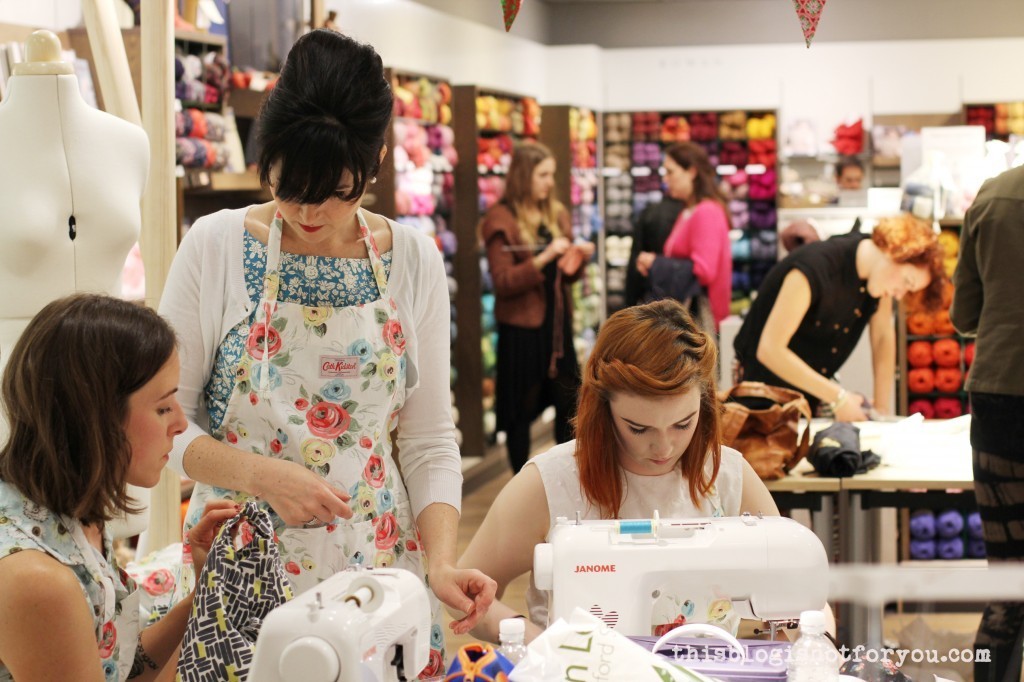 Me and fellow sewing bloggers Roisin (Dolly Clacket), Fiona (Diary of a Chain Stitcher), Amy (Almond Rock), Clare (Sew Dixie Lou), Elena (Randomly Happy) and Emmie (My Oh Sew Vintage Life) spent Saturday at John Lewis Oxford Street, sewing up a storm together with the lovely Lisa, founder of ‘Sew Over It‘ at the John Lewis Sewing Bee (JL is celebrating their 150th anniversary!).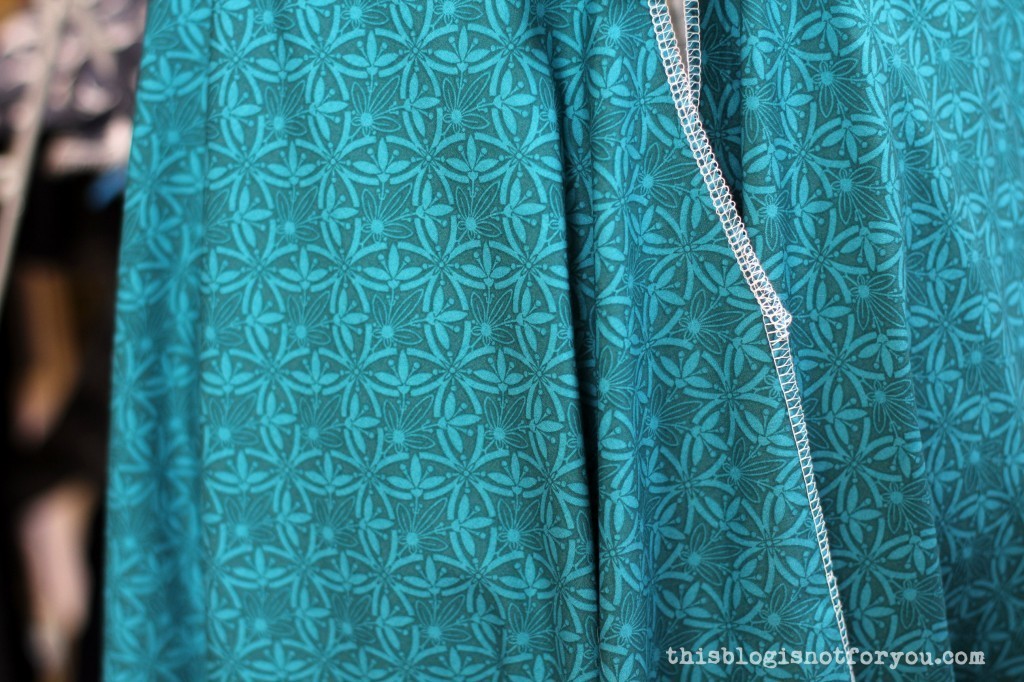
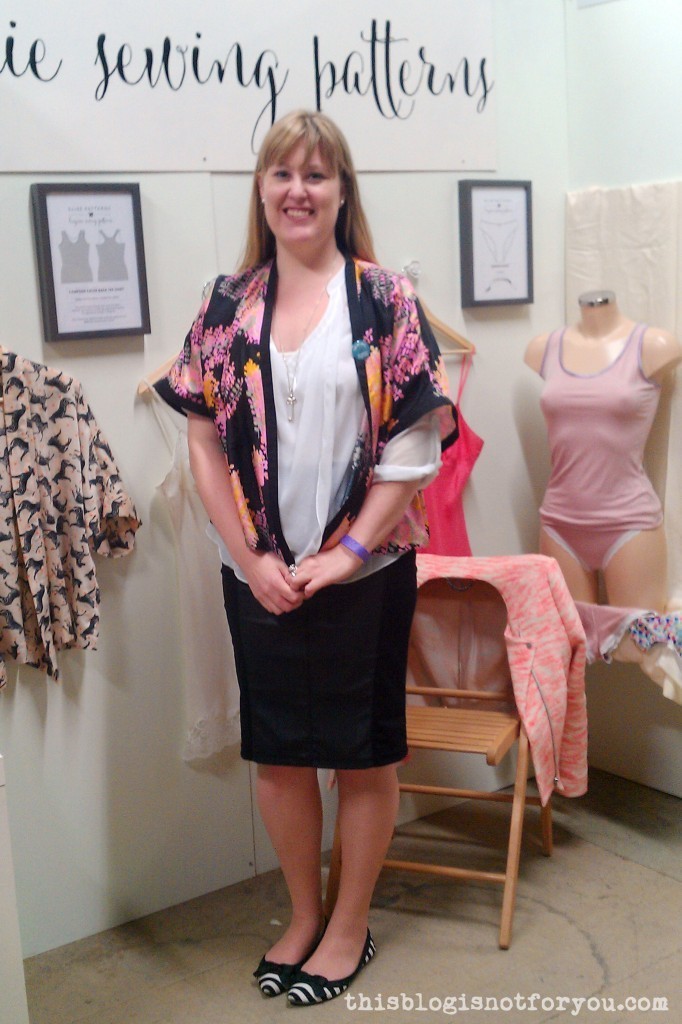 I also met the lovely Freya (Elise Patterns), who is launching her lingerie sewing patterns (hopefully!!) this week. I can’t wait to get hold of those knicker & Kimono patterns!
 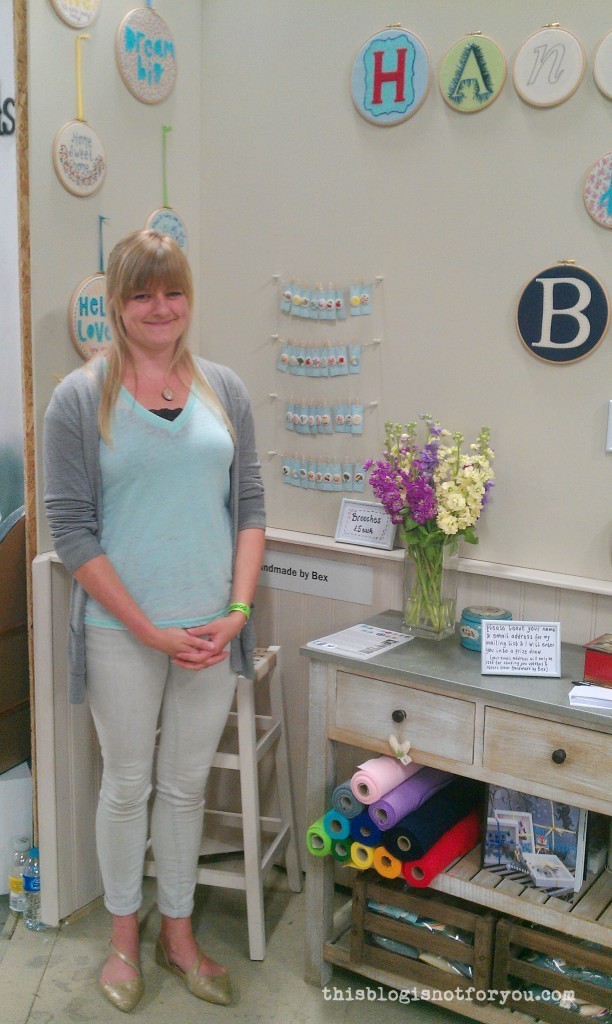 I also really loved “Handmade by Bex” and bought one of her adorable hand-embroidered brooches! Aren’t they cute?





 Wow, two garment posts in a row! Don’t worry, that’s not going to become a habit! I just wanted to squeeze in this dress, in time for this week’s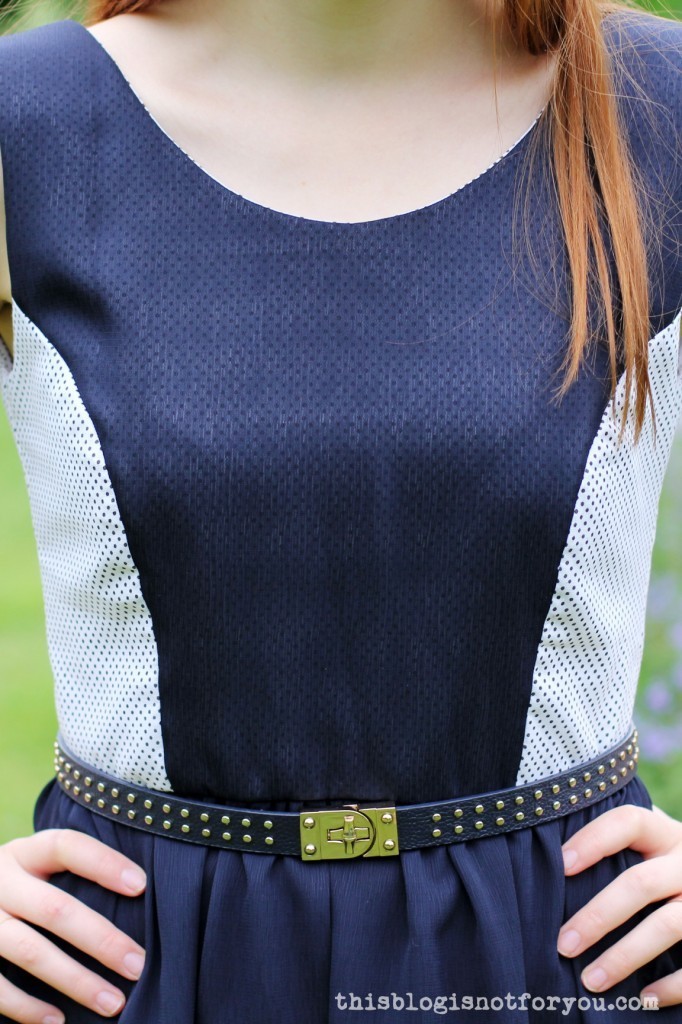
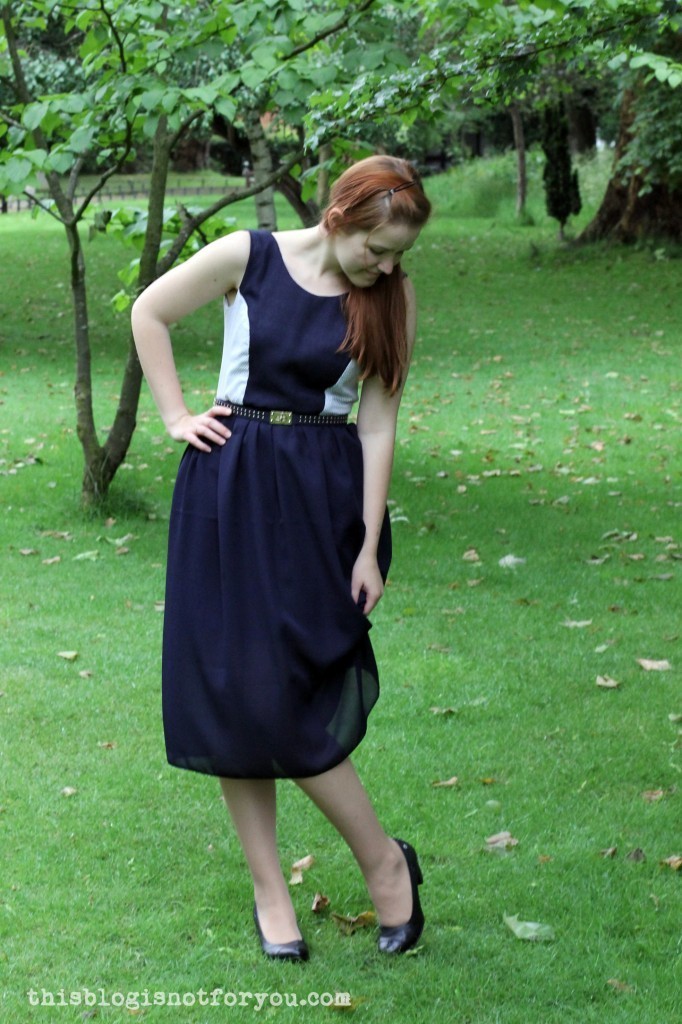
 Our local pub had some veeeeeeery convincing signs outside their door when we went to the park. But after we had to walk there twice (don’t forget to charge the camera batteries!) in this shitty weather, we decided to go to the off-licence around the corner and get some drinks to take home.




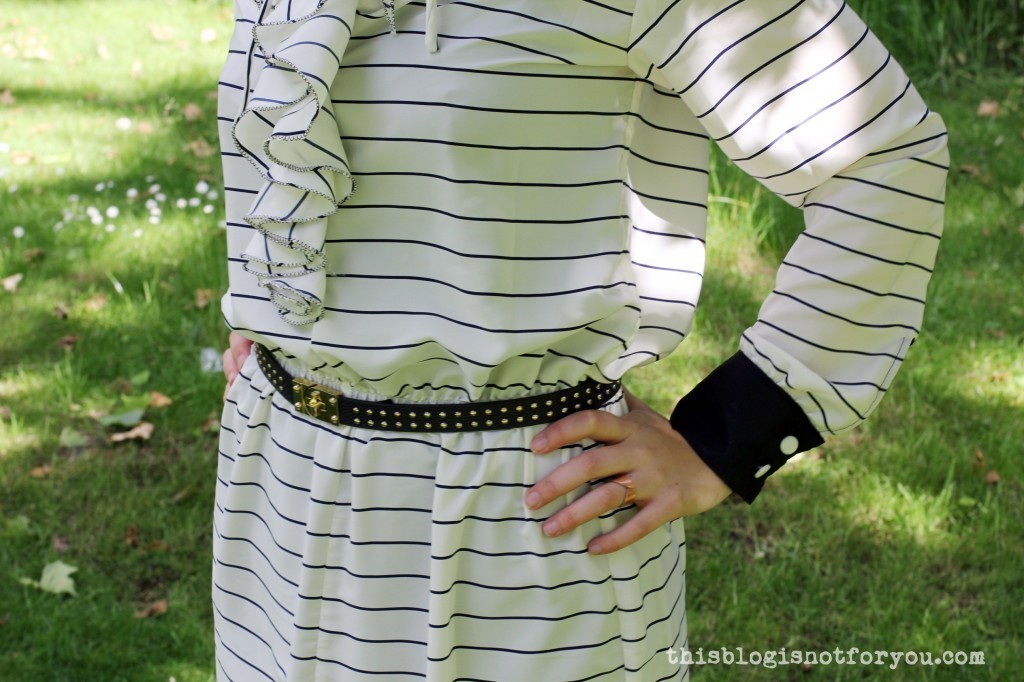 The dress has a casing for an elastic which cinches in the waist. (The belt is from Primark and it’s my absolute favourite belt on earth!..which is why it’s in almost every outfit picture.)
 Oh! And the shoes are DIY, too! They used to be a dirty white bargain from Primark, so I painted them black. Remember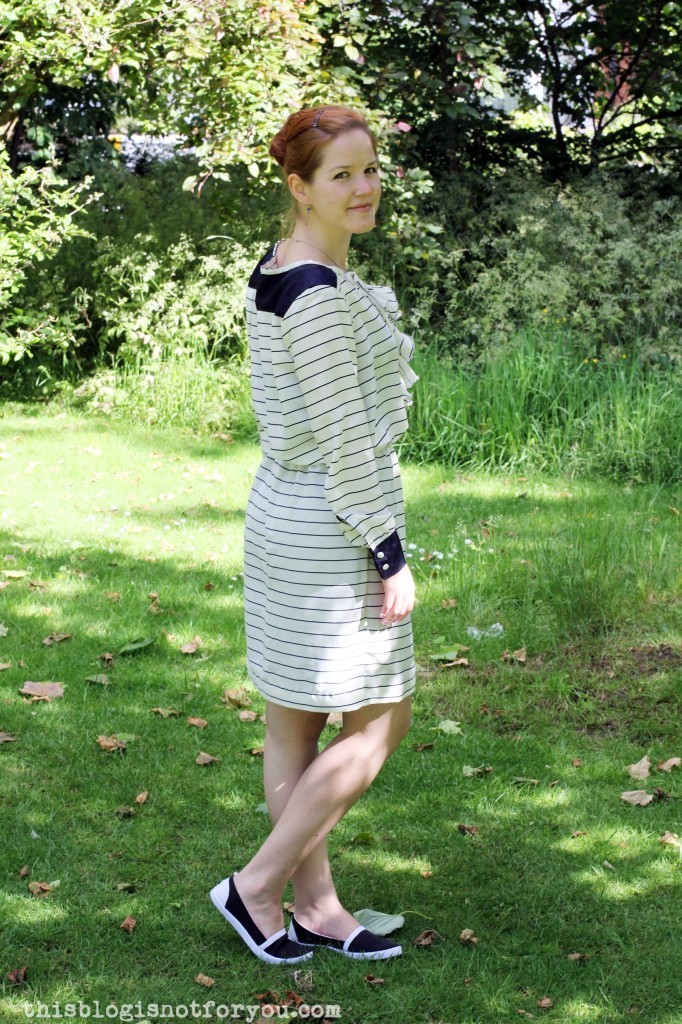
 Making the cape?

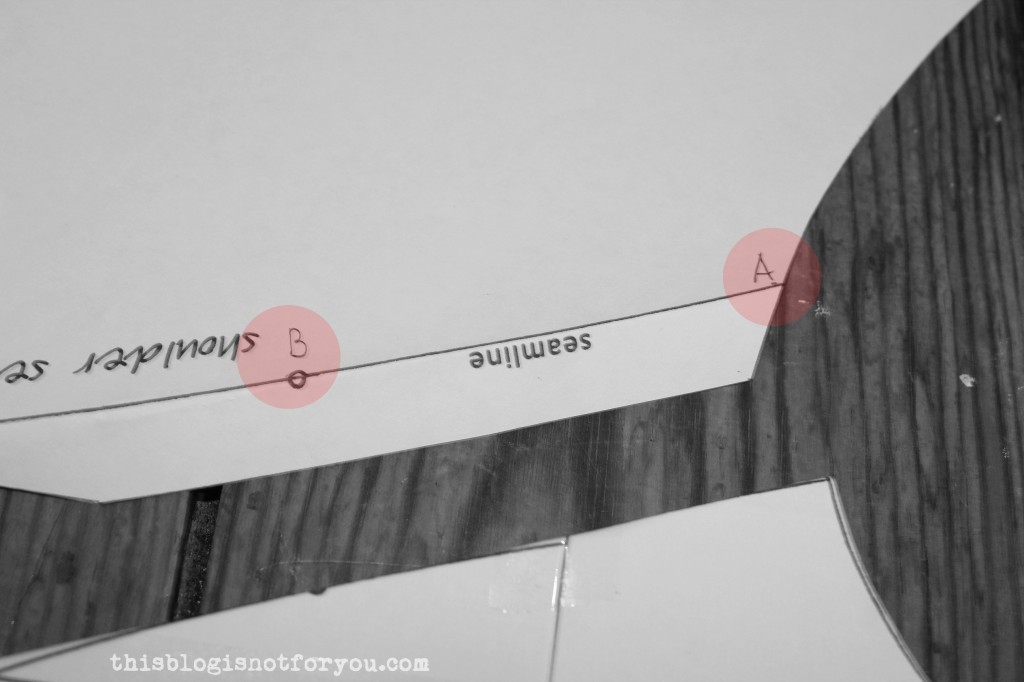 To make explaining this step easier, I have marked two points, A and B. A is where the shoulder seamline meets the neckline. B is where the small circle is marked.
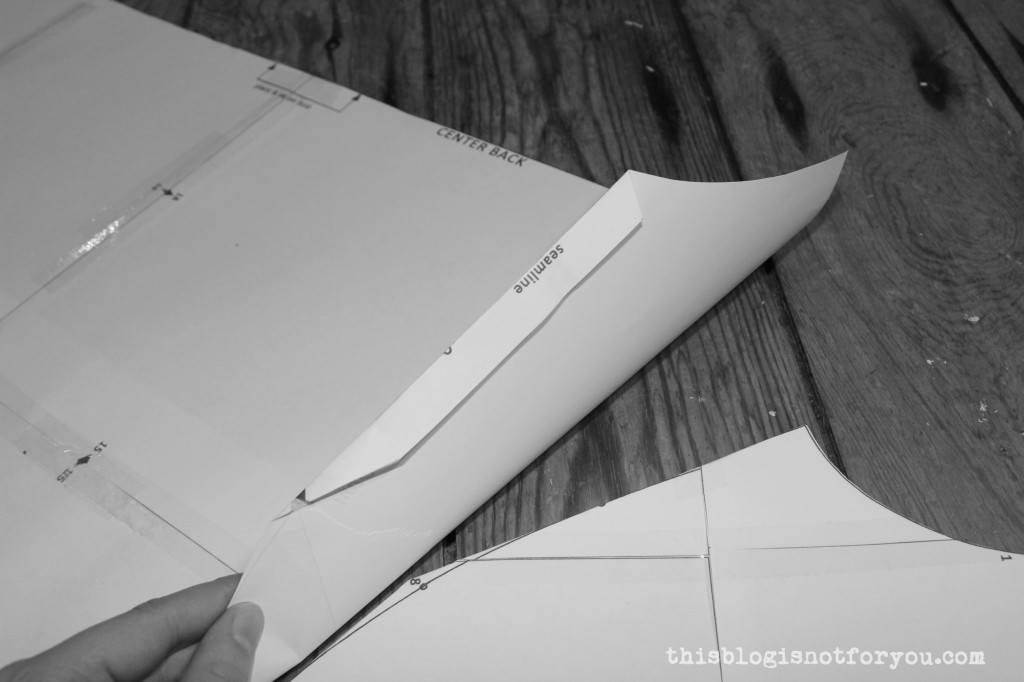 4. Now join the two pattern pieces, so the As match up and the Bs overlap by approx. 1cm. Tape together (don’t glue, you will want to be able to separate the pieces again and tape them back together in order to cut out your cape if you haven’t done so yet).
 Your pattern will now look like this:
 Now that we have a continuous neckline, we can start drafting the collar.
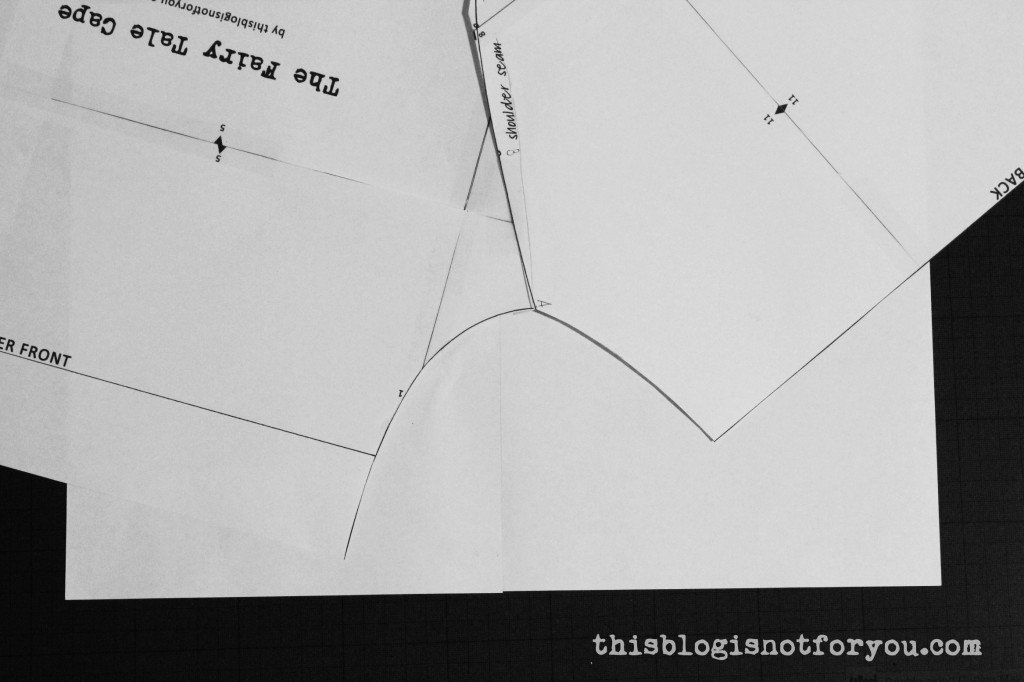 6. Copy the shape of the neckline, also marking the position of center front & back and the shoulder seamline.
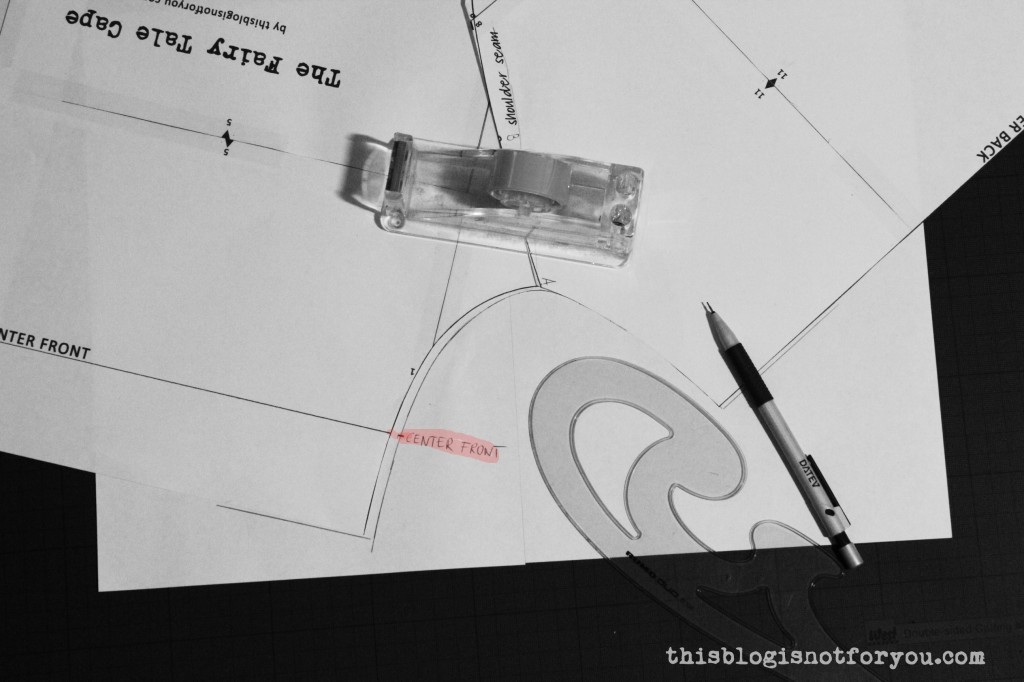 It should look like this:
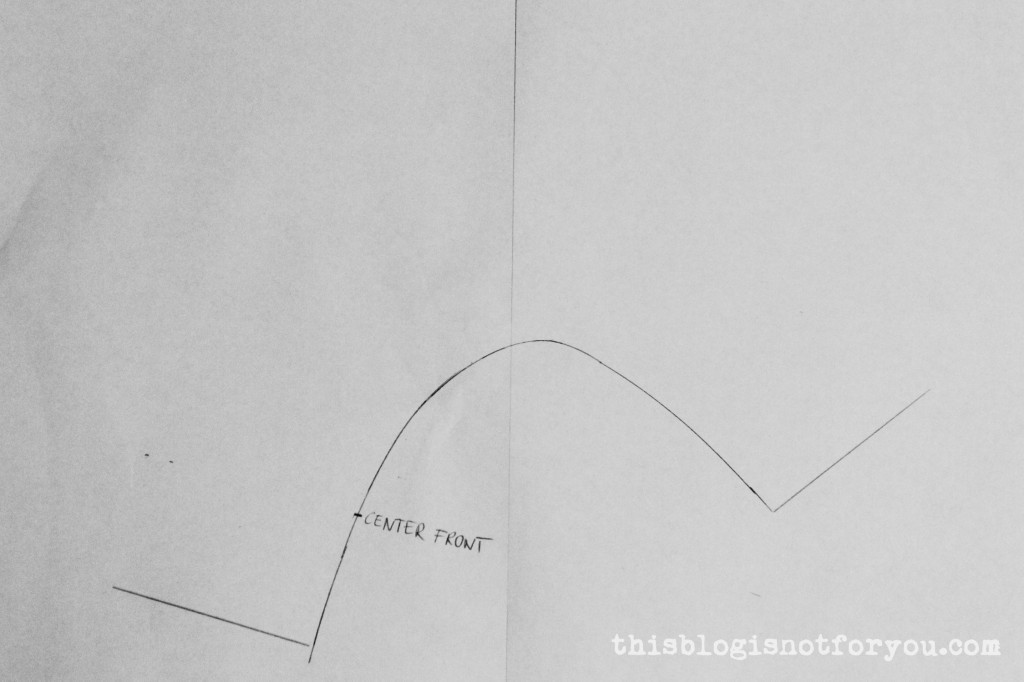 7. Now add 1.5cm (5/8”) seam allowance. (The seam allowance is already included in the cape pattern, which is why we need to mark it on the collar piece. You don’t want your collar end up too narrow).
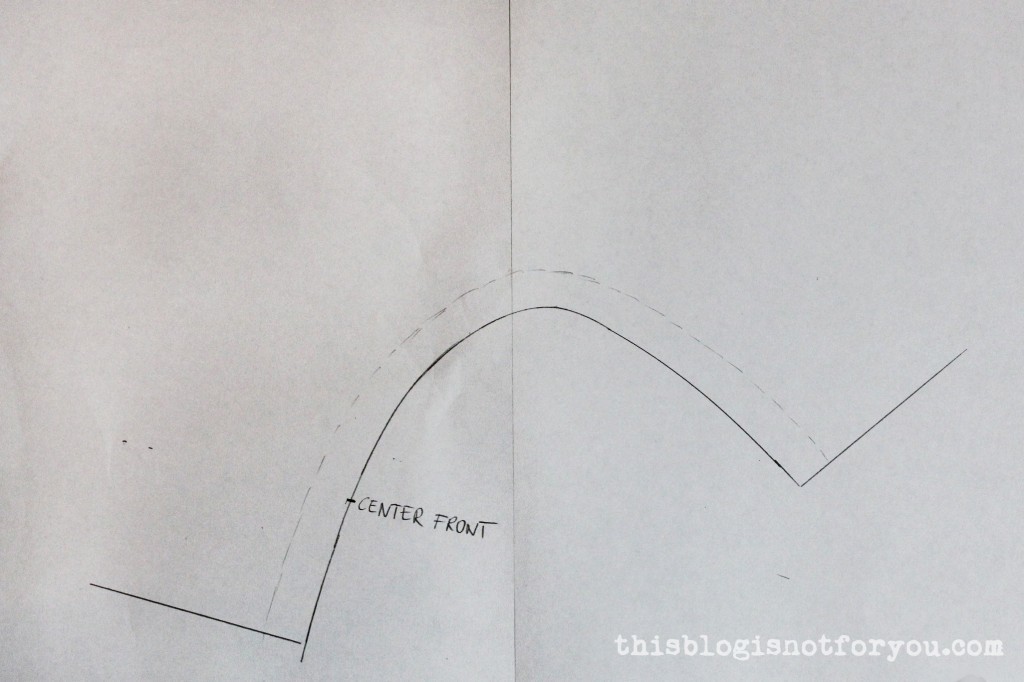 8. Draw the center front line (parallel to the front edge).
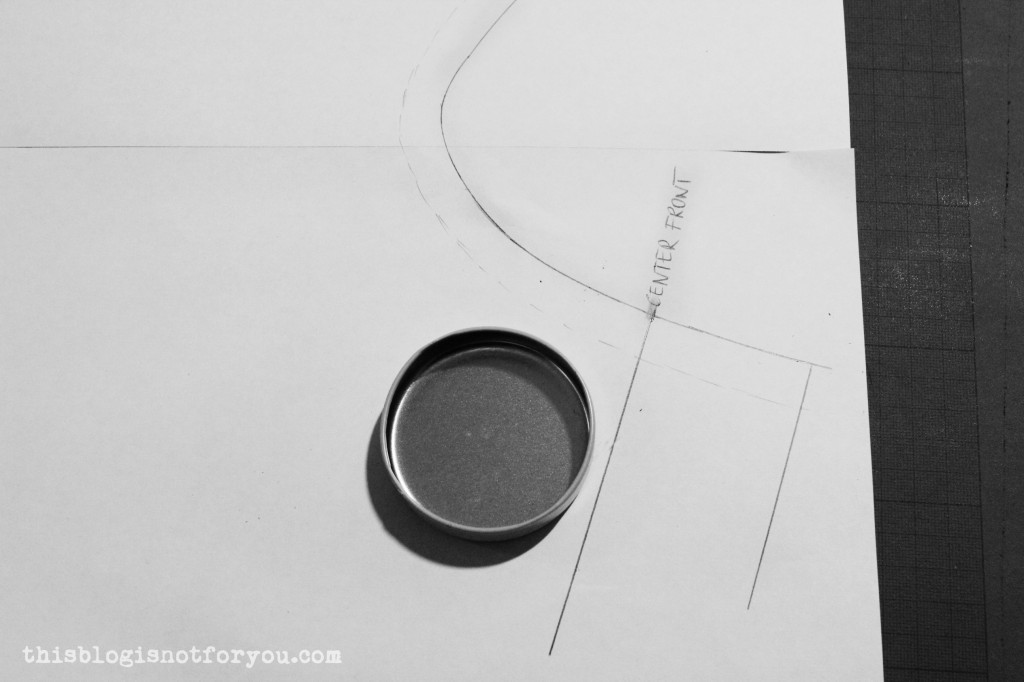 9. For this step I used a lid, but you can also do this free hand. Starting at the center front line draw a curved line. Here it’s completely up to you how you want the shape of your collar to look. When you’re satisfied with the shape, measure the width.
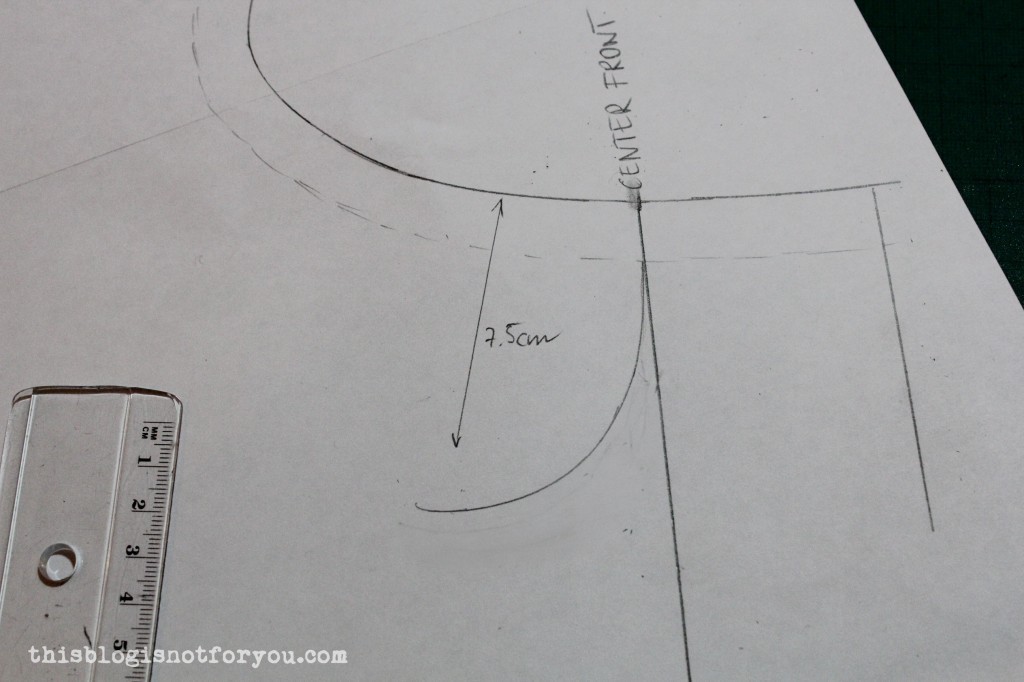 10. Mark the width measurement on the center back seam. Depending on the fabric you use the collar will be either cut on fold or in two pieces. If you are using fabric in a plain colour, you can simply cut the collar on fold (make a note next to the center back line). If you’re using patterned fabric which needs to be neatly lined up in the front, you will have to cut the collar in two pieces. In this case you will have to add 1.5cm of seam allowance to the center back edge.
 11. Mark the measured width all the way around the neckline.
 12. Draw a smooth line through all of the marks.
 13. Now you’re almost done! Just add some seam allowance to the bottom edge of your collar.
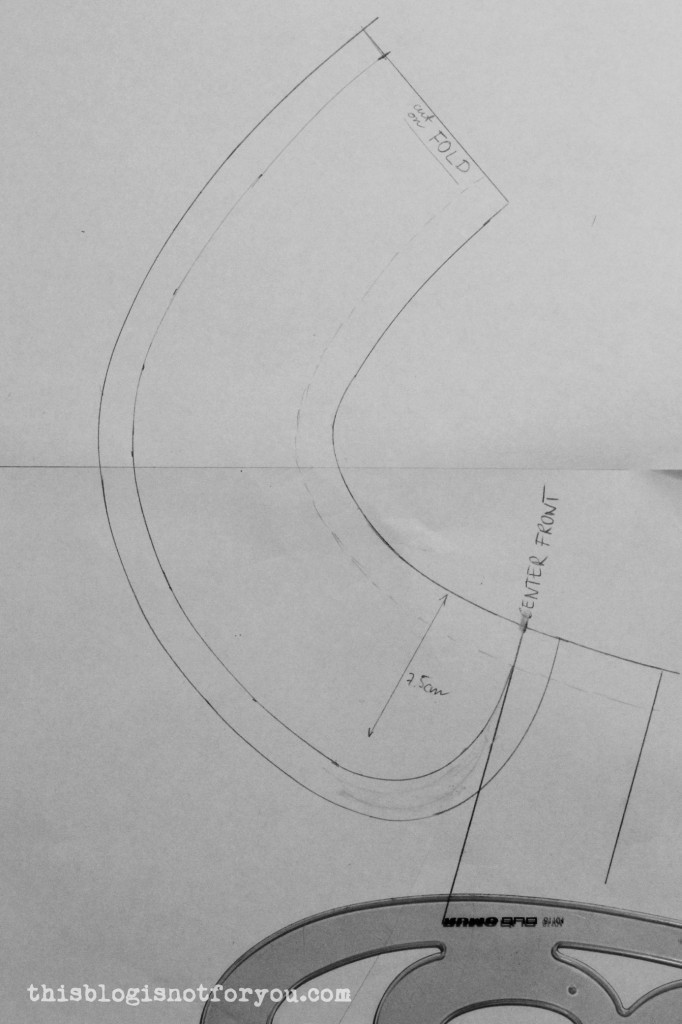 14. Mark the shoulder seam placement and center front with notches. Now grab a coffee and admire your newly drafted Peter Pan collar!

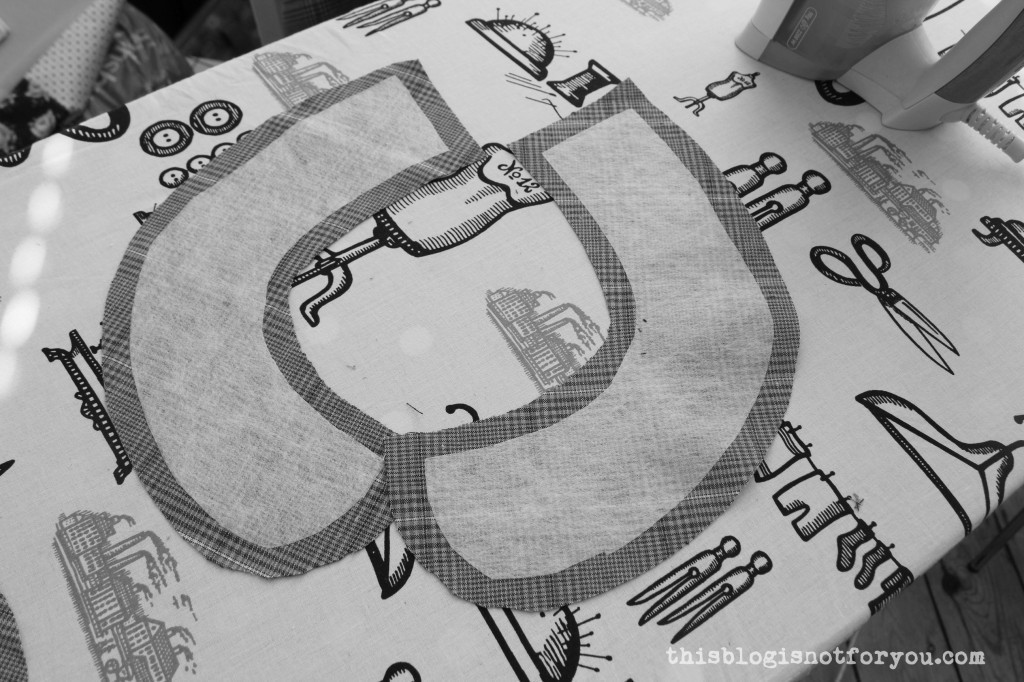 3. If not cut on fold, sew your collar pieces together at the center back. Press seam open.
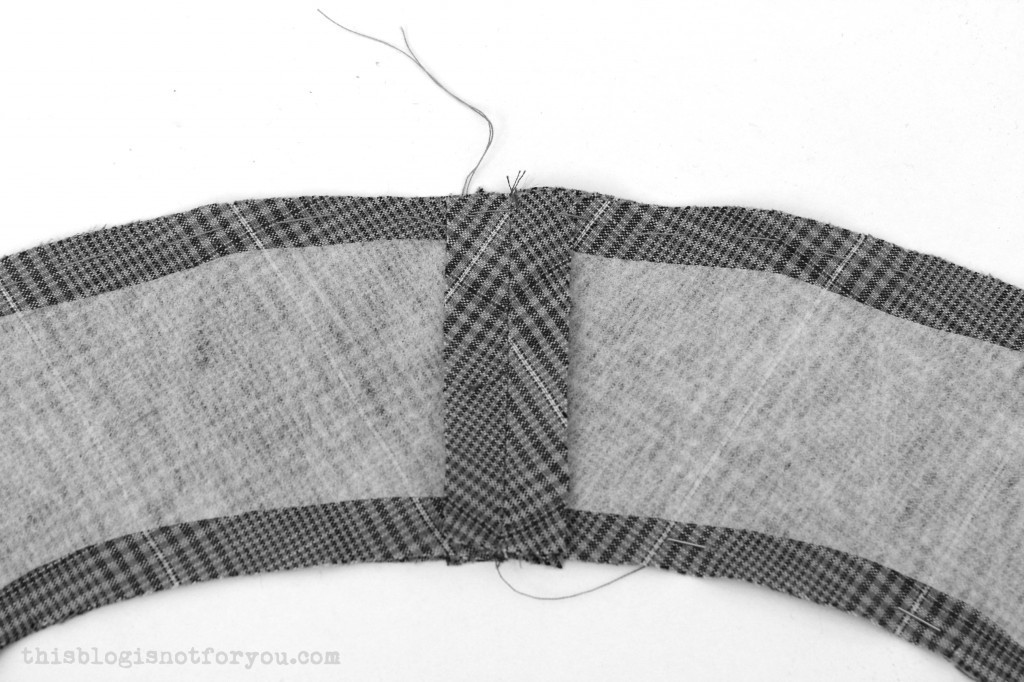 4. Pin or baste collar pieces together (right sides together) starting at the seam allowance mark at the front corner, all the way along the bottom edge. Leave the top edge as it is. Don’t sew it closed!
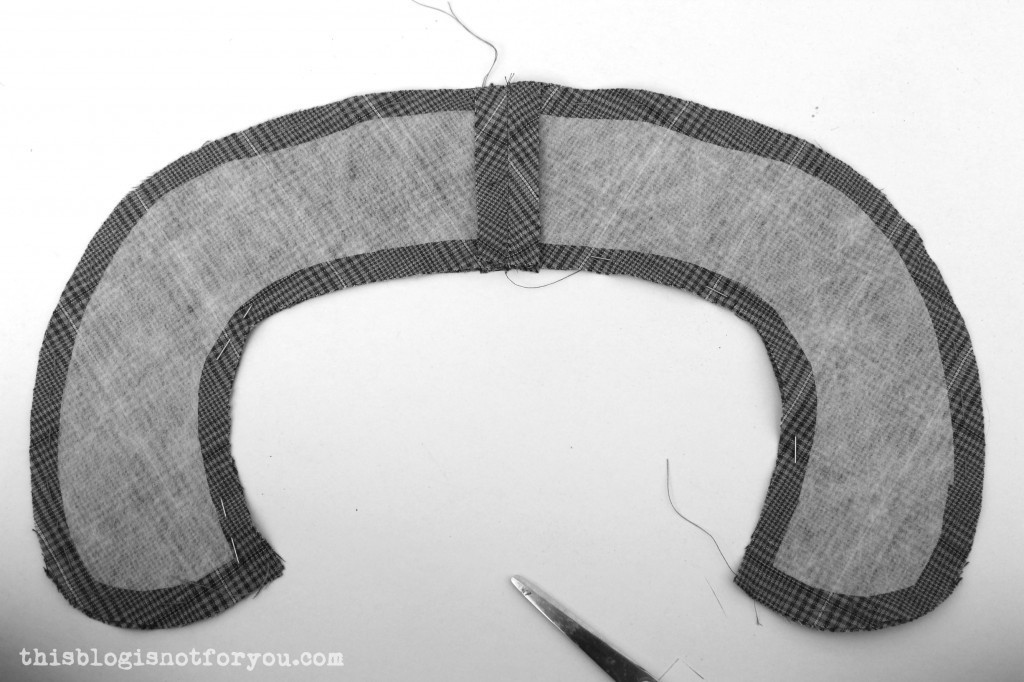 5. Sew along the pinned/basted edge using 1.5 cm of seam allowance. Before you turn the collar inside out, clip the rounded edges to remove bulk like so:
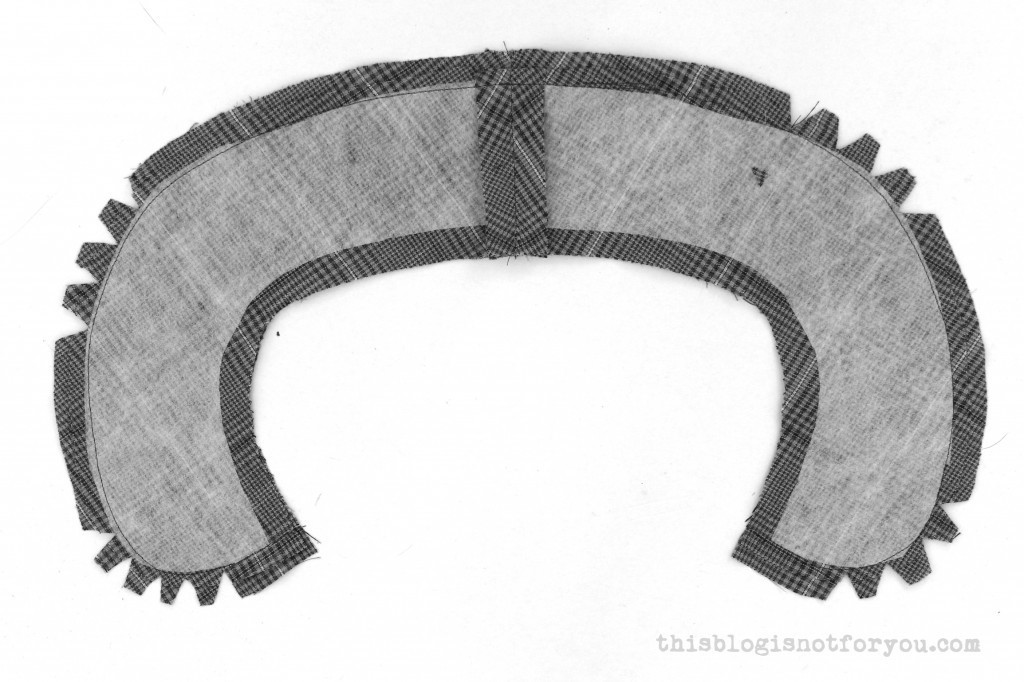 You can trim one seam allowance shorter than the other. this also helps to remove bulk.
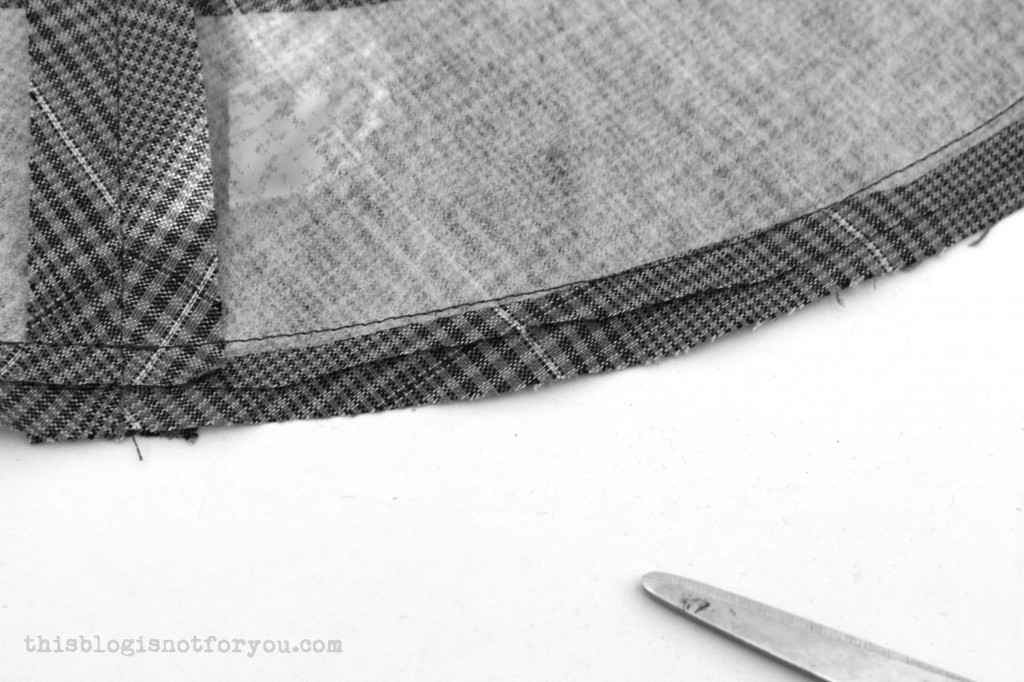 6. Turn inside out and give it a good press.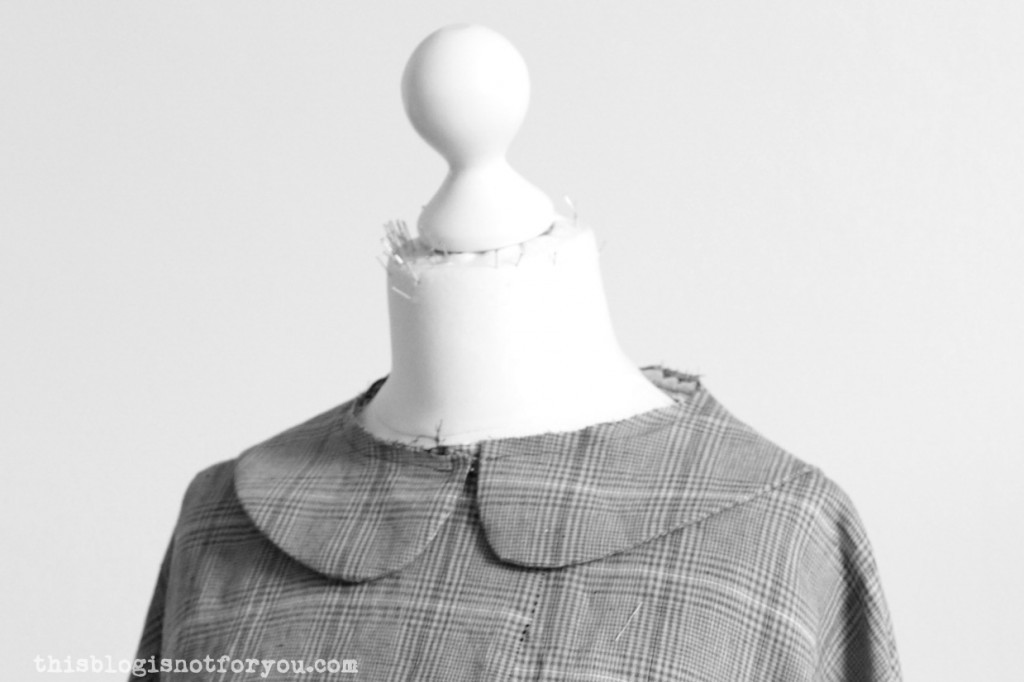

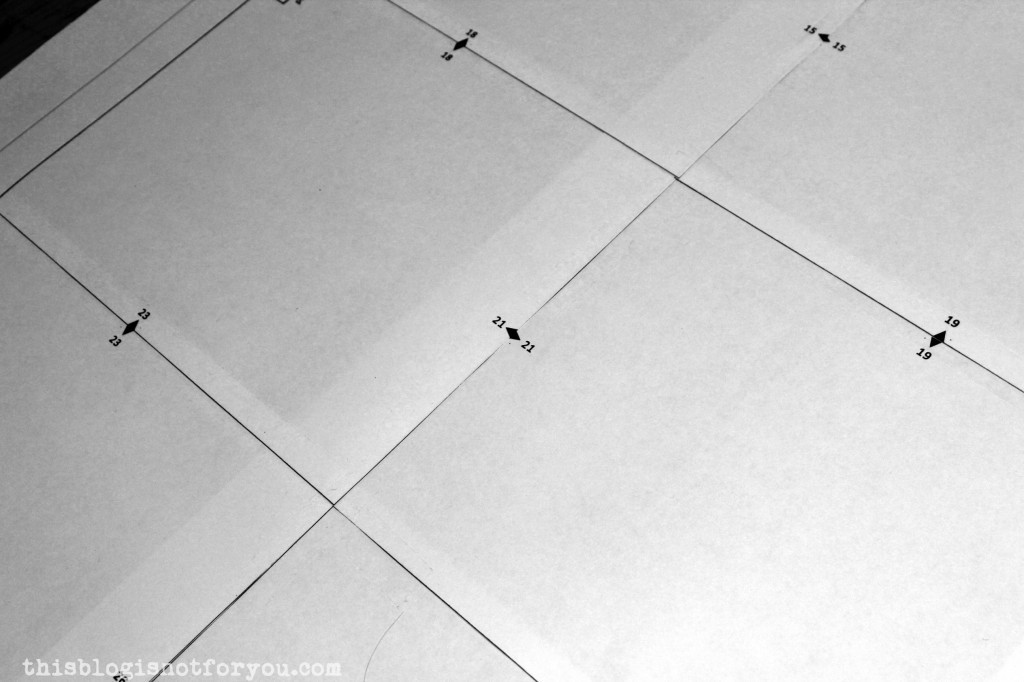 Depending on whether you cut directly on or slightly next to the gridlines, some pattern pieces might not match exactly at the notches. That’s ok. Try to match the pieces as good as you can, orienting yourself on the grid and and pattern lines rather than the notches. Use the notches as a guide to match the right pages (they can be a bit off, as long as all the gridlines are parallel/perpendicular and the pattern lines are matched up).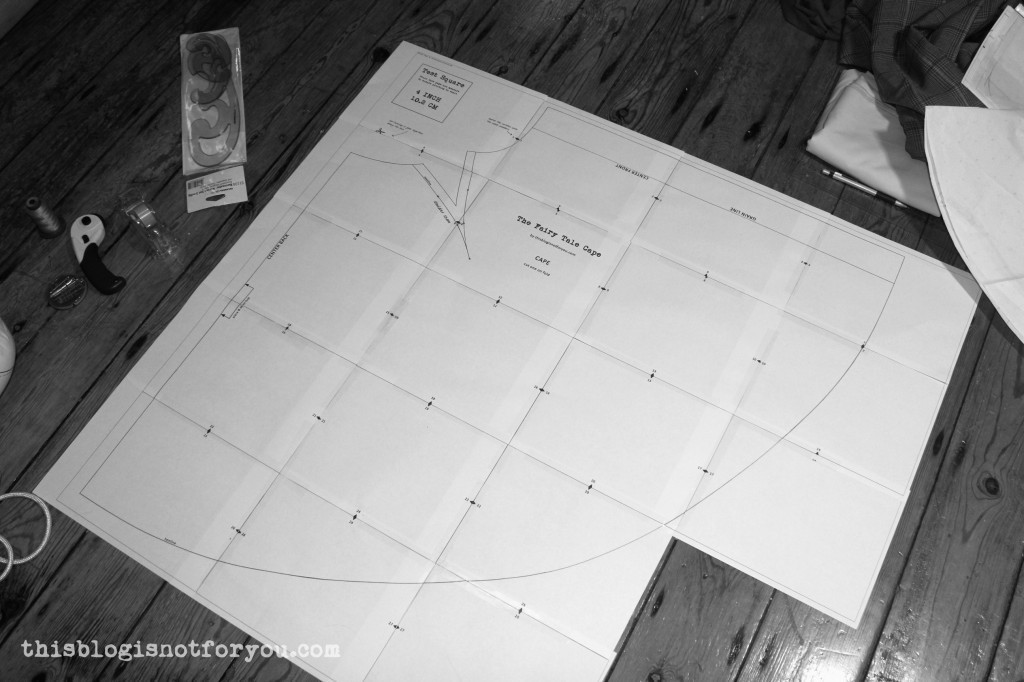
 Armslits don’t neccessarily require a lining, but for a more professional result I’d recommend adding one. The armslits are cut into the fabric at quite a late stage in the process. If your cape isn’t lined at all, you can even decide to add them at a later stage after the cape is finished. Adding armslits does not require much extra fabric, you can even use a different fabric in a contrasting colour.