Paper Ball Decor: Recycling Book Paper

book paper ball decor by thisblogisnotforyou.combook paper ball decor by thisblogisnotforyou.comToday I thought I’d share a sewing-related craft project which is super easy to make. You can make these paper balls from different sorts of paper and in whatever size you fancy. They are very quick to make and perfect for parties or home decor.

book paper ball decor by thisblogisnotforyou.combook paper ball decor by thisblogisnotforyou.com
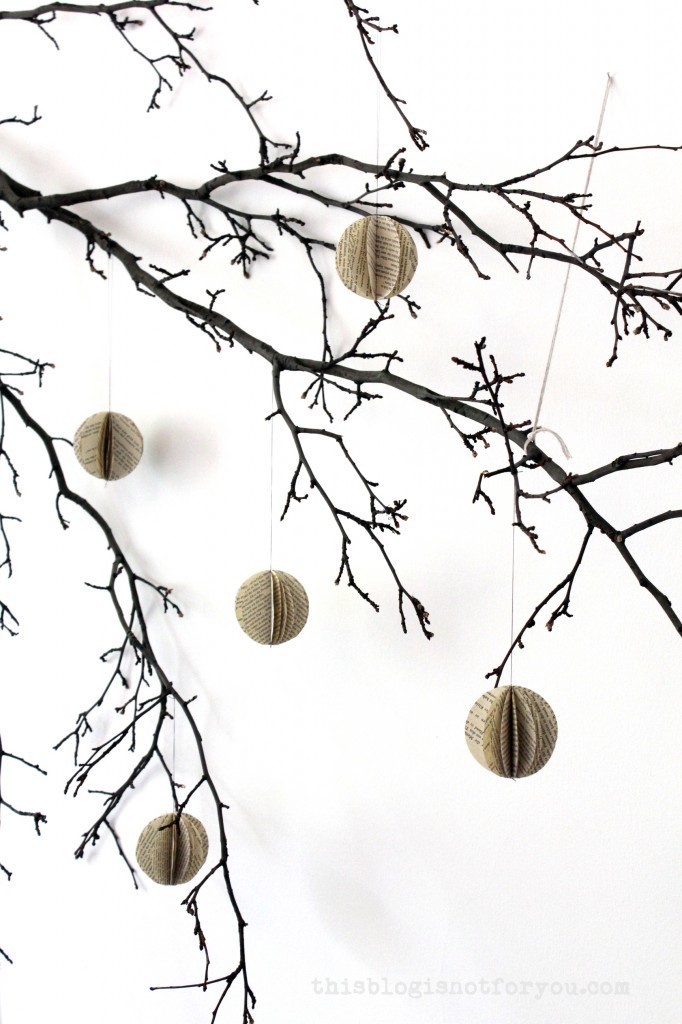
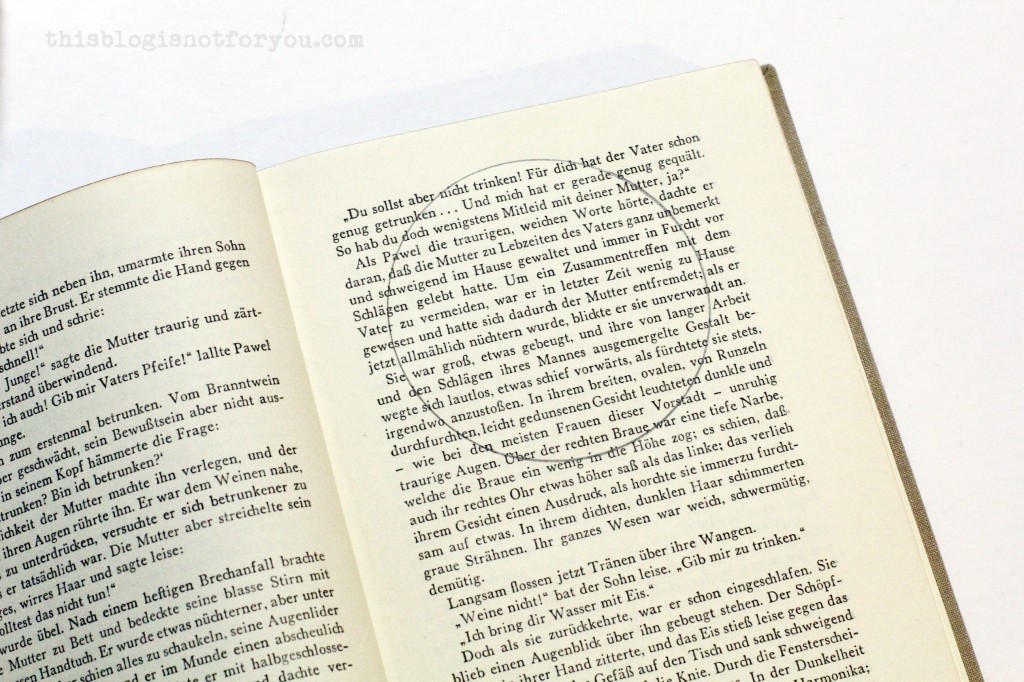
1. For the book paper balls get some old book from the flea market or your own shelves. Draw a circle onto the paper using a glass/jar/cup and tracing it with a pencil.

book paper ball decor by thisblogisnotforyou.combook paper ball decor by thisblogisnotforyou.com2. Cut it out (you can cut through several layers at once to speed up the process) and repeat until you’ve got enough pieces for the amount of paper balls you want to make. You will need approx. 8-15 circles per paper ball, depending on the thickness of the paper and the size of the paper ball. For bigger ones I’d recommend using more.book paper ball decor by thisblogisnotforyou.com
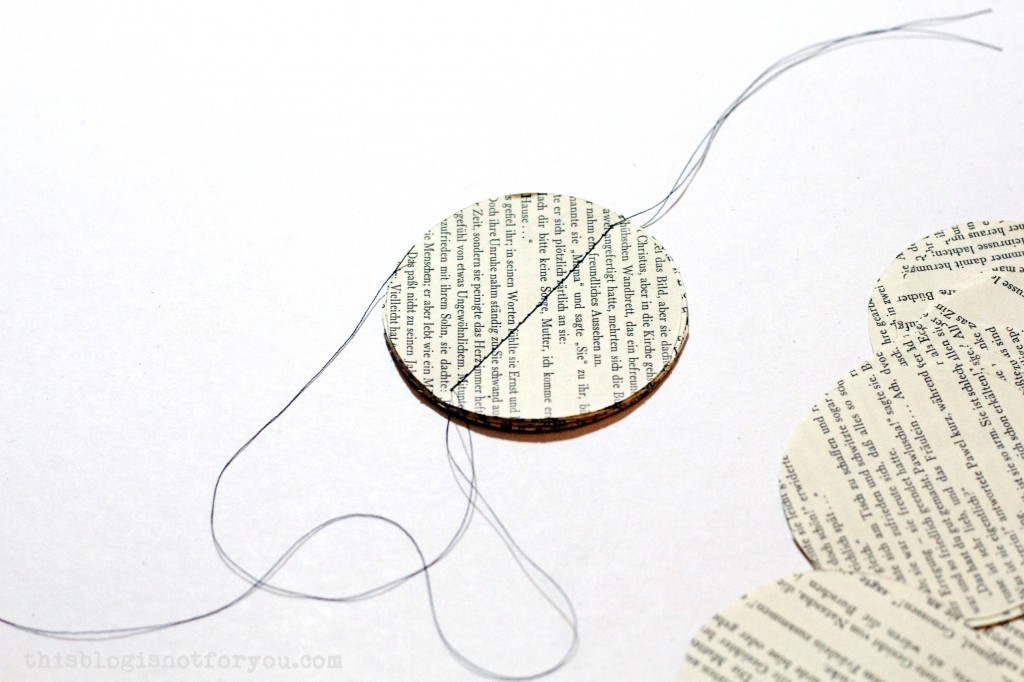
3. Stack them on top of each other and stitch down the middle with a straight stitch and a wider stitch length. My standard machine had no problems tackling 12 layers of book paper. However, if you are using more than 12 layers and they get stuck in your machine, you can simply sew them together by hand or try using a stapler.

Leave long thread tails and knot them on both ends. Cut off the thread tails on one side. You can  later use the long thread ends on the other side of the paper balls for hanging them up somewhere.

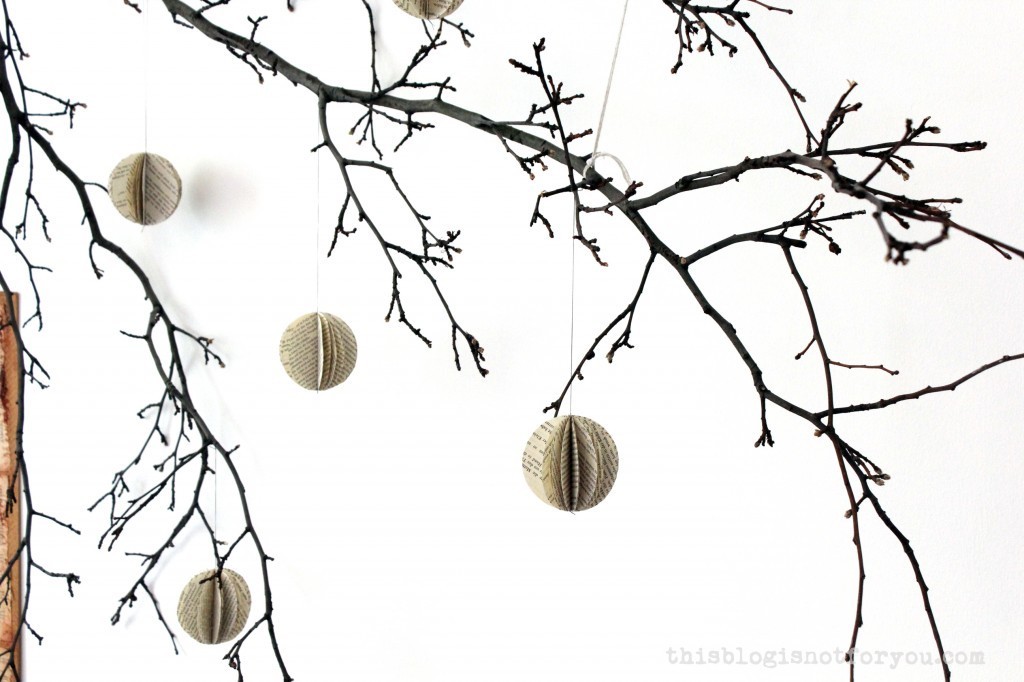
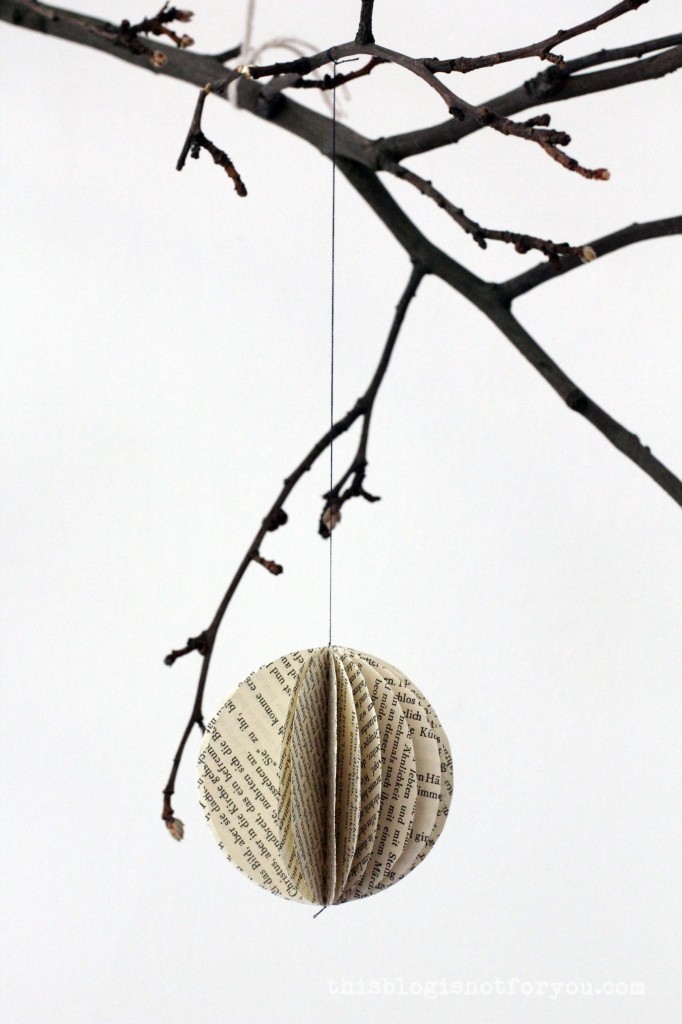
4. Gently bend apart the layers with your fingers, distributing them evenly until there are no big gaps left. Now it’s time to hang them up!book paper ball decor by thisblogisnotforyou.comYou can also try and make them using colourful scrapbook paper or pages from old fashion magazines.

It’s also a great project to make together with your kids and for showing them how to use a sewing machine.

You can hang your finsihed pieces up in your home, make mobiles or decorate your garden with them for your next party.book paper ball decor by thisblogisnotforyou.com

Hope you enjoyed this post! I’ve started my new job last week and have been very busy working on my new pattern which I hope to release at the beginning of August. That’s also the reason why you probably won’t see too many new makes this months. Posting on le blog less frequently doesn’t mean I’m not busy 🙂 I regularly post pictures of WIP on Twitter and Instagram, so feel free to follow me there and check out what I’m doing in the meantime (link below).

I still have to figure out how to combine my new work schedule with my favourite hobby. Any advice? 🙂


Happy sewing!

facebook/bloglovin/pinterest
twitter/instagram

Stay in touch!

Make Your Own Soap!

Make your own soap by thisblogisnotforyou.com
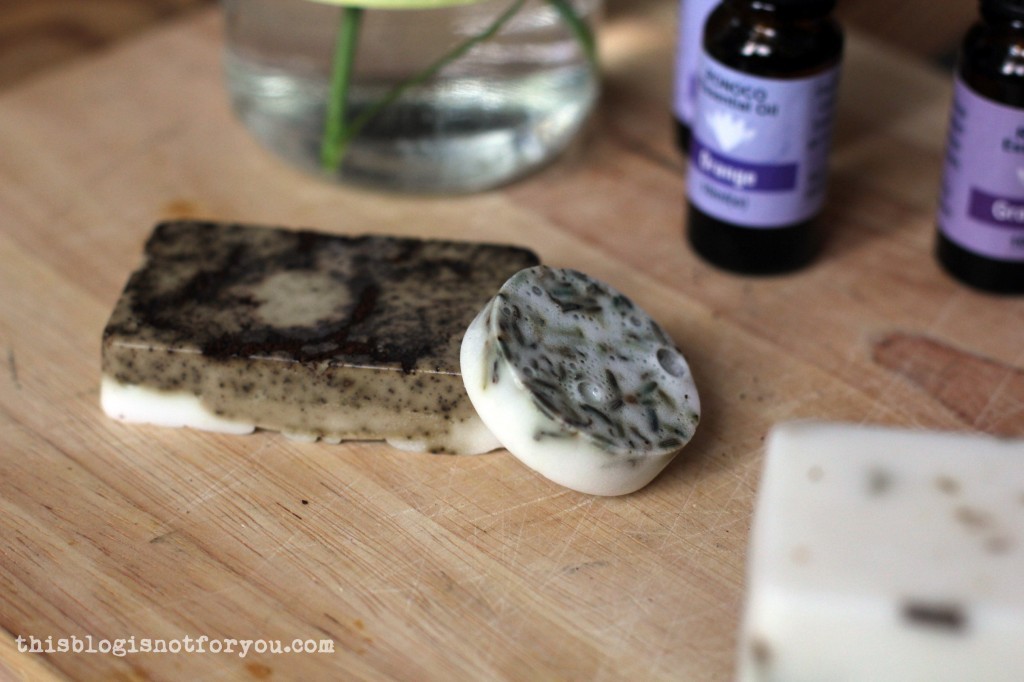
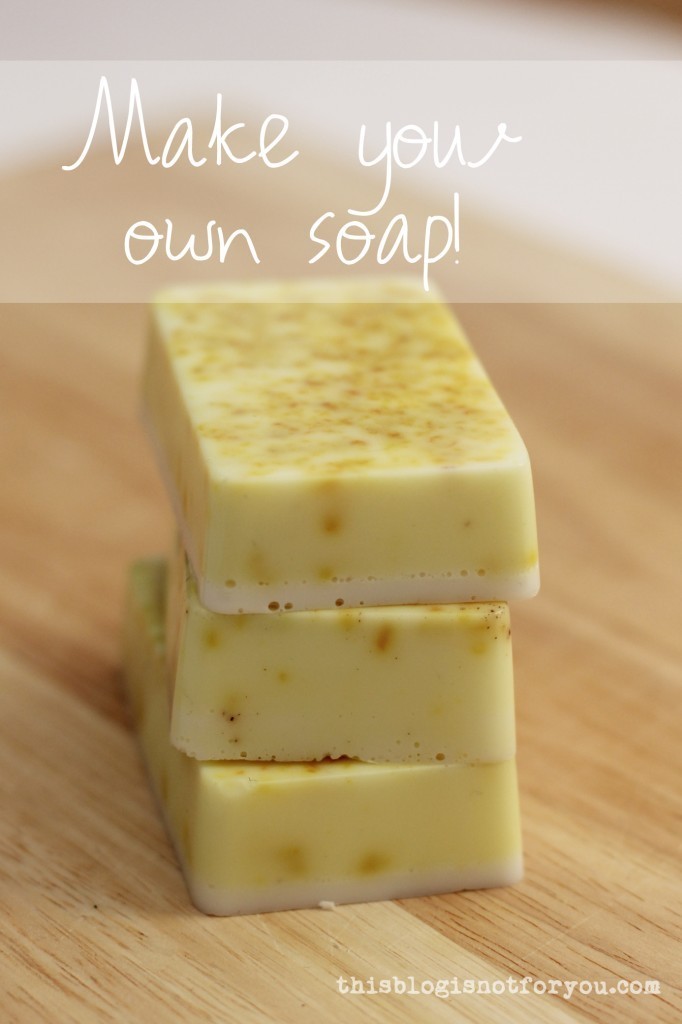
Ahhh, our flat smells heavenly! One of the many benefits of making your own soap. I love making soap because you can create the perfect soap bar with your favourite fragrances and ingredients. And, believe me, picking up the finished soap bar for the first time and smelling it is such a bliss!

You can make soap-making as easy or hard as you want. I decided to go the easy way, inspired by the ladies over at A Beautiful Mess and bought a goat’s milk soap base. If you want to make soap the hardcore way you can create your own base; there are some fab recipes out there. But it’s much more complicated and you will need a lot more ingredients. If you are trying to make soap for the first time, I would recommend starting with a melt-and-pour soap base. Make your own soap by thisblogisnotforyou.comMake your own soap by thisblogisnotforyou.comMake your own soap by thisblogisnotforyou.com

How To Make Your Own Soap

First of all, some basic supplies and ingrediences you will need for making your own soap:

– bowl for melting the soap base (microwave/double boiling)
– grater (for orange/grapefruit zest)
silicone mould (brownie/cupcake molds are often cheaper than soap molds, but are the same thing)
– wooden spoon/cocktail stick for stirring
melt-and-pour soap base (You can buy containers in different sizes. I bought 1kg and used about 500g so far from which I got about 12 bars) I bought goat’s milk soap base and really loved it. I’m sure there are also some vegan alternatives out there.

Ingredients you can use:

– orange/grapefruit zest
– various essential oils (lavender, orange, grapefruit, mint, rosemary etc.)
– poppy seeds
– coffee powder or beans
dried lavender (also great for keeping your closet moth-free)/rosemary

You can basically use whatever fragrances you like. Using essential oils works best, as you only need a few drops to get a long-lasting scent. Dried herbs or blossoms are also nice. Using zest is fine, as the soap base preserves and keeps it from going moldy, but don’t go to crazy with adding fresh ingredients and don’t use more than a couple of teaspoons.

Make your own soap by thisblogisnotforyou.com

Make your own soap by thisblogisnotforyou.com
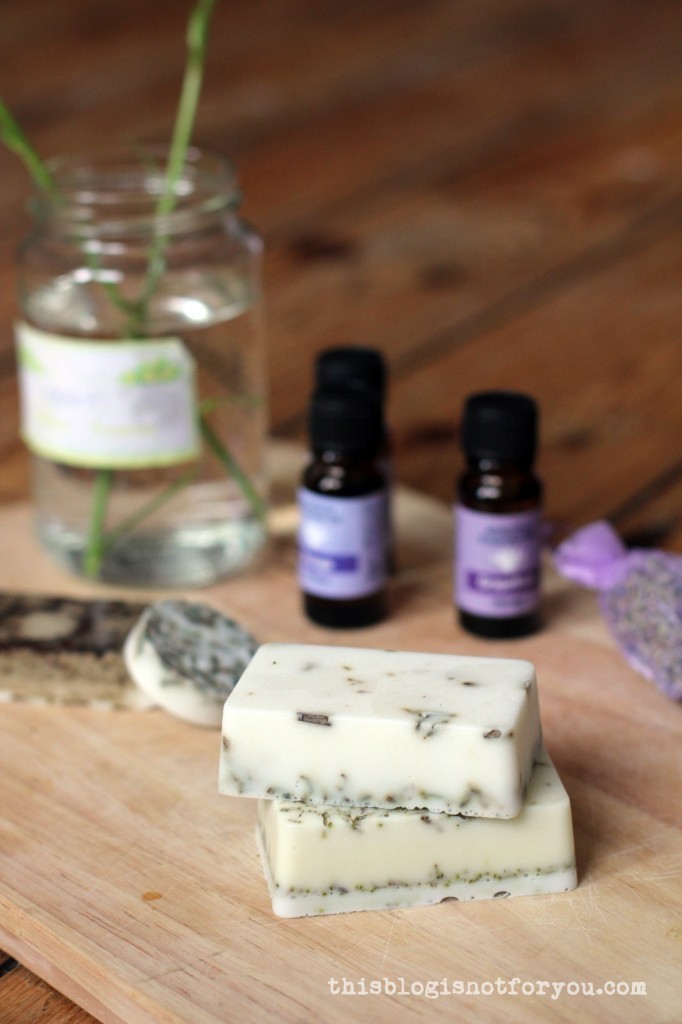
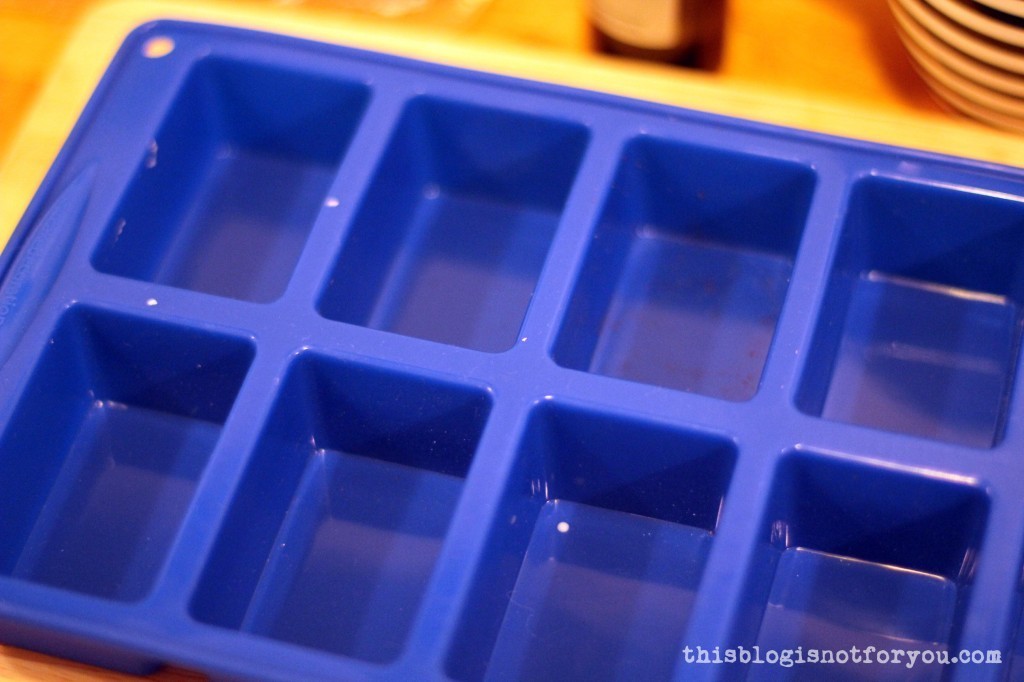
1. Make sure your silicone mould is clean and dry. I placed it on a wooden board, so I could move it while the soap wasn’t completely hardened yet.Make your own soap by thisblogisnotforyou.com2. Cut your soap base into smaller cubes with a knife and place them in a clean bowl.Make your own soap by thisblogisnotforyou.com
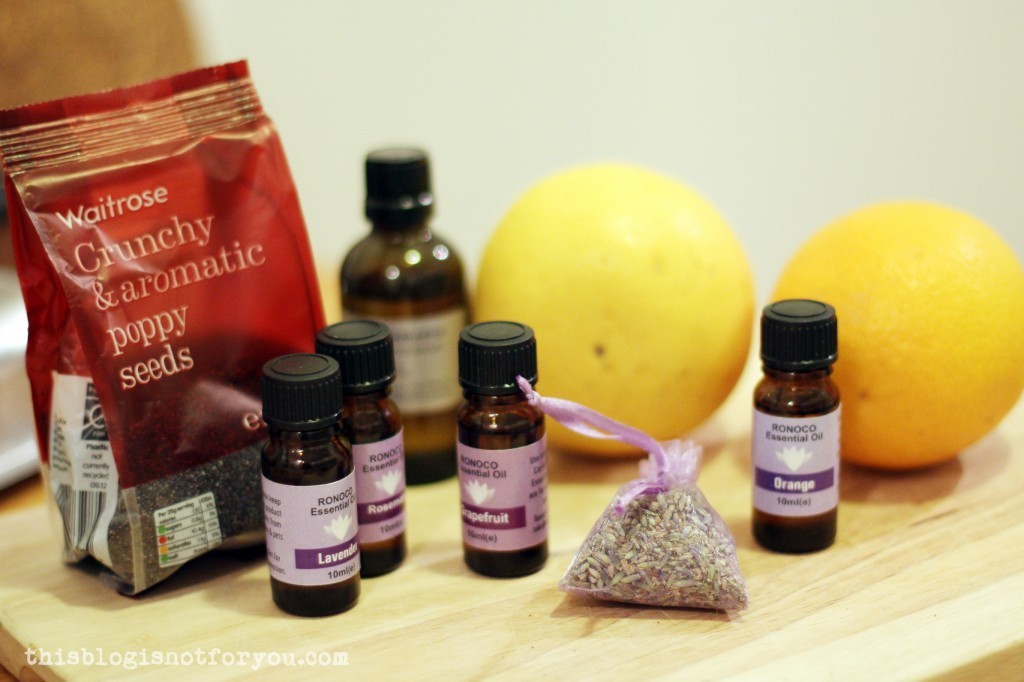
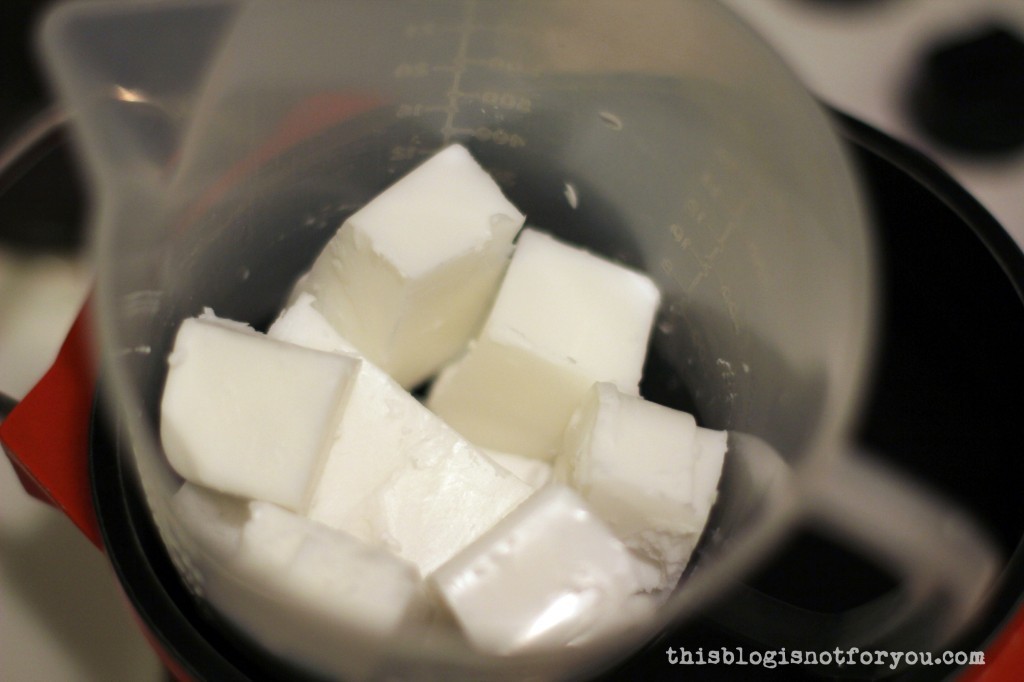
3. Before you melt the soap base, make sure you have all ingredients handy. The soap hardens quite quickly, so it’s better to zest the orange/grapefruit and open any plastic bags before you start melting the base.

If you want to make different soaps, prepare a few clean bowls you can use for the different soap mixes. I did not melt the whole amount of soap base at once but only melted enough to make 3-4 bars at a time, so I could try different recipes without having to hurry too much.Make your own soap by thisblogisnotforyou.com

4. Melt the soap base by double boiling or in the microwave. For some reason double boiling did not work with my soap base, so I heated it in the microwave. It melts pretty quickly, so be careful. Mircowave for no longer than 30 seconds at a time. With either method, make sure you don’t burn the soap (or have it explode in the microwave – ask me how I know this!).

5. Once the soap base is melted completely, add your ingredients and stir with a wooden spoon before pouring it into your silicone mould. Stir the soap slowly, otherwise it might form bubbles.Make your own soap by thisblogisnotforyou.com
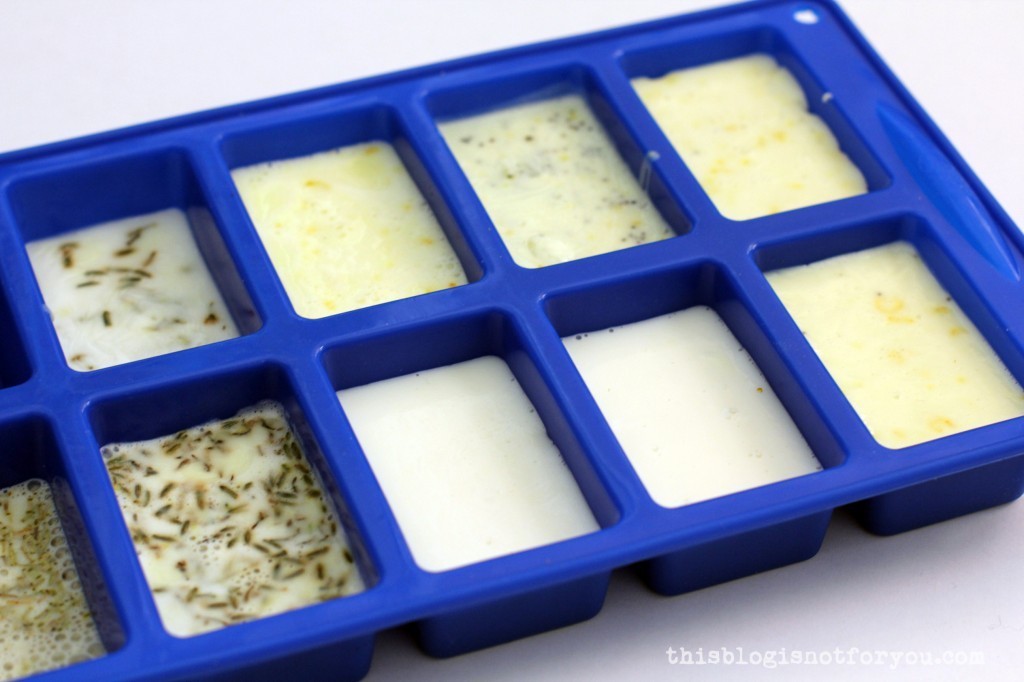
6. Let the soap harden. It only takes a couple of hours, but if you want to be on the safe side you can leave it in there over night. I put a piece of paper over the silicone mold to keep the soap dust-free.

7. Once the soap was hardened I put it in the fridge for a couple of minutes before popping the bars out of the mold.

Make your own soap by thisblogisnotforyou.com
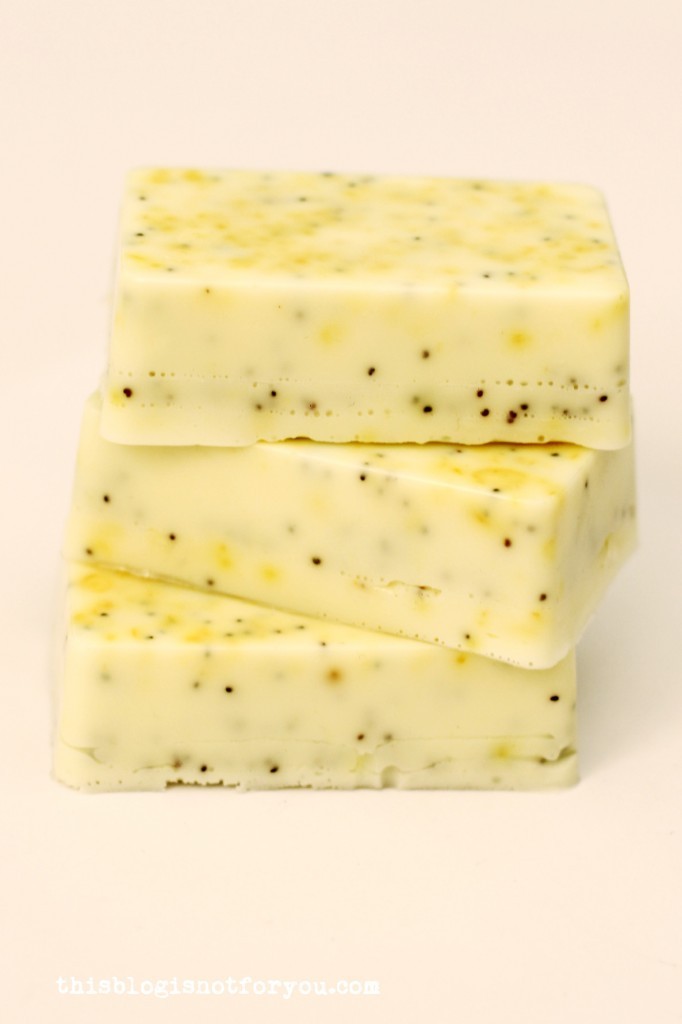
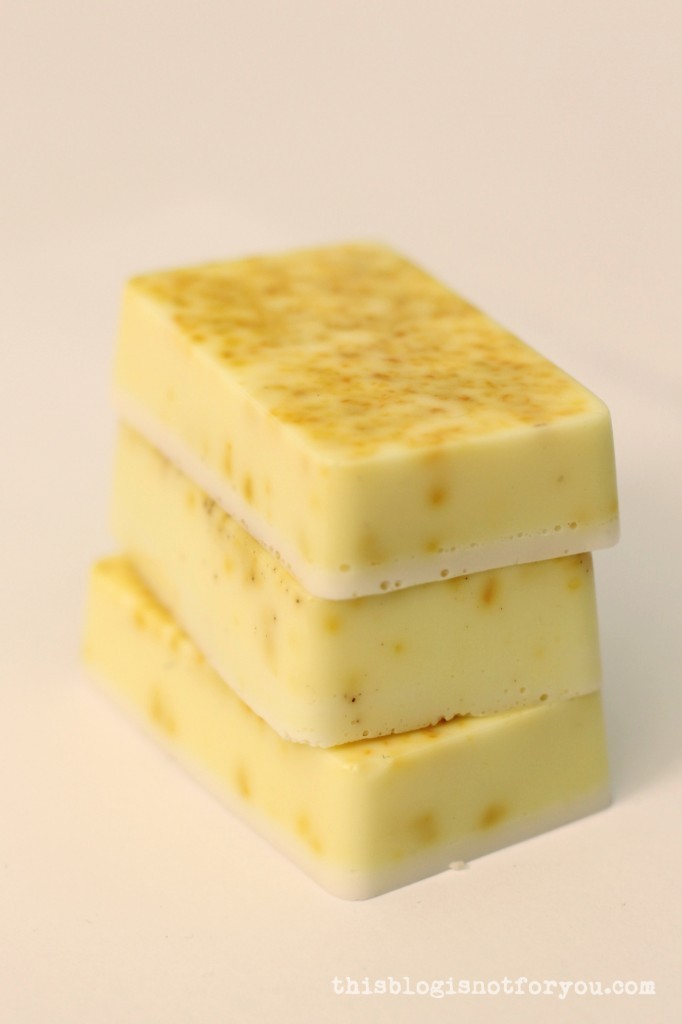
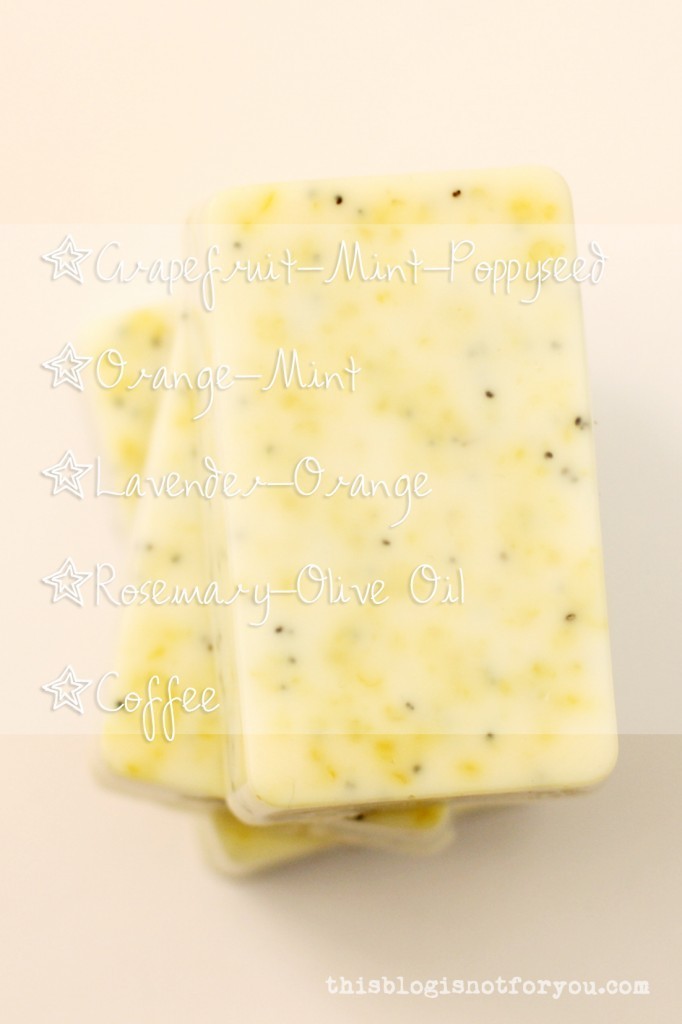
Grapefruit / mint / poppy seed: zest of half a grapefruit, 10 drops of grapefruit oil, 3 drops of mint oil, 1tbsp poppy seeds.
Orange / mintzest of half an orange, 10 drops of orange oil, 4 drops of mint oil.
Lavender / orange: 1 tbsp dried lavender buds, 10 drops of lavender oil, 5 drops of orange oil.
Rosemary / olive oil: 1 tbsp dried rosemary, 1tsp olive oil, 5 drops of rosemary oil.
Coffee: 1 tbsp of coffee powder.

Make your own soap by thisblogisnotforyou.comMake your own soap by thisblogisnotforyou.com

Grapefruit/Poppyseed/Mint (above) and Orange/Mint (below) are my favourites! I created the narrow white layer on the orange/mint bars below by pouring some clear melted soap base on top of the first layer after it was hardened.Make your own soap by thisblogisnotforyou.com
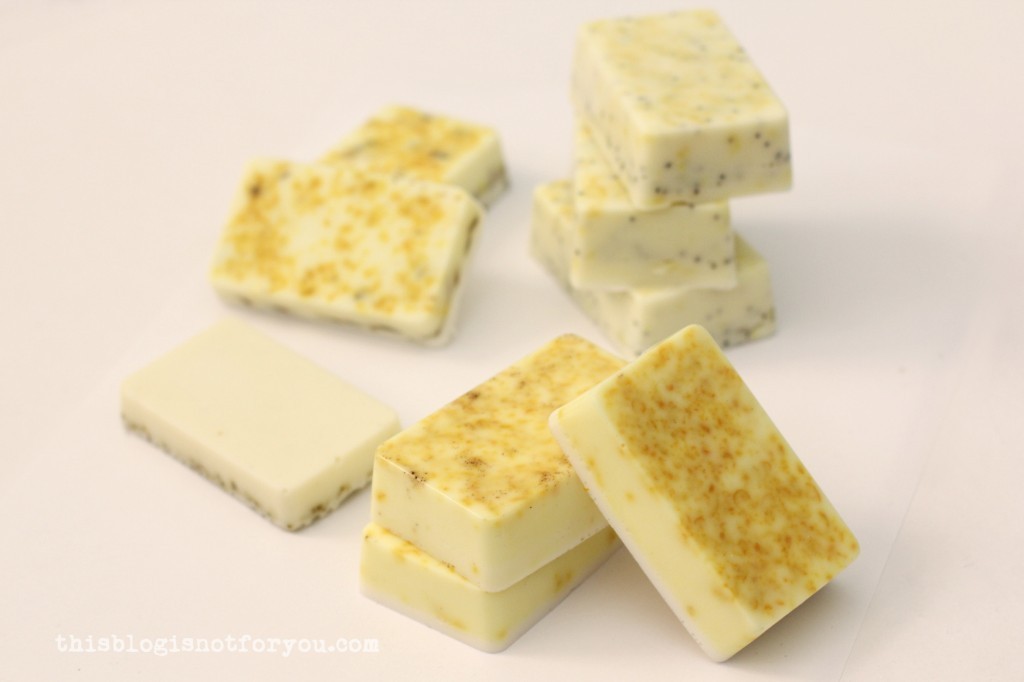
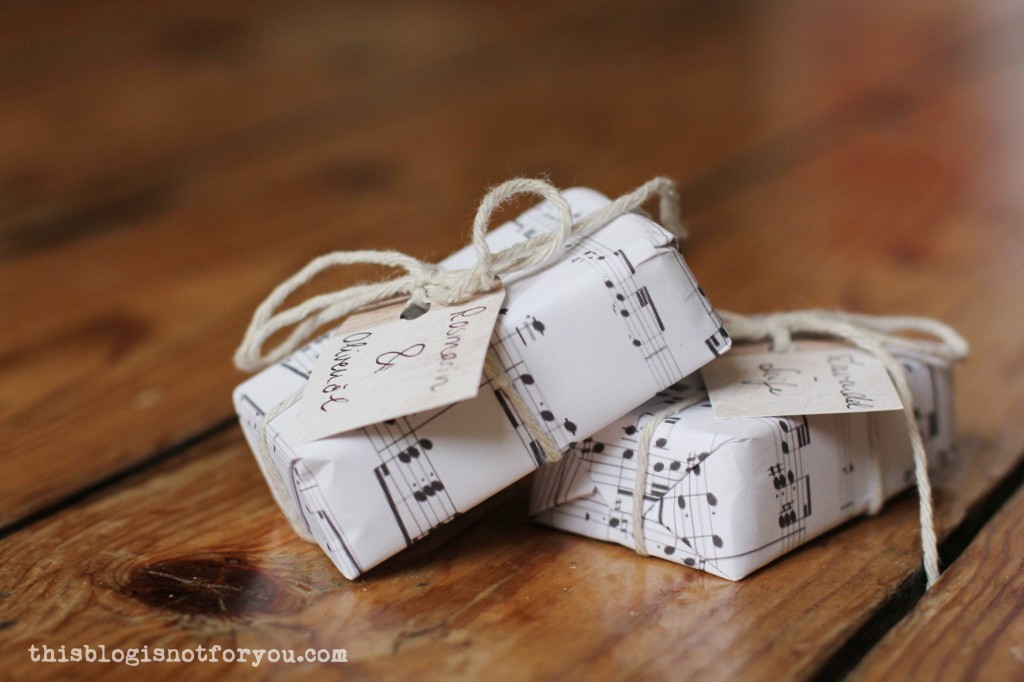
I wrapped the soap bars in recycled paper (I cut strips out of a shopping bag), which I taped together on the bottom.Make your own soap by thisblogisnotforyou.com
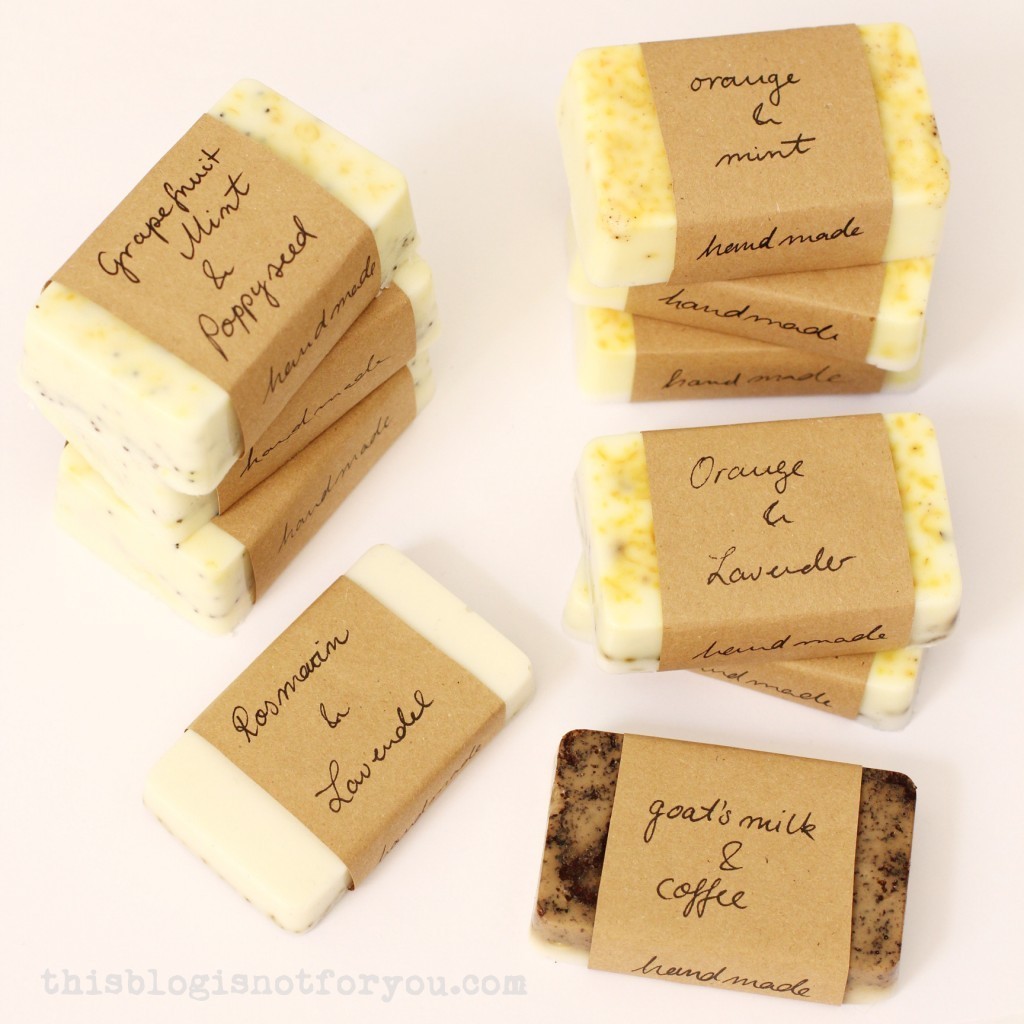
Before I gave some of the soap bars away to friends and family, I wrapped them in music paper (which I had printed out) and attached small labels with twine.Make your own soap by thisblogisnotforyou.comMake your own soap by thisblogisnotforyou.com


Happy soap making!

facebook/bloglovin/pinterest
twitter/instagram

Stay in touch!

DIY Leather Feather Earrings

DIY leather feather earrings by thisblogisnotforyou.com

Hellooo everyone! After some server errors (sorry about that!), I’m back. Upgrading plug-ins can be annoying if they decide to break your website!

Hope you had a great week so far! London couldn’t decide between pouring rain and bright sunlight, so luckily my conscience didn’t make me feel guilty about playing stay-at-home in order to prepare this tutorial and update my FAQ page.

A little while back I recycled two leather coats into a bag for my little sister. From this project I had tons of leather scraps left and made a pair of black and silver feather earrings. I gave them to my sister (who loved them) after which my mum also wanted her own pair.

I made three more pairs and will share a little tutorial for making these DIY cuties. Mother’s Day is this weekend and these adorable earrings make a lovely last-minute handmade gift! DIY leather feather earrings by thisblogisnotforyou.comDIY leather feather earrings by thisblogisnotforyou.com

DIY leather feather earrings by thisblogisnotforyou.com

These are the earrings I made for my sister, here modelled by a friend of mine:
DIY leather feather earrings by thisblogisnotforyou.com

Ok, let’s get cracking! Here’s how to make your own pair of DIY leather feather earrings:

DIY leather feather earrings by thisblogisnotforyou.com

OPTIONAL: Silver jewelry wire, tape, tailor’s chalk.

DIY leather feather earrings by thisblogisnotforyou.com

1. Cut out two symmetrical feather shaped pieces from the leather scraps. You can mark the shapes with chalk on the left side of the leather if you you’re not sure about freehand-cutting.

DIY leather feather earrings by thisblogisnotforyou.com

2. Stitch down the middle of your leather pieces (about 2/3 down), either with machine or by hand. This will stabilise the shape of the feather and look like the shaft. Alternatively, you can use jewelry wire instead of thread:DIY leather feather earrings by thisblogisnotforyou.comDIY leather feather earrings by thisblogisnotforyou.com

Puncture the leather with a needle, making it easier to thread the wire through it.
DIY leather feather earrings by thisblogisnotforyou.com
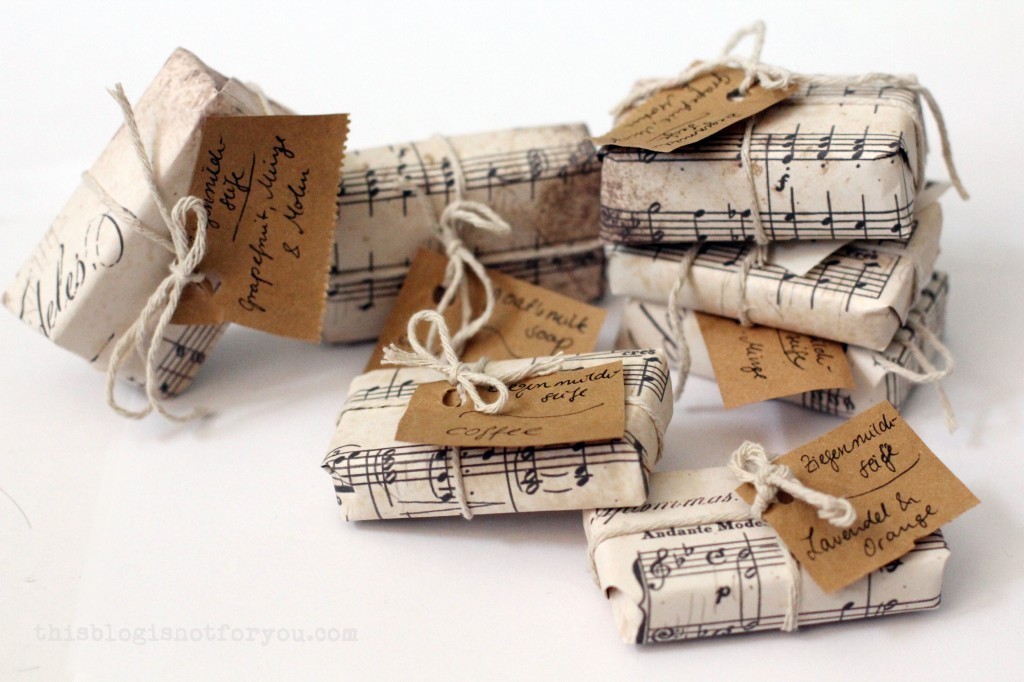
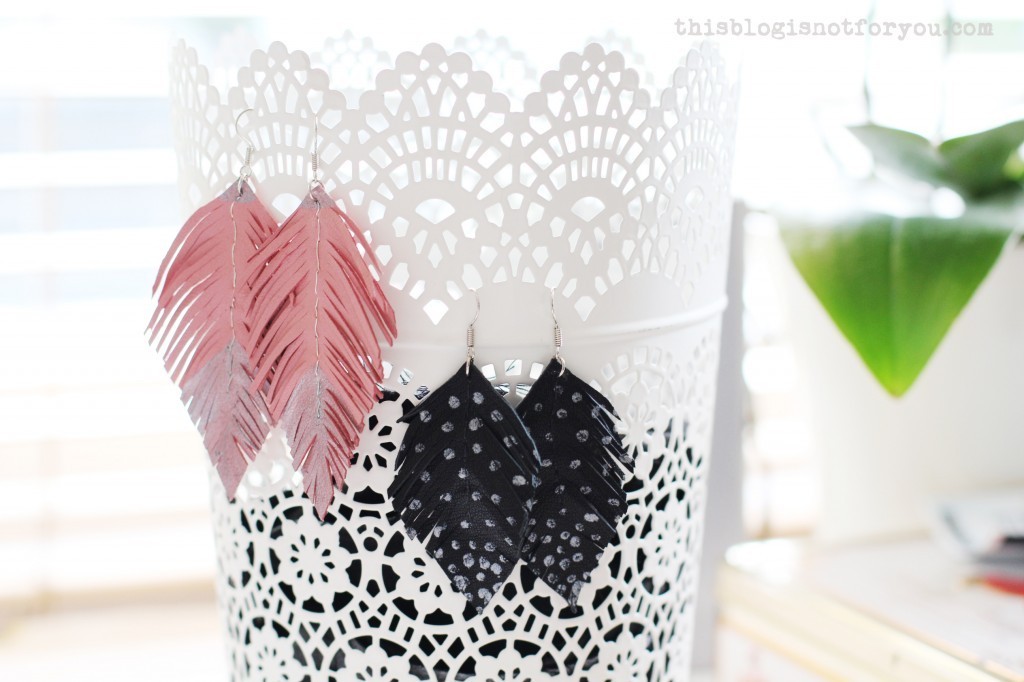
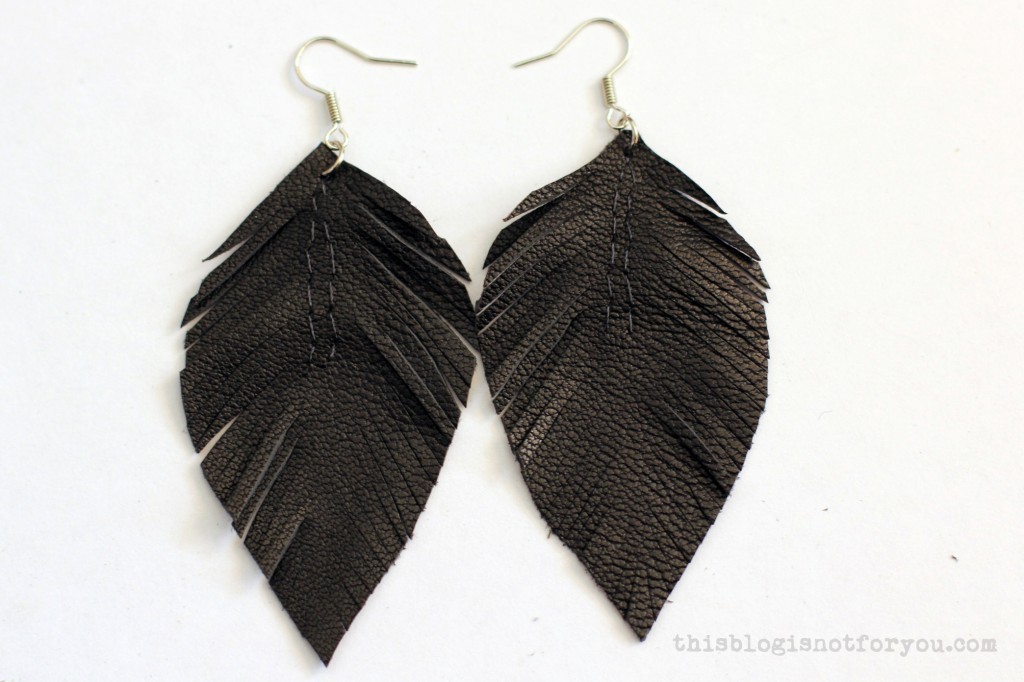
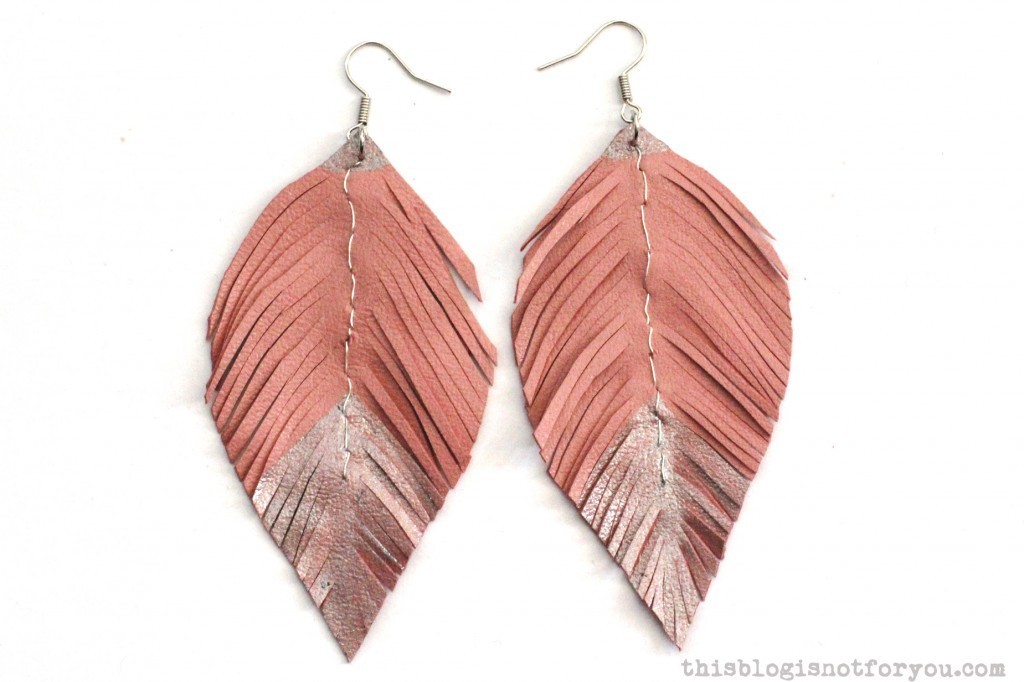
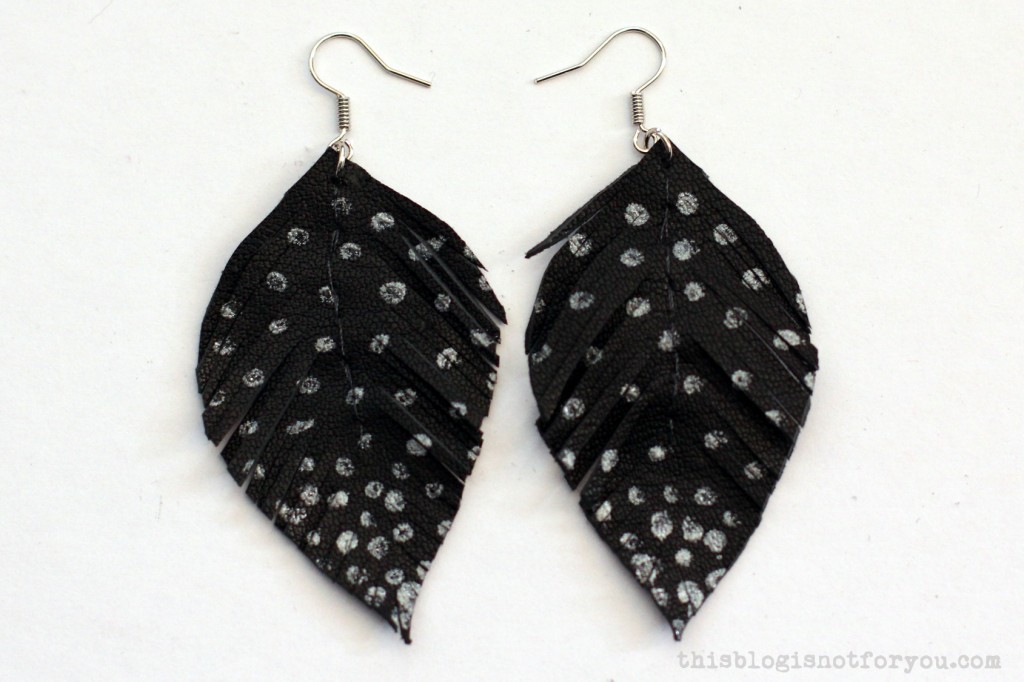
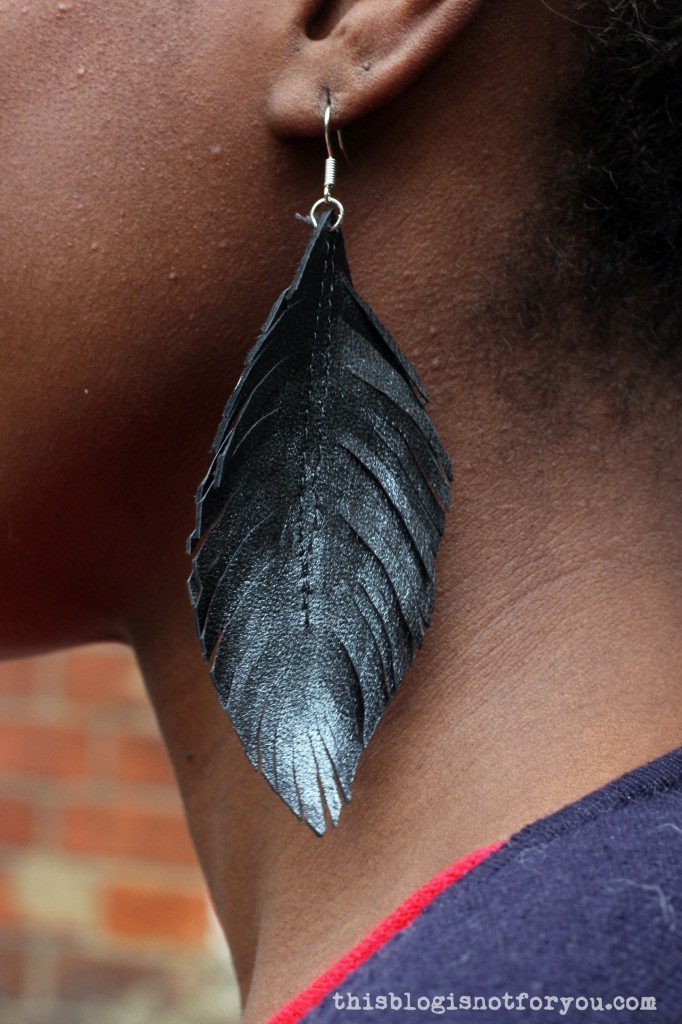
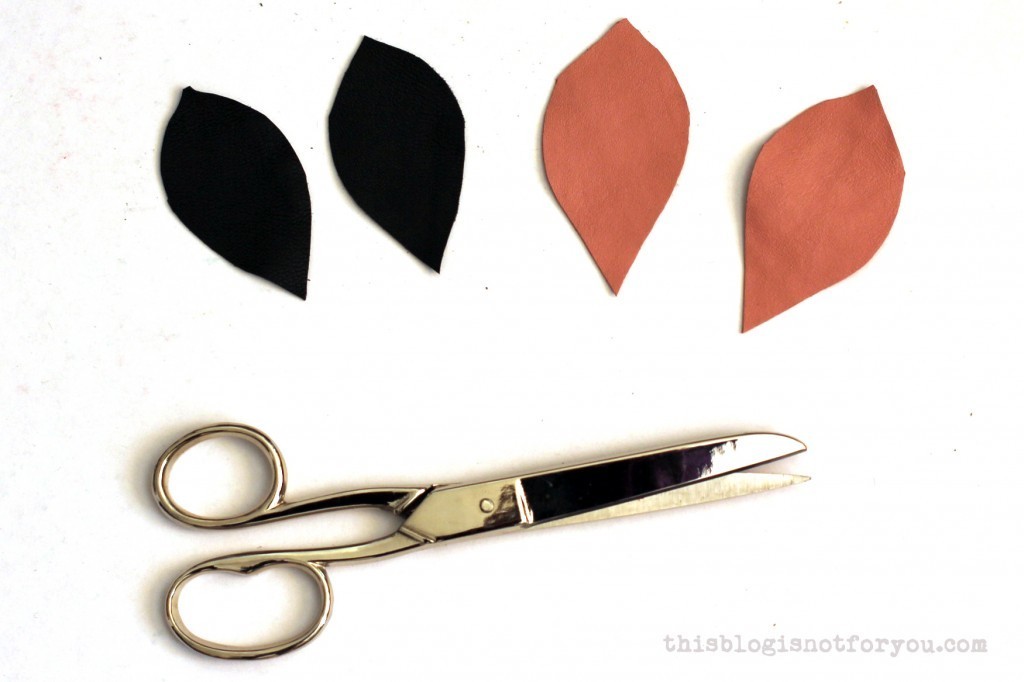
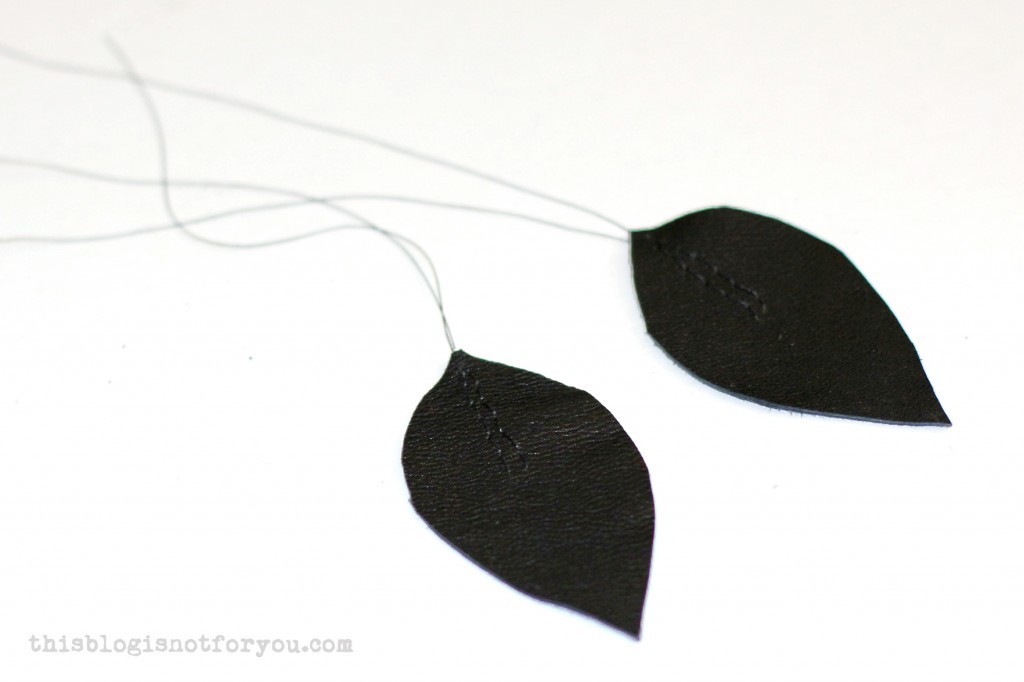
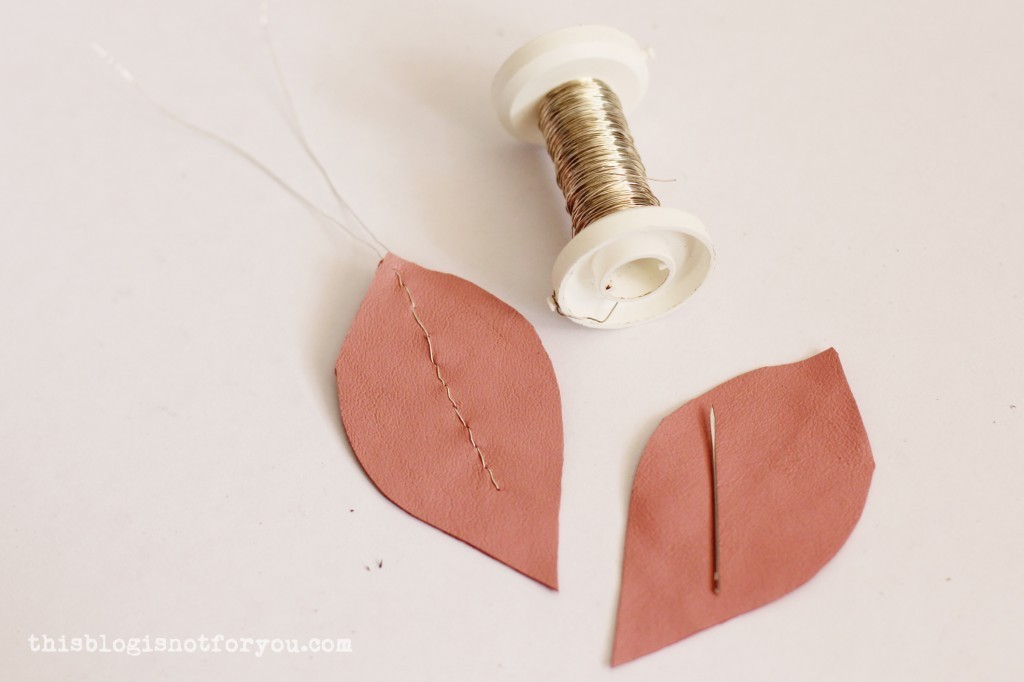
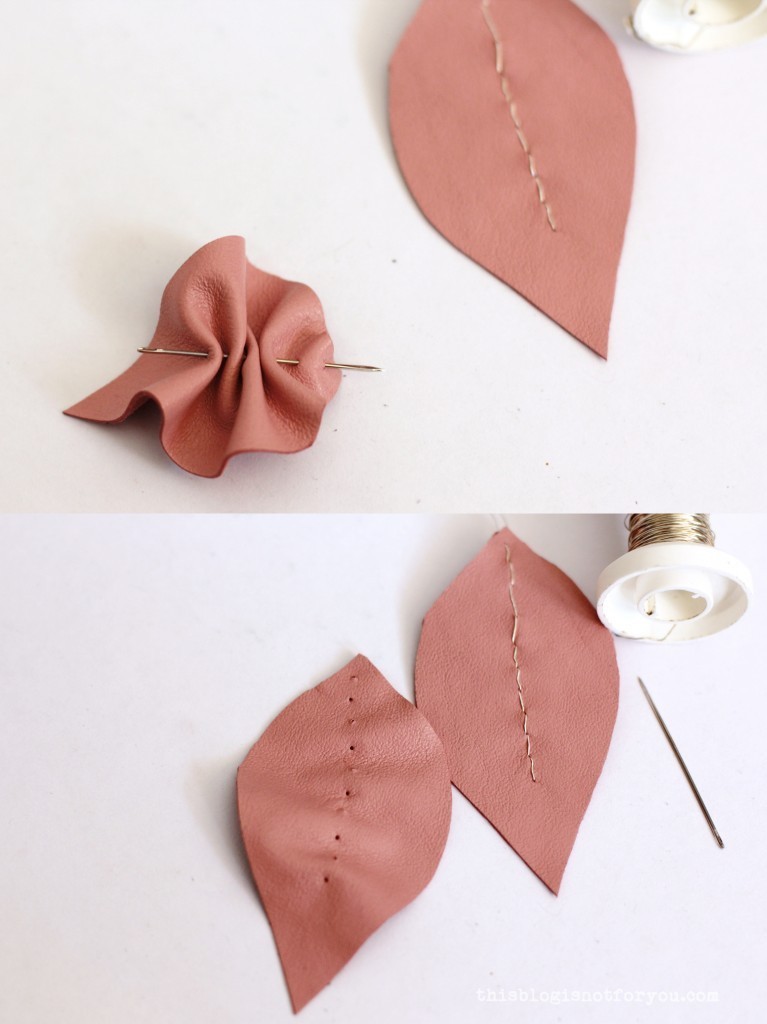
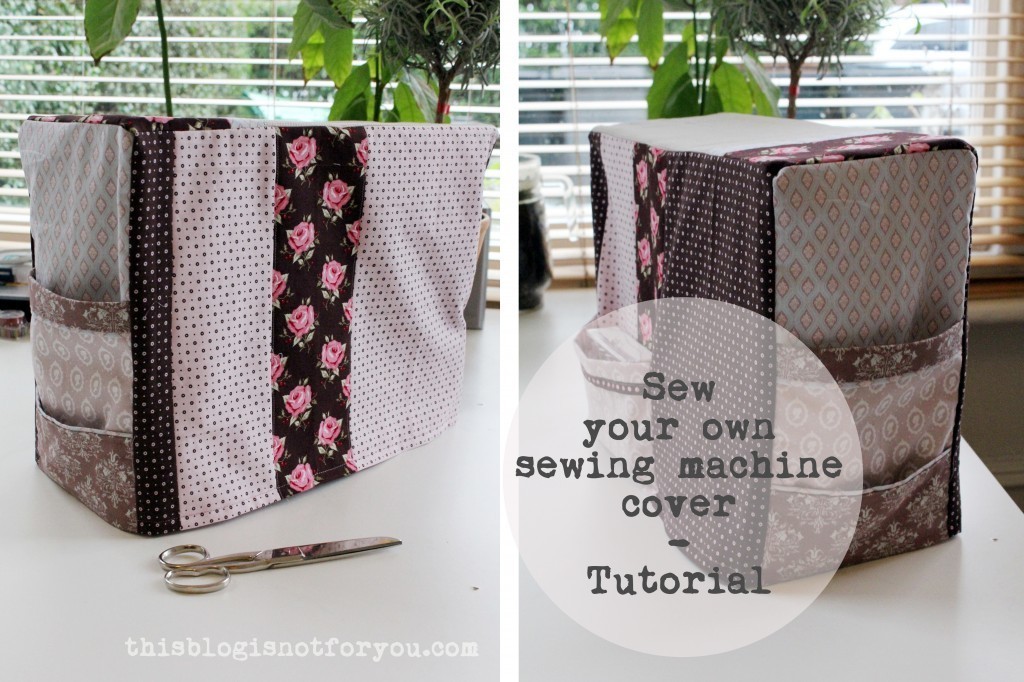
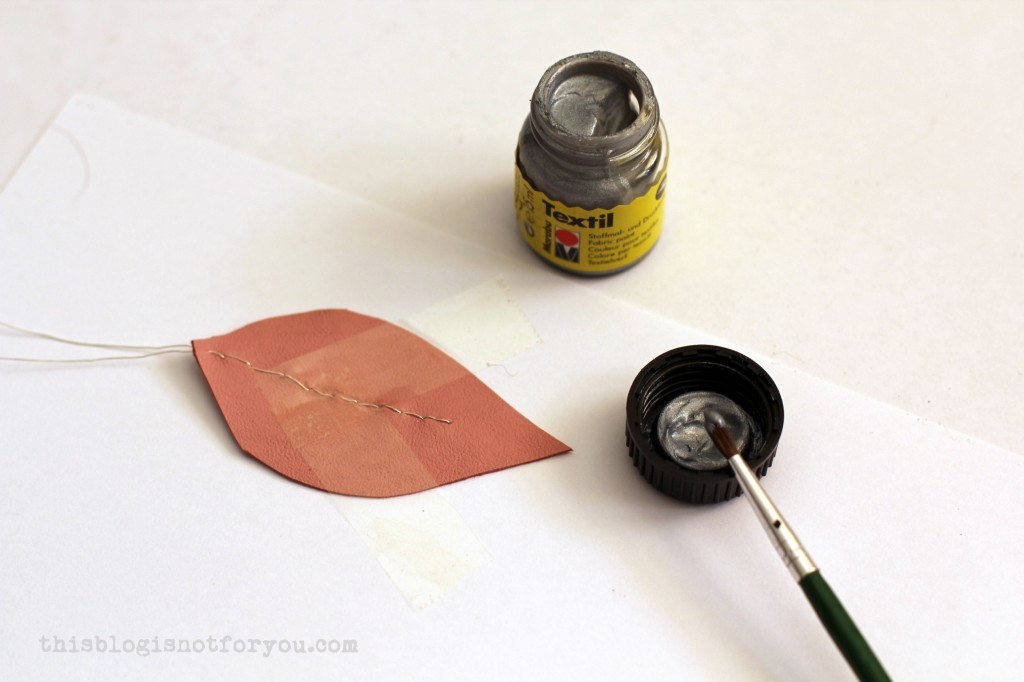
3.  Now it’s time to apply any textil paint. To create chevrons or other shapes with clear lines, you can mask the leather with tape. Wait until the paint is completely dry before you remove the paint.
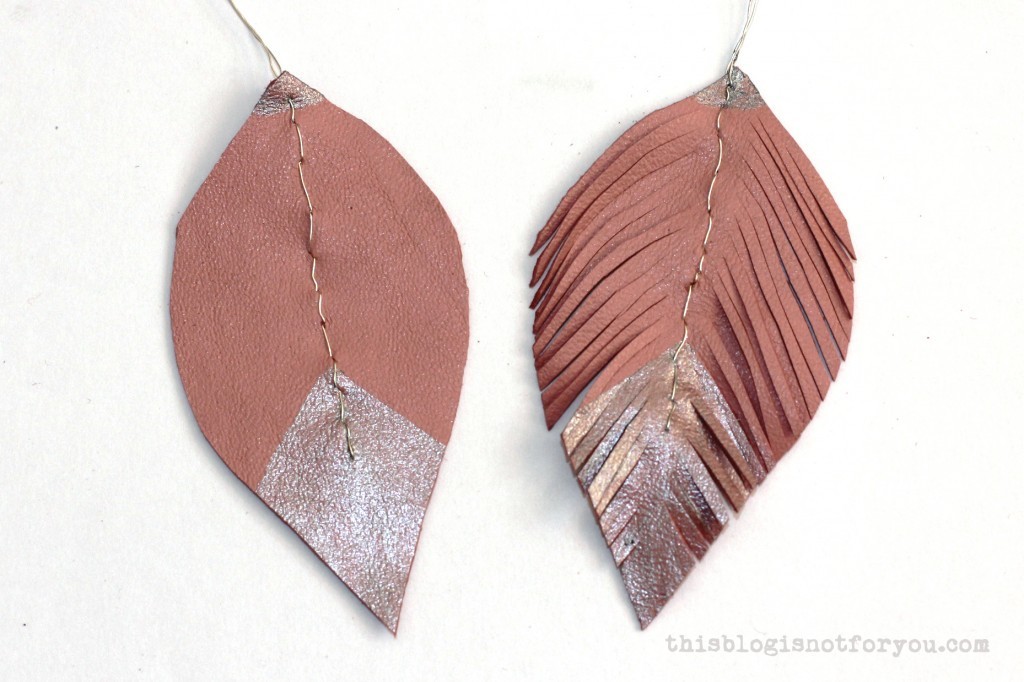
DIY leather feather earrings by thisblogisnotforyou.com

4. Cut into the leather diagonally. Be careful not to cut into the thread/wire.DIY leather feather earrings by thisblogisnotforyou.comDIY leather feather earrings by thisblogisnotforyou.com

This pair I decoreated with dots to look like guinea fowl feathers.
DIY leather feather earrings by thisblogisnotforyou.com

5. In the next and last step you will apply the jump rings and earrings hooks. Having pliers helps, but if you’re very careful, scissors will do the job, too.DIY leather feather earrings by thisblogisnotforyou.com

Use a larger needle to punch a little hole into the top of your earring. Bend the jump ring up and push it through. This is a bit fiddly. Holding the ring with a pair of pliers helps!DIY leather feather earrings by thisblogisnotforyou.com

Slide on the earring hook and use your pliers or scissors to squeeze the ends of the jump ring together again.DIY leather feather earrings by thisblogisnotforyou.com

Make sure you mirror the earring hooks. Using this technique, the earrings will hang sideways (see picture above). If you don’t like that, you can either use two jump rings or omit them altogether.

Well, and that’s it!

It’s a really fun and quick project which also makes a great handmade gift!

DIY leather feather earrings by thisblogisnotforyou.com

Have fun making your own feather earrings! xx


Happy weekend!

facebook/bloglovin/pinterest
Stay in touch!

Anthro-inspired Apron: Making-of/Tutorial

tutorial: anthro-inspired kitchen apron by thisblogisnotforyou.comHeeeeeeeeeeello!

After being a bit ill (and lethargic, blogging-wise) I finally managed to write up the ‘tutorial’ for my Anthro-inspired apron. I use quotation marks because I realised that I actually didn’t take quite as many pictures of the process as my busy brain had imagined. Oooppsi.

Well, think of it as an entertaining collection of commented making-of pictures. You will surely unterstand the process, since it’s really not that complicated. Think as if you had to sew with Burdastyle pattern instructions – at least I have pictures 🙂
tutorial: anthro-inspired kitchen apron by thisblogisnotforyou.com

First of all, I chose suitable fabric. (Obviously.)
It wasn’t quite as easy as it sounds, since I have many leftover fabric pieces in different sizes, colours, styles. When using fabric scraps you should map out what goes where before you start cutting to make sure you have enough fabric. (Ask me how I know this!)

I pinned different fabric combinations on my dressform, which helped a lot with figuring out the ‘design’. (And no, I didn’t like the neon-cupcake version.)

Anthropologie apron
Anthro-version

tutorial: anthro-inspired kitchen apron by thisblogisnotforyou.com
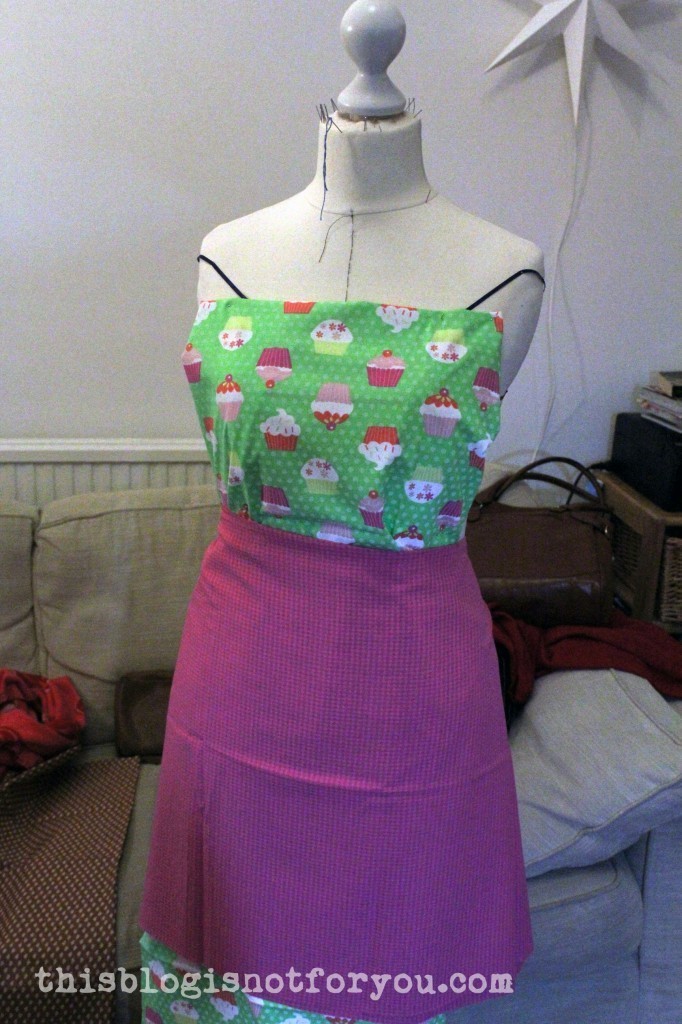
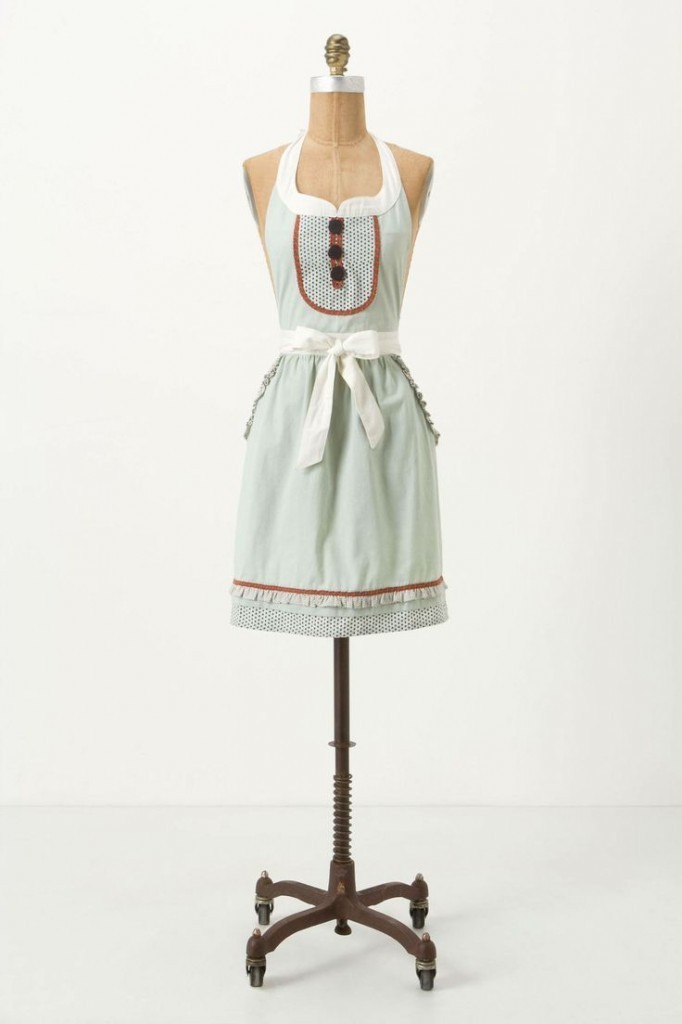
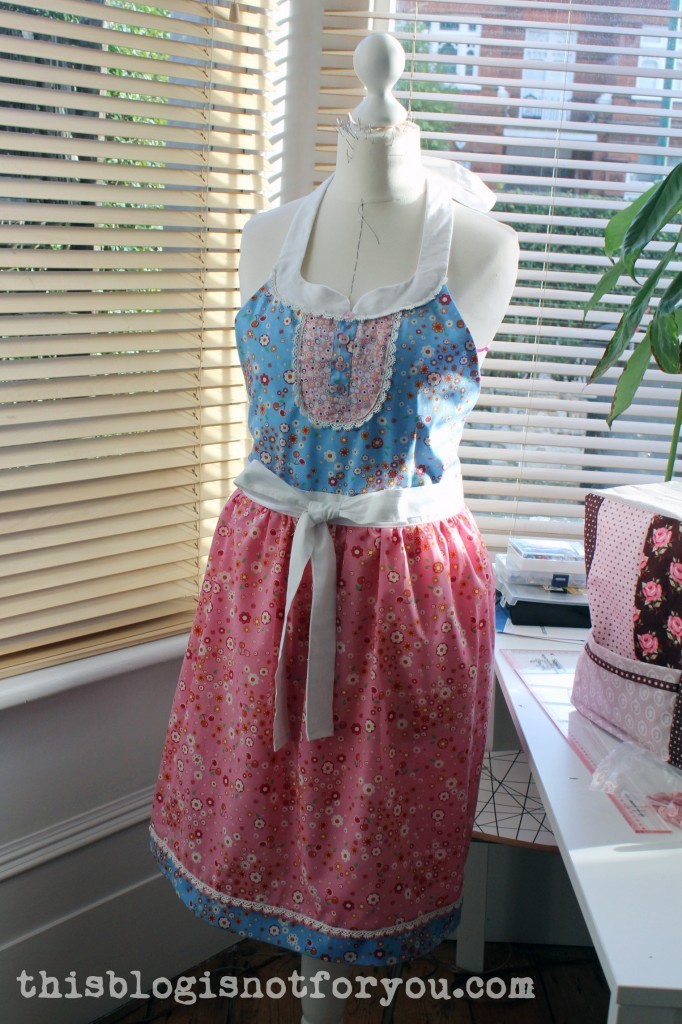
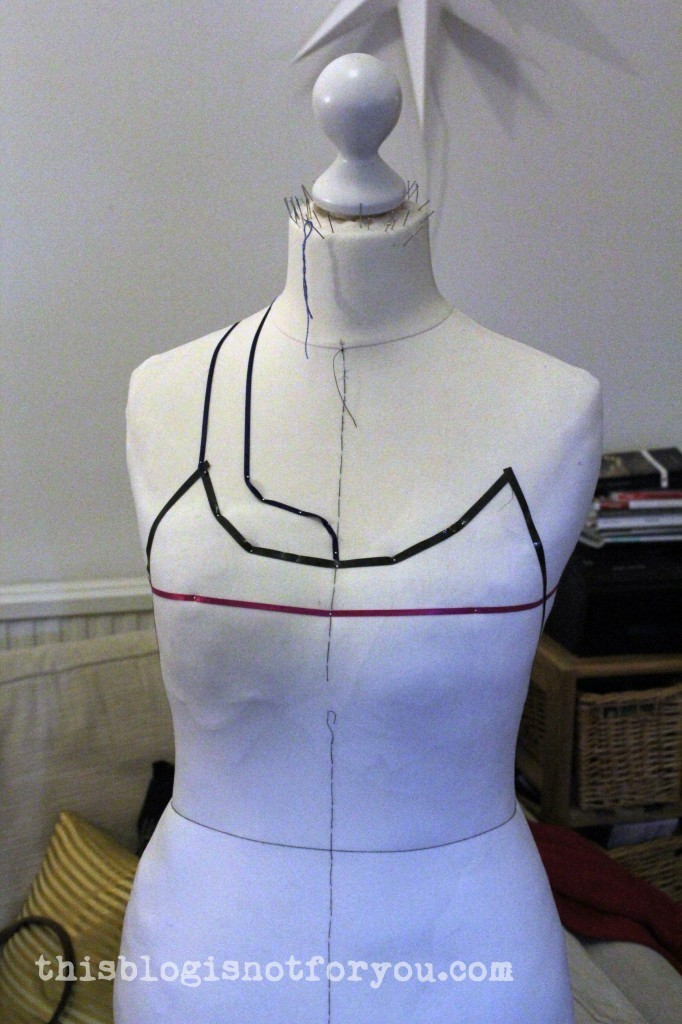
After choosing my fabrics, I used some black tape (you can also use ribbon and pin it) to mark the lines of the apron on my dressform. Alternatively, if you do not have a dressform, just draw it on paper and use it as a pattern piece. (It’s a kitchen apron, so don’t worry about the perfect fit too much.) I tried to make it very similar to the Anthro-version, as I really loved the shape of the neckline.tutorial: anthro-inspired kitchen apron by thisblogisnotforyou.com
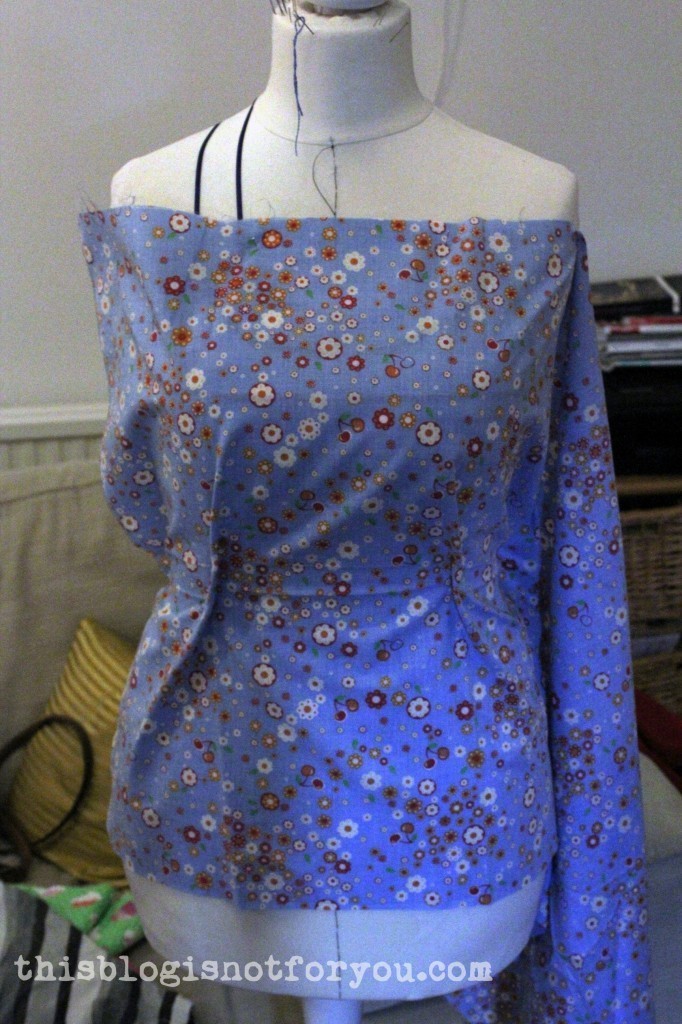
Pinning my fabric (wrong side up) on my dressform, I traced the marked neckline with tailor’s chalk.tutorial: anthro-inspired kitchen apron by thisblogisnotforyou.com

I cut out two pieces, one for lining the bodice (yes, even a kitchen apron appreciates lining). FYI, the side seams of my bodice meet the waistband about 1inch/2.5cm behind where your side seams normally would be (hope that makes sense). So the bodice part of the apron hugs the body and fits more snugly.

Before sewing together the two bodice pieces, all embellishments need to be applied first to get a neat finish.

tutorial: anthro-inspired kitchen apron by thisblogisnotforyou.com
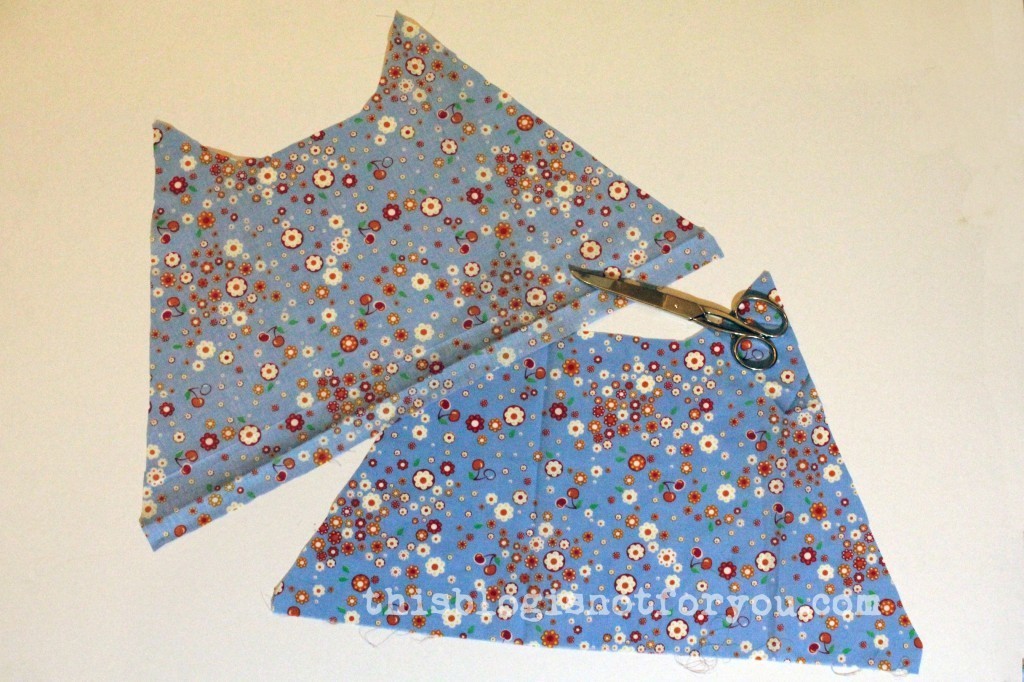
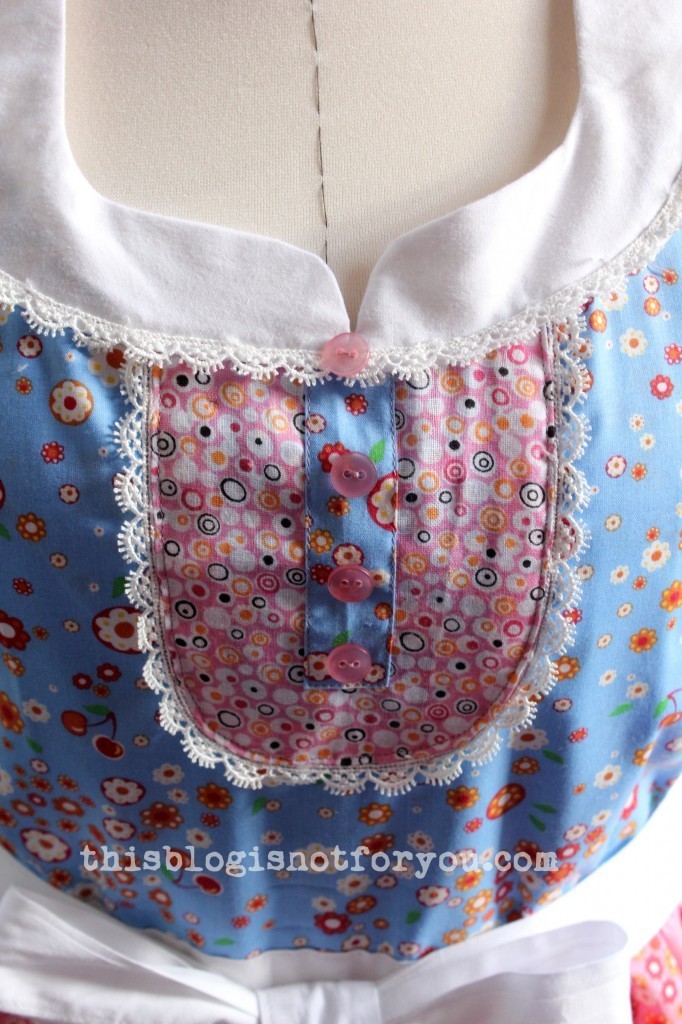
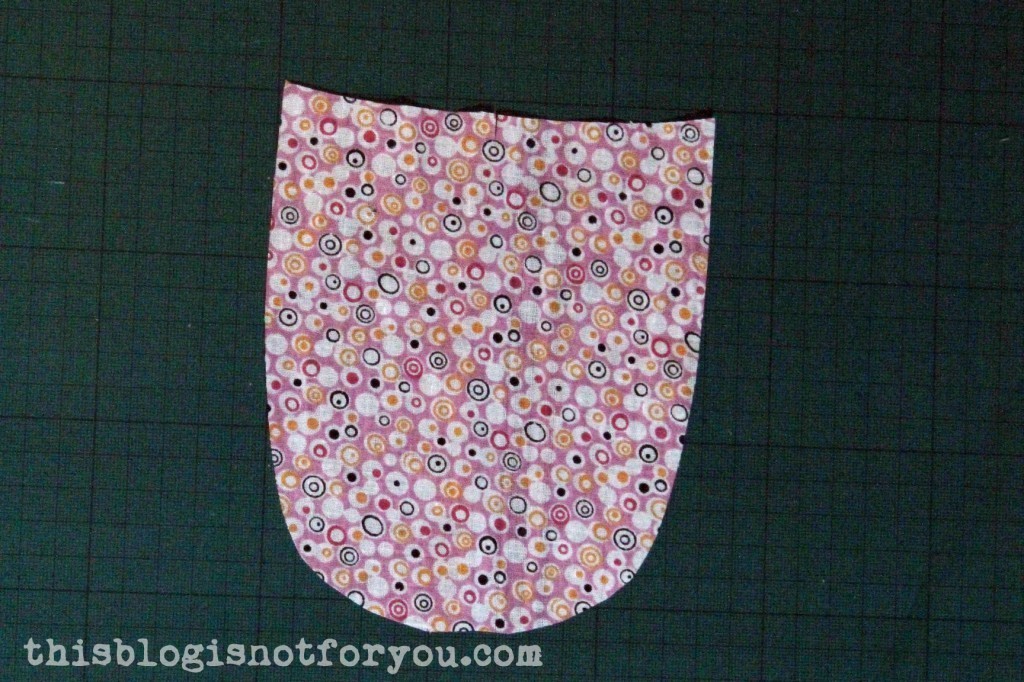
I cut out a bib (don’t forget the seam allowance!).tutorial: anthro-inspired kitchen apron by thisblogisnotforyou.com
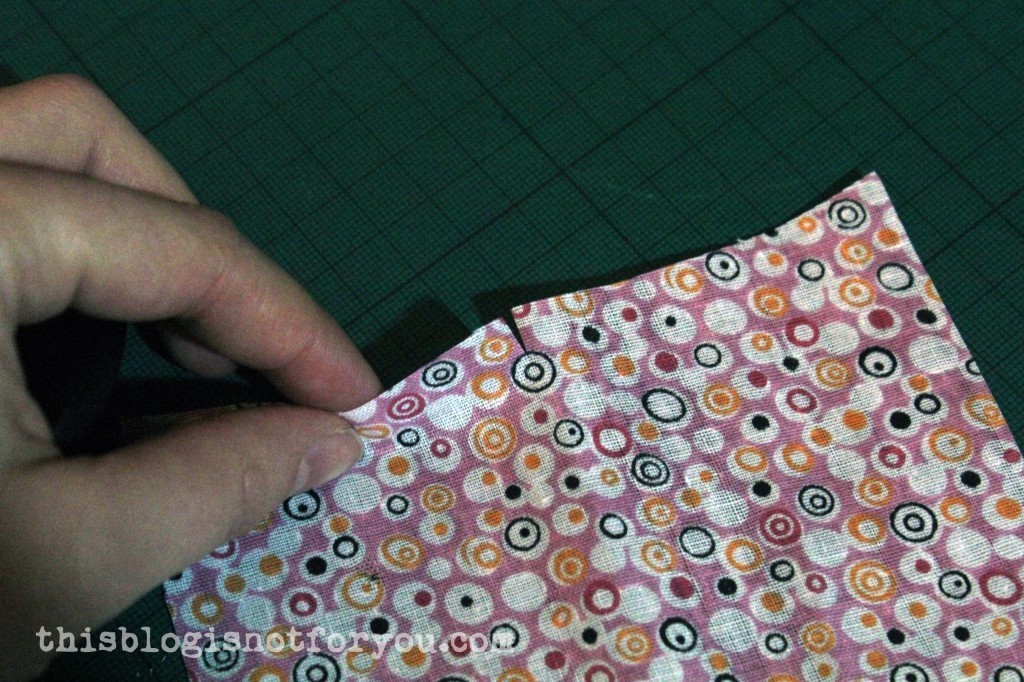
I marked the center on the bib (and also on my bodice piece) with a small notch.tutorial: anthro-inspired kitchen apron by thisblogisnotforyou.com

I stitched around the bib and clipped the seam allowance. This step helps you to keep the exact shape of the bib when pressing and topstitching.

Still with me?

Grab a cup of coffee before we go on – now comes the exciting part. Topstitching (YAY!).
tutorial: anthro-inspired kitchen apron by thisblogisnotforyou.com

Tada!

Yeahh, I sort of got so excited about the whole topstitching part that I forgot to take pictures of the steps in between.

Just a few tips:
Fold and press the seam allowance of the appliqués first. Align them with the center (important!) and pin/baste them in place. I would recommend handbasting in place, especially when sewing the bib onto the bodice. Round shapes are tricky enough to topstitch. Pins can cause the fabric to be a bit uneven or stretch out of shape. When you baste, the fabric lies completely flat.

I stitched the faux placket onto the bib first, then topstitched the bib onto the bodice. In a separate step I added some lace trim, stitching very close to my topstitching (I actually used contrasting thread for that).

Now it’s time to sew the bodice parts together, stitching around the side seams and neckline.

tutorial: anthro-inspired kitchen apron by thisblogisnotforyou.com
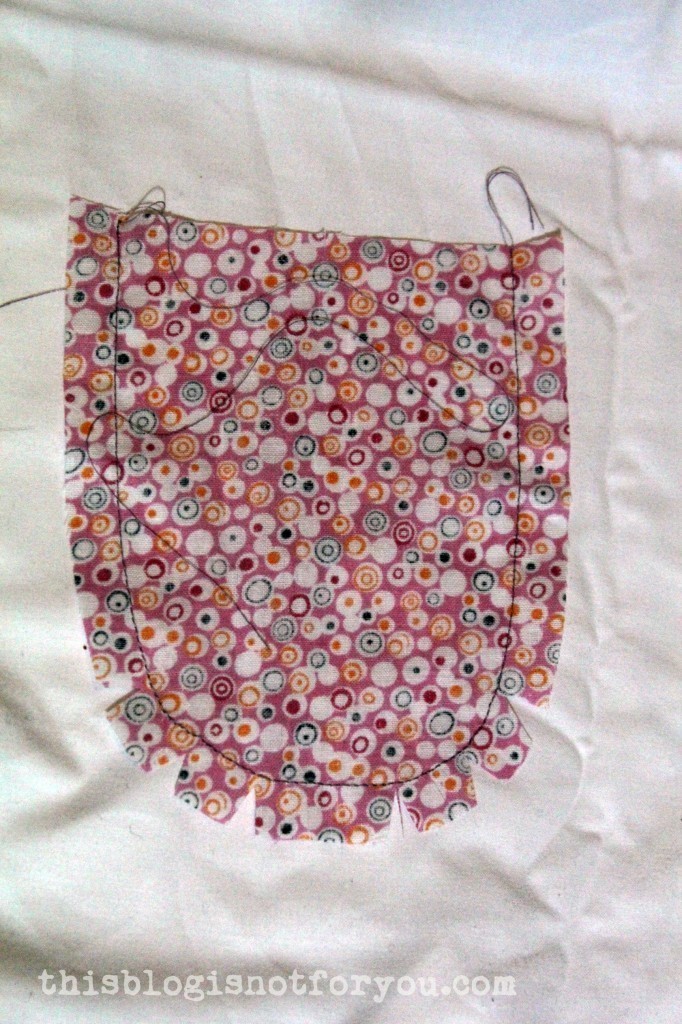
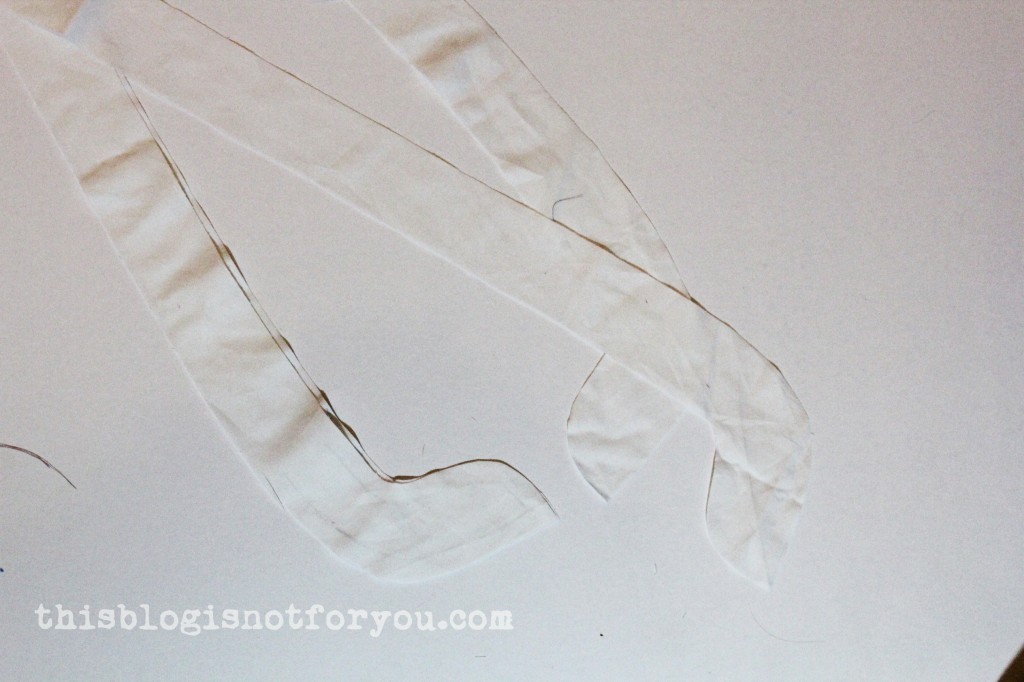
Using the same marking and tracing technique on my dressform, I cut out the straps. I stitched around the edges like so:
tutorial: anthro-inspired kitchen apron by thisblogisnotforyou.com

I left the bottom part (where the straps are attached to the bodice) open. This way you can easily turn the tube inside out and you can use the opening to slip in the top edge of the bodice, then topstitch around the neckline and all the raw edges are neatly hidden.

tutorial: anthro-inspired kitchen apron by thisblogisnotforyou.com

I messed up my topstitching here (probably too much coffee?) and had to unpick twice. In the end that wasn’t even necessary. After adding the trim to the neckline, the topstitching was hidden anyway. Sewing is about the things you don’t see, I know.tutorial: anthro-inspired kitchen apron by thisblogisnotforyou.com

Fold and press the seam allowance of the bottom edge of the bodice. Pin both bodice pieces together (left sides facing) and stitch together close to the edge.
tutorial: anthro-inspired kitchen apron by thisblogisnotforyou.com
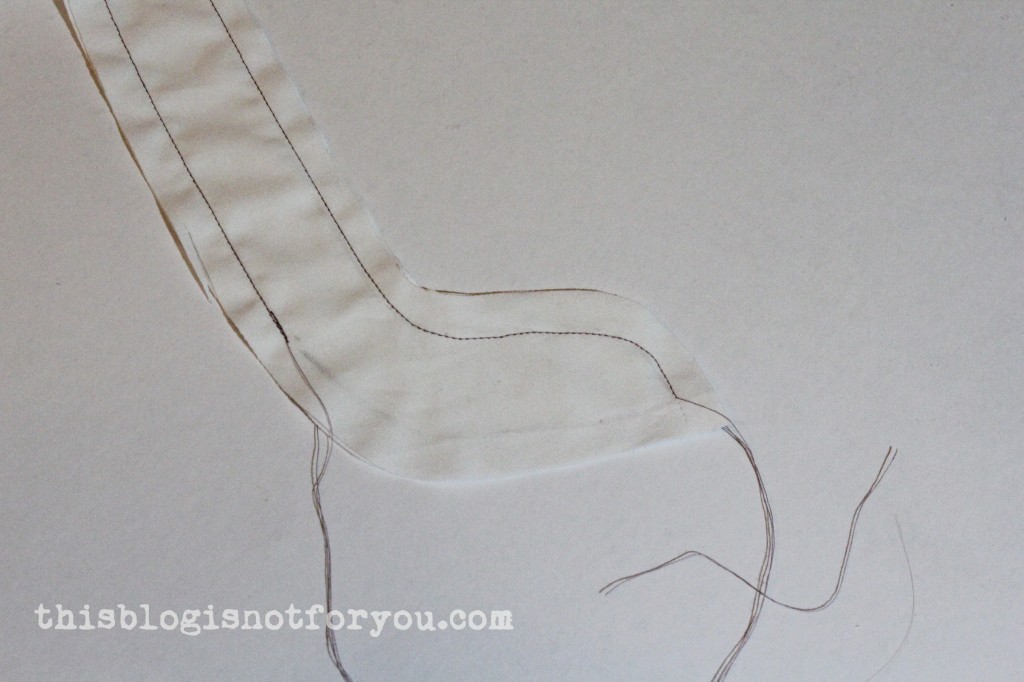
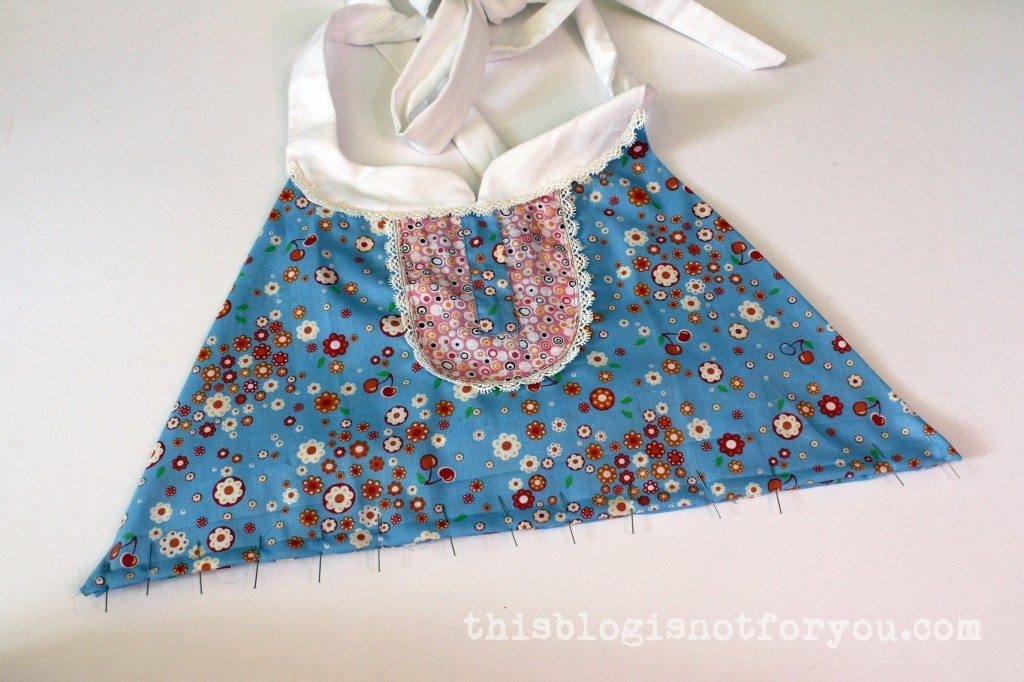
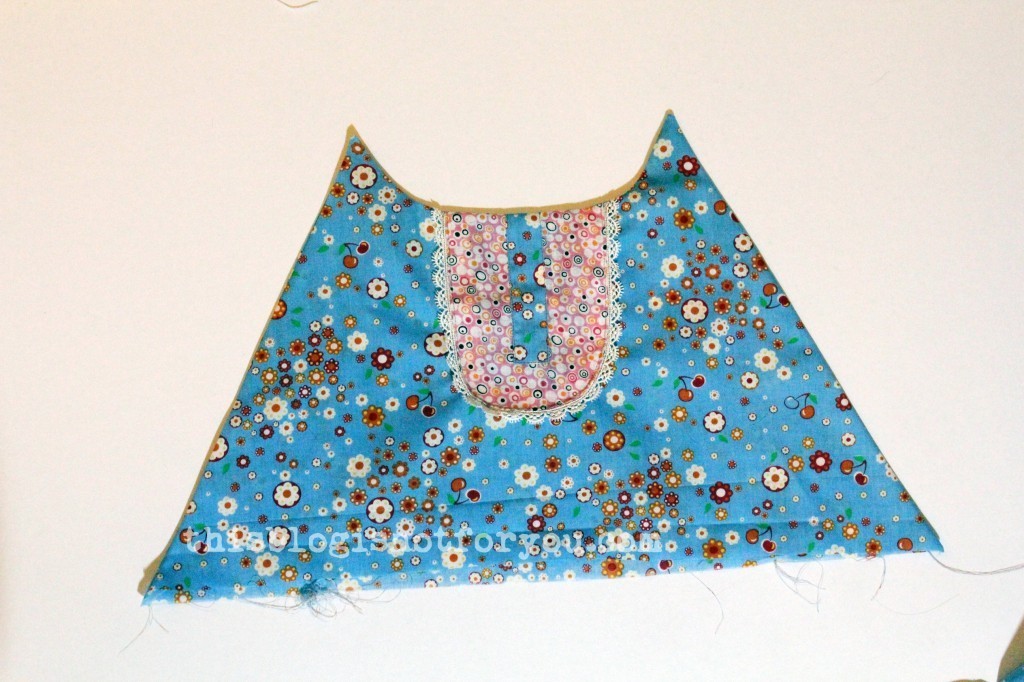
I then attached the waistband to the bodice. When cutting out the strap/straps for the waistband, make sure it’s long enough to tie it in the front.

I basically cut out two waistbands, topstitched together, enclosing the bodice and skirt. This way the apron also looks nicely finished on the wrong side.tutorial: anthro-inspired kitchen apron by thisblogisnotforyou.com
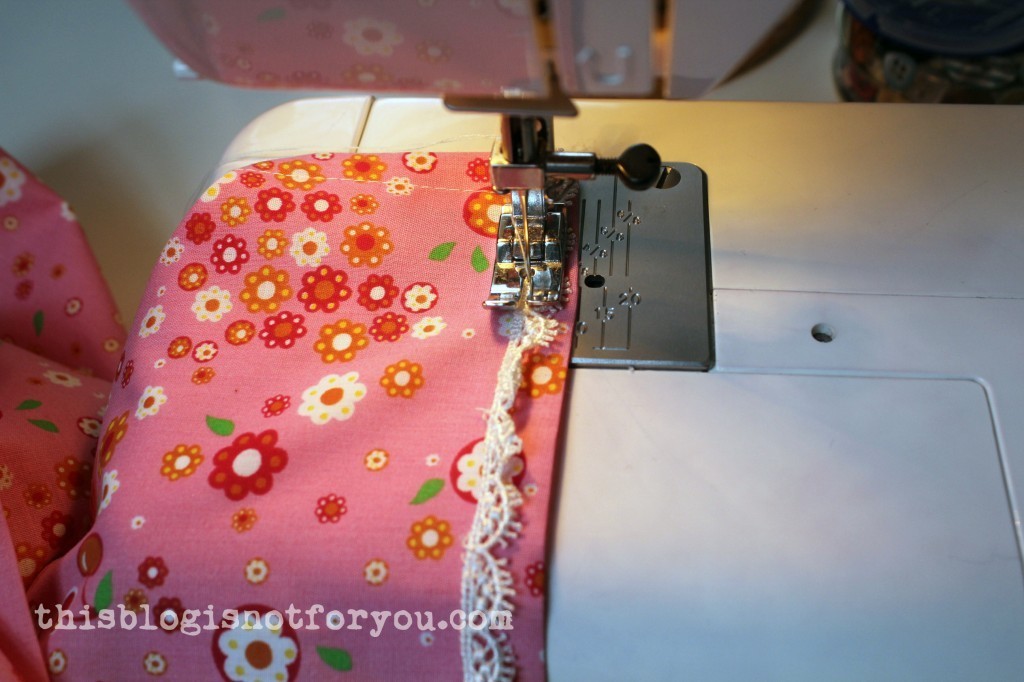
Before gathering and attaching the skirt panel, I hemmed it and added trim. It’s easier to do that when the fabric lies flat. tutorial: anthro-inspired kitchen apron by thisblogisnotforyou.com

I gathered the skirt panel and sewed it onto the waistband.tutorial: anthro-inspired kitchen apron by thisblogisnotforyou.com
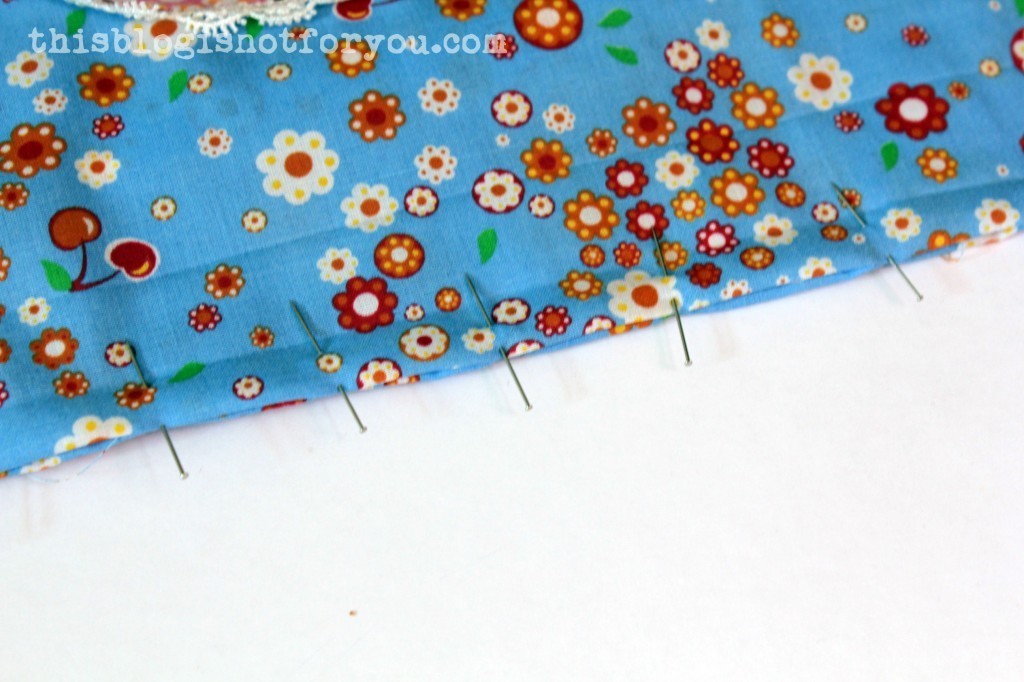
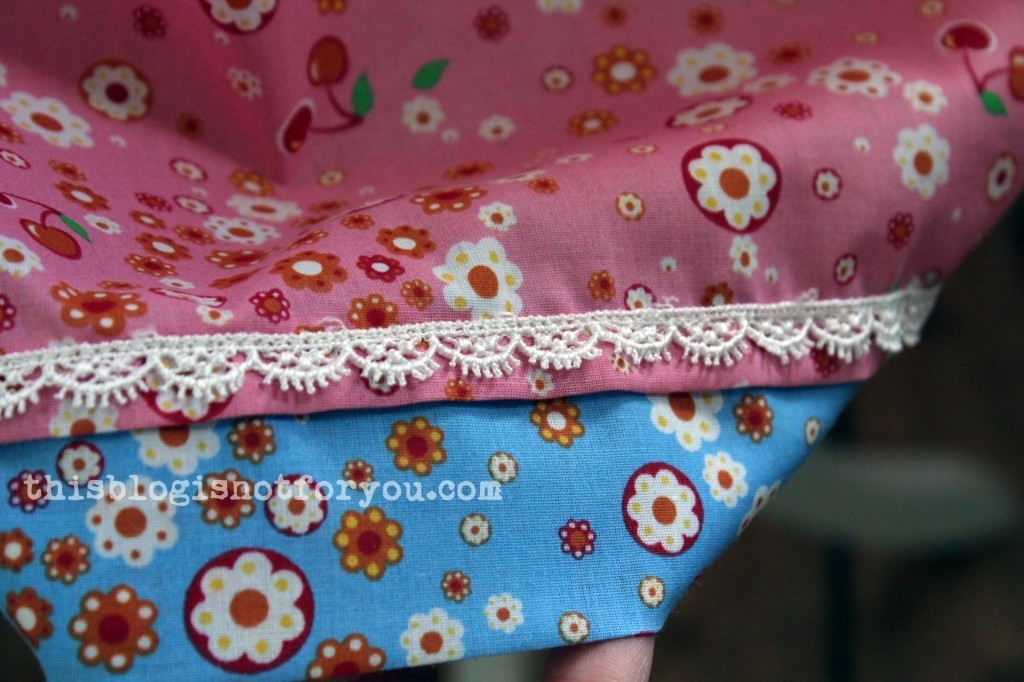
After the apron was finished, I decided to add a ‘second hem’ (is there a name for that?) in a contrasting colour/the same fabric I used for the bodice. I simply cut out a strip twice as wide as I wanted the hem to be, folded it over in the middle and stitched it onto the skirt, both hems overlapping.tutorial: anthro-inspired kitchen apron by thisblogisnotforyou.com

And that’s it. I hope my instructions made sense  – sorry for the lack of pictures.anthro-inspired kitchen apron by thisblogisnotforyou.comanthro-inspired kitchen apron by thisblogisnotforyou.com

Happy Sewing!

facebook/bloglovin/pinterest
Stay in touch!

Tutorial: How to sew a cover for your sewing machine

sewing machine cover by thisblogisnotforyou.com

Helloooo!

As promised, here comes the tutorial for the cute sewing machine cover I made last weekend. I looove it. My sewing space (which is basically 90% of our flat) looks so much better now (and tidier – probably the main reason why Mr Thisblogisnotforyou likes it very much).

The cover is rather simple to make, depending on how much detail you want to add. As the lining is the same shape an size as the fabric, you can also make your cover reversible (you sew the cover part twice and use one instead of the lining).

What you need:

– fabric leftovers/ fat quarters, some plain fabric for the lining (unless you want your cover to be reversible)
– thread
– scissors/or rotary cutter
– measuring tape
– a piece of cardboard

sewing machine cover tutorial by thisblogisnotforyou.com

Measurements:

For my cover, I used different quilting cottons. I ordered so many when I started sewing and never really used them after I began making clothes.

The size of the fabric pieces depends on your sewing machine and your design. When you use a lot of different fabrics like I did, the fabric pieces can be rather small – time to get out these leftovers you’ve kept all that time!

If you like to keep it simple and only want to use one fabric, the biggest piece should have the width of your sewing machine (plus seam allowance) and height as follows: 2x height + 1x depth of your sewing machine (plus seam allowance).

Now get out your tape measure and take measurement of your little darling. This of an imaginary rectangular box around your sewing machine, where everything needs to fit in. Don’t forget to include the balance wheel when measureing the width, height of spool pin etc.

My machine was 40cmx30cmx16cm. You should add about 1cm on each side.

To assemble the cover, we want to cut out the following pattern pieces:
sewing machine cover tutorial by thisblogisnotforyou.com

Front & back (mine is: 42cm x 32cm incl seam allowance), top (18cm x 42cm), sides (18cm x 32cm). 

Does this make sense? Alternatively, if you’re using only one fabric, you can combine front, back and top and cut out one big piece instead.

If you want to use up all your small fabric pieces, sew strips of them together creating one big piece with the right measurements.

This is my back panel.

sewing machine cover tutorial by thisblogisnotforyou.comsewing machine cover tutorial by thisblogisnotforyou.com

Stitch the pieces together (right sides facing) and give it a good press.

sewing machine cover tutorial by thisblogisnotforyou.com

sewing machine cover tutorial by thisblogisnotforyou.com

When piecing your panels together, a large square ruler helps to get perfect rectangles.

sewing machine cover tutorial by thisblogisnotforyou.com

Cutting out:

sewing machine cover tutorial by thisblogisnotforyou.com

Here we have front, back and top panel.

sewing machine cover tutorial by thisblogisnotforyou.com

Cutting out the side panel. I aligned it with the front and top panel, to check that all the measurements fitted perfectly before cutting.

Adding pockets:

In case you want to add pockets to the side panels, cut out one or more pieces with the same width and different heights. Use bias binding to finish the top edge of the pockets,sewing machine cover tutorial by thisblogisnotforyou.com

Align all bottom edges and stitch the pockets onto the side panel with a very narrow seam allowance.sewing machine cover tutorial by thisblogisnotforyou.com

Assembling then pieces:

sewing machine cover tutorial by thisblogisnotforyou.com

Now that we have all pieces, we start sewing front and back onto the top panel like so:sewing machine cover tutorial by thisblogisnotforyou.com

Press!

Next, the side panels. When sewing these on, make sure not to stitch over the front/back panel seam allowance like so:

sewing machine cover tutorial by thisblogisnotforyou.com
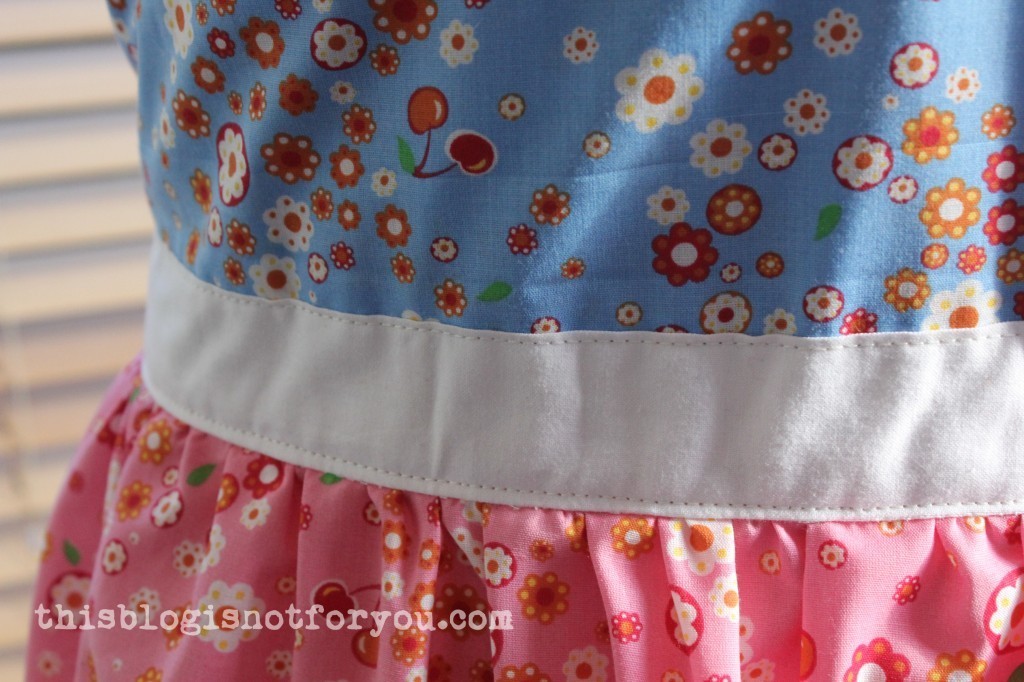
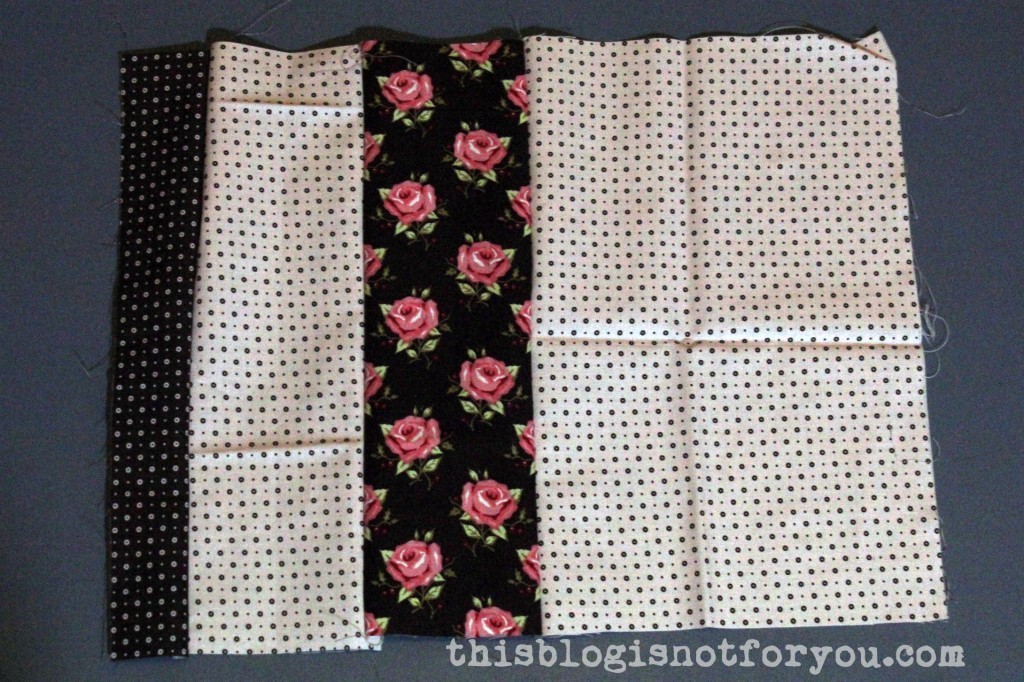
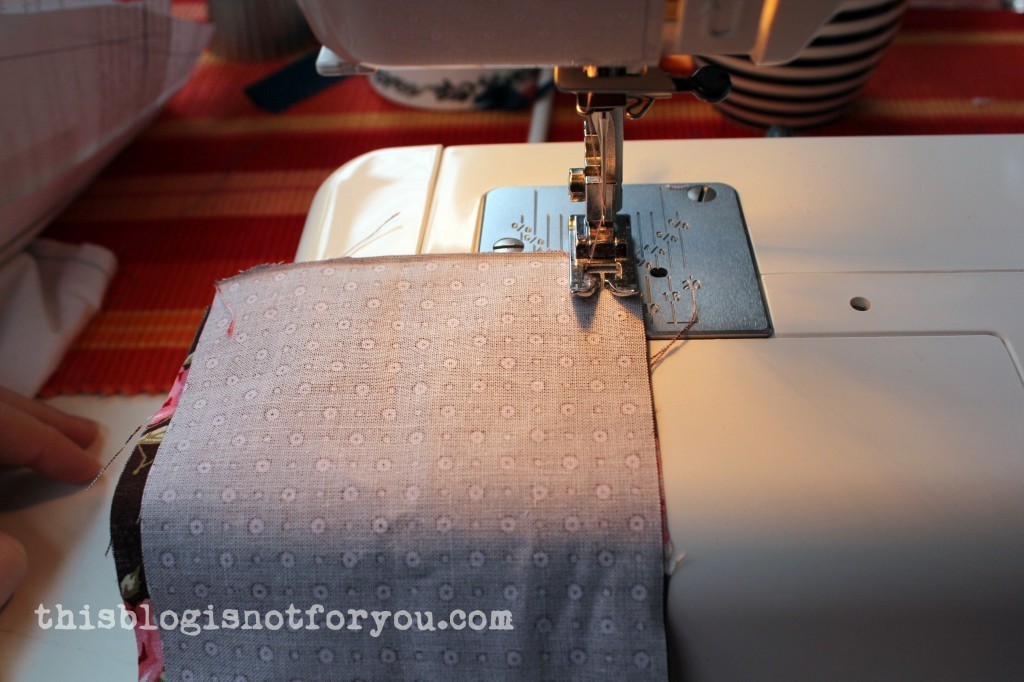
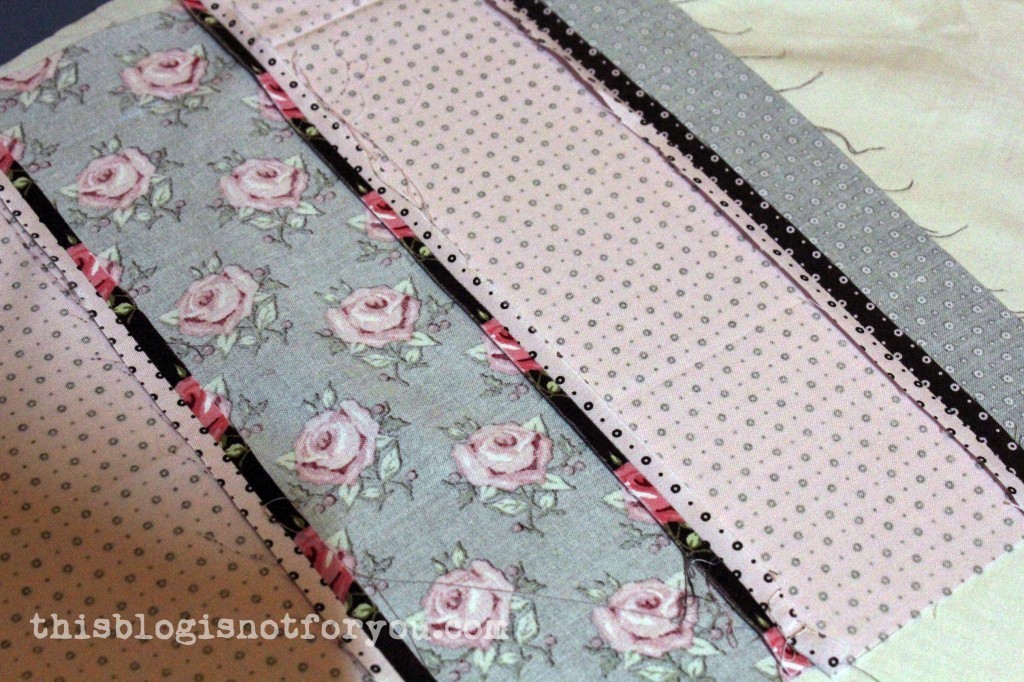
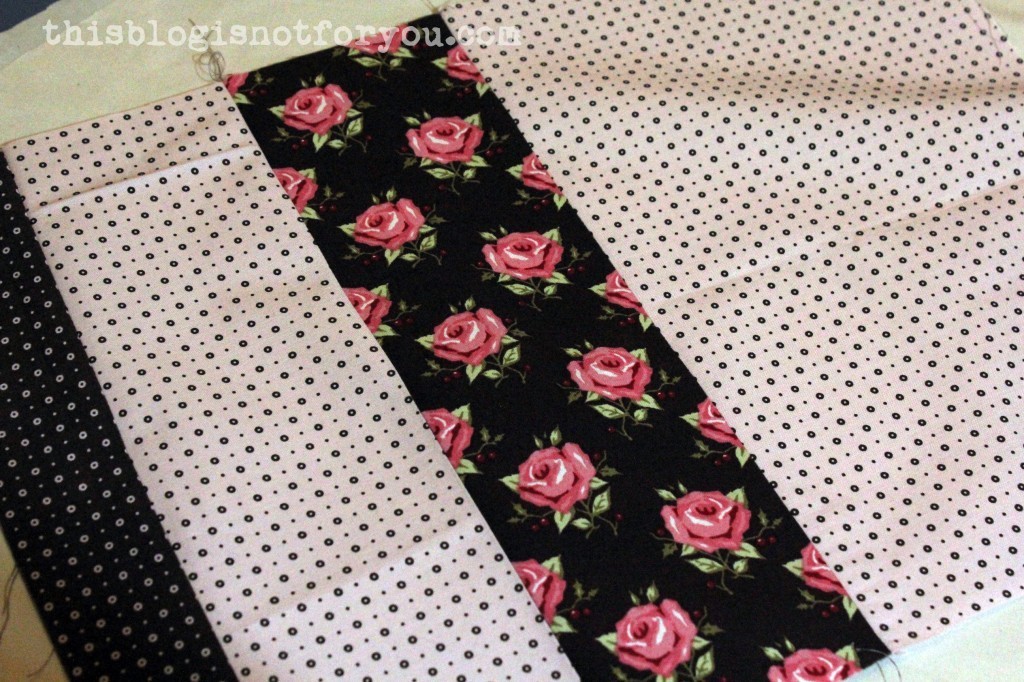
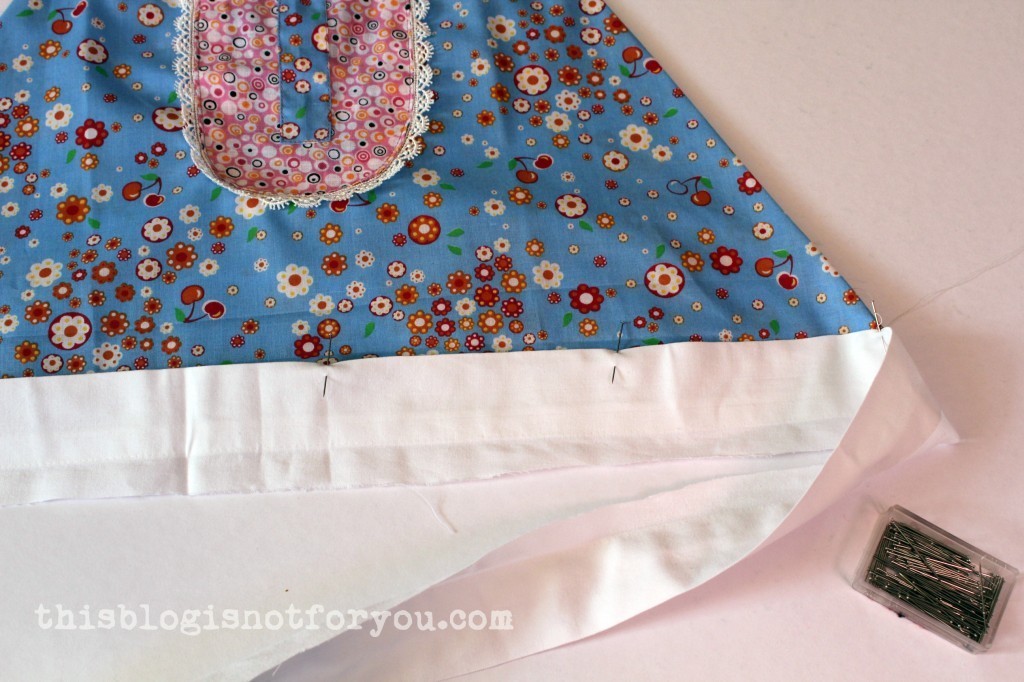
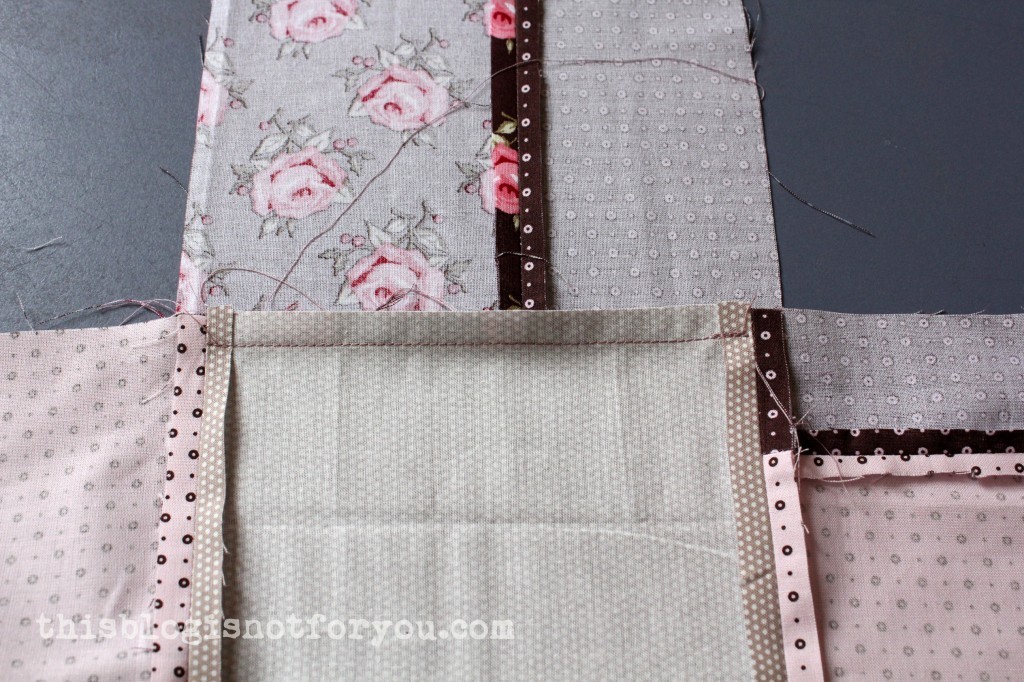
This is important in order to get nicely pointed corners in the end. You can also press the seam allowances apart. This makes is easier to sew side and front/back panel together and will help you to get that perfect corner.sewing machine cover tutorial by thisblogisnotforyou.com

Now sew side and front/back panel together. You can now check if the cover fits nicely.
Then do the same for the lining.

The lining cover will go into the cover, left sides facing. I secured the lining by basting it to the cover in all four corners.
sewing machine cover tutorial by thisblogisnotforyou.com

If you’d like to have a more stabil cover, you can slide a piece of cardbord (a tiny bit smaller than your top panel) between the top parts of lining and cover. You can keep it in place with double-sided tape or, as I did, handstitch it onto the lining in a few places.

sewing machine cover tutorial by thisblogisnotforyou.com

To finish the bottom edges, press both cover and lining seam allowance inwards, so that the seam allowances of both parts are facing each other. Secure with a few pins and stitch along all sides.

Done!

sewing machine cover by thisblogisnotforyou.com

If you have any questions, just leave me a comment below!

I’d love to see your version! Send a picture of your finished cover to hello(at)thisblogisnotforyou(dot)com!

Happy Sewing!

facebook/bloglovin/pinterest
Stay in touch!