I love blazers. I love red. Bright red blazers can look really cool, but this one was a weird mixture of too bold and too boring.
I love that it’s a jersey blazer, which kind of makes it more casual (since I don’t go to fancy events too often). But I thought that some contrasting colour was missing. It was just too red.
Look at all the red. RED.
I love to combine red and black and found that beautiful black lace in my fabric stash that has been waiting its turn for quite some time.
I also love to embroider fabrics with beads and sequins, I have no idea why. It takes so much time and hurts your eyes, but I guess the process is just really relaxing and meditative, like knitting for example.
After a huge amount of coffee, Star Wars Episodes IV & V and some Game of Thrones in between, I finally finished the blazer today. I only used simple handsewing techniques. (Even for the bias binding I used backstitching. The jersey fabric would’ve been too heavy for the machine and the jersey bias binding too stretchy.)
So if you don’t have access to a sewing machine, this could be a perfect project for you. You don’t need too many materials, no complicated sewing techniques, just a handful of beads, a few strips of lace and bias binding and A LOT of time and patience.
Instructions for making your own embellished blazer
If you do not have so much time, omit the beads and use some lace trim instead for the collar.
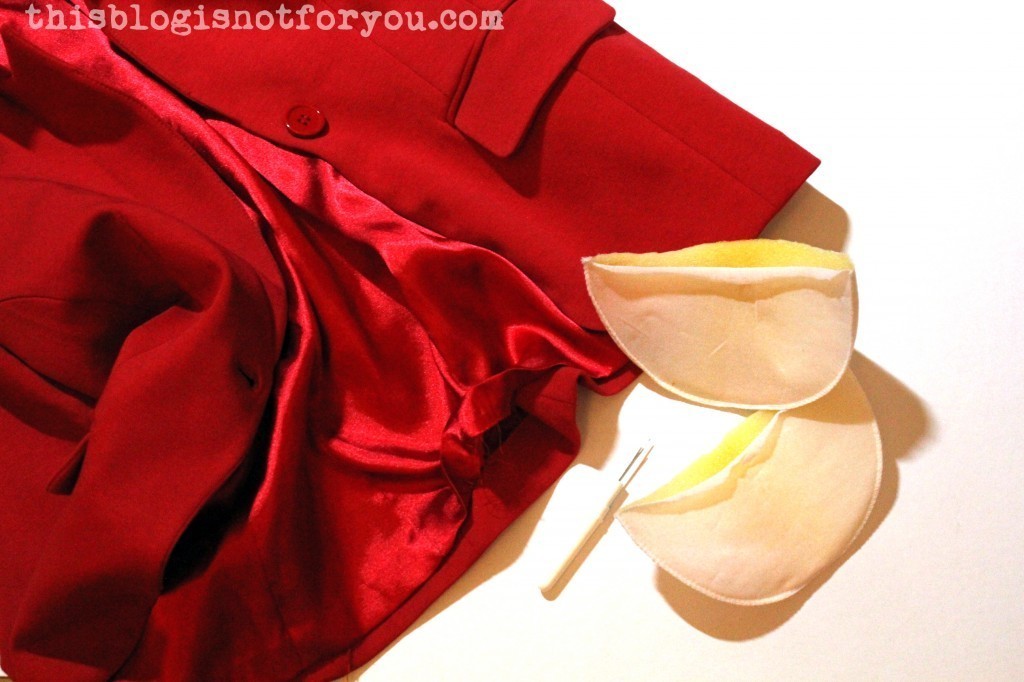
First of all, I took out these two bad guys (by opening the lining at the hem).
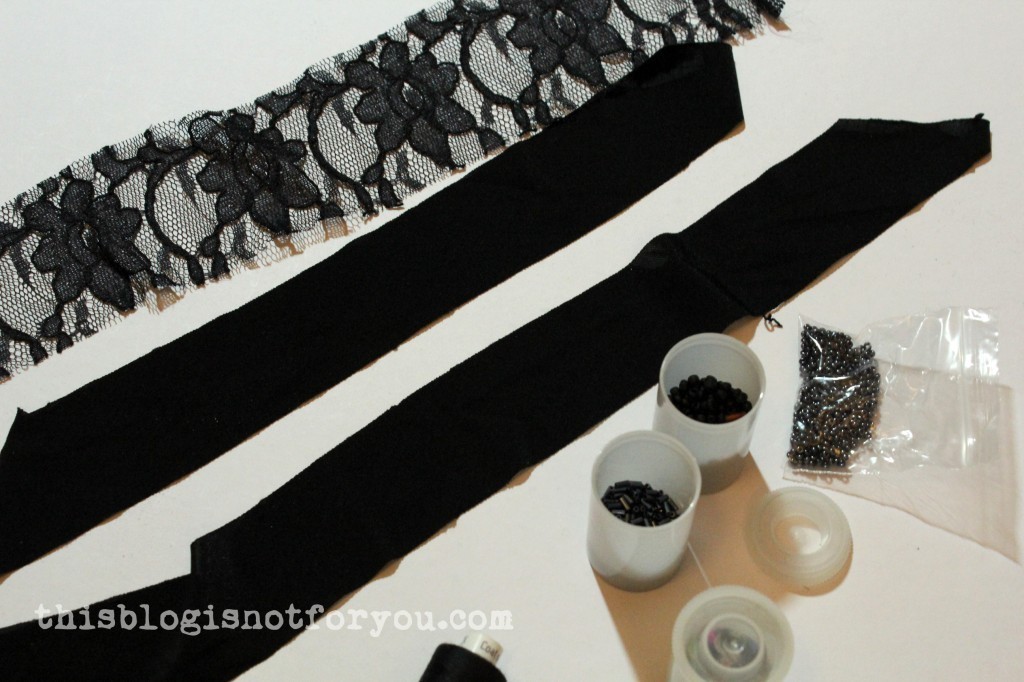
What you’ll need:
black thread
beads (different sizes and colours)
black sequins
black bias binding
lace
scissors, sewing needle
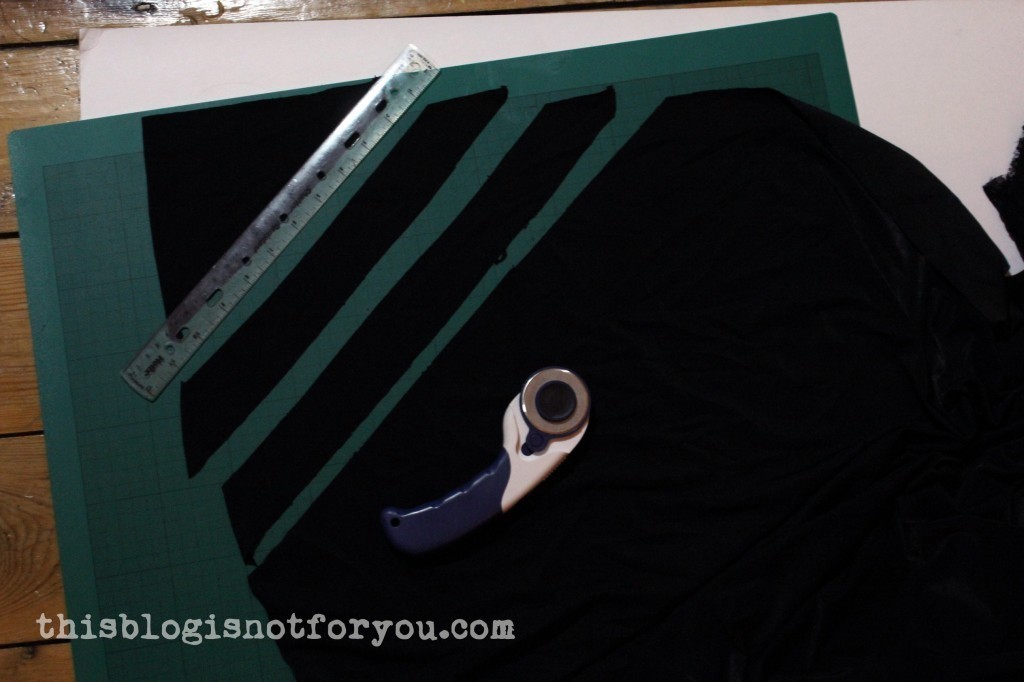
I made the bias binding from a black jersey (I guess there’s some Lycra in it, too).
Cut out some strips of fabric (approx. 4cm wide) on the bias, enough to cover the edges of collar and pockets.
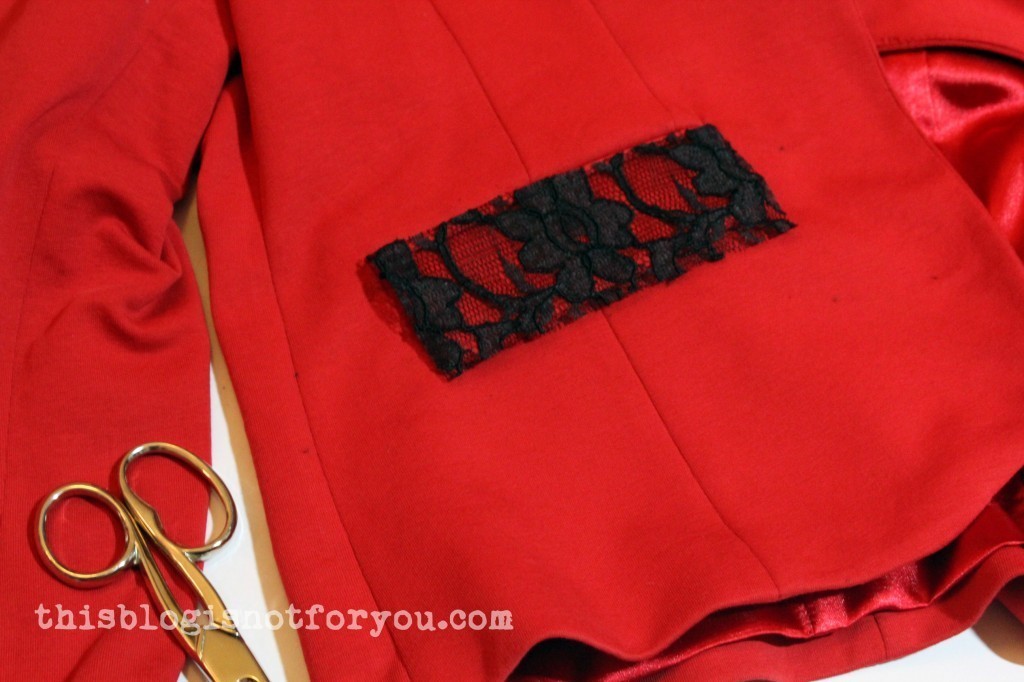
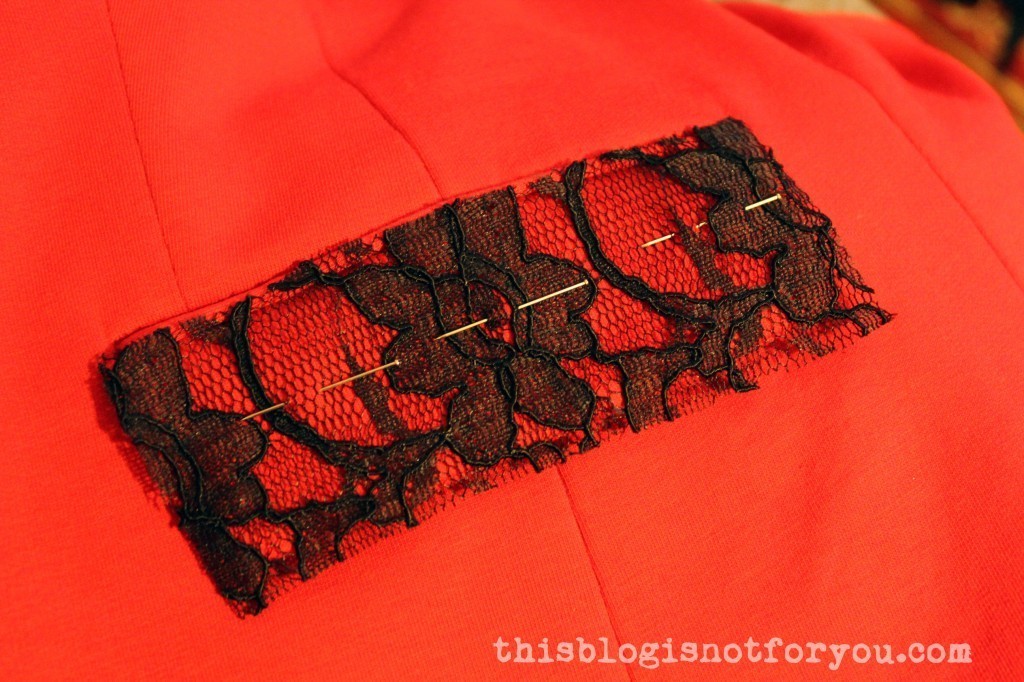
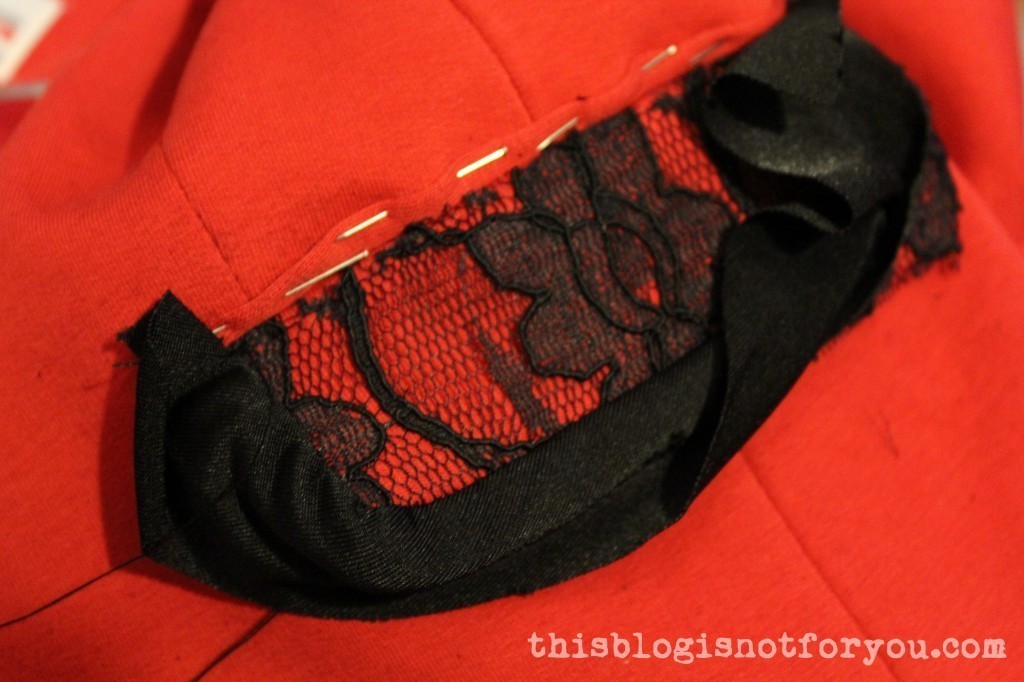
Cut out the lace, a little larger than the pocket. Pin it.
… then pin up the piping (if there’s some), so you can easily hide the lace under it.
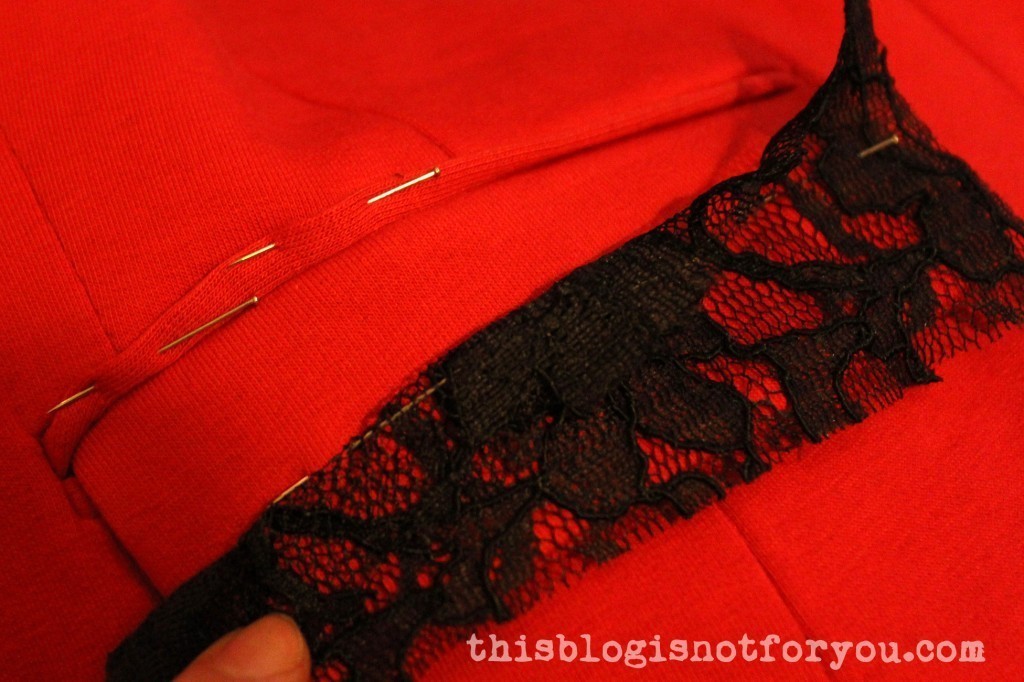
After sewing the lace on with a basting stitch all the way around (approx. 0.5-1cm from the edge), start attaching the bias binding:
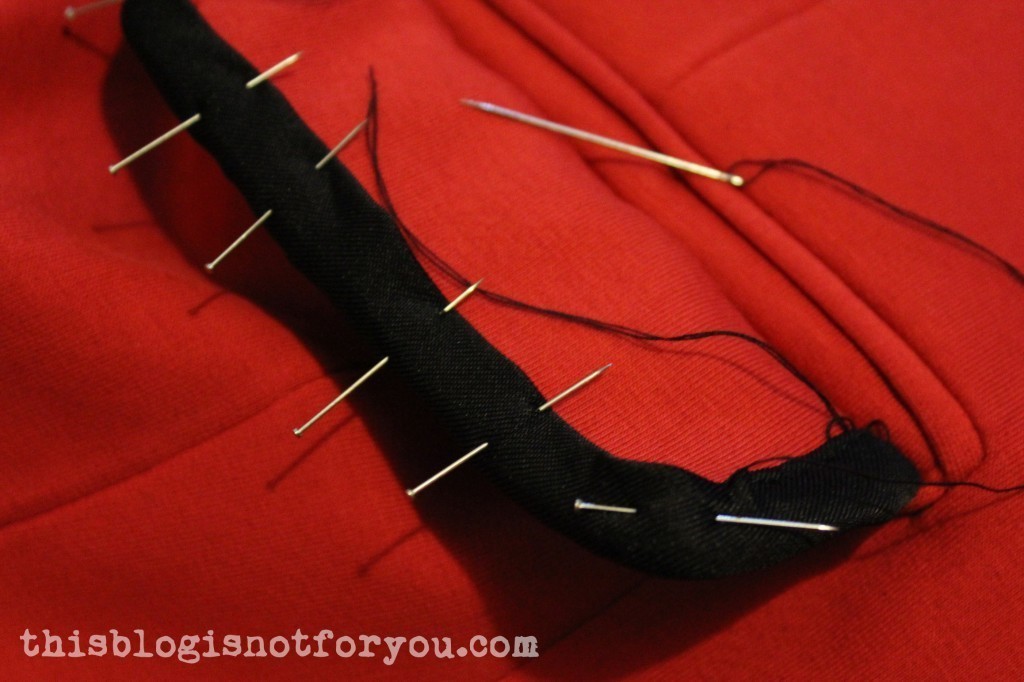
Start with the side facing up. Place the bias binding on the lace, right sides together. Handstitch approx. 1cm from the edge.
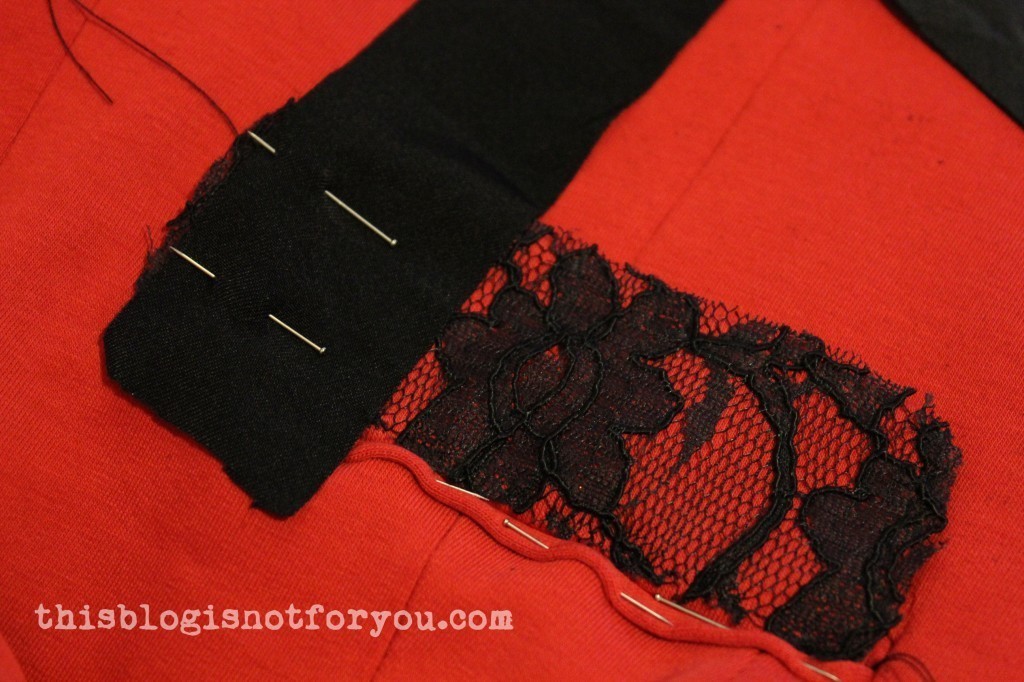
Tightly pull the binding over the edge.
Pin the raw edge under and stitch (I used a backstitch).
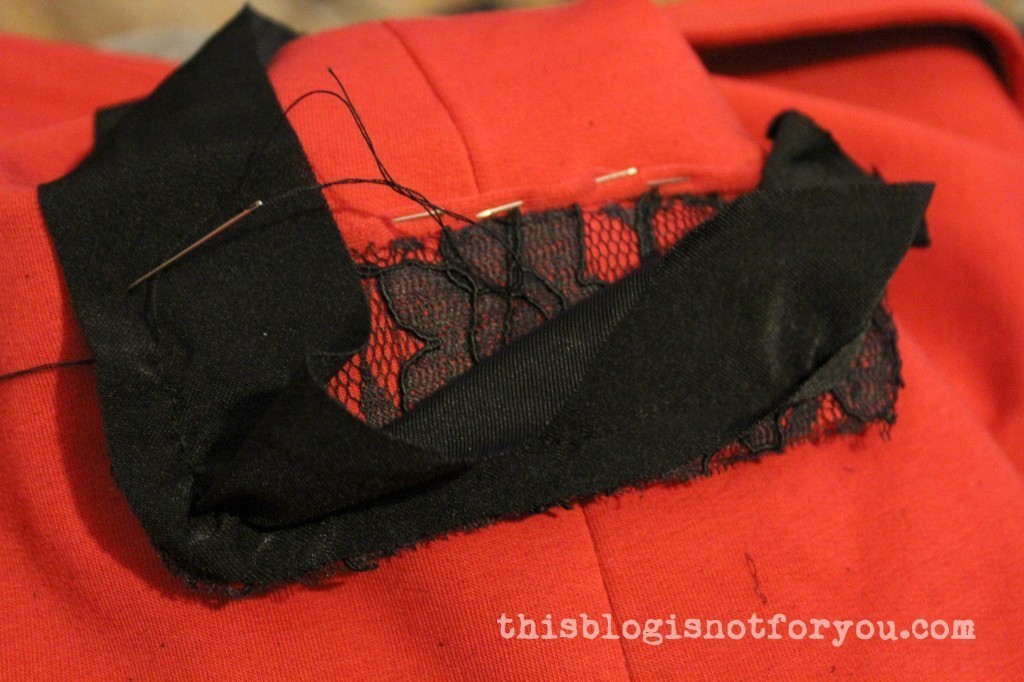
To hide the raw edge of the lace, I sewed the piping onto the flap using a slipstitch.
Now it’s time to add some sparkle!
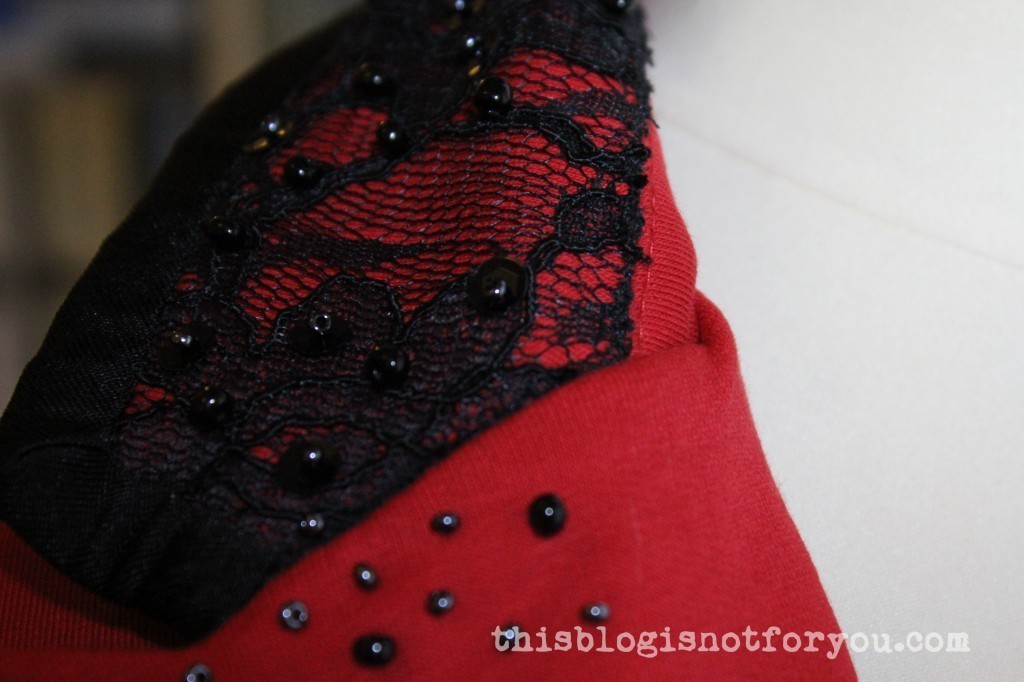
I embroidered the flap with black beads, silver-blue rocailles and black sequins.
I embroidered the collar sewing on black beads in two different sizes, starting at the bottom. Half-way up the collar I added silver-blue rocailles.
Since the collar did not have piping where I could hide the raw edge of the lace, I used a satin stitch all the way along the lower edge where I couldn’t add bias binding. This took almost as long as watching the whole Episode IV. So may the force be with you!
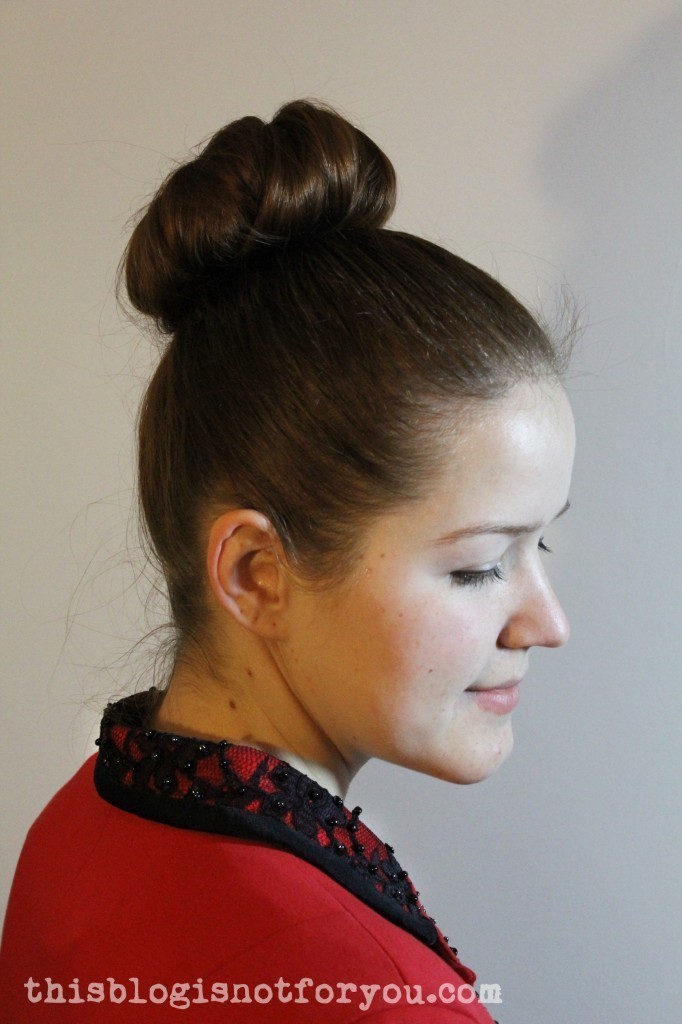
But it was totally worth it!
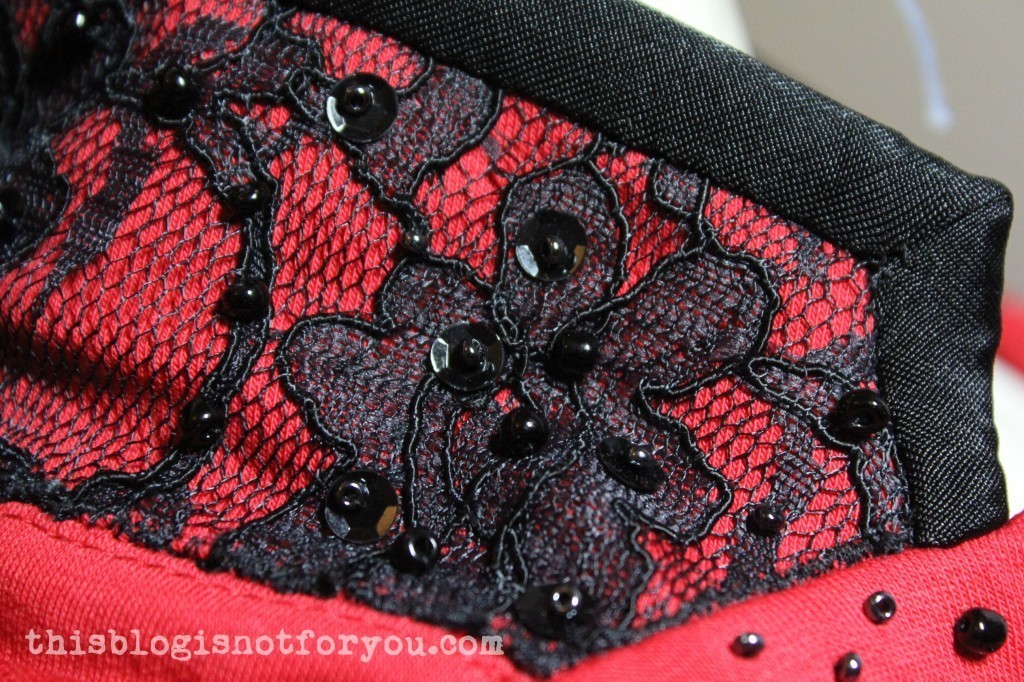
Here’s a close-up of the embroidered collar. I placed black sequins under the silver-blue rocailles. The beading also keeps the lace nicely in place.
I love my old new blazer (thanks mum for clearing out your wardrobe 🙂 ). I don’t like so much that the blazer lost a bit of its casualness. It looks really good with jeans and t-shirt, but I still feel a bit overdressed wearing it at work or when having coffee with a friend.
What do you think? How would you style it? Do you also enjoy time-consuming sewing-techniques (haha)?
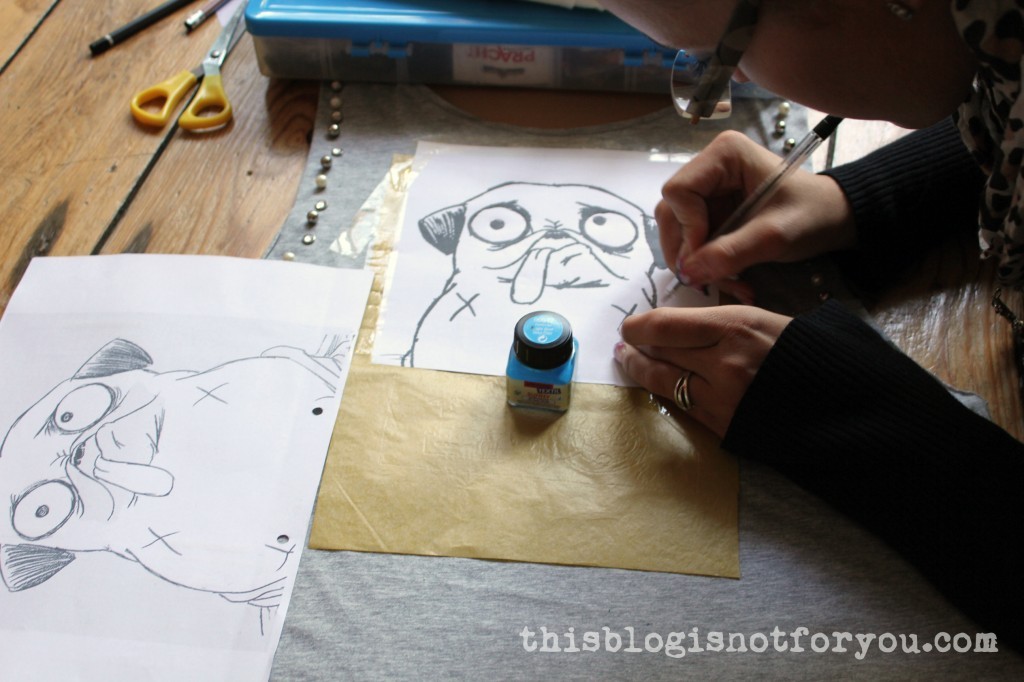
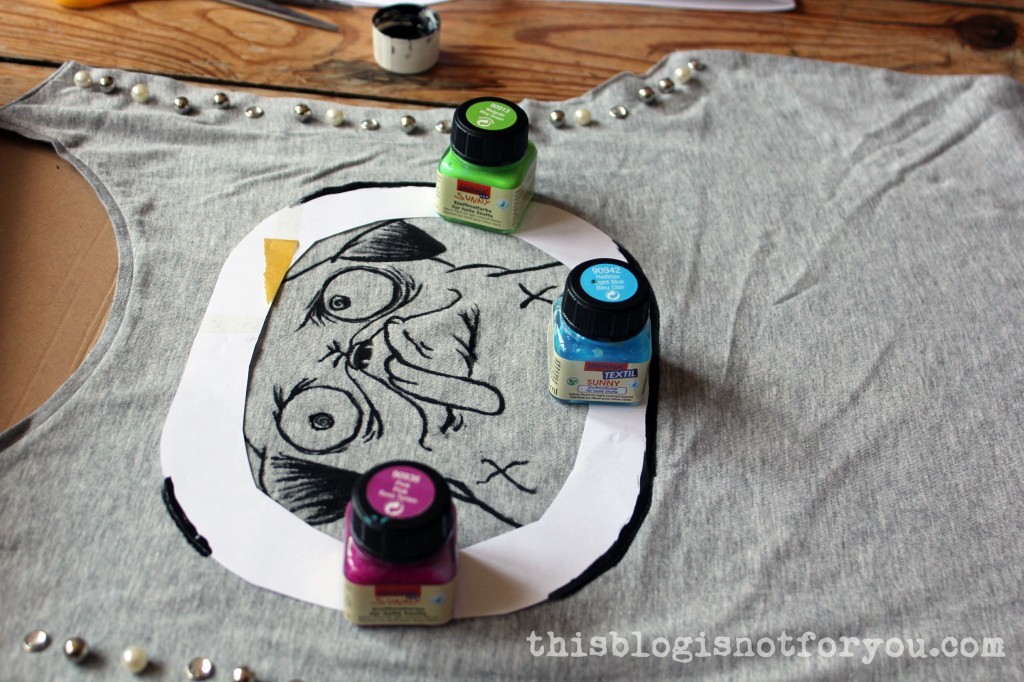
Last weekend I showed my sister, who visited me in London, how to paint a jersey shirt. We had bought this one from Primark’s sale rack and it seemed to be missing something.
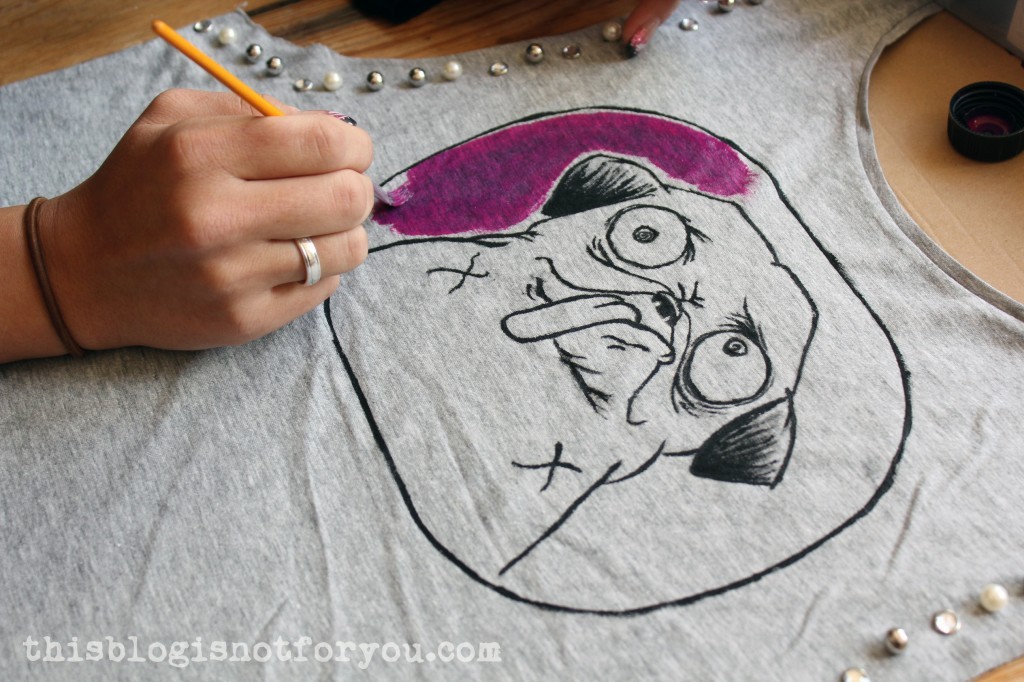
We used transfer paper to transfer the picture onto the shirt. This one leaves very pale yellow lines on the fabric you can easily paint over.We traced the yellow marking lines with a fabric marker and then used black fabric paint and a small paint brush.After painting we left it to dry and then ironed it, left side up.
The picture quality isn’t the best, because we finished late at night. 😀
By the way, my sister’s visit has been the reason why it has been so quiet around here. I’m working on several projects at the moment – so keep your eyes peeled!
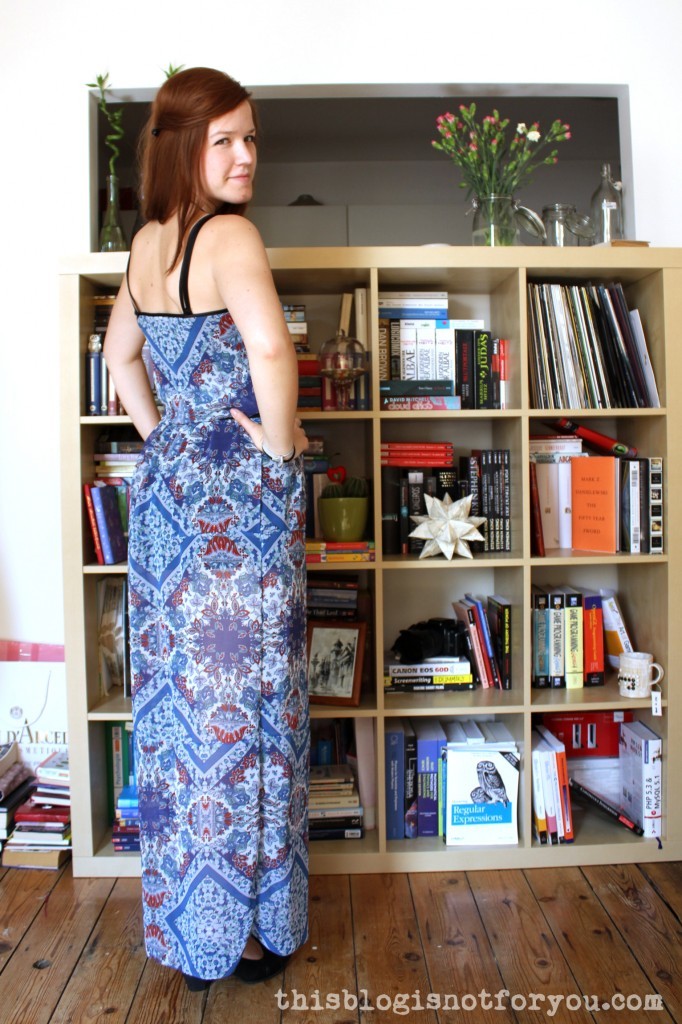
Here is the promised tutorial for those of you who are interested in how I made my maxi dress. Warning! This post got way too long. I recommend reading through first, before starting to cut your fabric 🙂
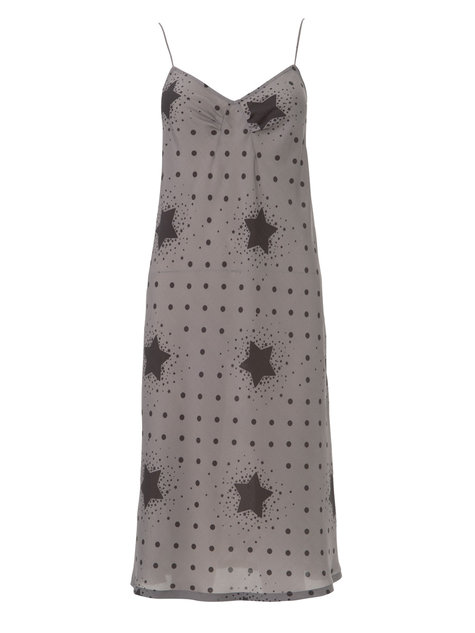
As I mentioned in my last post, I always wanted to make a maxi dress. I’m not a big big fan of the slightly shapeless jersey versions you see everywhere, although I bet these are super comfy. I wanted to make something easy, yet a bit elegant and thought of something like this:
source: img.alibaba.com
What do you need to make it?
Some lightweight fabric, matching thread, stretch satin or jersey for an underdress and some bias binding for the straps (you can make this from the fabric you use for your underdress by cutting strips at a 45 degree angle). Make sure the underdress has a bit of stretch, so that you can skip the zipper.
I used a chiffon (150x2m/60inx80in) and a stretch satin slip dress.
Of course you can make a fitted underdress/slip dress yourself, if you want to go all the way. Here are some pattern suggestions:
Burdastyle.com Cami Dress 09/2013 #114BBurdastyle.com Slip 07/2013 #116
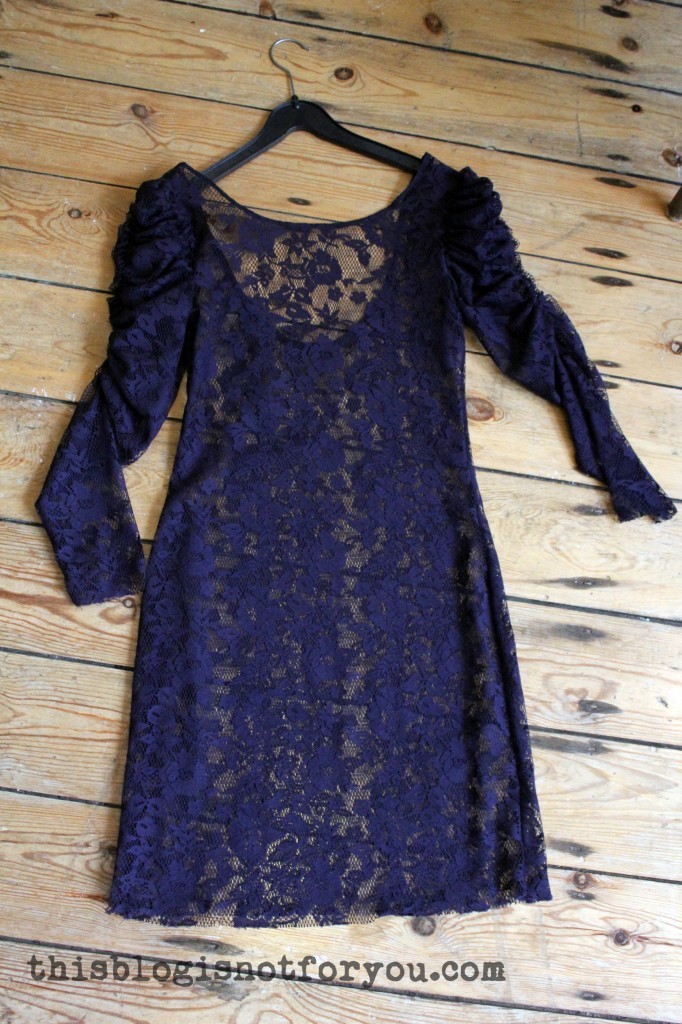
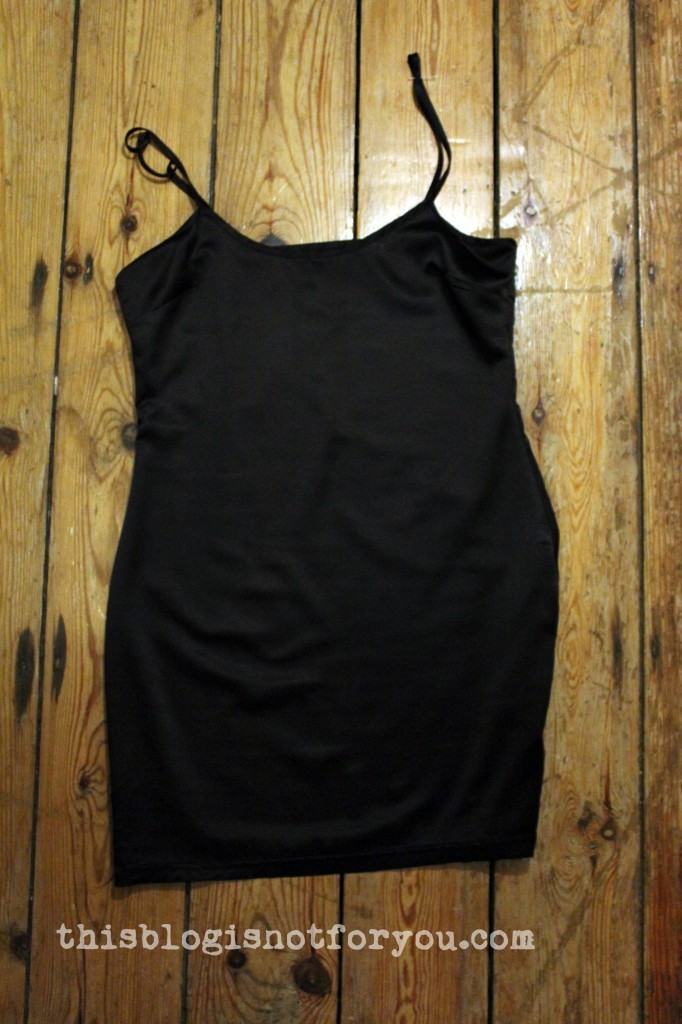
I was super lazy and used a stretch satin slip dress from a Zara lace dress I bought years ago. Who would do that to a lovely Zara dress?? Well, me. In a minute you will know why!
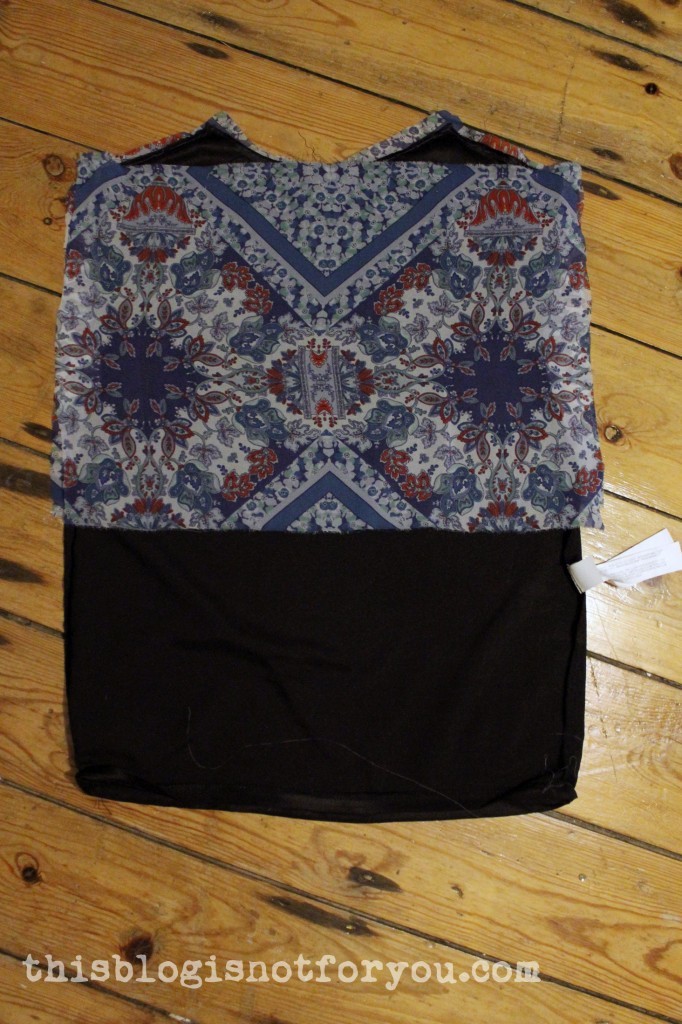
This is the dress without the underdress. Looks lovely, eh? It wasn’t.
So I bought this lovely lace dress during a Zara sale for just 6 Euro. I must have worn sunglasses when trying it on, because it turned out that the dress is super duper ill-fitting. I actually bought this to have something chic to wear for special occaisons, but um, no. Ill-fitting, wayyy too short and I really couldn’t tell what was the front and what was the back.
I wore this little number only once. This is a picture of that evening:
Where were we? Ah, making a maxi dress!
no, it’s not super wide. it’s just super short.
So this is the slip dress. It has only two side seams and two darts at the bust. You could easily make this dress using your bust, waist and hip measurements, creating two hourglass shaped panels. If you want to do that, please use stretch fabric. Otherwise it might not fit.
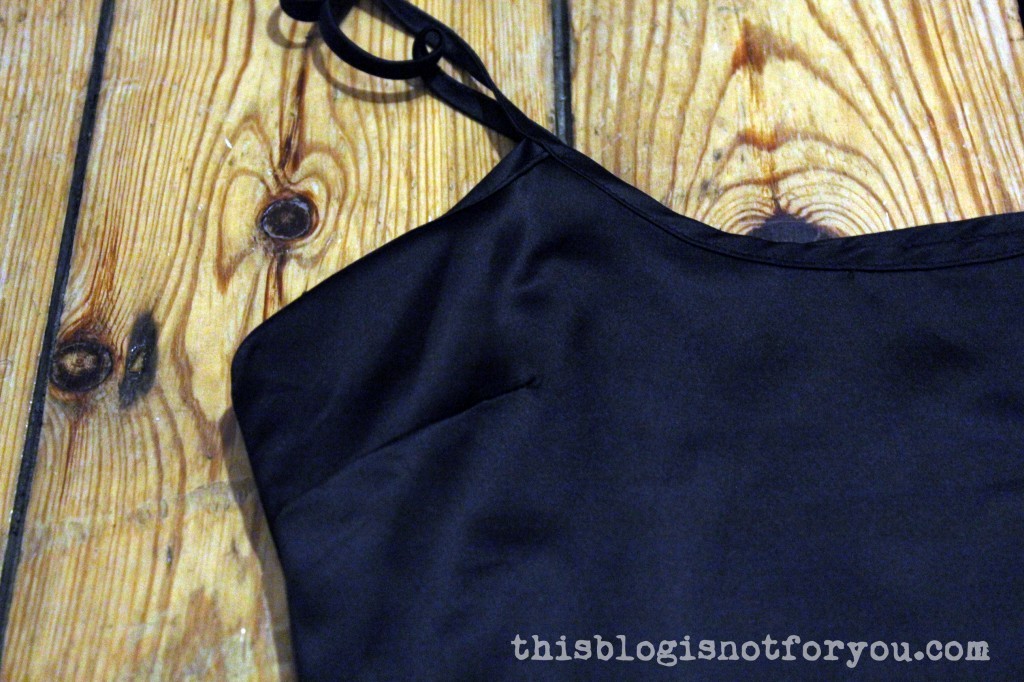
The bias binding/straps were made with the same stretch satin fabric. I decided to re-use them for my maxi dress.
Time to dig out my seam ripper!
If you’re making your own slip dress – just skip the bias binding and strap part!
Before continuing with the next step – make sure to turn the slip inside out.
If you do not have a dress form, that’s fine. I think it’s much easier to have one when draping and pinning, but this dress you can definitely make without one.
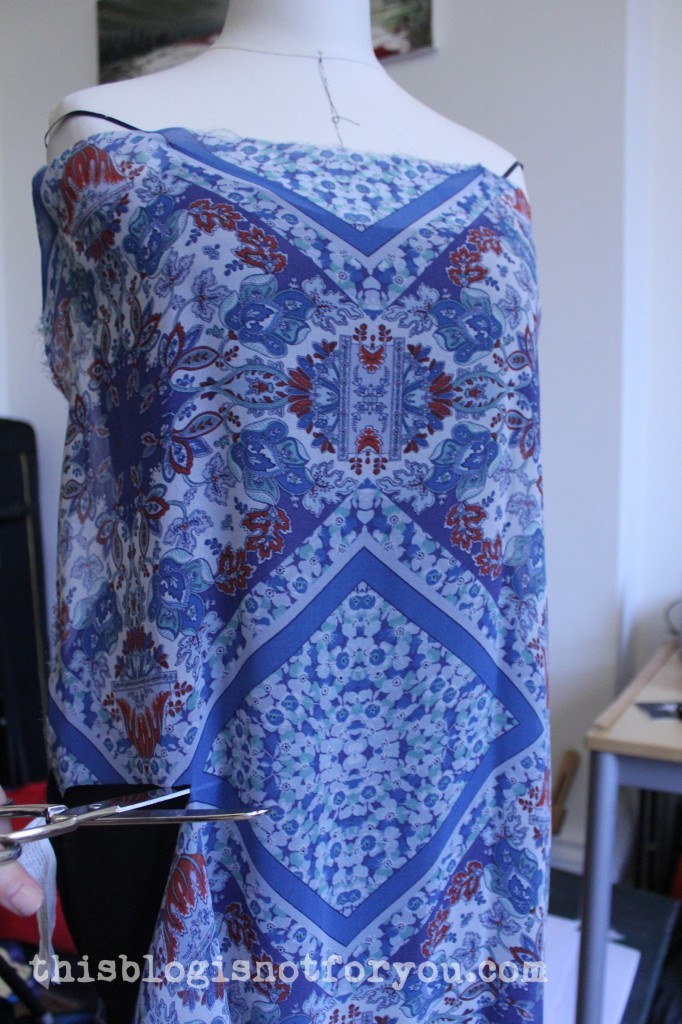
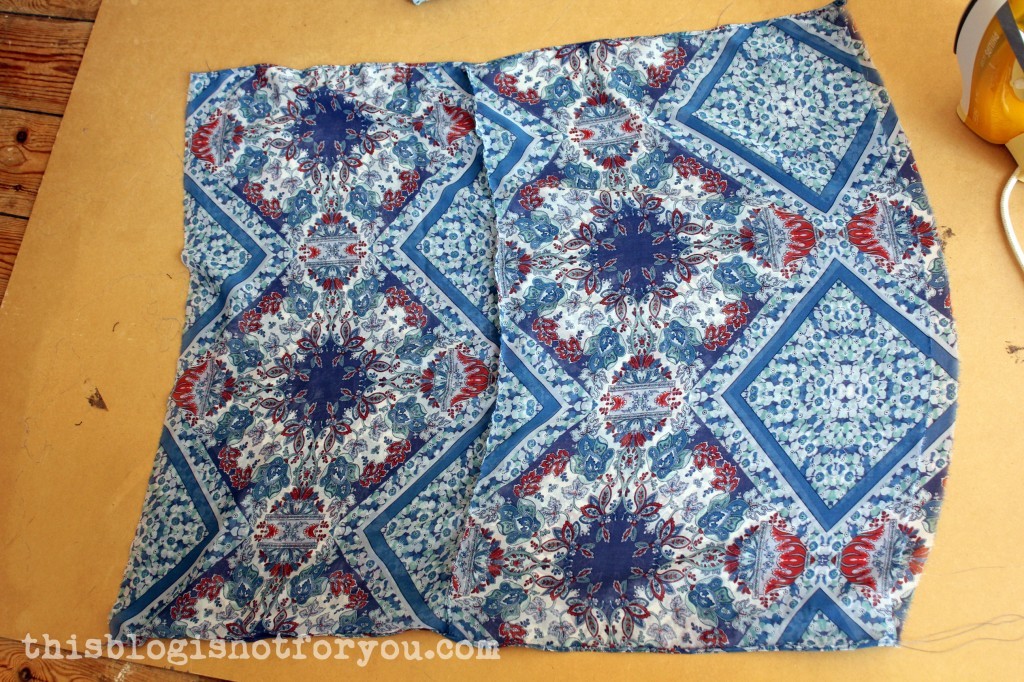
I loosely pinned the fabric (left side facing me) onto the dress form to see where the print would look best.
In the picture above you can see that I started pinning the fabric starting with the selvedge (see right side) pinned a few inches behind where the side seam would be. You just want to make sure to have enough seam allowance in the end. I just pinned the fabric flat onto the dress form, leaving enough seam allowance. I cut the fabric a few inches behind the left side seam.
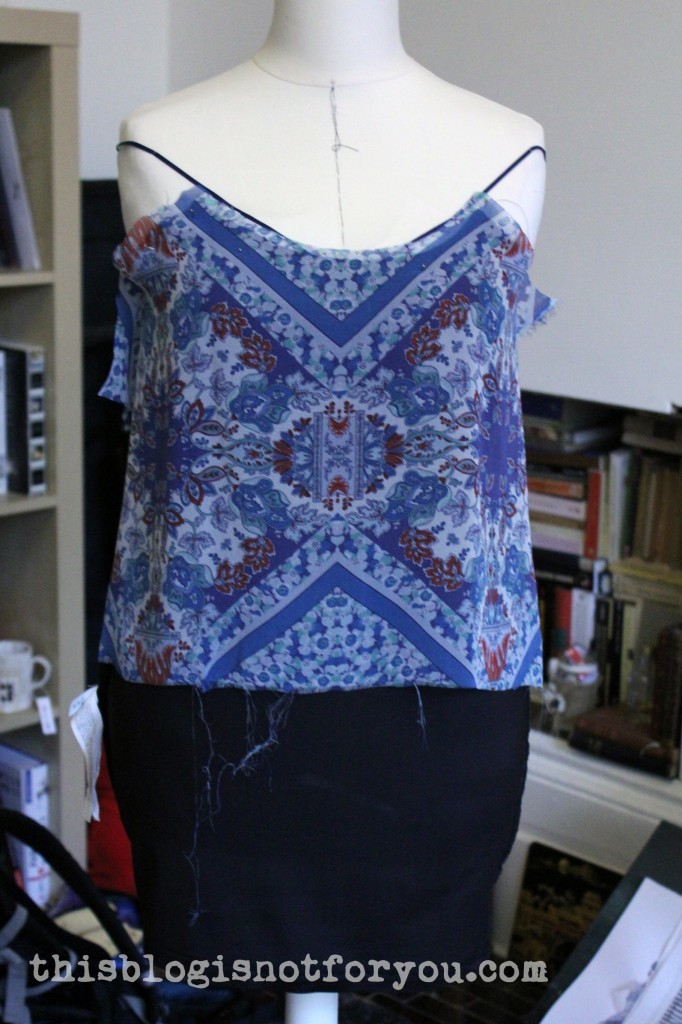
I decided to make the waist fitted and the bodice part a bit longer, so that it would cover the shirred waist and would loosely hang, looking almost like a separate part.
To get the perfect length I just used my hand to push up some of the fabric at the waist, adjusting until the fabric part that fell over it was was long enough to cover a waistband of about 10cm/4in length. (see picture above. Hope I don’t confuse you too much.)
Mark the fabric length were the waistband would start, e.g. in the picture above this would be were my fingertips are. Don’t cut the fabric in the loosely hanging fold, since you want to create that “overhanging” part.
If you’re competely confused by now – just add about 15-20cm length at your bodice piece’s waistline.
Chop, chop! I acutally prefer clipping and then tearing – makes a much straighter edge!
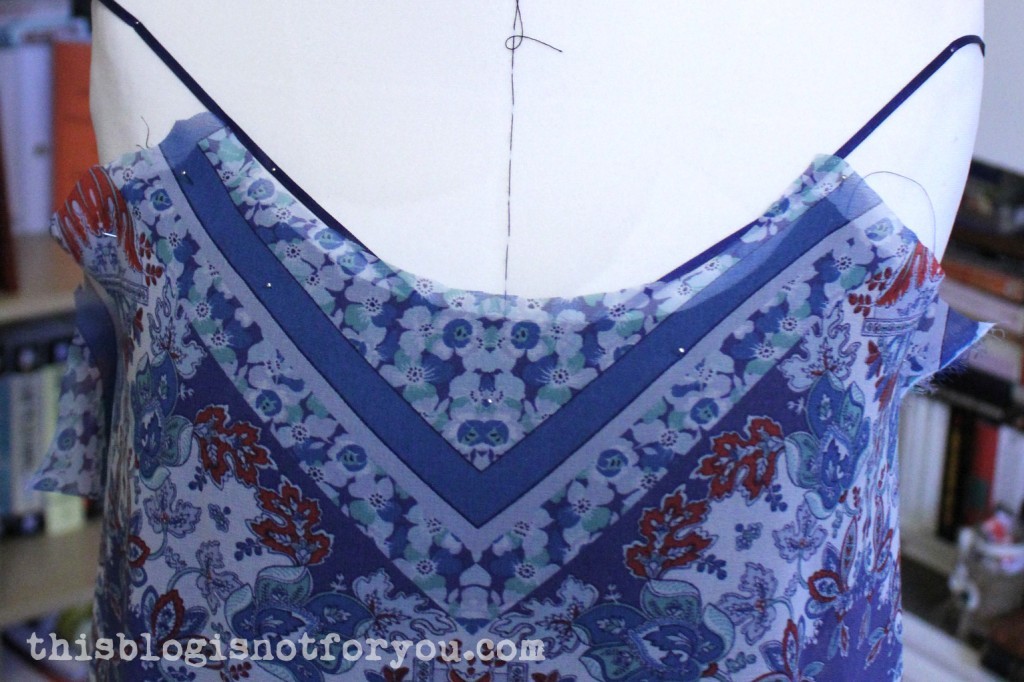
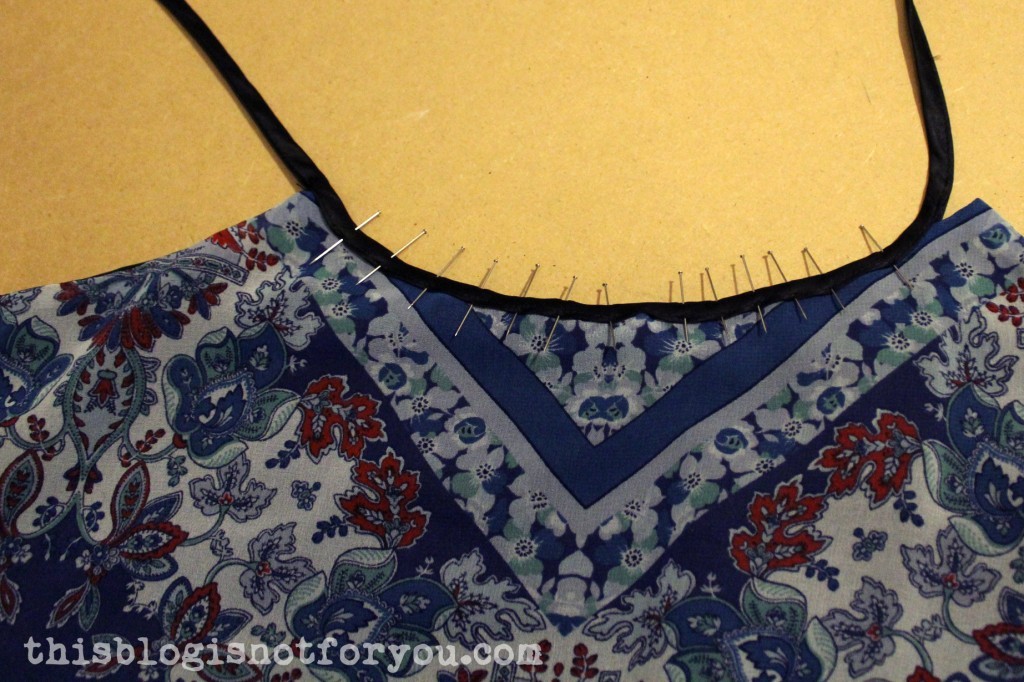
Now cut around the shapeof the neckline of your slip dress, leaving enough seam allowance.
Since I couldn’t really pin the chiffon (the pins would keep falling out), I hand-basted the fabric to the slip dress neckline. I’d recommend doing that anyway, to make sure everything stays in place.
I laid everything flat on the ground to make the side seam allowance more even. I made them straight (as compared to the fitted slip) so everything would fall a bit more loosely.
If your fabric does not have any stretch (like mine) I’d strongly recommend cutting the side seams straight anyway. Otherwise you will have problem getting the dress over your unmentionables.
Creating the back panel is super easy. Just line up a piece of fabric, leaving enough seam allowance at the top and using the egdes of your front panel at the side and bottom as a template for the back panel.
If you are using a print like I did, make sure everything is symmetrical. (You can easily forget that when you are super concentrated watching Project Runway, ask me how I know this)
I forgot to make pictures of the next steps, naughty me.
1. Sew the side seams first. Since I was working with chiffon, I used my favourite baby seams technique.
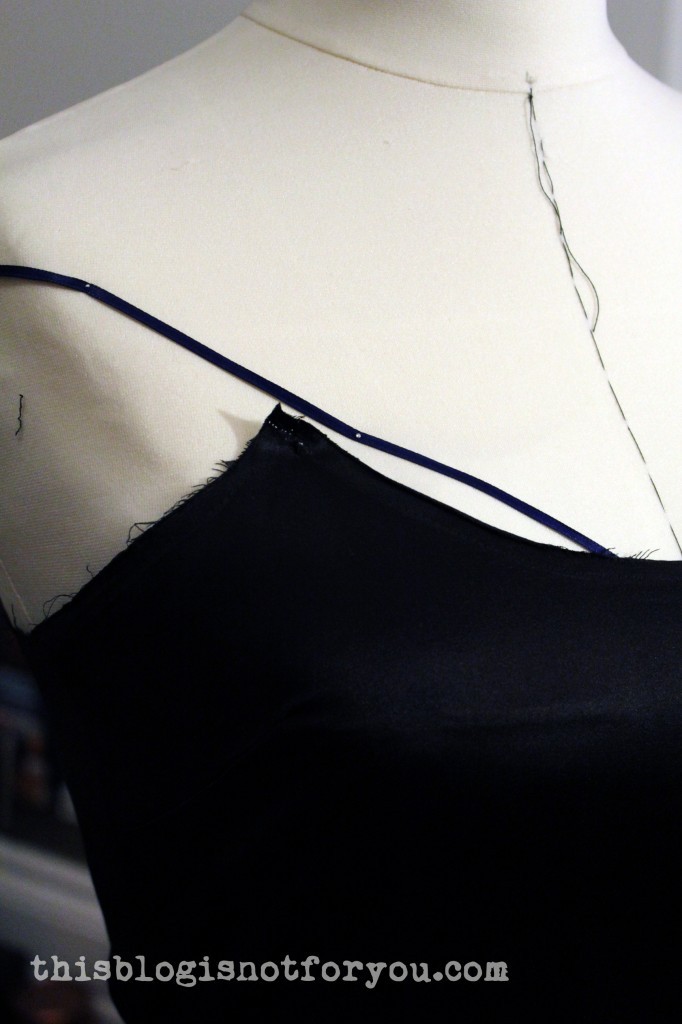
2. Stitch the fabric onto the slip dress neckline. I only had 0.5cm/0.2inch seam allowance on the slip dress, since I had removed the bias binding before. If you’re making your own slip, you can use more seam allowance.
3. Turn everything inside out and try it on. Make a happy dance.
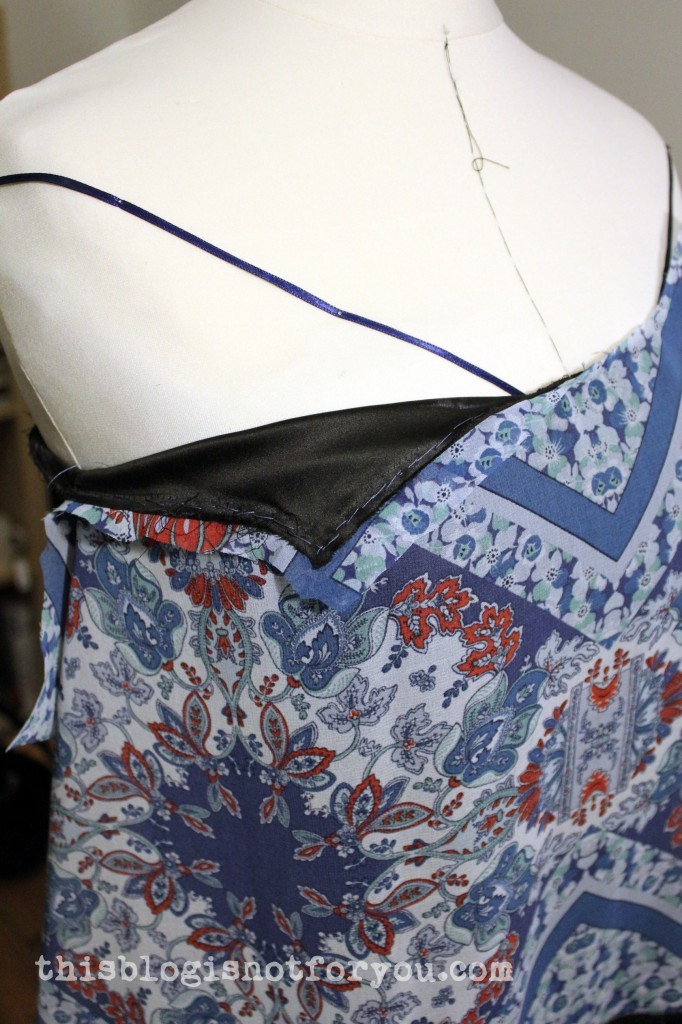
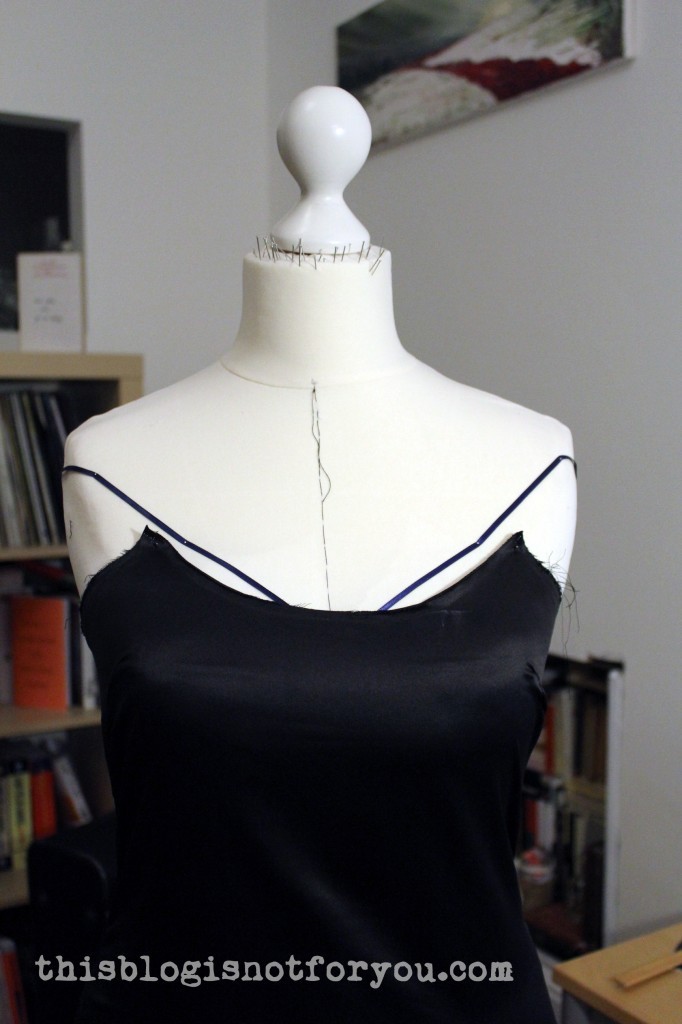
I pressed the turned dress (now right side facing you) and pinned the bias binding back onto the neckline. You need two strips of bias binding. One that goes all the way around the back and ends at the pointed corners at the bust, and one that goes along the neckline and the ends are used as straps.
Sew the one around the back and sides first, so you can cover the end with the one you use for the straps.
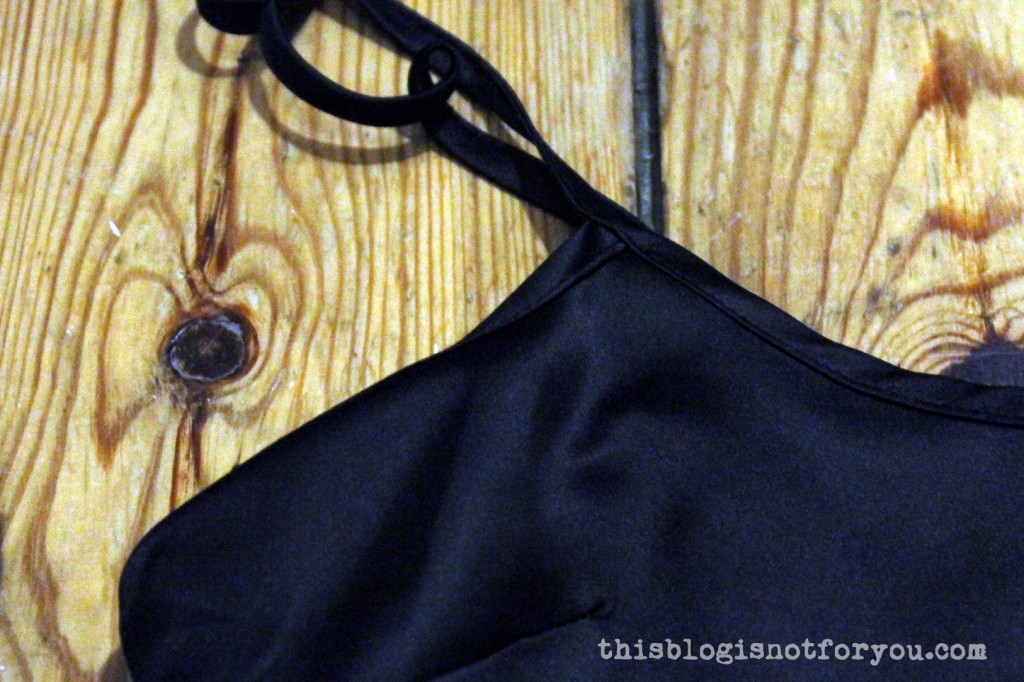
The straps are creating by simply stitching the binding together at the open side.
The ends of the straps are sewn onto the left side of the binding in the back. You can orientate yourself at your bra straps.
Now the skirt panels:
The length is really up to you. I made 3 tiers, each about 40 cm long since I wanted to gather the pieces like a petticoat. I didn’t do that in the end and now have two weird-looking seams that were absolutely unnecessary. If you just want to have a straight skirt, measure the length from waistband to your feet.
(Make sure to make the panels wide enough, so you can walk properly. Everything less than 150cm in cirumference might be problematic and you’ll walk like a geisha. My panels are 70cm each, that’s just about fine, but I’m thinking about altering that. I can’t run in this dress!)
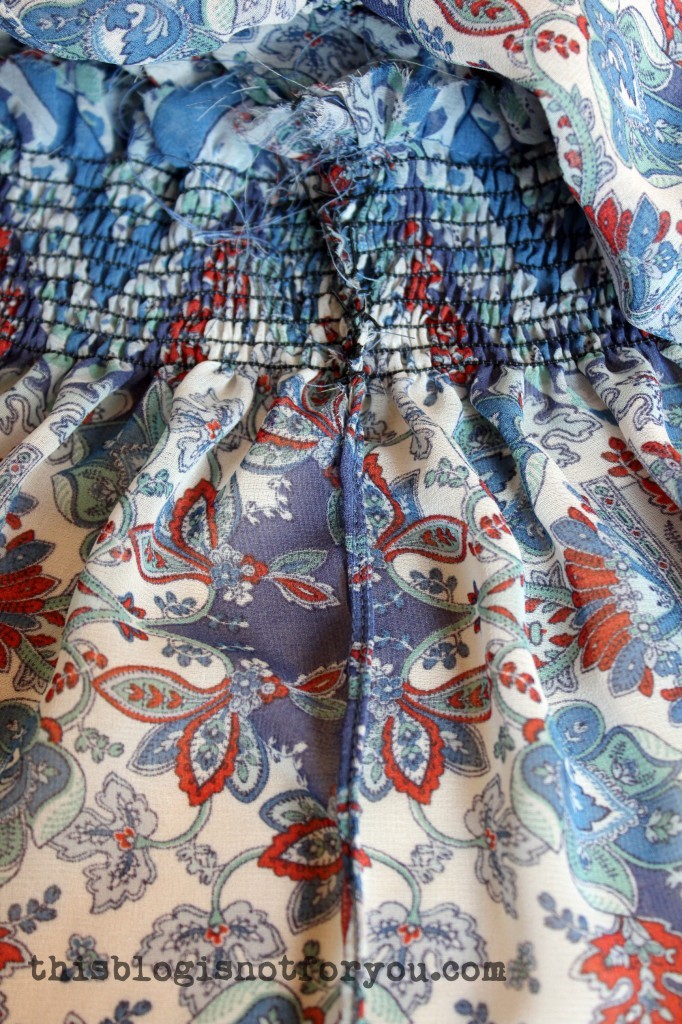
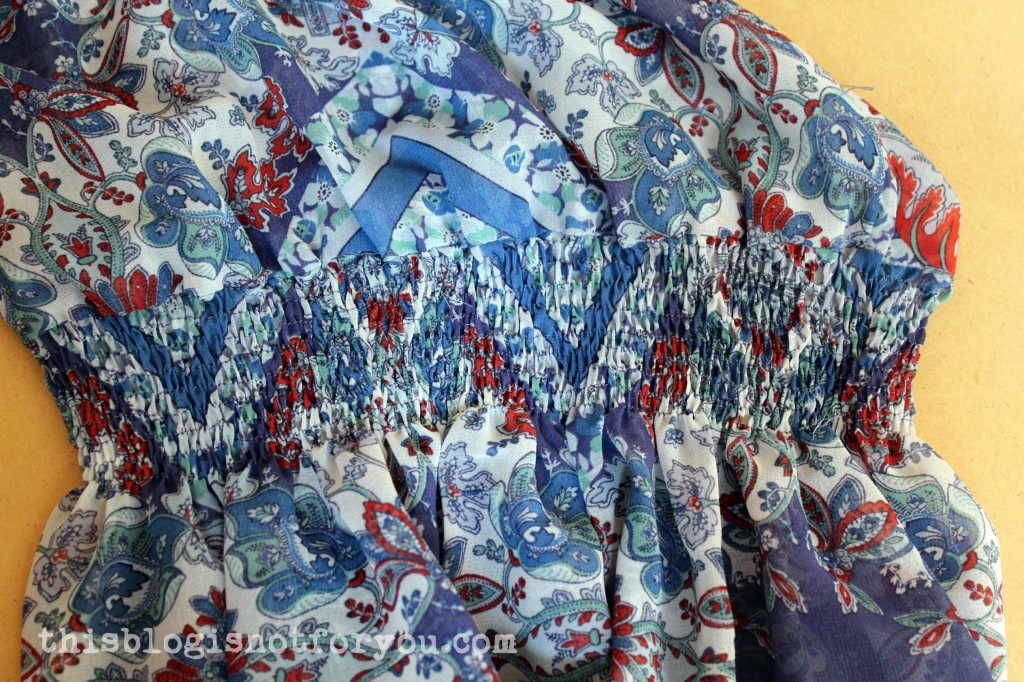
Now comes the fun part. We want the skirt panels to be shirred at the waist. (Alternatively, you can insert a wide elastic band, if you want to avoid the shirring)
To determine the width of the skirt panels, measure your waist. Shirring will make the fabric shrink in width so you need to add some extra width. As a rule of thumb you need to multiply your measurements with 1,5/2. The more lightweight the fabric is, the more width you need to add (because it will shir easier). I used chiffon and multiplied by 2.
Cut the fabric in half, so you have a front and back panel.
I left some seam allowance and then sewed 9 rows of elastic shirring, each about 0.7cm/0.3inch apart (orienting myself by the edge of my straight stitch presser foot).
Here’s a quick tutorial on shirring, if you don’t know how to do it. Try! It’s not hard at all. There are millions of other tutorials on shirring out there. Google it and make yourself familiar with the technique before you start.
For sewing the 9 rows I used 2 complete bobbins of elastic thread.
Sew the shirred panels together at the sides. In the pic above you can see the baby seams. The shirred part I simply stitch together and finished with a zig zag stitch.
Sew the shirred skirt onto your bodice piece, right sides together. You will need to carefully pin everything in place first. With both pieces pinned together, you will need to gently stretch the shirred part as you are sewing so that it is the same length as the bodice fabric.
By pressing the shirred fabric, the shirring will pull in nice and tight. Don’t pull the fabric, just press the iron down lightly.
Looking good!
If you made one long skirt panel, you can skip the next part.
If you made tiers (I recommend gathering them to create more width on the bottom), sew the tiers together. Then sew the side seams.
Pin the tiered part onto the bottom of the shirred panel and sew together.
I hemmed the dress using my narrow hem presser foot. It’s the perfect way to finish a chiffon hemline:
Phew! Are we done? I think so!
If this was way too confusing, don’t hesitate to ask questions in the comments.
When you’re done, please share our creation in the comments. I’d love to see it!
Hope you all enjoyed the long weekend (if you had one)! Did you use the long weekend for something crafty? Well, I did. Nothing too crazy, but I got a few projects done that had waited to be finished for a while.
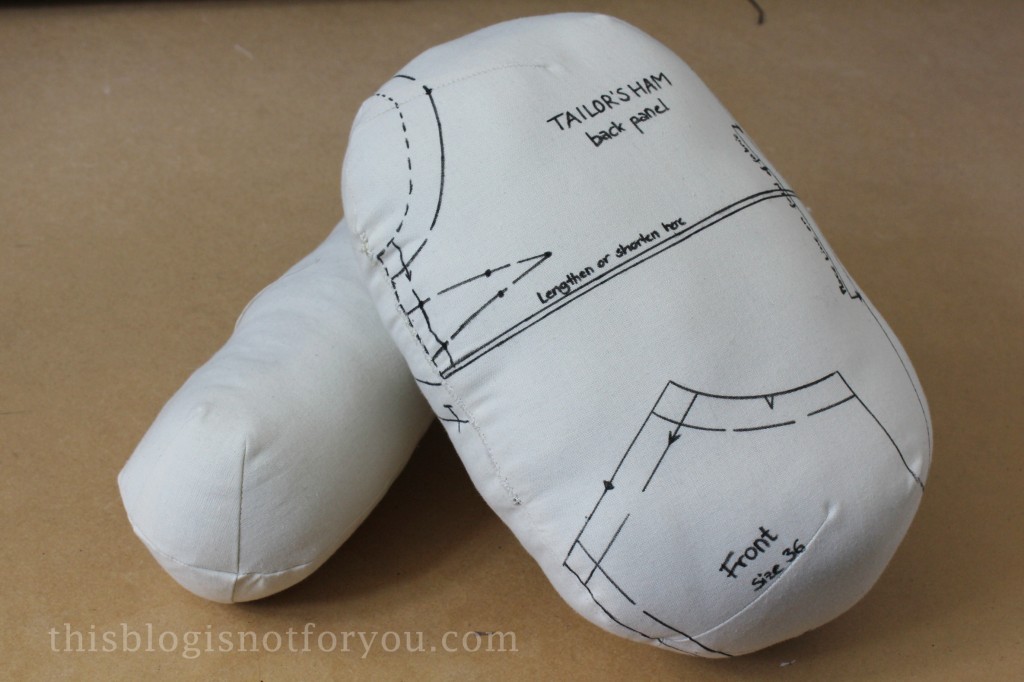
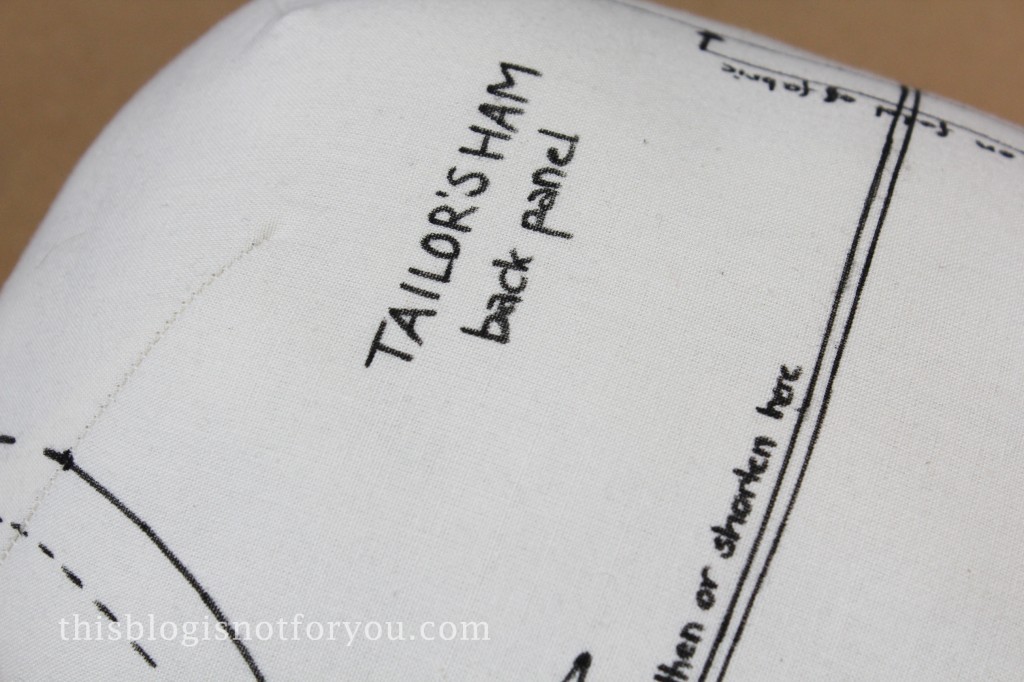
I was sewing up a cute summer blouse and while desperately trying to press the darts into a nice shape, I thought I finally needed to tackle the tailor’s ham project I planned weeks ago.
I found a brilliant tutorial by Kristiann (the Victory Patterns lady!) who did a great guest post over at Tilly and the Buttons. Check out her site for the instructions and the patterns.
I did it a bit differently though, since I neither had sawdust nor thick cotton canvas lying around.
I basically used an old cheap Primark pillow and fabric scraps for the stuffing. Since I did not have cotton canvas, I used plain (muslin) cotton in two layers I basted together before sewing the darts. Using two layers creates the right thickness and makes the cotton sturdy enough.
I basically cut out each piece four times. I lengthened the pattern a bit at the fold to make the shape more oval for the ham, I personally felt it was a bit too round and was afraid it might be a bit wobbly when pressing. I added about an inch to the pattern at the fold line.
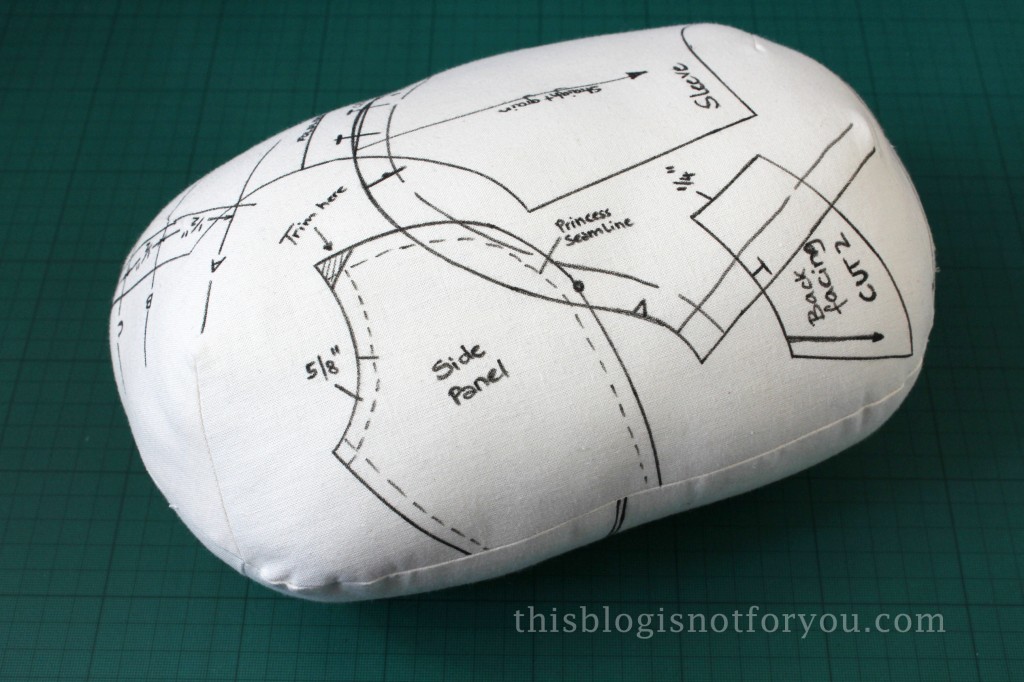
Here you can see that I basted the two layers of cotton together in the seam allowance (about 2/8” or 7mm from the edge). I then sewed the darts and basted them onto the seam allowance so they lay nice and flat and didn’t shift while I stitched all four layers together.
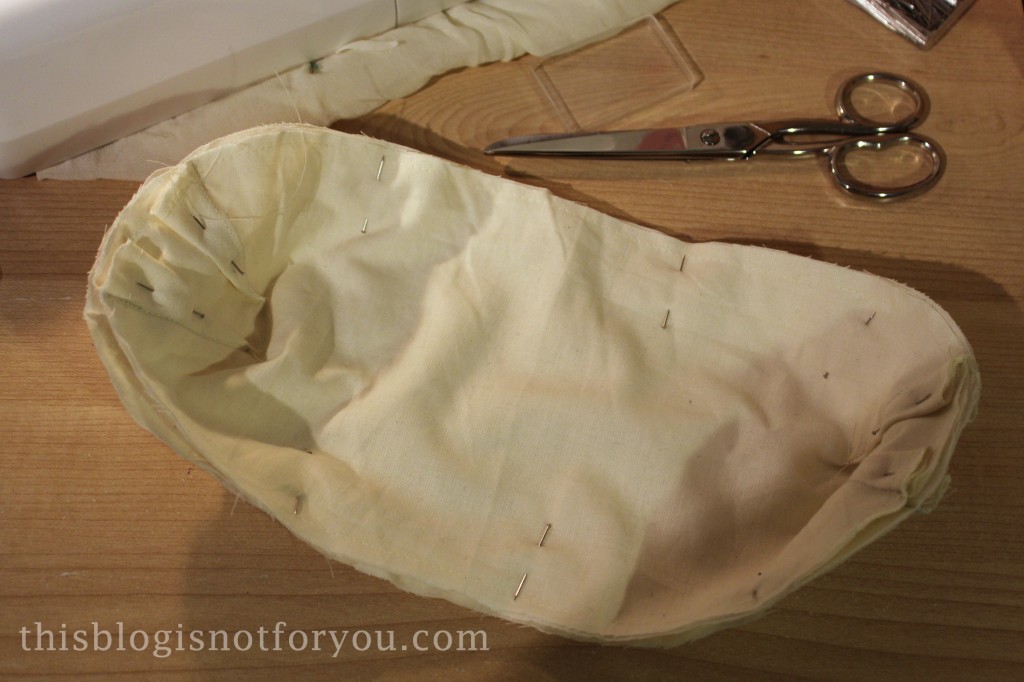
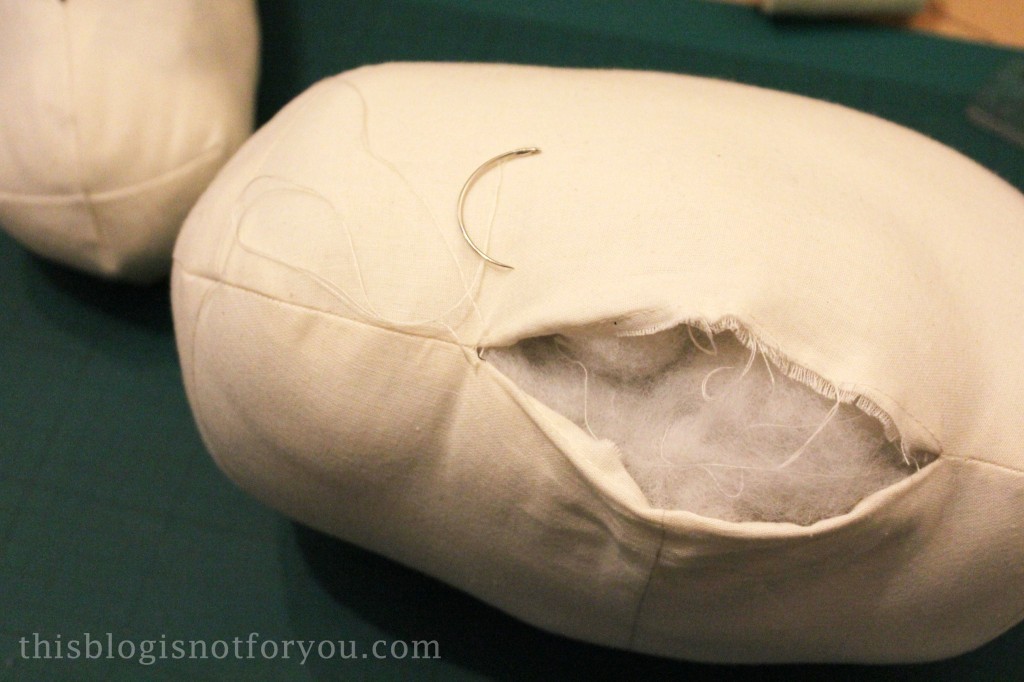
Make sure you leave at least 3”/10cm of the seam open on one side where the stuffing goes in.
Turn what now looks like a slightly unshapely bag inside out.
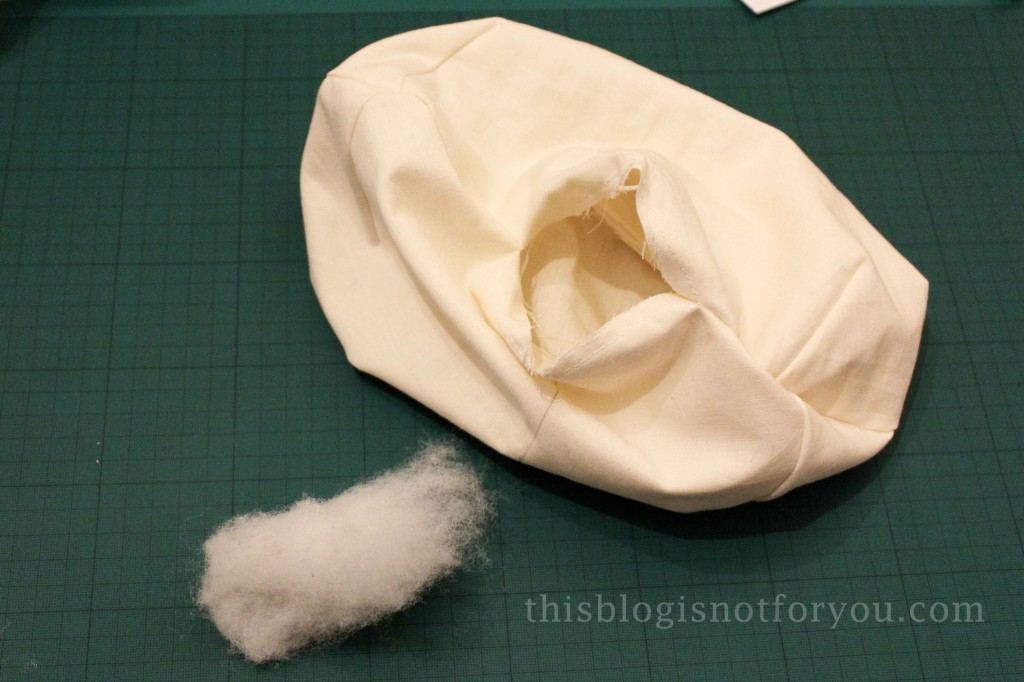
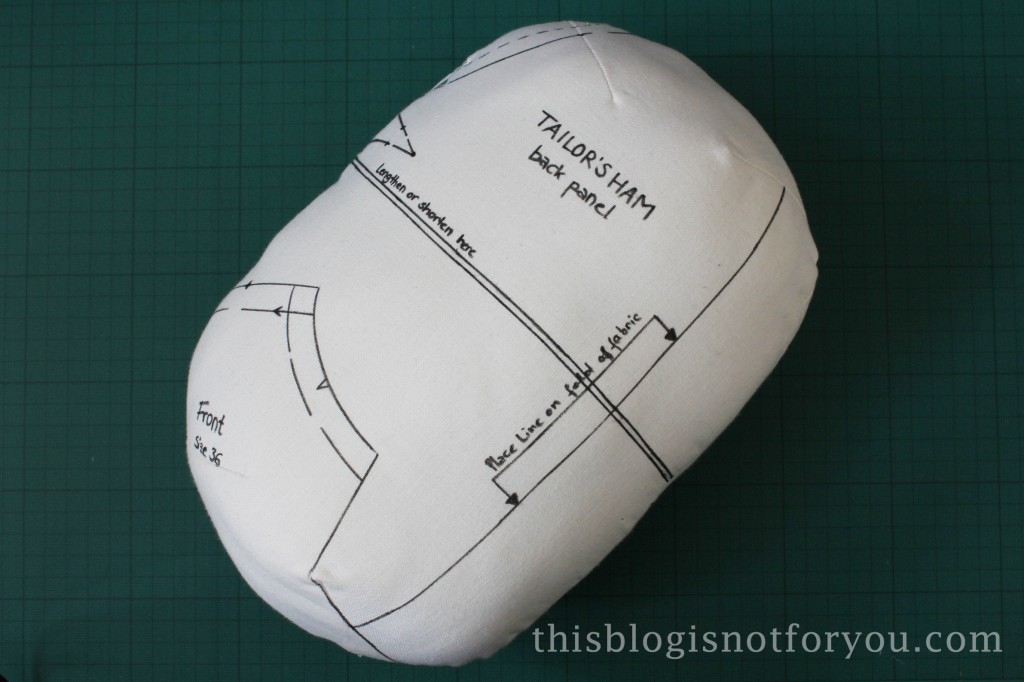
Yep, that’s how it’s supposed to look. Looks nothing like ham and sausage, right? 😉
Now comes the fun part. For the ham I basically cut apart and old Primark pillow (they are quite cheap and the whole pillow fits exactly into the tailor’s ham.
I have no idea what these cheap pillows are made of really, the stuffing was quite itchy. In case you make this as a fun weekend project with your kids, I suggest wearing household gloves.
Now, stuff it. (For the tailor’s sausage I used old fabric scraps. I always keep those useless way too tiny bits and pieces, but for this project they came in very handy!)
To sew up the open side I used a curved needle and double thread (I had no upholstery thread at home, doubling the thread worked just fine). A single thread will tear quickly. Just pull normal thread through the eye and double it up. Knot the two tail ends together and then sew with the doubled up thread.
Not the prettiest seam, I know. But, voilá! Now I have my very own tailor’s ham and tailor’s sausage!
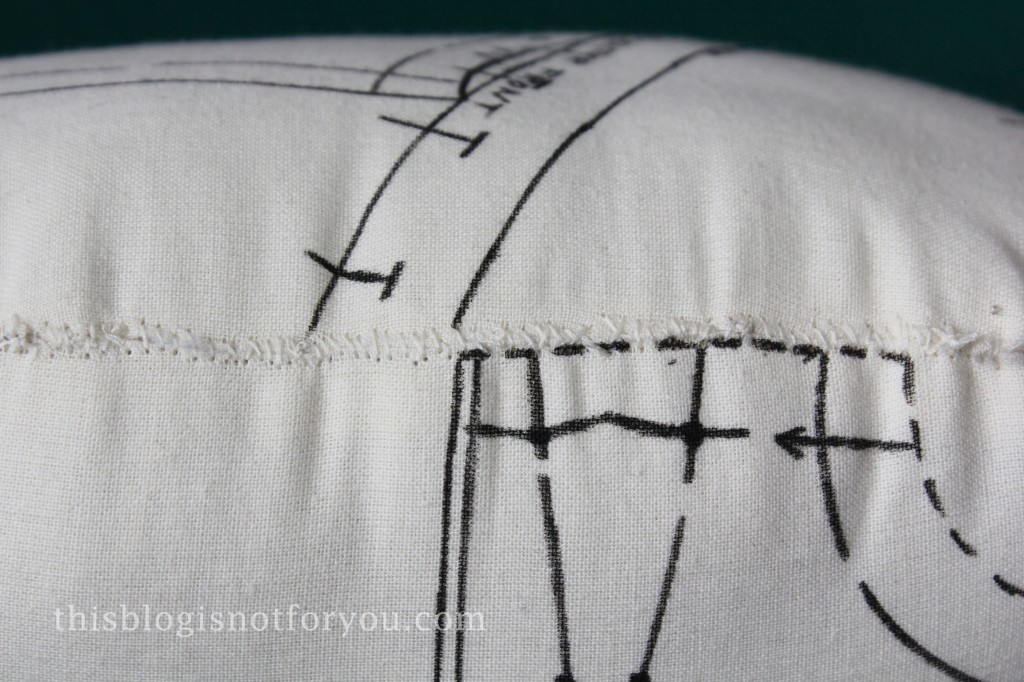
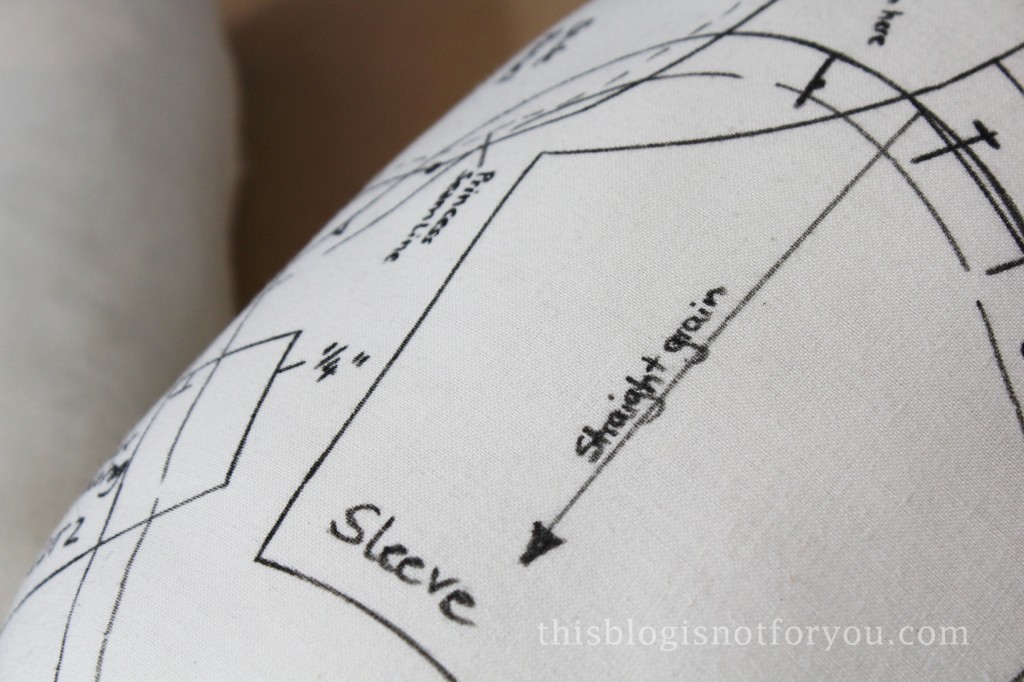
I chose to decorate the ham with a fabric marker. You could also use a cute colourful fabric instead of a second layer of cotton.
Super easy, super fun and super useful!
My man became quite alert when hearing I was making something with ham and sausage, not so excited anymore when he saw me ripping pillows on the carpet. Now he thinks the tailor’s ham makes quite a nice neck support pillow… 🙂
Now that exams are over, I had a little time here and there to sew and finish some things that were lying around for months. Dress #8 of my 27 Dresses Challenge is practically finished. The weather here in London just hasn’t been good enough to take proper pictures. So check out the blog at the beginning of the week if you’re interested in seeing the ‘ugliest dress I’ve ever sewn’ 🙂
Until then, here’s a quick and easy tutorial for the weekend.
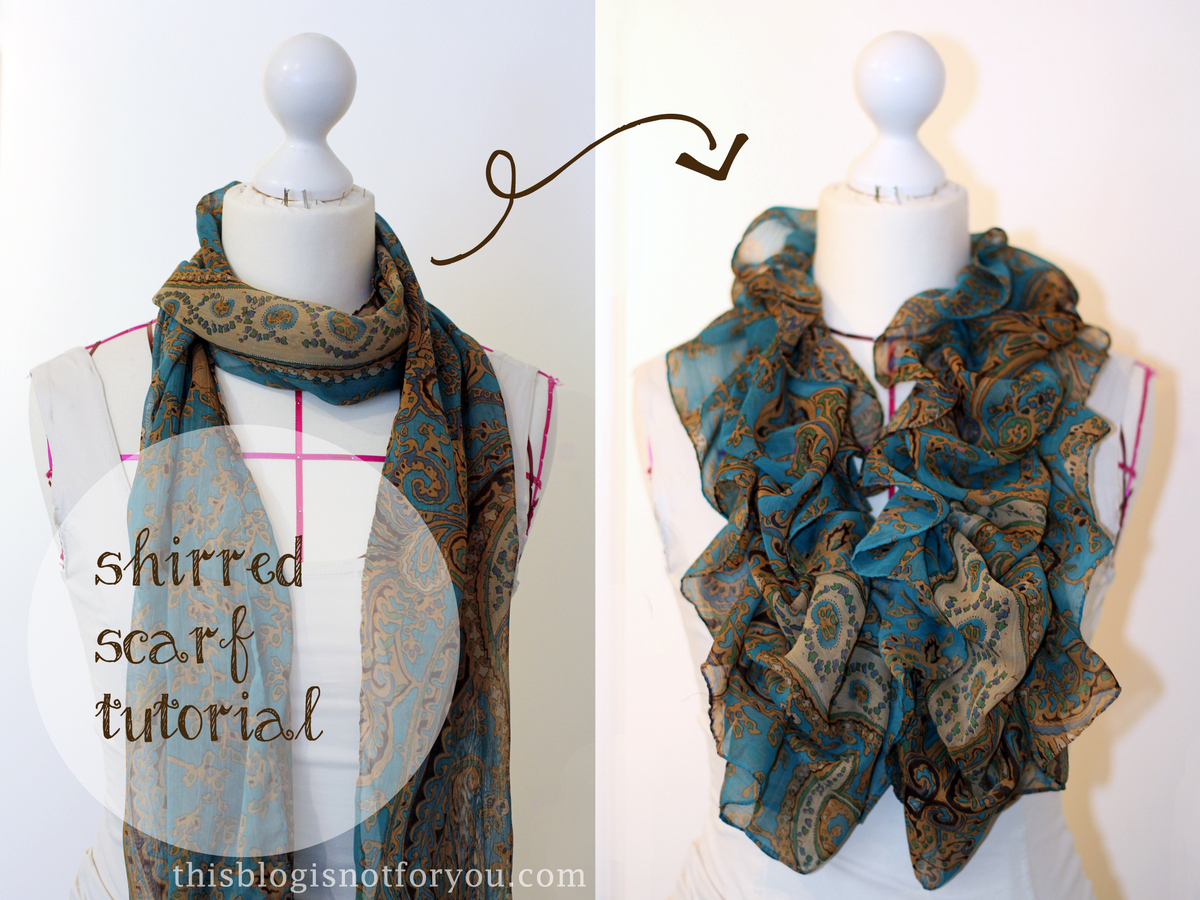
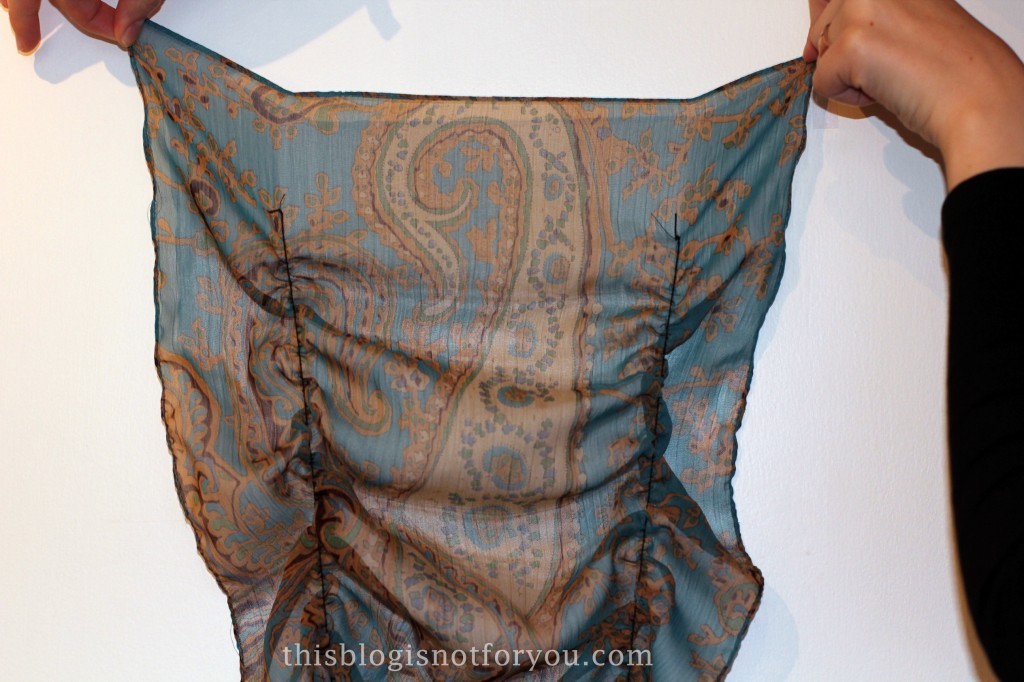
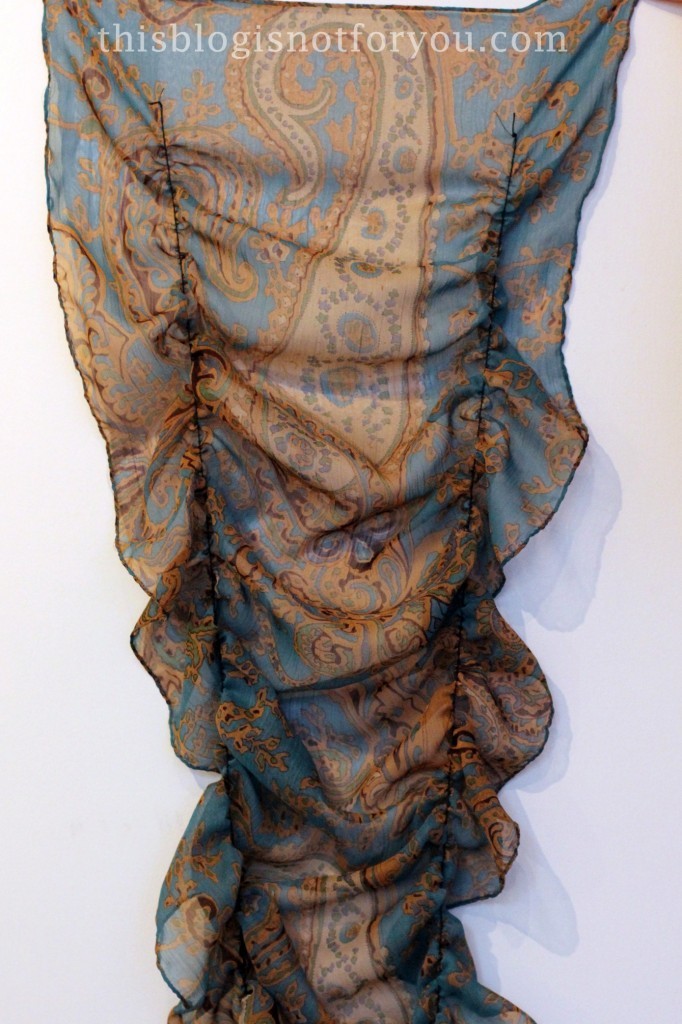
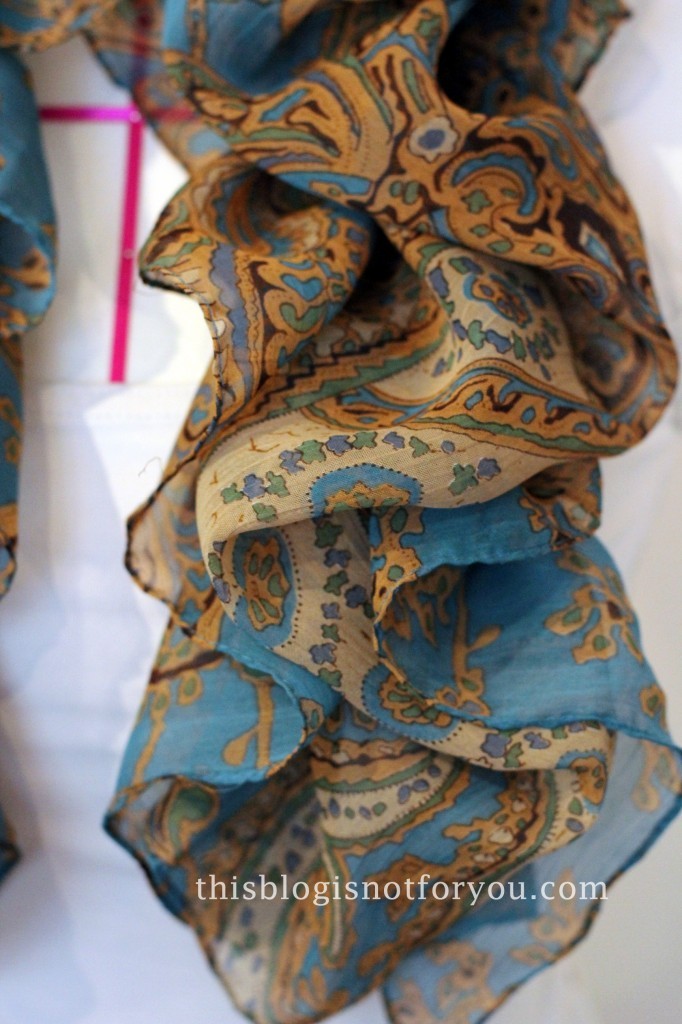
It’s time for upcycling some old scarfs for summer!
All you need:
-a scarf (lightweight fabric such as silk, chiffon, …). Choose a scarf that is long enough. Consider that after shirring it will be only half as long as it used to be!
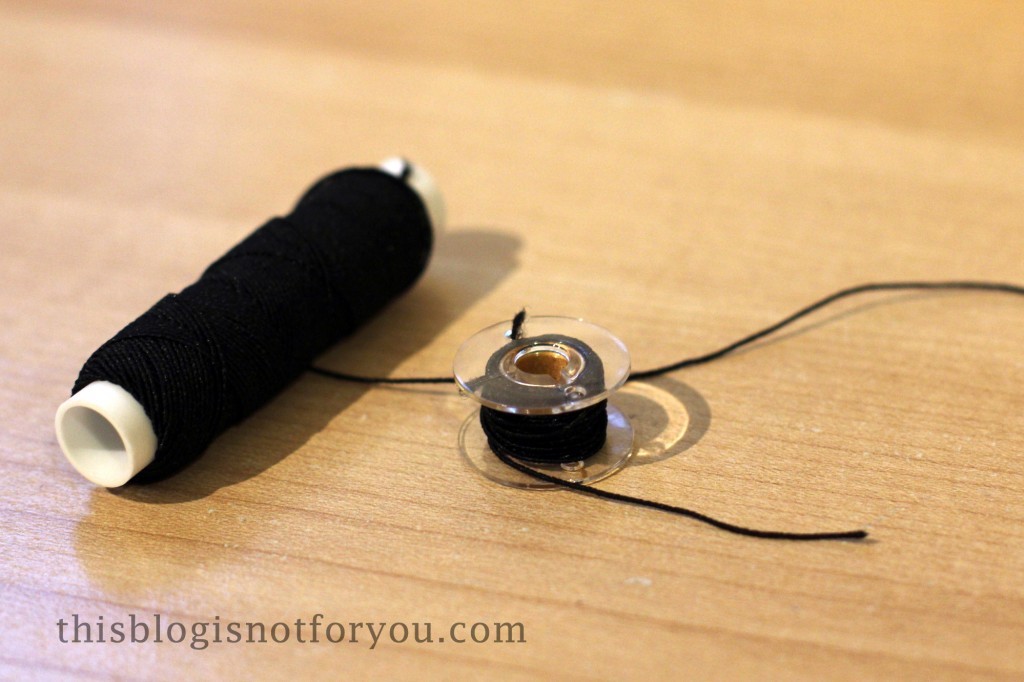
– elastic thread (and a sewing machine!)
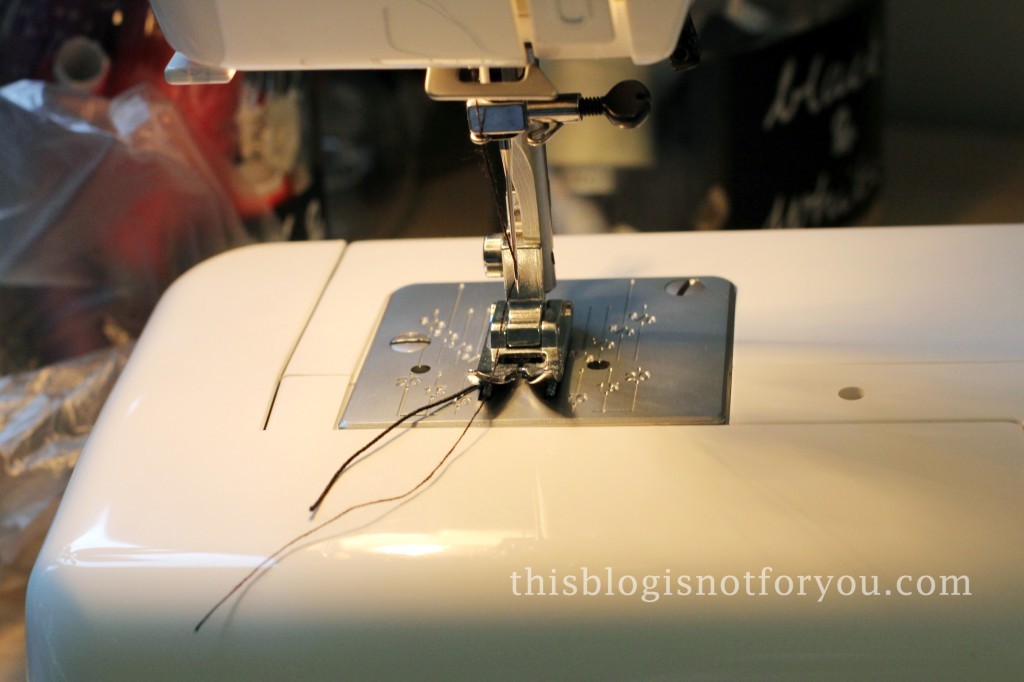
Wind an open bobbin with your elastic thread, not too tight and not to loose. Machine winding with your sewing machine might wind it too tight. If you’re too impatient winding it by hand, you can do it with your machine, holding the thread in your hand. That way you’re able to control the tension and it doesn’t get too tight.
Insert the bobbin as usual. You can make the bobbin thread tension tighter, if your machine has that option. I just left mine how it was and it worked fine.
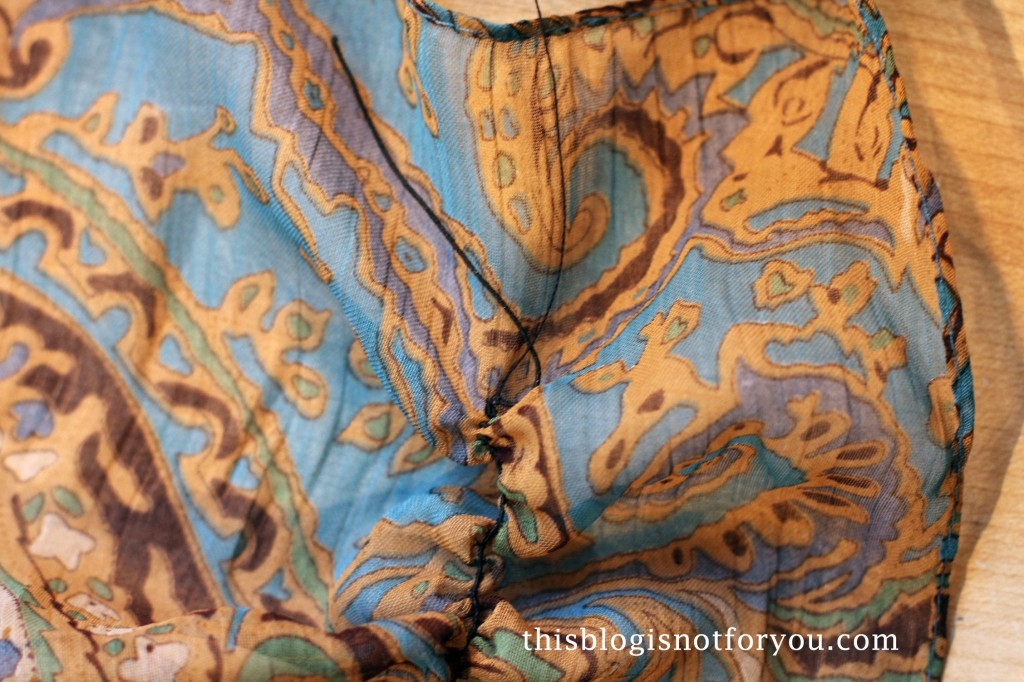
Pull the bobbin thread up manually. Make sure it doesn’t pop back into the machine (this happens when you don’t pull up enough thread).
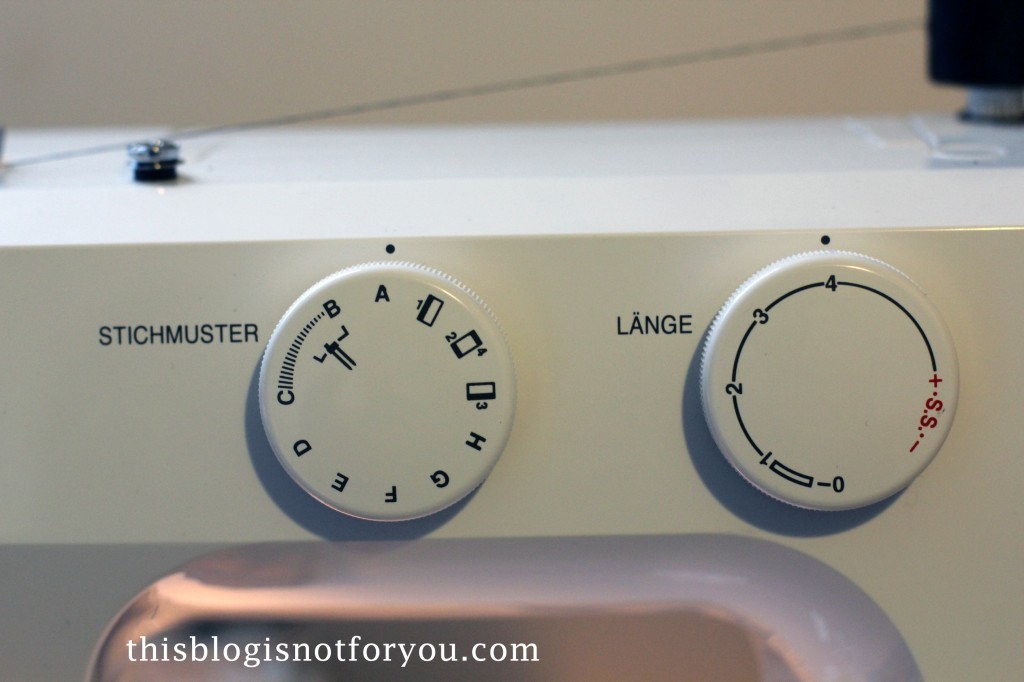
Set the machine to a straight stitch and a long stitch length (like a basting stitch).
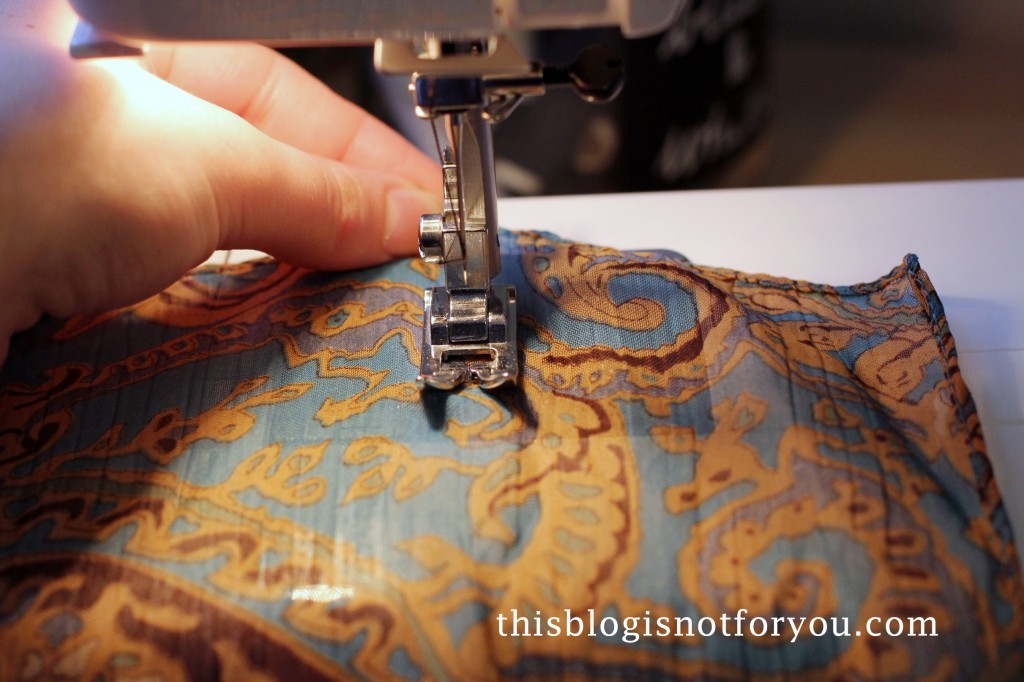
Sew two parallel rows, both the same distance from the side edge. Don’t start directly at the upper edge, but a few inches below.
While sewing, hold the fabric behind the needle with your left hand and pull slightly. Don’t let it ruffle until you’re done. With your right hand keep the fabric straight while sewing.
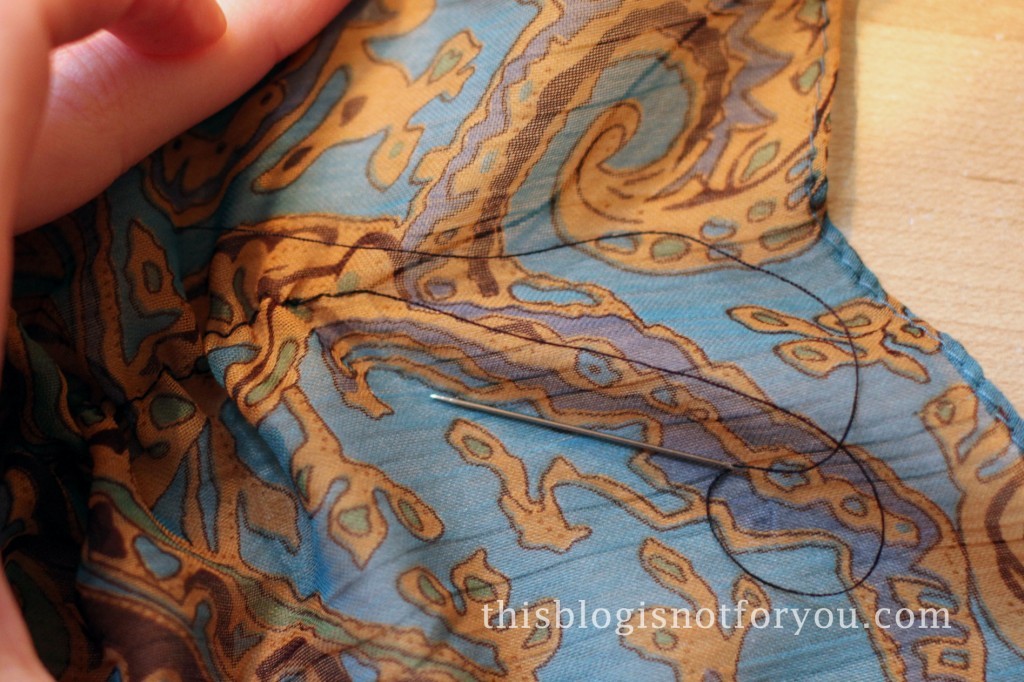
Before cutting the thread make sure you pull enough elastic thread out, otherwise it will pop back into the machine and you’ll have to pull it up again. You could also backstitch, but I didn’t want it to show on the scarf.
Cut the thread and use a needle to pull the upper thread through the fabric. Knots several times on the left side of the fabric before cutting the ends off.
You could also sew the two rows of shirring closer together to get an even more fluffy scarf. Try it out with a few old scarf or scraps of fabric to see what works best for you.

 I love blazers. I love red. Bright red blazers can look really cool, but this one was a weird mixture of too bold and too boring.


 We used transfer paper to transfer the picture onto the shirt. This one leaves very pale yellow lines on the fabric you can easily paint over.
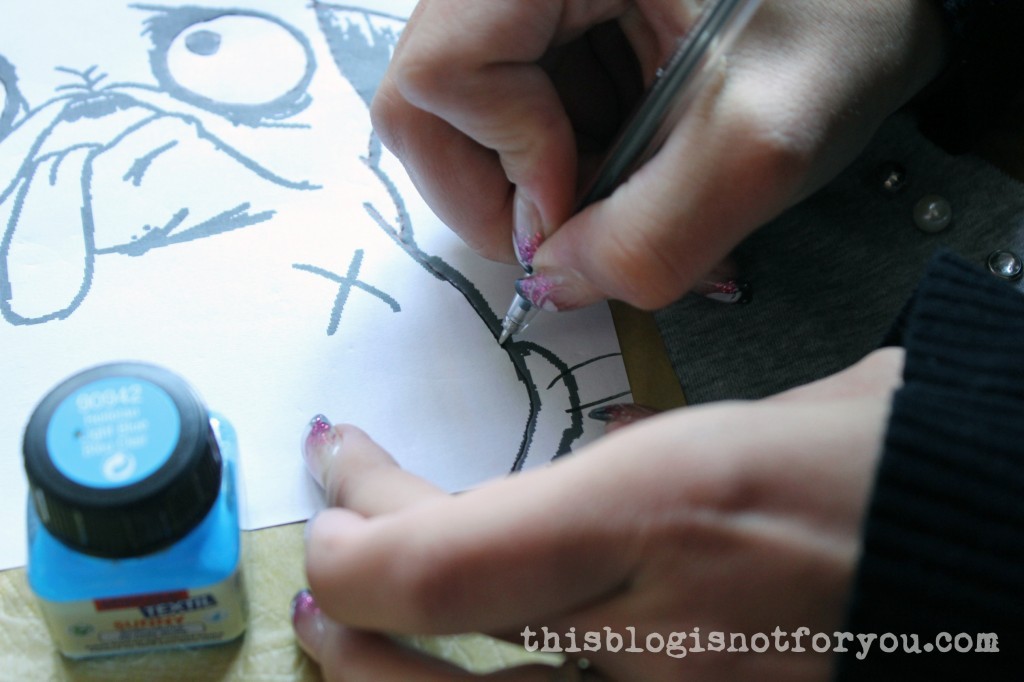 We traced the yellow marking lines with a fabric marker and then used black fabric paint and a small paint brush.
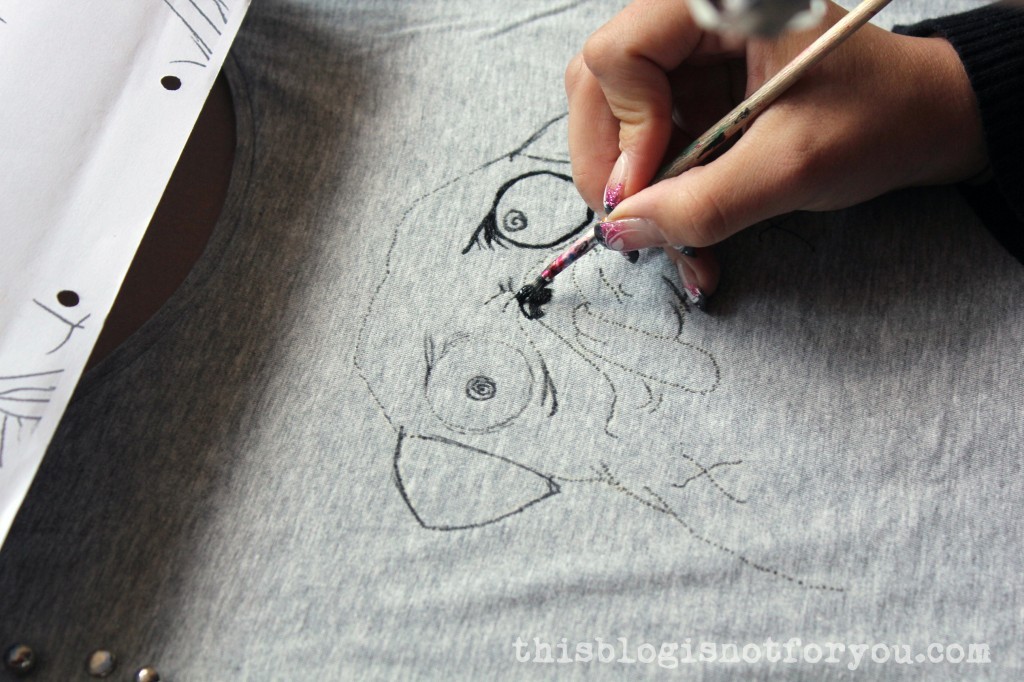
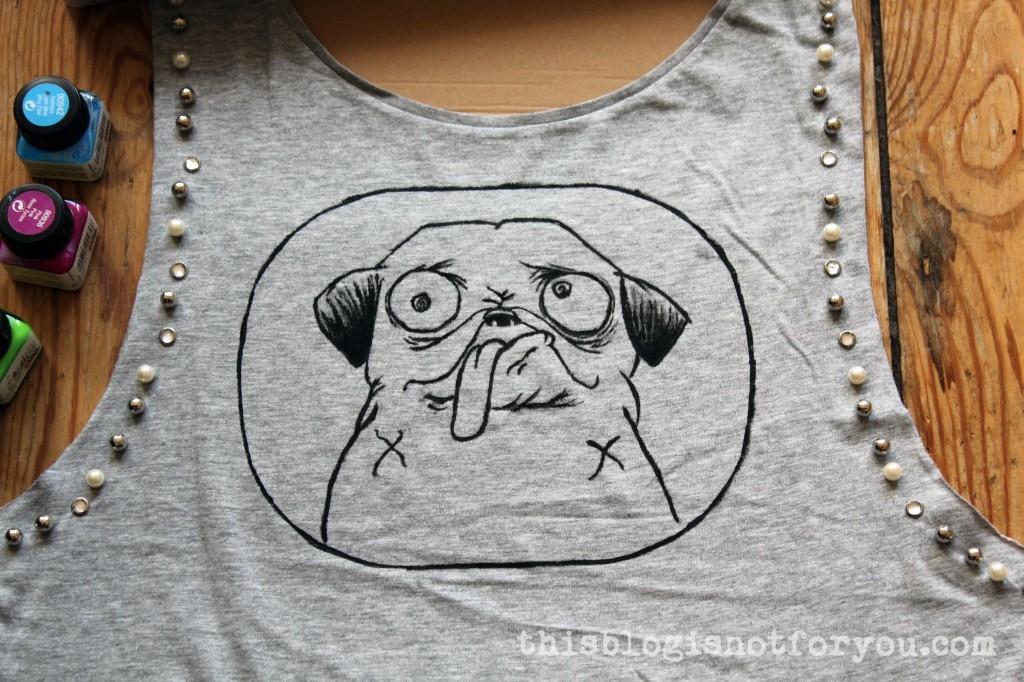
 After painting we left it to dry and then ironed it, left side up.


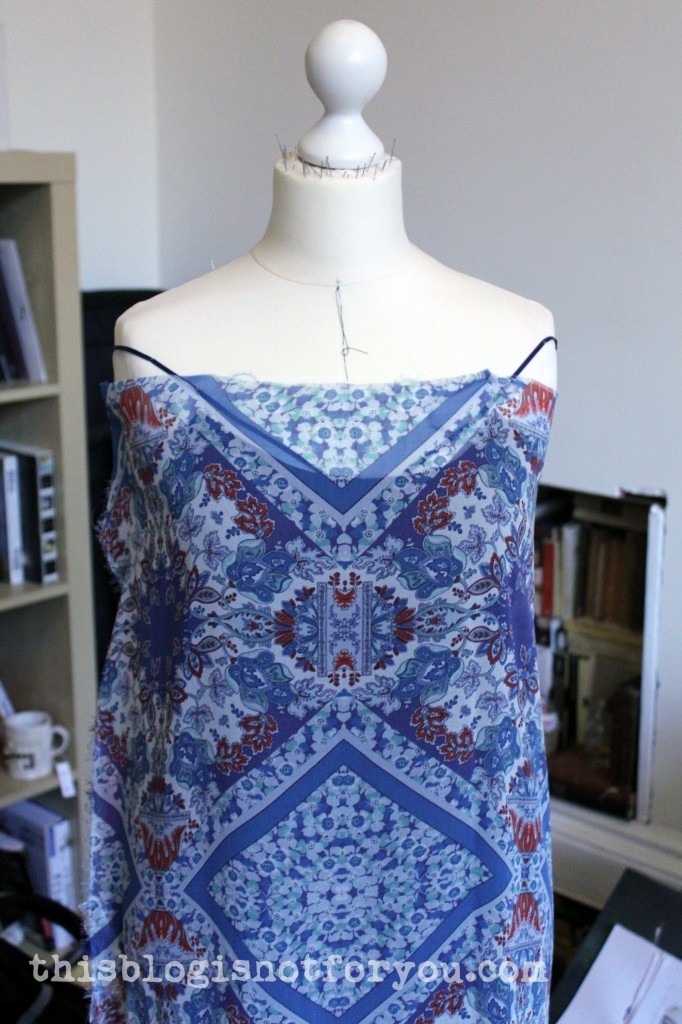 I loosely pinned the fabric (left side facing me) onto the dress form to see where the print would look best.
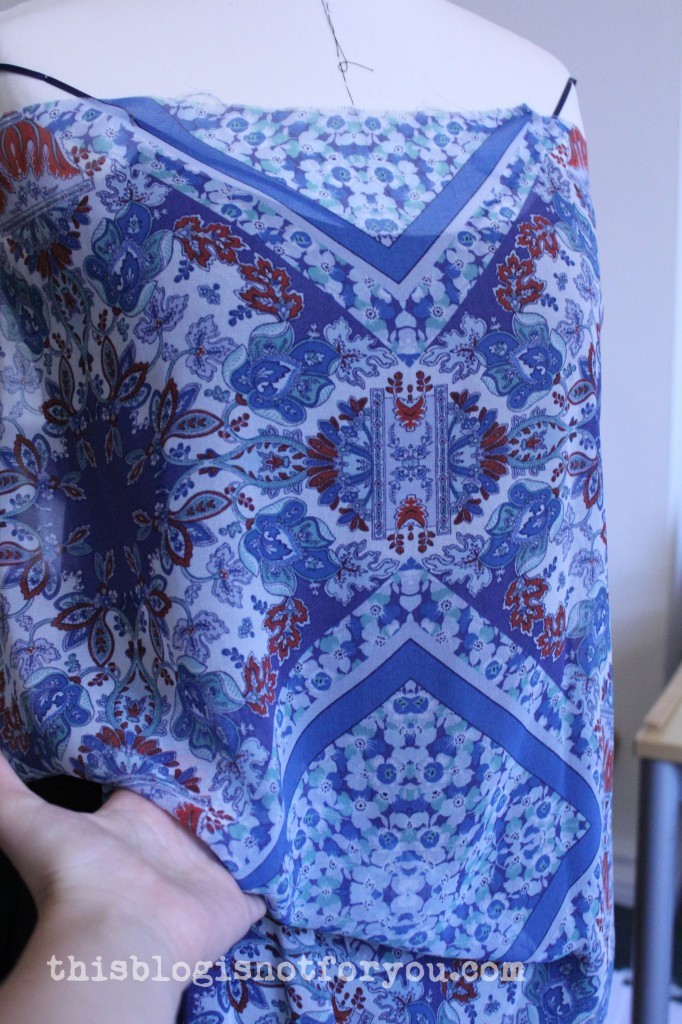 I decided to make the waist fitted and the bodice part a bit longer, so that it would cover the shirred waist and would loosely hang, looking almost like a separate part.