Get the look: Pleated Skirt with Suspenders and Vintage Trim Tutorial – no pattern needed!

pleated skirt with suspenders and vintage trim tutorial by thisblogisnotforyou.com
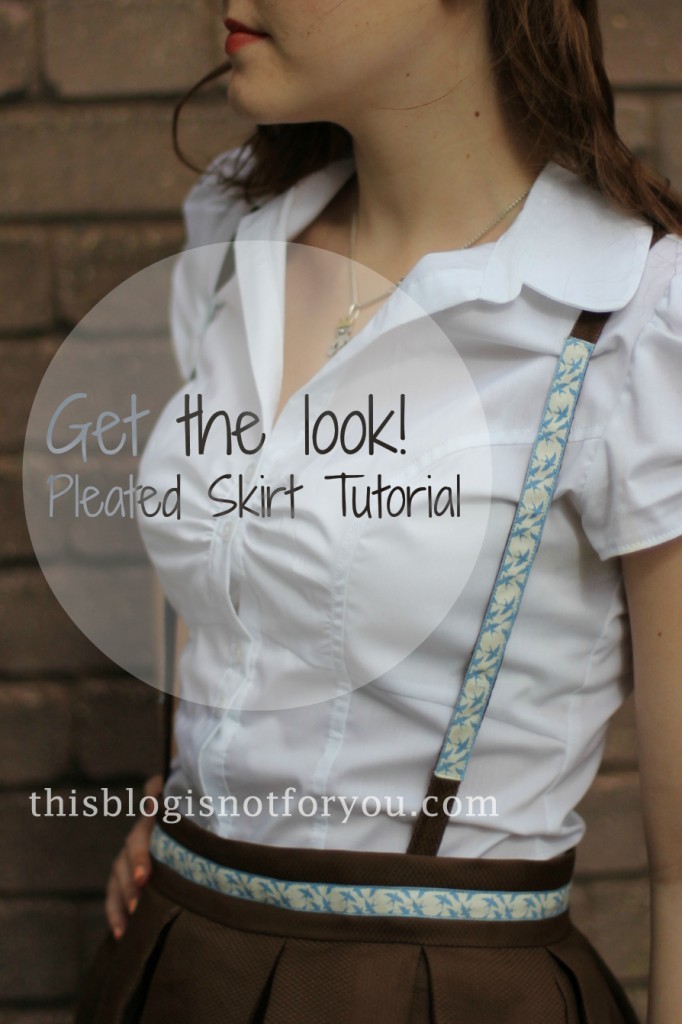
As promised, here’s the tutorial for the pleated skirt and suspenders I made on the weekend.

It’s a fairly easy sewing project and you won’t need any special skills to tackle it. The trickiest part is probably inserting the invisible zip, but this post also includes a tutorial on how to do it. So no worries, your skirt will turn out to be awesome! Let’s get cracking!

thisblogisnotforyou.com

You won’t need a pattern to make this skirt.
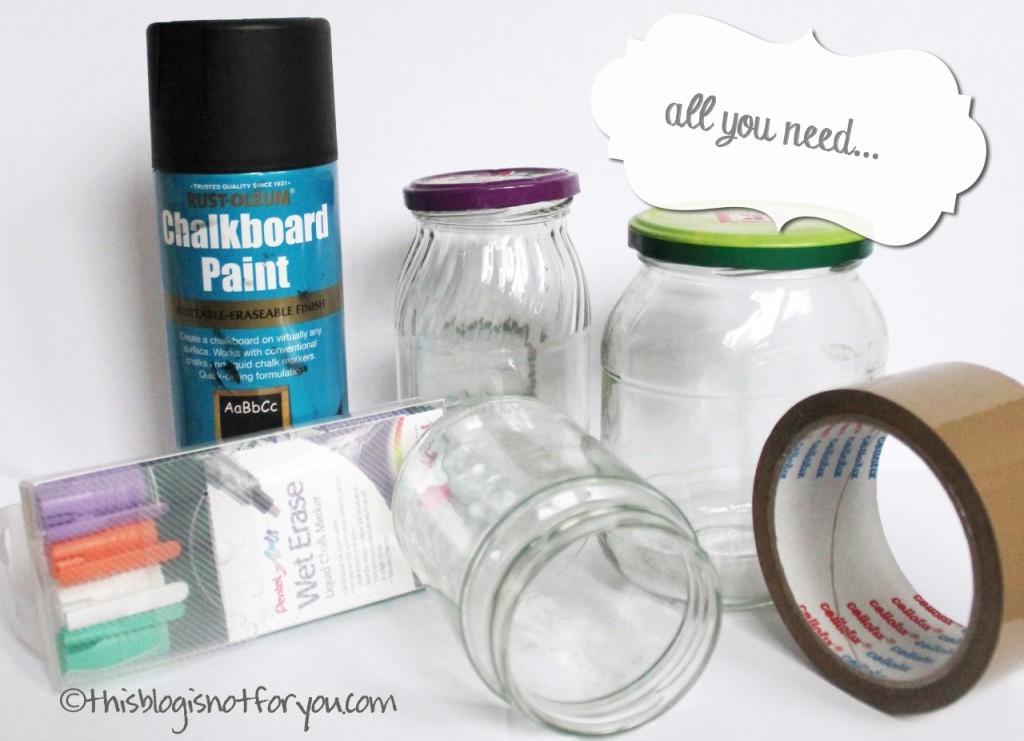
All you need:

– fabric (about 1m/40” wide and 1,5/60” long, depending on your waist measurements and the length of the skirt you prefer)

– invisible zip (ca. 25cm/10” long)

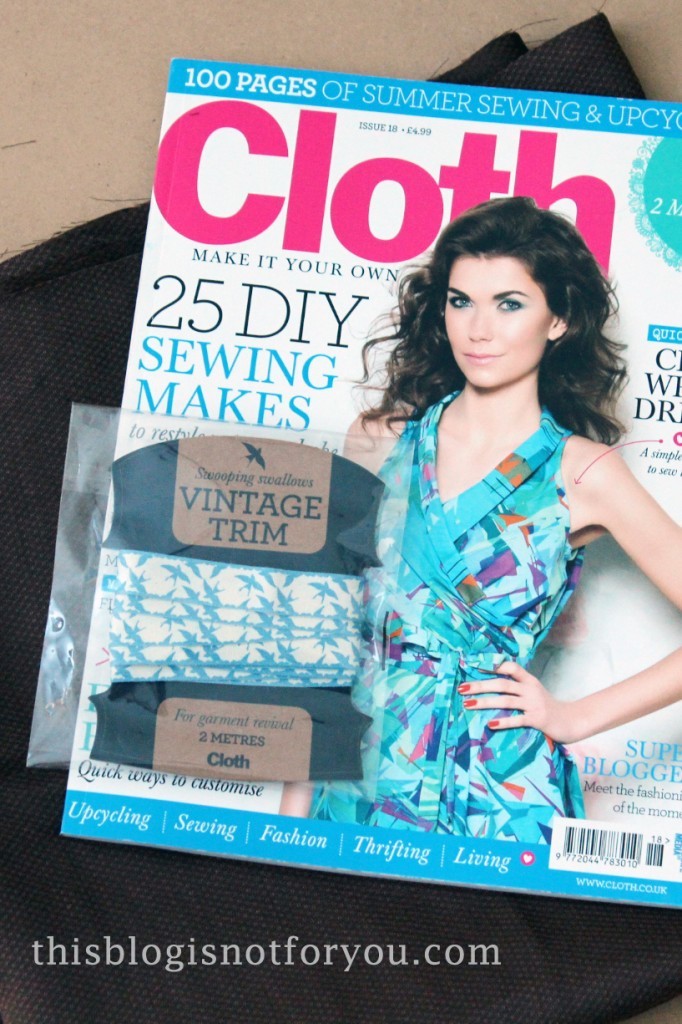
– trim (1,5-2m/60-80”)

– elastic band, 4 buttons

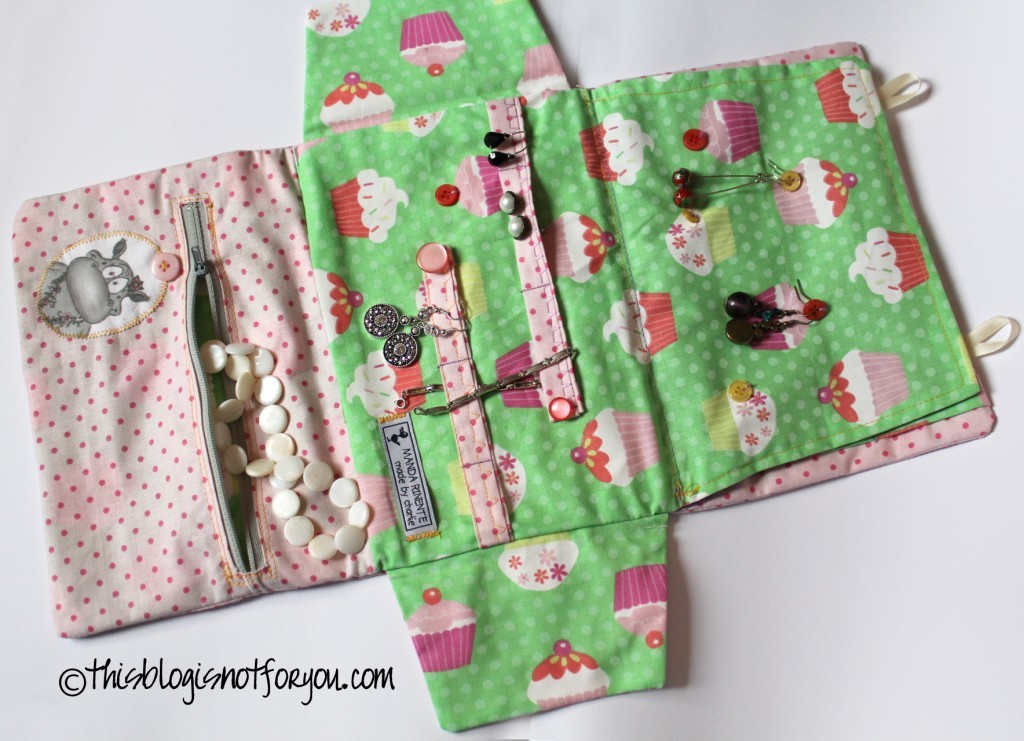
The trim I used is from the newest Cloth issue 18:

pleated skirt with suspenders and vintage trim tutorial by thisblogisnotforyou.com
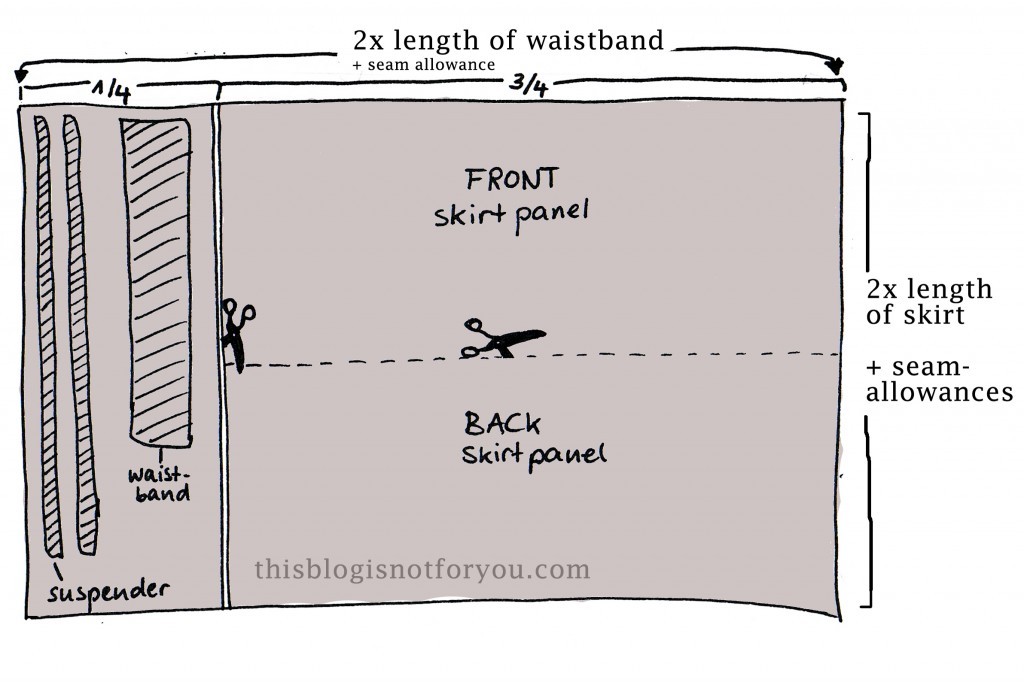
For the skirt you need fabric that is about two times as wide as the width of your waistband.
So first you need to decide how high you want your skirt to sit. Mine is a bit lower than my waistline. Measure the circumference of the part of your body where you want the skirt’s waistband to sit (and don’t forget to add about 2cm/1” of seam allowance on each side before cutting out!)

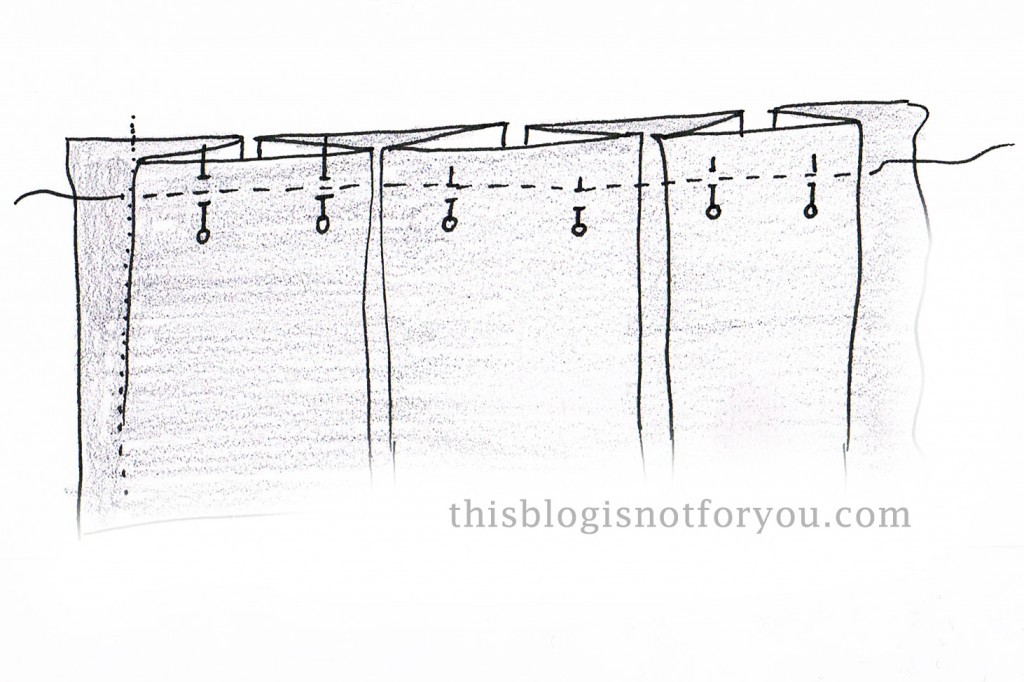
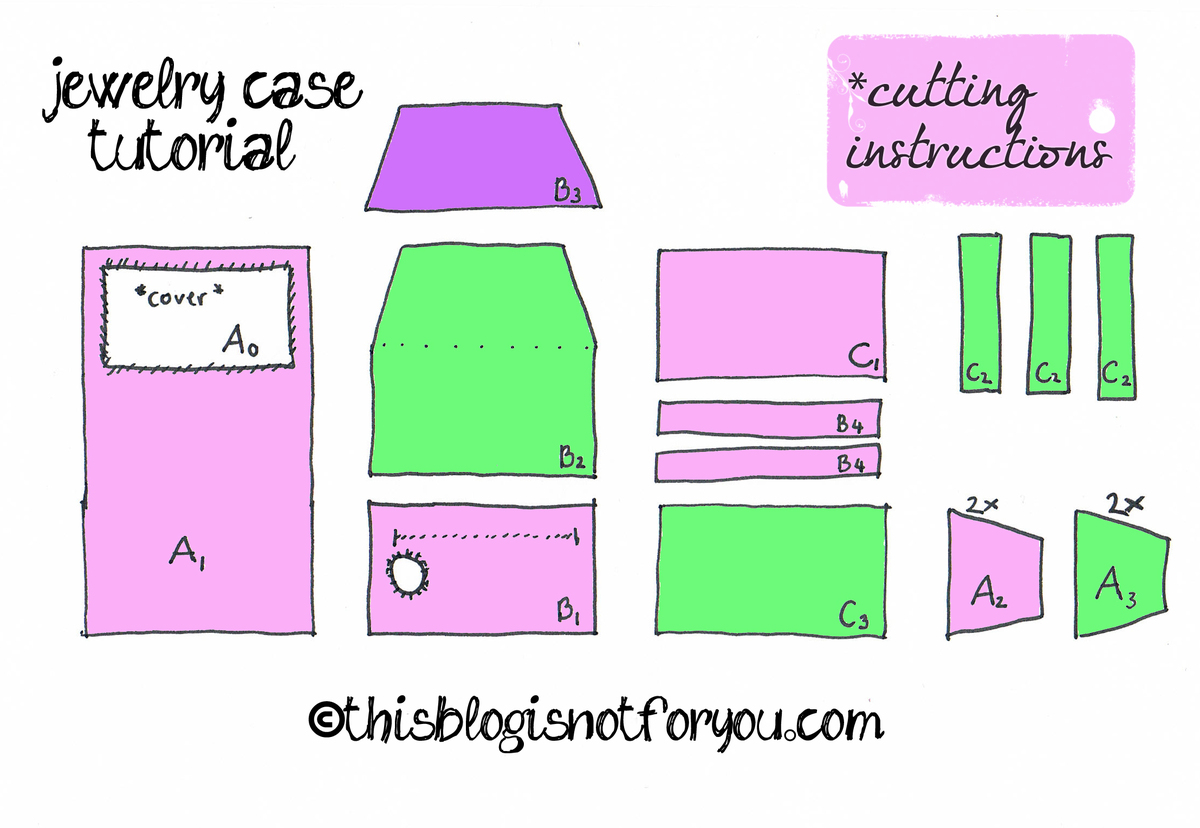
Use this as reference for the following calculations (the picture below also makes it much clearer):

– The length of the skirt panels is three times as wide as half the length of your waistband. For instance, the length of my waistband (excl. seam allowance) is 75cm. So each skirt panel will be gathered into half the length of the waistband, so 37.5cm.
Since we are making ‘box pleats’ we need three times as much fabric, so 37.5 x 3 = 112.5

If your fabric is wide enough, simply cut it in half two get your front and back panel. The top seam allowance of the skirt panels equals the width of the waistband (mine is 4cm).

To make the waistband and suspenders we don’t need a lot of fabric.
My waistband is 4cm wide. Since you need to fold it over later on, the overall width is 8cm plus seam allowance.
I made the suspenders rather narrow and used strips of each 4cm width (1,5cm wide + 0.5 cm seam allowance, so they are in the end of the same width as the trim).

fabric cutting plan for pleated skirt by thisblogisnotforyou.com

When you’re done with all the calculations and cutting, start sewing together one of the skirt panel’s side seams (we have to first insert the zipper, before we can do the same with the second side seam).

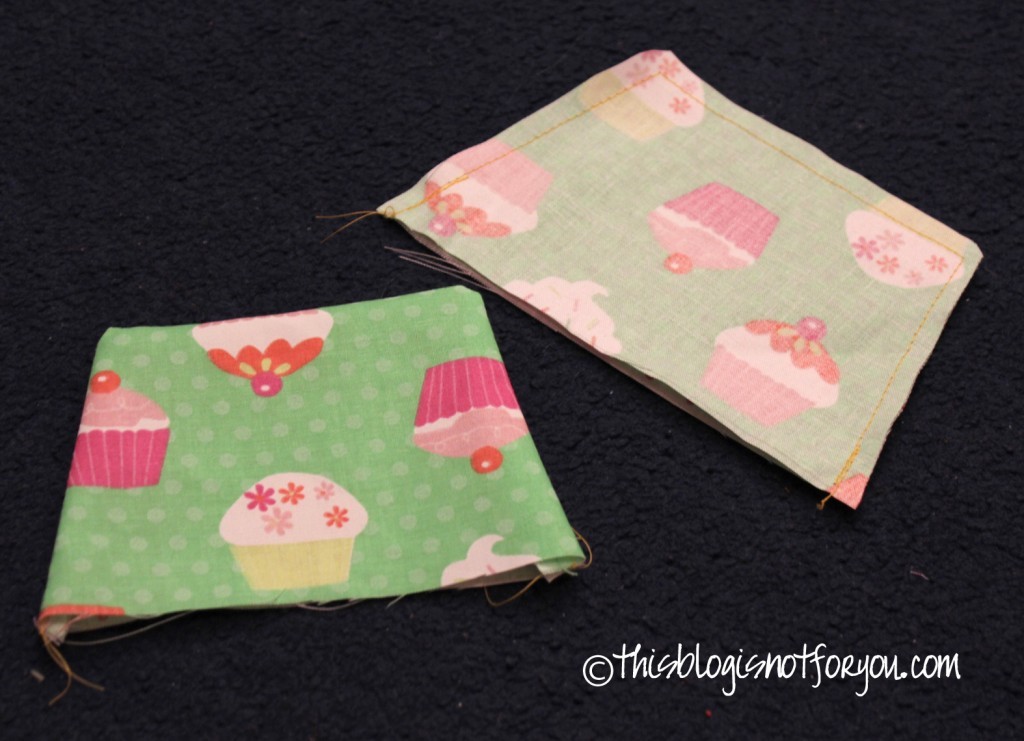
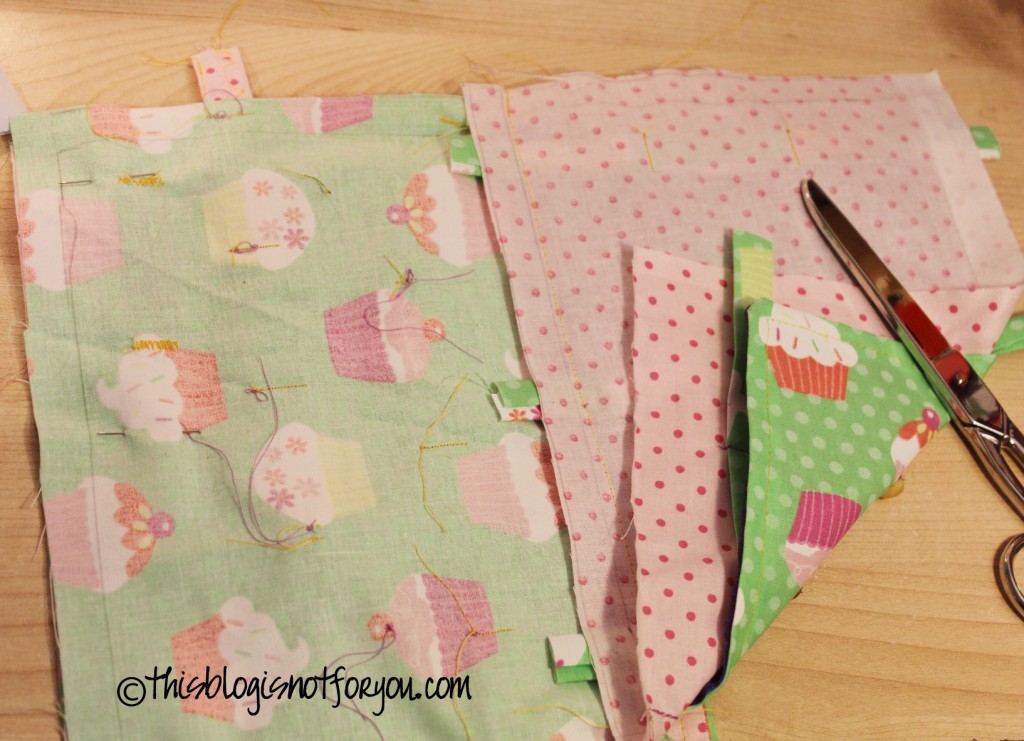
When you don’t have a serger, but want to have neatly finished seams, what you can do is use a french seam.french seams tutorial for pleated skirt by thisblogisnotforyou.com

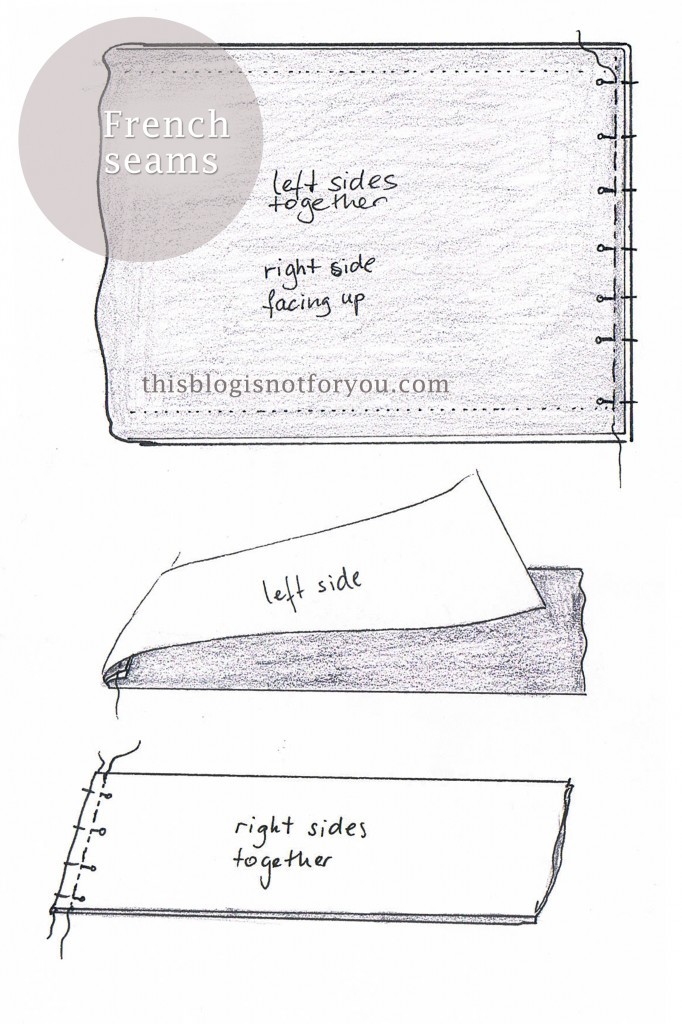
Place the skirt panels on top of each other, left sides together, to the right side are facing out. (If you’re a sewing novice: the right side will be the side of the fabric that will be on the outside later on).

Sew them together using a very narrow seam allowance (half of what you normally use). I used 5mm.

Then fold them over, so that the right side are together and the left side are facing out.  The raw edge is now between the two layers of fabric. Press the seam. Now sew another stitch to the left of the raw edge (which is now hidden between the two layers).

tutorial for pleated vintage skirt by thisblogisnotforyou.com
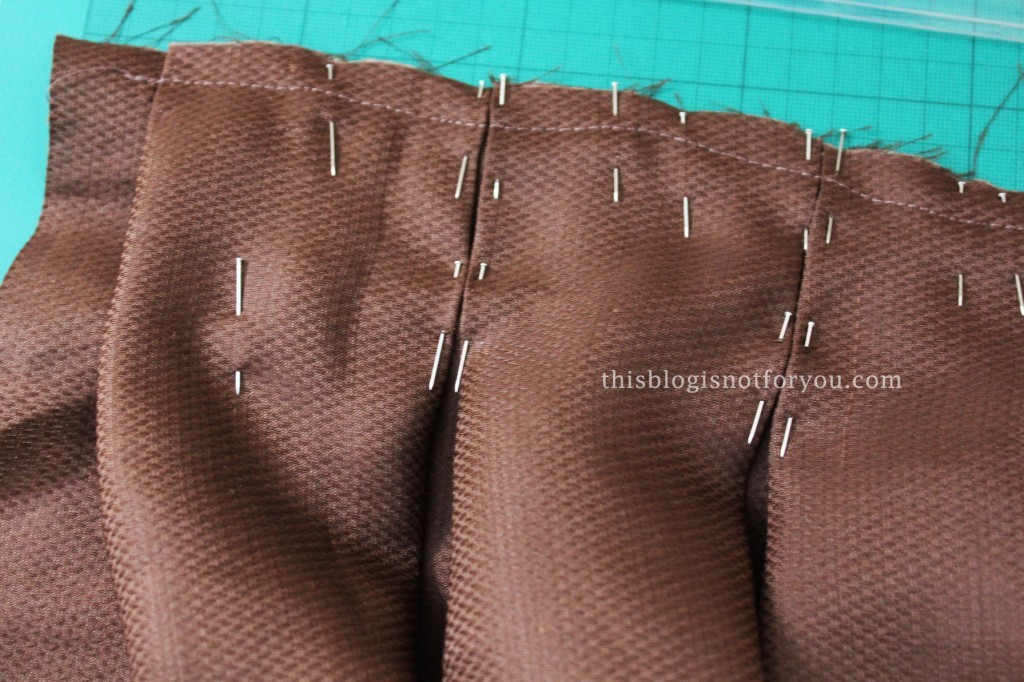
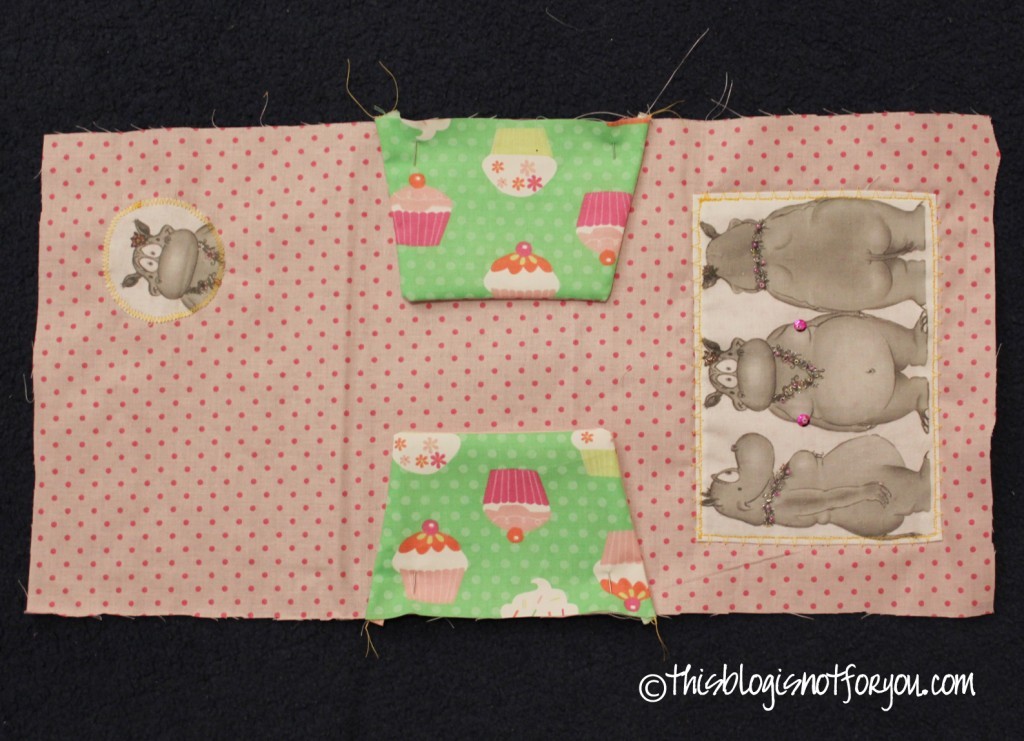
Now you gather the skirt panel by neatly folding them into even box pleats.
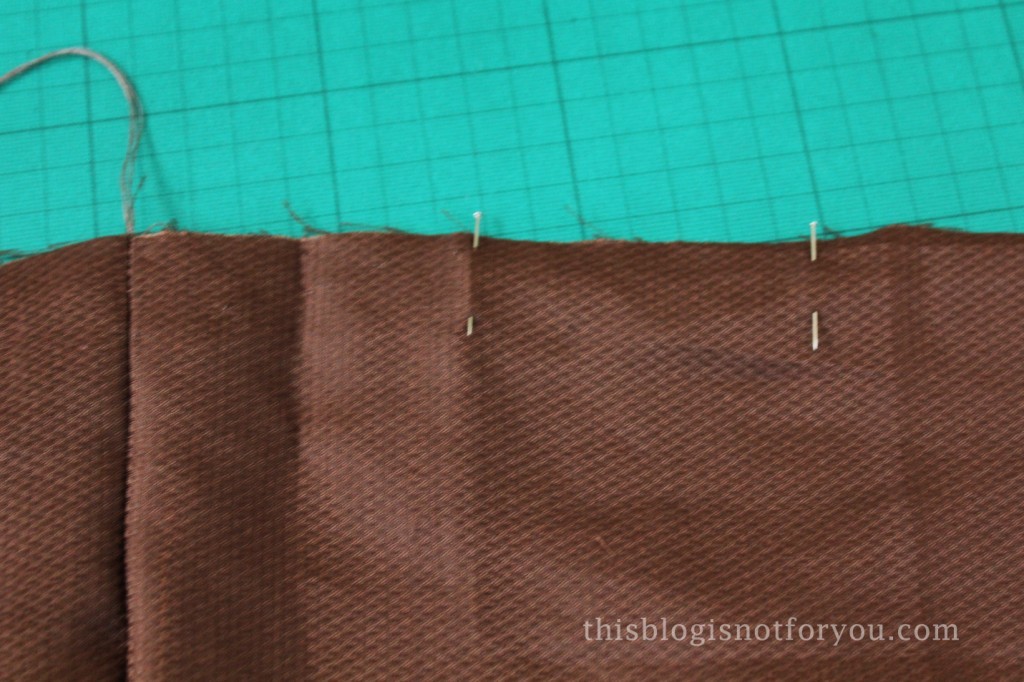
You first have to determine the width of each pleat. I wanted to have 5 in the front and 5 in the back, so to match my waistband (2x 37.5cm) each pleat has to be 7.5cm wide.

The fabric that is folded back is twice as much, 15cm. Measure and the mark the folds of the pleat with pins.

Here’s how the box pleats are folded.
tutorial for pleated vintage skirt by thisblogisnotforyou.com

tutorial for pleated vintage skirt by thisblogisnotforyou.com

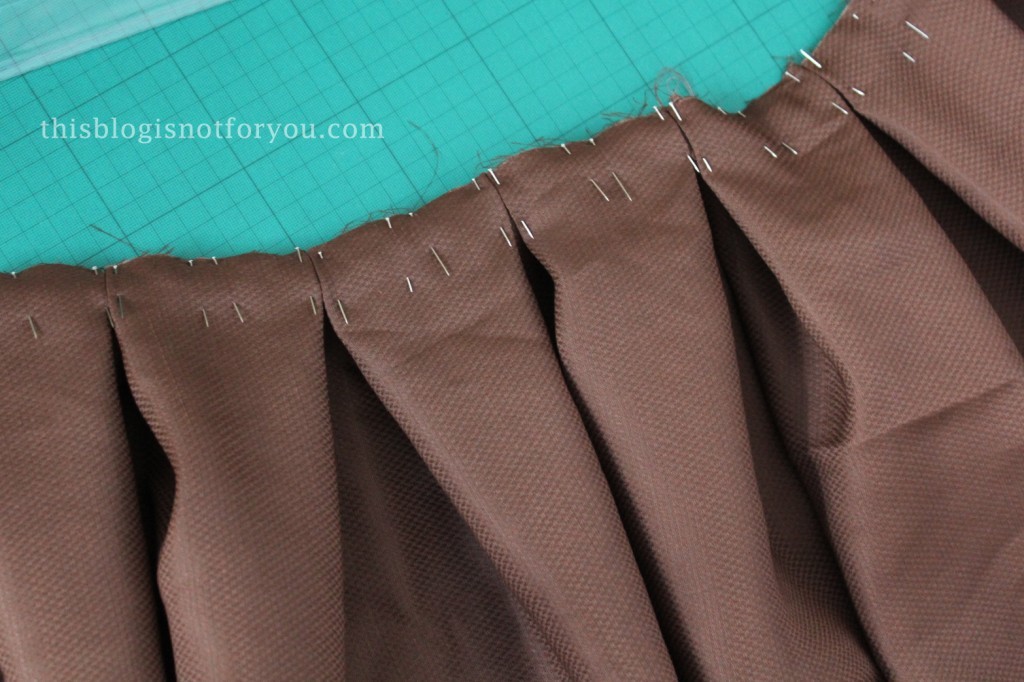
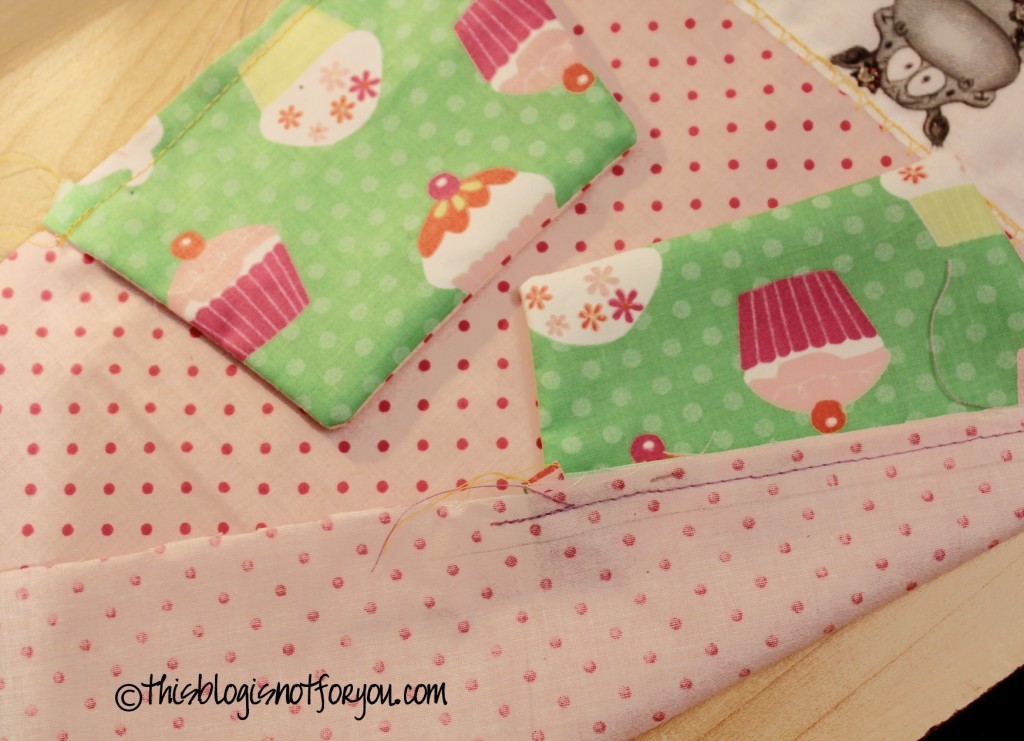
I used quite a lot of pins 🙂 But it’s important that the pleats stay in place to get a neat result in the end.

Now stitch the pleats in place. Normally, you really shouldn’t sew over pins, be careful not to damage your machine’s needle. If you don’t want to stitch over the pins, add a second row of pins to secure the pleats (you will need it anyway later on!).
tutorial for pleated vintage skirt by thisblogisnotforyou.comtutorial for pleated vintage skirt by thisblogisnotforyou.com

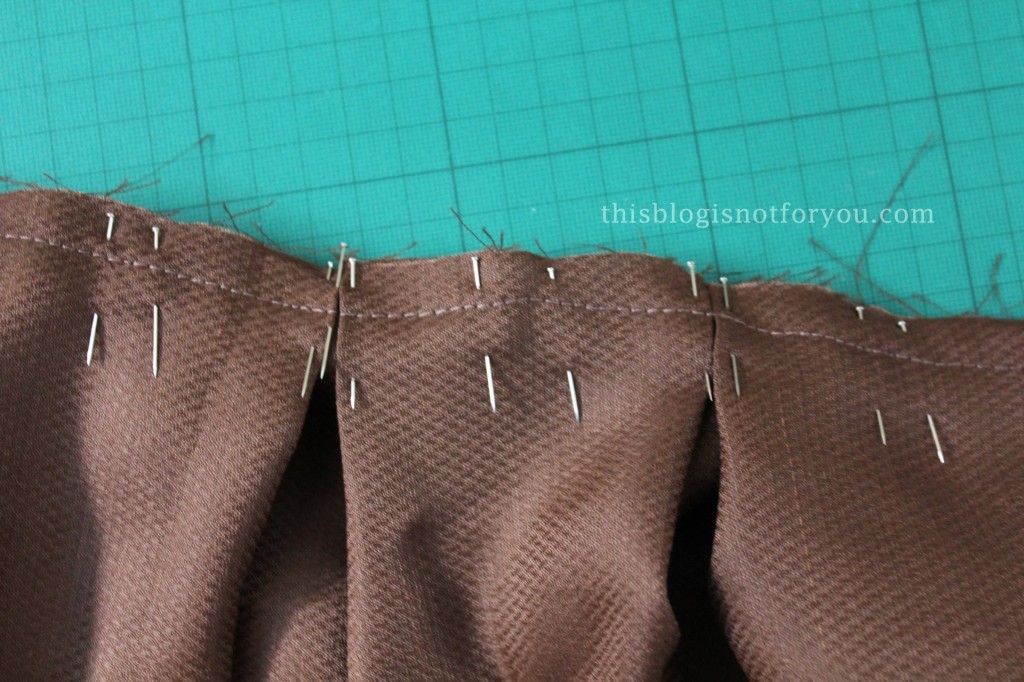
When you’ve stitched the first seam and added the second row of pins, you sew on the waistband.
The second row of pins is important to keep the pleats in place, since the seam of the waistband will be below the seam you just stitched. You could also just press the pleats in place, if you prefer doing that (my fabric was hard to press properly, so I just stuck with the pins).
tutorial for pleated vintage skirt by thisblogisnotforyou.com

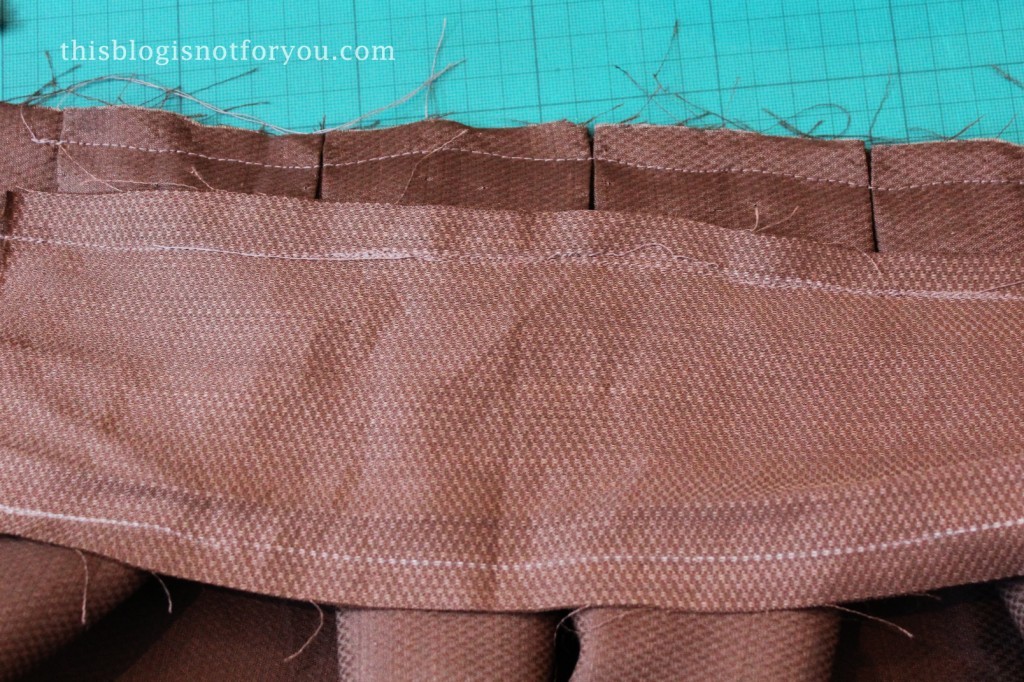
Place the waistband on the gathered skirt panel, right sides together. The seam you stitch  has to be as far away from the raw edge as the waistband is wide (4cm in my case. I added 1cm of seam allowance, so the distance between the raw edges is 3cm).tutorial for pleated vintage skirt by thisblogisnotforyou.com

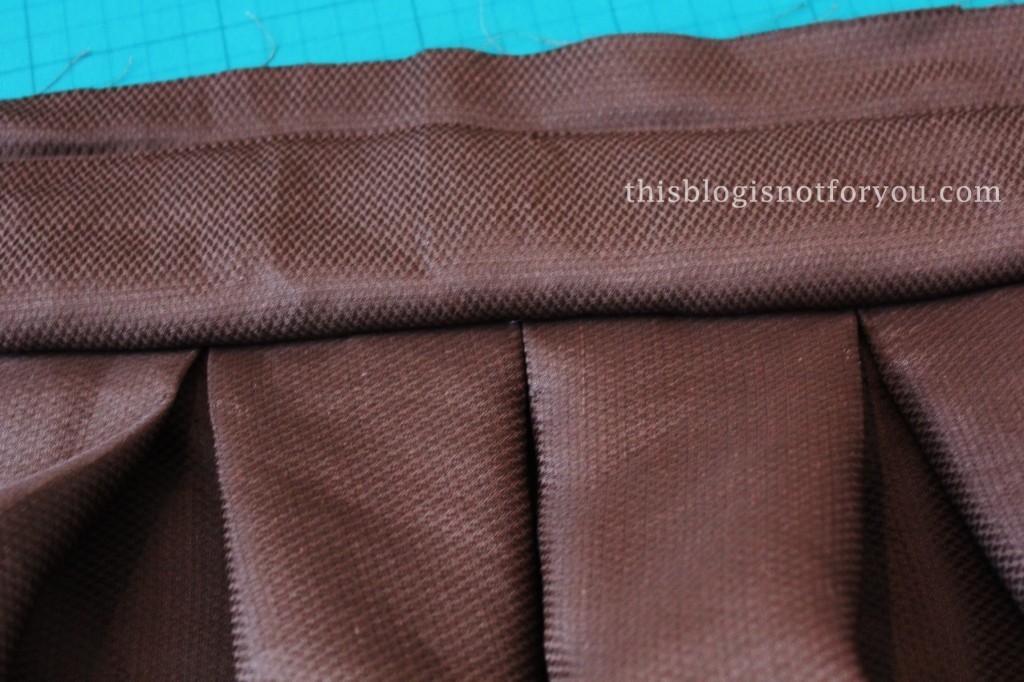
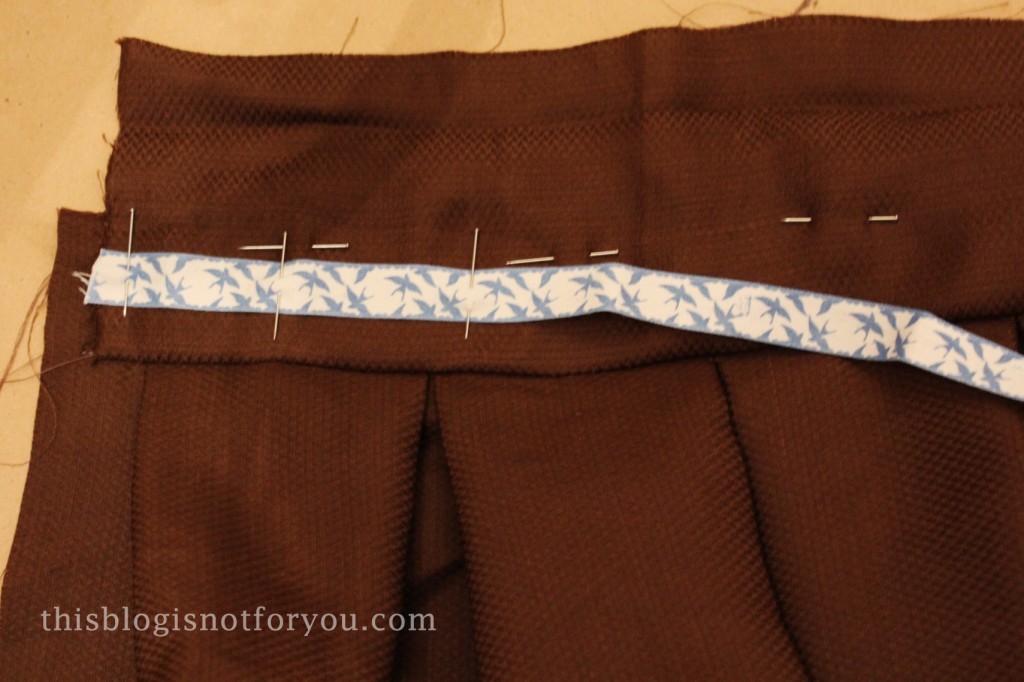
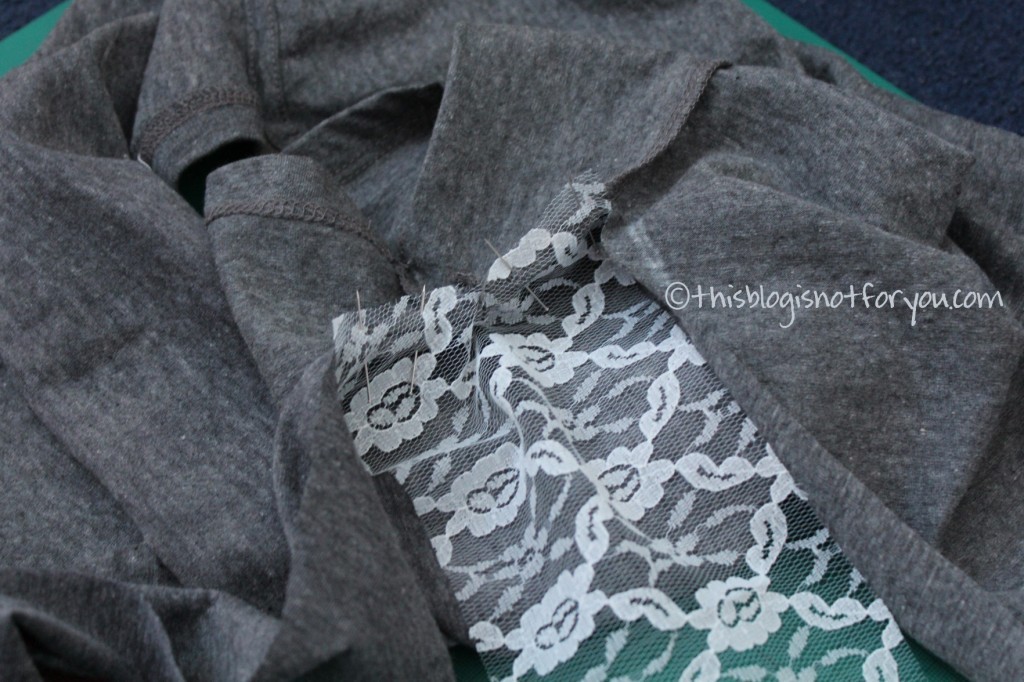
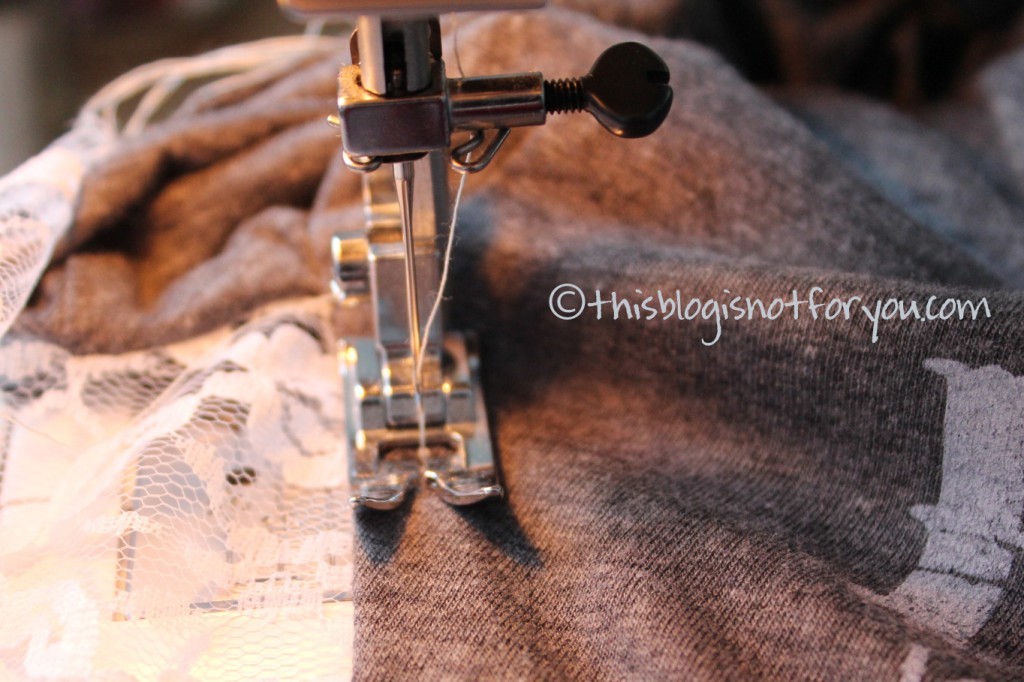
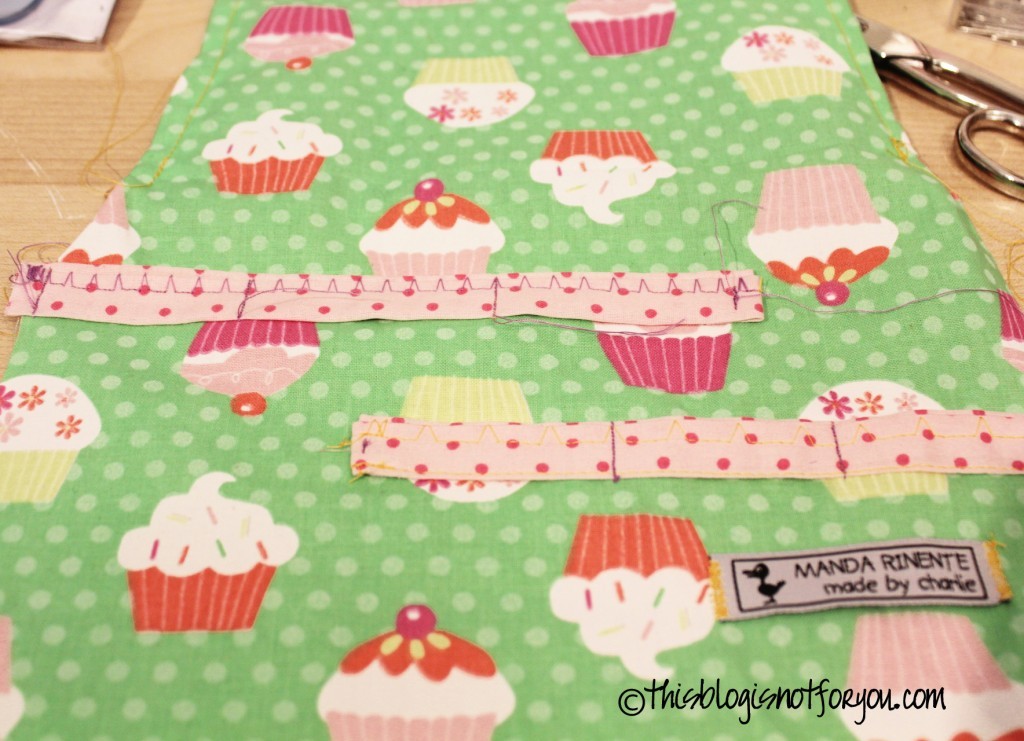
Fold open and press. Then place the trim in the middle and topstitch onto the waistband.
tutorial for pleated vintage skirt by thisblogisnotforyou.com

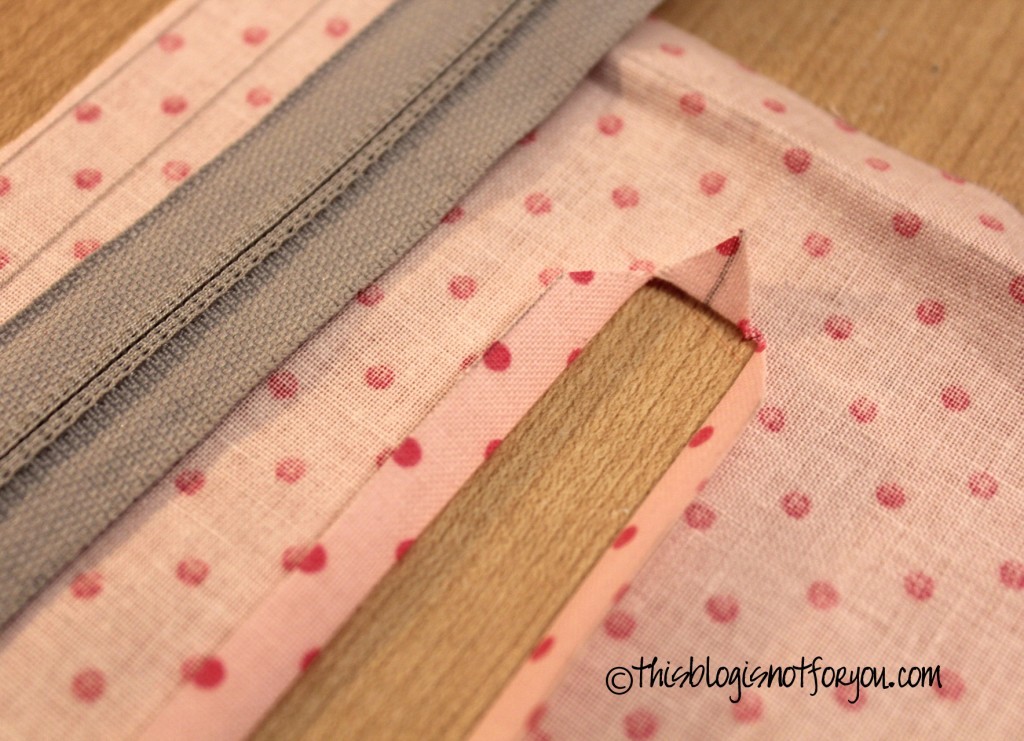
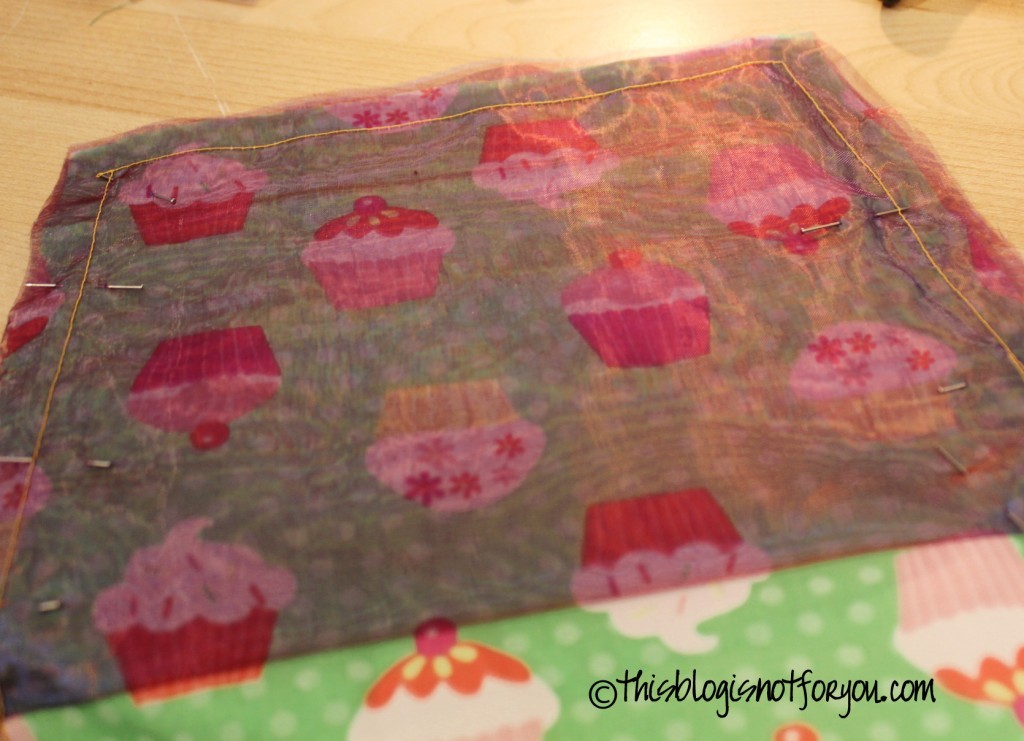
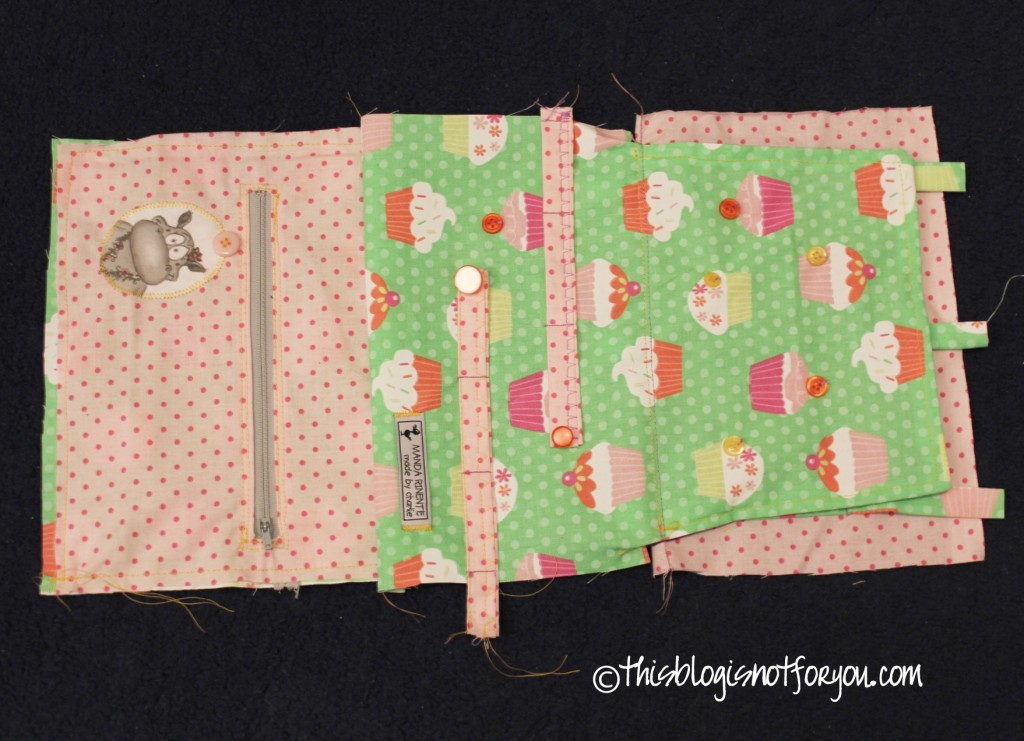
Now the invisible zip:invisible zipper tutorial for pleated skirt by thisblogisnotforyou.com

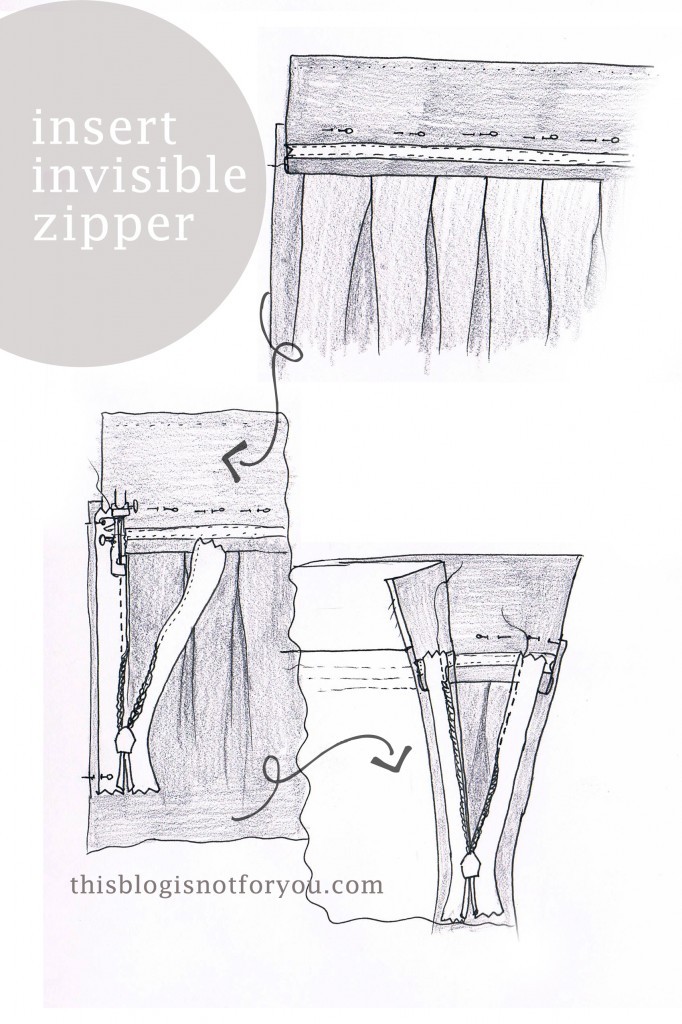
Make sure you close the zipper before pinning and stitching the other half. The seams of the waistband and the edges of the trim have to be in line with each other

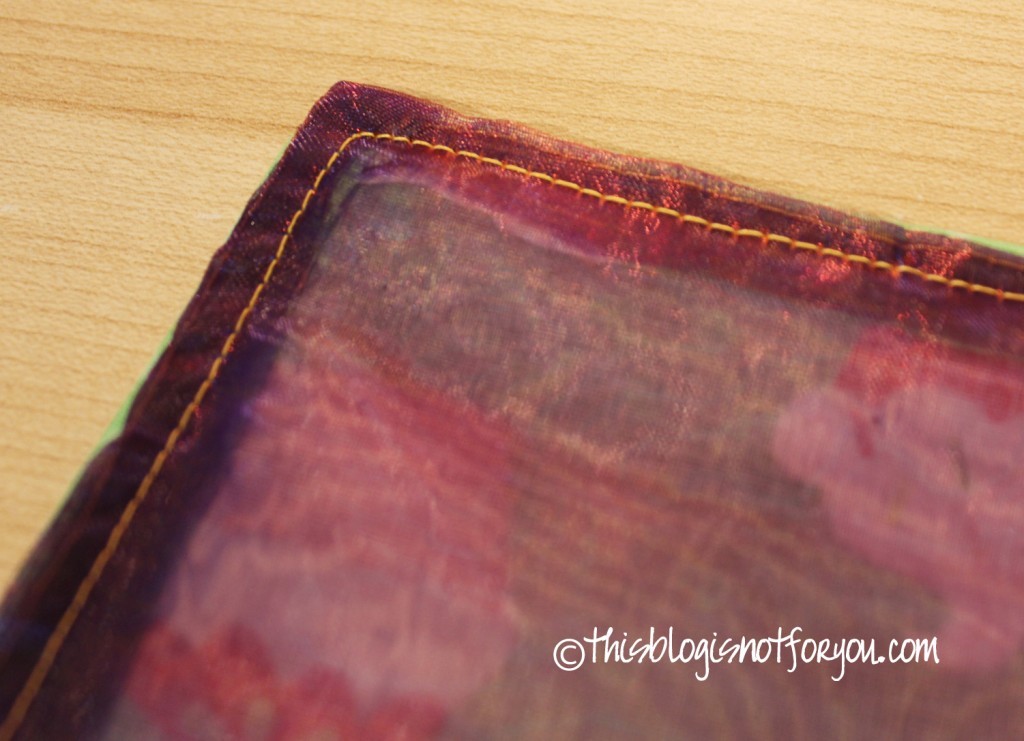
When you’re done, fold and press the upper seam allowance of the waistband. Fold over and handstitch to the zipper and the back of the skirt.

invisible zipper tutorial for pleated skirt by thisblogisnotforyou.com

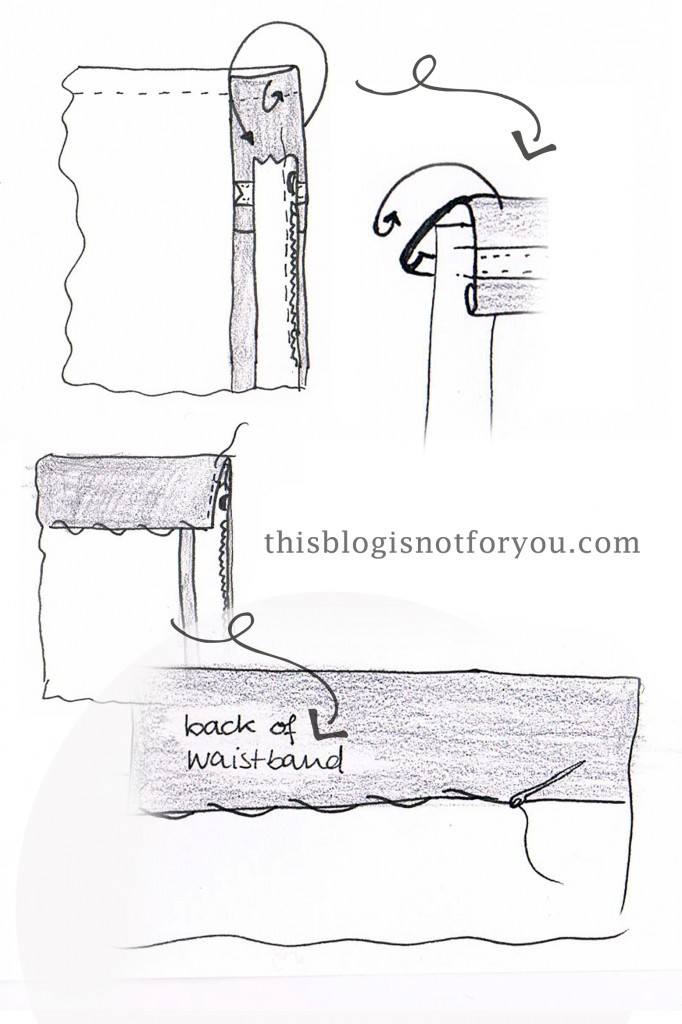
Also, sew the second side seam below the zipper.

Hem your skirt.tutorial for pleated vintage skirt by thisblogisnotforyou.com

Here you can also see the french seam. It’s quite a nice finish and the raw edge is neatly hidden.tutorial for pleated vintage skirt by thisblogisnotforyou.com

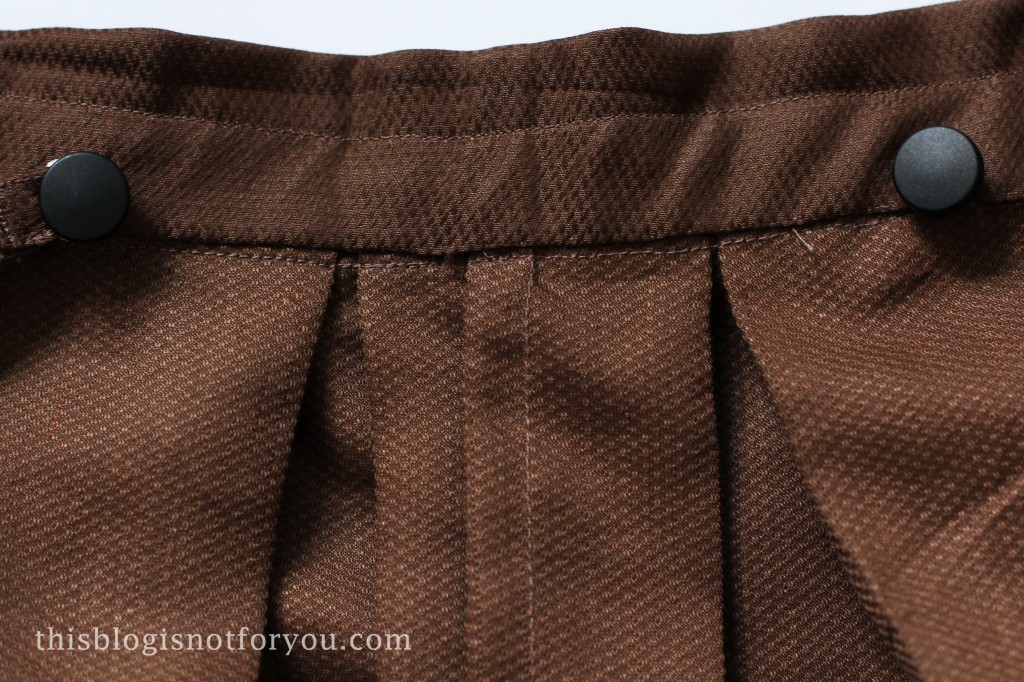
Now it’s time for the suspenders (or braces, for all the London gals 🙂 ).

Try on your skirt and measure the legth of the suspender straps by using your measuring tape. Mine are crossing at the back, keep that in mind while measuring. Add 4cm/2” of seam allowance on both ends.

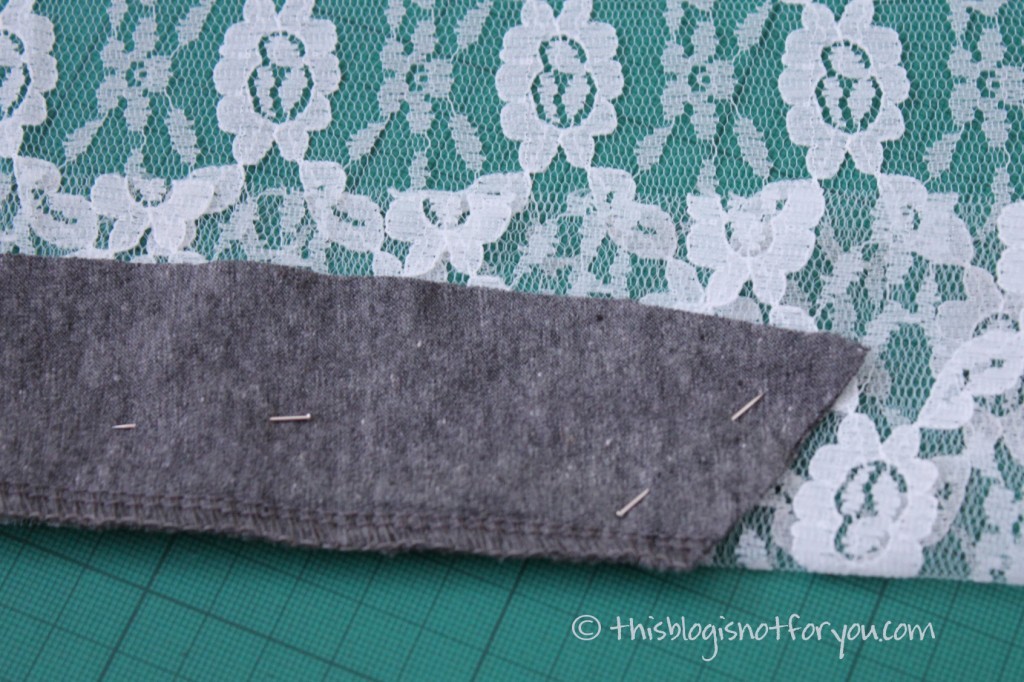
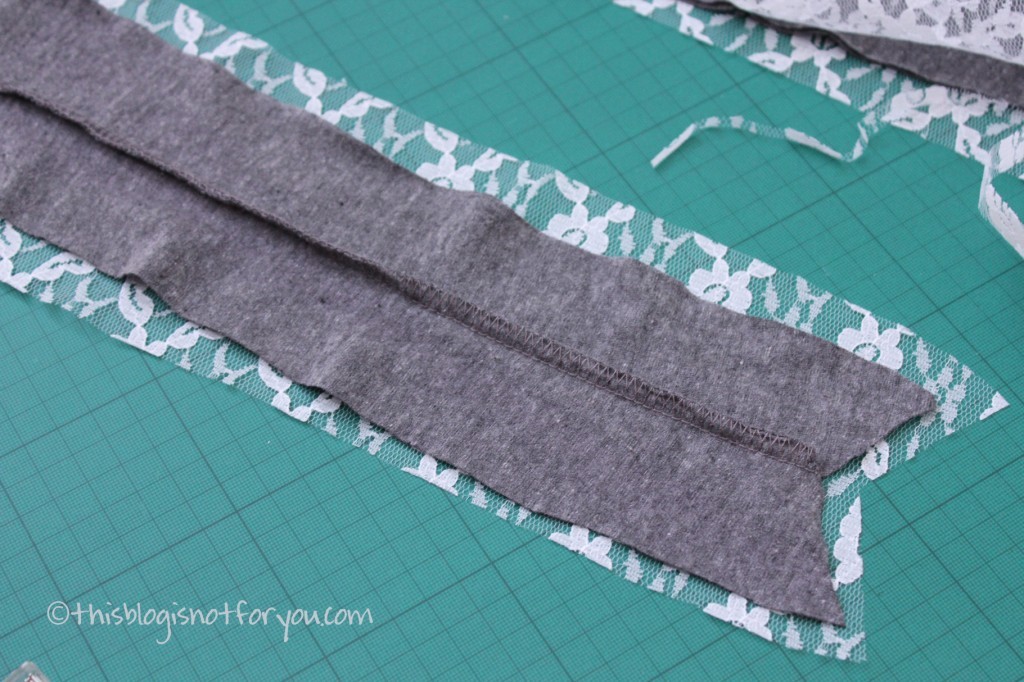
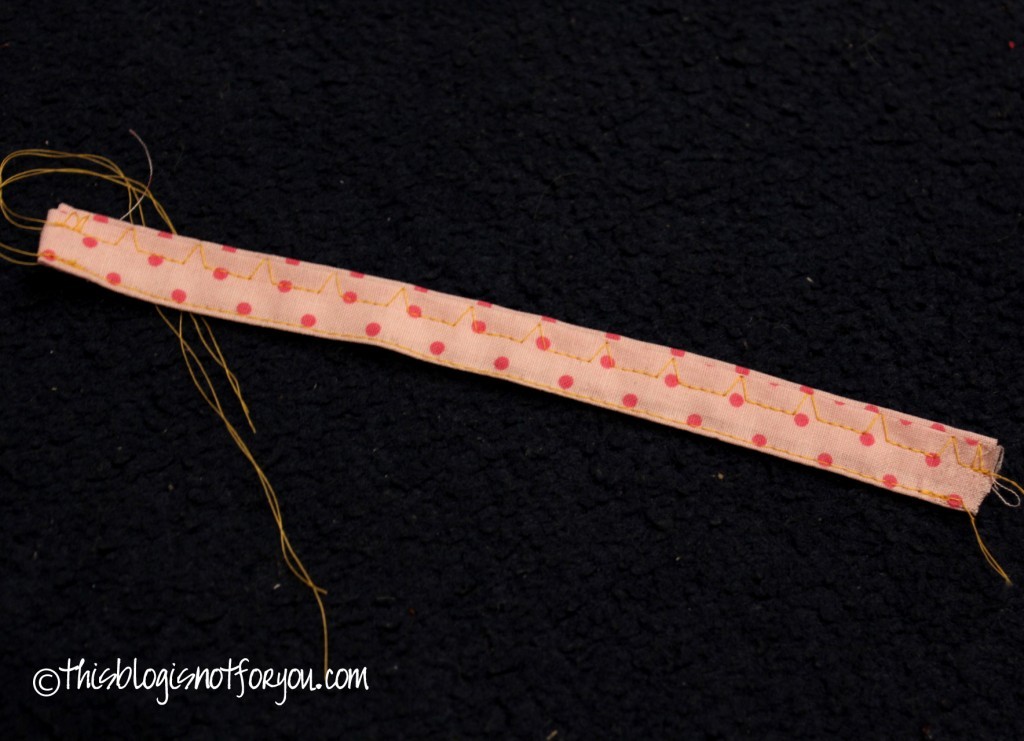
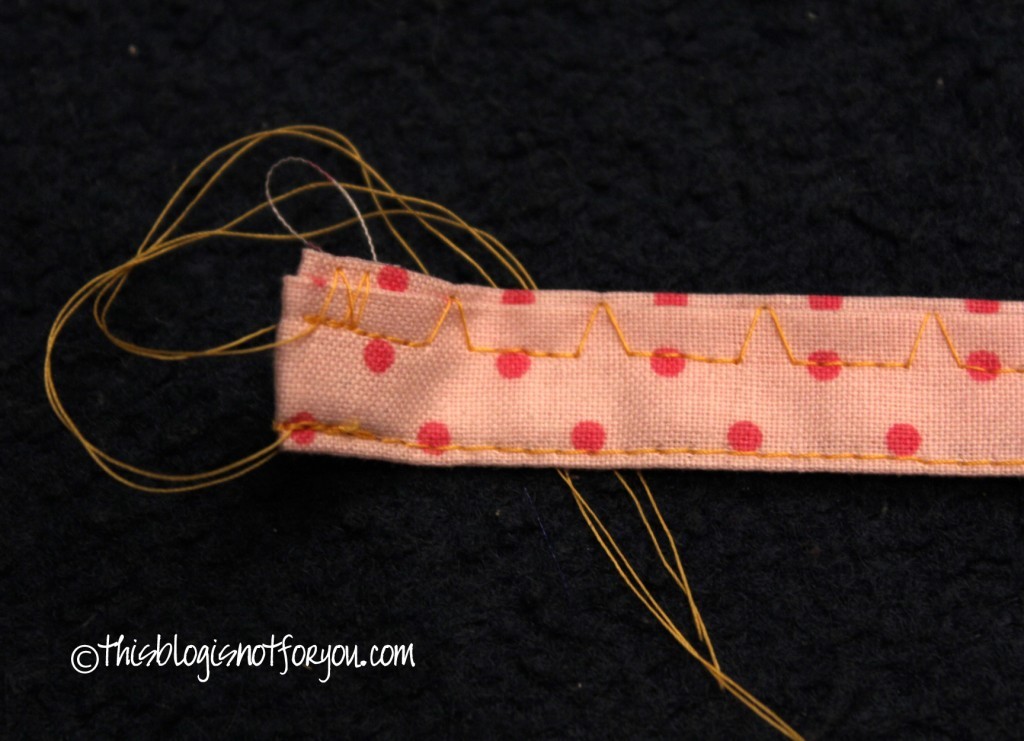
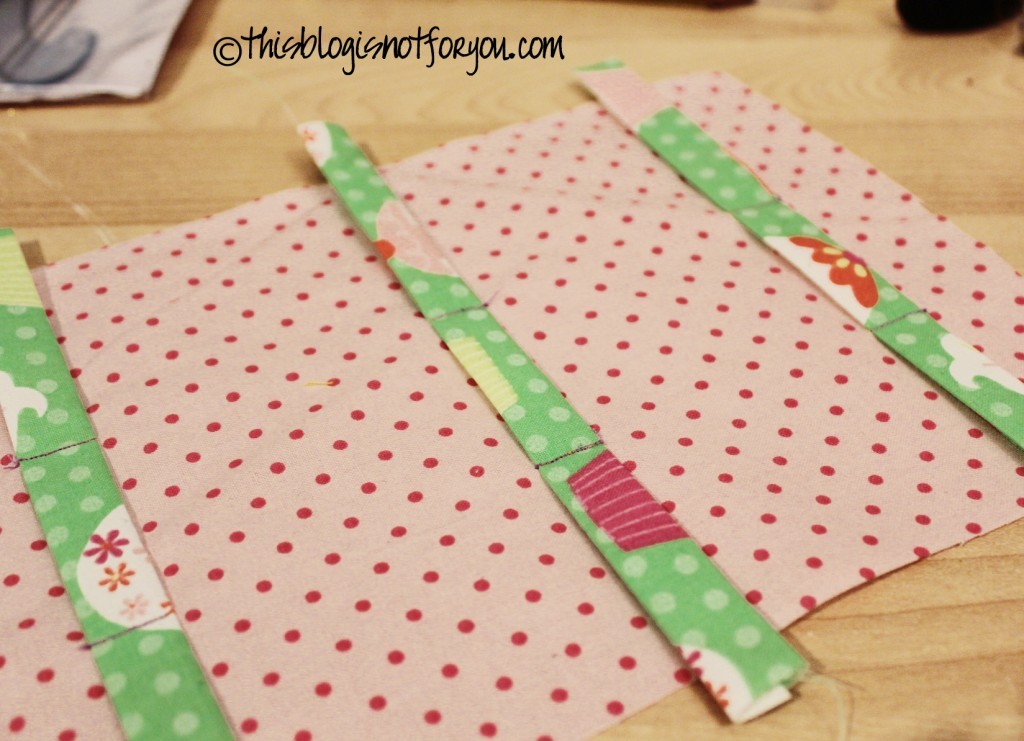
Mine are 1.5cm wide (as the trim). Using 0.5cm seam allowance I cut out strips of 4cm width. Fold the strips in half, right sides together. Stitch.

Use a safety pin so turn the tubes you now have inside out. Press.

Add the trim and topstitch.

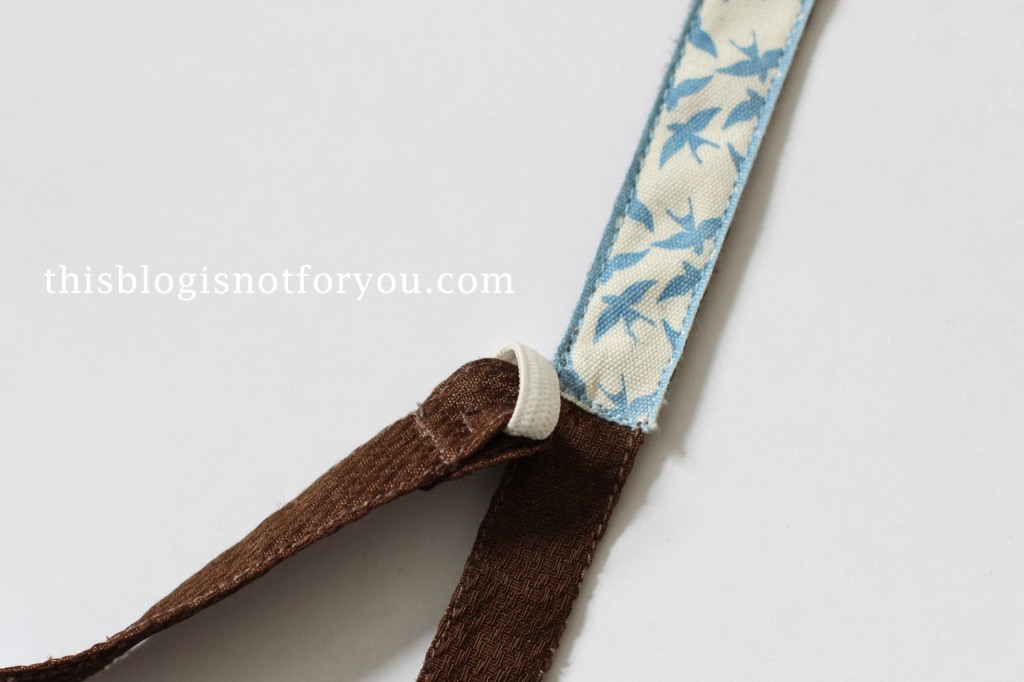
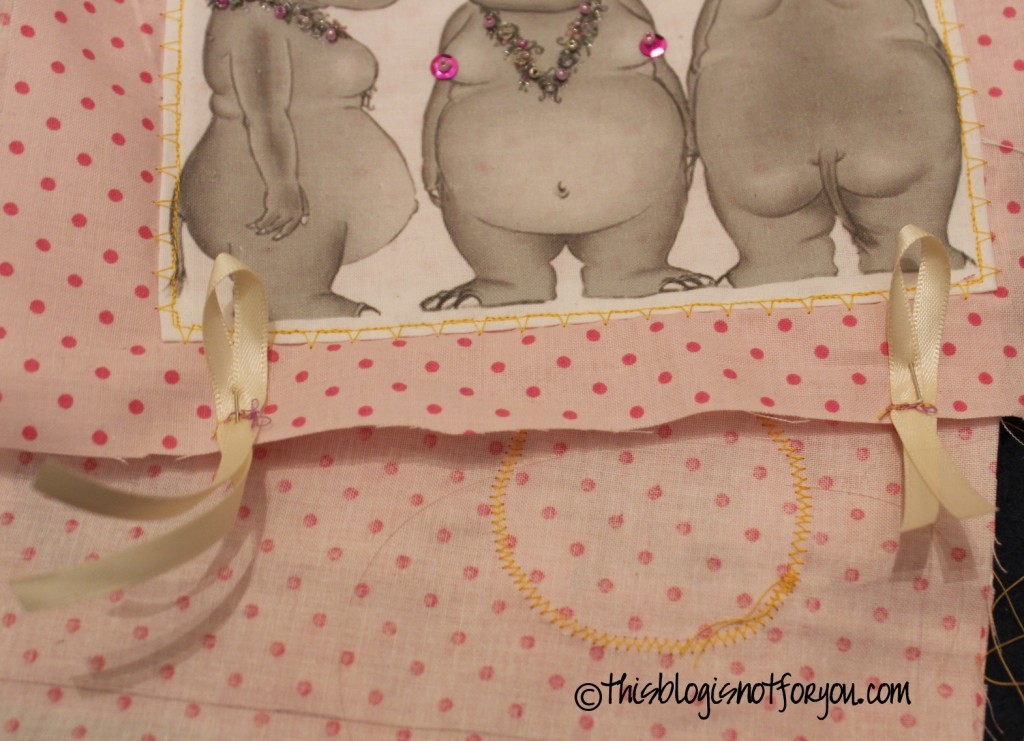
Sew the elastic band into four small loops (matching the size of your buttons).

Pull the end of the strap through the loop and fold over. Hide the ends of the elastic band in the fold and stitch together. Do that on all four ends.

tutorial for pleated vintage skirt by thisblogisnotforyou.comWith your skirt on, mark the position of the suspenders and sew on the buttons.tutorial for pleated vintage skirt by thisblogisnotforyou.com

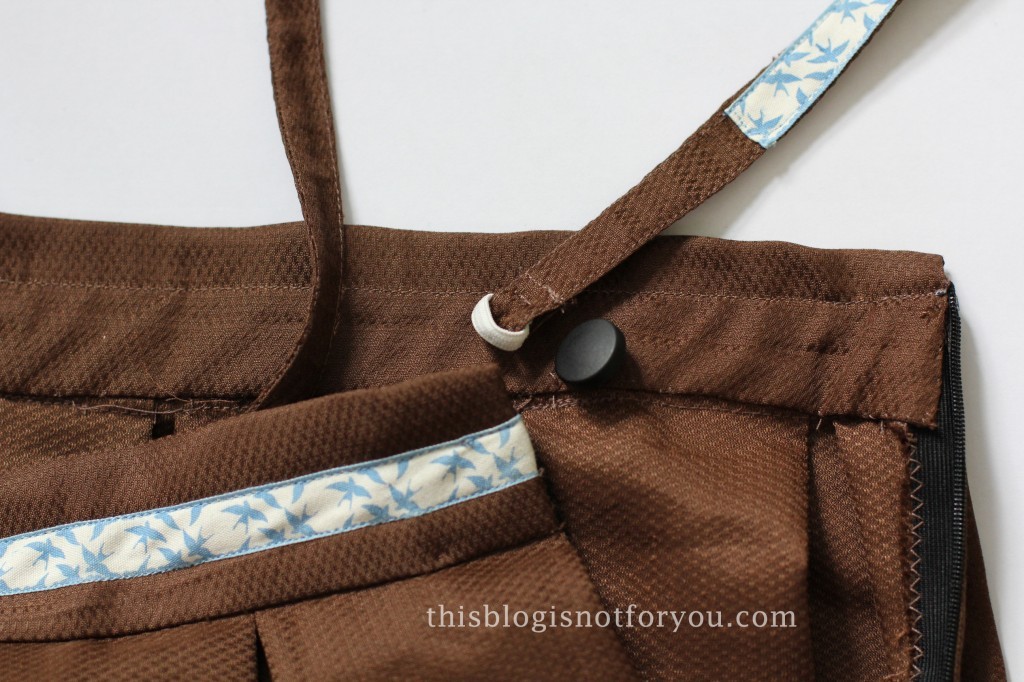
Press your skirt’s hem. I pressed the pleats only half way down to add a little fullness to the skirt.

Et voilá! You’re done! pleated skirt with suspenders by thisblogisnotforyou5

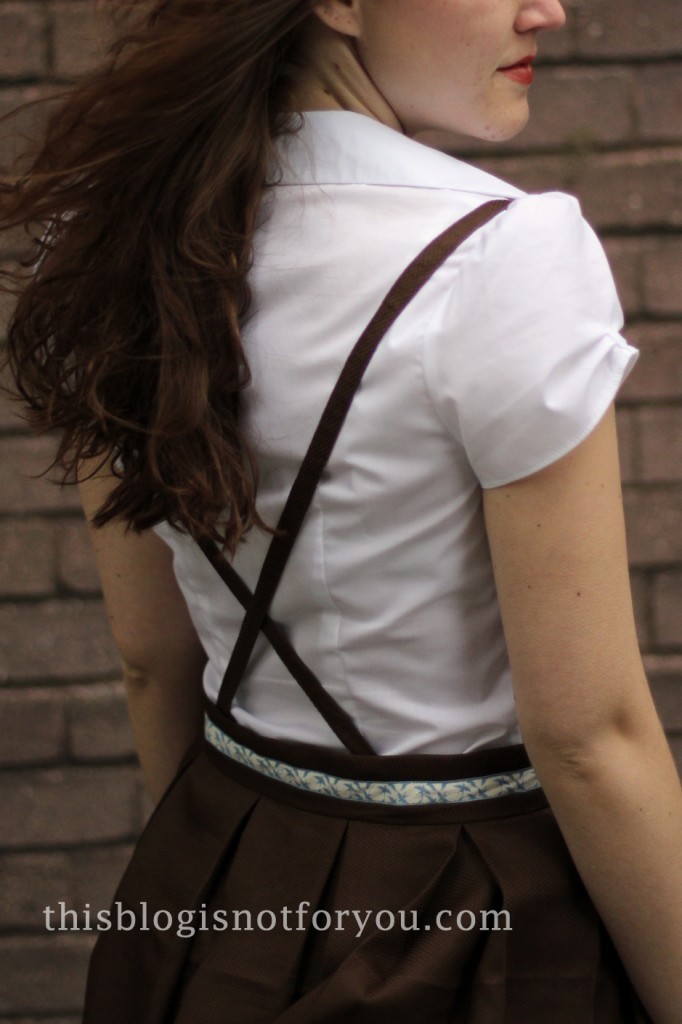
I’d LOVE to see what your skirt looks like! Just send me a picture: hello(at)thisblogisnotforyou(dot)com or upload them on the facebook page!

If you have any questions regarding this tutorial, feel free to ask! x

PS: After writing this post, I noticed that this skirt looks a lot like the Chihiro skirt – so in case you’re into Super High School Level Cosplay and want to dress up as Chihiro Fujisaki feel free to make and wear this skirt! x

Refashion It! Tshirt Refashion with Lace

tshirt refashion with lace insert by thisblogisnotforyou.com

Yes – I’m still there! In case you’ve wondered whether I’ve got the blogging blues – nope, I don’t. I’d love to blog more at the moment, but unfortunately I can’t. Life’s quite stressful at the moment and I’m basically studying for finals and writing on my dissertation non-stop.

Nevertheless, I try to sew a seam here and there whenever I’ve earned me some sewing time after days of studying. Not enough though for finishing the next dress for my 27 Dresses Challenge. The fabric is all cut out and waiting for me to return to my sewing machine in a few weeks time.

In the meantime I’ve done a quick and simple tshirt refashion with a shirt the boyfriend just brought me from a recent trip to Warsaw (yes, he did know before buying it that the first thing I’d do is cut it apart!)

Due to the lack of writing time at the moment – let the pictures speak for themselves:

tshirt refashion with lace insert by thisblogisnotforyou.comtshirt refashion with lace insert by thisblogisnotforyou.comtshirt refashion with lace insert by thisblogisnotforyou.com

Don’t forget to think of the seam allowance before cutting of the sides. Add seam allowance to the lace part as well.

tshirt refashion with lace insert by thisblogisnotforyou.com

tshirt refashion with lace insert by thisblogisnotforyou.comtshirt refashion with lace insert by thisblogisnotforyou.com

Start setting in the lace at the sleeves. Use a straight stretch stitch.tshirt refashion with lace insert by thisblogisnotforyou.com

Topstitch approximately 0.5cm next to the seam to secure your seam allowance in place and prevent it from being seen through the lace. When topstitching, don’t backstitch. Instead, use a needle to pull the top thread through the fabric, then fasten with knots.tshirt refashion with lace insert by thisblogisnotforyou.com

Done! :)tshirt refashion with lace insert by thisblogisnotforyou.comtshirt refashion with lace insert by thisblogisnotforyou.com

I think it really makes this shirt looking a bit more femine. Can’t wait for some hot summer days!


What do you think?

Have you refashioned anything lately?

 facebook/bloglovin/pinterest
Stay in touch!

How to draft your own asymmetrical hem dress pattern

how to make an asymmetrical hem dress by thisblogisnotforyou.com

We all love pattern hacks, don’t we? I really do like patterns, especially the Burdastyle ones, and there are so many that I’ll never be able to sew them all. Nevertheless, sometimes you just want to add your own personal touch. And when you have a certain design in mind, but you just can’t find that particular pattern you’re looking for anywhere, you probably have to.

Summer is (hopefully) coming soon and last year’s asymmetrical hem maxi dresses are in stores again (I like!). I actually didn’t buy any last summer, but I’m totally planning on sewing loads this spring. A lot of the patterns I have are from last year and older and Burdastyle didn’t have too many good asymmetrical hem dresses so far.

That’s where the pattern hack comes in handy. You can just pick whatever dress pattern you like and change the dress skirt pattern into an asymmetrical one. You can also start drafting one from scratch and combining it with your favorite bodice pattern.

A lot of people are afraid of drafting patterns. Yes, it’s complicated. Yes, you need to learn a lot of technique before you’re getting good at it and yes, it’s not too much fun in the beginning. But seriously, no one expects you to become a Lagerfeld, Marc Jacobs or Michael Kors overnight.

I found that it’s less frightening and really fun to start with trying out minor pattern hacks, changing patterns you’re already familiar with. As you’ve seen with my waterfall dress, I just used a simple Burdastyle pattern and changed it a bit.

As promised, I’m going to show you how I did it. Furthermore, I’ll show you what other changes are possible to get slightly different looks – there are so many different asymmetrical hem dresses!

THE FIRST LOOK: oval shaped with a straight hem in the back

How to draft your own asymmetrical hem dress pattern by thisblogisnotforyou.com
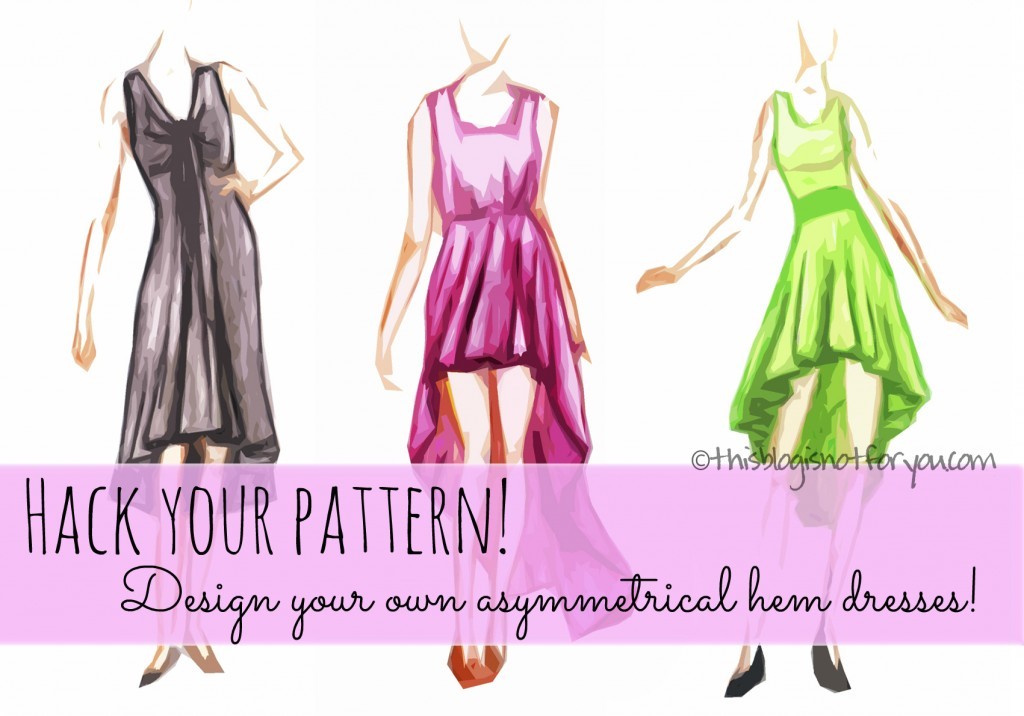
This is a draft of an asymmetrical hem that just about the same as the one of my waterfall dress. As shown in the picture below, the hem is straight in the centre front, sloped down at the sides and is quite straight (although not a 100%)  again in the back.

How to draft your own asymmetrical hem dress pattern by thisblogisnotforyou.com
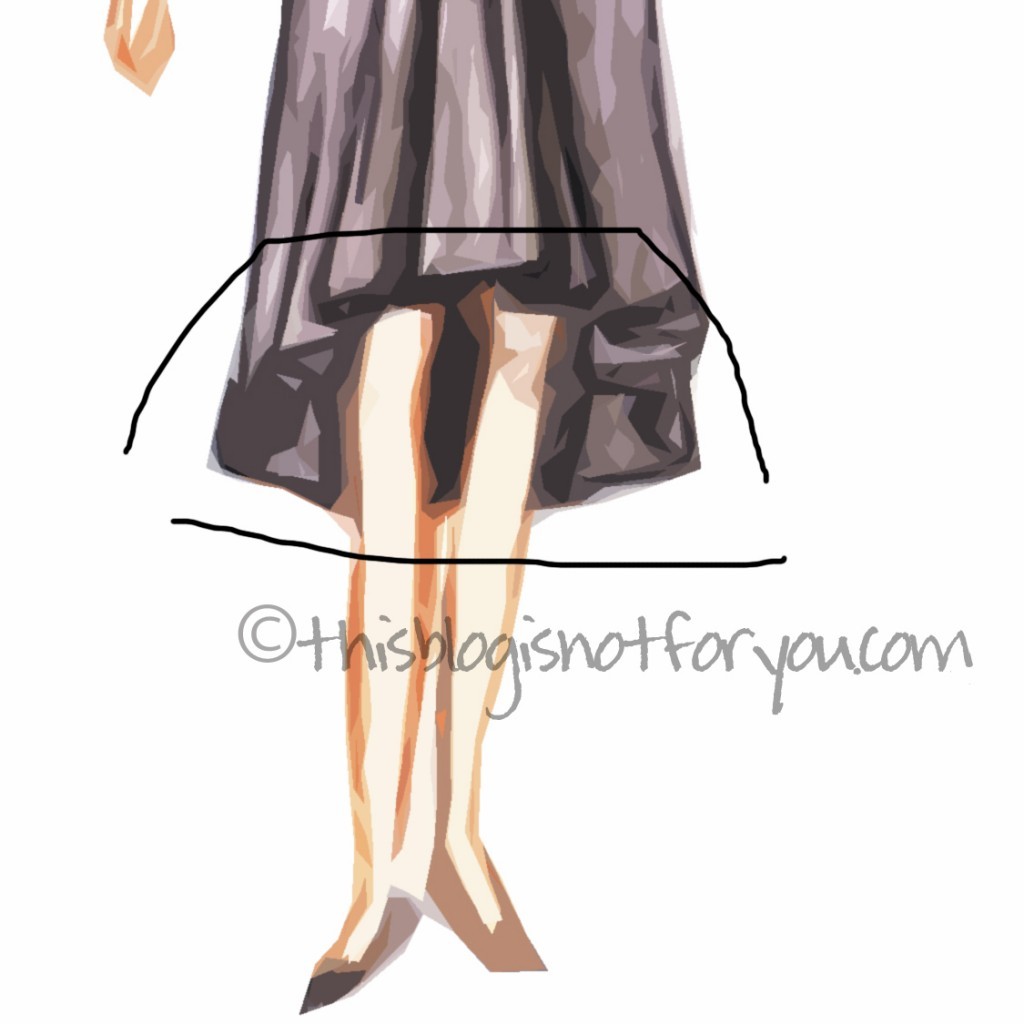
What you need to do is either shorten your pattern in the front or lengthen it in the back. Since I made the hem shorter anyway, I made the changes in the front. To get a more softer edge instead of a very triangular shape, you can’t just draw an asymmetrical staight line. The slightly s-shaped curve creates a smooth transition between front and back. You also see the line sloping down more steeply only after it reaches the middle of the front pattern piece. There are only small changes to the back pattern, to make the changes look  less abrupt and to avoid having it look like you combined two different pattern pieces.

It’s also very important to make the pattern pieces the same length at the side seam.

How to draft your own asymmetrical hem dress pattern by thisblogisnotforyou.comHere are some pictures from the modified Burdastyle pattern:
How to draft your own asymmetrical hem dress pattern by thisblogisnotforyou.com How to draft your own asymmetrical hem dress pattern by thisblogisnotforyou.com

Burda 2/2013 #114 by thisblogisnotforyou.com
THE SECOND LOOK: oval shape in the front, slightly longer v-shape in the back

How to draft your own asymmetrical hem dress pattern by thisblogisnotforyou.com
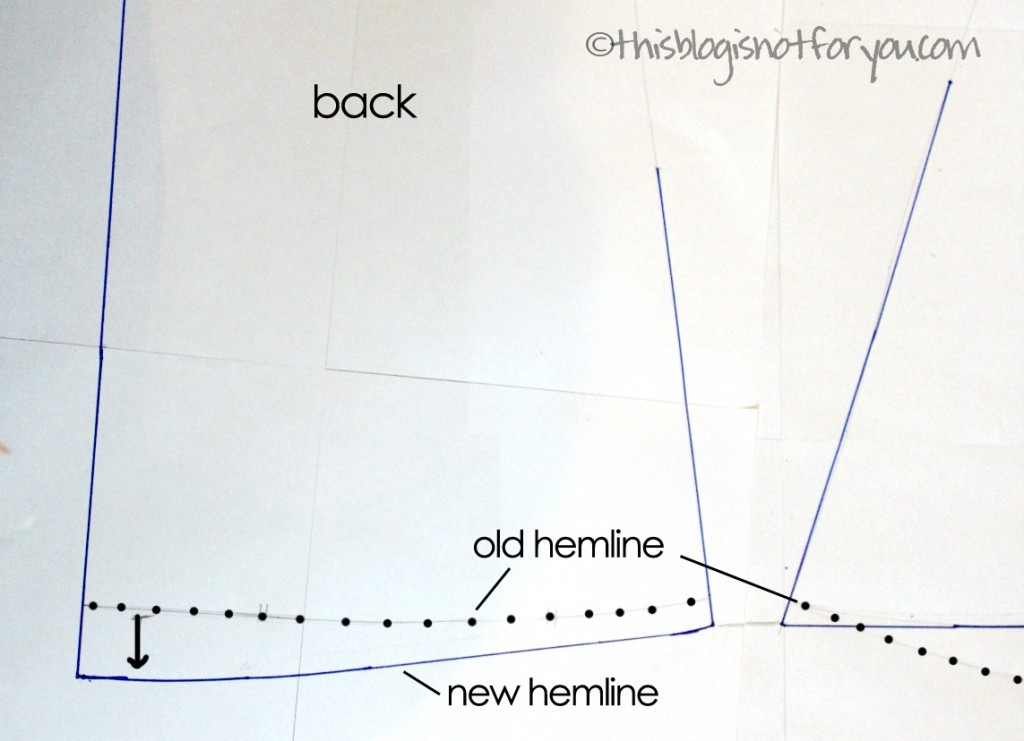
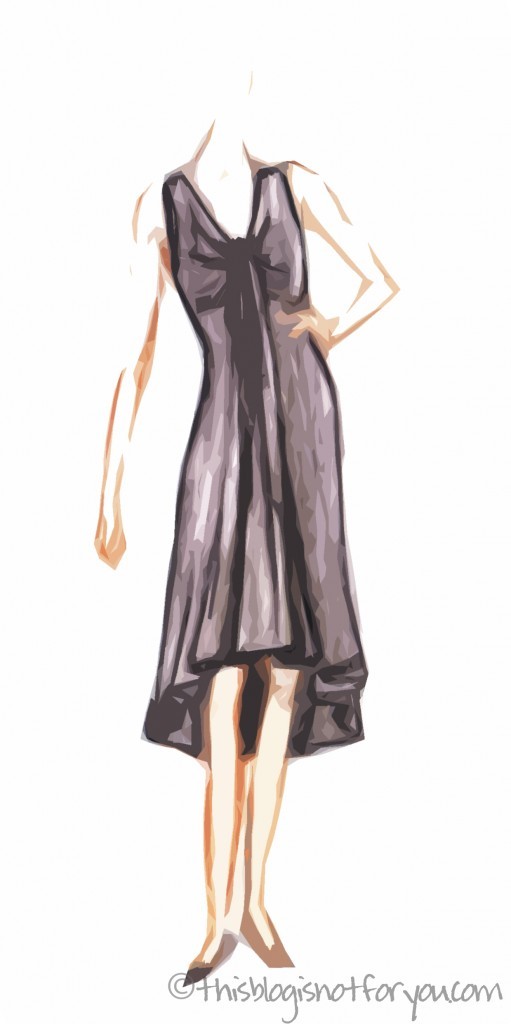
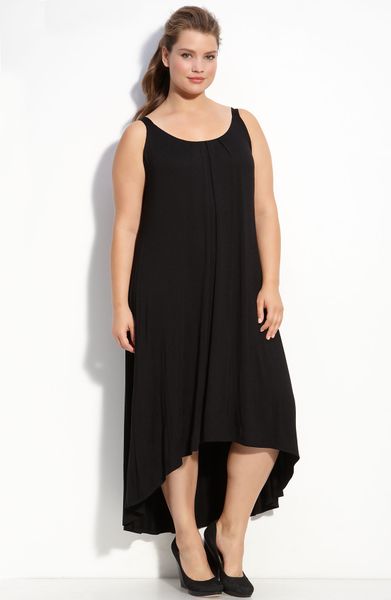
I very much love this look, because it looks quite romantic. Here the shape in the front is almost like the one in the first look, but the back is much longer and the transition from front to back is very smooth and it’s much more asymmetrical.
How to draft your own asymmetrical hem dress pattern by thisblogisnotforyou.com
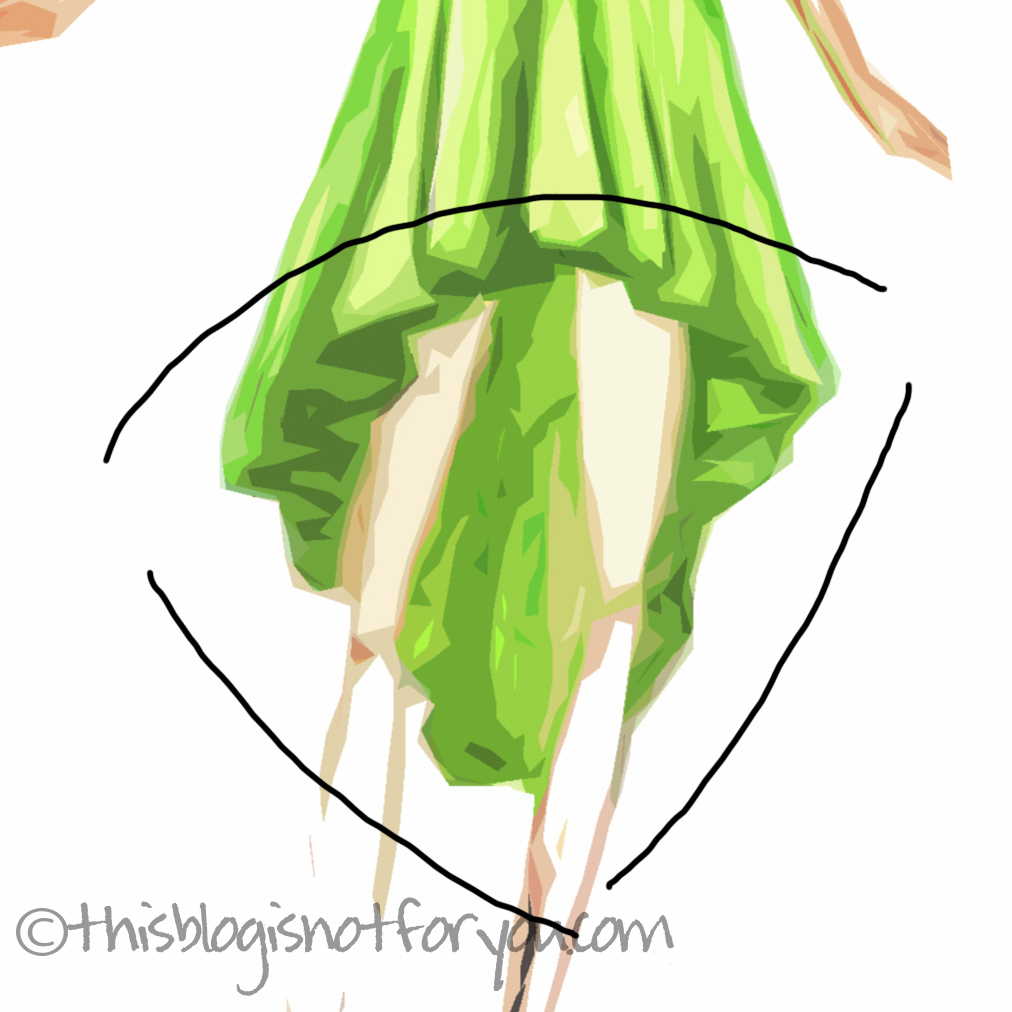
To get this look you have to shorten the front and lenghten the back quite a bit. If it’s a knee-length dress, I’d suggest shortening the front by at least 20cm/8” and lengthing the back by about 20-25cm/8-10” or more. Give the line a smooth curved shape in the centre front and back to avoid awkward triangular edges.
How to draft your own asymmetrical hem dress pattern by thisblogisnotforyou.com
THE THIRD LOOK: straight in the front, maxi v-shape in the back

How to draft your own asymmetrical hem dress pattern by thisblogisnotforyou.com
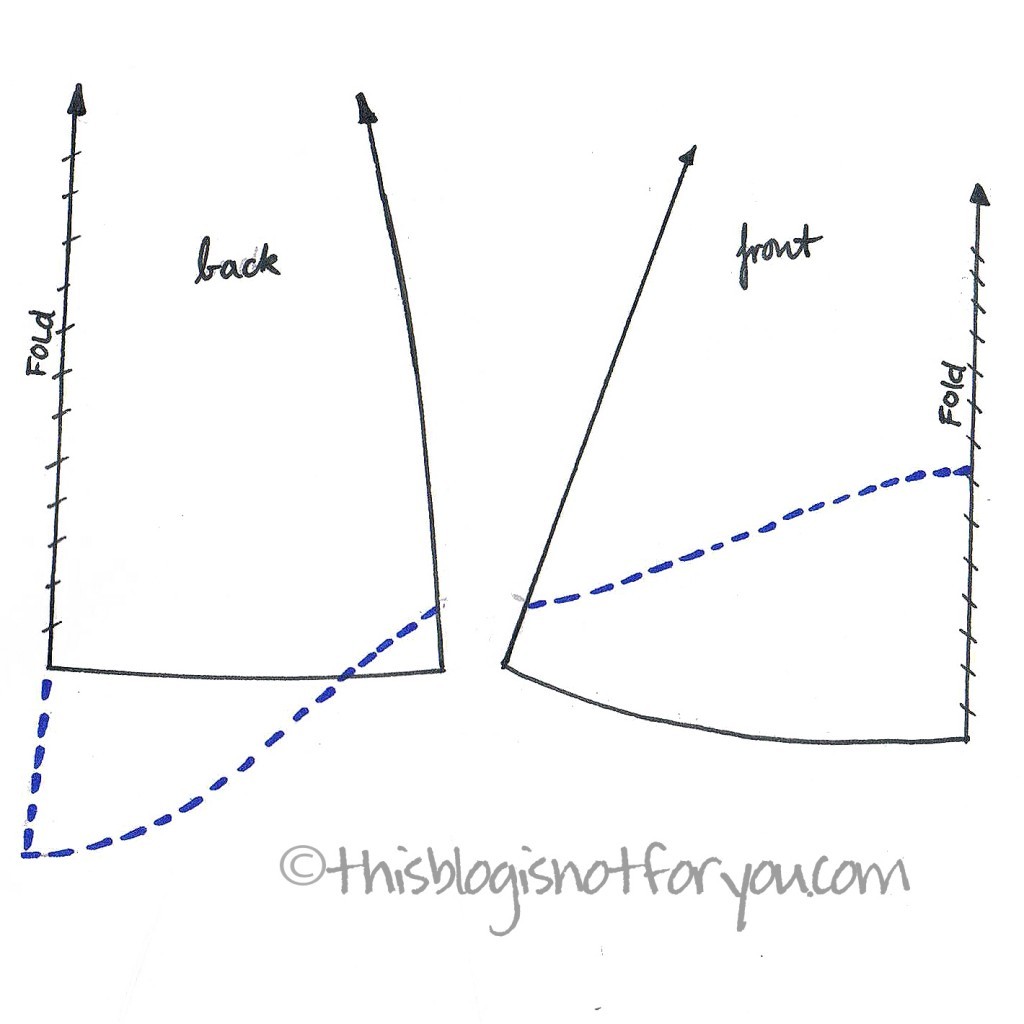
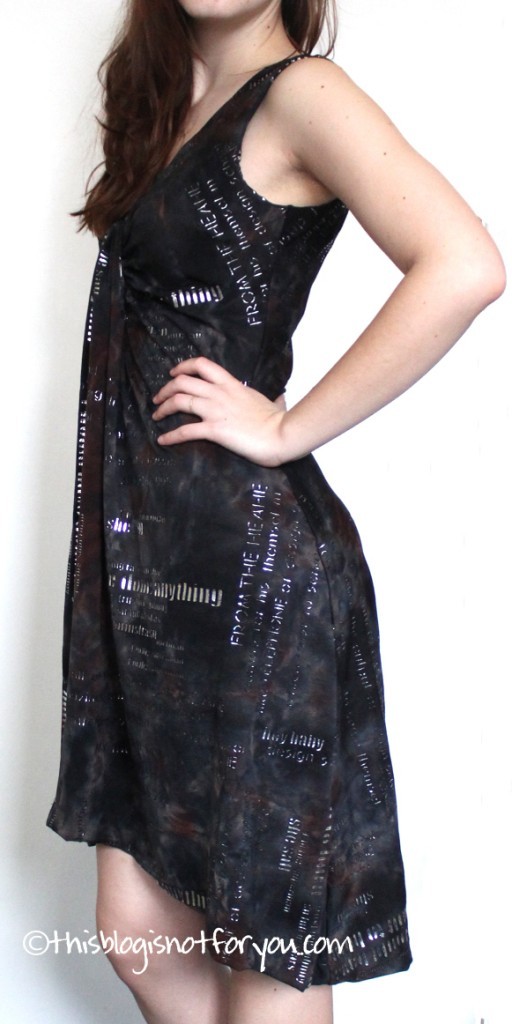
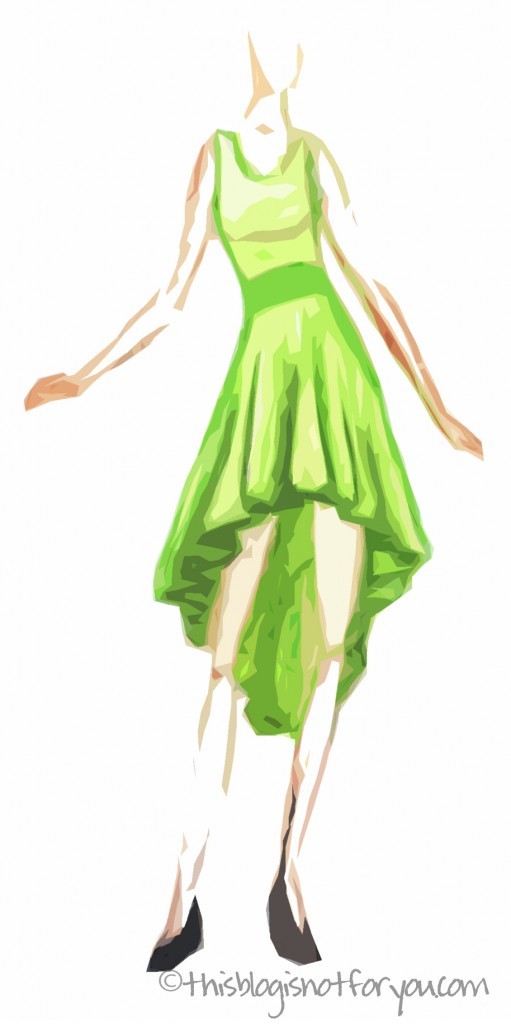
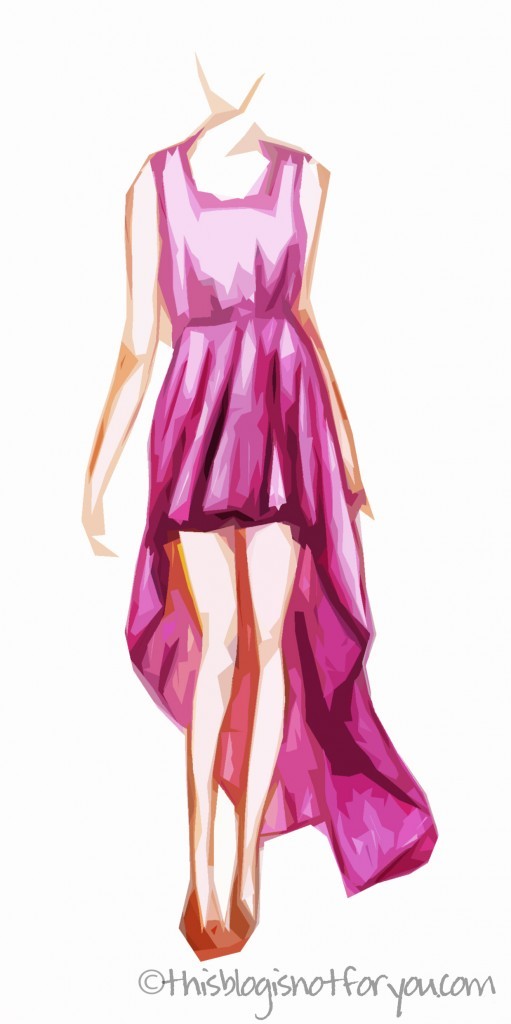
This is my favorite look and I’m de-fi-nite-ly making a dress like this for summer. It’s such an awesome femine look. Here, the front is straight almost until it reaches the side seams and then steeply slopes down to that long flowing train.
How to draft your own asymmetrical hem dress pattern by thisblogisnotforyou.com
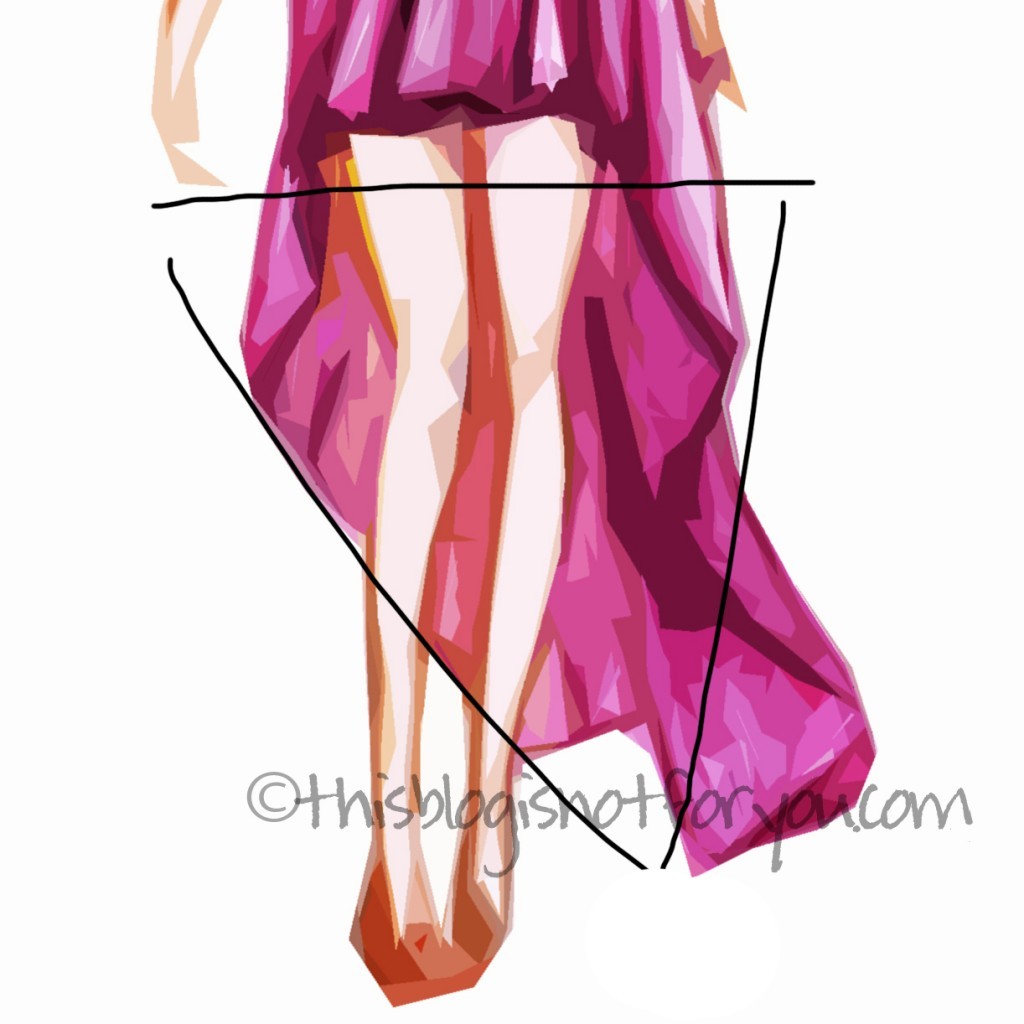
The front will be almost miniskirt-length, the back about ankle-length. (Take your measurements, waistline to ankle,  to get the right length)
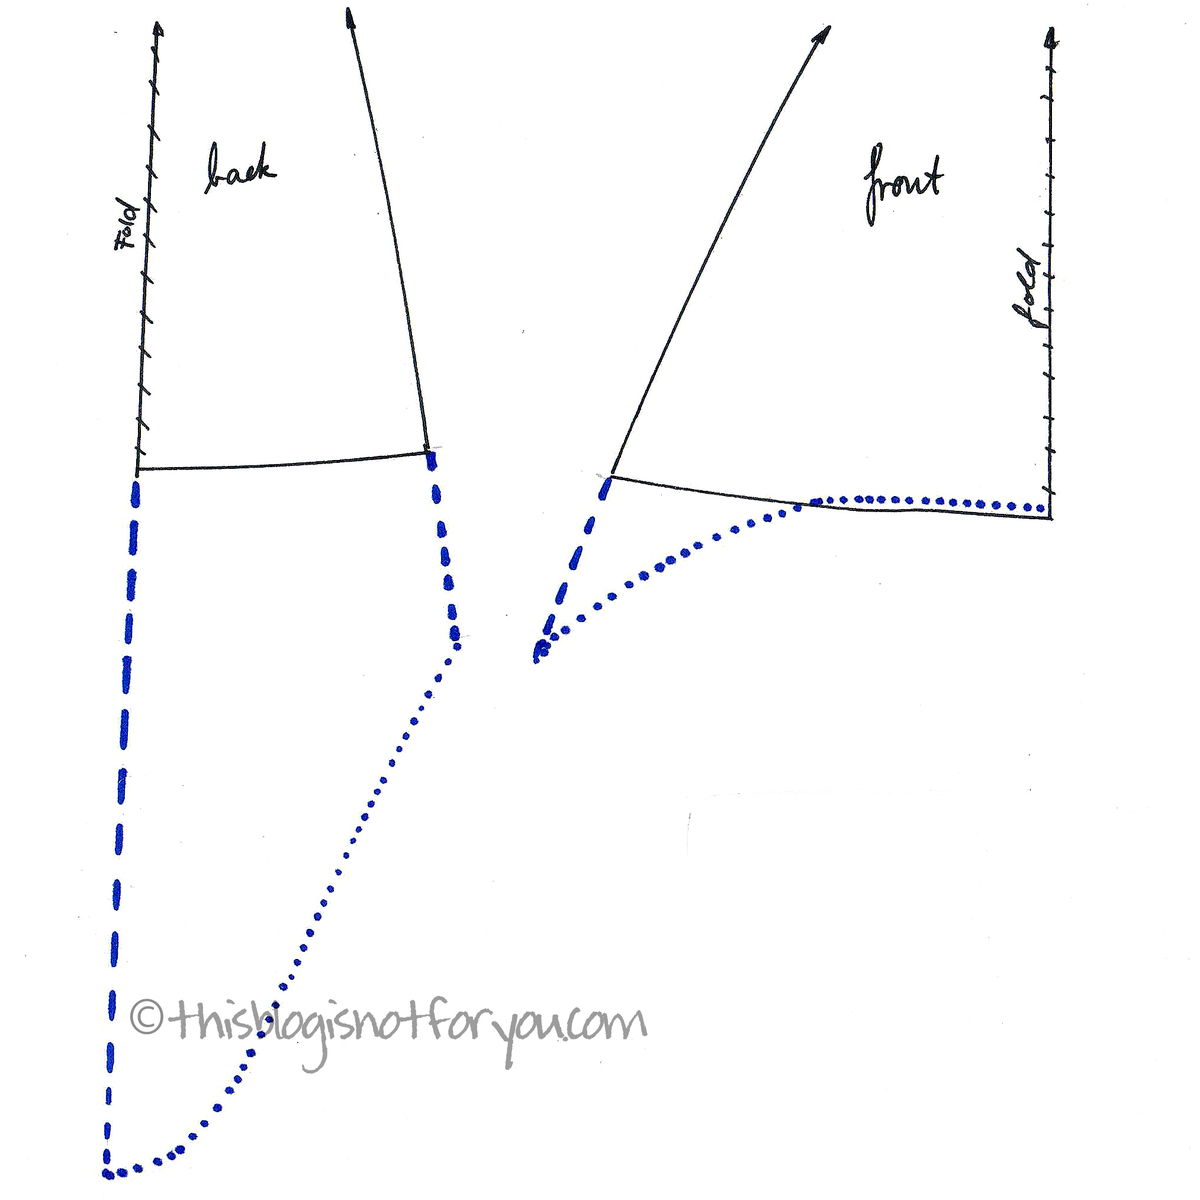
How to draft your own asymmetrical hem dress pattern by thisblogisnotforyou.comWhat you should always consider is the width of the hemline:

To get a beautifully flowing skirt, you need not only to lengthen but also to widen the pattern. You could also just use a gathered-skirt pattern, if you don’t feel confident enough to make the changes yourself. If you have one that fits you well, use it and simply make the changes described above.

Here’s an example of an asymmetrical dress with a very wide hem (which also means you’ll need loads of fabric!).

If you use a pattern of a slightly flared skirt it will probably look similar to this:

found at Bershka

found at Nordstrom

When you do not widen the hem of the pattern, the hem will probably end up looking like the one in the picture below. It’s also nice, but less romantic and flowing and probably more suitable for sporty and casual looks.

found at Zara

I hope this was somewhat helpful and I’ll see loads of pretty asymmetical dresses in the upcoming months!

In case you decide to hack your pattern to make an asymmetrical dress for the summer, I’d love to see it when it’s done!

Just send me a picture to hello(at)thisblogisnotforyou.com!

One last picture I had to share! 😉

facebook/bloglovin/pinterest
Stay in touch!

Organising with Chalkboard Paint

chalkboard paint organising jars by thisblogisnotforyou.com

This is a very quick DIY I did on the weekend. My messy boxes full of sewing supplies had been bothering me for quite a while. Normally I use plastic organising containers or empty cookie boxes, but buying containers can be quite expensive when you need a lot of them and I never find things after I put them in cookie boxes. I just have too many of them.

This DIY was inspired by a friend who sent me a picture of a craft/sewing room at IKEA Berlin. They had thread sorted in jars by colour. I liked the idea a lot – it looks so much better than plastic containers, is see-through (which is great for finding stuff!) and inexpensive.

I still had some chalkboard paint spray left from my previous chalkboard DIYs that I wanted to use for a weekend project.

It’s super simple, quick, decorative and inexpensive – sounds good?

chalkboard paint organising jars by thisblogisnotforyou.com

chalkboard paint organising jars by thisblogisnotforyou.com

I covered the jars with tape and left out the different shapes for the labels. I sprayed it with chalkboard paint spray (2 coats) which only takes a few minutes. I let it dry for a few hours – just to be on the safe side (you don’t want to have fingerprints on it, do you?). You can spray the lids as well, if you want to.

I removed the tape (carefully!) and labelled the jars with wet-erase liquid chalk marker.

Tip: You can make corrections to the chalkboard paint using cotton buds and nail polish remover.

chalkboard paint organising jars by thisblogisnotforyou.comchalkboard chalkboard paint organising jars by thisblogisnotforyou.comorganising jars by thisblogisnotforyou1chalkboard paint organising jars by thisblogisnotforyou.com


Sewing a Jewelry Travel Case


jewelry case tutorialhow to make a jewelry case

“Big girls need big diamonds.” – Elizabeth Taylor

What’s the point of owning a wide range of jewelry, when you can’t take all of it with you when travelling? Well, I probably could live with a single pair of earrings and just one necklace (sometimes that’s enough for weeks), but wouldn’t it be much better to be able to take more than that with you when you travel?

I lost a lot of jewelry by damaging and scratching it through storing it carelessly.

To keep that from happening, I had the idea of sewing a jewelry case that’s soft enough to keep my stuff from being scratched.

I came up with this soft jewelry roll which has different compartments for rings, ear studs, necklaces and bracelets:

jewelry roll 1 jewelry roll

I love travelling with this one, the only disadvantage is that it’s open on the sides. I haven’t lost anything yet, but I’m a little afraid stuff might fall out.

Anyway, I made another one as a gift for Christmas, considering the problem this time.

And – of course – I didn’t forget to take pictures of the process.

*drumroll* – Here comes the tutorial!

draft handwriting tutorial

#1 What you need:

– at least two different matching kinds of fabric (depending on how large you want the jewelry case to be, about 40-50 cm/0,5 yd should be enough)
– matching thread
– a zipper (approx. 20 cm/8”)
– small decorative buttons
– two buttons and ribbon or some other kind of fastener

for embellishing:
– iron-on transfers/ fabric with a cute imprint/ beads/ sequins etc.

jewelry case tutorial

#2 The fabric cutting.

*Plan your pattern!
*Draft your pattern!
*Be accurate and check twice before cutting.

jewelry case tutorial cutting instructions

This is a draft of the “pattern” I used. (Actually, I didn’t use a pattern, I started cutting right away, but this requires you having a precise plan in your head. It’s not that hard, since the shapes are all angular).

I used 3 different kinds of fabric. This is colour-coded in the picture above.

Also:
A – outer fabric
B – parts of first layer of lining
C – parts of second layer of lining

I’ll refer to the letters in the above key in the next steps.

*Dont forget the seam allowance before cutting everything out!*

#3 The Sewing Together.

*Adding the iron-on transfers/imprints.

jewelry case tutorial

I found the cute hippo picture online (here) and just printed it with my normal printer on white cotton. I explained how I did that in the comments of this post.

Printing with normal ink means it’s not waterproof!

Tip: I’ve read that black ink can be made waterproof, when you dip it into vinegar, let it dry and then press it. I just pressed it (imprint facing down), which should be enough for normal use. It shouldn’t be machine washed though.

Add any embellishments before sewing (I added some sequins and beads).

Make sure whatever you want to add is in the right place before you sew/iron. Especially when it’s intended to be centered (consider the seam allowance etc.)

If you want to use decorative buttons as I did (e.g. for earrings) sew them onto B2 before  sewing together the other pieces.

*Adding the zipper.

jewelry case tutorial

I applied a zipper to B1, which will be the front of an inside pocket in the lining.
To do this, pin the zipper, mark it’s position and then cut out a slit, as seen above.

Pin the zipper in the right place and sew. I just used the normal presser foot.
jewelry case tutorial

jewelry case tutorial

jewelry case tutorial

Sew together B1 and C3, both right side up. Be precise with the seam allowance. You don’t want the seam to be seen later on, it might be even better to use a slightly narrower seam allowance.

jewelry case tutorial For the flaps: Sew together A2+A3 (2x), right sides together. Turn inside out.

jewelry case tutorial

Sew B3 onto B2 (right sides together) along the outer edges (leaving out the fold line as marked in the cutting plan). Then turn inside out.

jewelry case tutorial

After turning inside out, stitch along close to the edge.

jewelry case tutorial 4

Fold the side edges of B4 to center line (2x) and stitch as seen in the picture below. jewelry case tutorial 4

Stich B4 onto B2 as shown in the picture below.jewelry case tutorial

jewelry case tutorial Do the same with C2 (3x) and C1. Here you don’t have to extra stitch the C2 pieces, if you sew them onto C1 with the open seam facing down.

jewelry case tutorial

Sew B2 onto C1 (both right side facing up), sewing along the fold line of B2.

Sew B1’s upper edge onto B2’s bottom edge (right sides together). Now you’re done with the lining! It should look like this:

jewelry case tutorial Before sewing together A and the lining, don’t forget to add the flaps. Pin them (lining fabric facing up) onto the A piece (right side up). Stich close to the edge (about half of the seam allowance).
jewelry case tutorial jewelry case tutorial jewelry case tutorial Also, add the fastener. I made two small loops out of ribbon and stitched them onto A1.

Before you pin A and the lining together (right sides together), make sure you fold down the B2-B3-flap to avoid stitching it down accidentally. (Things like that always seem to happen to me…!)jewelry case tutorial Leave a big enough gap to turn the whole thing inside out (approx. 5-6 cm should do, you can handstitch that part later on). jewelry case tutorial jewelry case tutorial Press everything and apply the two buttons for the closure. Done!

jewelry case tutorial jewelry case tutorial jewelry case tutorial jewelry case tutorial

jewelry case tutorialtutorial jewelry casejewelry case tutorialjewelry case tutorial

jewelry case tutorialjewelry case tutorialjewelry case tutorial
jewelry case


This post was featured at:

Boogieboard Cottage