How to make your own Petticoat

Petticoat tutorial by Thisblogisnotforyou.com

Finals are over! Hard to believe –  I finally have my life back. Well, for a few days/weeks at least. Anyway, one of the first things I did after finishing all the handmade Christmas gifts was gathering loads and loads of tulle again and sewing together the second Petticoat. This time I didn’t forget to take pictures and could make a detailed tutorial.
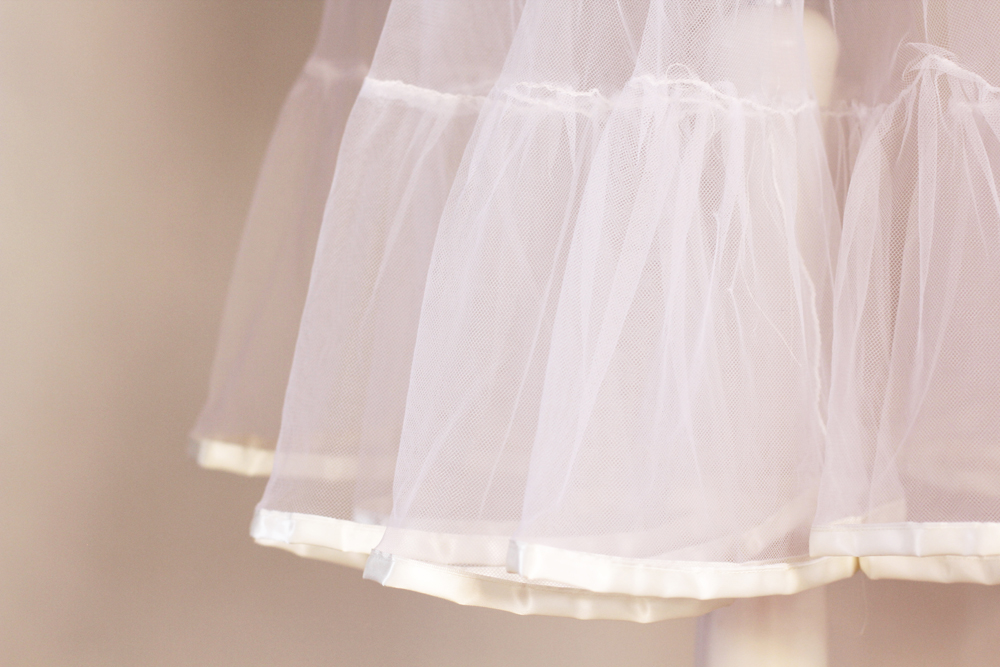
Petticoat tutorial by Thisblogisnotforyou.com

Here we go:

THE MATHS (not as bad as it sounds)

First of all, you have to decide about the length and number of layers of your Petticoat.
For the length it’s best you measure the skirt/dress you want to wear your Petticoat with from waist to hemline. The Petticoat should be about 1 inch shorter than the dress.

Depending on how many layers you want your Petticoat to have, you need to buy about 4yrd of tulle.(I used 3,5m and got 3 layers á 56cm out of it). You can use other fabric, but tulle is quite stiff and helps your Petticoat to become more puffy. Tulle is also quite itchy, if you want to make a Petticoat for a dress you don’t want to wear tights with, you might consider sewing a little underskirt or make the first layer out of a softer fabric.
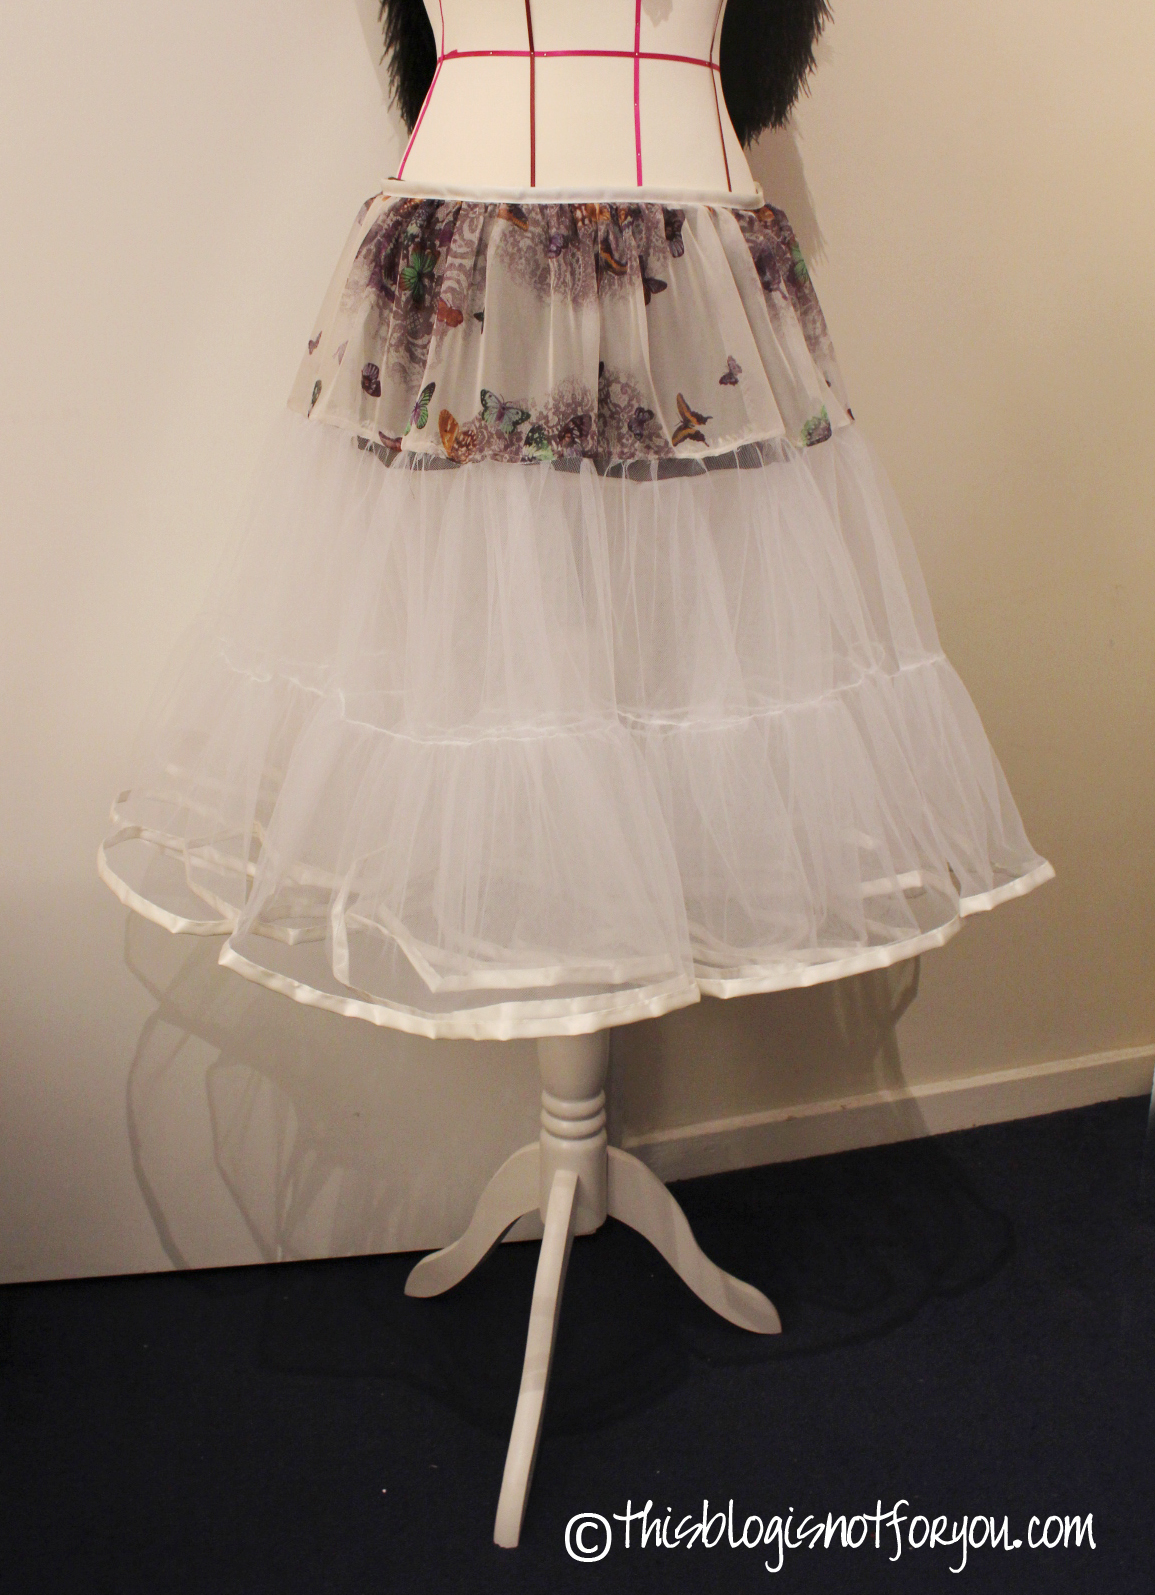
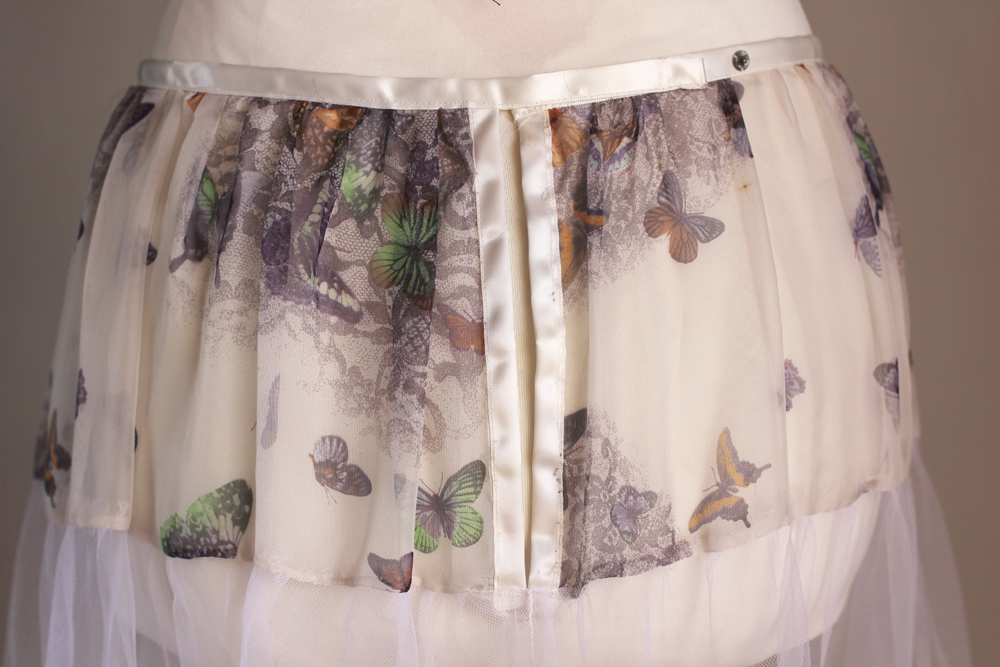
I just replaced the tulle of the first tier of all layers for a chiffon fabric. It’s more comfy, makes the Petticoat look really nice and does not look too bulky under the dress.

As soon as you have decided about the length and layers, you have to do a little math to know how much tulle you’ll need.
The Petticoat I made consists out of 3 tiers and a waistband. So if the skirt of your dress is 25 inch, you want your Petticoat to be about 24 inch long, so 3 tiers á 8 inch.

When you figured out how wide the single tiers are, you also want to know how long. As you can see on the scheme below, the length of the tiers doubles from tier to tier.
The top tier is about twice your waist circumference/ lentgh of waistband (about 2 yrd will do). So if you want your Petticoat to have 3 tiers, the bottom one will be about 8 yrd long. (Yeah that’s a lot of cutting and gathering, I know!)

Also, consider the seam allowance before cutting the tulle. For tulle you generally won’t need much seam allowance – a simple zigzag stitch on the fabric edge will do. With other fabric it might be about 0,5 inch/ 1-1,5 cm.  The bottom tier only needs seam allowance on one side if you’re hemming it with ribbon.

For the waistband I just used the ribbon I used for the hem.

So here’s a little scheme, which should also help with the general construction if you want to have more than one layer. My two layered Petticoat (picture at the end of this tutorial) differs a little from the two-layered Petticoat scheme (more on that later).Petticoat construction by Thisblogisnotforyou.com (Click through for full tutorial)Petticoat tutorial by Thisblogisnotforyou.com

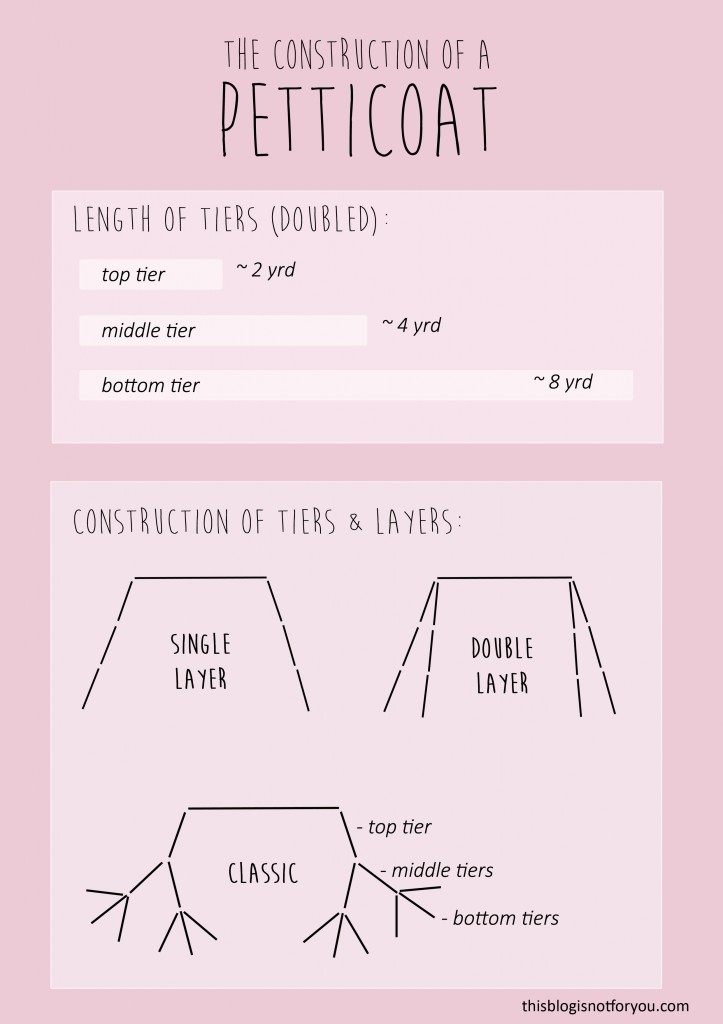
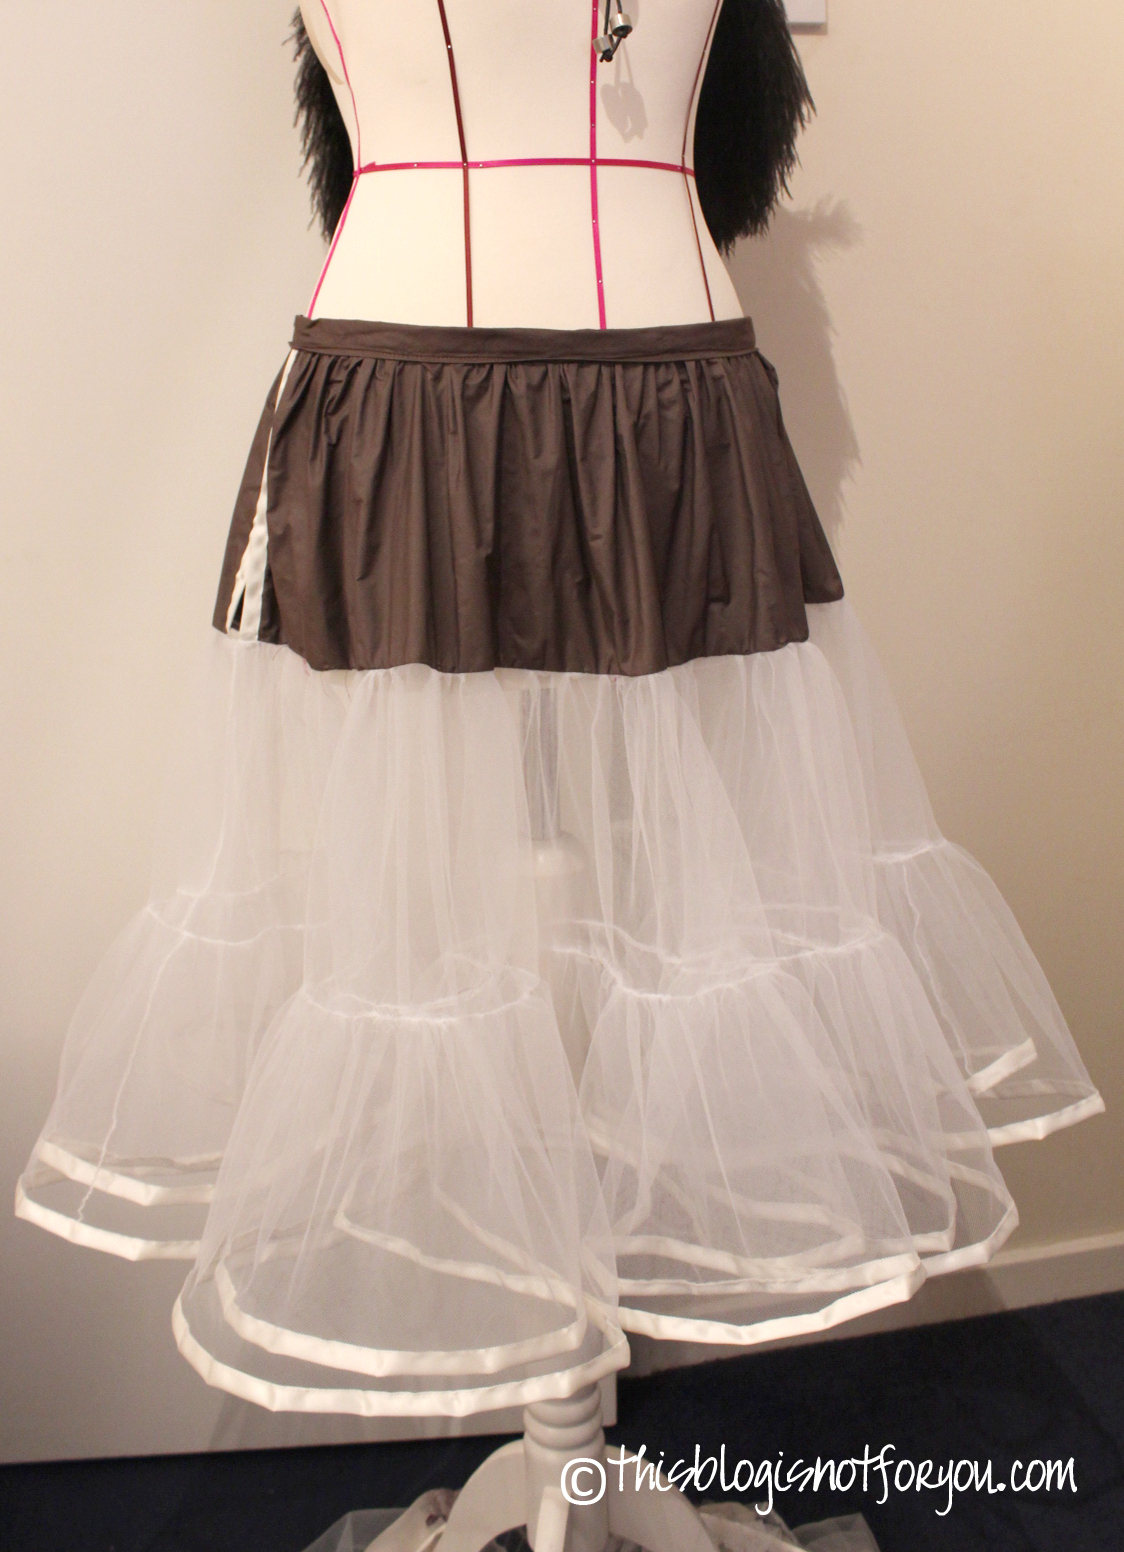
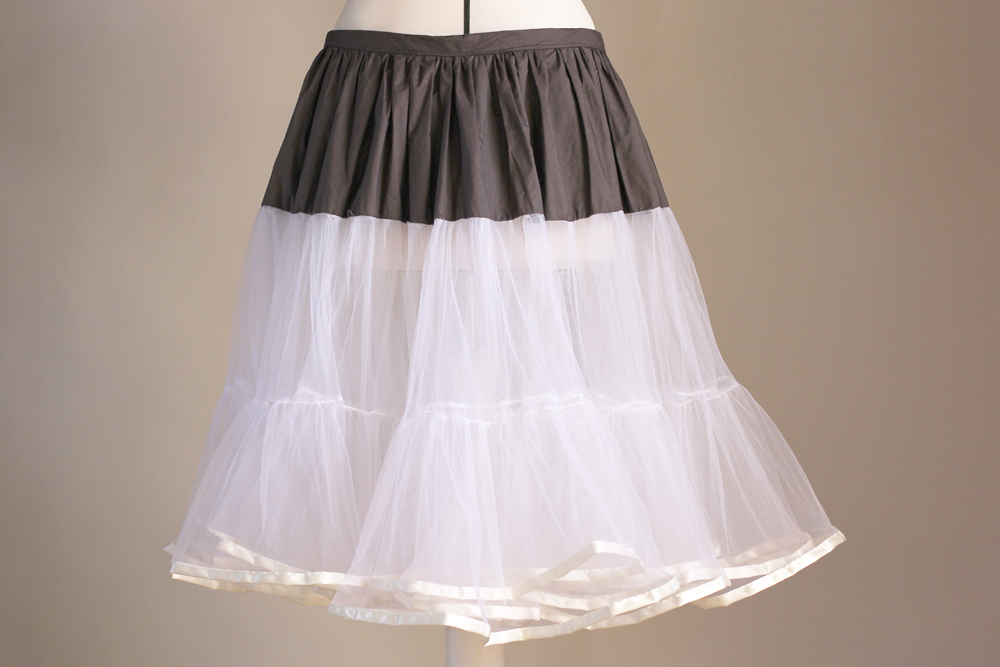
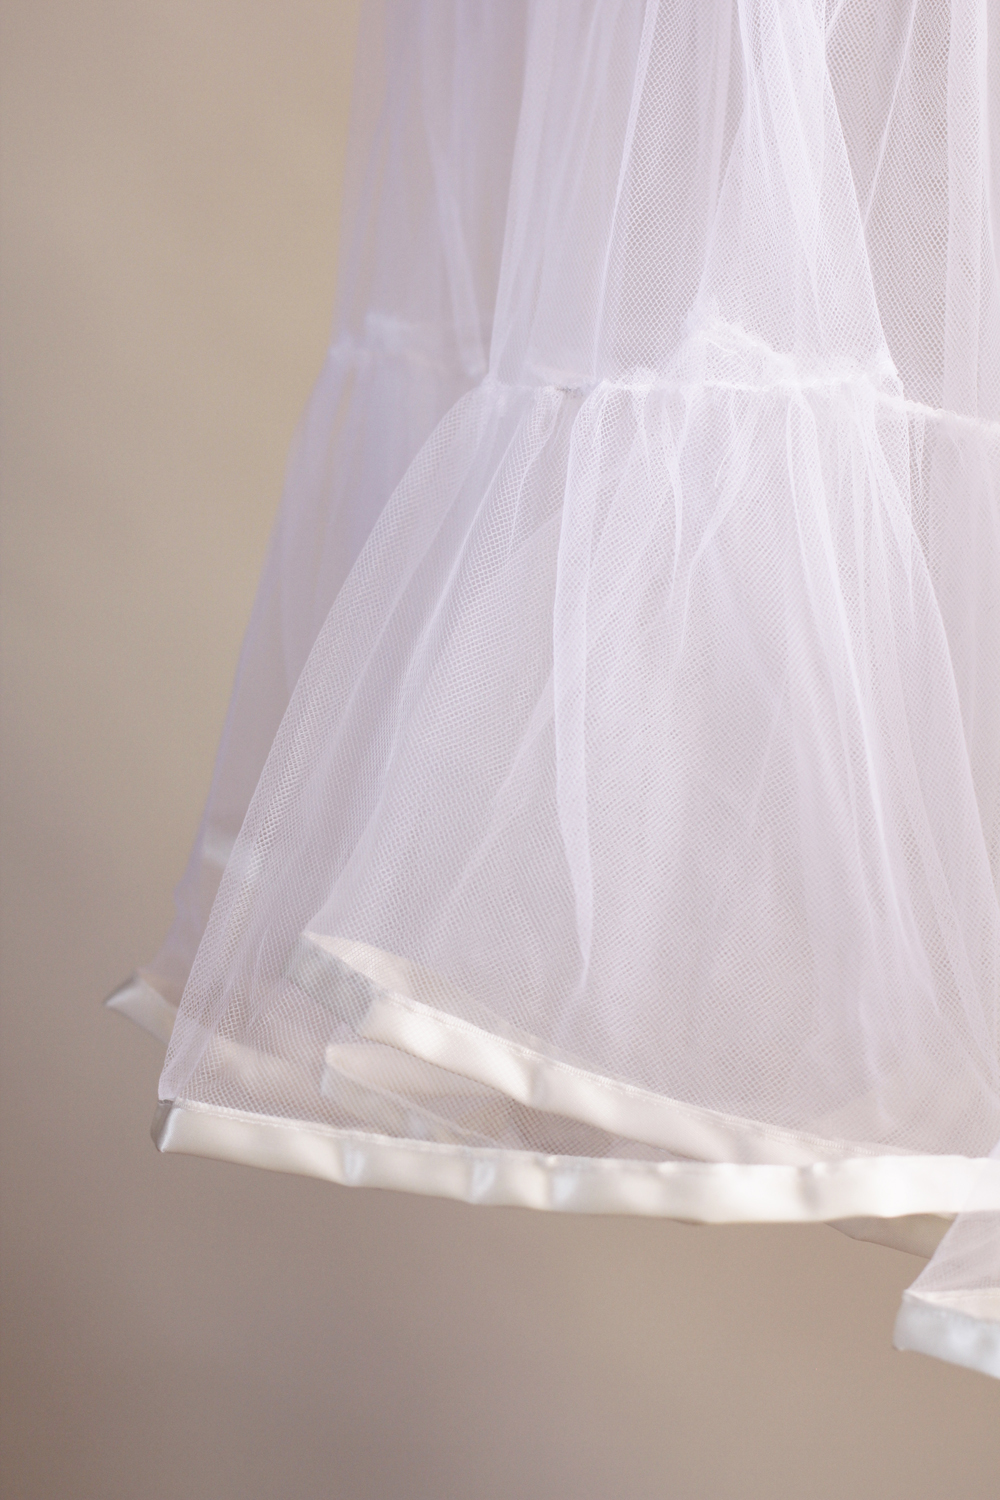
This is what my single layer Petticoat looks like. I wanted one that’s not too puffy. Whenever I want to add more volume, I wear the  double-layered Petticoat under this one. The more layers, the puffier – makes sense, eh?

SEWING THE THING TOGETHER 

First of all, for sewing a Petticoat one starts from bottom to top. That is sewing together the pieces for the single tiers, hemming and gathering the bottom tier.
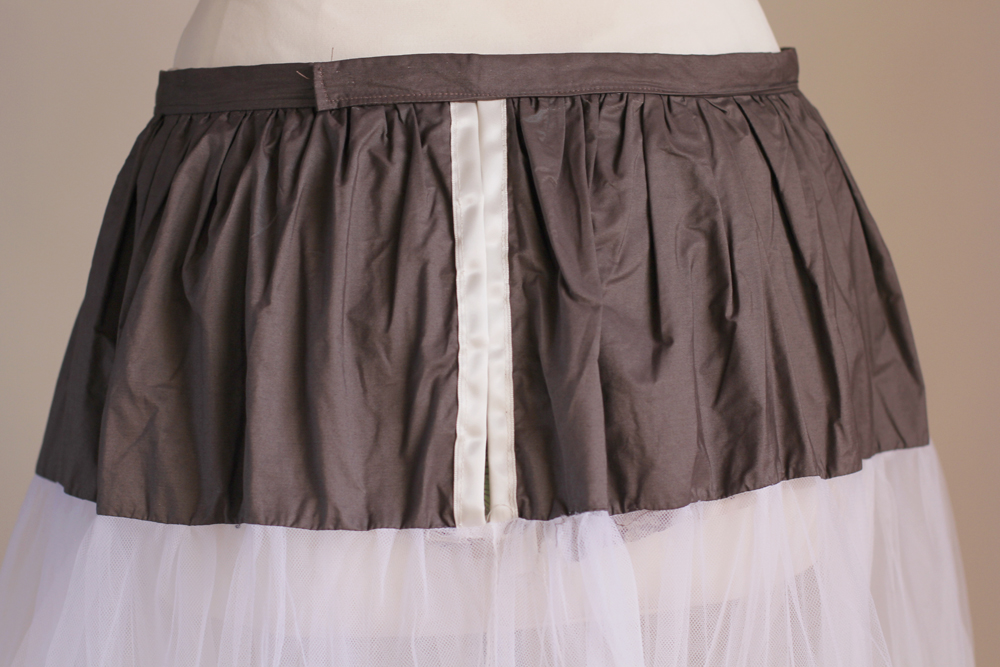
To sew together the ends of the top tier. You’ll need to add ribbon later on for the fastening.

After planning and cutting, start pinning the ribbon to the bottom tier. I used 1inch-wide creme-coloured satin ribbon. It’s fairly inexpensive and looks nice.

After pinning, stitch it down.

For the gathering, sew along the side of the bottom tier with straight stitches. Use large stitches and a tight tension, it makes it easier to pull the top thread to gather the fabric.

Lay the bottom tier around the middle tier. Makes it easier to gather the bottom tier to the lentgh of the circumference of the middle tier.

Makes sure you have the tulle right side to right side before pinning.

With pulling the upper thread start gathering the bottom tier until it has the same circumference as the middle tier.

If you don’t have enough room for spreading the fabric out in a circle, you can also fold both tiers in half and thus gather the bottom tier to the right length.

Pin everything into place and sew the tiers together. Before doing the same thing with the middle and the top tier, you need to hem the ends of the top tier.

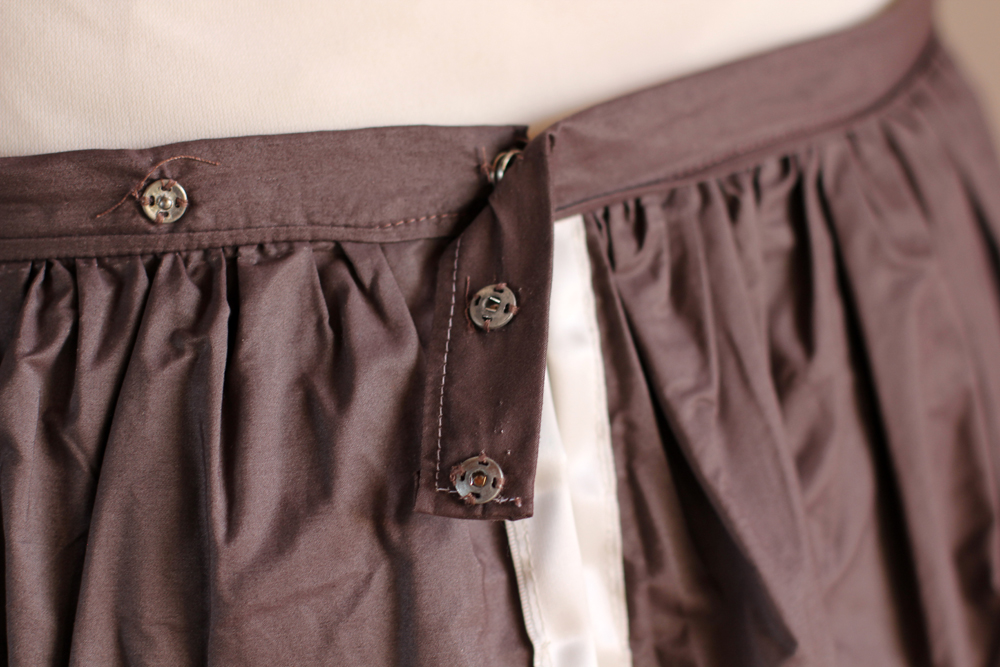
As mentioned, for the waistband I used the same ribbon I used for the hem. For the fastening I used a simple hook closure. I made this with three hooks, so I can adjust the Petticoat to the length of the dress I am wearing lowering it down when I widen the waistband.

Petticoat tutorial by Thisblogisnotforyou.comPetticoat tutorial by Thisblogisnotforyou.comPetticoat tutorial by Thisblogisnotforyou.com

This last pic is of the single layer Petticoat. Last week I finished the second one. Two layers – even more tulle. Sooo much fun, haha.

Petticoat tutorial by Thisblogisnotforyou.com

For the second, double-layered Petticoat I came up with this scheme, since I didn’t have enough tulle left:

For max volume I can wear the first Petticoat on top of the other one. This way I don’t have just a single three layered one, which isn’t really suitable for daily use 🙂 This is how the two together look like:Petticoat tutorial by Thisblogisnotforyou.comPetticoat tutorial by Thisblogisnotforyou.com
Petticoat tutorial by Thisblogisnotforyou.com

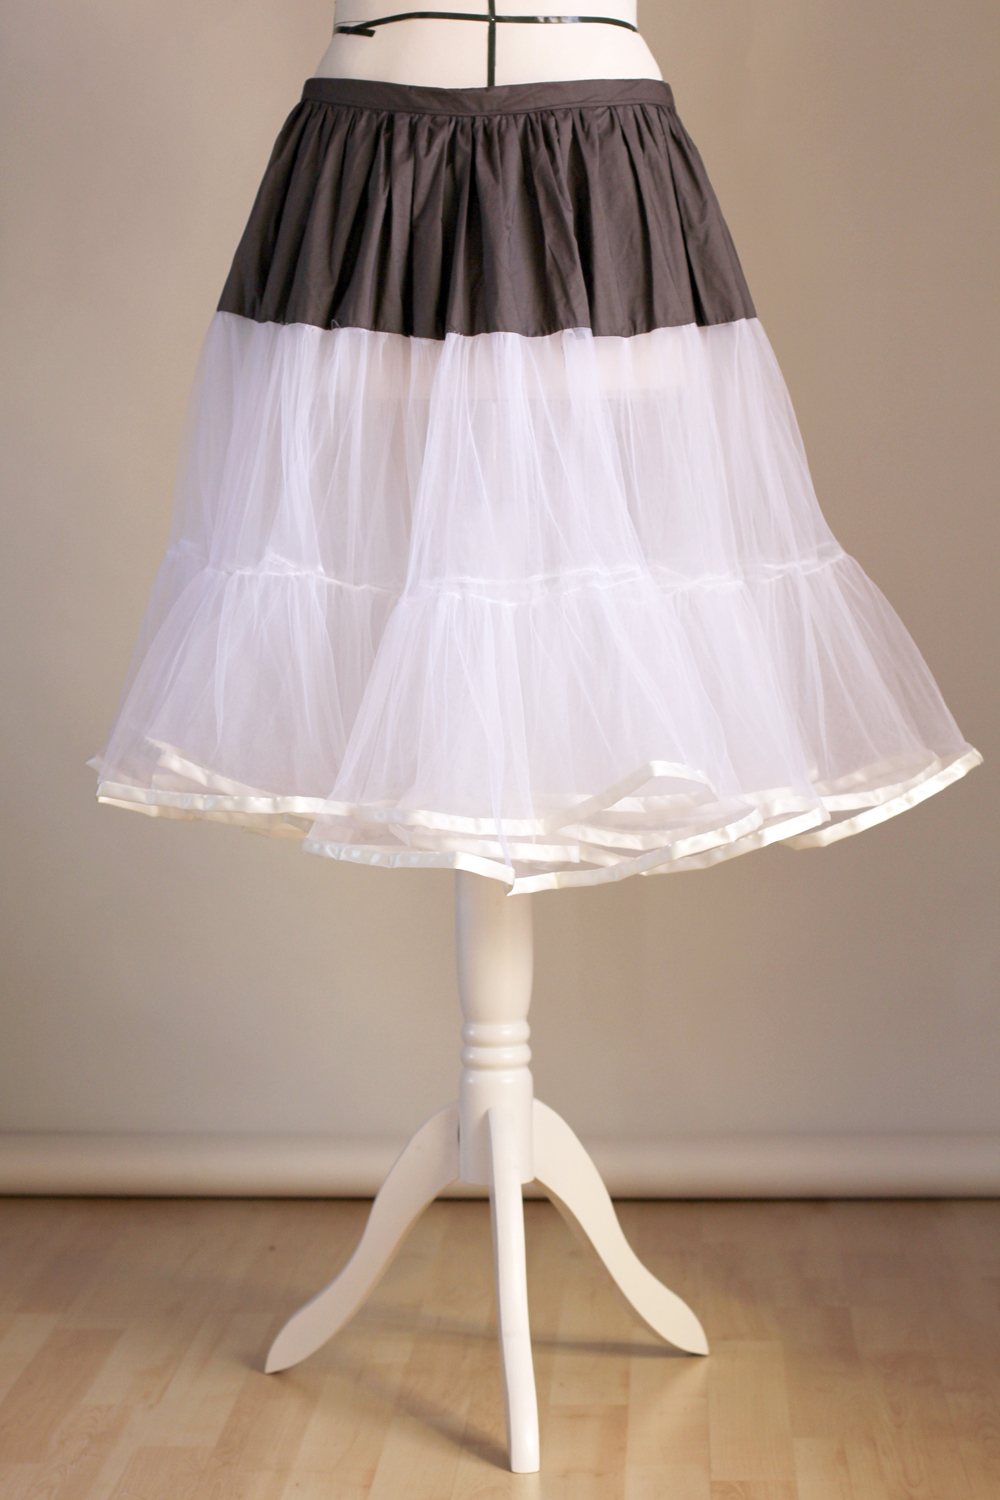
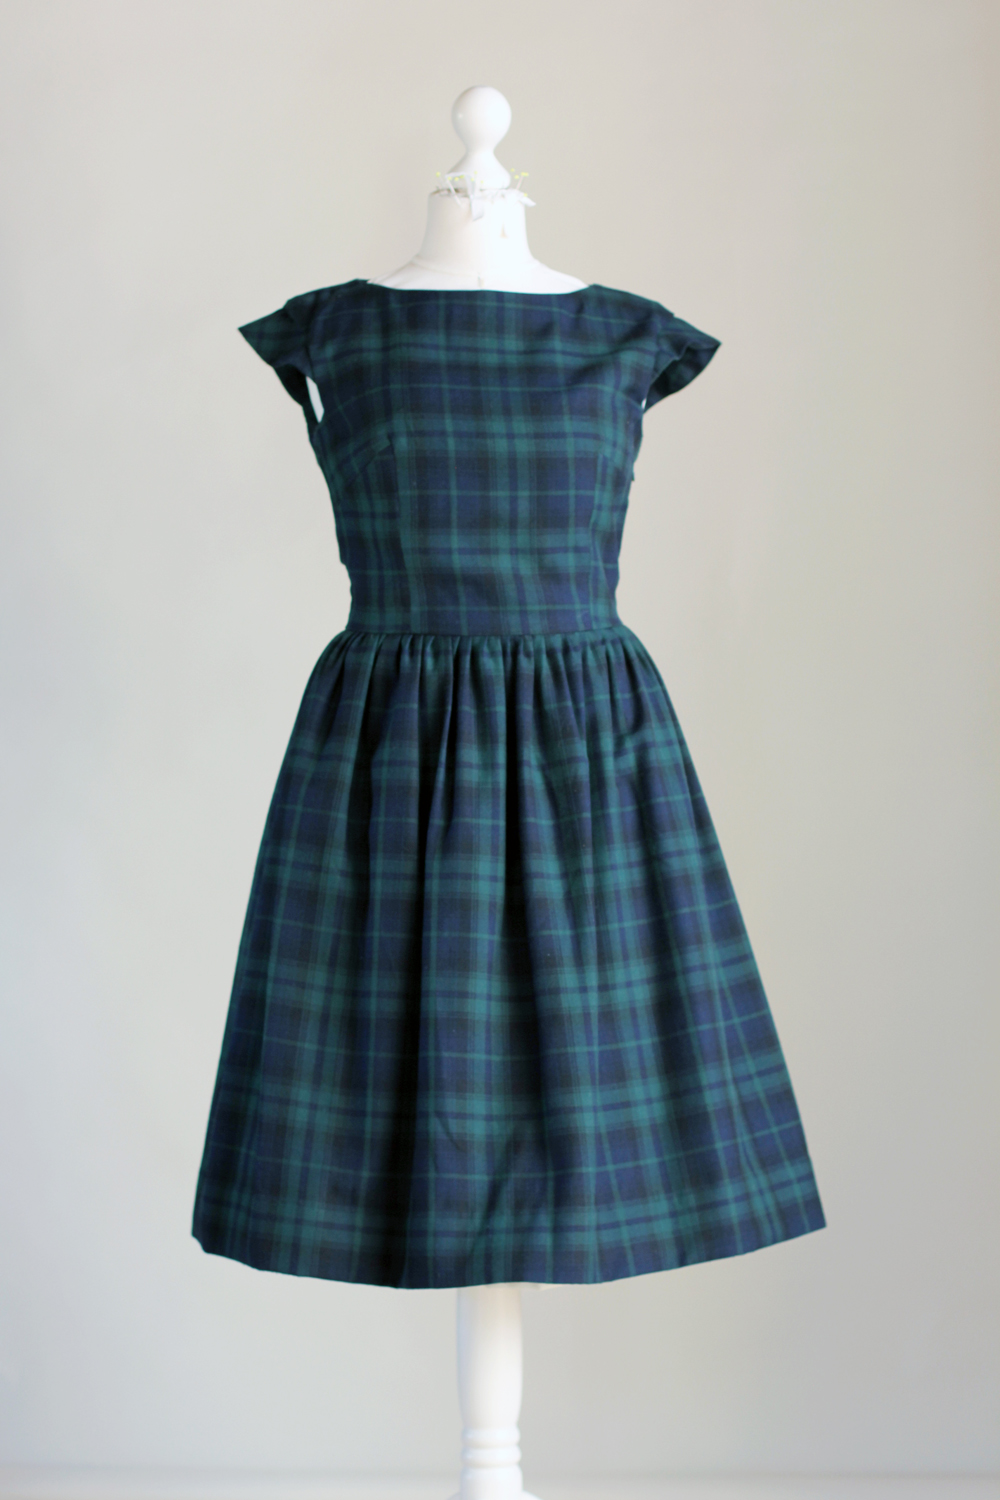
To see the effect of wearing a petticoat underneath a dress or skirt, here’s the same dress with and without a petticoat:Petticoat tutorial by Thisblogisnotforyou.com

Petticoat tutorial by Thisblogisnotforyou.com

Petticoat tutorial by Thisblogisnotforyou.com

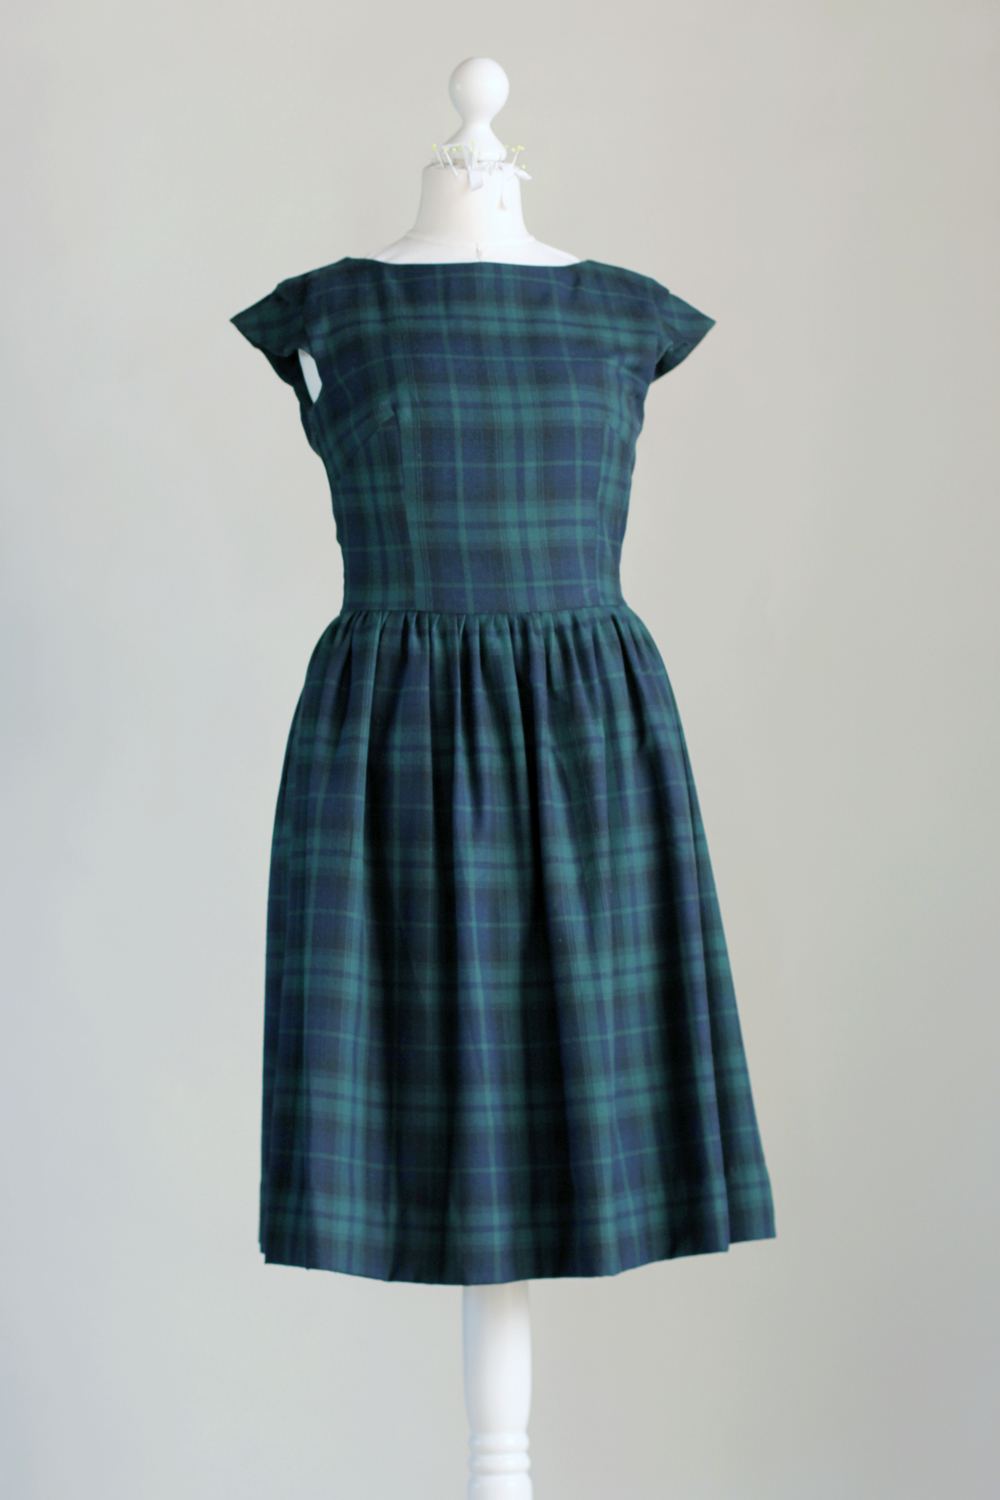
Voilá! It’s really simple and so so soo much cheaper than buying one. Have fun sewing your own Petticoat! May patience be with you! haha. (As mentioned before, Sinatra and red wine helps. Please just don’t spill it!)
If you have any questions, leave them  in the comments and I’ll promise to answer them asap.

xx

Charlie


Happy sewing!

facebook/bloglovin/pinterest
twitter/instagram

Stay in touch!

Refashion It! [Upcycling a stained shirt Tutorial]

So I bought a white shirt. And spilled something on it. Of course, that’s what white shirts are for. Luckily the stain was on one of the sleeves, so I thought about cutting them off. I read a lot of blogs about upcycling clothes lately and discovered a whole bunch of knock offs of this jcrew shirt:

My craft alarms set off and I decided to do this myself. Since I wasn’t sure how this would turn out, I tried it on a second, even older and more worn-out shirt before. Just in case. It turned out pretty well and now I have two – goody!

For doing it I found Suzannah’s tutorial most helpful. She blogs at Adventures in Dressmaking – a totally awesome blog you should check out if you’re into sewing and crafting.
Ok, now: Here’s my version of how to do it:

Mark the line where you want to cut off the sleves. To find out what’s the perfect length for you, put on the shirt, measure from the end of the left shoulder to the point where you want your sleeve to end. Add the seam allowance and mark the line at a right angle.

Cut off the serged seam allowance and the hem.

Trim the pieces of fabric to two even rectangles.

Cut one of the sleeves into evenly sized strips of about 1,5 inch/4cm.
Cut the other one into larger strips (2inch/5-6cm).

Hem the shortened sleeves of your tee.

Sew all 1,5 inch strips together into a longer single strip. Do the same with the 2 inch strips.

Now, for the ruffles:
Sew along one side on both of your strips with straight stitches. Use large stitches and a tight tension, it makes it easier to pull the top thread to gather the fabric.

Gather the first strip piece (1,5 inch) until it reaches the circumference of the neckline of your tee and pin it in place (see picture below), pointing up.

Sew along the seam of the ruffles.
Now do the same with the wider strip piece, pin it starting at the shoulder seam, pointing down. Cut it shortly before reaching the middle of the front neckline/ just above the V, if you’re using a V-neck tee. Sew down.

Use the cut-off rest and sew it on the top of the second strip. Start a few inches behind the shoulder seam and cut the strip off a few inches after the second strip. This way you’ll get a smooth transition between the pieces.

Trim the second and third strip into a nice round shape at the end. And you’re done!

For the white one I added a lace layer instead of the second strip.

Because just trimming the lace at the end makes it look rather ragged, I pinned it in place in a round shape, as you can see in the picture below. This way I wont need trimming.

Before adding the third strip:

I also added some lace to the hem of the sleeves.

Now I’m glad I didn’t throw it away. Two “new” shirts – yay!

like fireflies in december [DIY advent calendars]

#1 overflowing waterfall Advent calendar

I got this one this year. I’m still overwhelmed. Can you believe what was in there this morning (1st Dec)? A second smaller Advent calendar with 24 different tea bags. Calender-ception!

#2 pillow case into Advent calender

This one I made for my parents last year. It was a last minute project (yeah, December comes after November, I should start to remember that…).
It took a few hours, since I sewed the whole thing myself. It’s basically made from two pillow cases, one brown, one red and small pieces of white cloth.

Unfortunately, I didn’t make many pictures during the process, but it’s fairly easy to explain:

1. Cut one of the pillow cases in half, so one part still has the zipper/fastening part on it. Take that part and close the now open end. (Open the zipper, turn the pillow case inside out, sew right sides together, turn again.)

This way you end up having a narrow pillow case/ bag I used as “door” for Dec 6, St. Nicholas’ Day and also attach the other bags. It was big enough to put a magazine in there and some bigger chocolates.

2. Cut out little fabric square and write the numbers on them (I used fabric paint – makes it more permanent).

3. Cut out rectangle pieces for the “doors”/ little bags. Sew the numbers on before you sew the bags. Makes it much easier.

4. Don’t forget to include the strings so you can close the little bags.

5. Sew some cute buttons on the pillow case / bag 6 to attach the other bags. Make two buttonholes for the calendar to be hung up.

6. Fill with whatever you want.

7. Put everything together.


#3 more cute Advent calendar DIY ideas

1. Advent calendar that’s been refilled every year – some bags lost on the way…

Why not use all kinds of different socks and bags? I love the “patchwork” idea!

2. burlap activity countdown calendar

Optimal for filling with time.

3. matchbox Advent found at Matha Stewart

4. envelope calendar – found at Design Sponge

5. paper bag Advent calendar by lovely things

Simple, yet beautiful.

6. Christmas ornament calendar by life as a thrifter

nice idea for everyone who has too many ornaments lying around in boxes…

sweet dreams are made of this [bedtime candy, chalkboard paint project #1]

“It is one of life’s bitterest truths that bedtime so often arrives just when things are really getting interesting.”

— Lemony Snicket (A Series of Unfortunate Events, #11)

After seeing some pretty awesome chalkboard paint projects we wanted to do some chalkboard painting ourselves. So we ordered the cheapest paint we could find on Amazon. It finally arrived today and we started right away! We have guests over the weekend and I love to prepare Betthupferl (German for bedtime candy), so I had the idea of upcycling some old jam jars. I keep loads and loads of jars, sometimes they come in pretty handy. Since I never used chalkboard paint before, it wouldn’t have been great damage if the paint wasn’t good at all.

Here’s how I did it:

I used this brand, mainly because it was quite inexpensive. It was really easy to use and worked out well. I wouldn’t use it indoors, since it’s a spray and as you can see on the picture below it scatters the paint on a large scale. It’s best to hold it about 30cm from the surface and whilst spraying keep the can in motion. After applying the first layer wait at least 3-5 minutes until the next. For the jars one layer was enough, I did two though just to be on the safe side.

For labelling I used a liquid chalk marker. Fill with candy, apply ribbon – and you’re done! A cute idea and pretty simple to copy – our guests loved it!

So here they are – stuffed with goodies, sweet dreams guaranteed!

I’m afraid I’m a chalkboard paint addict now… There will be more chalkboard paint projects coming up for sure!

the flickering light of the candles [candle DIY]

I often keep old empty glass tins, they come in handy for storing buttons, beads and so on. A few days ago I found a wick while looking for some candles which gave me the idea of making a candle out of one of the creme tins. Here is how I did this:

 I spread the gold glitter with a wet brush, it’s fairly sticky so you won’t need glue (which would leave stains). Then I painted the inside of the tin with glass paint. (I guess acrylic paint would work as well).

Put the wick inside and glue it on (or use candle wax as I did). Melt white candle wax and fill the tin. Leave the tip of the wick (1cm) uncovered. I put some glitter on the wax before it firmed up to make it look more christmassy. (One could also wrap some golden wire or ribbon around the rim.)

And you’re done!
Here’s another one I made from an empty pesto jar and book pages.

“Sitting in the flickering light of the candles on this kerchief of sand, on this village square, we waited in the night. We were waiting for the rescuing dawn – or for the Moors. Something, I know not what, lent this night a savor of Christmas. We told stories, we joked, we sang songs. In the air there was that slight fever that reigns over a gaily prepared feast. And yet we were infinitely poor. Wind, sand, and stars. The austerity of Trappists. But on this badly lighted cloth, a handful of men who possessed nothing in the world but their memories were sharing invisible riches. “

— Antoine de Saint-Exupéry (Wind, Sand, and Stars)