

Heeeello everyone!
As promised, here are more pictures of my self-drafted bridesmaid dress and a brief tutorial on drafting flared half-circle sleeves.
If you think you’ve seen enough of that dress already, feel free to skip this post – there will be a massive amount of pics 🙂
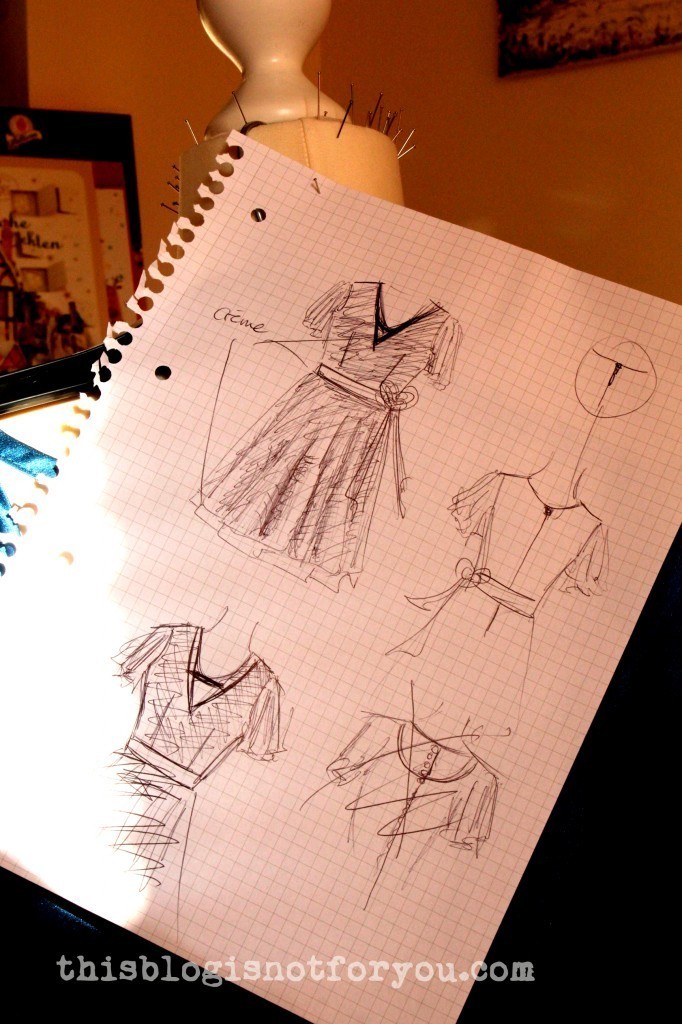
Btw, this is the original sketch of the dress. I was thinking about adding some fabric-covered buttons in the back, but discarded that idea pretty soon after starting to draft the pattern. It just didn’t fit in and would’ve been even more time consuming.

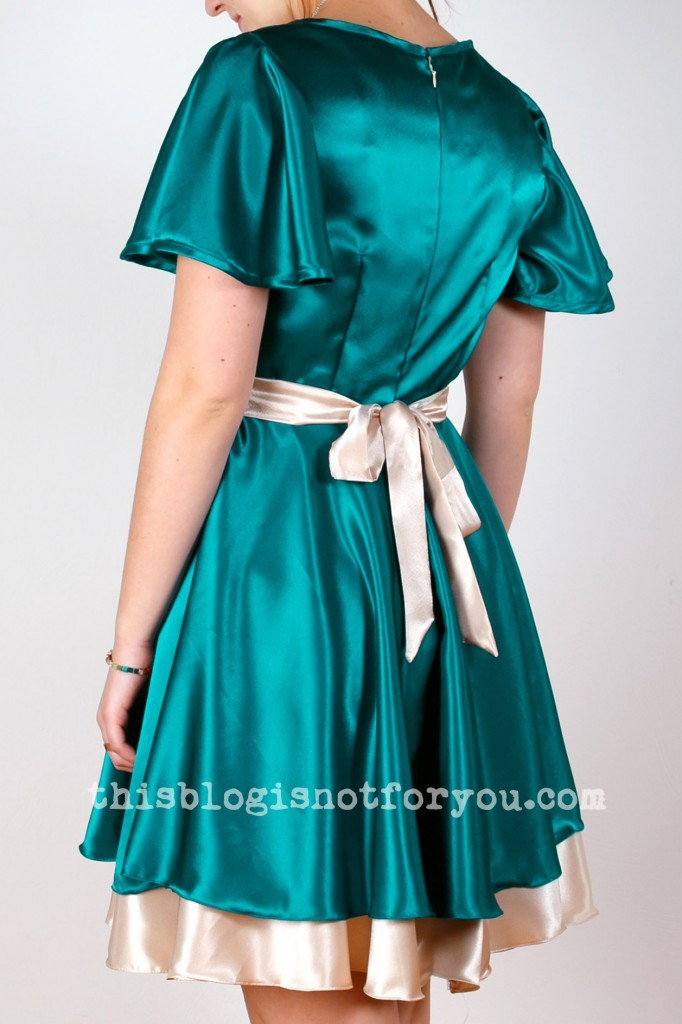
As you can see in the above pics, the colour of this dress is absolutely ‘unphotographable’. Neither of the two colours is quite right, it’s probably something in between.
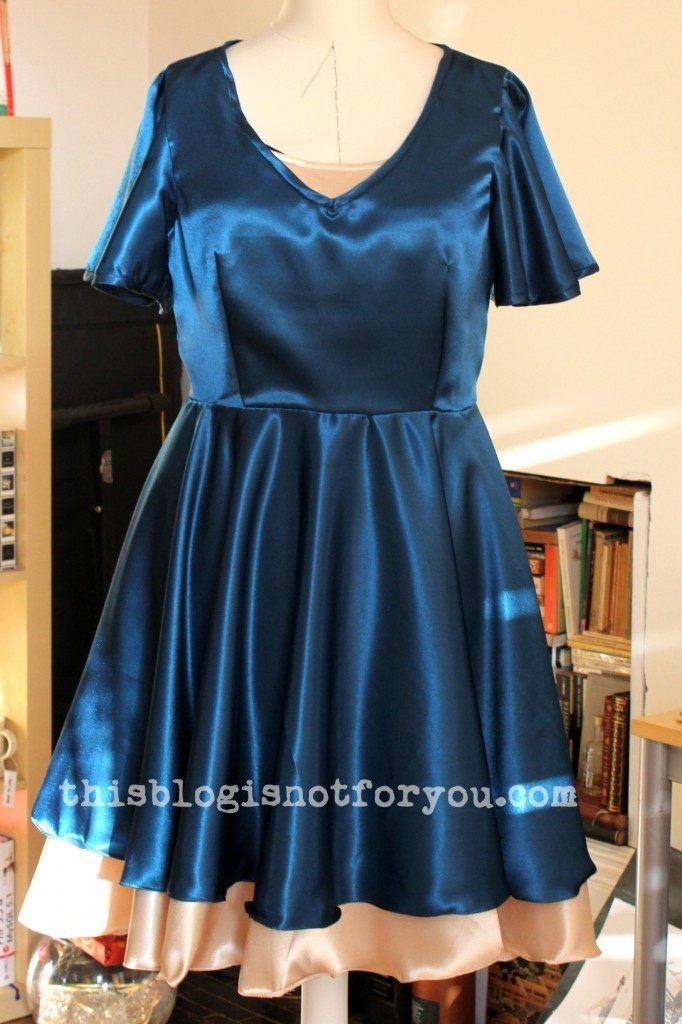
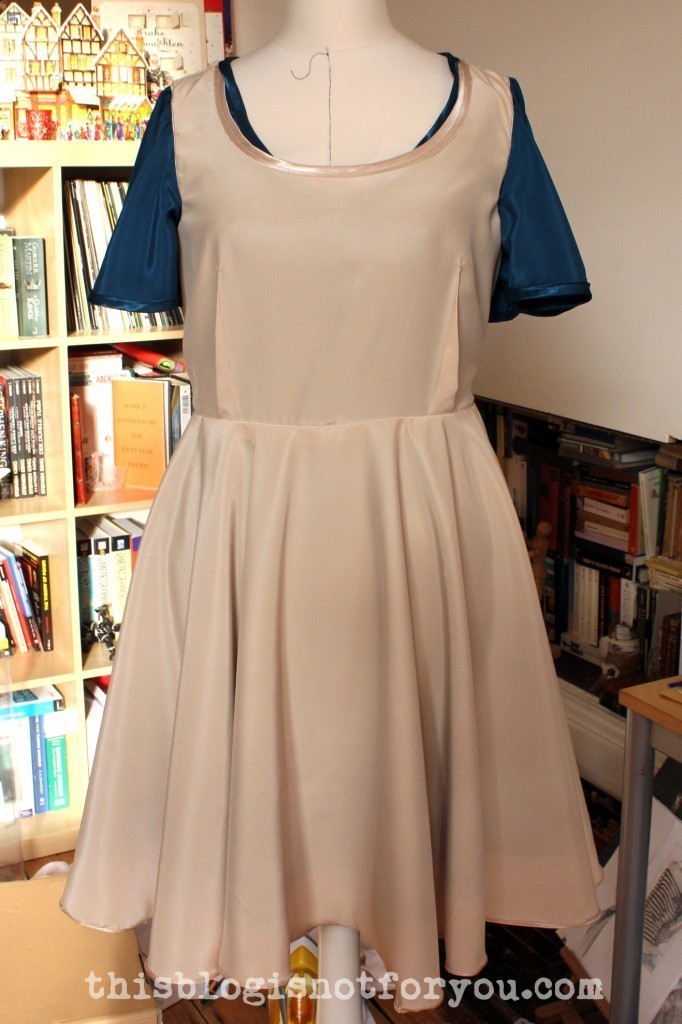
That’s what the dress looks like without the belt. Not bad, but I personally prefer the contrast of the creme coloured belt.

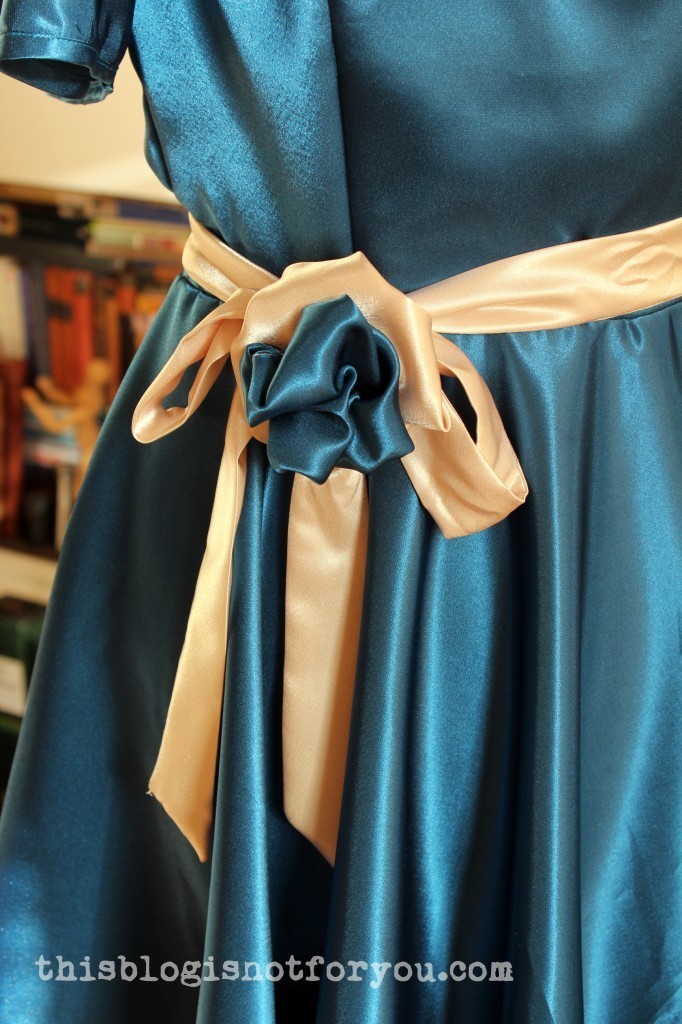
The bow can be worn the classic way, in the back, or, with the flower on top, in the front.

The flower is made from two cut-out circle. A bigger one cut out fo the creme fabric and a slightly smaller one in blue. Both hemmed with a narrow hem foot, sewn together in the middle and then gathered rather randomly, creating the flower shape.
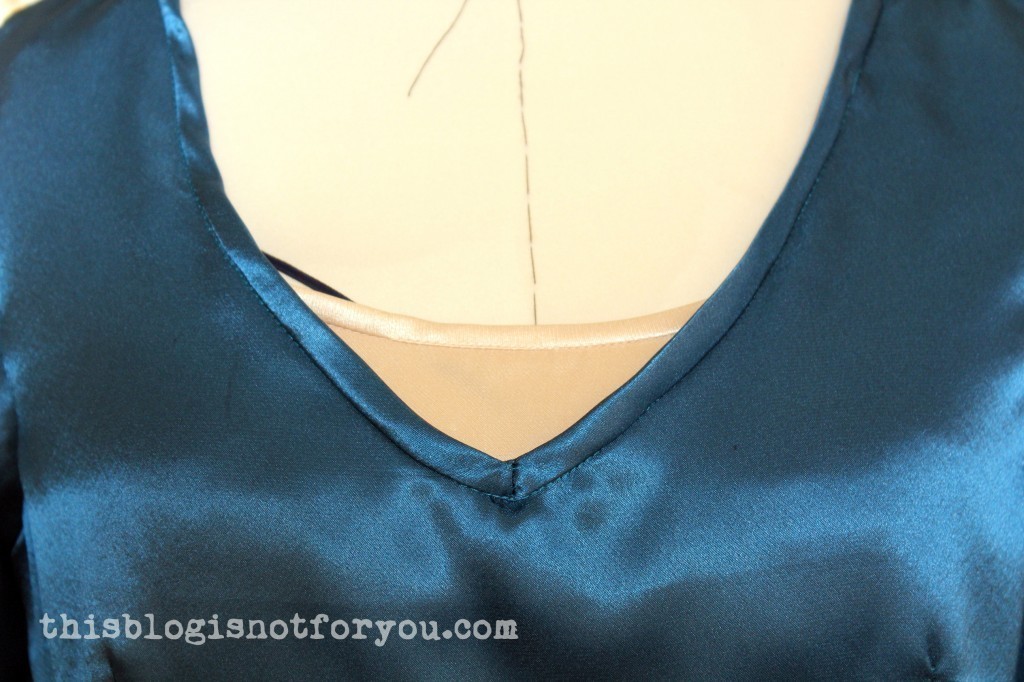
The dress is fully lined. The lining (same fabric in a contrasting colour) is right side up. Both layers, dress and lining, are made from the same pattern, same darts etc. The only difference is, the lining has a slightly different (higher and rounder) neckline, so it shows under the v-neckline and the circle skirt is about 4”/10cm longer. The sleeves are not lined.
Both layers are handsewn together at the shoulder seams and waist seams and machine stitched around the armskye.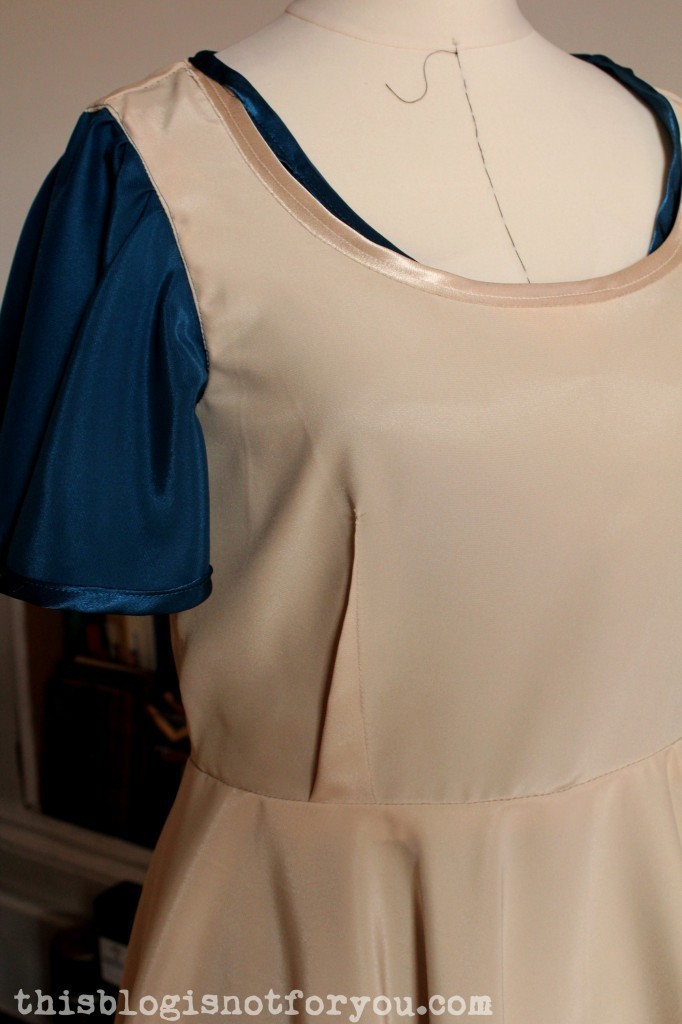
I inserted the invisible zip with my sewing machine, the lining around the zip is handsewn with a slip stitch. When attaching the lining to the zip, be careful to leave some space between the folded edge of the lining an the zip. Otherwise the constant opening and closing of the zipper will tear all your handstitching over time.
How to Draft Half-Circle Sleeves
To get the right amount of flare for the sleeves, I tried out different styles, but decided to make half-circle sleeves in the end. For drafting these, you basically begin with a simple sleeve pattern. If your bodice pattern does not have sleeves, you will have to draft one according to the bodice pattern and your own measurements and liking.
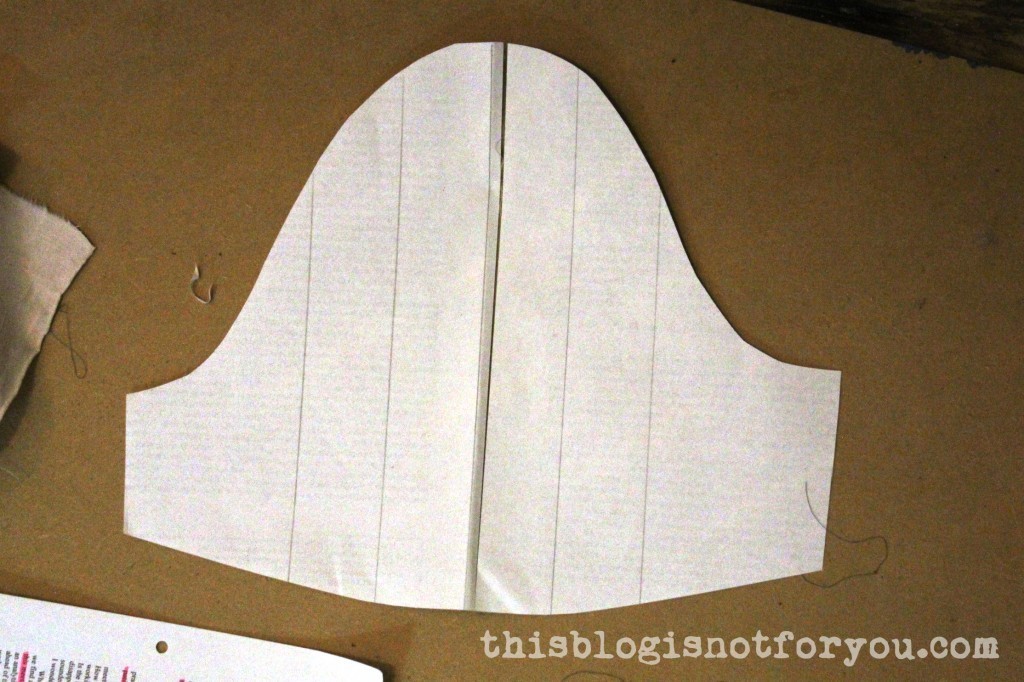
After cutting out the sleeve pattern, you divide the pattern into six pieces (or more if you like) by putting five folds in the sleeve foundation or marking the lines with a ruler.
Before cutting up the folds, measure the lentgh of the sleeve curve, so you can check the measurements of the sleeve cap with the armhole later.

Now cut up the folds and spread into a half circle, making sure to keep the strips together at the cap end (to make this easier you can tape them together).
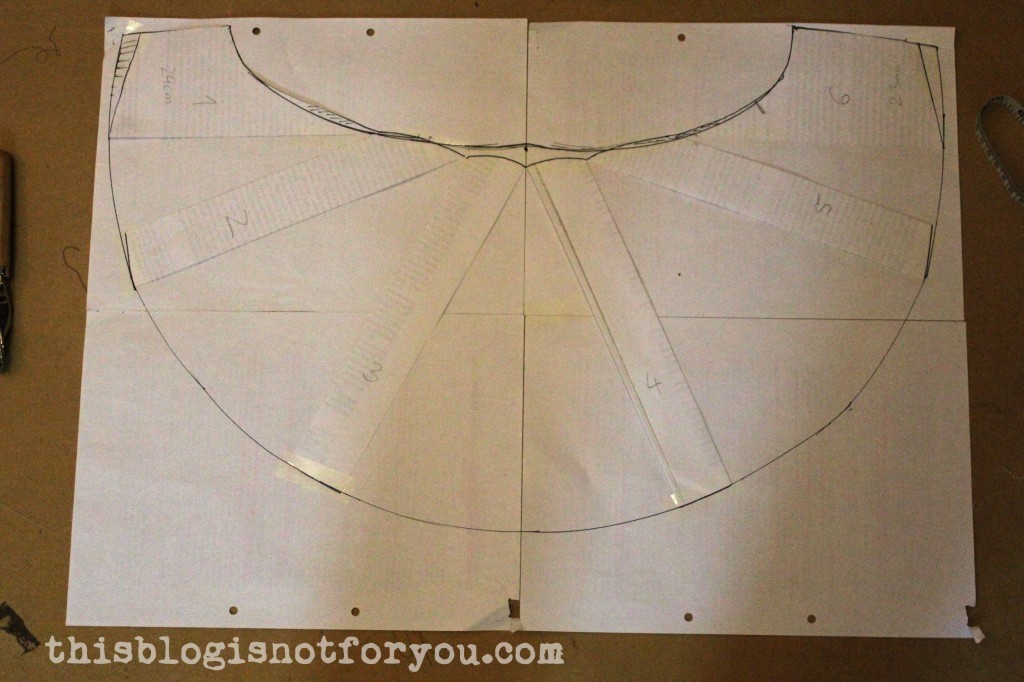
Tape the strips evenly spaced onto your new pattern paper. Check the measurements of the sleeve cap with the armhole and adjust if needed. Raise 1cm at the sleeve cap. Shape sleeve cap smoothly with a flowing line.
Make a muslin and see if the sleeve has the right length for you, adjust the pattern if needed.

I played around with different lengths and shapes.
You can always adjust the amount of flare and fullness by reducing or increasing the spread of the pattern pieces.
Please note:
Before hemming your half-circle sleeves or circle skirts, adding binding etc. – Always leave the cut-out fabric hanging for at least one day/over night (works best with on a dress form if you have one)!!
The parts that are cut on the bias (something that is inevitable when cutting out circles or half-circles) will probably stretch after hanging for a while.
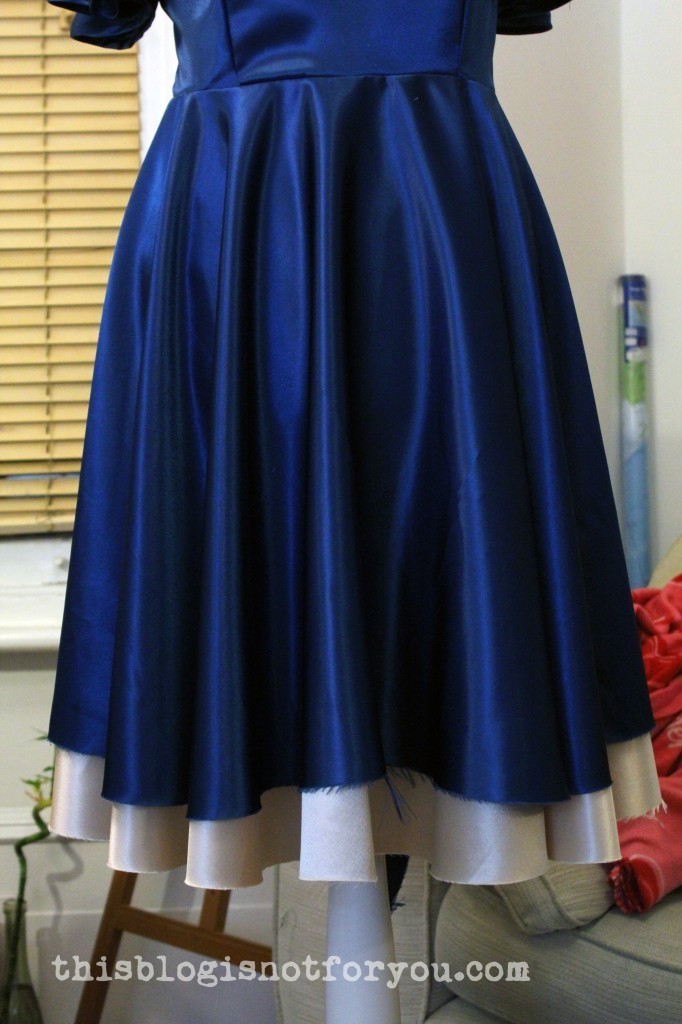
As you can see in this pic, the hem is slightly uneven after hanging on the dressform for two days. Carefully even out the skirt and sleeve hem by cutting off the excess fabric before hemming or adding binding to the edges. I recommend finishing the sleeves’ raw edges with a narrow hem, or binding off with bias binding made from the same fabric or in a contrasting colour.
Before wishing you all a happy weekend full of sewing, let me share this gem with you 🙂

Oh wow, I had no idea about letting the fabric hang! Great tip & tut on the sleeve:) I pinned it- thanks for sharing your skills! Beautiful dress!!
Thanks Amy!
Thanks alots
thank you. good and simple idea. can you help me how to fit a sew in bra cup for a blouse?
How much seam allowance do I add ?
Your explanation is well understood,but the circle sleeve is not clear
Thanks