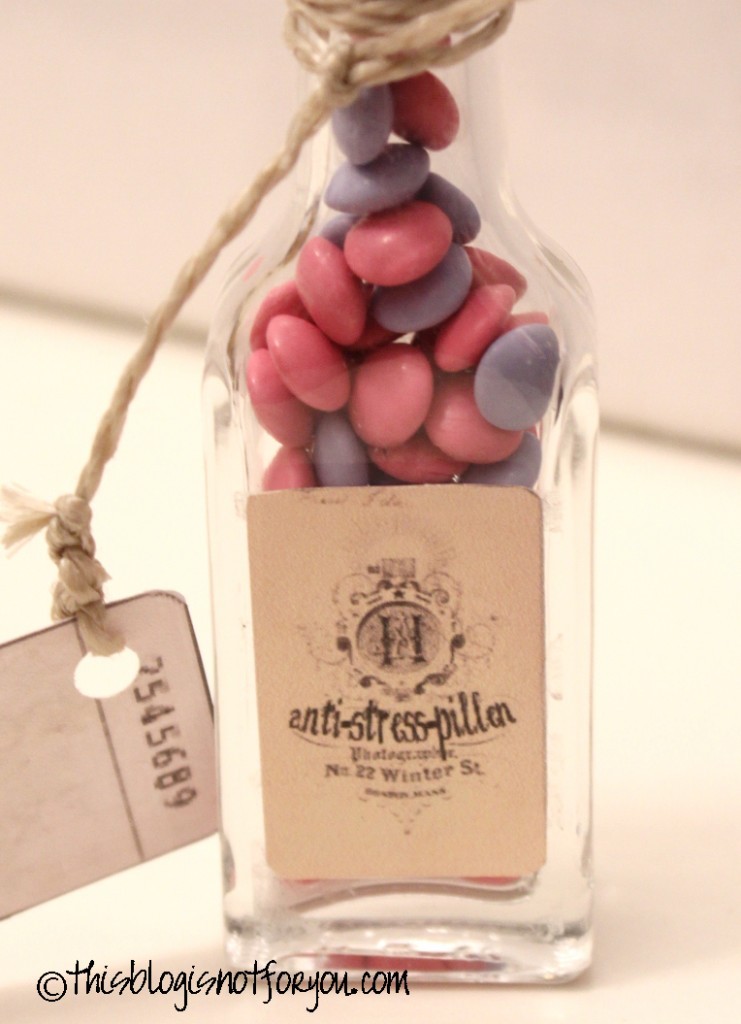
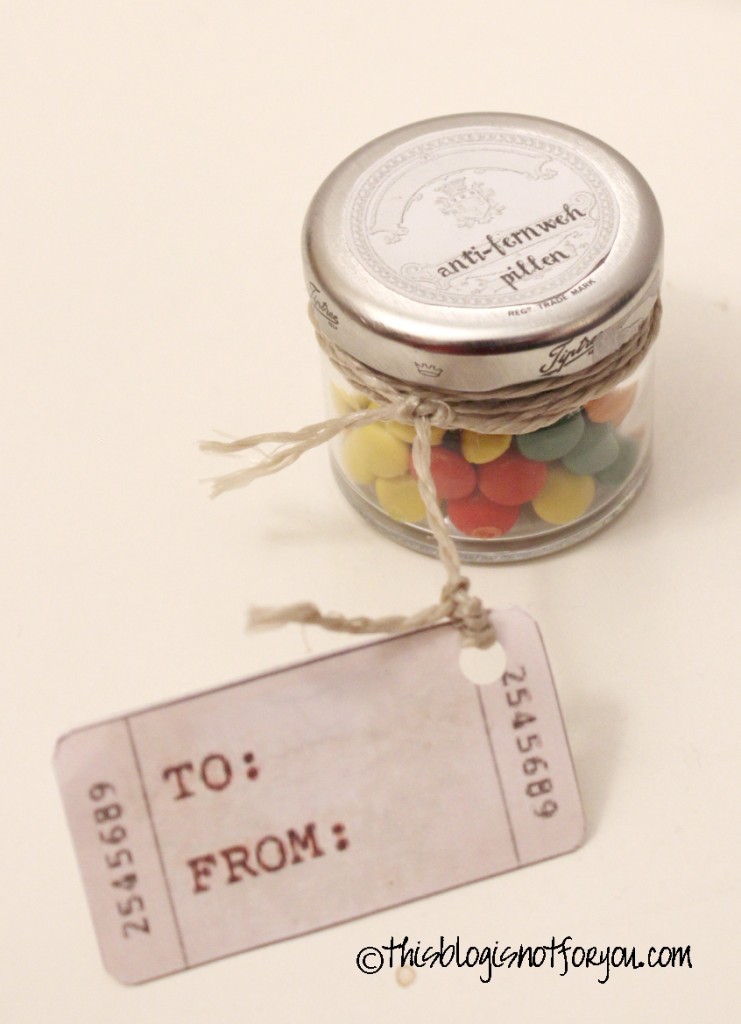
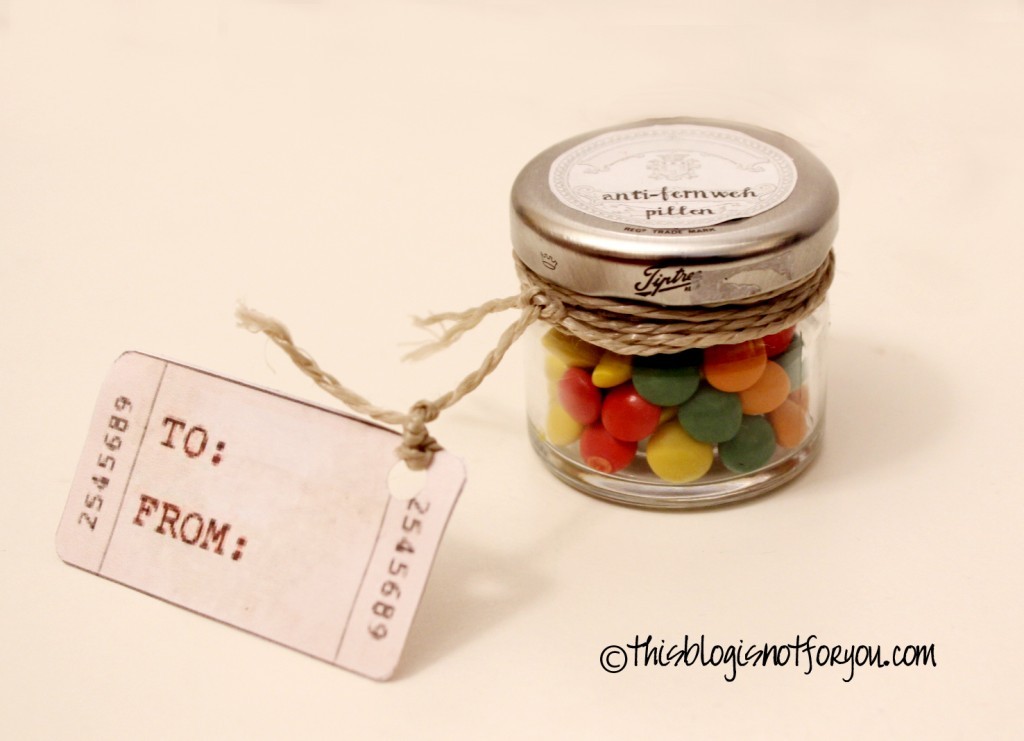
chocolate bean pillbox {DIY in 15 minutes #3}

chocolate bean pillbox DIY

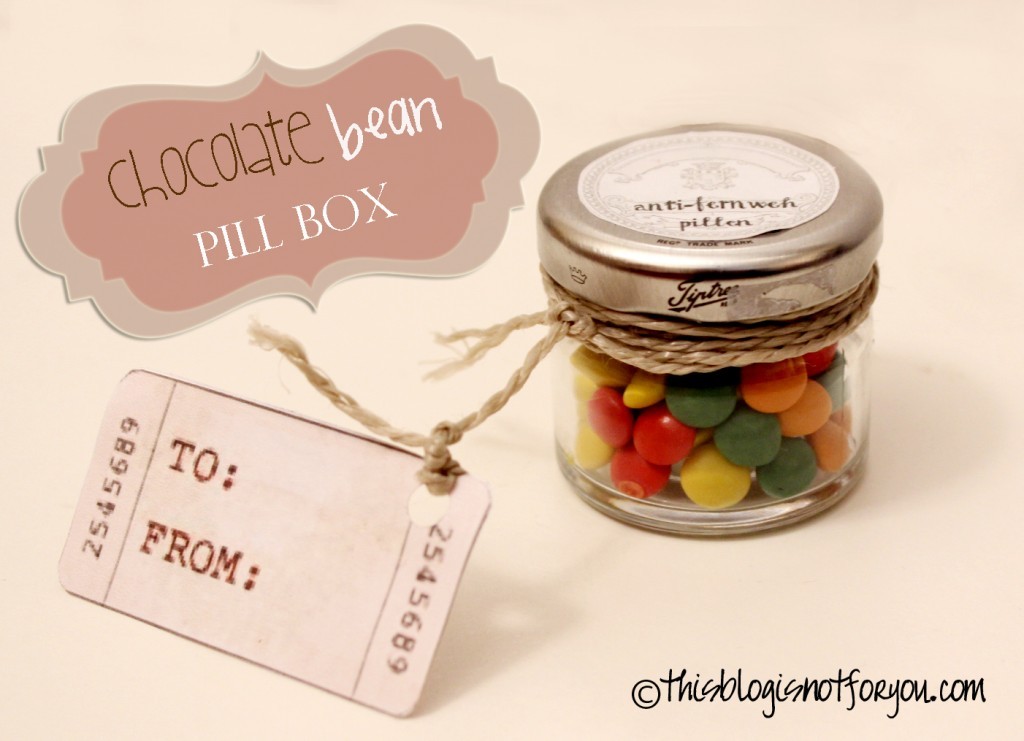
Another DIY I did before Christmas: “anti-stress” and “anti-wanderlust” pillboxes!

All you need:

– tiny empty jars and bottles
– chocolate beans
– vintage printables + paper
– twine
– glue stick

chocolate bean pillbox DIYchocolate bean pillbox DIY

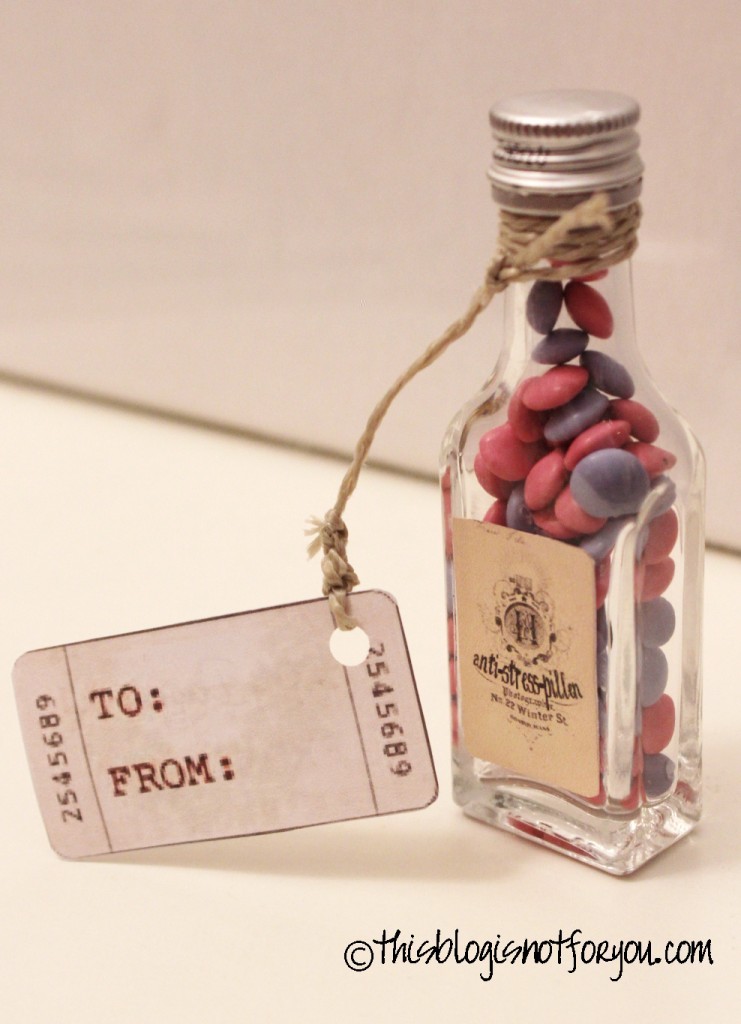
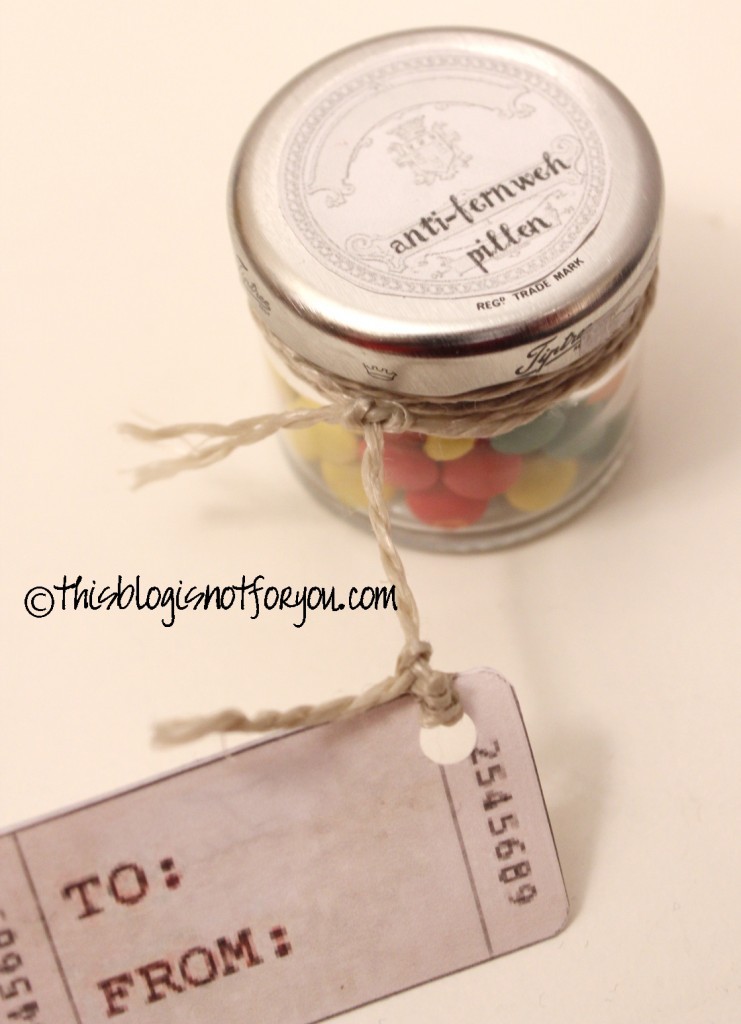
I used a tiny jam jar and a mini brandy bottle that I cleaned and dried up thoroughly. I sorted the chocolate beans by colour, to make the two sorts of pills look differently.

For making the labels I used free vintage printables I found online. Here are some of my favorites:

– free collage sheets

– vintage grunge printables

I altered the label in Photoshop and gauged the correct size. Cut the label out and glue it on the lid or on the front of the bottle.

I printed out some pretty vintage tags, punched holes in them and tied them up with the twine.

Maybe you know someone that could need some anti-stress pills, anti-lovesickness medicine or frustration-protection?

Have fun!

chocolate bean pillbox DIY chocolate bean pillbox DIY
 chocolate bean pillbox DIY


knotted necklace {diy}

I made this neckace months ago, but couldn’t post it since I made it for someone who reads this blog frequently for Christmas…well, here it is. It’s fairly easy to do, but it took me about 2-3 Gilmore Girls episodes until I had threaded all the beads. (Don’t ask how many – I didn’t count!)

I used three different colours of tube beads in random order.

I basically made two strings (each consisting of eight single strings) and knotted them together using the Double Carrick Bend and twisted the ends.

For the fastener I made a loop out of rocaille beads and used a bigger square-shaped bead on the other end. I used crimp beads to seal the end.

One string is a little longer than the other – thus the necklace/knot is slightly asymmetric which makes it look more interesting.

Have fun – oh, and Happy New Year! 🙂


Refashion It! Upcycling a Lamp with Handmade Paper

I upcycled this old lamp from my parents today. Quick, inexpensive and pretty, such a fun thing to do! It took no longer than 30 minutes and all I used was a sheet of handmade paper bought in a stationary store and double-sided adhesive tape.

The paper was beautiful and not expensive at all.

Finding the right size for the pattern was a little tricky. Make sure your sheet of paper is big enough!


This post was featured:

5 tips for the weekend #5

Sorry, I really neglected my Five Tips For The Weekend during the last few weeks, but I was really busy with exams and the whole holidays thing. Anyway, here are my five tips for the upcoming weekend:

#1 craft idea: detachable collar using an old shirt collar as  pattern

I love the idea and am definitely going to try this asap!
You will find the tutorial at burdastyle – have fun!

#2 movie you should re-watch every year 

I love to watch and re-watch Lion King – it’s totally worth it! I think it’s the best Disney movie and definitely one of the best animated films ever made – also, not only for kids 😉 And the perfect choice to watch with the family on a cold winter sunday.


#3 book you won’t regret reading

Momo is an awesome fantasy novel by Michael Ende and one of my favorite books of all time. Although widely considered a childrens book, it’s not.


#4 recipe to try on the weekend


After all the holiday-overindulgence, here’s a low-calorie recipie for Honey-Soy Broiled Salmon.

Too bad I couldn’t find a better picture, because this dish looks so delicious!


#5 try a 365 project

A Beautiful Mess shared some thoughts about 365 projects for the new year. I totally love the idea and will think about it, but I’m afraid my lack of discipline will ruin any plan.
Have you ever done something alike?

DIY Christmas gift tags

I finally wrapped up all the presents. This year I used handmade gift tags.

I printed the picture/text I wanted to be on the tags on white cotton. One could also just plain white paper, but cotton looks much nicer. I got the picture from Two Things In Common.

I glued the cotton cut-outs on green paper and embellished the gift tags with gold thread.